keys:
r random article
5 random article
b backward
4 backward
f foreward
6 foreward

t top of table
8 top of table
l last of table
2 last of table
7 go to table middle

T Top of page
e end of page

m mustWatch
p pause
c continU
s showPage

K set bookmark
k open bookmark
An Introduction to JavaScript
Let's see what's so special about JavaScript, what we can achieve with it, and what other technologies play well with it.
- What is JavaScript?
JavaScript was initially created to “make web pages alive”.
The programs in this language are called scripts.
They can be written right in a web page's HTML and run automatically as the page loads.
Scripts are provided and executed as plain text.
They don't need special preparation or compilation to run.
In this aspect, JavaScript is very different from another language called Java.
Why is it called JavaScript?
When JavaScript was created, it initially had another name: “LiveScript”.
But Java was very popular at that time, so it was decided that positioning a new language as a “younger brother” of Java would help.
But as it evolved, JavaScript became a fully independent language with its own specification called ECMAScript, and now it has no relation to Java at all.
Today, JavaScript can execute not only in the browser, but also on the server, or actually on any device that has a special program called the JavaScript engine.
The browser has an embedded engine sometimes called a “JavaScript virtual machine”.
Different engines have different “codenames”.
For example:
V8 – in Chrome and Opera.
SpiderMonkey – in Firefox.
…There are other codenames like “Chakra” for IE, “ChakraCore” for Microsoft Edge, “Nitro” and “SquirrelFish” for Safari, etc.
The terms above are good to remember because they are used in developer articles on the internet.
We'll use them too.
For instance, if “a feature X is supported by V8”, then it probably works in Chrome and Opera.
How do engines work?
Engines are complicated.
But the basics are easy.
The engine (embedded if it's a browser) reads (“parses”) the script.
Then it converts (“compiles”) the script to the machine language.
And then the machine code runs, pretty fast.
The engine applies optimizations at each step of the process.
It even watches the compiled script as it runs, analyzes the data that flows through it, and further optimizes the machine code based on that knowledge.
- What can in-browser JavaScript do?
Modern JavaScript is a “safe” programming language.
It does not provide low-level access to memory or CPU, because it was initially created for browsers which do not require it.
JavaScript's capabilities greatly depend on the environment it's running in.
For instance, Node.js supports functions that allow JavaScript to read/write arbitrary files, perform network requests, etc.
In-browser JavaScript can do everything related to webpage manipulation, interaction with the user, and the webserver.
For instance, in-browser JavaScript is able to:
Add new HTML to the page, change the existing content, modify styles.
React to user actions, run on mouse clicks, pointer movements, key presses.
Send requests over the network to remote servers, download and upload files (so-called AJAX and COMET technologies).
Get and set cookies, ask questions to the visitor, show messages.
Remember the data on the client-side (“local storage”).
- What CAN'T in-browser JavaScript do?
JavaScript's abilities in the browser are limited for the sake of the user's safety.
The aim is to prevent an evil webpage from accessing private information or harming the user's data.
Examples of such restrictions include:
JavaScript on a webpage may not read/write arbitrary files on the hard disk, copy them or execute programs.
It has no direct access to OS functions.
Modern browsers allow it to work with files, but the access is limited and only provided if the user does certain actions, like “dropping” a file into a browser window or selecting it via an <input> tag.
There are ways to interact with camera/microphone and other devices, but they require a user's explicit permission.
So a JavaScript-enabled page may not sneakily enable a web-camera, observe the surroundings and send the information to the NSA.
Different tabs/windows generally do not know about each other.
Sometimes they do, for example when one window uses JavaScript to open the other one.
But even in this case, JavaScript from one page may not access the other if they come from different sites (from a different domain, protocol or port).
This is called the “Same Origin Policy”.
To work around that, both pages must agree for data exchange and contain a special JavaScript code that handles it.
We'll cover that in the tutorial.
This limitation is, again, for the user's safety.
A page from http://anysite.com which a user has opened must not be able to access another browser tab with the URL http://gmail.com and steal information from there.
JavaScript can easily communicate over the net to the server where the current page came from.
But its ability to receive data from other sites/domains is crippled.
Though possible, it requires explicit agreement (expressed in HTTP headers) from the remote side.
Once again, that's a safety limitation.
Such limits do not exist if JavaScript is used outside of the browser, for example on a server.
Modern browsers also allow plugin/extensions which may ask for extended permissions.
- What makes JavaScript unique?
There are at least three great things about JavaScript:
Full integration with HTML/CSS.
Simple things are done simply.
Support by all major browsers and enabled by default.
JavaScript is the only browser technology that combines these three things.
That's what makes JavaScript unique.
That's why it's the most widespread tool for creating browser interfaces.
That said, JavaScript also allows to create servers, mobile applications, etc.
- Languages “over” JavaScript
The syntax of JavaScript does not suit everyone's needs.
Different people want different features.
That's to be expected, because projects and requirements are different for everyone.
So recently a plethora of new languages appeared, which are transpiled (converted) to JavaScript before they run in the browser.
Modern tools make the transpilation very fast and transparent, actually allowing developers to code in another language and auto-converting it “under the hood”.
Examples of such languages:
CoffeeScript is a “syntactic sugar” for JavaScript.
It introduces shorter syntax, allowing us to write clearer and more precise code.
Usually, Ruby devs like it.
TypeScript is concentrated on adding “strict data typing” to simplify the development and support of complex systems.
It is developed by Microsoft.
Flow also adds data typing, but in a different way.
Developed by Facebook.
Dart is a standalone language that has its own engine that runs in non-browser environments (like mobile apps), but also can be transpiled to JavaScript.
Developed by Google.
Brython is a Python transpiler to JavaScript that enables the writing of applications in pure Python without JavaScript.
Kotlin is a modern, concise and safe programming language that can target the browser or Node.
There are more.
Of course, even if we use one of transpiled languages, we should also know JavaScript to really understand what we're doing.
- Summary
JavaScript was initially created as a browser-only language, but it is now used in many other environments as well.
Today, JavaScript has a unique position as the most widely-adopted browser language with full integration in HTML/CSS.
There are many languages that get “transpiled” to JavaScript and provide certain features.
It is recommended to take a look at them, at least briefly, after mastering JavaScript.
An introduction
Manuals and specifications
This book is a tutorial.
It aims to help you gradually learn the language.
But once you're familiar with the basics, you'll need other sources.
- Specification
The ECMA-262 specification contains the most in-depth, detailed and formalized information about JavaScript.
It defines the language.
But being that formalized, it's difficult to understand at first.
So if you need the most trustworthy source of information about the language details, the specification is the right place.
But it's not for everyday use.
A new specification version is released every year.
In-between these releases, the latest specification draft is at https://tc39.es/ecma262/.
To read about new bleeding-edge features, including those that are “almost standard” (so-called “stage 3”), see proposals at https://github.com/tc39/proposals.
Also, if you're in developing for the browser, then there are other specifications covered in the second part of the tutorial.
- Manuals
MDN (Mozilla) JavaScript Reference is the main manual with examples and other information.
It's great to get in-depth information about individual language functions, methods etc.
One can find it at https://developer.mozilla.org/en-US/docs/Web/JavaScript/Reference.
Although, it's often best to use an internet search instead.
Just use “MDN [term]” in the query, e.g.
https://google.com/search?q=MDN+parseInt to search for parseInt function.
- Compatibility tables
JavaScript is a developing language, new features get added regularly.
To see their support among browser-based and other engines, see:
http://caniuse.com – per-feature tables of support, e.g.
to see which engines support modern cryptography functions: http://caniuse.com/#feat=cryptography.
https://kangax.github.io/compat-table – a table with language features and engines that support those or don't support.
All these resources are useful in real-life development, as they contain valuable information about language details, their support etc.
Please remember them (or this page) for the cases when you need in-depth information about a particular feature.
An introduction
Code editors
A code editor is the place where programmers spend most of their time.
There are two main types of code editors: IDEs and lightweight editors.
Many people use one tool of each type.
- IDE
The term IDE (Integrated Development Environment) refers to a powerful editor with many features that usually operates on a “whole project.” As the name suggests, it's not just an editor, but a full-scale “development environment.”
An IDE loads the project (which can be many files), allows navigation between files, provides autocompletion based on the whole project (not just the open file), and integrates with a version management system (like git), a testing environment, and other “project-level” stuff.
If you haven't selected an IDE yet, consider the following options:
Visual Studio Code (cross-platform, free).
WebStorm (cross-platform, paid).
For Windows, there's also “Visual Studio”, not to be confused with “Visual Studio Code”.
“Visual Studio” is a paid and mighty Windows-only editor, well-suited for the .NET platform.
It's also good at JavaScript.
There's also a free version Visual Studio Community.
Many IDEs are paid, but have a trial period.
Their cost is usually negligible compared to a qualified developer's salary, so just choose the best one for you.
- Lightweight editors
“Lightweight editors” are not as powerful as IDEs, but they're fast, elegant and simple.
They are mainly used to open and edit a file instantly.
The main difference between a “lightweight editor” and an “IDE” is that an IDE works on a project-level, so it loads much more data on start, analyzes the project structure if needed and so on.
A lightweight editor is much faster if we need only one file.
In practice, lightweight editors may have a lot of plugins including directory-level syntax analyzers and autocompleters, so there's no strict border between a lightweight editor and an IDE.
The following options deserve your attention:
Atom (cross-platform, free).
Visual Studio Code (cross-platform, free).
Sublime Text (cross-platform, shareware).
Notepad++ (Windows, free).
Vim and Emacs are also cool if you know how to use them.
- Let's not argue
The editors in the lists above are those that either I or my friends whom I consider good developers have been using for a long time and are happy with.
There are other great editors in our big world.
Please choose the one you like the most.
The choice of an editor, like any other tool, is individual and depends on your projects, habits, and personal preferences.
An introduction
Developer console
Code is prone to errors.
You will quite likely make errors… Oh, what am I talking about? You are absolutely going to make errors, at least if you're a human, not a robot.
But in the browser, users don't see errors by default.
So, if something goes wrong in the script, we won't see what's broken and can't fix it.
To see errors and get a lot of other useful information about scripts, “developer tools” have been embedded in browsers.
Most developers lean towards Chrome or Firefox for development because those browsers have the best developer tools.
Other browsers also provide developer tools, sometimes with special features, but are usually playing “catch-up” to Chrome or Firefox.
So most developers have a “favorite” browser and switch to others if a problem is browser-specific.
Developer tools are potent, they have many features.
To start, we'll learn how to open them, look at errors, and run JavaScript commands.
- Google Chrome
Open the page bug.html.
There's an error in the JavaScript code on it.
It's hidden from a regular visitor's eyes, so let's open developer tools to see it.
Press F12 or, if you're on Mac, then Cmd+Opt+J.
The developer tools will open on the Console tab by default.
It looks somewhat like this:
The exact look of developer tools depends on your version of Chrome.
It changes from time to time but should be similar.
Here we can see the red-colored error message.
In this case, the script contains an unknown “lalala” command.
On the right, there is a clickable link to the source bug.html:12 with the line number where the error has occurred.
Below the error message, there is a blue > symbol.
It marks a “command line” where we can type JavaScript commands.
Press Enter to run them.
Now we can see errors, and that's enough for a start.
We'll come back to developer tools later and cover debugging more in-depth in the chapter Debugging in Chrome.
Multi-line input
Usually, when we put a line of code into the console, and then press Enter, it executes.
To insert multiple lines, press Shift+Enter.
This way one can enter long fragments of JavaScript code.
- Firefox, Edge, and others
Most other browsers use F12 to open developer tools.
The look & feel of them is quite similar.
Once you know how to use one of these tools (you can start with Chrome), you can easily switch to another.
- Safari
Safari (Mac browser, not supported by Windows/Linux) is a little bit special here.
We need to enable the “Develop menu” first.
Open Preferences and go to the “Advanced” pane.
There's a checkbox at the bottom:
Now Cmd+Opt+C can toggle the console.
Also, note that the new top menu item named “Develop” has appeared.
It has many commands and options.
- Summary
Developer tools allow us to see errors, run commands, examine variables, and much more.
They can be opened with F12 for most browsers on Windows.
Chrome for Mac needs Cmd+Opt+J, Safari: Cmd+Opt+C (need to enable first).
Now we have the environment ready.
In the next section, we'll get down to JavaScript.
This part of the tutorial is about core JavaScript, the language itself.
But we need a working environment to run our scripts and, since this book is online, the browser is a good choice.
We'll keep the amount of browser-specific commands (like alert) to a minimum so that you don't spend time on them if you plan to concentrate on another environment (like Node.js).
We'll focus on JavaScript in the browser in the next part of the tutorial.
So first, let's see how we attach a script to a webpage.
For server-side environments (like Node.js), you can execute the script with a command like "node my.js".
- The “script” tag
JavaScript programs can be inserted almost anywhere into an HTML document using the <script> tag.
For instance:
<!DOCTYPE HTML>
<html>
<body>
<p>Before the script...</p>
<script>
alert( 'Hello, world!' );
</script>
<p>...After the script.</p>
</body>
</html>
You can run the example by clicking the “Play” button in the right-top corner of the box above.
The <script> tag contains JavaScript code which is automatically executed when the browser processes the tag.
- Modern markup
The <script> tag has a few attributes that are rarely used nowadays but can still be found in old code:
The type attribute: <script type=…>
The old HTML standard, HTML4, required a script to have a type.
Usually it was type="text/javascript".
It's not required anymore.
Also, the modern HTML standard totally changed the meaning of this attribute.
Now, it can be used for JavaScript modules.
But that's an advanced topic, we'll talk about modules in another part of the tutorial.
The language attribute: <script language=…>
This attribute was meant to show the language of the script.
This attribute no longer makes sense because JavaScript is the default language.
There is no need to use it.
Comments before and after scripts.
In really ancient books and guides, you may find comments inside <script> tags, like this:
<script type="text/javascript"><!--
    ...
//--></script>
This trick isn't used in modern JavaScript.
These comments hide JavaScript code from old browsers that didn't know how to process the <script> tag.
Since browsers released in the last 15 years don't have this issue, this kind of comment can help you identify really old code.
- External scripts
If we have a lot of JavaScript code, we can put it into a separate file.
Script files are attached to HTML with the src attribute:
<script src="/path/to/script.js"></script>
Here, /path/to/script.js is an absolute path to the script from the site root.
One can also provide a relative path from the current page.
For instance, src="script.js" would mean a file "script.js" in the current folder.
We can give a full URL as well.
For instance:
<script src="https://cdnjs.cloudflare.com/ajax/libs/lodash.js/4.17.11/lodash.js"></script>
To attach several scripts, use multiple tags:
<script src="/js/script1.js"></script>
<script src="/js/script2.js"></script>
…
Please note:
As a rule, only the simplest scripts are put into HTML.
More complex ones reside in separate files.
The benefit of a separate file is that the browser will download it and store it in its cache.
Other pages that reference the same script will take it from the cache instead of downloading it, so the file is actually downloaded only once.
That reduces traffic and makes pages faster.
If src is set, the script content is ignored.
A single <script> tag can't have both the src attribute and code inside.
This won't work:
<script src="file.js">
  alert(1); // the content is ignored, because src is set
</script>
We must choose either an external <script src="…"> or a regular <script> with code.
The example above can be split into two scripts to work:
<script src="file.js"></script>
<script>
  alert(1);
</script>
- Summary
We can use a <script> tag to add JavaScript code to a page.
The type and language attributes are not required.
A script in an external file can be inserted with <script src="path/to/script.js"></script>.
There is much more to learn about browser scripts and their interaction with the webpage.
But let's keep in mind that this part of the tutorial is devoted to the JavaScript language, so we shouldn't distract ourselves with browser-specific implementations of it.
We'll be using the browser as a way to run JavaScript, which is very convenient for online reading, but only one of many.
importance: 5
Create a page that shows a message “I'm JavaScript!”.
Do it in a sandbox, or on your hard drive, doesn't matter, just ensure that it works.
Demo in new window<!DOCTYPE html>
<html>
<body>
<script>
alert( "I'm JavaScript!" );
</script>
</body>
</html>Open the solution in a sandbox.
Show an alert with an external script
importance: 5
Take the solution of the previous task Show an alert.
Modify it by extracting the script content into an external file alert.js, residing in the same folder.
Open the page, ensure that the alert works.
The HTML code:
<!DOCTYPE html>
<html>

<body>

  <script src="alert.js"></script>

</body>

</html>
For the file alert.js in the same folder:
alert("I'm JavaScript!");JavaScript Fundamentals
Code structure
The first thing we'll study is the building blocks of code.
- Statements
Statements are syntax constructs and commands that perform actions.
We've already seen a statement, alert('Hello, world!'), which shows the message “Hello, world!”.
We can have as many statements in our code as we want.
Statements can be separated with a semicolon.
For example, here we split “Hello World” into two alerts:
alert('Hello');
alert('World');
Usually, statements are written on separate lines to make the code more readable:
alert('Hello');
alert('World');
- Semicolons
A semicolon may be omitted in most cases when a line break exists.
This would also work:
alert('Hello')
alert('World')
Here, JavaScript interprets the line break as an “implicit” semicolon.
This is called an automatic semicolon insertion.
In most cases, a newline implies a semicolon.
But “in most cases” does not mean “always”!
There are cases when a newline does not mean a semicolon.
For example:
alert(3 +
1
+ 2);
The code outputs 6 because JavaScript does not insert semicolons here.
It is intuitively obvious that if the line ends with a plus "+", then it is an “incomplete expression”, so the semicolon is not required.
And in this case that works as intended.
But there are situations where JavaScript “fails” to assume a semicolon where it is really needed.
Errors which occur in such cases are quite hard to find and fix.
An example of an error
If you're curious to see a concrete example of such an error, check this code out:
[1, 2].forEach(alert)
No need to think about the meaning of the brackets [] and forEach yet.
We'll study them later.
For now, just remember the result of the code: it shows 1 then 2.
Now, let's add an alert before the code and not finish it with a semicolon:
alert("There will be an error")

[1, 2].forEach(alert)
Now if we run the code, only the first alert is shown and then we have an error!
But everything is fine again if we add a semicolon after alert:
alert("All fine now");

[1, 2].forEach(alert)
Now we have the “All fine now” message followed by 1 and 2.
The error in the no-semicolon variant occurs because JavaScript does not assume a semicolon before square brackets [...].
So, because the semicolon is not auto-inserted, the code in the first example is treated as a single statement.
Here's how the engine sees it:
alert("There will be an error")[1, 2].forEach(alert)
But it should be two separate statements, not one.
Such a merging in this case is just wrong, hence the error.
This can happen in other situations.
We recommend putting semicolons between statements even if they are separated by newlines.
This rule is widely adopted by the community.
Let's note once again – it is possible to leave out semicolons most of the time.
But it's safer – especially for a beginner – to use them.
- Comments
As time goes on, programs become more and more complex.
It becomes necessary to add comments which describe what the code does and why.
Comments can be put into any place of a script.
They don't affect its execution because the engine simply ignores them.
One-line comments start with two forward slash characters //.
The rest of the line is a comment.
It may occupy a full line of its own or follow a statement.
Like here:
// This comment occupies a line of its own
alert('Hello');

alert('World'); // This comment follows the statement
Multiline comments start with a forward slash and an asterisk /* and end with an asterisk and a forward slash */.
Like this:
/* An example with two messages.
This is a multiline comment.
*/
alert('Hello');
alert('World');
The content of comments is ignored, so if we put code inside /* … */, it won't execute.
Sometimes it can be handy to temporarily disable a part of code:
/* Commenting out the code
alert('Hello');
*/
alert('World');
Use hotkeys!
In most editors, a line of code can be commented out by pressing the Ctrl+/ hotkey for a single-line comment and something like Ctrl+Shift+/ – for multiline comments (select a piece of code and press the hotkey).
For Mac, try Cmd instead of Ctrl and Option instead of Shift.
Nested comments are not supported!
There may not be /*...*/ inside another /*...*/.
Such code will die with an error:
/*
  /* nested comment ?!? */
*/
alert( 'World' );
Please, don't hesitate to comment your code.
Comments increase the overall code footprint, but that's not a problem at all.
There are many tools which minify code before publishing to a production server.
They remove comments, so they don't appear in the working scripts.
Therefore, comments do not have negative effects on production at all.
Later in the tutorial there will be a chapter Code quality that also explains how to write better comments.
JavaScript Fundamentals
The modern mode, "use strict"
For a long time, JavaScript evolved without compatibility issues.
New features were added to the language while old functionality didn't change.
That had the benefit of never breaking existing code.
But the downside was that any mistake or an imperfect decision made by JavaScript's creators got stuck in the language forever.
This was the case until 2009 when ECMAScript 5 (ES5) appeared.
It added new features to the language and modified some of the existing ones.
To keep the old code working, most such modifications are off by default.
You need to explicitly enable them with a special directive: "use strict".
- “use strict”
The directive looks like a string: "use strict" or 'use strict'.
When it is located at the top of a script, the whole script works the “modern” way.
For example:
"use strict";

// this code works the modern way
...
Quite soon we're going to learn functions (a way to group commands), so let's note in advance that "use strict" can be put at the beginning of a function.
Doing that enables strict mode in that function only.
But usually people use it for the whole script.
Ensure that “use strict” is at the top
Please make sure that "use strict" is at the top of your scripts, otherwise strict mode may not be enabled.
Strict mode isn't enabled here:
alert("some code");
// "use strict" below is ignored--it must be at the top

"use strict";

// strict mode is not activated
Only comments may appear above "use strict".
There's no way to cancel use strict
There is no directive like "no use strict" that reverts the engine to old behavior.
Once we enter strict mode, there's no going back.
- Browser console
When you use a developer console to run code, please note that it doesn't use strict by default.
Sometimes, when use strict makes a difference, you'll get incorrect results.
So, how to actually use strict in the console?
First, you can try to press Shift+Enter to input multiple lines, and put use strict on top, like this:
'use strict'; <Shift+Enter for a newline>
//  ...your code
<Enter to run>
It works in most browsers, namely Firefox and Chrome.
If it doesn't, e.g.
in an old browser, there's an ugly, but reliable way to ensure use strict.
Put it inside this kind of wrapper:
(function() {
  'use strict';

  // ...your code here...
})()
- Should we “use strict”?
The question may sound obvious, but it's not so.
One could recommend to start scripts with "use strict"… But you know what's cool?
Modern JavaScript supports “classes” and “modules” – advanced language structures (we'll surely get to them), that enable use strict automatically.
So we don't need to add the "use strict" directive, if we use them.
So, for now "use strict"; is a welcome guest at the top of your scripts.
Later, when your code is all in classes and modules, you may omit it.
As of now, we've got to know about use strict in general.
In the next chapters, as we learn language features, we'll see the differences between the strict and old modes.
Luckily, there aren't many and they actually make our lives better.
All examples in this tutorial assume strict mode unless (very rarely) specified otherwise.
JavaScript Fundamentals
Variables
Most of the time, a JavaScript application needs to work with information.
Here are two examples:
An online shop – the information might include goods being sold and a shopping cart.
A chat application – the information might include users, messages, and much more.
Variables are used to store this information.
- A variable
A variable is a “named storage” for data.
We can use variables to store goodies, visitors, and other data.
To create a variable in JavaScript, use the let keyword.
The statement below creates (in other words: declares) a variable with the name “message”:
let message;
Now, we can put some data into it by using the assignment operator =:
let message;

message = 'Hello'; // store the string
The string is now saved into the memory area associated with the variable.
We can access it using the variable name:
let message;
message = 'Hello!';

alert(message); // shows the variable content
To be concise, we can combine the variable declaration and assignment into a single line:
let message = 'Hello!'; // define the variable and assign the value

alert(message); // Hello!
We can also declare multiple variables in one line:
let user = 'John', age = 25, message = 'Hello';
That might seem shorter, but we don't recommend it.
For the sake of better readability, please use a single line per variable.
The multiline variant is a bit longer, but easier to read:
let user = 'John';
let age = 25;
let message = 'Hello';
Some people also define multiple variables in this multiline style:
let user = 'John',
  age = 25,
  message = 'Hello';
…Or even in the “comma-first” style:
let user = 'John'
  , age = 25
  , message = 'Hello';
Technically, all these variants do the same thing.
So, it's a matter of personal taste and aesthetics.
var instead of let
In older scripts, you may also find another keyword: var instead of let:
var message = 'Hello';
The var keyword is almost the same as let.
It also declares a variable, but in a slightly different, “old-school” way.
There are subtle differences between let and var, but they do not matter for us yet.
We'll cover them in detail in the chapter The old "var".
- A real-life analogy
We can easily grasp the concept of a “variable” if we imagine it as a “box” for data, with a uniquely-named sticker on it.
For instance, the variable message can be imagined as a box labeled "message" with the value "Hello!" in it:
We can put any value in the box.
We can also change it as many times as we want:
let message;

message = 'Hello!';

message = 'World!'; // value changed

alert(message);
When the value is changed, the old data is removed from the variable:
We can also declare two variables and copy data from one into the other.
let hello = 'Hello world!';

let message;

// copy 'Hello world' from hello into message
message = hello;

// now two variables hold the same data
alert(hello); // Hello world!
alert(message); // Hello world!
Declaring twice triggers an error
A variable should be declared only once.
A repeated declaration of the same variable is an error:
let message = "This";

// repeated 'let' leads to an error
let message = "That"; // SyntaxError: 'message' has already been declared
So, we should declare a variable once and then refer to it without let.
Functional languages
It's interesting to note that there exist functional programming languages, like Scala or Erlang that forbid changing variable values.
In such languages, once the value is stored “in the box”, it's there forever.
If we need to store something else, the language forces us to create a new box (declare a new variable).
We can't reuse the old one.
Though it may seem a little odd at first sight, these languages are quite capable of serious development.
More than that, there are areas like parallel computations where this limitation confers certain benefits.
Studying such a language (even if you're not planning to use it soon) is recommended to broaden the mind.
- Variable naming
There are two limitations on variable names in JavaScript:
The name must contain only letters, digits, or the symbols $ and _.
The first character must not be a digit.
Examples of valid names:
let userName;
let test123;
When the name contains multiple words, camelCase is commonly used.
That is: words go one after another, each word except first starting with a capital letter: myVeryLongName.
What's interesting – the dollar sign '$' and the underscore '_' can also be used in names.
They are regular symbols, just like letters, without any special meaning.
These names are valid:
let $ = 1; // declared a variable with the name "$"
let _ = 2; // and now a variable with the name "_"

alert($ + _); // 3
Examples of incorrect variable names:
let 1a; // cannot start with a digit

let my-name; // hyphens '-' aren't allowed in the name
Case matters
Variables named apple and AppLE are two different variables.
Non-Latin letters are allowed, but not recommended
It is possible to use any language, including cyrillic letters or even hieroglyphs, like this:
let имя = '...';
let 我 = '...';
Technically, there is no error here.
Such names are allowed, but there is an international convention to use English in variable names.
Even if we're writing a small script, it may have a long life ahead.
People from other countries may need to read it some time.
Reserved names
There is a list of reserved words, which cannot be used as variable names because they are used by the language itself.
For example: let, class, return, and function are reserved.
The code below gives a syntax error:
let let = 5; // can't name a variable "let", error!
let return = 5; // also can't name it "return", error!
An assignment without use strict
Normally, we need to define a variable before using it.
But in the old times, it was technically possible to create a variable by a mere assignment of the value without using let.
This still works now if we don't put use strict in our scripts to maintain compatibility with old scripts.
// note: no "use strict" in this example

num = 5; // the variable "num" is created if it didn't exist

alert(num); // 5
This is a bad practice and would cause an error in strict mode:
"use strict";

num = 5; // error: num is not defined
- Constants
To declare a constant (unchanging) variable, use const instead of let:
const myBirthday = '18.04.1982';
Variables declared using const are called “constants”.
They cannot be reassigned.
An attempt to do so would cause an error:
const myBirthday = '18.04.1982';

myBirthday = '01.01.2001'; // error, can't reassign the constant!
When a programmer is sure that a variable will never change, they can declare it with const to guarantee and clearly communicate that fact to everyone.
Uppercase constants
There is a widespread practice to use constants as aliases for difficult-to-remember values that are known prior to execution.
Such constants are named using capital letters and underscores.
For instance, let's make constants for colors in so-called “web” (hexadecimal) format:
const COLOR_RED = "#F00";
const COLOR_GREEN = "#0F0";
const COLOR_BLUE = "#00F";
const COLOR_ORANGE = "#FF7F00";

// ...when we need to pick a color
let color = COLOR_ORANGE;
alert(color); // #FF7F00
Benefits:
COLOR_ORANGE is much easier to remember than "#FF7F00".
It is much easier to mistype "#FF7F00" than COLOR_ORANGE.
When reading the code, COLOR_ORANGE is much more meaningful than #FF7F00.
When should we use capitals for a constant and when should we name it normally? Let's make that clear.
Being a “constant” just means that a variable's value never changes.
But there are constants that are known prior to execution (like a hexadecimal value for red) and there are constants that are calculated in run-time, during the execution, but do not change after their initial assignment.
For instance:
const pageLoadTime = /* time taken by a webpage to load */;
The value of pageLoadTime is not known prior to the page load, so it's named normally.
But it's still a constant because it doesn't change after assignment.
In other words, capital-named constants are only used as aliases for “hard-coded” values.
- Name things right
Talking about variables, there's one more extremely important thing.
A variable name should have a clean, obvious meaning, describing the data that it stores.
Variable naming is one of the most important and complex skills in programming.
A quick glance at variable names can reveal which code was written by a beginner versus an experienced developer.
In a real project, most of the time is spent modifying and extending an existing code base rather than writing something completely separate from scratch.
When we return to some code after doing something else for a while, it's much easier to find information that is well-labeled.
Or, in other words, when the variables have good names.
Please spend time thinking about the right name for a variable before declaring it.
Doing so will repay you handsomely.
Some good-to-follow rules are:
Use human-readable names like userName or shoppingCart.
Stay away from abbreviations or short names like a, b, c, unless you really know what you're doing.
Make names maximally descriptive and concise.
Examples of bad names are data and value.
Such names say nothing.
It's only okay to use them if the context of the code makes it exceptionally obvious which data or value the variable is referencing.
Agree on terms within your team and in your own mind.
If a site visitor is called a “user” then we should name related variables currentUser or newUser instead of currentVisitor or newManInTown.
Sounds simple? Indeed it is, but creating descriptive and concise variable names in practice is not.
Go for it.
Reuse or create?
And the last note.
There are some lazy programmers who, instead of declaring new variables, tend to reuse existing ones.
As a result, their variables are like boxes into which people throw different things without changing their stickers.
What's inside the box now? Who knows? We need to come closer and check.
Such programmers save a little bit on variable declaration but lose ten times more on debugging.
An extra variable is good, not evil.
Modern JavaScript minifiers and browsers optimize code well enough, so it won't create performance issues.
Using different variables for different values can even help the engine optimize your code.
- Summary
We can declare variables to store data by using the var, let, or const keywords.
let – is a modern variable declaration.
var – is an old-school variable declaration.
Normally we don't use it at all, but we'll cover subtle differences from let in the chapter The old "var", just in case you need them.
const – is like let, but the value of the variable can't be changed.
Variables should be named in a way that allows us to easily understand what's inside them.
importance: 2
Declare two variables: admin and name.
Assign the value "John" to name.
Copy the value from name to admin.
Show the value of admin using alert (must output “John”).
In the code below, each line corresponds to the item in the task list.
let admin, name; // can declare two variables at once

name = "John";

admin = name;

alert( admin ); // "John"
Giving the right name
importance: 3
Create a variable with the name of our planet.
How would you name such a variable?
Create a variable to store the name of a current visitor to a website.
How would you name that variable?
The variable for our planet
That's simple:
let ourPlanetName = "Earth";
Note, we could use a shorter name planet, but it might not be obvious what planet it refers to.
It's nice to be more verbose.
At least until the variable isNotTooLong.
The name of the current visitor
let currentUserName = "John";
Again, we could shorten that to userName if we know for sure that the user is current.
Modern editors and autocomplete make long variable names easy to write.
Don't save on them.
A name with 3 words in it is fine.
And if your editor does not have proper autocompletion, get a new one.
Uppercase const?
importance: 4
Examine the following code:
const birthday = '18.04.1982';

const age = someCode(birthday);
Here we have a constant birthday date and the age is calculated from birthday with the help of some code (it is not provided for shortness, and because details don't matter here).
Would it be right to use upper case for birthday? For age? Or even for both?
const BIRTHDAY = '18.04.1982'; // make uppercase?

const AGE = someCode(BIRTHDAY); // make uppercase?
We generally use upper case for constants that are “hard-coded”.
Or, in other words, when the value is known prior to execution and directly written into the code.
In this code, birthday is exactly like that.
So we could use the upper case for it.
In contrast, age is evaluated in run-time.
Today we have one age, a year after we'll have another one.
It is constant in a sense that it does not change through the code execution.
But it is a bit “less of a constant” than birthday: it is calculated, so we should keep the lower case for it.
JavaScript Fundamentals
Data types
A value in JavaScript is always of a certain type.
For example, a string or a number.
There are eight basic data types in JavaScript.
Here, we'll cover them in general and in the next chapters we'll talk about each of them in detail.
We can put any type in a variable.
For example, a variable can at one moment be a string and then store a number:
// no error
let message = "hello";
message = 123456;
Programming languages that allow such things, such as JavaScript, are called “dynamically typed”, meaning that there exist data types, but variables are not bound to any of them.
- Number
let n = 123;
n = 12.345;
The number type represents both integer and floating point numbers.
There are many operations for numbers, e.g.
multiplication *, division /, addition +, subtraction -, and so on.
Besides regular numbers, there are so-called “special numeric values” which also belong to this data type: Infinity, -Infinity and NaN.
Infinity represents the mathematical Infinity ∞.
It is a special value that's greater than any number.
We can get it as a result of division by zero:
alert( 1 / 0 ); // Infinity
Or just reference it directly:
alert( Infinity ); // InfinityNaN represents a computational error.
It is a result of an incorrect or an undefined mathematical operation, for instance:
alert( "not a number" / 2 ); // NaN, such division is erroneousNaN is sticky.
Any further operation on NaN returns NaN:
alert( "not a number" / 2 + 5 ); // NaN
So, if there's a NaN somewhere in a mathematical expression, it propagates to the whole result.
Mathematical operations are safe
Doing maths is “safe” in JavaScript.
We can do anything: divide by zero, treat non-numeric strings as numbers, etc.
The script will never stop with a fatal error (“die”).
At worst, we'll get NaN as the result.
Special numeric values formally belong to the “number” type.
Of course they are not numbers in the common sense of this word.
We'll see more about working with numbers in the chapter Numbers.
- BigInt
In JavaScript, the “number” type cannot represent integer values larger than (253-1) (that's 9007199254740991), or less than -(253-1) for negatives.
It's a technical limitation caused by their internal representation.
For most purposes that's quite enough, but sometimes we need really big numbers, e.g.
for cryptography or microsecond-precision timestamps.
BigInt type was recently added to the language to represent integers of arbitrary length.
A BigInt value is created by appending n to the end of an integer:
// the "n" at the end means it's a BigInt
const bigInt = 1234567890123456789012345678901234567890n;
As BigInt numbers are rarely needed, we don't cover them here, but devoted them a separate chapter BigInt.
Read it when you need such big numbers.
Compatibility issues
Right now, BigInt is supported in Firefox/Chrome/Edge/Safari, but not in IE.
You can check MDN BigInt compatibility table to know which versions of a browser are supported.
- String
A string in JavaScript must be surrounded by quotes.
let str = "Hello";
let str2 = 'Single quotes are ok too';
let phrase = `can embed another ${str}`;
In JavaScript, there are 3 types of quotes.
Double quotes: "Hello".
Single quotes: 'Hello'.
Backticks: `Hello`.
Double and single quotes are “simple” quotes.
There's practically no difference between them in JavaScript.
Backticks are “extended functionality” quotes.
They allow us to embed variables and expressions into a string by wrapping them in ${…}, for example:
let name = "John";

// embed a variable
alert( `Hello, ${name}!` ); // Hello, John!

// embed an expression
alert( `the result is ${1 + 2}` ); // the result is 3
The expression inside ${…} is evaluated and the result becomes a part of the string.
We can put anything in there: a variable like name or an arithmetical expression like 1 + 2 or something more complex.
Please note that this can only be done in backticks.
Other quotes don't have this embedding functionality!
alert( "the result is ${1 + 2}" ); // the result is ${1 + 2} (double quotes do nothing)
We'll cover strings more thoroughly in the chapter Strings.
There is no character type.
In some languages, there is a special “character” type for a single character.
For example, in the C language and in Java it is called “char”.
In JavaScript, there is no such type.
There's only one type: string.
A string may consist of zero characters (be empty), one character or many of them.
- Boolean (logical type)
The boolean type has only two values: true and false.
This type is commonly used to store yes/no values: true means “yes, correct”, and false means “no, incorrect”.
For instance:
let nameFieldChecked = true; // yes, name field is checked
let ageFieldChecked = false; // no, age field is not checked
Boolean values also come as a result of comparisons:
let isGreater = 4 > 1;

alert( isGreater ); // true (the comparison result is "yes")
We'll cover booleans more deeply in the chapter Logical operators.
- The “null” value
The special null value does not belong to any of the types described above.
It forms a separate type of its own which contains only the null value:
let age = null;
In JavaScript, null is not a “reference to a non-existing object” or a “null pointer” like in some other languages.
It's just a special value which represents “nothing”, “empty” or “value unknown”.
The code above states that age is unknown.
- The “undefined” value
The special value undefined also stands apart.
It makes a type of its own, just like null.
The meaning of undefined is “value is not assigned”.
If a variable is declared, but not assigned, then its value is undefined:
let age;

alert(age); // shows "undefined"
Technically, it is possible to explicitly assign undefined to a variable:
let age = 100;

// change the value to undefined
age = undefined;

alert(age); // "undefined"
…But we don't recommend doing that.
Normally, one uses null to assign an “empty” or “unknown” value to a variable, while undefined is reserved as a default initial value for unassigned things.
- Objects and Symbols
The object type is special.
All other types are called “primitive” because their values can contain only a single thing (be it a string or a number or whatever).
In contrast, objects are used to store collections of data and more complex entities.
Being that important, objects deserve a special treatment.
We'll deal with them later in the chapter Objects, after we learn more about primitives.
The symbol type is used to create unique identifiers for objects.
We have to mention it here for the sake of completeness, but also postpone the details till we know objects.
- The typeof operator
The typeof operator returns the type of the argument.
It's useful when we want to process values of different types differently or just want to do a quick check.
It supports two forms of syntax:
As an operator: typeof x.
As a function: typeof(x).
In other words, it works with parentheses or without them.
The result is the same.
The call to typeof x returns a string with the type name:
typeof undefined // "undefined"

typeof 0 // "number"

typeof 10n // "bigint"

typeof true // "boolean"

typeof "foo" // "string"

typeof Symbol("id") // "symbol"

typeof Math // "object"  (1)

typeof null // "object"  (2)

typeof alert // "function"  (3)
The last three lines may need additional explanation:
Math is a built-in object that provides mathematical operations.
We will learn it in the chapter Numbers.
Here, it serves just as an example of an object.
The result of typeof null is "object".
That's an officially recognized error in typeof behavior, coming from the early days of JavaScript and kept for compatibility.
Definitely, null is not an object.
It is a special value with a separate type of its own.
The result of typeof alert is "function", because alert is a function.
We'll study functions in the next chapters where we'll also see that there's no special “function” type in JavaScript.
Functions belong to the object type.
But typeof treats them differently, returning "function".
That also comes from the early days of JavaScript.
Technically, such behavior isn't correct, but can be convenient in practice.
- Summary
There are 8 basic data types in JavaScript.
number for numbers of any kind: integer or floating-point, integers are limited by ±(253-1).
bigint is for integer numbers of arbitrary length.
string for strings.
A string may have zero or more characters, there's no separate single-character type.
boolean for true/false.
null for unknown values – a standalone type that has a single value null.
undefined for unassigned values – a standalone type that has a single value undefined.
object for more complex data structures.
symbol for unique identifiers.
The typeof operator allows us to see which type is stored in a variable.
Two forms: typeof x or typeof(x).
Returns a string with the name of the type, like "string".
For null returns "object" – this is an error in the language, it's not actually an object.
In the next chapters, we'll concentrate on primitive values and once we're familiar with them, we'll move on to objects.
importance: 5
What is the output of the script?
let name = "Ilya";

alert( `hello ${1}` ); // ?

alert( `hello ${"name"}` ); // ?

alert( `hello ${name}` ); // ?
Backticks embed the expression inside ${...} into the string.
let name = "Ilya";

// the expression is a number 1
alert( `hello ${1}` ); // hello 1

// the expression is a string "name"
alert( `hello ${"name"}` ); // hello name

// the expression is a variable, embed it
alert( `hello ${name}` ); // hello Ilya
JavaScript Fundamentals
Interaction: alert, prompt, confirm
As we'll be using the browser as our demo environment, let's see a couple of functions to interact with the user: alert, prompt and confirm.
- alert
This one we've seen already.
It shows a message and waits for the user to press “OK”.
For example:
alert("Hello");
The mini-window with the message is called a modal window.
The word “modal” means that the visitor can't interact with the rest of the page, press other buttons, etc, until they have dealt with the window.
In this case – until they press “OK”.
- prompt
The function prompt accepts two arguments:
result = prompt(title, [default]);
It shows a modal window with a text message, an input field for the visitor, and the buttons OK/Cancel.
title
The text to show the visitor.
default
An optional second parameter, the initial value for the input field.
The square brackets in syntax [...]
The square brackets around default in the syntax above denote that the parameter is optional, not required.
The visitor can type something in the prompt input field and press OK.
Then we get that text in the result.
Or they can cancel the input by pressing Cancel or hitting the Esc key, then we get null as the result.
The call to prompt returns the text from the input field or null if the input was canceled.
For instance:
let age = prompt('How old are you?', 100);

alert(`You are ${age} years old!`); // You are 100 years old!
In IE: always supply a default
The second parameter is optional, but if we don't supply it, Internet Explorer will insert the text "undefined" into the prompt.
Run this code in Internet Explorer to see:
let test = prompt("Test");
So, for prompts to look good in IE, we recommend always providing the second argument:
let test = prompt("Test", ''); // <-- for IE
- confirm
The syntax:
result = confirm(question);
The function confirm shows a modal window with a question and two buttons: OK and Cancel.
The result is true if OK is pressed and false otherwise.
For example:
let isBoss = confirm("Are you the boss?");

alert( isBoss ); // true if OK is pressed
- Summary
We covered 3 browser-specific functions to interact with visitors:
alert
shows a message.
prompt
shows a message asking the user to input text.
It returns the text or, if Cancel button or Esc is clicked, null.
confirm
shows a message and waits for the user to press “OK” or “Cancel”.
It returns true for OK and false for Cancel/Esc.
All these methods are modal: they pause script execution and don't allow the visitor to interact with the rest of the page until the window has been dismissed.
There are two limitations shared by all the methods above:
The exact location of the modal window is determined by the browser.
Usually, it's in the center.
The exact look of the window also depends on the browser.
We can't modify it.
That is the price for simplicity.
There are other ways to show nicer windows and richer interaction with the visitor, but if “bells and whistles” do not matter much, these methods work just fine.
importance: 4
Create a web-page that asks for a name and outputs it.
Run the demo
JavaScript-code:
let name = prompt("What is your name?", "");
alert(name);
The full page:
<!DOCTYPE html>
<html>
<body>

  <script>
    'use strict';

    let name = prompt("What is your name?", "");
    alert(name);
  </script>

</body>
</html>
JavaScript Fundamentals
Type Conversions
Most of the time, operators and functions automatically convert the values given to them to the right type.
For example, alert automatically converts any value to a string to show it.
Mathematical operations convert values to numbers.
There are also cases when we need to explicitly convert a value to the expected type.
Not talking about objects yet
In this chapter, we won't cover objects.
For now we'll just be talking about primitives.
Later, after we learn about objects, in the chapter Object to primitive conversion we'll see how objects fit in.
- String Conversion
String conversion happens when we need the string form of a value.
For example, alert(value) does it to show the value.
We can also call the String(value) function to convert a value to a string:
let value = true;
alert(typeof value); // boolean

value = String(value); // now value is a string "true"
alert(typeof value); // string
String conversion is mostly obvious.
A false becomes "false", null becomes "null", etc.
- Numeric Conversion
Numeric conversion happens in mathematical functions and expressions automatically.
For example, when division / is applied to non-numbers:
alert( "6" / "2" ); // 3, strings are converted to numbers
We can use the Number(value) function to explicitly convert a value to a number:
let str = "123";
alert(typeof str); // string

let num = Number(str); // becomes a number 123

alert(typeof num); // number
Explicit conversion is usually required when we read a value from a string-based source like a text form but expect a number to be entered.
If the string is not a valid number, the result of such a conversion is NaN.
For instance:
let age = Number("an arbitrary string instead of a number");

alert(age); // NaN, conversion failed
Numeric conversion rules:
Value
Becomes…
undefined
NaN
null
0
true and false
1 and 0
string
Whitespaces from the start and end are removed.
If the remaining string is empty, the result is 0.
Otherwise, the number is “read” from the string.
An error gives NaN.
Examples:
alert( Number("   123   ") ); // 123
alert( Number("123z") );      // NaN (error reading a number at "z")
alert( Number(true) );        // 1
alert( Number(false) );       // 0
Please note that null and undefined behave differently here: null becomes zero while undefined becomes NaN.
Most mathematical operators also perform such conversion, we'll see that in the next chapter.
- Boolean Conversion
Boolean conversion is the simplest one.
It happens in logical operations (later we'll meet condition tests and other similar things) but can also be performed explicitly with a call to Boolean(value).
The conversion rule:
Values that are intuitively “empty”, like 0, an empty string, null, undefined, and NaN, become false.
Other values become true.
For instance:
alert( Boolean(1) ); // true
alert( Boolean(0) ); // false

alert( Boolean("hello") ); // true
alert( Boolean("") ); // false
Please note: the string with zero "0" is true
Some languages (namely PHP) treat "0" as false.
But in JavaScript, a non-empty string is always true.
alert( Boolean("0") ); // true
alert( Boolean(" ") ); // spaces, also true (any non-empty string is true)
- Summary
The three most widely used type conversions are to string, to number, and to boolean.
String Conversion – Occurs when we output something.
Can be performed with String(value).
The conversion to string is usually obvious for primitive values.
Numeric Conversion – Occurs in math operations.
Can be performed with Number(value).
The conversion follows the rules:
Value
Becomes…
undefined
NaN
null
0
true / false
1 / 0
string
The string is read “as is”, whitespaces from both sides are ignored.
An empty string becomes 0.
An error gives NaN.
Boolean Conversion – Occurs in logical operations.
Can be performed with Boolean(value).
Follows the rules:
Value
Becomes…
0, null, undefined, NaN, ""
false
any other value
true
Most of these rules are easy to understand and memorize.
The notable exceptions where people usually make mistakes are:
undefined is NaN as a number, not 0.
"0" and space-only strings like " " are true as a boolean.
Objects aren't covered here.
We'll return to them later in the chapter Object to primitive conversion that is devoted exclusively to objects after we learn more basic things about JavaScript.
JavaScript Fundamentals
Basic operators, maths
We know many operators from school.
They are things like addition +, multiplication *, subtraction -, and so on.
In this chapter, we'll start with simple operators, then concentrate on JavaScript-specific aspects, not covered by school arithmetic.
- Terms: “unary”, “binary”, “operand”
Before we move on, let's grasp some common terminology.
An operand – is what operators are applied to.
For instance, in the multiplication of 5 * 2 there are two operands: the left operand is 5 and the right operand is 2.
Sometimes, people call these “arguments” instead of “operands”.
An operator is unary if it has a single operand.
For example, the unary negation - reverses the sign of a number:
let x = 1;

x = -x;
alert( x ); // -1, unary negation was applied
An operator is binary if it has two operands.
The same minus exists in binary form as well:
let x = 1, y = 3;
alert( y - x ); // 2, binary minus subtracts values
Formally, in the examples above we have two different operators that share the same symbol: the negation operator, a unary operator that reverses the sign, and the subtraction operator, a binary operator that subtracts one number from another.
- Maths
The following math operations are supported:
Addition +,
Subtraction -,
Multiplication *,
Division /,
Remainder %,
Exponentiation **.
The first four are straightforward, while % and ** need a few words about them.
Remainder %
The remainder operator %, despite its appearance, is not related to percents.
The result of a % b is the remainder of the integer division of a by b.
For instance:
alert( 5 % 2 ); // 1, a remainder of 5 divided by 2
alert( 8 % 3 ); // 2, a remainder of 8 divided by 3
Exponentiation **
The exponentiation operator a ** b multiplies a by itself b times.
For instance:
alert( 2 ** 2 ); // 4  (2 multiplied by itself 2 times)
alert( 2 ** 3 ); // 8  (2 * 2 * 2, 3 times)
alert( 2 ** 4 ); // 16 (2 * 2 * 2 * 2, 4 times)
Mathematically, the exponentiation is defined for non-integer numbers as well.
For example, a square root is an exponentiation by 1/2:
alert( 4 ** (1/2) ); // 2 (power of 1/2 is the same as a square root)
alert( 8 ** (1/3) ); // 2 (power of 1/3 is the same as a cubic root)
- String concatenation with binary +
Let's meet features of JavaScript operators that are beyond school arithmetics.
Usually, the plus operator + sums numbers.
But, if the binary + is applied to strings, it merges (concatenates) them:
let s = "my" + "string";
alert(s); // mystring
Note that if any of the operands is a string, then the other one is converted to a string too.
For example:
alert( '1' + 2 ); // "12"
alert( 2 + '1' ); // "21"
See, it doesn't matter whether the first operand is a string or the second one.
Here's a more complex example:
alert(2 + 2 + '1' ); // "41" and not "221"
Here, operators work one after another.
The first + sums two numbers, so it returns 4, then the next + adds the string 1 to it, so it's like 4 + '1' = 41.
alert('1' + 2 + 2); // "122" and not "14"
Here, the first operand is a string, the compiler treats the other two operands as strings too.
The 2 gets concatenated to '1', so it's like '1' + 2 = "12" and "12" + 2 = "122".
The binary + is the only operator that supports strings in such a way.
Other arithmetic operators work only with numbers and always convert their operands to numbers.
Here's the demo for subtraction and division:
alert( 6 - '2' ); // 4, converts '2' to a number
alert( '6' / '2' ); // 3, converts both operands to numbers
- Numeric conversion, unary +
The plus + exists in two forms: the binary form that we used above and the unary form.
The unary plus or, in other words, the plus operator + applied to a single value, doesn't do anything to numbers.
But if the operand is not a number, the unary plus converts it into a number.
For example:
// No effect on numbers
let x = 1;
alert( +x ); // 1

let y = -2;
alert( +y ); // -2

// Converts non-numbers
alert( +true ); // 1
alert( +"" );   // 0
It actually does the same thing as Number(...), but is shorter.
The need to convert strings to numbers arises very often.
For example, if we are getting values from HTML form fields, they are usually strings.
What if we want to sum them?
The binary plus would add them as strings:
let apples = "2";
let oranges = "3";

alert( apples + oranges ); // "23", the binary plus concatenates strings
If we want to treat them as numbers, we need to convert and then sum them:
let apples = "2";
let oranges = "3";

// both values converted to numbers before the binary plus
alert( +apples + +oranges ); // 5

// the longer variant
// alert( Number(apples) + Number(oranges) ); // 5
From a mathematician's standpoint, the abundance of pluses may seem strange.
But from a programmer's standpoint, there's nothing special: unary pluses are applied first, they convert strings to numbers, and then the binary plus sums them up.
Why are unary pluses applied to values before the binary ones? As we're going to see, that's because of their higher precedence.
- Operator precedence
If an expression has more than one operator, the execution order is defined by their precedence, or, in other words, the default priority order of operators.
From school, we all know that the multiplication in the expression 1 + 2 * 2 should be calculated before the addition.
That's exactly the precedence thing.
The multiplication is said to have a higher precedence than the addition.
Parentheses override any precedence, so if we're not satisfied with the default order, we can use them to change it.
For example, write (1 + 2) * 2.
There are many operators in JavaScript.
Every operator has a corresponding precedence number.
The one with the larger number executes first.
If the precedence is the same, the execution order is from left to right.
Here's an extract from the precedence table (you don't need to remember this, but note that unary operators are higher than corresponding binary ones):
Precedence
Name
Sign
…
…
…
17
unary plus
+
17
unary negation
-
16
exponentiation
**
15
multiplication
*
15
division
/
13
addition
+
13
subtraction
-
…
…
…
3
assignment
=
…
…
…
As we can see, the “unary plus” has a priority of 17 which is higher than the 13 of “addition” (binary plus).
That's why, in the expression "+apples + +oranges", unary pluses work before the addition.
- Assignment
Let's note that an assignment = is also an operator.
It is listed in the precedence table with the very low priority of 3.
That's why, when we assign a variable, like x = 2 * 2 + 1, the calculations are done first and then the = is evaluated, storing the result in x.
let x = 2 * 2 + 1;

alert( x ); // 5
Assignment = returns a value
The fact of = being an operator, not a “magical” language construct has an interesting implication.
All operators in JavaScript return a value.
That's obvious for + and -, but also true for =.
The call x = value writes the value into xand then returns it.
Here's a demo that uses an assignment as part of a more complex expression:
let a = 1;
let b = 2;

let c = 3 - (a = b + 1);

alert( a ); // 3
alert( c ); // 0
In the example above, the result of expression (a = b + 1) is the value which was assigned to a (that is 3).
It is then used for further evaluations.
Funny code, isn't it? We should understand how it works, because sometimes we see it in JavaScript libraries.
Although, please don't write the code like that.
Such tricks definitely don't make code clearer or readable.
Chaining assignments
Another interesting feature is the ability to chain assignments:
let a, b, c;

a = b = c = 2 + 2;

alert( a ); // 4
alert( b ); // 4
alert( c ); // 4
Chained assignments evaluate from right to left.
First, the rightmost expression 2 + 2 is evaluated and then assigned to the variables on the left: c, b and a.
At the end, all the variables share a single value.
Once again, for the purposes of readability it's better to split such code into few lines:
c = 2 + 2;
b = c;
a = c;
That's easier to read, especially when eye-scanning the code fast.
- Modify-in-place
We often need to apply an operator to a variable and store the new result in that same variable.
For example:
let n = 2;
n = n + 5;
n = n * 2;
This notation can be shortened using the operators += and *=:
let n = 2;
n += 5; // now n = 7 (same as n = n + 5)
n *= 2; // now n = 14 (same as n = n * 2)

alert( n ); // 14
Short “modify-and-assign” operators exist for all arithmetical and bitwise operators: /=, -=, etc.
Such operators have the same precedence as a normal assignment, so they run after most other calculations:
let n = 2;

n *= 3 + 5;

alert( n ); // 16  (right part evaluated first, same as n *= 8)
- Increment/decrement
Increasing or decreasing a number by one is among the most common numerical operations.
So, there are special operators for it:
Increment++ increases a variable by 1:
let counter = 2;
counter++;        // works the same as counter = counter + 1, but is shorter
alert( counter ); // 3Decrement-- decreases a variable by 1:
let counter = 2;
counter--;        // works the same as counter = counter - 1, but is shorter
alert( counter ); // 1
Important:
Increment/decrement can only be applied to variables.
Trying to use it on a value like 5++ will give an error.
The operators ++ and -- can be placed either before or after a variable.
When the operator goes after the variable, it is in “postfix form”: counter++.
The “prefix form” is when the operator goes before the variable: ++counter.
Both of these statements do the same thing: increase counter by 1.
Is there any difference? Yes, but we can only see it if we use the returned value of ++/--.
Let's clarify.
As we know, all operators return a value.
Increment/decrement is no exception.
The prefix form returns the new value while the postfix form returns the old value (prior to increment/decrement).
To see the difference, here's an example:
let counter = 1;
let a = ++counter; // (*)

alert(a); // 2
In the line (*), the prefix form ++counter increments counter and returns the new value, 2.
So, the alert shows 2.
Now, let's use the postfix form:
let counter = 1;
let a = counter++; // (*) changed ++counter to counter++

alert(a); // 1
In the line (*), the postfix form counter++ also increments counter but returns the old value (prior to increment).
So, the alert shows 1.
To summarize:
If the result of increment/decrement is not used, there is no difference in which form to use:
let counter = 0;
counter++;
++counter;
alert( counter ); // 2, the lines above did the same
If we'd like to increase a value and immediately use the result of the operator, we need the prefix form:
let counter = 0;
alert( ++counter ); // 1
If we'd like to increment a value but use its previous value, we need the postfix form:
let counter = 0;
alert( counter++ ); // 0
Increment/decrement among other operators
The operators ++/-- can be used inside expressions as well.
Their precedence is higher than most other arithmetical operations.
For instance:
let counter = 1;
alert( 2 * ++counter ); // 4
Compare with:
let counter = 1;
alert( 2 * counter++ ); // 2, because counter++ returns the "old" value
Though technically okay, such notation usually makes code less readable.
One line does multiple things – not good.
While reading code, a fast “vertical” eye-scan can easily miss something like counter++ and it won't be obvious that the variable increased.
We advise a style of “one line – one action”:
let counter = 1;
alert( 2 * counter );
counter++;
- Bitwise operators
Bitwise operators treat arguments as 32-bit integer numbers and work on the level of their binary representation.
These operators are not JavaScript-specific.
They are supported in most programming languages.
The list of operators:
AND ( & )
OR ( | )
XOR ( ^ )
NOT ( ~ )
LEFT SHIFT ( << )
RIGHT SHIFT ( >> )
ZERO-FILL RIGHT SHIFT ( >>> )
These operators are used very rarely, when we need to fiddle with numbers on the very lowest (bitwise) level.
We won't need these operators any time soon, as web development has little use of them, but in some special areas, such as cryptography, they are useful.
You can read the Bitwise Operators chapter on MDN when a need arises.
- Comma
The comma operator , is one of the rarest and most unusual operators.
Sometimes, it's used to write shorter code, so we need to know it in order to understand what's going on.
The comma operator allows us to evaluate several expressions, dividing them with a comma ,.
Each of them is evaluated but only the result of the last one is returned.
For example:
let a = (1 + 2, 3 + 4);

alert( a ); // 7 (the result of 3 + 4)
Here, the first expression 1 + 2 is evaluated and its result is thrown away.
Then, 3 + 4 is evaluated and returned as the result.
Comma has a very low precedence
Please note that the comma operator has very low precedence, lower than =, so parentheses are important in the example above.
Without them: a = 1 + 2, 3 + 4 evaluates + first, summing the numbers into a = 3, 7, then the assignment operator = assigns a = 3, and the rest is ignored.
It's like (a = 1 + 2), 3 + 4.
Why do we need an operator that throws away everything except the last expression?
Sometimes, people use it in more complex constructs to put several actions in one line.
For example:
// three operations in one line
for (a = 1, b = 3, c = a * b; a < 10; a++) {
 ...
}
Such tricks are used in many JavaScript frameworks.
That's why we're mentioning them.
But usually they don't improve code readability so we should think well before using them.
importance: 5
What are the final values of all variables a, b, c and d after the code below?
let a = 1, b = 1;

let c = ++a; // ?
let d = b++; // ?
The answer is:
a = 2b = 2c = 2d = 1let a = 1, b = 1;
alert( ++a ); // 2, prefix form returns the new value
alert( b++ ); // 1, postfix form returns the old value
alert( a ); // 2, incremented once
alert( b ); // 2, incremented once
Assignment result
importance: 3
What are the values of a and x after the code below?
let a = 2;

let x = 1 + (a *= 2);
The answer is:
a = 4 (multiplied by 2)
x = 5 (calculated as 1 + 4)
Type conversions
importance: 5
What are results of these expressions?
"" + 1 + 0
"" - 1 + 0
true + false
6 / "3"
"2" * "3"
4 + 5 + "px"
"$" + 4 + 5
"4" - 2
"4px" - 2
7 / 0
"  -9  " + 5
"  -9  " - 5
null + 1
undefined + 1
" \t \n" - 2
Think well, write down and then compare with the answer.
"" + 1 + 0 = "10" // (1)
"" - 1 + 0 = -1 // (2)
true + false = 1
6 / "3" = 2
"2" * "3" = 6
4 + 5 + "px" = "9px"
"$" + 4 + 5 = "$45"
"4" - 2 = 2
"4px" - 2 = NaN
7 / 0 = Infinity
"  -9  " + 5 = "  -9  5" // (3)
"  -9  " - 5 = -14 // (4)
null + 1 = 1 // (5)
undefined + 1 = NaN // (6)
" \t \n" - 2 = -2 // (7)
The addition with a string "" + 1 converts 1 to a string: "" + 1 = "1", and then we have "1" + 0, the same rule is applied.
The subtraction - (like most math operations) only works with numbers, it converts an empty string "" to 0.
The addition with a string appends the number 5 to the string.
The subtraction always converts to numbers, so it makes " -9 " a number -9 (ignoring spaces around it).
null becomes 0 after the numeric conversion.
undefined becomes NaN after the numeric conversion.
Space characters, are trimmed off string start and end when a string is converted to a number.
Here the whole string consists of space characters, such as \t, \n and a “regular” space between them.
So, similarly to an empty string, it becomes 0.
Fix the addition
importance: 5
Here's a code that asks the user for two numbers and shows their sum.
It works incorrectly.
The output in the example below is 12 (for default prompt values).
Why? Fix it.
The result should be 3.
let a = prompt("First number?", 1);
let b = prompt("Second number?", 2);

alert(a + b); // 12
The reason is that prompt returns user input as a string.
So variables have values "1" and "2" respectively.
let a = "1"; // prompt("First number?", 1);
let b = "2"; // prompt("Second number?", 2);

alert(a + b); // 12
What we should do is to convert strings to numbers before +.
For example, using Number() or prepending them with +.
For example, right before prompt:
let a = +prompt("First number?", 1);
let b = +prompt("Second number?", 2);

alert(a + b); // 3
Or in the alert:
let a = prompt("First number?", 1);
let b = prompt("Second number?", 2);

alert(+a + +b); // 3
Using both unary and binary + in the latest code.
Looks funny, doesn't it?
JavaScript Fundamentals
Comparisons
We know many comparison operators from maths.
In JavaScript they are written like this:
Greater/less than: a > b, a < b.
Greater/less than or equals: a >= b, a <= b.
Equals: a == b, please note the double equality sign == means the equality test, while a single one a = b means an assignment.
Not equals.
In maths the notation is ≠, but in JavaScript it's written as a != b.
In this article we'll learn more about different types of comparisons, how JavaScript makes them, including important peculiarities.
At the end you'll find a good recipe to avoid “JavaScript quirks”-related issues.
- Boolean is the result
All comparison operators return a boolean value:
true – means “yes”, “correct” or “the truth”.
false – means “no”, “wrong” or “not the truth”.
For example:
alert( 2 > 1 );  // true (correct)
alert( 2 == 1 ); // false (wrong)
alert( 2 != 1 ); // true (correct)
A comparison result can be assigned to a variable, just like any value:
let result = 5 > 4; // assign the result of the comparison
alert( result ); // true
- String comparison
To see whether a string is greater than another, JavaScript uses the so-called “dictionary” or “lexicographical” order.
In other words, strings are compared letter-by-letter.
For example:
alert( 'Z' > 'A' ); // true
alert( 'Glow' > 'Glee' ); // true
alert( 'Bee' > 'Be' ); // true
The algorithm to compare two strings is simple:
Compare the first character of both strings.
If the first character from the first string is greater (or less) than the other string's, then the first string is greater (or less) than the second.
We're done.
Otherwise, if both strings' first characters are the same, compare the second characters the same way.
Repeat until the end of either string.
If both strings end at the same length, then they are equal.
Otherwise, the longer string is greater.
In the first example above, the comparison 'Z' > 'A' gets to a result at the first step.
The second comparison 'Glow' and 'Glee' needs more steps as strings are compared character-by-character:
G is the same as G.
l is the same as l.
o is greater than e.
Stop here.
The first string is greater.
Not a real dictionary, but Unicode order
The comparison algorithm given above is roughly equivalent to the one used in dictionaries or phone books, but it's not exactly the same.
For instance, case matters.
A capital letter "A" is not equal to the lowercase "a".
Which one is greater? The lowercase "a".
Why? Because the lowercase character has a greater index in the internal encoding table JavaScript uses (Unicode).
We'll get back to specific details and consequences of this in the chapter Strings.
- Comparison of different types
When comparing values of different types, JavaScript converts the values to numbers.
For example:
alert( '2' > 1 ); // true, string '2' becomes a number 2
alert( '01' == 1 ); // true, string '01' becomes a number 1
For boolean values, true becomes 1 and false becomes 0.
For example:
alert( true == 1 ); // true
alert( false == 0 ); // true
A funny consequence
It is possible that at the same time:
Two values are equal.
One of them is true as a boolean and the other one is false as a boolean.
For example:
let a = 0;
alert( Boolean(a) ); // false

let b = "0";
alert( Boolean(b) ); // true

alert(a == b); // true!
From JavaScript's standpoint, this result is quite normal.
An equality check converts values using the numeric conversion (hence "0" becomes 0), while the explicit Boolean conversion uses another set of rules.
- Strict equality
A regular equality check == has a problem.
It cannot differentiate 0 from false:
alert( 0 == false ); // true
The same thing happens with an empty string:
alert( '' == false ); // true
This happens because operands of different types are converted to numbers by the equality operator ==.
An empty string, just like false, becomes a zero.
What to do if we'd like to differentiate 0 from false?
A strict equality operator === checks the equality without type conversion.
In other words, if a and b are of different types, then a === b immediately returns false without an attempt to convert them.
Let's try it:
alert( 0 === false ); // false, because the types are different
There is also a “strict non-equality” operator !== analogous to !=.
The strict equality operator is a bit longer to write, but makes it obvious what's going on and leaves less room for errors.
- Comparison with null and undefined
There's a non-intuitive behavior when null or undefined are compared to other values.
For a strict equality check ===
These values are different, because each of them is a different type.
alert( null === undefined ); // false
For a non-strict check ==
There's a special rule.
These two are a “sweet couple”: they equal each other (in the sense of ==), but not any other value.
alert( null == undefined ); // true
For maths and other comparisons < > <= >=
null/undefined are converted to numbers: null becomes 0, while undefined becomes NaN.
Now let's see some funny things that happen when we apply these rules.
And, what's more important, how to not fall into a trap with them.
Strange result: null vs 0
Let's compare null with a zero:
alert( null > 0 );  // (1) false
alert( null == 0 ); // (2) false
alert( null >= 0 ); // (3) true
Mathematically, that's strange.
The last result states that "null is greater than or equal to zero", so in one of the comparisons above it must be true, but they are both false.
The reason is that an equality check == and comparisons > < >= <= work differently.
Comparisons convert null to a number, treating it as 0.
That's why (3) null >= 0 is true and (1) null > 0 is false.
On the other hand, the equality check == for undefined and null is defined such that, without any conversions, they equal each other and don't equal anything else.
That's why (2) null == 0 is false.
An incomparable undefined
The value undefined shouldn't be compared to other values:
alert( undefined > 0 ); // false (1)
alert( undefined < 0 ); // false (2)
alert( undefined == 0 ); // false (3)
Why does it dislike zero so much? Always false!
We get these results because:
Comparisons (1) and (2) return false because undefined gets converted to NaN and NaN is a special numeric value which returns false for all comparisons.
The equality check (3) returns false because undefined only equals null, undefined, and no other value.
Avoid problems
Why did we go over these examples? Should we remember these peculiarities all the time? Well, not really.
Actually, these tricky things will gradually become familiar over time, but there's a solid way to avoid problems with them:
Treat any comparison with undefined/null except the strict equality === with exceptional care.
Don't use comparisons >= > < <= with a variable which may be null/undefined, unless you're really sure of what you're doing.
If a variable can have these values, check for them separately.
- Summary
Comparison operators return a boolean value.
Strings are compared letter-by-letter in the “dictionary” order.
When values of different types are compared, they get converted to numbers (with the exclusion of a strict equality check).
The values null and undefined equal == each other and do not equal any other value.
Be careful when using comparisons like > or < with variables that can occasionally be null/undefined.
Checking for null/undefined separately is a good idea.
importance: 5
What will be the result for these expressions?
5 > 4
"apple" > "pineapple"
"2" > "12"
undefined == null
undefined === null
null == "\n0\n"
null === +"\n0\n"5 > 4 → true
"apple" > "pineapple" → false
"2" > "12" → true
undefined == null → true
undefined === null → false
null == "\n0\n" → false
null === +"\n0\n" → false
Some of the reasons:
Obviously, true.
Dictionary comparison, hence false.
"a" is smaller than "p".
Again, dictionary comparison, first char "2" is greater than the first char "1".
Values null and undefined equal each other only.
Strict equality is strict.
Different types from both sides lead to false.
Similar to (4), null only equals undefined.
Strict equality of different types.
JavaScript Fundamentals
Conditional branching: if, '?'
Sometimes, we need to perform different actions based on different conditions.
To do that, we can use the if statement and the conditional operator ?, that's also called a “question mark” operator.
- The “if” statement
The if(...) statement evaluates a condition in parentheses and, if the result is true, executes a block of code.
For example:
let year = prompt('In which year was ECMAScript-2015 specification published?', '');

if (year == 2015) alert( 'You are right!' );
In the example above, the condition is a simple equality check (year == 2015), but it can be much more complex.
If we want to execute more than one statement, we have to wrap our code block inside curly braces:
if (year == 2015) {
  alert( "That's correct!" );
  alert( "You're so smart!" );
}
We recommend wrapping your code block with curly braces {} every time you use an if statement, even if there is only one statement to execute.
Doing so improves readability.
- Boolean conversion
The if (…) statement evaluates the expression in its parentheses and converts the result to a boolean.
Let's recall the conversion rules from the chapter Type Conversions:
A number 0, an empty string "", null, undefined, and NaN all become false.
Because of that they are called “falsy” values.
Other values become true, so they are called “truthy”.
So, the code under this condition would never execute:
if (0) { // 0 is falsy
  ...
}
…and inside this condition – it always will:
if (1) { // 1 is truthy
  ...
}
We can also pass a pre-evaluated boolean value to if, like this:
let cond = (year == 2015); // equality evaluates to true or false

if (cond) {
  ...
}
- The “else” clause
The if statement may contain an optional “else” block.
It executes when the condition is falsy.
For example:
let year = prompt('In which year was the ECMAScript-2015 specification published?', '');

if (year == 2015) {
  alert( 'You guessed it right!' );
} else {
  alert( 'How can you be so wrong?' ); // any value except 2015
}
- Several conditions: “else if”
Sometimes, we'd like to test several variants of a condition.
The else if clause lets us do that.
For example:
let year = prompt('In which year was the ECMAScript-2015 specification published?', '');

if (year < 2015) {
  alert( 'Too early...' );
} else if (year > 2015) {
  alert( 'Too late' );
} else {
  alert( 'Exactly!' );
}
In the code above, JavaScript first checks year < 2015.
If that is falsy, it goes to the next condition year > 2015.
If that is also falsy, it shows the last alert.
There can be more else if blocks.
The final else is optional.
- Conditional operator ‘?'
Sometimes, we need to assign a variable depending on a condition.
For instance:
let accessAllowed;
let age = prompt('How old are you?', '');

if (age > 18) {
  accessAllowed = true;
} else {
  accessAllowed = false;
}

alert(accessAllowed);
The so-called “conditional” or “question mark” operator lets us do that in a shorter and simpler way.
The operator is represented by a question mark ?.
Sometimes it's called “ternary”, because the operator has three operands.
It is actually the one and only operator in JavaScript which has that many.
The syntax is:
let result = condition ? value1 : value2;
The condition is evaluated: if it's truthy then value1 is returned, otherwise – value2.
For example:
let accessAllowed = (age > 18) ? true : false;
Technically, we can omit the parentheses around age > 18.
The question mark operator has a low precedence, so it executes after the comparison >.
This example will do the same thing as the previous one:
// the comparison operator "age > 18" executes first anyway
// (no need to wrap it into parentheses)
let accessAllowed = age > 18 ? true : false;
But parentheses make the code more readable, so we recommend using them.
Please note:
In the example above, you can avoid using the question mark operator because the comparison itself returns true/false:
// the same
let accessAllowed = age > 18;
- Multiple ‘?'
A sequence of question mark operators ? can return a value that depends on more than one condition.
For instance:
let age = prompt('age?', 18);

let message = (age < 3) ? 'Hi, baby!' :
  (age < 18) ? 'Hello!' :
  (age < 100) ? 'Greetings!' :
  'What an unusual age!';

alert( message );
It may be difficult at first to grasp what's going on.
But after a closer look, we can see that it's just an ordinary sequence of tests:
The first question mark checks whether age < 3.
If true – it returns 'Hi, baby!'.
Otherwise, it continues to the expression after the colon ‘":"', checking age < 18.
If that's true – it returns 'Hello!'.
Otherwise, it continues to the expression after the next colon ‘":"', checking age < 100.
If that's true – it returns 'Greetings!'.
Otherwise, it continues to the expression after the last colon ‘":"', returning 'What an unusual age!'.
Here's how this looks using if..else:
if (age < 3) {
  message = 'Hi, baby!';
} else if (age < 18) {
  message = 'Hello!';
} else if (age < 100) {
  message = 'Greetings!';
} else {
  message = 'What an unusual age!';
}
- Non-traditional use of ‘?'
Sometimes the question mark ? is used as a replacement for if:
let company = prompt('Which company created JavaScript?', '');

(company == 'Netscape') ?
   alert('Right!') : alert('Wrong.');
Depending on the condition company == 'Netscape', either the first or the second expression after the ? gets executed and shows an alert.
We don't assign a result to a variable here.
Instead, we execute different code depending on the condition.
It's not recommended to use the question mark operator in this way.
The notation is shorter than the equivalent if statement, which appeals to some programmers.
But it is less readable.
Here is the same code using if for comparison:
let company = prompt('Which company created JavaScript?', '');

if (company == 'Netscape') {
  alert('Right!');
} else {
  alert('Wrong.');
}
Our eyes scan the code vertically.
Code blocks which span several lines are easier to understand than a long, horizontal instruction set.
The purpose of the question mark operator ? is to return one value or another depending on its condition.
Please use it for exactly that.
Use if when you need to execute different branches of code.
importance: 5
Will alert be shown?
if ("0") {
  alert( 'Hello' );
}Yes, it will.
Any string except an empty one (and "0" is not empty) becomes true in the logical context.
We can run and check:
if ("0") {
  alert( 'Hello' );
}
The name of JavaScript
importance: 2
Using the if..else construct, write the code which asks: ‘What is the “official” name of JavaScript?'
If the visitor enters “ECMAScript”, then output “Right!”, otherwise – output: “Didn't know? ECMAScript!”
Demo in new window<!DOCTYPE html>
<html>
<body>
<script>
'use strict';
let value = prompt('What is the "official" name of JavaScript?', '');
if (value == 'ECMAScript') {
alert('Right!');
} else {
alert("You don't know? ECMAScript!");
}
</script>
</body>
</html>
Show the sign
importance: 2
Using if..else, write the code which gets a number via prompt and then shows in alert:
1, if the value is greater than zero,
-1, if less than zero,
0, if equals zero.
In this task we assume that the input is always a number.
Demo in new windowlet value = prompt('Type a number', 0);
if (value > 0) {
alert( 1 );
} else if (value < 0) {
alert( -1 );
} else {
alert( 0 );
}
Rewrite 'if' into '?'
importance: 5
Rewrite this if using the conditional operator '?':
let result;

if (a + b < 4) {
  result = 'Below';
} else {
  result = 'Over';
}let result = (a + b < 4) ? 'Below' : 'Over';
Rewrite 'if..else' into '?'
importance: 5
Rewrite if..else using multiple ternary operators '?'.
For readability, it's recommended to split the code into multiple lines.
let message;

if (login == 'Employee') {
  message = 'Hello';
} else if (login == 'Director') {
  message = 'Greetings';
} else if (login == '') {
  message = 'No login';
} else {
  message = '';
}let message = (login == 'Employee') ? 'Hello' :
(login == 'Director') ? 'Greetings' :
(login == '') ? 'No login' :
'';JavaScript Fundamentals
Logical operators
There are three logical operators in JavaScript: || (OR), && (AND), ! (NOT).
Although they are called “logical”, they can be applied to values of any type, not only boolean.
Their result can also be of any type.
Let's see the details.
- || (OR)
The “OR” operator is represented with two vertical line symbols:
result = a || b;
In classical programming, the logical OR is meant to manipulate boolean values only.
If any of its arguments are true, it returns true, otherwise it returns false.
In JavaScript, the operator is a little bit trickier and more powerful.
But first, let's see what happens with boolean values.
There are four possible logical combinations:
alert( true || true );   // true
alert( false || true );  // true
alert( true || false );  // true
alert( false || false ); // false
As we can see, the result is always true except for the case when both operands are false.
If an operand is not a boolean, it's converted to a boolean for the evaluation.
For instance, the number 1 is treated as true, the number 0 as false:
if (1 || 0) { // works just like if( true || false )
  alert( 'truthy!' );
}
Most of the time, OR || is used in an if statement to test if any of the given conditions is true.
For example:
let hour = 9;

if (hour < 10 || hour > 18) {
  alert( 'The office is closed.' );
}
We can pass more conditions:
let hour = 12;
let isWeekend = true;

if (hour < 10 || hour > 18 || isWeekend) {
  alert( 'The office is closed.' ); // it is the weekend
}
- OR “||” finds the first truthy value
The logic described above is somewhat classical.
Now, let's bring in the “extra” features of JavaScript.
The extended algorithm works as follows.
Given multiple OR'ed values:
result = value1 || value2 || value3;
The OR || operator does the following:
Evaluates operands from left to right.
For each operand, converts it to boolean.
If the result is true, stops and returns the original value of that operand.
If all operands have been evaluated (i.e.
all were false), returns the last operand.
A value is returned in its original form, without the conversion.
In other words, a chain of OR || returns the first truthy value or the last one if no truthy value is found.
For instance:
alert( 1 || 0 ); // 1 (1 is truthy)

alert( null || 1 ); // 1 (1 is the first truthy value)
alert( null || 0 || 1 ); // 1 (the first truthy value)

alert( undefined || null || 0 ); // 0 (all falsy, returns the last value)
This leads to some interesting usage compared to a “pure, classical, boolean-only OR”.
Getting the first truthy value from a list of variables or expressions.
For instance, we have firstName, lastName and nickName variables, all optional (i.e.
can be undefined or have falsy values).
Let's use OR || to choose the one that has the data and show it (or "Anonymous" if nothing set):
let firstName = "";
let lastName = "";
let nickName = "SuperCoder";

alert( firstName || lastName || nickName || "Anonymous"); // SuperCoder
If all variables were falsy, "Anonymous" would show up.
Short-circuit evaluation.
Another feature of OR || operator is the so-called “short-circuit” evaluation.
It means that || processes its arguments until the first truthy value is reached, and then the value is returned immediately, without even touching the other argument.
That importance of this feature becomes obvious if an operand isn't just a value, but an expression with a side effect, such as a variable assignment or a function call.
In the example below, only the second message is printed:
true || alert("not printed");
false || alert("printed");
In the first line, the OR || operator stops the evaluation immediately upon seeing true, so the alert isn't run.
Sometimes, people use this feature to execute commands only if the condition on the left part is falsy.
- && (AND)
The AND operator is represented with two ampersands &&:
result = a && b;
In classical programming, AND returns true if both operands are truthy and false otherwise:
alert( true && true );   // true
alert( false && true );  // false
alert( true && false );  // false
alert( false && false ); // false
An example with if:
let hour = 12;
let minute = 30;

if (hour == 12 && minute == 30) {
  alert( 'The time is 12:30' );
}
Just as with OR, any value is allowed as an operand of AND:
if (1 && 0) { // evaluated as true && false
  alert( "won't work, because the result is falsy" );
}
- AND “&&” finds the first falsy value
Given multiple AND'ed values:
result = value1 && value2 && value3;
The AND && operator does the following:
Evaluates operands from left to right.
For each operand, converts it to a boolean.
If the result is false, stops and returns the original value of that operand.
If all operands have been evaluated (i.e.
all were truthy), returns the last operand.
In other words, AND returns the first falsy value or the last value if none were found.
The rules above are similar to OR.
The difference is that AND returns the first falsy value while OR returns the first truthy one.
Examples:
// if the first operand is truthy,
// AND returns the second operand:
alert( 1 && 0 ); // 0
alert( 1 && 5 ); // 5

// if the first operand is falsy,
// AND returns it.
The second operand is ignored
alert( null && 5 ); // null
alert( 0 && "no matter what" ); // 0
We can also pass several values in a row.
See how the first falsy one is returned:
alert( 1 && 2 && null && 3 ); // null
When all values are truthy, the last value is returned:
alert( 1 && 2 && 3 ); // 3, the last one
Precedence of AND && is higher than OR ||
The precedence of AND && operator is higher than OR ||.
So the code a && b || c && d is essentially the same as if the && expressions were in parentheses: (a && b) || (c && d).
Don't replace if with || or &&
Sometimes, people use the AND && operator as a "shorter way to write if".
For instance:
let x = 1;

(x > 0) && alert( 'Greater than zero!' );
The action in the right part of && would execute only if the evaluation reaches it.
That is, only if (x > 0) is true.
So we basically have an analogue for:
let x = 1;

if (x > 0) alert( 'Greater than zero!' );
Although, the variant with && appears shorter, if is more obvious and tends to be a little bit more readable.
So we recommend using every construct for its purpose: use if if we want if and use && if we want AND.
- ! (NOT)
The boolean NOT operator is represented with an exclamation sign !.
The syntax is pretty simple:
result = !value;
The operator accepts a single argument and does the following:
Converts the operand to boolean type: true/false.
Returns the inverse value.
For instance:
alert( !true ); // false
alert( !0 ); // true
A double NOT !! is sometimes used for converting a value to boolean type:
alert( !!"non-empty string" ); // true
alert( !!null ); // false
That is, the first NOT converts the value to boolean and returns the inverse, and the second NOT inverses it again.
In the end, we have a plain value-to-boolean conversion.
There's a little more verbose way to do the same thing – a built-in Boolean function:
alert( Boolean("non-empty string") ); // true
alert( Boolean(null) ); // false
The precedence of NOT ! is the highest of all logical operators, so it always executes first, before && or ||.
importance: 5
What is the code below going to output?
alert( null || 2 || undefined );
The answer is 2, that's the first truthy value.
alert( null || 2 || undefined );
What's the result of OR'ed alerts?
importance: 3
What will the code below output?
alert( alert(1) || 2 || alert(3) );
The answer: first 1, then 2.
alert( alert(1) || 2 || alert(3) );
The call to alert does not return a value.
Or, in other words, it returns undefined.
The first OR || evaluates its left operand alert(1).
That shows the first message with 1.
The alert returns undefined, so OR goes on to the second operand searching for a truthy value.
The second operand 2 is truthy, so the execution is halted, 2 is returned and then shown by the outer alert.
There will be no 3, because the evaluation does not reach alert(3).
What is the result of AND?
importance: 5
What is this code going to show?
alert( 1 && null && 2 );
The answer: null, because it's the first falsy value from the list.
alert( 1 && null && 2 );
What is the result of AND'ed alerts?
importance: 3
What will this code show?
alert( alert(1) && alert(2) );
The answer: 1, and then undefined.
alert( alert(1) && alert(2) );
The call to alert returns undefined (it just shows a message, so there's no meaningful return).
Because of that, && evaluates the left operand (outputs 1), and immediately stops, because undefined is a falsy value.
And && looks for a falsy value and returns it, so it's done.
The result of OR AND OR
importance: 5
What will the result be?
alert( null || 2 && 3 || 4 );
The answer: 3.
alert( null || 2 && 3 || 4 );
The precedence of AND && is higher than ||, so it executes first.
The result of 2 && 3 = 3, so the expression becomes:
null || 3 || 4
Now the result is the first truthy value: 3.
Check the range between
importance: 3
Write an if condition to check that age is between 14 and 90 inclusively.
“Inclusively” means that age can reach the edges 14 or 90.
if (age >= 14 && age <= 90)
Check the range outside
importance: 3
Write an if condition to check that age is NOT between 14 and 90 inclusively.
Create two variants: the first one using NOT !, the second one – without it.
The first variant:
if (!(age >= 14 && age <= 90))
The second variant:
if (age < 14 || age > 90)
A question about "if"
importance: 5
Which of these alerts are going to execute?
What will the results of the expressions be inside if(...)?
if (-1 || 0) alert( 'first' );
if (-1 && 0) alert( 'second' );
if (null || -1 && 1) alert( 'third' );
The answer: the first and the third will execute.
Details:
// Runs.
// The result of -1 || 0 = -1, truthy
if (-1 || 0) alert( 'first' );

// Doesn't run
// -1 && 0 = 0, falsy
if (-1 && 0) alert( 'second' );

// Executes
// Operator && has a higher precedence than ||
// so -1 && 1 executes first, giving us the chain:
// null || -1 && 1  ->  null || 1  ->  1
if (null || -1 && 1) alert( 'third' );
Check the login
importance: 3
Write the code which asks for a login with prompt.
If the visitor enters "Admin", then prompt for a password, if the input is an empty line or Esc – show “Canceled”, if it's another string – then show “I don't know you”.
The password is checked as follows:
If it equals “TheMaster”, then show “Welcome!”,
Another string – show “Wrong password”,
For an empty string or cancelled input, show “Canceled”
The schema:
Please use nested if blocks.
Mind the overall readability of the code.
Hint: passing an empty input to a prompt returns an empty string ''.
Pressing ESC during a prompt returns null.
Run the demolet userName = prompt("Who's there?", '');
if (userName === 'Admin') {
let pass = prompt('Password?', '');
if (pass === 'TheMaster') {
alert( 'Welcome!' );
} else if (pass === '' || pass === null) {
alert( 'Canceled' );
} else {
alert( 'Wrong password' );
}
} else if (userName === '' || userName === null) {
alert( 'Canceled' );
} else {
alert( "I don't know you" );
}
Note the vertical indents inside the if blocks.
They are technically not required, but make the code more readable.
JavaScript Fundamentals
Nullish coalescing operator '??'
A recent addition
This is a recent addition to the language.
Old browsers may need polyfills.
Here, in this article, we'll say that an expression is “defined” when it's neither null nor undefined.
The nullish coalescing operator is written as two question marks ??.
The result of a ?? b is:
if a is defined, then a,
if a isn't defined, then b.
In other words, ?? returns the first argument if it's not null/undefined.
Otherwise, the second one.
The nullish coalescing operator isn't anything completely new.
It's just a nice syntax to get the first “defined” value of the two.
We can rewrite result = a ?? b using the operators that we already know, like this:
result = (a !== null && a !== undefined) ? a : b;
The common use case for ?? is to provide a default value for a potentially undefined variable.
For example, here we show Anonymous if user isn't defined:
let user;

alert(user ?? "Anonymous"); // Anonymous
Of course, if user had any value except null/undefined, then we would see it instead:
let user = "John";

alert(user ?? "Anonymous"); // John
We can also use a sequence of ?? to select the first value from a list that isn't null/undefined.
Let's say we have a user's data in variables firstName, lastName or nickName.
All of them may be undefined, if the user decided not to enter a value.
We'd like to display the user name using one of these variables, or show “Anonymous” if all of them are undefined.
Let's use the ?? operator for that:
let firstName = null;
let lastName = null;
let nickName = "Supercoder";

// shows the first defined value:
alert(firstName ?? lastName ?? nickName ?? "Anonymous"); // Supercoder
- Comparison with ||
The OR || operator can be used in the same way as ??, as it was described in the previous chapter.
For example, in the code above we could replace ?? with || and still get the same result:
let firstName = null;
let lastName = null;
let nickName = "Supercoder";

// shows the first truthy value:
alert(firstName || lastName || nickName || "Anonymous"); // Supercoder
The OR || operator exists since the beginning of JavaScript, so developers were using it for such purposes for a long time.
On the other hand, the nullish coalescing operator ?? was added to JavaScript only recently, and the reason for that was that people weren't quite happy with ||.
The important difference between them is that:
|| returns the first truthy value.
?? returns the first defined value.
In other words, || doesn't distinguish between false, 0, an empty string "" and null/undefined.
They are all the same – falsy values.
If any of these is the first argument of ||, then we'll get the second argument as the result.
In practice though, we may want to use default value only when the variable is null/undefined.
That is, when the value is really unknown/not set.
For example, consider this:
let height = 0;

alert(height || 100); // 100
alert(height ?? 100); // 0
The height || 100 checks height for being a falsy value, and it really is.
so the result is the second argument, 100.
The height ?? 100 checks height for being null/undefined, and it's not,
so the result is height “as is”, that is 0.
If the zero height is a valid value, that shouldn't be replaced with the default, then ?? does just the right thing.
- Precedence
The precedence of the ?? operator is rather low: 5 in the MDN table.
So ?? is evaluated before = and ?, but after most other operations, such as +, *.
So if we'd like to choose a value with ?? in an expression with other operators, consider adding parentheses:
let height = null;
let width = null;

// important: use parentheses
let area = (height ?? 100) * (width ?? 50);

alert(area); // 5000
Otherwise, if we omit parentheses, then as * has the higher precedence than ??, it would execute first, leading to incorrect results.
// without parentheses
let area = height ?? 100 * width ?? 50;

// ...works the same as this (probably not what we want):
let area = height ?? (100 * width) ?? 50;
Using ?? with && or ||
Due to safety reasons, JavaScript forbids using ?? together with && and || operators, unless the precedence is explicitly specified with parentheses.
The code below triggers a syntax error:
let x = 1 && 2 ?? 3; // Syntax error
The limitation is surely debatable, but it was added to the language specification with the purpose to avoid programming mistakes, when people start to switch to ?? from ||.
Use explicit parentheses to work around it:
let x = (1 && 2) ?? 3; // Works

alert(x); // 2
- Summary
The nullish coalescing operator ?? provides a short way to choose the first “defined” value from a list.
It's used to assign default values to variables:
// set height=100, if height is null or undefined
height = height ?? 100;
The operator ?? has a very low precedence, only a bit higher than ? and =, so consider adding parentheses when using it in an expression.
It's forbidden to use it with || or && without explicit parentheses.
JavaScript Fundamentals
Loops: while and for
We often need to repeat actions.
For example, outputting goods from a list one after another or just running the same code for each number from 1 to 10.
Loops are a way to repeat the same code multiple times.
- The “while” loop
The while loop has the following syntax:
while (condition) {
  // code
  // so-called "loop body"
}
While the condition is truthy, the code from the loop body is executed.
For instance, the loop below outputs i while i < 3:
let i = 0;
while (i < 3) { // shows 0, then 1, then 2
  alert( i );
  i++;
}
A single execution of the loop body is called an iteration.
The loop in the example above makes three iterations.
If i++ was missing from the example above, the loop would repeat (in theory) forever.
In practice, the browser provides ways to stop such loops, and in server-side JavaScript, we can kill the process.
Any expression or variable can be a loop condition, not just comparisons: the condition is evaluated and converted to a boolean by while.
For instance, a shorter way to write while (i != 0) is while (i):
let i = 3;
while (i) { // when i becomes 0, the condition becomes falsy, and the loop stops
  alert( i );
  i--;
}
Curly braces are not required for a single-line body
If the loop body has a single statement, we can omit the curly braces {…}:
let i = 3;
while (i) alert(i--);
- The “do…while” loop
The condition check can be moved below the loop body using the do..while syntax:
do {
  // loop body
} while (condition);
The loop will first execute the body, then check the condition, and, while it's truthy, execute it again and again.
For example:
let i = 0;
do {
  alert( i );
  i++;
} while (i < 3);
This form of syntax should only be used when you want the body of the loop to execute at least once regardless of the condition being truthy.
Usually, the other form is preferred: while(…) {…}.
- The “for” loop
The for loop is more complex, but it's also the most commonly used loop.
It looks like this:
for (begin; condition; step) {
  // ...
loop body ...
}
Let's learn the meaning of these parts by example.
The loop below runs alert(i) for i from 0 up to (but not including) 3:
for (let i = 0; i < 3; i++) { // shows 0, then 1, then 2
  alert(i);
}
Let's examine the for statement part-by-part:
part
begin
i = 0
Executes once upon entering the loop.
condition
i < 3
Checked before every loop iteration.
If false, the loop stops.
body
alert(i)
Runs again and again while the condition is truthy.
step
i++
Executes after the body on each iteration.
The general loop algorithm works like this:
Run begin
→ (if condition → run body and run step)
→ (if condition → run body and run step)
→ (if condition → run body and run step)
→ ...
That is, begin executes once, and then it iterates: after each condition test, body and step are executed.
If you are new to loops, it could help to go back to the example and reproduce how it runs step-by-step on a piece of paper.
Here's exactly what happens in our case:
// for (let i = 0; i < 3; i++) alert(i)

// run begin
let i = 0
// if condition → run body and run step
if (i < 3) { alert(i); i++ }
// if condition → run body and run step
if (i < 3) { alert(i); i++ }
// if condition → run body and run step
if (i < 3) { alert(i); i++ }
// ...finish, because now i == 3
Inline variable declaration
Here, the “counter” variable i is declared right in the loop.
This is called an “inline” variable declaration.
Such variables are visible only inside the loop.
for (let i = 0; i < 3; i++) {
  alert(i); // 0, 1, 2
}
alert(i); // error, no such variable
Instead of defining a variable, we could use an existing one:
let i = 0;

for (i = 0; i < 3; i++) { // use an existing variable
  alert(i); // 0, 1, 2
}

alert(i); // 3, visible, because declared outside of the loop
Skipping parts
Any part of for can be skipped.
For example, we can omit begin if we don't need to do anything at the loop start.
Like here:
let i = 0; // we have i already declared and assigned

for (; i < 3; i++) { // no need for "begin"
  alert( i ); // 0, 1, 2
}
We can also remove the step part:
let i = 0;

for (; i < 3;) {
  alert( i++ );
}
This makes the loop identical to while (i < 3).
We can actually remove everything, creating an infinite loop:
for (;;) {
  // repeats without limits
}
Please note that the two for semicolons ; must be present.
Otherwise, there would be a syntax error.
- Breaking the loop
Normally, a loop exits when its condition becomes falsy.
But we can force the exit at any time using the special break directive.
For example, the loop below asks the user for a series of numbers, “breaking” when no number is entered:
let sum = 0;

while (true) {

  let value = +prompt("Enter a number", '');

  if (!value) break; // (*)

  sum += value;

}
alert( 'Sum: ' + sum );
The break directive is activated at the line (*) if the user enters an empty line or cancels the input.
It stops the loop immediately, passing control to the first line after the loop.
Namely, alert.
The combination “infinite loop + break as needed” is great for situations when a loop's condition must be checked not in the beginning or end of the loop, but in the middle or even in several places of its body.
- Continue to the next iteration
The continue directive is a “lighter version” of break.
It doesn't stop the whole loop.
Instead, it stops the current iteration and forces the loop to start a new one (if the condition allows).
We can use it if we're done with the current iteration and would like to move on to the next one.
The loop below uses continue to output only odd values:
for (let i = 0; i < 10; i++) {

  // if true, skip the remaining part of the body
  if (i % 2 == 0) continue;

  alert(i); // 1, then 3, 5, 7, 9
}
For even values of i, the continue directive stops executing the body and passes control to the next iteration of for (with the next number).
So the alert is only called for odd values.
The continue directive helps decrease nesting
A loop that shows odd values could look like this:
for (let i = 0; i < 10; i++) {

  if (i % 2) {
    alert( i );
  }

}
From a technical point of view, this is identical to the example above.
Surely, we can just wrap the code in an if block instead of using continue.
But as a side-effect, this created one more level of nesting (the alert call inside the curly braces).
If the code inside of if is longer than a few lines, that may decrease the overall readability.
No break/continue to the right side of ‘?'
Please note that syntax constructs that are not expressions cannot be used with the ternary operator ?.
In particular, directives such as break/continue aren't allowed there.
For example, if we take this code:
if (i > 5) {
  alert(i);
} else {
  continue;
}
…and rewrite it using a question mark:
(i > 5) ? alert(i) : continue; // continue isn't allowed here
…it stops working: there's a syntax error.
This is just another reason not to use the question mark operator ? instead of if.
- Labels for break/continue
Sometimes we need to break out from multiple nested loops at once.
For example, in the code below we loop over i and j, prompting for the coordinates (i, j) from (0,0) to (2,2):
for (let i = 0; i < 3; i++) {

  for (let j = 0; j < 3; j++) {

    let input = prompt(`Value at coords (${i},${j})`, '');

    // what if we want to exit from here to Done (below)?
  }
}

alert('Done!');
We need a way to stop the process if the user cancels the input.
The ordinary break after input would only break the inner loop.
That's not sufficient–labels, come to the rescue!
A label is an identifier with a colon before a loop:
labelName: for (...) {
  ...
}
The break <labelName> statement in the loop below breaks out to the label:
outer: for (let i = 0; i < 3; i++) {

  for (let j = 0; j < 3; j++) {

    let input = prompt(`Value at coords (${i},${j})`, '');

    // if an empty string or canceled, then break out of both loops
    if (!input) break outer; // (*)

    // do something with the value...
  }
}
alert('Done!');
In the code above, break outer looks upwards for the label named outer and breaks out of that loop.
So the control goes straight from (*) to alert('Done!').
We can also move the label onto a separate line:
outer:
for (let i = 0; i < 3; i++) { ...
}
The continue directive can also be used with a label.
In this case, code execution jumps to the next iteration of the labeled loop.
Labels do not allow to “jump” anywhere
Labels do not allow us to jump into an arbitrary place in the code.
For example, it is impossible to do this:
break label; // doesn't jumps to the label below

label: for (...)
A call to break/continue is only possible from inside a loop and the label must be somewhere above the directive.
- Summary
We covered 3 types of loops:
while – The condition is checked before each iteration.
do..while – The condition is checked after each iteration.
for (;;) – The condition is checked before each iteration, additional settings available.
To make an “infinite” loop, usually the while(true) construct is used.
Such a loop, just like any other, can be stopped with the break directive.
If we don't want to do anything in the current iteration and would like to forward to the next one, we can use the continue directive.
break/continue support labels before the loop.
A label is the only way for break/continue to escape a nested loop to go to an outer one.
importance: 3
What is the last value alerted by this code? Why?
let i = 3;

while (i) {
  alert( i-- );
}
The answer: 1.
let i = 3;

while (i) {
  alert( i-- );
}
Every loop iteration decreases i by 1.
The check while(i) stops the loop when i = 0.
Hence, the steps of the loop form the following sequence (“loop unrolled”):
let i = 3;

alert(i--); // shows 3, decreases i to 2

alert(i--) // shows 2, decreases i to 1

alert(i--) // shows 1, decreases i to 0

// done, while(i) check stops the loop
Which values does the while loop show?
importance: 4
For every loop iteration, write down which value it outputs and then compare it with the solution.
Both loops alert the same values, or not?
The prefix form ++i:
let i = 0;
while (++i < 5) alert( i );
The postfix form i++let i = 0;
while (i++ < 5) alert( i );
The task demonstrates how postfix/prefix forms can lead to different results when used in comparisons.
From 1 to 4let i = 0;
while (++i < 5) alert( i );
The first value is i = 1, because ++i first increments i and then returns the new value.
So the first comparison is 1 < 5 and the alert shows 1.
Then follow 2, 3, 4… – the values show up one after another.
The comparison always uses the incremented value, because ++ is before the variable.
Finally, i = 4 is incremented to 5, the comparison while(5 < 5) fails, and the loop stops.
So 5 is not shown.
From 1 to 5let i = 0;
while (i++ < 5) alert( i );
The first value is again i = 1.
The postfix form of i++ increments i and then returns the old value, so the comparison i++ < 5 will use i = 0 (contrary to ++i < 5).
But the alert call is separate.
It's another statement which executes after the increment and the comparison.
So it gets the current i = 1.
Then follow 2, 3, 4…
Let's stop on i = 4.
The prefix form ++i would increment it and use 5 in the comparison.
But here we have the postfix form i++.
So it increments i to 5, but returns the old value.
Hence the comparison is actually while(4 < 5) – true, and the control goes on to alert.
The value i = 5 is the last one, because on the next step while(5 < 5) is false.
Which values get shown by the "for" loop?
importance: 4
For each loop write down which values it is going to show.
Then compare with the answer.
Both loops alert same values or not?
The postfix form:
for (let i = 0; i < 5; i++) alert( i );
The prefix form:
for (let i = 0; i < 5; ++i) alert( i );The answer: from 0 to 4 in both cases.for (let i = 0; i < 5; ++i) alert( i );
for (let i = 0; i < 5; i++) alert( i );
That can be easily deducted from the algorithm of for:
Execute once i = 0 before everything (begin).
Check the condition i < 5
If true – execute the loop body alert(i), and then i++
The increment i++ is separated from the condition check (2).
That's just another statement.
The value returned by the increment is not used here, so there's no difference between i++ and ++i.
Output even numbers in the loop
importance: 5
Use the for loop to output even numbers from 2 to 10.
Run the demofor (let i = 2; i <= 10; i++) {
if (i % 2 == 0) {
alert( i );
}
}
We use the “modulo” operator % to get the remainder and check for the evenness here.
Replace "for" with "while"
importance: 5
Rewrite the code changing the for loop to while without altering its behavior (the output should stay same).
for (let i = 0; i < 3; i++) {
  alert( `number ${i}!` );
}let i = 0;
while (i < 3) {
alert( `number ${i}!` );
i++;
}
Repeat until the input is correct
importance: 5
Write a loop which prompts for a number greater than 100.
If the visitor enters another number – ask them to input again.
The loop must ask for a number until either the visitor enters a number greater than 100 or cancels the input/enters an empty line.
Here we can assume that the visitor only inputs numbers.
There's no need to implement a special handling for a non-numeric input in this task.
Run the demolet num;
do {
num = prompt("Enter a number greater than 100?", 0);
} while (num <= 100 && num);
The loop do..while repeats while both checks are truthy:
The check for num <= 100 – that is, the entered value is still not greater than 100.
The check && num is false when num is null or an empty string.
Then the while loop stops too.
P.S.
If num is null then num <= 100 is true, so without the 2nd check the loop wouldn't stop if the user clicks CANCEL.
Both checks are required.
Output prime numbers
importance: 3
An integer number greater than 1 is called a prime if it cannot be divided without a remainder by anything except 1 and itself.
In other words, n > 1 is a prime if it can't be evenly divided by anything except 1 and n.
For example, 5 is a prime, because it cannot be divided without a remainder by 2, 3 and 4.
Write the code which outputs prime numbers in the interval from 2 to n.
For n = 10 the result will be 2,3,5,7.
P.S.
The code should work for any n, not be hard-tuned for any fixed value.
There are many algorithms for this task.
Let's use a nested loop:
For each i in the interval {
  check if i has a divisor from 1..i
  if yes => the value is not a prime
  if no => the value is a prime, show it
}
The code using a label:
let n = 10;

nextPrime:
for (let i = 2; i <= n; i++) { // for each i...

  for (let j = 2; j < i; j++) { // look for a divisor..
    if (i % j == 0) continue nextPrime; // not a prime, go next i
  }

  alert( i ); // a prime
}
There's a lot of space to optimize it.
For instance, we could look for the divisors from 2 to square root of i.
But anyway, if we want to be really efficient for large intervals, we need to change the approach and rely on advanced maths and complex algorithms like Quadratic sieve, General number field sieve etc.
JavaScript Fundamentals
The "switch" statement
A switch statement can replace multiple if checks.
It gives a more descriptive way to compare a value with multiple variants.
- The syntax
The switch has one or more case blocks and an optional default.
It looks like this:
switch(x) {
case 'value1': // if (x === 'value1')
...
[break]
case 'value2': // if (x === 'value2')
...
[break]
default:
...
[break]
}
The value of x is checked for a strict equality to the value from the first case (that is, value1) then to the second (value2) and so on.
If the equality is found, switch starts to execute the code starting from the corresponding case, until the nearest break (or until the end of switch).
If no case is matched then the default code is executed (if it exists).
- An example
An example of switch (the executed code is highlighted):
let a = 2 + 2;
switch (a) {
case 3:
alert( 'Too small' );
break;
case 4:
alert( 'Exactly!' );
break;
case 5:
alert( 'Too large' );
break;
default:
alert( "I don't know such values" );
}
Here the switch starts to compare a from the first case variant that is 3.
The match fails.
Then 4.
That's a match, so the execution starts from case 4 until the nearest break.
If there is no break then the execution continues with the next case without any checks.
An example without break:
let a = 2 + 2;
switch (a) {
case 3:
alert( 'Too small' );
case 4:
alert( 'Exactly!' );
case 5:
alert( 'Too big' );
default:
alert( "I don't know such values" );
}
In the example above we'll see sequential execution of three alerts:
alert( 'Exactly!' );
alert( 'Too big' );
alert( "I don't know such values" );
Any expression can be a switch/case argument
Both switch and case allow arbitrary expressions.
For example:
let a = "1";
let b = 0;
switch (+a) {
case b + 1:
alert("this runs, because +a is 1, exactly equals b+1");
break;
default:
alert("this doesn't run");
}
Here +a gives 1, that's compared with b + 1 in case, and the corresponding code is executed.
- Grouping of “case”
Several variants of case which share the same code can be grouped.
For example, if we want the same code to run for case 3 and case 5:
let a = 3;
switch (a) {
case 4:
alert('Right!');
break;
case 3: // (*) grouped two cases
case 5:
alert('Wrong!');
alert("Why don't you take a math class?");
break;
default:
alert('The result is strange.
Really.');
}
Now both 3 and 5 show the same message.
The ability to “group” cases is a side-effect of how switch/case works without break.
Here the execution of case 3 starts from the line (*) and goes through case 5, because there's no break.
- Type matters
Let's emphasize that the equality check is always strict.
The values must be of the same type to match.
For example, let's consider the code:
let arg = prompt("Enter a value?");
switch (arg) {
case '0':
case '1':
alert( 'One or zero' );
break;
case '2':
alert( 'Two' );
break;
case 3:
alert( 'Never executes!' );
break;
default:
alert( 'An unknown value' );
}
For 0, 1, the first alert runs.
For 2 the second alert runs.
But for 3, the result of the prompt is a string "3", which is not strictly equal === to the number 3.
So we've got a dead code in case 3! The default variant will execute.
importance: 5
Write the code using if..else which would correspond to the following switch:
switch (browser) {
case 'Edge':
alert( "You've got the Edge!" );
break;
case 'Chrome':
case 'Firefox':
case 'Safari':
case 'Opera':
alert( 'Okay we support these browsers too' );
break;
default:
alert( 'We hope that this page looks ok!' );
}
To precisely match the functionality of switch, the if must use a strict comparison '==='.
For given strings though, a simple '==' works too.
if(browser == 'Edge') {
alert("You've got the Edge!");
} else if (browser == 'Chrome'
|| browser == 'Firefox'
|| browser == 'Safari'
|| browser == 'Opera') {
alert( 'Okay we support these browsers too' );
} else {
alert( 'We hope that this page looks ok!' );
}
Please note: the construct browser == 'Chrome' || browser == 'Firefox' … is split into multiple lines for better readability.
But the switch construct is still cleaner and more descriptive.
Rewrite "if" into "switch"
importance: 4
Rewrite the code below using a single switch statement:
let a = +prompt('a?', '');
if (a == 0) {
alert( 0 );
}
if (a == 1) {
alert( 1 );
}
if (a == 2 || a == 3) {
alert( '2,3' );
}
The first two checks turn into two case.
The third check is split into two cases:
let a = +prompt('a?', '');
switch (a) {
case 0:
alert( 0 );
break;
case 1:
alert( 1 );
break;
case 2:
case 3:
alert( '2,3' );
break;
}
Please note: the break at the bottom is not required.
But we put it to make the code future-proof.
In the future, there is a chance that we'd want to add one more case, for example case 4.
And if we forget to add a break before it, at the end of case 3, there will be an error.
So that's a kind of self-insurance.
JavaScript Fundamentals
Functions
Quite often we need to perform a similar action in many places of the script.
For example, we need to show a nice-looking message when a visitor logs in, logs out and maybe somewhere else.
Functions are the main “building blocks” of the program.
They allow the code to be called many times without repetition.
We've already seen examples of built-in functions, like alert(message), prompt(message, default) and confirm(question).
But we can create functions of our own as well.
- Function Declaration
To create a function we can use a function declaration.
It looks like this:
function showMessage() {
alert( 'Hello everyone!' );
}
The function keyword goes first, then goes the name of the function, then a list of parameters between the parentheses (comma-separated, empty in the example above) and finally the code of the function, also named “the function body”, between curly braces.
function name(parameters) {
...body...
}
Our new function can be called by its name: showMessage().
For instance:
function showMessage() {
alert( 'Hello everyone!' );
}
showMessage();
showMessage();
The call showMessage() executes the code of the function.
Here we will see the message two times.
This example clearly demonstrates one of the main purposes of functions: to avoid code duplication.
If we ever need to change the message or the way it is shown, it's enough to modify the code in one place: the function which outputs it.
- Local variables
A variable declared inside a function is only visible inside that function.
For example:
function showMessage() {
let message = "Hello, I'm JavaScript!"; // local variable
alert( message );
}
showMessage(); // Hello, I'm JavaScript!
alert( message ); // <-- Error! The variable is local to the function
- Outer variables
A function can access an outer variable as well, for example:
let userName = 'John';
function showMessage() {
let message = 'Hello, ' + userName;
alert(message);
}
showMessage(); // Hello, John
The function has full access to the outer variable.
It can modify it as well.
For instance:
let userName = 'John';
function showMessage() {
userName = "Bob"; // (1) changed the outer variable
let message = 'Hello, ' + userName;
alert(message);
}
alert( userName ); // John before the function call
showMessage();
alert( userName ); // Bob, the value was modified by the function
The outer variable is only used if there's no local one.
If a same-named variable is declared inside the function then it shadows the outer one.
For instance, in the code below the function uses the local userName.
The outer one is ignored:
let userName = 'John';
function showMessage() {
let userName = "Bob"; // declare a local variable
let message = 'Hello, ' + userName; // Bob
alert(message);
}
// the function will create and use its own userName
showMessage();
alert( userName ); // John, unchanged, the function did not access the outer variable
Global variables
Variables declared outside of any function, such as the outer userName in the code above, are called global.
Global variables are visible from any function (unless shadowed by locals).
It's a good practice to minimize the use of global variables.
Modern code has few or no globals.
Most variables reside in their functions.
Sometimes though, they can be useful to store project-level data.
- Parameters
We can pass arbitrary data to functions using parameters (also called function arguments) .
In the example below, the function has two parameters: from and text.
function showMessage(from, text) { // arguments: from, text
alert(from + ': ' + text);
}
showMessage('Ann', 'Hello!'); // Ann: Hello! (*)
showMessage('Ann', "What's up?"); // Ann: What's up? (**)
When the function is called in lines (*) and (**), the given values are copied to local variables from and text.
Then the function uses them.
Here's one more example: we have a variable from and pass it to the function.
Please note: the function changes from, but the change is not seen outside, because a function always gets a copy of the value:
function showMessage(from, text) {
from = '*' + from + '*'; // make "from" look nicer
alert( from + ': ' + text );
}
let from = "Ann";
showMessage(from, "Hello"); // *Ann*: Hello
// the value of "from" is the same, the function modified a local copy
alert( from ); // Ann
- Default values
If a parameter is not provided, then its value becomes undefined.
For instance, the aforementioned function showMessage(from, text) can be called with a single argument:
showMessage("Ann");
That's not an error.
Such a call would output "*Ann*: undefined".
There's no text, so it's assumed that text === undefined.
If we want to use a “default” text in this case, then we can specify it after =:
function showMessage(from, text = "no text given") {
alert( from + ": " + text );
}
showMessage("Ann"); // Ann: no text given
Now if the text parameter is not passed, it will get the value "no text given"
Here "no text given" is a string, but it can be a more complex expression, which is only evaluated and assigned if the parameter is missing.
So, this is also possible:
function showMessage(from, text = anotherFunction()) {
// anotherFunction() only executed if no text given
// its result becomes the value of text
}
Evaluation of default parameters
In JavaScript, a default parameter is evaluated every time the function is called without the respective parameter.
In the example above, anotherFunction() is called every time showMessage() is called without the text parameter.
Alternative default parameters
Sometimes it makes sense to set default values for parameters not in the function declaration, but at a later stage, during its execution.
To check for an omitted parameter, we can compare it with undefined:
function showMessage(text) {
if (text === undefined) {
text = 'empty message';
}
alert(text);
}
showMessage(); // empty message
…Or we could use the || operator:
// if text parameter is omitted or "" is passed, set it to 'empty'
function showMessage(text) {
text = text || 'empty';
...
}
Modern JavaScript engines support the nullish coalescing operator??, it's better when falsy values, such as 0, are considered regular:
// if there's no "count" parameter, show "unknown"
function showCount(count) {
alert(count ?? "unknown");
}
showCount(0); // 0
showCount(null); // unknown
showCount(); // unknown
- Returning a value
A function can return a value back into the calling code as the result.
The simplest example would be a function that sums two values:
function sum(a, b) {
return a + b;
}
let result = sum(1, 2);
alert( result ); // 3
The directive return can be in any place of the function.
When the execution reaches it, the function stops, and the value is returned to the calling code (assigned to result above).
There may be many occurrences of return in a single function.
For instance:
function checkAge(age) {
if (age >= 18) {
return true;
} else {
return confirm('Do you have permission from your parents?');
}
}
let age = prompt('How old are you?', 18);
if ( checkAge(age) ) {
alert( 'Access granted' );
} else {
alert( 'Access denied' );
}
It is possible to use return without a value.
That causes the function to exit immediately.
For example:
function showMovie(age) {
if ( !checkAge(age) ) {
return;
}
alert( "Showing you the movie" ); // (*)
// ...
}
In the code above, if checkAge(age) returns false, then showMovie won't proceed to the alert.
A function with an empty return or without it returns undefined
If a function does not return a value, it is the same as if it returns undefined:
function doNothing() { /* empty */ }
alert( doNothing() === undefined ); // true
An empty return is also the same as return undefined:
function doNothing() {
return;
}
alert( doNothing() === undefined ); // true
Never add a newline between return and the value
For a long expression in return, it might be tempting to put it on a separate line, like this:
return
(some + long + expression + or + whatever * f(a) + f(b))
That doesn't work, because JavaScript assumes a semicolon after return.
That'll work the same as:
return;
(some + long + expression + or + whatever * f(a) + f(b))
So, it effectively becomes an empty return.
If we want the returned expression to wrap across multiple lines, we should start it at the same line as return.
Or at least put the opening parentheses there as follows:
return (
some + long + expression
+ or +
whatever * f(a) + f(b)
)
And it will work just as we expect it to.
- Naming a function
Functions are actions.
So their name is usually a verb.
It should be brief, as accurate as possible and describe what the function does, so that someone reading the code gets an indication of what the function does.
It is a widespread practice to start a function with a verbal prefix which vaguely describes the action.
There must be an agreement within the team on the meaning of the prefixes.
For instance, functions that start with "show" usually show something.
Function starting with…
"get…" – return a value,
"calc…" – calculate something,
"create…" – create something,
"check…" – check something and return a boolean, etc.
Examples of such names:
showMessage(..) // shows a message
getAge(..) // returns the age (gets it somehow)
calcSum(..) // calculates a sum and returns the result
createForm(..) // creates a form (and usually returns it)
checkPermission(..) // checks a permission, returns true/false
With prefixes in place, a glance at a function name gives an understanding what kind of work it does and what kind of value it returns.
One function – one action
A function should do exactly what is suggested by its name, no more.
Two independent actions usually deserve two functions, even if they are usually called together (in that case we can make a 3rd function that calls those two).
A few examples of breaking this rule:
getAge – would be bad if it shows an alert with the age (should only get).
createForm – would be bad if it modifies the document, adding a form to it (should only create it and return).
checkPermission – would be bad if it displays the access granted/denied message (should only perform the check and return the result).
These examples assume common meanings of prefixes.
You and your team are free to agree on other meanings, but usually they're not much different.
In any case, you should have a firm understanding of what a prefix means, what a prefixed function can and cannot do.
All same-prefixed functions should obey the rules.
And the team should share the knowledge.
Ultrashort function names
Functions that are used very often sometimes have ultrashort names.
For example, the jQuery framework defines a function with $.
The Lodash library has its core function named _.
These are exceptions.
Generally functions names should be concise and descriptive.
- Functions == Comments
Functions should be short and do exactly one thing.
If that thing is big, maybe it's worth it to split the function into a few smaller functions.
Sometimes following this rule may not be that easy, but it's definitely a good thing.
A separate function is not only easier to test and debug – its very existence is a great comment!
For instance, compare the two functions showPrimes(n) below.
Each one outputs prime numbers up to n.
The first variant uses a label:
function showPrimes(n) {
nextPrime: for (let i = 2; i < n; i++) {
for (let j = 2; j < i; j++) {
if (i % j == 0) continue nextPrime;
}
alert( i ); // a prime
}
}
The second variant uses an additional function isPrime(n) to test for primality:
function showPrimes(n) {
for (let i = 2; i < n; i++) {
if (!isPrime(i)) continue;
alert(i); // a prime
}
}
function isPrime(n) {
for (let i = 2; i < n; i++) {
if ( n % i == 0) return false;
}
return true;
}
The second variant is easier to understand, isn't it? Instead of the code piece we see a name of the action (isPrime).
Sometimes people refer to such code as self-describing.
So, functions can be created even if we don't intend to reuse them.
They structure the code and make it readable.
- Summary
A function declaration looks like this:
function name(parameters, delimited, by, comma) {
/* code */
}
Values passed to a function as parameters are copied to its local variables.
A function may access outer variables.
But it works only from inside out.
The code outside of the function doesn't see its local variables.
A function can return a value.
If it doesn't, then its result is undefined.
To make the code clean and easy to understand, it's recommended to use mainly local variables and parameters in the function, not outer variables.
It is always easier to understand a function which gets parameters, works with them and returns a result than a function which gets no parameters, but modifies outer variables as a side-effect.
Function naming:
A name should clearly describe what the function does.
When we see a function call in the code, a good name instantly gives us an understanding what it does and returns.
A function is an action, so function names are usually verbal.
There exist many well-known function prefixes like create…, show…, get…, check… and so on.
Use them to hint what a function does.
Functions are the main building blocks of scripts.
Now we've covered the basics, so we actually can start creating and using them.
But that's only the beginning of the path.
We are going to return to them many times, going more deeply into their advanced features.
importance: 4
The following function returns true if the parameter age is greater than 18.
Otherwise it asks for a confirmation and returns its result:
function checkAge(age) {
if (age > 18) {
return true;
} else {
// ...
return confirm('Did parents allow you?');
}
}
Will the function work differently if else is removed?
function checkAge(age) {
if (age > 18) {
return true;
}
// ...
return confirm('Did parents allow you?');
}
Is there any difference in the behavior of these two variants?
No difference.
Rewrite the function using '?' or '||'
importance: 4
The following function returns true if the parameter age is greater than 18.
Otherwise it asks for a confirmation and returns its result.
function checkAge(age) {
if (age > 18) {
return true;
} else {
return confirm('Did parents allow you?');
}
}
Rewrite it, to perform the same, but without if, in a single line.
Make two variants of checkAge:
Using a question mark operator ?
Using OR ||
Using a question mark operator '?':
function checkAge(age) {
return (age > 18) ? true : confirm('Did parents allow you?');
}
Using OR || (the shortest variant):
function checkAge(age) {
return (age > 18) || confirm('Did parents allow you?');
}
Note that the parentheses around age > 18 are not required here.
They exist for better readabilty.
Function min(a, b)
importance: 1
Write a function min(a,b) which returns the least of two numbers a and b.
For instance:
min(2, 5) == 2
min(3, -1) == -1
min(1, 1) == 1
A solution using if:
function min(a, b) {
if (a < b) {
return a;
} else {
return b;
}
}
A solution with a question mark operator '?':
function min(a, b) {
return a < b ? a : b;
}
P.S.
In the case of an equality a == b it does not matter what to return.
Function pow(x,n)
importance: 4
Write a function pow(x,n) that returns x in power n.
Or, in other words, multiplies x by itself n times and returns the result.
pow(3, 2) = 3 * 3 = 9
pow(3, 3) = 3 * 3 * 3 = 27
pow(1, 100) = 1 * 1 * ...* 1 = 1
Create a web-page that prompts for x and n, and then shows the result of pow(x,n).
Run the demo
P.S.
In this task the function should support only natural values of n: integers up from 1.
function pow(x, n) {
let result = x;
for (let i = 1; i < n; i++) {
result *= x;
}
return result;
}
let x = prompt("x?", '');
let n = prompt("n?", '');
if (n < 1) {
alert(`Power ${n} is not supported, use a positive integer`);
} else {
alert( pow(x, n) );
}JavaScript Fundamentals
Function expressions
In JavaScript, a function is not a “magical language structure”, but a special kind of value.
The syntax that we used before is called a Function Declaration:
function sayHi() {
alert( "Hello" );
}
There is another syntax for creating a function that is called a Function Expression.
It looks like this:
let sayHi = function() {
alert( "Hello" );
};
Here, the function is created and assigned to the variable explicitly, like any other value.
No matter how the function is defined, it's just a value stored in the variable sayHi.
The meaning of these code samples is the same: "create a function and put it into the variable sayHi".
We can even print out that value using alert:
function sayHi() {
alert( "Hello" );
}
alert( sayHi ); // shows the function code
Please note that the last line does not run the function, because there are no parentheses after sayHi.
There are programming languages where any mention of a function name causes its execution, but JavaScript is not like that.
In JavaScript, a function is a value, so we can deal with it as a value.
The code above shows its string representation, which is the source code.
Surely, a function is a special value, in the sense that we can call it like sayHi().
But it's still a value.
So we can work with it like with other kinds of values.
We can copy a function to another variable:
function sayHi() { // (1) create
alert( "Hello" );
}
let func = sayHi; // (2) copy
func(); // Hello // (3) run the copy (it works)!
sayHi(); // Hello // this still works too (why wouldn't it)
Here's what happens above in detail:
The Function Declaration (1) creates the function and puts it into the variable named sayHi.
Line (2) copies it into the variable func.
Please note again: there are no parentheses after sayHi.
If there were, then func = sayHi() would write the result of the callsayHi() into func, not the functionsayHi itself.
Now the function can be called as both sayHi() and func().
Note that we could also have used a Function Expression to declare sayHi, in the first line:
let sayHi = function() {
alert( "Hello" );
};
let func = sayHi;
// ...
Everything would work the same.
Why is there a semicolon at the end?
You might wonder, why does Function Expression have a semicolon ; at the end, but Function Declaration does not:
function sayHi() {
// ...
}
let sayHi = function() {
// ...
};
The answer is simple:
There's no need for ; at the end of code blocks and syntax structures that use them like if { ...
}, for { }, function f { } etc.
A Function Expression is used inside the statement: let sayHi = ...;, as a value.
It's not a code block, but rather an assignment.
The semicolon ; is recommended at the end of statements, no matter what the value is.
So the semicolon here is not related to the Function Expression itself, it just terminates the statement.
- Callback functions
Let's look at more examples of passing functions as values and using function expressions.
We'll write a function ask(question, yes, no) with three parameters:
question
Text of the question
yes
Function to run if the answer is “Yes”
no
Function to run if the answer is “No”
The function should ask the question and, depending on the user's answer, call yes() or no():
function ask(question, yes, no) {
if (confirm(question)) yes()
else no();
}
function showOk() {
alert( "You agreed." );
}
function showCancel() {
alert( "You canceled the execution." );
}
// usage: functions showOk, showCancel are passed as arguments to ask
ask("Do you agree?", showOk, showCancel);
In practice, such functions are quite useful.
The major difference between a real-life ask and the example above is that real-life functions use more complex ways to interact with the user than a simple confirm.
In the browser, such function usually draws a nice-looking question window.
But that's another story.
The arguments showOk and showCancel of ask are called callback functions or just callbacks.
The idea is that we pass a function and expect it to be “called back” later if necessary.
In our case, showOk becomes the callback for “yes” answer, and showCancel for “no” answer.
We can use Function Expressions to write the same function much shorter:
function ask(question, yes, no) {
if (confirm(question)) yes()
else no();
}
ask(
"Do you agree?",
function() { alert("You agreed."); },
function() { alert("You canceled the execution."); }
);
Here, functions are declared right inside the ask(...) call.
They have no name, and so are called anonymous.
Such functions are not accessible outside of ask (because they are not assigned to variables), but that's just what we want here.
Such code appears in our scripts very naturally, it's in the spirit of JavaScript.
A function is a value representing an “action”
Regular values like strings or numbers represent the data.
A function can be perceived as an action.
We can pass it between variables and run when we want.
- Function Expression vs Function Declaration
Let's formulate the key differences between Function Declarations and Expressions.
First, the syntax: how to differentiate between them in the code.
Function Declaration: a function, declared as a separate statement, in the main code flow.
// Function Declaration
function sum(a, b) {
return a + b;
}Function Expression: a function, created inside an expression or inside another syntax construct.
Here, the function is created at the right side of the “assignment expression” =:
// Function Expression
let sum = function(a, b) {
return a + b;
};
The more subtle difference is when a function is created by the JavaScript engine.
A Function Expression is created when the execution reaches it and is usable only from that moment.
Once the execution flow passes to the right side of the assignment let sum = function… – here we go, the function is created and can be used (assigned, called, etc.
) from now on.
Function Declarations are different.
A Function Declaration can be called earlier than it is defined.
For example, a global Function Declaration is visible in the whole script, no matter where it is.
That's due to internal algorithms.
When JavaScript prepares to run the script, it first looks for global Function Declarations in it and creates the functions.
We can think of it as an “initialization stage”.
And after all Function Declarations are processed, the code is executed.
So it has access to these functions.
For example, this works:
sayHi("John"); // Hello, John
function sayHi(name) {
alert( `Hello, ${name}` );
}
The Function Declaration sayHi is created when JavaScript is preparing to start the script and is visible everywhere in it.
…If it were a Function Expression, then it wouldn't work:
sayHi("John"); // error!
let sayHi = function(name) { // (*) no magic any more
alert( `Hello, ${name}` );
};
Function Expressions are created when the execution reaches them.
That would happen only in the line (*).
Too late.
Another special feature of Function Declarations is their block scope.
In strict mode, when a Function Declaration is within a code block, it's visible everywhere inside that block.
But not outside of it.
For instance, let's imagine that we need to declare a function welcome() depending on the age variable that we get during runtime.
And then we plan to use it some time later.
If we use Function Declaration, it won't work as intended:
let age = prompt("What is your age?", 18);
// conditionally declare a function
if (age < 18) {
function welcome() {
alert("Hello!");
}
} else {
function welcome() {
alert("Greetings!");
}
}
// ...use it later
welcome(); // Error: welcome is not defined
That's because a Function Declaration is only visible inside the code block in which it resides.
Here's another example:
let age = 16; // take 16 as an example
if (age < 18) {
welcome(); // \ (runs)
// |
function welcome() { // |
alert("Hello!"); // | Function Declaration is available
} // | everywhere in the block where it's declared
// |
welcome(); // / (runs)
} else {
function welcome() {
alert("Greetings!");
}
}
// Here we're out of curly braces,
// so we can not see Function Declarations made inside of them.
welcome(); // Error: welcome is not defined
What can we do to make welcome visible outside of if?
The correct approach would be to use a Function Expression and assign welcome to the variable that is declared outside of if and has the proper visibility.
This code works as intended:
let age = prompt("What is your age?", 18);
let welcome;
if (age < 18) {
welcome = function() {
alert("Hello!");
};
} else {
welcome = function() {
alert("Greetings!");
};
}
welcome(); // ok now
Or we could simplify it even further using a question mark operator ?:
let age = prompt("What is your age?", 18);
let welcome = (age < 18) ?
function() { alert("Hello!"); } :
function() { alert("Greetings!"); };
welcome(); // ok now
When to choose Function Declaration versus Function Expression?
As a rule of thumb, when we need to declare a function, the first to consider is Function Declaration syntax.
It gives more freedom in how to organize our code, because we can call such functions before they are declared.
That's also better for readability, as it's easier to look up function f(…) {…} in the code than let f = function(…) {…};.
Function Declarations are more “eye-catching”.
…But if a Function Declaration does not suit us for some reason, or we need a conditional declaration (we've just seen an example), then Function Expression should be used.
- Summary
Functions are values.
They can be assigned, copied or declared in any place of the code.
If the function is declared as a separate statement in the main code flow, that's called a “Function Declaration”.
If the function is created as a part of an expression, it's called a “Function Expression”.
Function Declarations are processed before the code block is executed.
They are visible everywhere in the block.
Function Expressions are created when the execution flow reaches them.
In most cases when we need to declare a function, a Function Declaration is preferable, because it is visible prior to the declaration itself.
That gives us more flexibility in code organization, and is usually more readable.
So we should use a Function Expression only when a Function Declaration is not fit for the task.
We've seen a couple of examples of that in this chapter, and will see more in the future.
JavaScript Fundamentals
Arrow functions, the basics
There's another very simple and concise syntax for creating functions, that's often better than Function Expressions.
It's called “arrow functions”, because it looks like this:
let func = (arg1, arg2, ...argN) => expression
…This creates a function func that accepts arguments arg1..argN, then evaluates the expression on the right side with their use and returns its result.
In other words, it's the shorter version of:
let func = function(arg1, arg2, ...argN) {
return expression;
};
Let's see a concrete example:
let sum = (a, b) => a + b;
/* This arrow function is a shorter form of:
let sum = function(a, b) {
return a + b;
};
*/
alert( sum(1, 2) ); // 3
As you can, see (a, b) => a + b means a function that accepts two arguments named a and b.
Upon the execution, it evaluates the expression a + b and returns the result.
If we have only one argument, then parentheses around parameters can be omitted, making that even shorter.
For example:
let double = n => n * 2;
// roughly the same as: let double = function(n) { return n * 2 }
alert( double(3) ); // 6
If there are no arguments, parentheses will be empty (but they should be present):
let sayHi = () => alert("Hello!");
sayHi();
Arrow functions can be used in the same way as Function Expressions.
For instance, to dynamically create a function:
let age = prompt("What is your age?", 18);
let welcome = (age < 18) ?
() => alert('Hello') :
() => alert("Greetings!");
welcome();
Arrow functions may appear unfamiliar and not very readable at first, but that quickly changes as the eyes get used to the structure.
They are very convenient for simple one-line actions, when we're just too lazy to write many words.
- Multiline arrow functions
The examples above took arguments from the left of => and evaluated the right-side expression with them.
Sometimes we need something a little bit more complex, like multiple expressions or statements.
It is also possible, but we should enclose them in curly braces.
Then use a normal return within them.
Like this:
let sum = (a, b) => { // the curly brace opens a multiline function
let result = a + b;
return result; // if we use curly braces, then we need an explicit "return"
};
alert( sum(1, 2) ); // 3
More to come
Here we praised arrow functions for brevity.
But that's not all!
Arrow functions have other interesting features.
To study them in-depth, we first need to get to know some other aspects of JavaScript, so we'll return to arrow functions later in the chapter Arrow functions revisited.
For now, we can already use arrow functions for one-line actions and callbacks.
- Summary
Arrow functions are handy for one-liners.
They come in two flavors:
Without curly braces: (...args) => expression – the right side is an expression: the function evaluates it and returns the result.
With curly braces: (...args) => { body } – brackets allow us to write multiple statements inside the function, but we need an explicit return to return something.
Replace Function Expressions with arrow functions in the code below:
function ask(question, yes, no) {
if (confirm(question)) yes()
else no();
}
ask(
"Do you agree?",
function() { alert("You agreed."); },
function() { alert("You canceled the execution."); }
);function ask(question, yes, no) {
if (confirm(question)) yes()
else no();
}
ask(
"Do you agree?",
() => alert("You agreed."),
() => alert("You canceled the execution.")
);
Looks short and clean, right?
JavaScript Fundamentals
JavaScript specials
This chapter briefly recaps the features of JavaScript that we've learned by now, paying special attention to subtle moments.
- Code structure
Statements are delimited with a semicolon:
alert('Hello'); alert('World');
Usually, a line-break is also treated as a delimiter, so that would also work:
alert('Hello')
alert('World')
That's called “automatic semicolon insertion”.
Sometimes it doesn't work, for instance:
alert("There will be an error after this message")
[1, 2].forEach(alert)
Most codestyle guides agree that we should put a semicolon after each statement.
Semicolons are not required after code blocks {...} and syntax constructs with them like loops:
function f() {
// no semicolon needed after function declaration
}
for(;;) {
// no semicolon needed after the loop
}
…But even if we can put an “extra” semicolon somewhere, that's not an error.
It will be ignored.
More in: Code structure.
- Strict mode
To fully enable all features of modern JavaScript, we should start scripts with "use strict".
'use strict';
...
The directive must be at the top of a script or at the beginning of a function body.
Without "use strict", everything still works, but some features behave in the old-fashion, “compatible” way.
We'd generally prefer the modern behavior.
Some modern features of the language (like classes that we'll study in the future) enable strict mode implicitly.
More in: The modern mode, "use strict".
- Variables
Can be declared using:
letconst (constant, can't be changed)
var (old-style, will see later)
A variable name can include:
Letters and digits, but the first character may not be a digit.
Characters $ and _ are normal, on par with letters.
Non-Latin alphabets and hieroglyphs are also allowed, but commonly not used.
Variables are dynamically typed.
They can store any value:
let x = 5;
x = "John";
There are 8 data types:
number for both floating-point and integer numbers,
bigint for integer numbers of arbitrary length,
string for strings,
boolean for logical values: true/false,
null – a type with a single value null, meaning “empty” or “does not exist”,
undefined – a type with a single value undefined, meaning “not assigned”,
object and symbol – for complex data structures and unique identifiers, we haven't learnt them yet.
The typeof operator returns the type for a value, with two exceptions:
typeof null == "object" // error in the language
typeof function(){} == "function" // functions are treated specially
More in: Variables and Data types.
- Interaction
We're using a browser as a working environment, so basic UI functions will be:
All these functions are modal, they pause the code execution and prevent the visitor from interacting with the page until they answer.
For instance:
let userName = prompt("Your name?", "Alice");
let isTeaWanted = confirm("Do you want some tea?");
alert( "Visitor: " + userName ); // Alice
alert( "Tea wanted: " + isTeaWanted ); // true
More in: Interaction: alert, prompt, confirm.
- Operators
JavaScript supports the following operators:
Arithmetical
Regular: * + - /, also % for the remainder and ** for power of a number.
The binary plus + concatenates strings.
And if any of the operands is a string, the other one is converted to string too:
alert( '1' + 2 ); // '12', string
alert( 1 + '2' ); // '12', string
Assignments
There is a simple assignment: a = b and combined ones like a *= 2.
Bitwise
Bitwise operators work with 32-bit integers at the lowest, bit-level: see the docs when they are needed.
Conditional
The only operator with three parameters: cond ? resultA : resultB.
If cond is truthy, returns resultA, otherwise resultB.
Logical operators
Logical AND && and OR || perform short-circuit evaluation and then return the value where it stopped (not necessary true/false).
Logical NOT ! converts the operand to boolean type and returns the inverse value.
Nullish coalescing operator
The ?? operator provides a way to choose a defined value from a list of variables.
The result of a ?? b is a unless it's null/undefined, then b.
Comparisons
Equality check == for values of different types converts them to a number (except null and undefined that equal each other and nothing else), so these are equal:
alert( 0 == false ); // true
alert( 0 == '' ); // true
Other comparisons convert to a number as well.
The strict equality operator === doesn't do the conversion: different types always mean different values for it.
Values null and undefined are special: they equal == each other and don't equal anything else.
Greater/less comparisons compare strings character-by-character, other types are converted to a number.
We covered 3 types of loops:
// 1
while (condition) {
...
}
// 2
do {
...
} while (condition);
// 3
for(let i = 0; i < 10; i++) {
...
}
The variable declared in for(let...) loop is visible only inside the loop.
But we can also omit let and reuse an existing variable.
Directives break/continue allow to exit the whole loop/current iteration.
Use labels to break nested loops.
Details in: Loops: while and for.
Later we'll study more types of loops to deal with objects.
- The “switch” construct
The “switch” construct can replace multiple if checks.
It uses === (strict equality) for comparisons.
For instance:
let age = prompt('Your age?', 18);
switch (age) {
case 18:
alert("Won't work"); // the result of prompt is a string, not a number
break;
case "18":
alert("This works!");
break;
default:
alert("Any value not equal to one above");
}
Details in: The "switch" statement.
- Functions
We covered three ways to create a function in JavaScript:
Function Declaration: the function in the main code flow
function sum(a, b) {
let result = a + b;
return result;
}
Function Expression: the function in the context of an expression
let sum = function(a, b) {
let result = a + b;
return result;
};
Arrow functions:
// expression at the right side
let sum = (a, b) => a + b;
// or multi-line syntax with { ...
}, need return here:
let sum = (a, b) => {
// ...
return a + b;
}
// without arguments
let sayHi = () => alert("Hello");
// with a single argument
let double = n => n * 2;
Functions may have local variables: those declared inside its body or its parameter list.
Such variables are only visible inside the function.
Parameters can have default values: function sum(a = 1, b = 2) {...}.
Functions always return something.
If there's no return statement, then the result is undefined.
Details: see Functions, Arrow functions, the basics.
- More to come
That was a brief list of JavaScript features.
As of now we've studied only basics.
Further in the tutorial you'll find more specials and advanced features of JavaScript.
Before writing more complex code, let's talk about debugging.
Debugging is the process of finding and fixing errors within a script.
All modern browsers and most other environments support debugging tools – a special UI in developer tools that makes debugging much easier.
It also allows to trace the code step by step to see what exactly is going on.
We'll be using Chrome here, because it has enough features, most other browsers have a similar process.
- The “Sources” panel
Your Chrome version may look a little bit different, but it still should be obvious what's there.
Open the example page in Chrome.
Turn on developer tools with F12 (Mac: Cmd+Opt+I).
Select the Sources panel.
Here's what you should see if you are doing it for the first time:
The toggler button opens the tab with files.
Let's click it and select hello.js in the tree view.
Here's what should show up:
The Sources panel has 3 parts:
The File Navigator pane lists HTML, JavaScript, CSS and other files, including images that are attached to the page.
Chrome extensions may appear here too.
The Code Editor pane shows the source code.
The JavaScript Debugging pane is for debugging, we'll explore it soon.
Now you could click the same toggler again to hide the resources list and give the code some space.
- Console
If we press Esc, then a console opens below.
We can type commands there and press Enter to execute.
After a statement is executed, its result is shown below.
For example, here 1+2 results in 3, and hello("debugger") returns nothing, so the result is undefined:
- Breakpoints
Let's examine what's going on within the code of the example page.
In hello.js, click at line number 4.
Yes, right on the 4 digit, not on the code.
Congratulations! You've set a breakpoint.
Please also click on the number for line 8.
It should look like this (blue is where you should click):
A breakpoint is a point of code where the debugger will automatically pause the JavaScript execution.
While the code is paused, we can examine current variables, execute commands in the console etc.
In other words, we can debug it.
We can always find a list of breakpoints in the right panel.
That's useful when we have many breakpoints in various files.
It allows us to:
Quickly jump to the breakpoint in the code (by clicking on it in the right panel).
Temporarily disable the breakpoint by unchecking it.
Remove the breakpoint by right-clicking and selecting Remove.
…And so on.
Conditional breakpoints
Right click on the line number allows to create a conditional breakpoint.
It only triggers when the given expression is truthy.
That's handy when we need to stop only for a certain variable value or for certain function parameters.
- Debugger command
We can also pause the code by using the debugger command in it, like this:
function hello(name) {
let phrase = `Hello, ${name}!`;
debugger; // <-- the debugger stops here
say(phrase);
}
That's very convenient when we are in a code editor and don't want to switch to the browser and look up the script in developer tools to set the breakpoint.
- Pause and look around
In our example, hello() is called during the page load, so the easiest way to activate the debugger (after we've set the breakpoints) is to reload the page.
So let's press F5 (Windows, Linux) or Cmd+R (Mac).
As the breakpoint is set, the execution pauses at the 4th line:
Please open the informational dropdowns to the right (labeled with arrows).
They allow you to examine the current code state:
Watch – shows current values for any expressions.
You can click the plus + and input an expression.
The debugger will show its value at any moment, automatically recalculating it in the process of execution.
Call Stack – shows the nested calls chain.
At the current moment the debugger is inside hello() call, called by a script in index.html (no function there, so it's called “anonymous”).
If you click on a stack item (e.g.
“anonymous”), the debugger jumps to the corresponding code, and all its variables can be examined as well.
Scope – current variables.Local shows local function variables.
You can also see their values highlighted right over the source.
Global has global variables (out of any functions).
There's also this keyword there that we didn't study yet, but we'll do that soon.
- Tracing the execution
Now it's time to trace the script.
There are buttons for it at the top of the right panel.
Let's engage them.
– “Resume”: continue the execution, hotkey F8.
Resumes the execution.
If there are no additional breakpoints, then the execution just continues and the debugger loses control.
Here's what we can see after a click on it:
The execution has resumed, reached another breakpoint inside say() and paused there.
Take a look at the “Call Stack” at the right.
It has increased by one more call.
We're inside say() now.
– “Step”: run the next command, hotkey F9.
Run the next statement.
If we click it now, alert will be shown.
Clicking this again and again will step through all script statements one by one.
– “Step over”: run the next command, but don't go into a function, hotkey F10.
Similar to the previous “Step” command, but behaves differently if the next statement is a function call.
That is: not a built-in, like alert, but a function of our own.
The “Step” command goes into it and pauses the execution at its first line, while “Step over” executes the nested function call invisibly, skipping the function internals.
The execution is then paused immediately after that function.
That's good if we're not interested to see what happens inside the function call.
– “Step into”, hotkey F11.
That's similar to “Step”, but behaves differently in case of asynchronous function calls.
If you're only starting to learn JavaScript, then you can ignore the difference, as we don't have asynchronous calls yet.
For the future, just note that “Step” command ignores async actions, such as setTimeout (scheduled function call), that execute later.
The “Step into” goes into their code, waiting for them if necessary.
See DevTools manual for more details.
– “Step out”: continue the execution till the end of the current function, hotkey Shift+F11.
Continue the execution and stop it at the very last line of the current function.
That's handy when we accidentally entered a nested call using , but it does not interest us, and we want to continue to its end as soon as possible.
– enable/disable all breakpoints.
That button does not move the execution.
Just a mass on/off for breakpoints.
– enable/disable automatic pause in case of an error.
When enabled, and the developer tools is open, a script error automatically pauses the execution.
Then we can analyze variables to see what went wrong.
So if our script dies with an error, we can open debugger, enable this option and reload the page to see where it dies and what's the context at that moment.
Continue to here
Right click on a line of code opens the context menu with a great option called “Continue to here”.
That's handy when we want to move multiple steps forward to the line, but we're too lazy to set a breakpoint.
- Logging
To output something to console from our code, there's console.log function.
For instance, this outputs values from 0 to 4 to console:
// open console to see
for (let i = 0; i < 5; i++) {
console.log("value,", i);
}
Regular users don't see that output, it is in the console.
To see it, either open the Console panel of developer tools or press Esc while in another panel: that opens the console at the bottom.
If we have enough logging in our code, then we can see what's going on from the records, without the debugger.
- Summary
As we can see, there are three main ways to pause a script:
A breakpoint.
The debugger statements.
An error (if dev tools are open and the button is “on”).
When paused, we can debug – examine variables and trace the code to see where the execution goes wrong.
There are many more options in developer tools than covered here.
The full manual is at https://developers.google.com/web/tools/chrome-devtools.
The information from this chapter is enough to begin debugging, but later, especially if you do a lot of browser stuff, please go there and look through more advanced capabilities of developer tools.
Oh, and also you can click at various places of dev tools and just see what's showing up.
That's probably the fastest route to learn dev tools.
Don't forget about the right click and context menus!
Code quality
Coding Style
Our code must be as clean and easy to read as possible.
That is actually the art of programming – to take a complex task and code it in a way that is both correct and human-readable.
A good code style greatly assists in that.
- Syntax
Here is a cheat sheet with some suggested rules (see below for more details):
Now let's discuss the rules and reasons for them in detail.
There are no “you must” rules
Nothing is set in stone here.
These are style preferences, not religious dogmas.
Curly Braces
In most JavaScript projects curly braces are written in “Egyptian” style with the opening brace on the same line as the corresponding keyword – not on a new line.
There should also be a space before the opening bracket, like this:
if (condition) {
// do this
// ...and that
// ...and that
}
A single-line construct, such as if (condition) doSomething(), is an important edge case.
Should we use braces at all?
Here are the annotated variants so you can judge their readability for yourself:
Beginners sometimes do that.
Bad! Curly braces are not needed:
if (n < 0) {alert(`Power ${n} is not supported`);}
Split to a separate line without braces.
Never do that, easy to make an error when adding new lines:
if (n < 0)
alert(`Power ${n} is not supported`);
One line without braces – acceptable, if it's short:
if (n < 0) alert(`Power ${n} is not supported`);
The best variant:
if (n < 0) {
alert(`Power ${n} is not supported`);
}
For a very brief code, one line is allowed, e.g.
if (cond) return null.
But a code block (the last variant) is usually more readable.
Line Length
No one likes to read a long horizontal line of code.
It's best practice to split them.
For example:
// backtick quotes ` allow to split the string into multiple lines
let str = `
ECMA International's TC39 is a group of JavaScript developers,
implementers, academics, and more, collaborating with the community
to maintain and evolve the definition of JavaScript.
`;
And, for if statements:
if (
id === 123 &&
moonPhase === 'Waning Gibbous' &&
zodiacSign === 'Libra'
) {
letTheSorceryBegin();
}
The maximum line length should be agreed upon at the team-level.
It's usually 80 or 120 characters.
Indents
There are two types of indents:
Horizontal indents: 2 or 4 spaces.
A horizontal indentation is made using either 2 or 4 spaces or the horizontal tab symbol (key Tab).
Which one to choose is an old holy war.
Spaces are more common nowadays.
One advantage of spaces over tabs is that spaces allow more flexible configurations of indents than the tab symbol.
For instance, we can align the parameters with the opening bracket, like this:
show(parameters,
aligned, // 5 spaces padding at the left
one,
after,
another
) {
// ...
}Vertical indents: empty lines for splitting code into logical blocks.
Even a single function can often be divided into logical blocks.
In the example below, the initialization of variables, the main loop and returning the result are split vertically:
function pow(x, n) {
let result = 1;
// <--
for (let i = 0; i < n; i++) {
result *= x;
}
// <--
return result;
}
Insert an extra newline where it helps to make the code more readable.
There should not be more than nine lines of code without a vertical indentation.
Semicolons
A semicolon should be present after each statement, even if it could possibly be skipped.
There are languages where a semicolon is truly optional and it is rarely used.
In JavaScript, though, there are cases where a line break is not interpreted as a semicolon, leaving the code vulnerable to errors.
See more about that in the chapter Code structure.
If you're an experienced JavaScript programmer, you may choose a no-semicolon code style like StandardJS.
Otherwise, it's best to use semicolons to avoid possible pitfalls.
The majority of developers put semicolons.
Nesting Levels
Try to avoid nesting code too many levels deep.
For example, in the loop, it's sometimes a good idea to use the continue directive to avoid extra nesting.
For example, instead of adding a nested if conditional like this:
for (let i = 0; i < 10; i++) {
if (cond) {
...
// <- one more nesting level
}
}
We can write:
for (let i = 0; i < 10; i++) {
if (!cond) continue;
...
// <- no extra nesting level
}
A similar thing can be done with if/else and return.
For example, two constructs below are identical.
Option 1:
function pow(x, n) {
if (n < 0) {
alert("Negative 'n' not supported");
} else {
let result = 1;
for (let i = 0; i < n; i++) {
result *= x;
}
return result;
}
}
Option 2:
function pow(x, n) {
if (n < 0) {
alert("Negative 'n' not supported");
return;
}
let result = 1;
for (let i = 0; i < n; i++) {
result *= x;
}
return result;
}
The second one is more readable because the “special case” of n < 0 is handled early on.
Once the check is done we can move on to the “main” code flow without the need for additional nesting.
- Function Placement
If you are writing several “helper” functions and the code that uses them, there are three ways to organize the functions.
Declare the functions above the code that uses them:
// function declarations
function createElement() {
...
}
function setHandler(elem) {
...
}
function walkAround() {
...
}
// the code which uses them
let elem = createElement();
setHandler(elem);
walkAround();
Code first, then functions
// the code which uses the functions
let elem = createElement();
setHandler(elem);
walkAround();
// --- helper functions ---
function createElement() {
...
}
function setHandler(elem) {
...
}
function walkAround() {
...
}
Mixed: a function is declared where it's first used.
Most of time, the second variant is preferred.
That's because when reading code, we first want to know what it does.
If the code goes first, then it becomes clear from the start.
Then, maybe we won't need to read the functions at all, especially if their names are descriptive of what they actually do.
- Style Guides
A style guide contains general rules about “how to write” code, e.g.
which quotes to use, how many spaces to indent, the maximal line length, etc.
A lot of minor things.
When all members of a team use the same style guide, the code looks uniform, regardless of which team member wrote it.
Of course, a team can always write their own style guide, but usually there's no need to.
There are many existing guides to choose from.
Some popular choices:
Google JavaScript Style GuideAirbnb JavaScript Style GuideIdiomatic.JSStandardJS
(plus many more)
If you're a novice developer, start with the cheat sheet at the beginning of this chapter.
Then you can browse other style guides to pick up more ideas and decide which one you like best.
- Automated Linters
Linters are tools that can automatically check the style of your code and make improving suggestions.
The great thing about them is that style-checking can also find some bugs, like typos in variable or function names.
Because of this feature, using a linter is recommended even if you don't want to stick to one particular “code style”.
Here are some well-known linting tools:
JSLint – one of the first linters.
JSHint – more settings than JSLint.
ESLint – probably the newest one.
All of them can do the job.
The author uses ESLint.
Most linters are integrated with many popular editors: just enable the plugin in the editor and configure the style.
For instance, for ESLint you should do the following:
Install Node.js.
Install ESLint with the command npm install -g eslint (npm is a JavaScript package installer).
Create a config file named .eslintrc in the root of your JavaScript project (in the folder that contains all your files).
Install/enable the plugin for your editor that integrates with ESLint.
The majority of editors have one.
Here's an example of an .eslintrc file:
{
"extends": "eslint:recommended",
"env": {
"browser": true,
"node": true,
"es6": true
},
"rules": {
"no-console": 0,
"indent": 2
}
}
Here the directive "extends" denotes that the configuration is based on the “eslint:recommended” set of settings.
After that, we specify our own.
It is also possible to download style rule sets from the web and extend them instead.
See http://eslint.org/docs/user-guide/getting-started for more details about installation.
Also certain IDEs have built-in linting, which is convenient but not as customizable as ESLint.
- Summary
All syntax rules described in this chapter (and in the style guides referenced) aim to increase the readability of your code.
All of them are debatable.
When we think about writing “better” code, the questions we should ask ourselves are: “What makes the code more readable and easier to understand?” and “What can help us avoid errors?” These are the main things to keep in mind when choosing and debating code styles.
Reading popular style guides will allow you to keep up to date with the latest ideas about code style trends and best practices.
importance: 4
What's wrong with the code style below?
function pow(x,n)
{
let result=1;
for(let i=0;i<n;i++) {result*=x;}
return result;
}
let x=prompt("x?",''), n=prompt("n?",'')
if (n<=0)
{
alert(`Power ${n} is not supported, please enter an integer number greater than zero`);
}
else
{
alert(pow(x,n))
}
Fix it.
You could note the following:
function pow(x,n) // <- no space between arguments
{ // <- figure bracket on a separate line
let result=1; // <- no spaces before or after =
for(let i=0;i<n;i++) {result*=x;} // <- no spaces
// the contents of { ...
} should be on a new line
return result;
}
let x=prompt("x?",''), n=prompt("n?",'') // <-- technically possible,
// but better make it 2 lines, also there's no spaces and missing ;
if (n<=0) // <- no spaces inside (n <= 0), and should be extra line above it
{ // <- figure bracket on a separate line
// below - long lines can be split into multiple lines for improved readability
alert(`Power ${n} is not supported, please enter an integer number greater than zero`);
}
else // <- could write it on a single line like "} else {"
{
alert(pow(x,n)) // no spaces and missing ;
}
The fixed variant:
function pow(x, n) {
let result = 1;
for (let i = 0; i < n; i++) {
result *= x;
}
return result;
}
let x = prompt("x?", "");
let n = prompt("n?", "");
if (n <= 0) {
alert(`Power ${n} is not supported,
please enter an integer number greater than zero`);
} else {
alert( pow(x, n) );
}Code quality
Comments
As we know from the chapter Code structure, comments can be single-line: starting with // and multiline: /* ...
*/.
We normally use them to describe how and why the code works.
At first sight, commenting might be obvious, but novices in programming often use them wrongly.
- Bad comments
Novices tend to use comments to explain “what is going on in the code”.
Like this:
// This code will do this thing (...) and that thing (...)
// ...and who knows what else...
very;
complex;
code;
But in good code, the amount of such “explanatory” comments should be minimal.
Seriously, the code should be easy to understand without them.
There's a great rule about that: “if the code is so unclear that it requires a comment, then maybe it should be rewritten instead”.
Recipe: factor out functions
Sometimes it's beneficial to replace a code piece with a function, like here:
function showPrimes(n) {
nextPrime:
for (let i = 2; i < n; i++) {
// check if i is a prime number
for (let j = 2; j < i; j++) {
if (i % j == 0) continue nextPrime;
}
alert(i);
}
}
The better variant, with a factored out function isPrime:
function showPrimes(n) {
for (let i = 2; i < n; i++) {
if (!isPrime(i)) continue;
alert(i);
}
}
function isPrime(n) {
for (let i = 2; i < n; i++) {
if (n % i == 0) return false;
}
return true;
}
Now we can understand the code easily.
The function itself becomes the comment.
Such code is called self-descriptive.
Recipe: create functions
And if we have a long “code sheet” like this:
// here we add whiskey
for(let i = 0; i < 10; i++) {
let drop = getWhiskey();
smell(drop);
add(drop, glass);
}
// here we add juice
for(let t = 0; t < 3; t++) {
let tomato = getTomato();
examine(tomato);
let juice = press(tomato);
add(juice, glass);
}
// ...
Then it might be a better variant to refactor it into functions like:
addWhiskey(glass);
addJuice(glass);
function addWhiskey(container) {
for(let i = 0; i < 10; i++) {
let drop = getWhiskey();
//...
}
}
function addJuice(container) {
for(let t = 0; t < 3; t++) {
let tomato = getTomato();
//...
}
}
Once again, functions themselves tell what's going on.
There's nothing to comment.
And also the code structure is better when split.
It's clear what every function does, what it takes and what it returns.
In reality, we can't totally avoid “explanatory” comments.
There are complex algorithms.
And there are smart “tweaks” for purposes of optimization.
But generally we should try to keep the code simple and self-descriptive.
- Good comments
So, explanatory comments are usually bad.
Which comments are good?
Describe the architecture
Provide a high-level overview of components, how they interact, what's the control flow in various situations… In short – the bird's eye view of the code.
There's a special language UML to build high-level architecture diagrams explaining the code.
Definitely worth studying.
Document function parameters and usage
There's a special syntax JSDoc to document a function: usage, parameters, returned value.
For instance:
/**
* Returns x raised to the n-th power.
*
* @param {number} x The number to raise.
* @param {number} n The power, must be a natural number.
* @return {number} x raised to the n-th power.
*/
function pow(x, n) {
...
}
Such comments allow us to understand the purpose of the function and use it the right way without looking in its code.
By the way, many editors like WebStorm can understand them as well and use them to provide autocomplete and some automatic code-checking.
Also, there are tools like JSDoc 3 that can generate HTML-documentation from the comments.
You can read more information about JSDoc at http://usejsdoc.org/.
Why is the task solved this way?
What's written is important.
But what's not written may be even more important to understand what's going on.
Why is the task solved exactly this way? The code gives no answer.
If there are many ways to solve the task, why this one? Especially when it's not the most obvious one.
Without such comments the following situation is possible:
You (or your colleague) open the code written some time ago, and see that it's “suboptimal”.
You think: “How stupid I was then, and how much smarter I'm now”, and rewrite using the “more obvious and correct” variant.
…The urge to rewrite was good.
But in the process you see that the “more obvious” solution is actually lacking.
You even dimly remember why, because you already tried it long ago.
You revert to the correct variant, but the time was wasted.
Comments that explain the solution are very important.
They help to continue development the right way.
Any subtle features of the code? Where they are used?
If the code has anything subtle and counter-intuitive, it's definitely worth commenting.
- Summary
An important sign of a good developer is comments: their presence and even their absence.
Good comments allow us to maintain the code well, come back to it after a delay and use it more effectively.
Comment this:
Overall architecture, high-level view.
Function usage.
Important solutions, especially when not immediately obvious.
Avoid comments:
That tell “how code works” and “what it does”.
Put them in only if it's impossible to make the code so simple and self-descriptive that it doesn't require them.
Comments are also used for auto-documenting tools like JSDoc3: they read them and generate HTML-docs (or docs in another format).
Code quality
Ninja code
Learning without thought is labor lost; thought without learning is perilous.
Programmer ninjas of the past used these tricks to sharpen the mind of code maintainers.
Code review gurus look for them in test tasks.
Novice developers sometimes use them even better than programmer ninjas.
Read them carefully and find out who you are – a ninja, a novice, or maybe a code reviewer?
Irony detected
Many try to follow ninja paths.
Few succeed.
- Brevity is the soul of wit
Make the code as short as possible.
Show how smart you are.
Let subtle language features guide you.
For instance, take a look at this ternary operator '?':
// taken from a well-known javascript library
i = i ? i < 0 ? Math.max(0, len + i) : i : 0;
Cool, right? If you write like that, a developer who comes across this line and tries to understand what is the value of i is going to have a merry time.
Then come to you, seeking for an answer.
Tell them that shorter is always better.
Initiate them into the paths of ninja.
- One-letter variables
The Dao hides in wordlessness.
Only the Dao is well begun and well
completed.
Another way to code shorter is to use single-letter variable names everywhere.
Like a, b or c.
A short variable disappears in the code like a real ninja in the forest.
No one will be able to find it using “search” of the editor.
And even if someone does, they won't be able to “decipher” what the name a or b means.
…But there's an exception.
A real ninja will never use i as the counter in a "for" loop.
Anywhere, but not here.
Look around, there are many more exotic letters.
For instance, x or y.
An exotic variable as a loop counter is especially cool if the loop body takes 1-2 pages (make it longer if you can).
Then if someone looks deep inside the loop, they won't be able to quickly figure out that the variable named x is the loop counter.
- Use abbreviations
If the team rules forbid the use of one-letter and vague names – shorten them, make abbreviations.
Like this:
list → lst.
userAgent → ua.
browser → brsr.
…etc
Only the one with truly good intuition will be able to understand such names.
Try to shorten everything.
Only a worthy person should be able to uphold the development of your code.
- Soigh.
Be abstract.
The great square is cornerless
The great vessel is last complete,
The great note is rarified sound,
The great image has no form.
While choosing a name try to use the most abstract word.
Like obj, data, value, item, elem and so on.
The ideal name for a variable is data. Use it everywhere you can.
Indeed, every variable holds data, right?
…But what to do if data is already taken? Try value, it's also universal.
After all, a variable eventually gets a value.
Name a variable by its type: str, num…
Give them a try.
A young initiate may wonder – are such names really useful for a ninja? Indeed, they are!
Sure, the variable name still means something.
It says what's inside the variable: a string, a number or something else.
But when an outsider tries to understand the code, they'll be surprised to see that there's actually no information at all! And will ultimately fail to alter your well-thought code.
The value type is easy to find out by debugging.
But what's the meaning of the variable? Which string/number does it store?
There's just no way to figure out without a good meditation!
…But what if there are no more such names? Just add a number: data1, item2, elem5…
- Attention test
Only a truly attentive programmer should be able to understand your code.
But how to check that?
One of the ways – use similar variable names, like date and data.
Mix them where you can.
A quick read of such code becomes impossible.
And when there's a typo… Ummm… We're stuck for long, time to drink tea.
- Smart synonyms
The Tao that can be told is not the eternal Tao.
The name that can be named is not the eternal name.
Using similar names for same things makes life more interesting and shows your creativity to the public.
For instance, consider function prefixes.
If a function shows a message on the screen – start it with display…, like displayMessage.
And then if another function shows on the screen something else, like a user name, start it with show… (like showName).
Insinuate that there's a subtle difference between such functions, while there is none.
Make a pact with fellow ninjas of the team: if John starts “showing” functions with display... in his code, then Peter could use render.., and Ann – paint....
Note how much more interesting and diverse the code became.
…And now the hat trick!
For two functions with important differences – use the same prefix!
For instance, the function printPage(page) will use a printer.
And the function printText(text) will put the text on-screen.
Let an unfamiliar reader think well over similarly named function printMessage: “Where does it put the message? To a printer or on the screen?”.
To make it really shine, printMessage(message) should output it in the new window!
- Reuse names
Once the whole is divided, the parts
need names.
There are already enough names.
One must know when to stop.
Add a new variable only when absolutely necessary.
Instead, reuse existing names.
Just write new values into them.
In a function try to use only variables passed as parameters.
That would make it really hard to identify what's exactly in the variable now.
And also where it comes from.
The purpose is to develop the intuition and memory of a person reading the code.
A person with weak intuition would have to analyze the code line-by-line and track the changes through every code branch.
An advanced variant of the approach is to covertly (!) replace the value with something alike in the middle of a loop or a function.
For instance:
function ninjaFunction(elem) {
// 20 lines of code working with elem
elem = clone(elem);
// 20 more lines, now working with the clone of the elem!
}
A fellow programmer who wants to work with elem in the second half of the function will be surprised… Only during the debugging, after examining the code they will find out that they're working with a clone!
Seen in code regularly.
Deadly effective even against an experienced ninja.
- Underscores for fun
Put underscores _ and __ before variable names.
Like _name or __value.
It would be great if only you knew their meaning.
Or, better, add them just for fun, without particular meaning at all.
Or different meanings in different places.
You kill two rabbits with one shot.
First, the code becomes longer and less readable, and the second, a fellow developer may spend a long time trying to figure out what the underscores mean.
A smart ninja puts underscores at one spot of code and evades them at other places.
That makes the code even more fragile and increases the probability of future errors.
- Show your love
Let everyone see how magnificent your entities are! Names like superElement, megaFrame and niceItem will definitely enlighten a reader.
Indeed, from one hand, something is written: super.., mega.., nice.. But from the other hand – that brings no details.
A reader may decide to look for a hidden meaning and meditate for an hour or two of their paid working time.
- Overlap outer variables
When in the light, can't see anything in the darkness.
When in the darkness, can see everything in the light.
Use same names for variables inside and outside a function.
As simple.
No efforts to invent new names.
let user = authenticateUser();
function render() {
let user = anotherValue();
...
...many lines...
...
...
// <-- a programmer wants to work with user here and...
...
}
A programmer who jumps inside the render will probably fail to notice that there's a local user shadowing the outer one.
Then they'll try to work with user assuming that it's the external variable, the result of authenticateUser()… The trap is sprung! Hello, debugger…
- Side-effects everywhere!
There are functions that look like they don't change anything.
Like isReady(), checkPermission(), findTags()… They are assumed to carry out calculations, find and return the data, without changing anything outside of them.
In other words, without “side-effects”.
A really beautiful trick is to add a “useful” action to them, besides the main task.
An expression of dazed surprise on the face of your colleague when they see a function named is.., check.. or find... changing something – will definitely broaden your boundaries of reason.
Another way to surprise is to return a non-standard result.
Show your original thinking! Let the call of checkPermission return not true/false, but a complex object with the results of the check.
Those developers who try to write if (checkPermission(..)), will wonder why it doesn't work.
Tell them: “Read the docs!”.
And give this article.
- Powerful functions!
The great Tao flows everywhere,
both to the left and to the right.
Don't limit the function by what's written in its name.
Be broader.
For instance, a function validateEmail(email) could (besides checking the email for correctness) show an error message and ask to re-enter the email.
Additional actions should not be obvious from the function name.
A true ninja coder will make them not obvious from the code as well.
Joining several actions into one protects your code from reuse.
Imagine, another developer wants only to check the email, and not output any message.
Your function validateEmail(email) that does both will not suit them.
So they won't break your meditation by asking anything about it.
- Summary
All “pieces of advice” above are from the real code… Sometimes, written by experienced developers.
Maybe even more experienced than you are ;)
Follow some of them, and your code will become full of surprises.
Follow many of them, and your code will become truly yours, no one would want to change it.
Follow all, and your code will become a valuable lesson for young developers looking for enlightenment.
Code quality
Automated testing with Mocha
Automated testing will be used in further tasks, and it's also widely used in real projects.
- Why we need tests?
When we write a function, we can usually imagine what it should do: which parameters give which results.
During development, we can check the function by running it and comparing the outcome with the expected one.
For instance, we can do it in the console.
If something is wrong – then we fix the code, run again, check the result – and so on till it works.
But such manual “re-runs” are imperfect.
When testing a code by manual re-runs, it's easy to miss something.
For instance, we're creating a function f.
Wrote some code, testing: f(1) works, but f(2) doesn't work.
We fix the code and now f(2) works.
Looks complete? But we forgot to re-test f(1).
That may lead to an error.
That's very typical.
When we develop something, we keep a lot of possible use cases in mind.
But it's hard to expect a programmer to check all of them manually after every change.
So it becomes easy to fix one thing and break another one.
Automated testing means that tests are written separately, in addition to the code.
They run our functions in various ways and compare results with the expected.
- Behavior Driven Development (BDD)
Let's start with a technique named Behavior Driven Development or, in short, BDD.
BDD is three things in one: tests AND documentation AND examples.
To understand BDD, we'll examine a practical case of development.
- Development of “pow”: the spec
Let's say we want to make a function pow(x, n) that raises x to an integer power n.
We assume that n≥0.
That task is just an example: there's the ** operator in JavaScript that can do that, but here we concentrate on the development flow that can be applied to more complex tasks as well.
Before creating the code of pow, we can imagine what the function should do and describe it.
Such description is called a specification or, in short, a spec, and contains descriptions of use cases together with tests for them, like this:
describe("pow", function() {
it("raises to n-th power", function() {
assert.equal(pow(2, 3), 8);
});
});
A spec has three main building blocks that you can see above:
describe("title", function() { ...
})
What functionality we're describing.
In our case we're describing the function pow.
Used to group “workers” – the it blocks.
it("use case description", function() { ...
})
In the title of it we in a human-readable way describe the particular use case, and the second argument is a function that tests it.
assert.equal(value1, value2)
The code inside it block, if the implementation is correct, should execute without errors.
Functions assert.* are used to check whether pow works as expected.
Right here we're using one of them – assert.equal, it compares arguments and yields an error if they are not equal.
Here it checks that the result of pow(2, 3) equals 8.
There are other types of comparisons and checks, that we'll add later.
The specification can be executed, and it will run the test specified in it block.
We'll see that later.
- The development flow
The flow of development usually looks like this:
An initial spec is written, with tests for the most basic functionality.
An initial implementation is created.
To check whether it works, we run the testing framework Mocha (more details soon) that runs the spec.
While the functionality is not complete, errors are displayed.
We make corrections until everything works.
Now we have a working initial implementation with tests.
We add more use cases to the spec, probably not yet supported by the implementations.
Tests start to fail.
Go to 3, update the implementation till tests give no errors.
Repeat steps 3-6 till the functionality is ready.
So, the development is iterative.
We write the spec, implement it, make sure tests pass, then write more tests, make sure they work etc.
At the end we have both a working implementation and tests for it.
Let's see this development flow in our practical case.
The first step is already complete: we have an initial spec for pow.
Now, before making the implementation, let's use few JavaScript libraries to run the tests, just to see that they are working (they will all fail).
- The spec in action
Here in the tutorial we'll be using the following JavaScript libraries for tests:
Mocha – the core framework: it provides common testing functions including describe and it and the main function that runs tests.
Chai – the library with many assertions.
It allows to use a lot of different assertions, for now we need only assert.equal.
Sinon – a library to spy over functions, emulate built-in functions and more, we'll need it much later.
These libraries are suitable for both in-browser and server-side testing.
Here we'll consider the browser variant.
The full HTML page with these frameworks and pow spec:
<!DOCTYPE html>
<html>
<head>
<!-- add mocha css, to show results -->
<link rel="stylesheet" href="https://cdnjs.cloudflare.com/ajax/libs/mocha/3.2.0/mocha.css">
<!-- add mocha framework code -->
<script src="https://cdnjs.cloudflare.com/ajax/libs/mocha/3.2.0/mocha.js"></script>
<script>
mocha.setup('bdd'); // minimal setup
</script>
<!-- add chai -->
<script src="https://cdnjs.cloudflare.com/ajax/libs/chai/3.5.0/chai.js"></script>
<script>
// chai has a lot of stuff, let's make assert global
let assert = chai.assert;
</script>
</head>
<body>
<script>
function pow(x, n) {
/* function code is to be written, empty now */
}
</script>
<!-- the script with tests (describe, it...) -->
<script src="test.js"></script>
<!-- the element with id="mocha" will contain test results -->
<div id="mocha"></div>
<!-- run tests! -->
<script>
mocha.run();
</script>
</body>
</html>
The page can be divided into five parts:
The <head> – add third-party libraries and styles for tests.
The <script> with the function to test, in our case – with the code for pow.
The tests – in our case an external script test.js that has describe("pow", ...) from above.
The HTML element <div id="mocha"> will be used by Mocha to output results.
The tests are started by the command mocha.run().
The result:
As of now, the test fails, there's an error.
That's logical: we have an empty function code in pow, so pow(2,3) returns undefined instead of 8.
For the future, let's note that there are more high-level test-runners, like karma and others, that make it easy to autorun many different tests.
- Initial implementation
Let's make a simple implementation of pow, for tests to pass:
function pow(x, n) {
return 8; // :) we cheat!
}
Wow, now it works!
- Improving the spec
What we've done is definitely a cheat.
The function does not work: an attempt to calculate pow(3,4) would give an incorrect result, but tests pass.
…But the situation is quite typical, it happens in practice.
Tests pass, but the function works wrong.
Our spec is imperfect.
We need to add more use cases to it.
Let's add one more test to check that pow(3, 4) = 81.
We can select one of two ways to organize the test here:
The first variant – add one more assert into the same it:
describe("pow", function() {
it("raises to n-th power", function() {
assert.equal(pow(2, 3), 8);
assert.equal(pow(3, 4), 81);
});
});
The second – make two tests:
describe("pow", function() {
it("2 raised to power 3 is 8", function() {
assert.equal(pow(2, 3), 8);
});
it("3 raised to power 4 is 81", function() {
assert.equal(pow(3, 4), 81);
});
});
The principal difference is that when assert triggers an error, the it block immediately terminates.
So, in the first variant if the first assert fails, then we'll never see the result of the second assert.
Making tests separate is useful to get more information about what's going on, so the second variant is better.
And besides that, there's one more rule that's good to follow.
One test checks one thing.
If we look at the test and see two independent checks in it, it's better to split it into two simpler ones.
So let's continue with the second variant.
The result:
As we could expect, the second test failed.
Sure, our function always returns 8, while the assert expects 81.
- Improving the implementation
Let's write something more real for tests to pass:
function pow(x, n) {
let result = 1;
for (let i = 0; i < n; i++) {
result *= x;
}
return result;
}
To be sure that the function works well, let's test it for more values.
Instead of writing it blocks manually, we can generate them in for:
describe("pow", function() {
function makeTest(x) {
let expected = x * x * x;
it(`${x} in the power 3 is ${expected}`, function() {
assert.equal(pow(x, 3), expected);
});
}
for (let x = 1; x <= 5; x++) {
makeTest(x);
}
});
The result:
- Nested describe
We're going to add even more tests.
But before that let's note that the helper function makeTest and for should be grouped together.
We won't need makeTest in other tests, it's needed only in for: their common task is to check how pow raises into the given power.
Grouping is done with a nested describe:
describe("pow", function() {
describe("raises x to power 3", function() {
function makeTest(x) {
let expected = x * x * x;
it(`${x} in the power 3 is ${expected}`, function() {
assert.equal(pow(x, 3), expected);
});
}
for (let x = 1; x <= 5; x++) {
makeTest(x);
}
});
// ...
more tests to follow here, both describe and it can be added
});
The nested describe defines a new “subgroup” of tests.
In the output we can see the titled indentation:
In the future we can add more it and describe on the top level with helper functions of their own, they won't see makeTest.
before/after and beforeEach/afterEach
We can setup before/after functions that execute before/after running tests, and also beforeEach/afterEach functions that execute before/after everyit.
For instance:
describe("test", function() {
before(() => alert("Testing started – before all tests"));
after(() => alert("Testing finished – after all tests"));
beforeEach(() => alert("Before a test – enter a test"));
afterEach(() => alert("After a test – exit a test"));
it('test 1', () => alert(1));
it('test 2', () => alert(2));
});
The running sequence will be:
Testing started – before all tests (before)
Before a test – enter a test (beforeEach)
1
After a test – exit a test (afterEach)
Before a test – enter a test (beforeEach)
2
After a test – exit a test (afterEach)
Testing finished – after all tests (after)Open the example in the sandbox.Usually, beforeEach/afterEach and before/after are used to perform initialization, zero out counters or do something else between the tests (or test groups).
- Extending the spec
The basic functionality of pow is complete.
The first iteration of the development is done.
When we're done celebrating and drinking champagne – let's go on and improve it.
As it was said, the function pow(x, n) is meant to work with positive integer values n.
To indicate a mathematical error, JavaScript functions usually return NaN.
Let's do the same for invalid values of n.
Let's first add the behavior to the spec(!):
describe("pow", function() {
// ...
it("for negative n the result is NaN", function() {
assert.isNaN(pow(2, -1));
});
it("for non-integer n the result is NaN", function() {
assert.isNaN(pow(2, 1.5));
});
});
The result with new tests:
The newly added tests fail, because our implementation does not support them.
That's how BDD is done: first we write failing tests, and then make an implementation for them.
Other assertions
Please note the assertion assert.isNaN: it checks for NaN.
There are other assertions in Chai as well, for instance:
assert.equal(value1, value2) – checks the equality value1 == value2.
assert.strictEqual(value1, value2) – checks the strict equality value1 === value2.
assert.notEqual, assert.notStrictEqual – inverse checks to the ones above.
assert.isTrue(value) – checks that value === trueassert.isFalse(value) – checks that value === false
…the full list is in the docs
So we should add a couple of lines to pow:
function pow(x, n) {
if (n < 0) return NaN;
if (Math.round(n) != n) return NaN;
let result = 1;
for (let i = 0; i < n; i++) {
result *= x;
}
return result;
}
Now it works, all tests pass:
Open the full final example in the sandbox.
- Summary
In BDD, the spec goes first, followed by implementation.
At the end we have both the spec and the code.
The spec can be used in three ways:
As Tests – they guarantee that the code works correctly.
As Docs – the titles of describe and it tell what the function does.
As Examples – the tests are actually working examples showing how a function can be used.
With the spec, we can safely improve, change, even rewrite the function from scratch and make sure it still works right.
That's especially important in large projects when a function is used in many places.
When we change such a function, there's just no way to manually check if every place that uses it still works right.
Without tests, people have two ways:
To perform the change, no matter what.
And then our users meet bugs, as we probably fail to check something manually.
Or, if the punishment for errors is harsh, as there are no tests, people become afraid to modify such functions, and then the code becomes outdated, no one wants to get into it.
Not good for development.
Automatic testing helps to avoid these problems!
If the project is covered with tests, there's just no such problem.
After any changes, we can run tests and see a lot of checks made in a matter of seconds.
Besides, a well-tested code has better architecture.
Naturally, that's because auto-tested code is easier to modify and improve.
But there's also another reason.
To write tests, the code should be organized in such a way that every function has a clearly described task, well-defined input and output.
That means a good architecture from the beginning.
In real life that's sometimes not that easy.
Sometimes it's difficult to write a spec before the actual code, because it's not yet clear how it should behave.
But in general writing tests makes development faster and more stable.
Later in the tutorial you will meet many tasks with tests baked-in.
So you'll see more practical examples.
Writing tests requires good JavaScript knowledge.
But we're just starting to learn it.
So, to settle down everything, as of now you're not required to write tests, but you should already be able to read them even if they are a little bit more complex than in this chapter.
importance: 5
What's wrong in the test of pow below?
it("Raises x to the power n", function() {
let x = 5;
let result = x;
assert.equal(pow(x, 1), result);
result *= x;
assert.equal(pow(x, 2), result);
result *= x;
assert.equal(pow(x, 3), result);
});
P.S.
Syntactically the test is correct and passes.
The test demonstrates one of the temptations a developer meets when writing tests.
What we have here is actually 3 tests, but layed out as a single function with 3 asserts.
Sometimes it's easier to write this way, but if an error occurs, it's much less obvious what went wrong.
If an error happens in the middle of a complex execution flow, then we'll have to figure out the data at that point.
We'll actually have to debug the test.
It would be much better to break the test into multiple it blocks with clearly written inputs and outputs.
Like this:
describe("Raises x to power n", function() {
it("5 in the power of 1 equals 5", function() {
assert.equal(pow(5, 1), 5);
});
it("5 in the power of 2 equals 25", function() {
assert.equal(pow(5, 2), 25);
});
it("5 in the power of 3 equals 125", function() {
assert.equal(pow(5, 3), 125);
});
});
We replaced the single it with describe and a group of it blocks.
Now if something fails we would see clearly what the data was.
Also we can isolate a single test and run it in standalone mode by writing it.only instead of it:
describe("Raises x to power n", function() {
it("5 in the power of 1 equals 5", function() {
assert.equal(pow(5, 1), 5);
});
// Mocha will run only this block
it.only("5 in the power of 2 equals 25", function() {
assert.equal(pow(5, 2), 25);
});
it("5 in the power of 3 equals 125", function() {
assert.equal(pow(5, 3), 125);
});
});Code quality
Polyfills and transpilers
The JavaScript language steadily evolves.
New proposals to the language appear regularly, they are analyzed and, if considered worthy, are appended to the list at https://tc39.github.io/ecma262/ and then progress to the specification.
Teams behind JavaScript engines have their own ideas about what to implement first.
They may decide to implement proposals that are in draft and postpone things that are already in the spec, because they are less interesting or just harder to do.
So it's quite common for an engine to implement only the part of the standard.
A good page to see the current state of support for language features is https://kangax.github.io/compat-table/es6/ (it's big, we have a lot to study yet).
As programmers, we'd like to use most recent features.
The more good stuff – the better!
From the other hand, how to make out modern code work on older engines that don't understand recent features yet?
There are two tools for that:
Transpilers.
Polyfills.
Here, in this chapter, our purpose is to get the gist of how they work, and their place in web development.
- Transpilers
A transpiler is a special piece of software that can parse (“read and understand”) modern code, and rewrite it using older syntax constructs, so that the result would be the same.
E.g.
JavaScript before year 2020 didn't have the “nullish coalescing operator” ??.
So, if a visitor uses an outdated browser, it may fail to understand the code like height = height ?? 100.
A transpiler would analyze our code and rewrite height ?? 100 into (height !== undefined && height !== null) ? height : 100.
// before running the transpiler
height = height ?? 100;
// after running the transpiler
height = (height !== undefined && height !== null) ? height : 100;
Now the rewritten code is suitable for older JavaScript engines.
Usually, a developer runs the transpiler on their own computer, and then deploys the transpiled code to the server.
Speaking of names, Babel is one of the most prominent transpilers out there.
Modern project build systems, such as webpack, provide means to run transpiler automatically on every code change, so it's very easy to integrate into development process.
- Polyfills
New language features may include not only syntax constructs and operators, but also built-in functions.
For example, Math.trunc(n) is a function that “cuts off” the decimal part of a number, e.g Math.trunc(1.23) = 1.
In some (very outdated) JavaScript engines, there's no Math.trunc, so such code will fail.
As we're talking about new functions, not syntax changes, there's no need to transpile anything here.
We just need to declare the missing function.
A script that updates/adds new functions is called “polyfill”.
It “fills in” the gap and adds missing implementations.
For this particular case, the polyfill for Math.trunc is a script that implements it, like this:
if (!Math.trunc) { // if no such function
// implement it
Math.trunc = function(number) {
// Math.ceil and Math.floor exist even in ancient JavaScript engines
// they are covered later in the tutorial
return number < 0 ? Math.ceil(number) : Math.floor(number);
};
}
JavaScript is a highly dynamic language, scripts may add/modify any functions, even including built-in ones.
Two interesting libraries of polyfills are:
core js that supports a lot, allows to include only needed features.
polyfill.io service that provides a script with polyfills, depending on the features and user's browser.
- Summary
In this chapter we'd like to motivate you to study modern and even “bleeding-edge” language features, even if they aren't yet well-supported by JavaScript engines.
Just don't forget to use transpiler (if using modern syntax or operators) and polyfills (to add functions that may be missing).
And they'll ensure that the code works.
For example, later when you're familiar with JavaScript, you can setup a code build system based on webpack with babel-loader plugin.
Good resources that show the current state of support for various features:
https://kangax.github.io/compat-table/es6/ – for pure JavaScript.
https://caniuse.com/ – for browser-related functions.
P.S.
Google Chrome is usually the most up-to-date with language features, try it if a tutorial demo fails.
Most tutorial demos work with any modern browser though.
As we know from the chapter Data types, there are eight data types in JavaScript.
Seven of them are called “primitive”, because their values contain only a single thing (be it a string or a number or whatever).
In contrast, objects are used to store keyed collections of various data and more complex entities.
In JavaScript, objects penetrate almost every aspect of the language.
So we must understand them first before going in-depth anywhere else.
An object can be created with figure brackets {…} with an optional list of properties.
A property is a “key: value” pair, where key is a string (also called a “property name”), and value can be anything.
We can imagine an object as a cabinet with signed files.
Every piece of data is stored in its file by the key.
It's easy to find a file by its name or add/remove a file.
An empty object (“empty cabinet”) can be created using one of two syntaxes:
let user = new Object(); // "object constructor" syntax
let user = {}; // "object literal" syntaxUsually, the figure brackets {...} are used.
That declaration is called an object literal.
- Literals and properties
We can immediately put some properties into {...} as “key: value” pairs:
let user = { // an object
name: "John", // by key "name" store value "John"
age: 30 // by key "age" store value 30
};
A property has a key (also known as “name” or “identifier”) before the colon ":" and a value to the right of it.
In the user object, there are two properties:
The first property has the name "name" and the value "John".
The second one has the name "age" and the value 30.
The resulting user object can be imagined as a cabinet with two signed files labeled “name” and “age”.
We can add, remove and read files from it any time.
Property values are accessible using the dot notation:
// get property values of the object:
alert( user.name ); // John
alert( user.age ); // 30
The value can be of any type.
Let's add a boolean one:
user.isAdmin = true;To remove a property, we can use delete operator:
delete user.age;We can also use multiword property names, but then they must be quoted:
let user = {
name: "John",
age: 30,
"likes birds": true // multiword property name must be quoted
};The last property in the list may end with a comma:
let user = {
name: "John",
age: 30,
}
That is called a “trailing” or “hanging” comma.
Makes it easier to add/remove/move around properties, because all lines become alike.
- Square brackets
For multiword properties, the dot access doesn't work:
// this would give a syntax error
user.likes birds = true
JavaScript doesn't understand that.
It thinks that we address user.likes, and then gives a syntax error when comes across unexpected birds.
The dot requires the key to be a valid variable identifier.
That implies: contains no spaces, doesn't start with a digit and doesn't include special characters ($ and _ are allowed).
There's an alternative “square bracket notation” that works with any string:
let user = {};
// set
user["likes birds"] = true;
// get
alert(user["likes birds"]); // true
// delete
delete user["likes birds"];
Now everything is fine.
Please note that the string inside the brackets is properly quoted (any type of quotes will do).
Square brackets also provide a way to obtain the property name as the result of any expression – as opposed to a literal string – like from a variable as follows:
let key = "likes birds";
// same as user["likes birds"] = true;
user[key] = true;
Here, the variable key may be calculated at run-time or depend on the user input.
And then we use it to access the property.
That gives us a great deal of flexibility.
For instance:
let user = {
name: "John",
age: 30
};
let key = prompt("What do you want to know about the user?", "name");
// access by variable
alert( user[key] ); // John (if enter "name")
The dot notation cannot be used in a similar way:
let user = {
name: "John",
age: 30
};
let key = "name";
alert( user.key ) // undefined
Computed properties
We can use square brackets in an object literal, when creating an object.
That's called computed properties.
For instance:
let fruit = prompt("Which fruit to buy?", "apple");
let bag = {
[fruit]: 5, // the name of the property is taken from the variable fruit
};
alert( bag.apple ); // 5 if fruit="apple"
The meaning of a computed property is simple: [fruit] means that the property name should be taken from fruit.
So, if a visitor enters "apple", bag will become {apple: 5}.
Essentially, that works the same as:
let fruit = prompt("Which fruit to buy?", "apple");
let bag = {};
// take property name from the fruit variable
bag[fruit] = 5;
…But looks nicer.
We can use more complex expressions inside square brackets:
let fruit = 'apple';
let bag = {
[fruit + 'Computers']: 5 // bag.appleComputers = 5
};
Square brackets are much more powerful than the dot notation.
They allow any property names and variables.
But they are also more cumbersome to write.
So most of the time, when property names are known and simple, the dot is used.
And if we need something more complex, then we switch to square brackets.
- Property value shorthand
In real code we often use existing variables as values for property names.
For instance:
function makeUser(name, age) {
return {
name: name,
age: age,
// ...other properties
};
}
let user = makeUser("John", 30);
alert(user.name); // John
In the example above, properties have the same names as variables.
The use-case of making a property from a variable is so common, that there's a special property value shorthand to make it shorter.
Instead of name:name we can just write name, like this:
function makeUser(name, age) {
return {
name, // same as name: name
age, // same as age: age
// ...
};
}
We can use both normal properties and shorthands in the same object:
let user = {
name, // same as name:name
age: 30
};
- Property names limitations
As we already know, a variable cannot have a name equal to one of language-reserved words like “for”, “let”, “return” etc.
But for an object property, there's no such restriction:
// these properties are all right
let obj = {
for: 1,
let: 2,
return: 3
};
alert( obj.for + obj.let + obj.return ); // 6
In short, there are no limitations on property names.
They can be any strings or symbols (a special type for identifiers, to be covered later).
Other types are automatically converted to strings.
For instance, a number 0 becomes a string "0" when used as a property key:
let obj = {
0: "test" // same as "0": "test"
};
// both alerts access the same property (the number 0 is converted to string "0")
alert( obj["0"] ); // test
alert( obj[0] ); // test (same property)
There's a minor gotcha with a special property named __proto__.
We can't set it to a non-object value:
let obj = {};
obj.__proto__ = 5; // assign a number
alert(obj.__proto__); // [object Object] - the value is an object, didn't work as intended
As we see from the code, the assignment to a primitive 5 is ignored.
We'll cover the special nature of __proto__ in subsequent chapters, and suggest the ways to fix such behavior.
- Property existence test, “in” operator
A notable feature of objects in JavaScript, compared to many other languages, is that it's possible to access any property.
There will be no error if the property doesn't exist!
Reading a non-existing property just returns undefined.
So we can easily test whether the property exists:
let user = {};
alert( user.noSuchProperty === undefined ); // true means "no such property"
There's also a special operator "in" for that.
The syntax is:
"key" in object
For instance:
let user = { name: "John", age: 30 };
alert( "age" in user ); // true, user.age exists
alert( "blabla" in user ); // false, user.blabla doesn't exist
Please note that on the left side of in there must be a property name.
That's usually a quoted string.
If we omit quotes, that means a variable, it should contain the actual name to be tested.
For instance:
let user = { age: 30 };
let key = "age";
alert( key in user ); // true, property "age" exists
Why does the in operator exist? Isn't it enough to compare against undefined?
Well, most of the time the comparison with undefined works fine.
But there's a special case when it fails, but "in" works correctly.
It's when an object property exists, but stores undefined:
let obj = {
test: undefined
};
alert( obj.test ); // it's undefined, so - no such property?
alert( "test" in obj ); // true, the property does exist!
In the code above, the property obj.test technically exists.
So the in operator works right.
Situations like this happen very rarely, because undefined should not be explicitly assigned.
We mostly use null for “unknown” or “empty” values.
So the in operator is an exotic guest in the code.
- The “for…in” loop
To walk over all keys of an object, there exists a special form of the loop: for..in.
This is a completely different thing from the for(;;) construct that we studied before.
The syntax:
for (key in object) {
// executes the body for each key among object properties
}
For instance, let's output all properties of user:
let user = {
name: "John",
age: 30,
isAdmin: true
};
for (let key in user) {
// keys
alert( key ); // name, age, isAdmin
// values for the keys
alert( user[key] ); // John, 30, true
}
Note that all “for” constructs allow us to declare the looping variable inside the loop, like let key here.
Also, we could use another variable name here instead of key.
For instance, "for (let prop in obj)" is also widely used.
Ordered like an object
Are objects ordered? In other words, if we loop over an object, do we get all properties in the same order they were added? Can we rely on this?
The short answer is: “ordered in a special fashion”: integer properties are sorted, others appear in creation order.
The details follow.
As an example, let's consider an object with the phone codes:
let codes = {
"49": "Germany",
"41": "Switzerland",
"44": "Great Britain",
// ..,
"1": "USA"
};
for (let code in codes) {
alert(code); // 1, 41, 44, 49
}
The object may be used to suggest a list of options to the user.
If we're making a site mainly for German audience then we probably want 49 to be the first.
But if we run the code, we see a totally different picture:
USA (1) goes first
then Switzerland (41) and so on.
The phone codes go in the ascending sorted order, because they are integers.
So we see 1, 41, 44, 49.
Integer properties? What's that?
The “integer property” term here means a string that can be converted to-and-from an integer without a change.
So, “49” is an integer property name, because when it's transformed to an integer number and back, it's still the same.
But “+49” and “1.2” are not:
// Math.trunc is a built-in function that removes the decimal part
alert( String(Math.trunc(Number("49"))) ); // "49", same, integer property
alert( String(Math.trunc(Number("+49"))) ); // "49", not same "+49" not integer property
alert( String(Math.trunc(Number("1.2"))) ); // "1", not same "1.2" not integer property
…On the other hand, if the keys are non-integer, then they are listed in the creation order, for instance:
let user = {
name: "John",
surname: "Smith"
};
user.age = 25; // add one more
// non-integer properties are listed in the creation order
for (let prop in user) {
alert( prop ); // name, surname, age
}
So, to fix the issue with the phone codes, we can “cheat” by making the codes non-integer.
Adding a plus "+" sign before each code is enough.
Like this:
let codes = {
"+49": "Germany",
"+41": "Switzerland",
"+44": "Great Britain",
// ..,
"+1": "USA"
};
for (let code in codes) {
alert( +code ); // 49, 41, 44, 1
}
Now it works as intended.
- Summary
Objects are associative arrays with several special features.
They store properties (key-value pairs), where:
Property keys must be strings or symbols (usually strings).
Values can be of any type.
To access a property, we can use:
The dot notation: obj.property.
Square brackets notation obj["property"].
Square brackets allow to take the key from a variable, like obj[varWithKey].
Additional operators:
To delete a property: delete obj.prop.
To check if a property with the given key exists: "key" in obj.
To iterate over an object: for (let key in obj) loop.
What we've studied in this chapter is called a “plain object”, or just Object.
There are many other kinds of objects in JavaScript:
Array to store ordered data collections,
Date to store the information about the date and time,
Error to store the information about an error.
…And so on.
They have their special features that we'll study later.
Sometimes people say something like “Array type” or “Date type”, but formally they are not types of their own, but belong to a single “object” data type.
And they extend it in various ways.
Objects in JavaScript are very powerful.
Here we've just scratched the surface of a topic that is really huge.
We'll be closely working with objects and learning more about them in further parts of the tutorial.
importance: 5
Write the code, one line for each action:
Create an empty object user.
Add the property name with the value John.
Add the property surname with the value Smith.
Change the value of the name to Pete.
Remove the property name from the object.
let user = {};
user.name = "John";
user.surname = "Smith";
user.name = "Pete";
delete user.name;
Check for emptiness
importance: 5
Write the function isEmpty(obj) which returns true if the object has no properties, false otherwise.
Should work like that:
let schedule = {};
alert( isEmpty(schedule) ); // true
schedule["8:30"] = "get up";
alert( isEmpty(schedule) ); // falseOpen a sandbox with tests.
Just loop over the object and return false immediately if there's at least one property.
function isEmpty(obj) {
for (let key in obj) {
// if the loop has started, there is a property
return false;
}
return true;
}Open the solution with tests in a sandbox.
Sum object properties
importance: 5
We have an object storing salaries of our team:
let salaries = {
John: 100,
Ann: 160,
Pete: 130
}
Write the code to sum all salaries and store in the variable sum.
Should be 390 in the example above.
If salaries is empty, then the result must be 0.
let salaries = {
John: 100,
Ann: 160,
Pete: 130
};
let sum = 0;
for (let key in salaries) {
sum += salaries[key];
}
alert(sum); // 390
Multiply numeric property values by 2
importance: 3
Create a function multiplyNumeric(obj) that multiplies all numeric property values of obj by 2.
For instance:
// before the call
let menu = {
width: 200,
height: 300,
title: "My menu"
};
multiplyNumeric(menu);
// after the call
menu = {
width: 400,
height: 600,
title: "My menu"
};
Please note that multiplyNumeric does not need to return anything.
It should modify the object in-place.
P.S.
Use typeof to check for a number here.
Open a sandbox with tests.function multiplyNumeric(obj) {
for (let key in obj) {
if (typeof obj[key] == 'number') {
obj[key] *= 2;
}
}
}Open the solution with tests in a sandbox.Objects: the basics
Object references and copying
One of the fundamental differences of objects versus primitives is that objects are stored and copied “by reference”, whereas primitive values: strings, numbers, booleans, etc – are always copied “as a whole value”.
That's easy to understand if we look a bit under the hood of what happens when we copy a value.
Let's start with a primitive, such as a string.
Here we put a copy of message into phrase:
let message = "Hello!";
let phrase = message;
As a result we have two independent variables, each one storing the string "Hello!".
Quite an obvious result, right?
Objects are not like that.
A variable assigned to an object stores not the object itself, but its “address in memory” – in other words “a reference” to it.
Let's look at an example of such a variable:
let user = {
name: "John"
};
And here's how it's actually stored in memory:
The object is stored somewhere in memory (at the right of the picture), while the user variable (at the left) has a “reference” to it.
We may think of an object variable, such as user, as like a sheet of paper with the address of the object on it.
When we perform actions with the object, e.g.
take a property user.name, the JavaScript engine looks at what's at that address and performs the operation on the actual object.
Now here's why it's important.
When an object variable is copied, the reference is copied, but the object itself is not duplicated.
For instance:
let user = { name: "John" };
let admin = user; // copy the reference
Now we have two variables, each storing a reference to the same object:
As you can see, there's still one object, but now with two variables that reference it.
We can use either variable to access the object and modify its contents:
let user = { name: 'John' };
let admin = user;
admin.name = 'Pete'; // changed by the "admin" reference
alert(user.name); // 'Pete', changes are seen from the "user" reference
It's as if we had a cabinet with two keys and used one of them (admin) to get into it and make changes.
Then, if we later use another key (user), we are still opening the same cabinet and can access the changed contents.
- Comparison by reference
Two objects are equal only if they are the same object.
For instance, here a and b reference the same object, thus they are equal:
let a = {};
let b = a; // copy the reference
alert( a == b ); // true, both variables reference the same object
alert( a === b ); // true
And here two independent objects are not equal, even though they look alike (both are empty):
let a = {};
let b = {}; // two independent objects
alert( a == b ); // false
For comparisons like obj1 > obj2 or for a comparison against a primitive obj == 5, objects are converted to primitives.
We'll study how object conversions work very soon, but to tell the truth, such comparisons are needed very rarely – usually they appear as a result of a programming mistake.
- Cloning and merging, Object.assign
So, copying an object variable creates one more reference to the same object.
But what if we need to duplicate an object? Create an independent copy, a clone?
That's also doable, but a little bit more difficult, because there's no built-in method for that in JavaScript.
But there is rarely a need – copying by reference is good most of the time.
But if we really want that, then we need to create a new object and replicate the structure of the existing one by iterating over its properties and copying them on the primitive level.
Like this:
let user = {
name: "John",
age: 30
};
let clone = {}; // the new empty object
// let's copy all user properties into it
for (let key in user) {
clone[key] = user[key];
}
// now clone is a fully independent object with the same content
clone.name = "Pete"; // changed the data in it
alert( user.name ); // still John in the original object
Also we can use the method Object.assign for that.
The syntax is:
Object.assign(dest, [src1, src2, src3...])
The first argument dest is a target object.
Further arguments src1, ..., srcN (can be as many as needed) are source objects.
It copies the properties of all source objects src1, ..., srcN into the target dest.
In other words, properties of all arguments starting from the second are copied into the first object.
The call returns dest.
For instance, we can use it to merge several objects into one:
let user = { name: "John" };
let permissions1 = { canView: true };
let permissions2 = { canEdit: true };
// copies all properties from permissions1 and permissions2 into user
Object.assign(user, permissions1, permissions2);
// now user = { name: "John", canView: true, canEdit: true }
If the copied property name already exists, it gets overwritten:
let user = { name: "John" };
Object.assign(user, { name: "Pete" });
alert(user.name); // now user = { name: "Pete" }
We also can use Object.assign to replace for..in loop for simple cloning:
let user = {
name: "John",
age: 30
};
let clone = Object.assign({}, user);
It copies all properties of user into the empty object and returns it.
- Nested cloning
Until now we assumed that all properties of user are primitive.
But properties can be references to other objects.
What to do with them?
Like this:
let user = {
name: "John",
sizes: {
height: 182,
width: 50
}
};
alert( user.sizes.height ); // 182
Now it's not enough to copy clone.sizes = user.sizes, because the user.sizes is an object, it will be copied by reference.
So clone and user will share the same sizes:
Like this:
let user = {
name: "John",
sizes: {
height: 182,
width: 50
}
};
let clone = Object.assign({}, user);
alert( user.sizes === clone.sizes ); // true, same object
// user and clone share sizes
user.sizes.width++; // change a property from one place
alert(clone.sizes.width); // 51, see the result from the other one
To fix that, we should use a cloning loop that examines each value of user[key] and, if it's an object, then replicate its structure as well.
That is called a “deep cloning”.
We can use recursion to implement it.
Or, to not reinvent the wheel, take an existing implementation, for instance _.cloneDeep(obj) from the JavaScript library lodash.
Const objects can be modified
An important side effect of storing objects as references is that an object declared as constcan be modified.
For instance:
const user = {
name: "John"
};
user.name = "Pete"; // (*)
alert(user.name); // Pete
It might seem that the line (*) would cause an error, but it does not.
The value of user is constant, it must always reference the same object, but properties of that object are free to change.
In other words, the const user gives an error only if we try to set user=... as a whole.
That said, if we really need to make constant object properties, it's also possible, but using totally different methods.
We'll mention that in the chapter Property flags and descriptors.
- Summary
Objects are assigned and copied by reference.
In other words, a variable stores not the “object value”, but a “reference” (address in memory) for the value.
So copying such a variable or passing it as a function argument copies that reference, not the object itself.
All operations via copied references (like adding/removing properties) are performed on the same single object.
To make a “real copy” (a clone) we can use Object.assign for the so-called “shallow copy” (nested objects are copied by reference) or a “deep cloning” function, such as _.cloneDeep(obj).
Objects: the basics
Garbage collection
Memory management in JavaScript is performed automatically and invisibly to us.
We create primitives, objects, functions… All that takes memory.
What happens when something is not needed any more? How does the JavaScript engine discover it and clean it up?
- Reachability
The main concept of memory management in JavaScript is reachability.
Simply put, “reachable” values are those that are accessible or usable somehow.
They are guaranteed to be stored in memory.
There's a base set of inherently reachable values, that cannot be deleted for obvious reasons.
For instance:
The currently executing function, its local variables and parameters.
Other functions on the current chain of nested calls, their local variables and parameters.
Global variables.
(there are some other, internal ones as well)
These values are called roots.
Any other value is considered reachable if it's reachable from a root by a reference or by a chain of references.
For instance, if there's an object in a global variable, and that object has a property referencing another object, that object is considered reachable.
And those that it references are also reachable.
Detailed examples to follow.
There's a background process in the JavaScript engine that is called garbage collector.
It monitors all objects and removes those that have become unreachable.
- A simple example
Here's the simplest example:
// user has a reference to the object
let user = {
name: "John"
};Here the arrow depicts an object reference.
The global variable "user" references the object {name: "John"} (we'll call it John for brevity).
The "name" property of John stores a primitive, so it's painted inside the object.
If the value of user is overwritten, the reference is lost:
user = null;Now John becomes unreachable.
There's no way to access it, no references to it.
Garbage collector will junk the data and free the memory.
- Two references
Now let's imagine we copied the reference from user to admin:
// user has a reference to the object
let user = {
name: "John"
};
let admin = user;Now if we do the same:
user = null;
…Then the object is still reachable via admin global variable, so it's in memory.
If we overwrite admin too, then it can be removed.
- Interlinked objects
Now a more complex example.
The family:
function marry(man, woman) {
woman.husband = man;
man.wife = woman;
return {
father: man,
mother: woman
}
}
let family = marry({
name: "John"
}, {
name: "Ann"
});
Function marry “marries” two objects by giving them references to each other and returns a new object that contains them both.
The resulting memory structure:
As of now, all objects are reachable.
Now let's remove two references:
delete family.father;
delete family.mother.husband;It's not enough to delete only one of these two references, because all objects would still be reachable.
But if we delete both, then we can see that John has no incoming reference any more:
Outgoing references do not matter.
Only incoming ones can make an object reachable.
So, John is now unreachable and will be removed from the memory with all its data that also became unaccessible.
After garbage collection:
- Unreachable island
It is possible that the whole island of interlinked objects becomes unreachable and is removed from the memory.
The source object is the same as above.
Then:
family = null;
The in-memory picture becomes:
This example demonstrates how important the concept of reachability is.
It's obvious that John and Ann are still linked, both have incoming references.
But that's not enough.
The former "family" object has been unlinked from the root, there's no reference to it any more, so the whole island becomes unreachable and will be removed.
- Internal algorithms
The basic garbage collection algorithm is called “mark-and-sweep”.
The following “garbage collection” steps are regularly performed:
The garbage collector takes roots and “marks” (remembers) them.
Then it visits and “marks” all references from them.
Then it visits marked objects and marks their references.
All visited objects are remembered, so as not to visit the same object twice in the future.
…And so on until every reachable (from the roots) references are visited.
All objects except marked ones are removed.
For instance, let our object structure look like this:
We can clearly see an “unreachable island” to the right side.
Now let's see how “mark-and-sweep” garbage collector deals with it.
The first step marks the roots:
Then their references are marked:
…And their references, while possible:
Now the objects that could not be visited in the process are considered unreachable and will be removed:
We can also imagine the process as spilling a huge bucket of paint from the roots, that flows through all references and marks all reachable objects.
The unmarked ones are then removed.
That's the concept of how garbage collection works.
JavaScript engines apply many optimizations to make it run faster and not affect the execution.
Some of the optimizations:
Generational collection – objects are split into two sets: “new ones” and “old ones”.
Many objects appear, do their job and die fast, they can be cleaned up aggressively.
Those that survive for long enough, become “old” and are examined less often.
Incremental collection – if there are many objects, and we try to walk and mark the whole object set at once, it may take some time and introduce visible delays in the execution.
So the engine tries to split the garbage collection into pieces.
Then the pieces are executed one by one, separately.
That requires some extra bookkeeping between them to track changes, but we have many tiny delays instead of a big one.
Idle-time collection – the garbage collector tries to run only while the CPU is idle, to reduce the possible effect on the execution.
There exist other optimizations and flavours of garbage collection algorithms.
As much as I'd like to describe them here, I have to hold off, because different engines implement different tweaks and techniques.
And, what's even more important, things change as engines develop, so studying deeper “in advance”, without a real need is probably not worth that.
Unless, of course, it is a matter of pure interest, then there will be some links for you below.
- Summary
The main things to know:
Garbage collection is performed automatically.
We cannot force or prevent it.
Objects are retained in memory while they are reachable.
Being referenced is not the same as being reachable (from a root): a pack of interlinked objects can become unreachable as a whole.
Modern engines implement advanced algorithms of garbage collection.
A general book “The Garbage Collection Handbook: The Art of Automatic Memory Management” (R.
Jones et al) covers some of them.
If you are familiar with low-level programming, the more detailed information about V8 garbage collector is in the article A tour of V8: Garbage Collection.
V8 blog also publishes articles about changes in memory management from time to time.
Naturally, to learn the garbage collection, you'd better prepare by learning about V8 internals in general and read the blog of Vyacheslav Egorov who worked as one of V8 engineers.
I'm saying: “V8”, because it is best covered with articles in the internet.
For other engines, many approaches are similar, but garbage collection differs in many aspects.
In-depth knowledge of engines is good when you need low-level optimizations.
It would be wise to plan that as the next step after you're familiar with the language.
Objects: the basics
Object methods, "this"
Objects are usually created to represent entities of the real world, like users, orders and so on:
let user = {
name: "John",
age: 30
};
And, in the real world, a user can act: select something from the shopping cart, login, logout etc.
Actions are represented in JavaScript by functions in properties.
- Method examples
For a start, let's teach the user to say hello:
let user = {
name: "John",
age: 30
};
user.sayHi = function() {
alert("Hello!");
};
user.sayHi(); // Hello!
Here we've just used a Function Expression to create a function and assign it to the property user.sayHi of the object.
Then we can call it as user.sayHi().
The user can now speak!
A function that is a property of an object is called its method.
So, here we've got a method sayHi of the object user.
Of course, we could use a pre-declared function as a method, like this:
let user = {
// ...
};
// first, declare
function sayHi() {
alert("Hello!");
};
// then add as a method
user.sayHi = sayHi;
user.sayHi(); // Hello!
Object-oriented programming
When we write our code using objects to represent entities, that's called object-oriented programming, in short: “OOP”.
OOP is a big thing, an interesting science of its own.
How to choose the right entities? How to organize the interaction between them? That's architecture, and there are great books on that topic, like “Design Patterns: Elements of Reusable Object-Oriented Software” by E.
Gamma, R.
Helm, R.
Johnson, J.
Vissides or “Object-Oriented Analysis and Design with Applications” by G.
Booch, and more.
Method shorthand
There exists a shorter syntax for methods in an object literal:
// these objects do the same
user = {
sayHi: function() {
alert("Hello");
}
};
// method shorthand looks better, right?
user = {
sayHi() { // same as "sayHi: function()"
alert("Hello");
}
};
As demonstrated, we can omit "function" and just write sayHi().
To tell the truth, the notations are not fully identical.
There are subtle differences related to object inheritance (to be covered later), but for now they do not matter.
In almost all cases the shorter syntax is preferred.
- “this” in methods
It's common that an object method needs to access the information stored in the object to do its job.
For instance, the code inside user.sayHi() may need the name of the user.
To access the object, a method can use the this keyword.
The value of this is the object “before dot”, the one used to call the method.
For instance:
let user = {
name: "John",
age: 30,
sayHi() {
// "this" is the "current object"
alert(this.name);
}
};
user.sayHi(); // John
Here during the execution of user.sayHi(), the value of this will be user.
Technically, it's also possible to access the object without this, by referencing it via the outer variable:
let user = {
name: "John",
age: 30,
sayHi() {
alert(user.name); // "user" instead of "this"
}
};
…But such code is unreliable.
If we decide to copy user to another variable, e.g.
admin = user and overwrite user with something else, then it will access the wrong object.
That's demonstrated below:
let user = {
name: "John",
age: 30,
sayHi() {
alert( user.name ); // leads to an error
}
};
let admin = user;
user = null; // overwrite to make things obvious
admin.sayHi(); // TypeError: Cannot read property 'name' of null
If we used this.name instead of user.name inside the alert, then the code would work.
- “this” is not bound
In JavaScript, keyword this behaves unlike most other programming languages.
It can be used in any function, even if it's not a method of an object.
There's no syntax error in the following example:
function sayHi() {
alert( this.name );
}
The value of this is evaluated during the run-time, depending on the context.
For instance, here the same function is assigned to two different objects and has different “this” in the calls:
let user = { name: "John" };
let admin = { name: "Admin" };
function sayHi() {
alert( this.name );
}
// use the same function in two objects
user.f = sayHi;
admin.f = sayHi;
// these calls have different this
// "this" inside the function is the object "before the dot"
user.f(); // John (this == user)
admin.f(); // Admin (this == admin)
admin['f'](); // Admin (dot or square brackets access the method – doesn't matter)
The rule is simple: if obj.f() is called, then this is obj during the call of f.
So it's either user or admin in the example above.
Calling without an object: this == undefined
We can even call the function without an object at all:
function sayHi() {
alert(this);
}
sayHi(); // undefined
In this case this is undefined in strict mode.
If we try to access this.name, there will be an error.
In non-strict mode the value of this in such case will be the global object (window in a browser, we'll get to it later in the chapter Global object).
This is a historical behavior that "use strict" fixes.
Usually such call is a programming error.
If there's this inside a function, it expects to be called in an object context.
The consequences of unbound this
If you come from another programming language, then you are probably used to the idea of a "bound this", where methods defined in an object always have this referencing that object.
In JavaScript this is “free”, its value is evaluated at call-time and does not depend on where the method was declared, but rather on what object is “before the dot”.
The concept of run-time evaluated this has both pluses and minuses.
On the one hand, a function can be reused for different objects.
On the other hand, the greater flexibility creates more possibilities for mistakes.
Here our position is not to judge whether this language design decision is good or bad.
We'll understand how to work with it, how to get benefits and avoid problems.
- Arrow functions have no “this”
Arrow functions are special: they don't have their “own” this.
If we reference this from such a function, it's taken from the outer “normal” function.
For instance, here arrow() uses this from the outer user.sayHi() method:
let user = {
firstName: "Ilya",
sayHi() {
let arrow = () => alert(this.firstName);
arrow();
}
};
user.sayHi(); // Ilya
That's a special feature of arrow functions, it's useful when we actually do not want to have a separate this, but rather to take it from the outer context.
Later in the chapter Arrow functions revisited we'll go more deeply into arrow functions.
- Summary
Functions that are stored in object properties are called “methods”.
Methods allow objects to “act” like object.doSomething().
Methods can reference the object as this.
The value of this is defined at run-time.
When a function is declared, it may use this, but that this has no value until the function is called.
A function can be copied between objects.
When a function is called in the “method” syntax: object.method(), the value of this during the call is object.
Please note that arrow functions are special: they have no this.
When this is accessed inside an arrow function, it is taken from outside.
importance: 5
Here the function makeUser returns an object.
What is the result of accessing its ref? Why?
function makeUser() {
return {
name: "John",
ref: this
};
}
let user = makeUser();
alert( user.ref.name ); // What's the result?Answer: an error.
Try it:
function makeUser() {
return {
name: "John",
ref: this
};
}
let user = makeUser();
alert( user.ref.name ); // Error: Cannot read property 'name' of undefined
That's because rules that set this do not look at object definition.
Only the moment of call matters.
Here the value of this inside makeUser() is undefined, because it is called as a function, not as a method with “dot” syntax.
The value of this is one for the whole function, code blocks and object literals do not affect it.
So ref: this actually takes current this of the function.
We can rewrite the function and return the same this with undefined value:
function makeUser(){
return this; // this time there's no object literal
}
alert( makeUser().name ); // Error: Cannot read property 'name' of undefined
As you can see the result of alert( makeUser().name ) is the same as the result of alert( user.ref.name ) from the previous example.
Here's the opposite case:
function makeUser() {
return {
name: "John",
ref() {
return this;
}
};
}
let user = makeUser();
alert( user.ref().name ); // John
Now it works, because user.ref() is a method.
And the value of this is set to the object before dot ..
Create a calculator
importance: 5
Create an object calculator with three methods:
read() prompts for two values and saves them as object properties.
sum() returns the sum of saved values.
mul() multiplies saved values and returns the result.
let calculator = {
// ...
your code ...
};
calculator.read();
alert( calculator.sum() );
alert( calculator.mul() );Run the demoOpen a sandbox with tests.let calculator = {
sum() {
return this.a + this.b;
},
mul() {
return this.a * this.b;
},
read() {
this.a = +prompt('a?', 0);
this.b = +prompt('b?', 0);
}
};
calculator.read();
alert( calculator.sum() );
alert( calculator.mul() );Open the solution with tests in a sandbox.
Chaining
importance: 2
There's a ladder object that allows to go up and down:
let ladder = {
step: 0,
up() {
this.step++;
},
down() {
this.step--;
},
showStep: function() { // shows the current step
alert( this.step );
}
};
Now, if we need to make several calls in sequence, can do it like this:
ladder.up();
ladder.up();
ladder.down();
ladder.showStep(); // 1
Modify the code of up, down and showStep to make the calls chainable, like this:
ladder.up().up().down().showStep(); // 1
Such approach is widely used across JavaScript libraries.
Open a sandbox with tests.
The solution is to return the object itself from every call.
let ladder = {
step: 0,
up() {
this.step++;
return this;
},
down() {
this.step--;
return this;
},
showStep() {
alert( this.step );
return this;
}
}
ladder.up().up().down().up().down().showStep(); // 1
We also can write a single call per line.
For long chains it's more readable:
ladder
.up()
.up()
.down()
.up()
.down()
.showStep(); // 1Open the solution with tests in a sandbox.Objects: the basics
Constructor, operator "new"
The regular {...} syntax allows to create one object.
But often we need to create many similar objects, like multiple users or menu items and so on.
That can be done using constructor functions and the "new" operator.
- Constructor function
Constructor functions technically are regular functions.
There are two conventions though:
They are named with capital letter first.
They should be executed only with "new" operator.
For instance:
function User(name) {
this.name = name;
this.isAdmin = false;
}
let user = new User("Jack");
alert(user.name); // Jack
alert(user.isAdmin); // false
When a function is executed with new, it does the following steps:
A new empty object is created and assigned to this.
The function body executes.
Usually it modifies this, adds new properties to it.
The value of this is returned.
In other words, new User(...) does something like:
function User(name) {
// this = {}; (implicitly)
// add properties to this
this.name = name;
this.isAdmin = false;
// return this; (implicitly)
}
So let user = new User("Jack") gives the same result as:
let user = {
name: "Jack",
isAdmin: false
};
Now if we want to create other users, we can call new User("Ann"), new User("Alice") and so on.
Much shorter than using literals every time, and also easy to read.
That's the main purpose of constructors – to implement reusable object creation code.
Let's note once again – technically, any function can be used as a constructor.
That is: any function can be run with new, and it will execute the algorithm above.
The “capital letter first” is a common agreement, to make it clear that a function is to be run with new.
new function() { … }
If we have many lines of code all about creation of a single complex object, we can wrap them in constructor function, like this:
let user = new function() {
this.name = "John";
this.isAdmin = false;
// ...other code for user creation
// maybe complex logic and statements
// local variables etc
};
The constructor can't be called again, because it is not saved anywhere, just created and called.
So this trick aims to encapsulate the code that constructs the single object, without future reuse.
- Constructor mode test: new.target
Advanced stuff
The syntax from this section is rarely used, skip it unless you want to know everything.
Inside a function, we can check whether it was called with new or without it, using a special new.target property.
It is undefined for regular calls and equals the function if called with new:
function User() {
alert(new.target);
}
// without "new":
User(); // undefined
// with "new":
new User(); // function User { ...
}
That can be used inside the function to know whether it was called with new, “in constructor mode”, or without it, “in regular mode”.
We can also make both new and regular calls to do the same, like this:
function User(name) {
if (!new.target) { // if you run me without new
return new User(name); // ...I will add new for you
}
this.name = name;
}
let john = User("John"); // redirects call to new User
alert(john.name); // John
This approach is sometimes used in libraries to make the syntax more flexible.
So that people may call the function with or without new, and it still works.
Probably not a good thing to use everywhere though, because omitting new makes it a bit less obvious what's going on.
With new we all know that the new object is being created.
- Return from constructors
Usually, constructors do not have a return statement.
Their task is to write all necessary stuff into this, and it automatically becomes the result.
But if there is a return statement, then the rule is simple:
If return is called with an object, then the object is returned instead of this.
If return is called with a primitive, it's ignored.
In other words, return with an object returns that object, in all other cases this is returned.
For instance, here return overrides this by returning an object:
function BigUser() {
this.name = "John";
return { name: "Godzilla" }; // <-- returns this object
}
alert( new BigUser().name ); // Godzilla, got that object
And here's an example with an empty return (or we could place a primitive after it, doesn't matter):
function SmallUser() {
this.name = "John";
return; // <-- returns this
}
alert( new SmallUser().name ); // John
Usually constructors don't have a return statement.
Here we mention the special behavior with returning objects mainly for the sake of completeness.
Omitting parentheses
By the way, we can omit parentheses after new, if it has no arguments:
let user = new User; // <-- no parentheses
// same as
let user = new User();
Omitting parentheses here is not considered a “good style”, but the syntax is permitted by specification.
- Methods in constructor
Using constructor functions to create objects gives a great deal of flexibility.
The constructor function may have parameters that define how to construct the object, and what to put in it.
Of course, we can add to this not only properties, but methods as well.
For instance, new User(name) below creates an object with the given name and the method sayHi:
function User(name) {
this.name = name;
this.sayHi = function() {
alert( "My name is: " + this.name );
};
}
let john = new User("John");
john.sayHi(); // My name is: John
/*
john = {
name: "John",
sayHi: function() { ...
}
}
*/
To create complex objects, there's a more advanced syntax, classes, that we'll cover later.
- Summary
Constructor functions or, briefly, constructors, are regular functions, but there's a common agreement to name them with capital letter first.
Constructor functions should only be called using new.
Such a call implies a creation of empty this at the start and returning the populated one at the end.
We can use constructor functions to make multiple similar objects.
JavaScript provides constructor functions for many built-in language objects: like Date for dates, Set for sets and others that we plan to study.
Objects, we'll be back!
In this chapter we only cover the basics about objects and constructors.
They are essential for learning more about data types and functions in the next chapters.
After we learn that, we return to objects and cover them in-depth in the chapters Prototypes, inheritance and Classes.
importance: 2
Is it possible to create functions A and B such as new A()==new B()?
function A() { ...
}
function B() { ...
}
let a = new A;
let b = new B;
alert( a == b ); // true
If it is, then provide an example of their code.
Yes, it's possible.
If a function returns an object then new returns it instead of this.
So they can, for instance, return the same externally defined object obj:
let obj = {};
function A() { return obj; }
function B() { return obj; }
alert( new A() == new B() ); // true
Create new Calculator
importance: 5
Create a constructor function Calculator that creates objects with 3 methods:
read() asks for two values using prompt and remembers them in object properties.
sum() returns the sum of these properties.
mul() returns the multiplication product of these properties.
For instance:
let calculator = new Calculator();
calculator.read();
alert( "Sum=" + calculator.sum() );
alert( "Mul=" + calculator.mul() );Run the demoOpen a sandbox with tests.function Calculator() {
this.read = function() {
this.a = +prompt('a?', 0);
this.b = +prompt('b?', 0);
};
this.sum = function() {
return this.a + this.b;
};
this.mul = function() {
return this.a * this.b;
};
}
let calculator = new Calculator();
calculator.read();
alert( "Sum=" + calculator.sum() );
alert( "Mul=" + calculator.mul() );Open the solution with tests in a sandbox.
Create new Accumulator
importance: 5
Create a constructor function Accumulator(startingValue).
Object that it creates should:
Store the “current value” in the property value.
The starting value is set to the argument of the constructor startingValue.
The read() method should use prompt to read a new number and add it to value.
In other words, the value property is the sum of all user-entered values with the initial value startingValue.
Here's the demo of the code:
let accumulator = new Accumulator(1); // initial value 1
accumulator.read(); // adds the user-entered value
accumulator.read(); // adds the user-entered value
alert(accumulator.value); // shows the sum of these valuesRun the demoOpen a sandbox with tests.function Accumulator(startingValue) {
this.value = startingValue;
this.read = function() {
this.value += +prompt('How much to add?', 0);
};
}
let accumulator = new Accumulator(1);
accumulator.read();
accumulator.read();
alert(accumulator.value);Open the solution with tests in a sandbox.Objects: the basics
Optional chaining '?.'
A recent addition
This is a recent addition to the language.
Old browsers may need polyfills.
The optional chaining ?. is a safe way to access nested object properties, even if an intermediate property doesn't exist.
- The “non-existing property” problem
If you've just started to read the tutorial and learn JavaScript, maybe the problem hasn't touched you yet, but it's quite common.
As an example, let's say we have user objects that hold the information about our users.
Most of our users have addresses in user.address property, with the street user.address.street, but some did not provide them.
In such case, when we attempt to get user.address.street, and the user happens to be without an address, we get an error:
let user = {}; // a user without "address" property
alert(user.address.street); // Error!
That's the expected result.
JavaScript works like this.
As user.address is undefined, an attempt to get user.address.street fails with an error.
In many practical cases we'd prefer to get undefined instead of an error here (meaning “no street”).
…And another example.
In the web development, we can get an object that corresponds to a web page element using a special method call, such as document.querySelector('.elem'), and it returns null when there's no such element.
// document.querySelector('.elem') is null if there's no element
let html = document.querySelector('.elem').innerHTML; // error if it's null
Once again, if the element doesn't exist, we'll get an error accessing .innerHTML of null.
And in some cases, when the absence of the element is normal, we'd like to avoid the error and just accept html = null as the result.
How can we do this?
The obvious solution would be to check the value using if or the conditional operator ?, before accessing its property, like this:
let user = {};
alert(user.address ? user.address.street : undefined);
It works, there's no error… But it's quite inelegant.
As you can see, the "user.address" appears twice in the code.
For more deeply nested properties, that becomes a problem as more repetitions are required.
E.g.
let's try getting user.address.street.name.
We need to check both user.address and user.address.street:
let user = {}; // user has no address
alert(user.address ? user.address.street ? user.address.street.name : null : null);
That's just awful, one may even have problems understanding such code.
Don't even care to, as there's a better way to write it, using the && operator:
let user = {}; // user has no address
alert( user.address && user.address.street && user.address.street.name ); // undefined (no error)
AND'ing the whole path to the property ensures that all components exist (if not, the evaluation stops), but also isn't ideal.
As you can see, property names are still duplicated in the code.
E.g.
in the code above, user.address appears three times.
That's why the optional chaining ?. was added to the language.
To solve this problem once and for all!
- Optional chaining
The optional chaining ?. stops the evaluation if the value before ?. is undefined or null and returns undefined.
Further in this article, for brevity, we'll be saying that something “exists” if it's not null and not undefined.
In other words, value?.prop:
works as value.prop, if value exists,
otherwise (when value is undefined/null) it returns undefined.
Here's the safe way to access user.address.street using ?.:
let user = {}; // user has no address
alert( user?.address?.street ); // undefined (no error)
The code is short and clean, there's no duplication at all.
Reading the address with user?.address works even if user object doesn't exist:
let user = null;
alert( user?.address ); // undefined
alert( user?.address.street ); // undefined
Please note: the ?. syntax makes optional the value before it, but not any further.
E.g.
in user?.address.street.name the ?. allows user to safely be null/undefined (and returns undefined in that case), but that's only for user.
Further properties are accessed in a regular way.
If we want some of them to be optional, then we'll need to replace more . with ?..
Don't overuse the optional chaining
We should use ?. only where it's ok that something doesn't exist.
For example, if according to our coding logic user object must exist, but address is optional, then we should write user.address?.street, but not user?.address?.street.
So, if user happens to be undefined due to a mistake, we'll see a programming error about it and fix it.
Otherwise, coding errors can be silenced where not appropriate, and become more difficult to debug.
The variable before ?. must be declared
If there's no variable user at all, then user?.anything triggers an error:
// ReferenceError: user is not defined
user?.address;
The variable must be declared (e.g.
let/const/var user or as a function parameter).
The optional chaining works only for declared variables.
- Short-circuiting
As it was said before, the ?. immediately stops (“short-circuits”) the evaluation if the left part doesn't exist.
So, if there are any further function calls or side effects, they don't occur.
For instance:
let user = null;
let x = 0;
user?.sayHi(x++); // no "sayHi", so the execution doesn't reach x++
alert(x); // 0, value not incremented
- Other variants: ?.(), ?.[]
The optional chaining ?. is not an operator, but a special syntax construct, that also works with functions and square brackets.
For example, ?.() is used to call a function that may not exist.
In the code below, some of our users have admin method, and some don't:
let userAdmin = {
admin() {
alert("I am admin");
}
};
let userGuest = {};
userAdmin.admin?.(); // I am admin
userGuest.admin?.(); // nothing (no such method)
Here, in both lines we first use the dot (user1.admin) to get admin property, because the user object must exist, so it's safe read from it.
Then ?.() checks the left part: if the admin function exists, then it runs (that's so for user1).
Otherwise (for user2) the evaluation stops without errors.
The ?.[] syntax also works, if we'd like to use brackets [] to access properties instead of dot ..
Similar to previous cases, it allows to safely read a property from an object that may not exist.
let key = "firstName";
let user1 = {
firstName: "John"
};
let user2 = null;
alert( user1?.[key] ); // John
alert( user2?.[key] ); // undefined
Also we can use ?. with delete:
delete user?.name; // delete user.name if user exists
We can use ?. for safe reading and deleting, but not writing
The optional chaining ?. has no use at the left side of an assignment.
For example:
let user = null;
user?.name = "John"; // Error, doesn't work
// because it evaluates to undefined = "John"
It's just not that smart.
- Summary
The optional chaining ?. syntax has three forms:
obj?.prop – returns obj.prop if obj exists, otherwise undefined.
obj?.[prop] – returns obj[prop] if obj exists, otherwise undefined.
obj.method?.() – calls obj.method() if obj.method exists, otherwise returns undefined.
As we can see, all of them are straightforward and simple to use.
The ?. checks the left part for null/undefined and allows the evaluation to proceed if it's not so.
A chain of ?. allows to safely access nested properties.
Still, we should apply ?. carefully, only where it's acceptable that the left part doesn't exist.
So that it won't hide programming errors from us, if they occur.
Objects: the basics
Symbol type
By specification, object property keys may be either of string type, or of symbol type.
Not numbers, not booleans, only strings or symbols, these two types.
Till now we've been using only strings.
Now let's see the benefits that symbols can give us.
- Symbols
A “symbol” represents a unique identifier.
A value of this type can be created using Symbol():
// id is a new symbol
let id = Symbol();
Upon creation, we can give symbol a description (also called a symbol name), mostly useful for debugging purposes:
// id is a symbol with the description "id"
let id = Symbol("id");
Symbols are guaranteed to be unique.
Even if we create many symbols with the same description, they are different values.
The description is just a label that doesn't affect anything.
For instance, here are two symbols with the same description – they are not equal:
let id1 = Symbol("id");
let id2 = Symbol("id");
alert(id1 == id2); // false
If you are familiar with Ruby or another language that also has some sort of “symbols” – please don't be misguided.
JavaScript symbols are different.
Symbols don't auto-convert to a string
Most values in JavaScript support implicit conversion to a string.
For instance, we can alert almost any value, and it will work.
Symbols are special.
They don't auto-convert.
For instance, this alert will show an error:
let id = Symbol("id");
alert(id); // TypeError: Cannot convert a Symbol value to a string
That's a “language guard” against messing up, because strings and symbols are fundamentally different and should not accidentally convert one into another.
If we really want to show a symbol, we need to explicitly call .toString() on it, like here:
let id = Symbol("id");
alert(id.toString()); // Symbol(id), now it works
Or get symbol.description property to show the description only:
let id = Symbol("id");
alert(id.description); // id
- “Hidden” properties
Symbols allow us to create “hidden” properties of an object, that no other part of code can accidentally access or overwrite.
For instance, if we're working with user objects, that belong to a third-party code.
We'd like to add identifiers to them.
Let's use a symbol key for it:
let user = { // belongs to another code
name: "John"
};
let id = Symbol("id");
user[id] = 1;
alert( user[id] ); // we can access the data using the symbol as the key
What's the benefit of using Symbol("id") over a string "id"?
As user objects belongs to another code, and that code also works with them, we shouldn't just add any fields to it.
That's unsafe.
But a symbol cannot be accessed accidentally, the third-party code probably won't even see it, so it's probably all right to do.
Also, imagine that another script wants to have its own identifier inside user, for its own purposes.
That may be another JavaScript library, so that the scripts are completely unaware of each other.
Then that script can create its own Symbol("id"), like this:
// ...
let id = Symbol("id");
user[id] = "Their id value";
There will be no conflict between our and their identifiers, because symbols are always different, even if they have the same name.
…But if we used a string "id" instead of a symbol for the same purpose, then there would be a conflict:
let user = { name: "John" };
// Our script uses "id" property
user.id = "Our id value";
// ...Another script also wants "id" for its purposes...
user.id = "Their id value"
// Boom! overwritten by another script!
Symbols in an object literal
If we want to use a symbol in an object literal {...}, we need square brackets around it.
Like this:
let id = Symbol("id");
let user = {
name: "John",
[id]: 123 // not "id": 123
};
That's because we need the value from the variable id as the key, not the string “id”.
Symbols are skipped by for…in
Symbolic properties do not participate in for..in loop.
For instance:
let id = Symbol("id");
let user = {
name: "John",
age: 30,
[id]: 123
};
for (let key in user) alert(key); // name, age (no symbols)
// the direct access by the symbol works
alert( "Direct: " + user[id] );Object.keys(user) also ignores them.
That's a part of the general “hiding symbolic properties” principle.
If another script or a library loops over our object, it won't unexpectedly access a symbolic property.
In contrast, Object.assign copies both string and symbol properties:
let id = Symbol("id");
let user = {
[id]: 123
};
let clone = Object.assign({}, user);
alert( clone[id] ); // 123
There's no paradox here.
That's by design.
The idea is that when we clone an object or merge objects, we usually want all properties to be copied (including symbols like id).
- Global symbols
As we've seen, usually all symbols are different, even if they have the same name.
But sometimes we want same-named symbols to be same entities.
For instance, different parts of our application want to access symbol "id" meaning exactly the same property.
To achieve that, there exists a global symbol registry.
We can create symbols in it and access them later, and it guarantees that repeated accesses by the same name return exactly the same symbol.
In order to read (create if absent) a symbol from the registry, use Symbol.for(key).
That call checks the global registry, and if there's a symbol described as key, then returns it, otherwise creates a new symbol Symbol(key) and stores it in the registry by the given key.
For instance:
// read from the global registry
let id = Symbol.for("id"); // if the symbol did not exist, it is created
// read it again (maybe from another part of the code)
let idAgain = Symbol.for("id");
// the same symbol
alert( id === idAgain ); // true
Symbols inside the registry are called global symbols.
If we want an application-wide symbol, accessible everywhere in the code – that's what they are for.
That sounds like Ruby
In some programming languages, like Ruby, there's a single symbol per name.
In JavaScript, as we can see, that's right for global symbols.
Symbol.keyFor
For global symbols, not only Symbol.for(key) returns a symbol by name, but there's a reverse call: Symbol.keyFor(sym), that does the reverse: returns a name by a global symbol.
For instance:
// get symbol by name
let sym = Symbol.for("name");
let sym2 = Symbol.for("id");
// get name by symbol
alert( Symbol.keyFor(sym) ); // name
alert( Symbol.keyFor(sym2) ); // id
The Symbol.keyFor internally uses the global symbol registry to look up the key for the symbol.
So it doesn't work for non-global symbols.
If the symbol is not global, it won't be able to find it and returns undefined.
That said, any symbols have description property.
For instance:
let globalSymbol = Symbol.for("name");
let localSymbol = Symbol("name");
alert( Symbol.keyFor(globalSymbol) ); // name, global symbol
alert( Symbol.keyFor(localSymbol) ); // undefined, not global
alert( localSymbol.description ); // name
- System symbols
There exist many “system” symbols that JavaScript uses internally, and we can use them to fine-tune various aspects of our objects.
They are listed in the specification in the Well-known symbols table:
Symbol.hasInstanceSymbol.isConcatSpreadableSymbol.iteratorSymbol.toPrimitive
…and so on.
For instance, Symbol.toPrimitive allows us to describe object to primitive conversion.
We'll see its use very soon.
Other symbols will also become familiar when we study the corresponding language features.
- Summary
Symbol is a primitive type for unique identifiers.
Symbols are created with Symbol() call with an optional description (name).
Symbols are always different values, even if they have the same name.
If we want same-named symbols to be equal, then we should use the global registry: Symbol.for(key) returns (creates if needed) a global symbol with key as the name.
Multiple calls of Symbol.for with the same key return exactly the same symbol.
Symbols have two main use cases:
“Hidden” object properties.
If we want to add a property into an object that “belongs” to another script or a library, we can create a symbol and use it as a property key.
A symbolic property does not appear in for..in, so it won't be accidentally processed together with other properties.
Also it won't be accessed directly, because another script does not have our symbol.
So the property will be protected from accidental use or overwrite.
So we can “covertly” hide something into objects that we need, but others should not see, using symbolic properties.
There are many system symbols used by JavaScript which are accessible as Symbol.*.
We can use them to alter some built-in behaviors.
For instance, later in the tutorial we'll use Symbol.iterator for iterables, Symbol.toPrimitive to setup object-to-primitive conversion and so on.
Technically, symbols are not 100% hidden.
There is a built-in method Object.getOwnPropertySymbols(obj) that allows us to get all symbols.
Also there is a method named Reflect.ownKeys(obj) that returns all keys of an object including symbolic ones.
So they are not really hidden.
But most libraries, built-in functions and syntax constructs don't use these methods.
Objects: the basics
Object to primitive conversion
What happens when objects are added obj1 + obj2, subtracted obj1 - obj2 or printed using alert(obj)?
In that case, objects are auto-converted to primitives, and then the operation is carried out.
In the chapter Type Conversions we've seen the rules for numeric, string and boolean conversions of primitives.
But we left a gap for objects.
Now, as we know about methods and symbols it becomes possible to fill it.
All objects are true in a boolean context.
There are only numeric and string conversions.
The numeric conversion happens when we subtract objects or apply mathematical functions.
For instance, Date objects (to be covered in the chapter Date and time) can be subtracted, and the result of date1 - date2 is the time difference between two dates.
As for the string conversion – it usually happens when we output an object like alert(obj) and in similar contexts.
- ToPrimitive
We can fine-tune string and numeric conversion, using special object methods.
There are three variants of type conversion, so-called “hints”, described in the specification:
"string"
For an object-to-string conversion, when we're doing an operation on an object that expects a string, like alert:
// output
alert(obj);
// using object as a property key
anotherObj[obj] = 123;
"number"
For an object-to-number conversion, like when we're doing maths:
// explicit conversion
let num = Number(obj);
// maths (except binary plus)
let n = +obj; // unary plus
let delta = date1 - date2;
// less/greater comparison
let greater = user1 > user2;
"default"
Occurs in rare cases when the operator is “not sure” what type to expect.
For instance, binary plus + can work both with strings (concatenates them) and numbers (adds them), so both strings and numbers would do.
So if a binary plus gets an object as an argument, it uses the "default" hint to convert it.
Also, if an object is compared using == with a string, number or a symbol, it's also unclear which conversion should be done, so the "default" hint is used.
// binary plus uses the "default" hint
let total = obj1 + obj2;
// obj == number uses the "default" hint
if (user == 1) { ...
};
The greater and less comparison operators, such as <>, can work with both strings and numbers too.
Still, they use the "number" hint, not "default".
That's for historical reasons.
In practice though, we don't need to remember these peculiar details, because all built-in objects except for one case (Date object, we'll learn it later) implement "default" conversion the same way as "number".
And we can do the same.
No "boolean" hint
Please note – there are only three hints.
It's that simple.
There is no “boolean” hint (all objects are true in boolean context) or anything else.
And if we treat "default" and "number" the same, like most built-ins do, then there are only two conversions.
To do the conversion, JavaScript tries to find and call three object methods:
Call obj[Symbol.toPrimitive](hint) – the method with the symbolic key Symbol.toPrimitive (system symbol), if such method exists,
Otherwise if hint is "string"
try obj.toString() and obj.valueOf(), whatever exists.
Otherwise if hint is "number" or "default"
try obj.valueOf() and obj.toString(), whatever exists.
- Symbol.toPrimitive
Let's start from the first method.
There's a built-in symbol named Symbol.toPrimitive that should be used to name the conversion method, like this:
obj[Symbol.toPrimitive] = function(hint) {
// must return a primitive value
// hint = one of "string", "number", "default"
};
For instance, here user object implements it:
let user = {
name: "John",
money: 1000,
[Symbol.toPrimitive](hint) {
alert(`hint: ${hint}`);
return hint == "string" ? `{name: "${this.name}"}` : this.money;
}
};
// conversions demo:
alert(user); // hint: string -> {name: "John"}
alert(+user); // hint: number -> 1000
alert(user + 500); // hint: default -> 1500
As we can see from the code, user becomes a self-descriptive string or a money amount depending on the conversion.
The single method user[Symbol.toPrimitive] handles all conversion cases.
- toString/valueOf
Methods toString and valueOf come from ancient times.
They are not symbols (symbols did not exist that long ago), but rather “regular” string-named methods.
They provide an alternative “old-style” way to implement the conversion.
If there's no Symbol.toPrimitive then JavaScript tries to find them and try in the order:
toString -> valueOf for “string” hint.
valueOf -> toString otherwise.
These methods must return a primitive value.
If toString or valueOf returns an object, then it's ignored (same as if there were no method).
By default, a plain object has following toString and valueOf methods:
The toString method returns a string "[object Object]".
The valueOf method returns the object itself.
Here's the demo:
let user = {name: "John"};
alert(user); // [object Object]
alert(user.valueOf() === user); // true
So if we try to use an object as a string, like in an alert or so, then by default we see [object Object].
And the default valueOf is mentioned here only for the sake of completeness, to avoid any confusion.
As you can see, it returns the object itself, and so is ignored.
Don't ask me why, that's for historical reasons.
So we can assume it doesn't exist.
Let's implement these methods.
For instance, here user does the same as above using a combination of toString and valueOf instead of Symbol.toPrimitive:
let user = {
name: "John",
money: 1000,
// for hint="string"
toString() {
return `{name: "${this.name}"}`;
},
// for hint="number" or "default"
valueOf() {
return this.money;
}
};
alert(user); // toString -> {name: "John"}
alert(+user); // valueOf -> 1000
alert(user + 500); // valueOf -> 1500
As we can see, the behavior is the same as the previous example with Symbol.toPrimitive.
Often we want a single “catch-all” place to handle all primitive conversions.
In this case, we can implement toString only, like this:
let user = {
name: "John",
toString() {
return this.name;
}
};
alert(user); // toString -> John
alert(user + 500); // toString -> John500
In the absence of Symbol.toPrimitive and valueOf, toString will handle all primitive conversions.
- Return types
The important thing to know about all primitive-conversion methods is that they do not necessarily return the “hinted” primitive.
There is no control whether toString returns exactly a string, or whether Symbol.toPrimitive method returns a number for a hint "number".
The only mandatory thing: these methods must return a primitive, not an object.
Historical notes
For historical reasons, if toString or valueOf returns an object, there's no error, but such value is ignored (like if the method didn't exist).
That's because in ancient times there was no good “error” concept in JavaScript.
In contrast, Symbol.toPrimitivemust return a primitive, otherwise there will be an error.
- Further conversions
As we know already, many operators and functions perform type conversions, e.g.
multiplication * converts operands to numbers.
If we pass an object as an argument, then there are two stages:
The object is converted to a primitive (using the rules described above).
If the resulting primitive isn't of the right type, it's converted.
For instance:
let obj = {
// toString handles all conversions in the absence of other methods
toString() {
return "2";
}
};
alert(obj * 2); // 4, object converted to primitive "2", then multiplication made it a number
The multiplication obj * 2 first converts the object to primitive (that's a string "2").
Then "2" * 2 becomes 2 * 2 (the string is converted to number).
Binary plus will concatenate strings in the same situation, as it gladly accepts a string:
let obj = {
toString() {
return "2";
}
};
alert(obj + 2); // 22 ("2" + 2), conversion to primitive returned a string => concatenation
- Summary
The object-to-primitive conversion is called automatically by many built-in functions and operators that expect a primitive as a value.
There are 3 types (hints) of it:
"string" (for alert and other operations that need a string)
"number" (for maths)
"default" (few operators)
The specification describes explicitly which operator uses which hint.
There are very few operators that “don't know what to expect” and use the "default" hint.
Usually for built-in objects "default" hint is handled the same way as "number", so in practice the last two are often merged together.
The conversion algorithm is:
Call obj[Symbol.toPrimitive](hint) if the method exists,
Otherwise if hint is "string"
try obj.toString() and obj.valueOf(), whatever exists.
Otherwise if hint is "number" or "default"
try obj.valueOf() and obj.toString(), whatever exists.
In practice, it's often enough to implement only obj.toString() as a “catch-all” method for all conversions that return a “human-readable” representation of an object, for logging or debugging purposes.
JavaScript allows us to work with primitives (strings, numbers, etc.) as if they were objects.
They also provide methods to call as such.
We will study those soon, but first we'll see how it works because, of course, primitives are not objects (and here we will make it even clearer).
Let's look at the key distinctions between primitives and objects.
A primitive
Is a value of a primitive type.
There are 7 primitive types: string, number, bigint, boolean, symbol, null and undefined.
An object
Is capable of storing multiple values as properties.
Can be created with {}, for instance: {name: "John", age: 30}.
There are other kinds of objects in JavaScript: functions, for example, are objects.
One of the best things about objects is that we can store a function as one of its properties.
let john = {
name: "John",
sayHi: function() {
alert("Hi buddy!");
}
};
john.sayHi(); // Hi buddy!
So here we've made an object john with the method sayHi.
Many built-in objects already exist, such as those that work with dates, errors, HTML elements, etc.
They have different properties and methods.
But, these features come with a cost!
Objects are “heavier” than primitives.
They require additional resources to support the internal machinery.
- A primitive as an object
Here's the paradox faced by the creator of JavaScript:
There are many things one would want to do with a primitive like a string or a number.
It would be great to access them as methods.
Primitives must be as fast and lightweight as possible.
The solution looks a little bit awkward, but here it is:
Primitives are still primitive.
A single value, as desired.
The language allows access to methods and properties of strings, numbers, booleans and symbols.
In order for that to work, a special “object wrapper” that provides the extra functionality is created, and then is destroyed.
The “object wrappers” are different for each primitive type and are called: String, Number, Boolean and Symbol.
Thus, they provide different sets of methods.
For instance, there exists a string method str.toUpperCase() that returns a capitalized str.
Here's how it works:
let str = "Hello";
alert( str.toUpperCase() ); // HELLO
Simple, right? Here's what actually happens in str.toUpperCase():
The string str is a primitive.
So in the moment of accessing its property, a special object is created that knows the value of the string, and has useful methods, like toUpperCase().
That method runs and returns a new string (shown by alert).
The special object is destroyed, leaving the primitive str alone.
So primitives can provide methods, but they still remain lightweight.
The JavaScript engine highly optimizes this process.
It may even skip the creation of the extra object at all.
But it must still adhere to the specification and behave as if it creates one.
A number has methods of its own, for instance, toFixed(n) rounds the number to the given precision:
let n = 1.23456;
alert( n.toFixed(2) ); // 1.23
We'll see more specific methods in chapters Numbers and Strings.
Constructors String/Number/Boolean are for internal use only
Some languages like Java allow us to explicitly create “wrapper objects” for primitives using a syntax like new Number(1) or new Boolean(false).
In JavaScript, that's also possible for historical reasons, but highly unrecommended.
Things will go crazy in several places.
For instance:
alert( typeof 0 ); // "number"
alert( typeof new Number(0) ); // "object"!
Objects are always truthy in if, so here the alert will show up:
let zero = new Number(0);
if (zero) { // zero is true, because it's an object
alert( "zero is truthy!?!" );
}
On the other hand, using the same functions String/Number/Boolean without new is a totally sane and useful thing.
They convert a value to the corresponding type: to a string, a number, or a boolean (primitive).
For example, this is entirely valid:
let num = Number("123"); // convert a string to number
null/undefined have no methods
The special primitives null and undefined are exceptions.
They have no corresponding “wrapper objects” and provide no methods.
In a sense, they are “the most primitive”.
An attempt to access a property of such value would give the error:
alert(null.test); // error
- Summary
Primitives except null and undefined provide many helpful methods.
We will study those in the upcoming chapters.
Formally, these methods work via temporary objects, but JavaScript engines are well tuned to optimize that internally, so they are not expensive to call.
importance: 5
Consider the following code:
let str = "Hello";
str.test = 5;
alert(str.test);
How do you think, will it work? What will be shown?
Try running it:
let str = "Hello";
str.test = 5; // (*)
alert(str.test);
Depending on whether you have use strict or not, the result may be:
undefined (no strict mode)
An error (strict mode).
Why? Let's replay what's happening at line (*):
When a property of str is accessed, a “wrapper object” is created.
In strict mode, writing into it is an error.
Otherwise, the operation with the property is carried on, the object gets the test property, but after that the “wrapper object” disappears, so in the last line str has no trace of the property.
This example clearly shows that primitives are not objects.
They can't store additional data.
Data types
Numbers
In modern JavaScript, there are two types of numbers:
Regular numbers in JavaScript are stored in 64-bit format IEEE-754, also known as “double precision floating point numbers”.
These are numbers that we're using most of the time, and we'll talk about them in this chapter.
BigInt numbers, to represent integers of arbitrary length.
They are sometimes needed, because a regular number can't exceed 253 or be less than -253.
As bigints are used in few special areas, we devote them a special chapter BigInt.
So here we'll talk about regular numbers.
Let's expand our knowledge of them.
- More ways to write a number
Imagine we need to write 1 billion.
The obvious way is:
let billion = 1000000000;
We also can use underscore _ as the separator:
let billion = 1_000_000_000;
Here the underscore _ plays the role of the “syntactic sugar”, it makes the number more readable.
The JavaScript engine simply ignores _ between digits, so it's exactly the same one billion as above.
In real life though, we try to avoid writing long sequences of zeroes.
We're too lazy for that.
We'll try to write something like "1bn" for a billion or "7.3bn" for 7 billion 300 million.
The same is true for most large numbers.
In JavaScript, we can shorten a number by appending the letter "e" to it and specifying the zeroes count:
let billion = 1e9; // 1 billion, literally: 1 and 9 zeroes
alert( 7.3e9 ); // 7.3 billions (same as 7300000000 or 7_300_000_000)
In other words, e multiplies the number by 1 with the given zeroes count.
1e3 = 1 * 1000 // e3 means *1000
1.23e6 = 1.23 * 1000000 // e6 means *1000000
Now let's write something very small.
Say, 1 microsecond (one millionth of a second):
let ms = 0.000001;
Just like before, using "e" can help.
If we'd like to avoid writing the zeroes explicitly, we could say the same as:
let ms = 1e-6; // six zeroes to the left from 1
If we count the zeroes in 0.000001, there are 6 of them.
So naturally it's 1e-6.
In other words, a negative number after "e" means a division by 1 with the given number of zeroes:
// -3 divides by 1 with 3 zeroes
1e-3 = 1 / 1000 (=0.001)
// -6 divides by 1 with 6 zeroes
1.23e-6 = 1.23 / 1000000 (=0.00000123)
Hex, binary and octal numbers
Hexadecimal numbers are widely used in JavaScript to represent colors, encode characters, and for many other things.
So naturally, there exists a shorter way to write them: 0x and then the number.
For instance:
alert( 0xff ); // 255
alert( 0xFF ); // 255 (the same, case doesn't matter)
Binary and octal numeral systems are rarely used, but also supported using the 0b and 0o prefixes:
let a = 0b11111111; // binary form of 255
let b = 0o377; // octal form of 255
alert( a == b ); // true, the same number 255 at both sides
There are only 3 numeral systems with such support.
For other numeral systems, we should use the function parseInt (which we will see later in this chapter).
- toString(base)
The method num.toString(base) returns a string representation of num in the numeral system with the given base.
For example:
let num = 255;
alert( num.toString(16) ); // ff
alert( num.toString(2) ); // 11111111
The base can vary from 2 to 36.
By default it's 10.
Common use cases for this are:
base=16 is used for hex colors, character encodings etc, digits can be 0..9 or A..F.
base=2 is mostly for debugging bitwise operations, digits can be 0 or 1.
base=36 is the maximum, digits can be 0..9 or A..Z.
The whole latin alphabet is used to represent a number.
A funny, but useful case for 36 is when we need to turn a long numeric identifier into something shorter, for example to make a short url.
Can simply represent it in the numeral system with base 36:
alert( 123456..toString(36) ); // 2n9c
Two dots to call a method
Please note that two dots in 123456..toString(36) is not a typo.
If we want to call a method directly on a number, like toString in the example above, then we need to place two dots .. after it.
If we placed a single dot: 123456.toString(36), then there would be an error, because JavaScript syntax implies the decimal part after the first dot.
And if we place one more dot, then JavaScript knows that the decimal part is empty and now goes the method.
Also could write (123456).toString(36).
- Rounding
One of the most used operations when working with numbers is rounding.
There are several built-in functions for rounding:
Math.floor
Rounds down: 3.1 becomes 3, and -1.1 becomes -2.
Math.ceil
Rounds up: 3.1 becomes 4, and -1.1 becomes -1.
Math.round
Rounds to the nearest integer: 3.1 becomes 3, 3.6 becomes 4, the middle case: 3.5 rounds up to 4 too.
Math.trunc (not supported by Internet Explorer)
Removes anything after the decimal point without rounding: 3.1 becomes 3, -1.1 becomes -1.
Here's the table to summarize the differences between them:
Math.floor
Math.ceil
Math.round
Math.trunc
3.1
3
4
3
3
3.6
3
4
4
3
-1.1
-2
-1
-1
-1
-1.6
-2
-1
-2
-1
These functions cover all of the possible ways to deal with the decimal part of a number.
But what if we'd like to round the number to n-th digit after the decimal?
For instance, we have 1.2345 and want to round it to 2 digits, getting only 1.23.
There are two ways to do so:
Multiply-and-divide.
For example, to round the number to the 2nd digit after the decimal, we can multiply the number by 100 (or a bigger power of 10), call the rounding function and then divide it back.
let num = 1.23456;
alert( Math.floor(num * 100) / 100 ); // 1.23456 -> 123.456 -> 123 -> 1.23
The method toFixed(n) rounds the number to n digits after the point and returns a string representation of the result.
let num = 12.34;
alert( num.toFixed(1) ); // "12.3"
This rounds up or down to the nearest value, similar to Math.round:
let num = 12.36;
alert( num.toFixed(1) ); // "12.4"
Please note that result of toFixed is a string.
If the decimal part is shorter than required, zeroes are appended to the end:
let num = 12.34;
alert( num.toFixed(5) ); // "12.34000", added zeroes to make exactly 5 digits
We can convert it to a number using the unary plus or a Number() call: +num.toFixed(5).
- Imprecise calculations
Internally, a number is represented in 64-bit format IEEE-754, so there are exactly 64 bits to store a number: 52 of them are used to store the digits, 11 of them store the position of the decimal point (they are zero for integer numbers), and 1 bit is for the sign.
If a number is too big, it would overflow the 64-bit storage, potentially giving an infinity:
alert( 1e500 ); // Infinity
What may be a little less obvious, but happens quite often, is the loss of precision.
Consider this (falsy!) test:
alert( 0.1 + 0.2 == 0.3 ); // false
That's right, if we check whether the sum of 0.1 and 0.2 is 0.3, we get false.
Strange! What is it then if not 0.3?
alert( 0.1 + 0.2 ); // 0.30000000000000004
Ouch! There are more consequences than an incorrect comparison here.
Imagine you're making an e-shopping site and the visitor puts $0.10 and $0.20 goods into their cart.
The order total will be $0.30000000000000004.
That would surprise anyone.
But why does this happen?
A number is stored in memory in its binary form, a sequence of bits – ones and zeroes.
But fractions like 0.1, 0.2 that look simple in the decimal numeric system are actually unending fractions in their binary form.
In other words, what is 0.1? It is one divided by ten 1/10, one-tenth.
In decimal numeral system such numbers are easily representable.
Compare it to one-third: 1/3.
It becomes an endless fraction 0.33333(3).
So, division by powers 10 is guaranteed to work well in the decimal system, but division by 3 is not.
For the same reason, in the binary numeral system, the division by powers of 2 is guaranteed to work, but 1/10 becomes an endless binary fraction.
There's just no way to store exactly 0.1 or exactly 0.2 using the binary system, just like there is no way to store one-third as a decimal fraction.
The numeric format IEEE-754 solves this by rounding to the nearest possible number.
These rounding rules normally don't allow us to see that “tiny precision loss”, but it exists.
We can see this in action:
alert( 0.1.toFixed(20) ); // 0.10000000000000000555
And when we sum two numbers, their “precision losses” add up.
That's why 0.1 + 0.2 is not exactly 0.3.
Not only JavaScript
The same issue exists in many other programming languages.
PHP, Java, C, Perl, Ruby give exactly the same result, because they are based on the same numeric format.
Can we work around the problem? Sure, the most reliable method is to round the result with the help of a method toFixed(n):
let sum = 0.1 + 0.2;
alert( sum.toFixed(2) ); // 0.30
Please note that toFixed always returns a string.
It ensures that it has 2 digits after the decimal point.
That's actually convenient if we have an e-shopping and need to show $0.30.
For other cases, we can use the unary plus to coerce it into a number:
let sum = 0.1 + 0.2;
alert( +sum.toFixed(2) ); // 0.3
We also can temporarily multiply the numbers by 100 (or a bigger number) to turn them into integers, do the maths, and then divide back.
Then, as we're doing maths with integers, the error somewhat decreases, but we still get it on division:
alert( (0.1 * 10 + 0.2 * 10) / 10 ); // 0.3
alert( (0.28 * 100 + 0.14 * 100) / 100); // 0.4200000000000001
So, multiply/divide approach reduces the error, but doesn't remove it totally.
Sometimes we could try to evade fractions at all.
Like if we're dealing with a shop, then we can store prices in cents instead of dollars.
But what if we apply a discount of 30%? In practice, totally evading fractions is rarely possible.
Just round them to cut “tails” when needed.
The funny thing
Try running this:
// Hello! I'm a self-increasing number!
alert( 9999999999999999 ); // shows 10000000000000000
This suffers from the same issue: a loss of precision.
There are 64 bits for the number, 52 of them can be used to store digits, but that's not enough.
So the least significant digits disappear.
JavaScript doesn't trigger an error in such events.
It does its best to fit the number into the desired format, but unfortunately, this format is not big enough.
Two zeroes
Another funny consequence of the internal representation of numbers is the existence of two zeroes: 0 and -0.
That's because a sign is represented by a single bit, so it can be set or not set for any number including a zero.
In most cases the distinction is unnoticeable, because operators are suited to treat them as the same.
- Tests: isFinite and isNaN
Remember these two special numeric values?
Infinity (and -Infinity) is a special numeric value that is greater (less) than anything.
NaN represents an error.
They belong to the type number, but are not “normal” numbers, so there are special functions to check for them:
isNaN(value) converts its argument to a number and then tests it for being NaN:
alert( isNaN(NaN) ); // true
alert( isNaN("str") ); // true
But do we need this function? Can't we just use the comparison === NaN? Sorry, but the answer is no.
The value NaN is unique in that it does not equal anything, including itself:
alert( NaN === NaN ); // falseisFinite(value) converts its argument to a number and returns true if it's a regular number, not NaN/Infinity/-Infinity:
alert( isFinite("15") ); // true
alert( isFinite("str") ); // false, because a special value: NaN
alert( isFinite(Infinity) ); // false, because a special value: Infinity
Sometimes isFinite is used to validate whether a string value is a regular number:
let num = +prompt("Enter a number", '');
// will be true unless you enter Infinity, -Infinity or not a number
alert( isFinite(num) );
Please note that an empty or a space-only string is treated as 0 in all numeric functions including isFinite.
Compare with Object.is
There is a special built-in method Object.is that compares values like ===, but is more reliable for two edge cases:
It works with NaN: Object.is(NaN, NaN) === true, that's a good thing.
Values 0 and -0 are different: Object.is(0, -0) === false, technically that's true, because internally the number has a sign bit that may be different even if all other bits are zeroes.
In all other cases, Object.is(a, b) is the same as a === b.
This way of comparison is often used in JavaScript specification.
When an internal algorithm needs to compare two values for being exactly the same, it uses Object.is (internally called SameValue).
- parseInt and parseFloat
Numeric conversion using a plus + or Number() is strict.
If a value is not exactly a number, it fails:
alert( +"100px" ); // NaN
The sole exception is spaces at the beginning or at the end of the string, as they are ignored.
But in real life we often have values in units, like "100px" or "12pt" in CSS.
Also in many countries the currency symbol goes after the amount, so we have "19€" and would like to extract a numeric value out of that.
That's what parseInt and parseFloat are for.
They “read” a number from a string until they can't.
In case of an error, the gathered number is returned.
The function parseInt returns an integer, whilst parseFloat will return a floating-point number:
alert( parseInt('100px') ); // 100
alert( parseFloat('12.5em') ); // 12.5
alert( parseInt('12.3') ); // 12, only the integer part is returned
alert( parseFloat('12.3.4') ); // 12.3, the second point stops the reading
There are situations when parseInt/parseFloat will return NaN.
It happens when no digits could be read:
alert( parseInt('a123') ); // NaN, the first symbol stops the process
The second argument of parseInt(str, radix)
The parseInt() function has an optional second parameter.
It specifies the base of the numeral system, so parseInt can also parse strings of hex numbers, binary numbers and so on:
alert( parseInt('0xff', 16) ); // 255
alert( parseInt('ff', 16) ); // 255, without 0x also works
alert( parseInt('2n9c', 36) ); // 123456
- Other math functions
JavaScript has a built-in Math object which contains a small library of mathematical functions and constants.
A few examples:
Math.random()
Returns a random number from 0 to 1 (not including 1).
alert( Math.random() ); // 0.1234567894322
alert( Math.random() ); // 0.5435252343232
alert( Math.random() ); // ...
(any random numbers)
Math.max(a, b, c...) / Math.min(a, b, c...)
Returns the greatest/smallest from the arbitrary number of arguments.
alert( Math.max(3, 5, -10, 0, 1) ); // 5
alert( Math.min(1, 2) ); // 1
Math.pow(n, power)
Returns n raised to the given power.
alert( Math.pow(2, 10) ); // 2 in power 10 = 1024
There are more functions and constants in Math object, including trigonometry, which you can find in the docs for the Math object.
- Summary
To write numbers with many zeroes:
Append "e" with the zeroes count to the number.
Like: 123e6 is the same as 123 with 6 zeroes 123000000.
A negative number after "e" causes the number to be divided by 1 with given zeroes.
E.g.
123e-6 means 0.000123 (123 millionths).
For different numeral systems:
Can write numbers directly in hex (0x), octal (0o) and binary (0b) systems.
parseInt(str, base) parses the string str into an integer in numeral system with given base, 2 ≤ base ≤ 36.
num.toString(base) converts a number to a string in the numeral system with the given base.
For converting values like 12pt and 100px to a number:
Use parseInt/parseFloat for the “soft” conversion, which reads a number from a string and then returns the value they could read before the error.
For fractions:
Round using Math.floor, Math.ceil, Math.trunc, Math.round or num.toFixed(precision).
Make sure to remember there's a loss of precision when working with fractions.
More mathematical functions:
See the Math object when you need them.
The library is very small, but can cover basic needs.
importance: 5
Create a script that prompts the visitor to enter two numbers and then shows their sum.
Run the demo
P.S.
There is a gotcha with types.
let a = +prompt("The first number?", "");
let b = +prompt("The second number?", "");
alert( a + b );
Note the unary plus + before prompt.
It immediately converts the value to a number.
Otherwise, a and b would be string their sum would be their concatenation, that is: "1" + "2" = "12".
Why 6.35.toFixed(1) == 6.3?
importance: 4
According to the documentation Math.round and toFixed both round to the nearest number: 0..4 lead down while 5..9 lead up.
For instance:
alert( 1.35.toFixed(1) ); // 1.4
In the similar example below, why is 6.35 rounded to 6.3, not 6.4?
alert( 6.35.toFixed(1) ); // 6.3
How to round 6.35 the right way?
Internally the decimal fraction 6.35 is an endless binary.
As always in such cases, it is stored with a precision loss.
Let's see:
alert( 6.35.toFixed(20) ); // 6.34999999999999964473
The precision loss can cause both increase and decrease of a number.
In this particular case the number becomes a tiny bit less, that's why it rounded down.
And what's for 1.35?
alert( 1.35.toFixed(20) ); // 1.35000000000000008882
Here the precision loss made the number a little bit greater, so it rounded up.
How can we fix the problem with 6.35 if we want it to be rounded the right way?
We should bring it closer to an integer prior to rounding:
alert( (6.35 * 10).toFixed(20) ); // 63.50000000000000000000
Note that 63.5 has no precision loss at all.
That's because the decimal part 0.5 is actually 1/2.
Fractions divided by powers of 2 are exactly represented in the binary system, now we can round it:
alert( Math.round(6.35 * 10) / 10); // 6.35 -> 63.5 -> 64(rounded) -> 6.4
Repeat until the input is a number
importance: 5
Create a function readNumber which prompts for a number until the visitor enters a valid numeric value.
The resulting value must be returned as a number.
The visitor can also stop the process by entering an empty line or pressing “CANCEL”.
In that case, the function should return null.
Run the demoOpen a sandbox with tests.function readNumber() {
let num;
do {
num = prompt("Enter a number please?", 0);
} while ( !isFinite(num) );
if (num === null || num === '') return null;
return +num;
}
alert(`Read: ${readNumber()}`);
The solution is a little bit more intricate that it could be because we need to handle null/empty lines.
So we actually accept the input until it is a “regular number”.
Both null (cancel) and empty line also fit that condition, because in numeric form they are 0.
After we stopped, we need to treat null and empty line specially (return null), because converting them to a number would return 0.
Open the solution with tests in a sandbox.
An occasional infinite loop
importance: 4
This loop is infinite.
It never ends.
Why?
let i = 0;
while (i != 10) {
i += 0.2;
}
That's because i would never equal 10.
Run it to see the real values of i:
let i = 0;
while (i < 11) {
i += 0.2;
if (i > 9.8 && i < 10.2) alert( i );
}
None of them is exactly 10.
Such things happen because of the precision losses when adding fractions like 0.2.
Conclusion: evade equality checks when working with decimal fractions.
A random number from min to max
importance: 2
The built-in function Math.random() creates a random value from 0 to 1 (not including 1).
Write the function random(min, max) to generate a random floating-point number from min to max (not including max).
Examples of its work:
alert( random(1, 5) ); // 1.2345623452
alert( random(1, 5) ); // 3.7894332423
alert( random(1, 5) ); // 4.3435234525
We need to “map” all values from the interval 0…1 into values from min to max.
That can be done in two stages:
If we multiply a random number from 0…1 by max-min, then the interval of possible values increases 0..1 to 0..max-min.
Now if we add min, the possible interval becomes from min to max.
The function:
function random(min, max) {
return min + Math.random() * (max - min);
}
alert( random(1, 5) );
alert( random(1, 5) );
alert( random(1, 5) );
A random integer from min to max
importance: 2
Create a function randomInteger(min, max) that generates a random integer number from min to max including both min and max as possible values.
Any number from the interval min..max must appear with the same probability.
Examples of its work:
alert( randomInteger(1, 5) ); // 1
alert( randomInteger(1, 5) ); // 3
alert( randomInteger(1, 5) ); // 5
You can use the solution of the previous task as the base.
The simple but wrong solution
The simplest, but wrong solution would be to generate a value from min to max and round it:
function randomInteger(min, max) {
let rand = min + Math.random() * (max - min);
return Math.round(rand);
}
alert( randomInteger(1, 3) );
The function works, but it is incorrect.
The probability to get edge values min and max is two times less than any other.
If you run the example above many times, you would easily see that 2 appears the most often.
That happens because Math.round() gets random numbers from the interval 1..3 and rounds them as follows:
values from 1 ...
to 1.4999999999 become 1
values from 1.5 ...
to 2.4999999999 become 2
values from 2.5 ...
to 2.9999999999 become 3
Now we can clearly see that 1 gets twice less values than 2.
And the same with 3.
The correct solution
There are many correct solutions to the task.
One of them is to adjust interval borders.
To ensure the same intervals, we can generate values from 0.5 to 3.5, thus adding the required probabilities to the edges:
function randomInteger(min, max) {
// now rand is from (min-0.5) to (max+0.5)
let rand = min - 0.5 + Math.random() * (max - min + 1);
return Math.round(rand);
}
alert( randomInteger(1, 3) );
An alternative way could be to use Math.floor for a random number from min to max+1:
function randomInteger(min, max) {
// here rand is from min to (max+1)
let rand = min + Math.random() * (max + 1 - min);
return Math.floor(rand);
}
alert( randomInteger(1, 3) );
Now all intervals are mapped this way:
values from 1 ...
to 1.9999999999 become 1
values from 2 ...
to 2.9999999999 become 2
values from 3 ...
to 3.9999999999 become 3
All intervals have the same length, making the final distribution uniform.
Data types
Strings
In JavaScript, the textual data is stored as strings.
There is no separate type for a single character.
The internal format for strings is always UTF-16, it is not tied to the page encoding.
- Quotes
Let's recall the kinds of quotes.
Strings can be enclosed within either single quotes, double quotes or backticks:
let single = 'single-quoted';
let double = "double-quoted";
let backticks = `backticks`;
Single and double quotes are essentially the same.
Backticks, however, allow us to embed any expression into the string, by wrapping it in ${…}:
function sum(a, b) {
return a + b;
}
alert(`1 + 2 = ${sum(1, 2)}.`); // 1 + 2 = 3.
Another advantage of using backticks is that they allow a string to span multiple lines:
let guestList = `Guests:
* John
* Pete
* Mary
`;
alert(guestList); // a list of guests, multiple lines
Looks natural, right? But single or double quotes do not work this way.
If we use them and try to use multiple lines, there'll be an error:
let guestList = "Guests: // Error: Unexpected token ILLEGAL
* John";
Single and double quotes come from ancient times of language creation when the need for multiline strings was not taken into account.
Backticks appeared much later and thus are more versatile.
Backticks also allow us to specify a “template function” before the first backtick.
The syntax is: func`string`.
The function func is called automatically, receives the string and embedded expressions and can process them.
This is called “tagged templates”.
This feature makes it easier to implement custom templating, but is rarely used in practice.
You can read more about it in the manual.
- Special characters
It is still possible to create multiline strings with single and double quotes by using a so-called “newline character”, written as \n, which denotes a line break:
let guestList = "Guests:\n * John\n * Pete\n * Mary";
alert(guestList); // a multiline list of guests
For example, these two lines are equal, just written differently:
let str1 = "Hello\nWorld"; // two lines using a "newline symbol"
// two lines using a normal newline and backticks
let str2 = `Hello
World`;
alert(str1 == str2); // true
There are other, less common “special” characters.
Here's the full list:
Character
Description
\n
New line
\r
Carriage return: not used alone.
Windows text files use a combination of two characters \r\n to represent a line break.
\', \"
Quotes
\\
Backslash
\t
Tab
\b, \f, \v
Backspace, Form Feed, Vertical Tab – kept for compatibility, not used nowadays.
\xXX
Unicode character with the given hexadecimal Unicode XX, e.g.
'\x7A' is the same as 'z'.
\uXXXX
A Unicode symbol with the hex code XXXX in UTF-16 encoding, for instance \u00A9 – is a Unicode for the copyright symbol .
It must be exactly 4 hex digits.
\u{X…XXXXXX} (1 to 6 hex characters)
A Unicode symbol with the given UTF-32 encoding.
Some rare characters are encoded with two Unicode symbols, taking 4 bytes.
This way we can insert long codes.
Examples with Unicode:
alert( "\u00A9" ); //
alert( "\u{20331}" ); // 佫, a rare Chinese hieroglyph (long Unicode)
alert( "\u{1F60D}" ); // , a smiling face symbol (another long Unicode)
All special characters start with a backslash character \.
It is also called an “escape character”.
We might also use it if we wanted to insert a quote into the string.
For instance:
alert( 'I\'m the Walrus!' ); // I'm the Walrus!
As you can see, we have to prepend the inner quote by the backslash \', because otherwise it would indicate the string end.
Of course, only the quotes that are the same as the enclosing ones need to be escaped.
So, as a more elegant solution, we could switch to double quotes or backticks instead:
alert( `I'm the Walrus!` ); // I'm the Walrus!
Note that the backslash \ serves for the correct reading of the string by JavaScript, then disappears.
The in-memory string has no \.
You can clearly see that in alert from the examples above.
But what if we need to show an actual backslash \ within the string?
That's possible, but we need to double it like \\:
alert( `The backslash: \\` ); // The backslash: \
- String length
The length property has the string length:
alert( `My\n`.length ); // 3
Note that \n is a single “special” character, so the length is indeed 3.
length is a property
People with a background in some other languages sometimes mistype by calling str.length() instead of just str.length.
That doesn't work.
Please note that str.length is a numeric property, not a function.
There is no need to add parenthesis after it.
- Accessing characters
To get a character at position pos, use square brackets [pos] or call the method str.charAt(pos).
The first character starts from the zero position:
let str = `Hello`;
// the first character
alert( str[0] ); // H
alert( str.charAt(0) ); // H
// the last character
alert( str[str.length - 1] ); // o
The square brackets are a modern way of getting a character, while charAt exists mostly for historical reasons.
The only difference between them is that if no character is found, [] returns undefined, and charAt returns an empty string:
let str = `Hello`;
alert( str[1000] ); // undefined
alert( str.charAt(1000) ); // '' (an empty string)
We can also iterate over characters using for..of:
for (let char of "Hello") {
alert(char); // H,e,l,l,o (char becomes "H", then "e", then "l" etc)
}
- Strings are immutable
Strings can't be changed in JavaScript.
It is impossible to change a character.
Let's try it to show that it doesn't work:
let str = 'Hi';
str[0] = 'h'; // error
alert( str[0] ); // doesn't work
The usual workaround is to create a whole new string and assign it to str instead of the old one.
For instance:
let str = 'Hi';
str = 'h' + str[1]; // replace the string
alert( str ); // hi
In the following sections we'll see more examples of this.
- Changing the case
Methods toLowerCase() and toUpperCase() change the case:
alert( 'Interface'.toUpperCase() ); // INTERFACE
alert( 'Interface'.toLowerCase() ); // interface
Or, if we want a single character lowercased:
alert( 'Interface'[0].toLowerCase() ); // 'i'
- Searching for a substring
There are multiple ways to look for a substring within a string.
str.indexOf
The first method is str.indexOf(substr, pos).
It looks for the substr in str, starting from the given position pos, and returns the position where the match was found or -1 if nothing can be found.
For instance:
let str = 'Widget with id';
alert( str.indexOf('Widget') ); // 0, because 'Widget' is found at the beginning
alert( str.indexOf('widget') ); // -1, not found, the search is case-sensitive
alert( str.indexOf("id") ); // 1, "id" is found at the position 1 (..idget with id)
The optional second parameter allows us to start searching from a given position.
For instance, the first occurrence of "id" is at position 1.
To look for the next occurrence, let's start the search from position 2:
let str = 'Widget with id';
alert( str.indexOf('id', 2) ) // 12
If we're interested in all occurrences, we can run indexOf in a loop.
Every new call is made with the position after the previous match:
let str = 'As sly as a fox, as strong as an ox';
let target = 'as'; // let's look for it
let pos = 0;
while (true) {
let foundPos = str.indexOf(target, pos);
if (foundPos == -1) break;
alert( `Found at ${foundPos}` );
pos = foundPos + 1; // continue the search from the next position
}
The same algorithm can be layed out shorter:
let str = "As sly as a fox, as strong as an ox";
let target = "as";
let pos = -1;
while ((pos = str.indexOf(target, pos + 1)) != -1) {
alert( pos );
}str.lastIndexOf(substr, position)
There is also a similar method str.lastIndexOf(substr, position) that searches from the end of a string to its beginning.
It would list the occurrences in the reverse order.
There is a slight inconvenience with indexOf in the if test.
We can't put it in the if like this:
let str = "Widget with id";
if (str.indexOf("Widget")) {
alert("We found it"); // doesn't work!
}
The alert in the example above doesn't show because str.indexOf("Widget") returns 0 (meaning that it found the match at the starting position).
Right, but if considers 0 to be false.
So, we should actually check for -1, like this:
let str = "Widget with id";
if (str.indexOf("Widget") != -1) {
alert("We found it"); // works now!
}
The bitwise NOT trick
One of the old tricks used here is the bitwise NOT~ operator.
It converts the number to a 32-bit integer (removes the decimal part if exists) and then reverses all bits in its binary representation.
In practice, that means a simple thing: for 32-bit integers ~n equals -(n+1).
For instance:
alert( ~2 ); // -3, the same as -(2+1)
alert( ~1 ); // -2, the same as -(1+1)
alert( ~0 ); // -1, the same as -(0+1)
alert( ~-1 ); // 0, the same as -(-1+1)
As we can see, ~n is zero only if n == -1 (that's for any 32-bit signed integer n).
So, the test if ( ~str.indexOf("...") ) is truthy only if the result of indexOf is not -1.
In other words, when there is a match.
People use it to shorten indexOf checks:
let str = "Widget";
if (~str.indexOf("Widget")) {
alert( 'Found it!' ); // works
}
It is usually not recommended to use language features in a non-obvious way, but this particular trick is widely used in old code, so we should understand it.
Just remember: if (~str.indexOf(...)) reads as “if found”.
To be precise though, as big numbers are truncated to 32 bits by ~ operator, there exist other numbers that give 0, the smallest is ~4294967295=0.
That makes such check correct only if a string is not that long.
Right now we can see this trick only in the old code, as modern JavaScript provides .includes method (see below).
includes, startsWith, endsWith
The more modern method str.includes(substr, pos) returns true/false depending on whether str contains substr within.
It's the right choice if we need to test for the match, but don't need its position:
alert( "Widget with id".includes("Widget") ); // true
alert( "Hello".includes("Bye") ); // false
The optional second argument of str.includes is the position to start searching from:
alert( "Widget".includes("id") ); // true
alert( "Widget".includes("id", 3) ); // false, from position 3 there is no "id"
The methods str.startsWith and str.endsWith do exactly what they say:
alert( "Widget".startsWith("Wid") ); // true, "Widget" starts with "Wid"
alert( "Widget".endsWith("get") ); // true, "Widget" ends with "get"
- Getting a substring
There are 3 methods in JavaScript to get a substring: substring, substr and slice.
str.slice(start [, end])
Returns the part of the string from start to (but not including) end.
For instance:
let str = "stringify";
alert( str.slice(0, 5) ); // 'strin', the substring from 0 to 5 (not including 5)
alert( str.slice(0, 1) ); // 's', from 0 to 1, but not including 1, so only character at 0
If there is no second argument, then slice goes till the end of the string:
let str = "stringify";
alert( str.slice(2) ); // 'ringify', from the 2nd position till the end
Negative values for start/end are also possible.
They mean the position is counted from the string end:
let str = "stringify";
// start at the 4th position from the right, end at the 1st from the right
alert( str.slice(-4, -1) ); // 'gif'
str.substring(start [, end])
Returns the part of the string betweenstart and end.
This is almost the same as slice, but it allows start to be greater than end.
For instance:
let str = "stringify";
// these are same for substring
alert( str.substring(2, 6) ); // "ring"
alert( str.substring(6, 2) ); // "ring"
// ...but not for slice:
alert( str.slice(2, 6) ); // "ring" (the same)
alert( str.slice(6, 2) ); // "" (an empty string)
Negative arguments are (unlike slice) not supported, they are treated as 0.
str.substr(start [, length])
Returns the part of the string from start, with the given length.
In contrast with the previous methods, this one allows us to specify the length instead of the ending position:
let str = "stringify";
alert( str.substr(2, 4) ); // 'ring', from the 2nd position get 4 characters
The first argument may be negative, to count from the end:
let str = "stringify";
alert( str.substr(-4, 2) ); // 'gi', from the 4th position get 2 characters
Let's recap these methods to avoid any confusion:
method
selects…
negatives
slice(start, end)
from start to end (not including end)
allows negatives
substring(start, end)
between start and end
negative values mean 0
substr(start, length)
from start get length characters
allows negative start
Which one to choose?
All of them can do the job.
Formally, substr has a minor drawback: it is described not in the core JavaScript specification, but in Annex B, which covers browser-only features that exist mainly for historical reasons.
So, non-browser environments may fail to support it.
But in practice it works everywhere.
Of the other two variants, slice is a little bit more flexible, it allows negative arguments and shorter to write.
So, it's enough to remember solely slice of these three methods.
- Comparing strings
As we know from the chapter Comparisons, strings are compared character-by-character in alphabetical order.
Although, there are some oddities.
A lowercase letter is always greater than the uppercase:
alert( 'a' > 'Z' ); // true
Letters with diacritical marks are “out of order”:
alert( ' sterreich' > 'Zealand' ); // true
This may lead to strange results if we sort these country names.
Usually people would expect Zealand to come after sterreich in the list.
To understand what happens, let's review the internal representation of strings in JavaScript.
All strings are encoded using UTF-16.
That is: each character has a corresponding numeric code.
There are special methods that allow to get the character for the code and back.
str.codePointAt(pos)
Returns the code for the character at position pos:
// different case letters have different codes
alert( "z".codePointAt(0) ); // 122
alert( "Z".codePointAt(0) ); // 90
String.fromCodePoint(code)
Creates a character by its numeric codealert( String.fromCodePoint(90) ); // Z
We can also add Unicode characters by their codes using \u followed by the hex code:
// 90 is 5a in hexadecimal system
alert( '\u005a' ); // Z
Now let's see the characters with codes 65..220 (the latin alphabet and a little bit extra) by making a string of them:
let str = '';
for (let i = 65; i <= 220; i++) {
str += String.fromCodePoint(i);
}
alert( str );
// ABCDEFGHIJKLMNOPQRSTUVWXYZ[\]^_`abcdefghijklmnopqrstuvwxyz{|}~
// ¢£¤¥|§¨ a - ˉ°±23′μ · 1o àá èéê ìí D òó × ùú ü
See? Capital characters go first, then a few special ones, then lowercase characters, and near the end of the output.
Now it becomes obvious why a > Z.
The characters are compared by their numeric code.
The greater code means that the character is greater.
The code for a (97) is greater than the code for Z (90).
All lowercase letters go after uppercase letters because their codes are greater.
Some letters like stand apart from the main alphabet.
Here, it's code is greater than anything from a to z.
Correct comparisons
The “right” algorithm to do string comparisons is more complex than it may seem, because alphabets are different for different languages.
So, the browser needs to know the language to compare.
Luckily, all modern browsers (IE10- requires the additional library Intl.js) support the internationalization standard ECMA-402.
It provides a special method to compare strings in different languages, following their rules.
The call str.localeCompare(str2) returns an integer indicating whether str is less, equal or greater than str2 according to the language rules:
Returns a negative number if str is less than str2.
Returns a positive number if str is greater than str2.
Returns 0 if they are equivalent.
For instance:
alert( ' sterreich'.localeCompare('Zealand') ); // -1
This method actually has two additional arguments specified in the documentation, which allows it to specify the language (by default taken from the environment, letter order depends on the language) and setup additional rules like case sensitivity or should "a" and "a " be treated as the same etc.
- Internals, Unicode
Advanced knowledge
The section goes deeper into string internals.
This knowledge will be useful for you if you plan to deal with emoji, rare mathematical or hieroglyphic characters or other rare symbols.
You can skip the section if you don't plan to support them.
Surrogate pairs
All frequently used characters have 2-byte codes.
Letters in most european languages, numbers, and even most hieroglyphs, have a 2-byte representation.
But 2 bytes only allow 65536 combinations and that's not enough for every possible symbol.
So rare symbols are encoded with a pair of 2-byte characters called “a surrogate pair”.
The length of such symbols is 2:
alert( ' '.length ); // 2, MATHEMATICAL SCRIPT CAPITAL X
alert( ' '.length ); // 2, FACE WITH TEARS OF JOY
alert( ' '.length ); // 2, a rare Chinese hieroglyph
Note that surrogate pairs did not exist at the time when JavaScript was created, and thus are not correctly processed by the language!
We actually have a single symbol in each of the strings above, but the length shows a length of 2.
String.fromCodePoint and str.codePointAt are few rare methods that deal with surrogate pairs right.
They recently appeared in the language.
Before them, there were only String.fromCharCode and str.charCodeAt.
These methods are actually the same as fromCodePoint/codePointAt, but don't work with surrogate pairs.
Getting a symbol can be tricky, because surrogate pairs are treated as two characters:
alert( ' '[0] ); // strange symbols...
alert( ' '[1] ); // ...pieces of the surrogate pair
Note that pieces of the surrogate pair have no meaning without each other.
So the alerts in the example above actually display garbage.
Technically, surrogate pairs are also detectable by their codes: if a character has the code in the interval of 0xd800..0xdbff, then it is the first part of the surrogate pair.
The next character (second part) must have the code in interval 0xdc00..0xdfff.
These intervals are reserved exclusively for surrogate pairs by the standard.
In the case above:
// charCodeAt is not surrogate-pair aware, so it gives codes for parts
alert( ' '.charCodeAt(0).toString(16) ); // d835, between 0xd800 and 0xdbff
alert( ' '.charCodeAt(1).toString(16) ); // dcb3, between 0xdc00 and 0xdfff
You will find more ways to deal with surrogate pairs later in the chapter Iterables.
There are probably special libraries for that too, but nothing famous enough to suggest here.
Diacritical marks and normalization
In many languages there are symbols that are composed of the base character with a mark above/under it.
For instance, the letter a can be the base character for: àáa ā.
Most common “composite” character have their own code in the UTF-16 table.
But not all of them, because there are too many possible combinations.
To support arbitrary compositions, UTF-16 allows us to use several Unicode characters: the base character followed by one or many “mark” characters that “decorate” it.
For instance, if we have S followed by the special “dot above” character (code \u0307), it is shown as S .
alert( 'S\u0307' ); // S
If we need an additional mark above the letter (or below it) – no problem, just add the necessary mark character.
For instance, if we append a character “dot below” (code \u0323), then we'll have “S with dots above and below”: S .
For example:
alert( 'S\u0307\u0323' ); // S
This provides great flexibility, but also an interesting problem: two characters may visually look the same, but be represented with different Unicode compositions.
For instance:
let s1 = 'S\u0307\u0323'; // S , S + dot above + dot below
let s2 = 'S\u0323\u0307'; // S , S + dot below + dot above
alert( `s1: ${s1}, s2: ${s2}` );
alert( s1 == s2 ); // false though the characters look identical (?!)
To solve this, there exists a “Unicode normalization” algorithm that brings each string to the single “normal” form.
It is implemented by str.normalize().
alert( "S\u0307\u0323".normalize() == "S\u0323\u0307".normalize() ); // true
It's funny that in our situation normalize() actually brings together a sequence of 3 characters to one: \u1e68 (S with two dots).
alert( "S\u0307\u0323".normalize().length ); // 1
alert( "S\u0307\u0323".normalize() == "\u1e68" ); // true
In reality, this is not always the case.
The reason being that the symbol is “common enough”, so UTF-16 creators included it in the main table and gave it the code.
If you want to learn more about normalization rules and variants – they are described in the appendix of the Unicode standard: Unicode Normalization Forms, but for most practical purposes the information from this section is enough.
- Summary
There are 3 types of quotes.
Backticks allow a string to span multiple lines and embed expressions ${…}.
Strings in JavaScript are encoded using UTF-16.
We can use special characters like \n and insert letters by their Unicode using \u....
To get a character, use: [].
To get a substring, use: slice or substring.
To lowercase/uppercase a string, use: toLowerCase/toUpperCase.
To look for a substring, use: indexOf, or includes/startsWith/endsWith for simple checks.
To compare strings according to the language, use: localeCompare, otherwise they are compared by character codes.
There are several other helpful methods in strings:
str.trim() – removes (“trims”) spaces from the beginning and end of the string.
str.repeat(n) – repeats the string n times.
…and more to be found in the manual.
Strings also have methods for doing search/replace with regular expressions.
But that's big topic, so it's explained in a separate tutorial section Regular expressions.
importance: 5
Write a function ucFirst(str) that returns the string str with the uppercased first character, for instance:
ucFirst("john") == "John";Open a sandbox with tests.
We can't “replace” the first character, because strings in JavaScript are immutable.
But we can make a new string based on the existing one, with the uppercased first character:
let newStr = str[0].toUpperCase() + str.slice(1);
There's a small problem though.
If str is empty, then str[0] is undefined, and as undefined doesn't have the toUpperCase() method, we'll get an error.
There are two variants here:
Use str.charAt(0), as it always returns a string (maybe empty).
Add a test for an empty string.
Here's the 2nd variant:
function ucFirst(str) {
if (!str) return str;
return str[0].toUpperCase() + str.slice(1);
}
alert( ucFirst("john") ); // JohnOpen the solution with tests in a sandbox.
Check for spam
importance: 5
Write a function checkSpam(str) that returns true if str contains ‘viagra' or ‘XXX', otherwise false.
The function must be case-insensitive:
checkSpam('buy ViAgRA now') == true
checkSpam('free xxxxx') == true
checkSpam("innocent rabbit") == falseOpen a sandbox with tests.
To make the search case-insensitive, let's bring the string to lower case and then search:
function checkSpam(str) {
let lowerStr = str.toLowerCase();
return lowerStr.includes('viagra') || lowerStr.includes('xxx');
}
alert( checkSpam('buy ViAgRA now') );
alert( checkSpam('free xxxxx') );
alert( checkSpam("innocent rabbit") );Open the solution with tests in a sandbox.
Truncate the text
importance: 5
Create a function truncate(str, maxlength) that checks the length of the str and, if it exceeds maxlength – replaces the end of str with the ellipsis character "…", to make its length equal to maxlength.
The result of the function should be the truncated (if needed) string.
For instance:
truncate("What I'd like to tell on this topic is:", 20) = "What I'd like to te…"
truncate("Hi everyone!", 20) = "Hi everyone!"Open a sandbox with tests.
The maximal length must be maxlength, so we need to cut it a little shorter, to give space for the ellipsis.
Note that there is actually a single Unicode character for an ellipsis.
That's not three dots.
function truncate(str, maxlength) {
return (str.length > maxlength) ?
str.slice(0, maxlength - 1) + '…' : str;
}Open the solution with tests in a sandbox.
Extract the money
importance: 4
We have a cost in the form "$120".
That is: the dollar sign goes first, and then the number.
Create a function extractCurrencyValue(str) that would extract the numeric value from such string and return it.
The example:
alert( extractCurrencyValue('$120') === 120 ); // trueOpen a sandbox with tests.function extractCurrencyValue(str) {
return +str.slice(1);
}Open the solution with tests in a sandbox.Data types
Arrays
Objects allow you to store keyed collections of values.
That's fine.
But quite often we find that we need an ordered collection, where we have a 1st, a 2nd, a 3rd element and so on.
For example, we need that to store a list of something: users, goods, HTML elements etc.
It is not convenient to use an object here, because it provides no methods to manage the order of elements.
We can't insert a new property “between” the existing ones.
Objects are just not meant for such use.
There exists a special data structure named Array, to store ordered collections.
- Declaration
There are two syntaxes for creating an empty array:
let arr = new Array();
let arr = [];
Almost all the time, the second syntax is used.
We can supply initial elements in the brackets:
let fruits = ["Apple", "Orange", "Plum"];
Array elements are numbered, starting with zero.
We can get an element by its number in square brackets:
let fruits = ["Apple", "Orange", "Plum"];
alert( fruits[0] ); // Apple
alert( fruits[1] ); // Orange
alert( fruits[2] ); // Plum
We can replace an element:
fruits[2] = 'Pear'; // now ["Apple", "Orange", "Pear"]
…Or add a new one to the array:
fruits[3] = 'Lemon'; // now ["Apple", "Orange", "Pear", "Lemon"]
The total count of the elements in the array is its length:
let fruits = ["Apple", "Orange", "Plum"];
alert( fruits.length ); // 3
We can also use alert to show the whole array.
let fruits = ["Apple", "Orange", "Plum"];
alert( fruits ); // Apple,Orange,Plum
An array can store elements of any type.
For instance:
// mix of values
let arr = [ 'Apple', { name: 'John' }, true, function() { alert('hello'); } ];
// get the object at index 1 and then show its name
alert( arr[1].name ); // John
// get the function at index 3 and run it
arr[3](); // hello
Trailing comma
An array, just like an object, may end with a comma:
let fruits = [
"Apple",
"Orange",
"Plum",
];
The “trailing comma” style makes it easier to insert/remove items, because all lines become alike.
- Methods pop/push, shift/unshift
A queue is one of the most common uses of an array.
In computer science, this means an ordered collection of elements which supports two operations:
push appends an element to the end.
shift get an element from the beginning, advancing the queue, so that the 2nd element becomes the 1st.
Arrays support both operations.
In practice we need it very often.
For example, a queue of messages that need to be shown on-screen.
There's another use case for arrays – the data structure named stack.
It supports two operations:
push adds an element to the end.
pop takes an element from the end.
So new elements are added or taken always from the “end”.
A stack is usually illustrated as a pack of cards: new cards are added to the top or taken from the top:
For stacks, the latest pushed item is received first, that's also called LIFO (Last-In-First-Out) principle.
For queues, we have FIFO (First-In-First-Out).
Arrays in JavaScript can work both as a queue and as a stack.
They allow you to add/remove elements both to/from the beginning or the end.
In computer science the data structure that allows this, is called deque.
Methods that work with the end of the array:
pop
Extracts the last element of the array and returns it:
let fruits = ["Apple", "Orange", "Pear"];
alert( fruits.pop() ); // remove "Pear" and alert it
alert( fruits ); // Apple, Orange
push
Append the element to the end of the array:
let fruits = ["Apple", "Orange"];
fruits.push("Pear");
alert( fruits ); // Apple, Orange, Pear
The call fruits.push(...) is equal to fruits[fruits.length] = ....
Methods that work with the beginning of the array:
shift
Extracts the first element of the array and returns it:
let fruits = ["Apple", "Orange", "Pear"];
alert( fruits.shift() ); // remove Apple and alert it
alert( fruits ); // Orange, Pear
unshift
Add the element to the beginning of the array:
let fruits = ["Orange", "Pear"];
fruits.unshift('Apple');
alert( fruits ); // Apple, Orange, Pear
Methods push and unshift can add multiple elements at once:
let fruits = ["Apple"];
fruits.push("Orange", "Peach");
fruits.unshift("Pineapple", "Lemon");
// ["Pineapple", "Lemon", "Apple", "Orange", "Peach"]
alert( fruits );
- Internals
An array is a special kind of object.
The square brackets used to access a property arr[0] actually come from the object syntax.
That's essentially the same as obj[key], where arr is the object, while numbers are used as keys.
They extend objects providing special methods to work with ordered collections of data and also the length property.
But at the core it's still an object.
Remember, there are only eight basic data types in JavaScript (see the Data types chapter for more info).
Array is an object and thus behaves like an object.
For instance, it is copied by reference:
let fruits = ["Banana"]
let arr = fruits; // copy by reference (two variables reference the same array)
alert( arr === fruits ); // true
arr.push("Pear"); // modify the array by reference
alert( fruits ); // Banana, Pear - 2 items now
…But what makes arrays really special is their internal representation.
The engine tries to store its elements in the contiguous memory area, one after another, just as depicted on the illustrations in this chapter, and there are other optimizations as well, to make arrays work really fast.
But they all break if we quit working with an array as with an “ordered collection” and start working with it as if it were a regular object.
For instance, technically we can do this:
let fruits = []; // make an array
fruits[99999] = 5; // assign a property with the index far greater than its length
fruits.age = 25; // create a property with an arbitrary name
That's possible, because arrays are objects at their base.
We can add any properties to them.
But the engine will see that we're working with the array as with a regular object.
Array-specific optimizations are not suited for such cases and will be turned off, their benefits disappear.
The ways to misuse an array:
Add a non-numeric property like arr.test = 5.
Make holes, like: add arr[0] and then arr[1000] (and nothing between them).
Fill the array in the reverse order, like arr[1000], arr[999] and so on.
Please think of arrays as special structures to work with the ordered data.
They provide special methods for that.
Arrays are carefully tuned inside JavaScript engines to work with contiguous ordered data, please use them this way.
And if you need arbitrary keys, chances are high that you actually require a regular object {}.
- Performance
Methods push/pop run fast, while shift/unshift are slow.
Why is it faster to work with the end of an array than with its beginning? Let's see what happens during the execution:
fruits.shift(); // take 1 element from the start
It's not enough to take and remove the element with the number 0.
Other elements need to be renumbered as well.
The shift operation must do 3 things:
Remove the element with the index 0.
Move all elements to the left, renumber them from the index 1 to 0, from 2 to 1 and so on.
Update the length property.
The more elements in the array, the more time to move them, more in-memory operations.
The similar thing happens with unshift: to add an element to the beginning of the array, we need first to move existing elements to the right, increasing their indexes.
And what's with push/pop? They do not need to move anything.
To extract an element from the end, the pop method cleans the index and shortens length.
The actions for the pop operation:
fruits.pop(); // take 1 element from the endThe pop method does not need to move anything, because other elements keep their indexes.
That's why it's blazingly fast.
The similar thing with the push method.
- Loops
One of the oldest ways to cycle array items is the for loop over indexes:
let arr = ["Apple", "Orange", "Pear"];
for (let i = 0; i < arr.length; i++) {
alert( arr[i] );
}
But for arrays there is another form of loop, for..of:
let fruits = ["Apple", "Orange", "Plum"];
// iterates over array elements
for (let fruit of fruits) {
alert( fruit );
}
The for..of doesn't give access to the number of the current element, just its value, but in most cases that's enough.
And it's shorter.
Technically, because arrays are objects, it is also possible to use for..in:
let arr = ["Apple", "Orange", "Pear"];
for (let key in arr) {
alert( arr[key] ); // Apple, Orange, Pear
}
But that's actually a bad idea.
There are potential problems with it:
The loop for..in iterates over all properties, not only the numeric ones.
There are so-called “array-like” objects in the browser and in other environments, that look like arrays.
That is, they have length and indexes properties, but they may also have other non-numeric properties and methods, which we usually don't need.
The for..in loop will list them though.
So if we need to work with array-like objects, then these “extra” properties can become a problem.
The for..in loop is optimized for generic objects, not arrays, and thus is 10-100 times slower.
Of course, it's still very fast.
The speedup may only matter in bottlenecks.
But still we should be aware of the difference.
Generally, we shouldn't use for..in for arrays.
- A word about “length”
The length property automatically updates when we modify the array.
To be precise, it is actually not the count of values in the array, but the greatest numeric index plus one.
For instance, a single element with a large index gives a big length:
let fruits = [];
fruits[123] = "Apple";
alert( fruits.length ); // 124
Note that we usually don't use arrays like that.
Another interesting thing about the length property is that it's writable.
If we increase it manually, nothing interesting happens.
But if we decrease it, the array is truncated.
The process is irreversible, here's the example:
let arr = [1, 2, 3, 4, 5];
arr.length = 2; // truncate to 2 elements
alert( arr ); // [1, 2]
arr.length = 5; // return length back
alert( arr[3] ); // undefined: the values do not return
So, the simplest way to clear the array is: arr.length = 0;.
- new Array()
There is one more syntax to create an array:
let arr = new Array("Apple", "Pear", "etc");
It's rarely used, because square brackets [] are shorter.
Also there's a tricky feature with it.
If new Array is called with a single argument which is a number, then it creates an array without items, but with the given length.
Let's see how one can shoot themself in the foot:
let arr = new Array(2); // will it create an array of [2] ?
alert( arr[0] ); // undefined! no elements.
alert( arr.length ); // length 2
In the code above, new Array(number) has all elements undefined.
To evade such surprises, we usually use square brackets, unless we really know what we're doing.
- Multidimensional arrays
Arrays can have items that are also arrays.
We can use it for multidimensional arrays, for example to store matrices:
let matrix = [
[1, 2, 3],
[4, 5, 6],
[7, 8, 9]
];
alert( matrix[1][1] ); // 5, the central element
- toString
Arrays have their own implementation of toString method that returns a comma-separated list of elements.
For instance:
let arr = [1, 2, 3];
alert( arr ); // 1,2,3
alert( String(arr) === '1,2,3' ); // true
Also, let's try this:
alert( [] + 1 ); // "1"
alert( [1] + 1 ); // "11"
alert( [1,2] + 1 ); // "1,21"
Arrays do not have Symbol.toPrimitive, neither a viable valueOf, they implement only toString conversion, so here [] becomes an empty string, [1] becomes "1" and [1,2] becomes "1,2".
When the binary plus "+" operator adds something to a string, it converts it to a string as well, so the next step looks like this:
alert( "" + 1 ); // "1"
alert( "1" + 1 ); // "11"
alert( "1,2" + 1 ); // "1,21"
- Don't compare arrays with ==
Arrays in JavaScript, unlike some other programming languages, shouldn't be compared with operator ==.
This operator has no special treatment for arrays, it works with them as with any objects.
Let's recall the rules:
Two objects are equal == only if they're references to the same object.
If one of arguments of == is an object, and the other one is a primitive, then the object gets converted to primitive, as explained in the chapter Object to primitive conversion.
…With an exception of null and undefined that equal == each other and nothing else.
The strict comparison === is even simpler, as it doesn't convert types.
So, if we compare arrays with ==, they are never the same, unless we compare two variables that reference exactly the same array.
For example:
alert( [] == [] ); // false
alert( [0] == [0] ); // false
These arrays are technically different objects.
So they aren't equal.
The == operator doesn't do item-by-item comparison.
Comparison with primitives may give seemingly strange results as well:
alert( 0 == [] ); // true
alert('0' == [] ); // false
Here, in both cases, we compare a primitive with an array object.
So the array [] gets converted to primitive for the purpose of comparison and becomes an empty string ''.
Then the comparison process goes on with the primitives, as described in the chapter Type Conversions:
// after [] was converted to ''
alert( 0 == '' ); // true, as '' becomes converted to number 0
alert('0' == '' ); // false, no type conversion, different strings
So, how to compare arrays?
That's simple: don't use the == operator.
Instead, compare them item-by-item in a loop or using iteration methods explained in the next chapter.
- Summary
Array is a special kind of object, suited to storing and managing ordered data items.
The declaration:
// square brackets (usual)
let arr = [item1, item2...];
// new Array (exceptionally rare)
let arr = new Array(item1, item2...);
The call to new Array(number) creates an array with the given length, but without elements.
The length property is the array length or, to be precise, its last numeric index plus one.
It is auto-adjusted by array methods.
If we shorten length manually, the array is truncated.
We can use an array as a deque with the following operations:
push(...items) adds items to the end.
pop() removes the element from the end and returns it.
shift() removes the element from the beginning and returns it.
unshift(...items) adds items to the beginning.
To loop over the elements of the array:
for (let i=0; i<arr.length; i++) – works fastest, old-browser-compatible.
for (let item of arr) – the modern syntax for items only,
for (let i in arr) – never use.
To compare arrays, don't use the == operator (as well as >, < and others), as they have no special treatment for arrays.
They handle them as any objects, and it's not what we usually want.
Instead you can use for..of loop to compare arrays item-by-item.
We will continue with arrays and study more methods to add, remove, extract elements and sort arrays in the next chapter Array methods.
importance: 3
What is this code going to show?
let fruits = ["Apples", "Pear", "Orange"];
// push a new value into the "copy"
let shoppingCart = fruits;
shoppingCart.push("Banana");
// what's in fruits?
alert( fruits.length ); // ?
The result is 4:
let fruits = ["Apples", "Pear", "Orange"];
let shoppingCart = fruits;
shoppingCart.push("Banana");
alert( fruits.length ); // 4
That's because arrays are objects.
So both shoppingCart and fruits are the references to the same array.
Array operations.
importance: 5
Let's try 5 array operations.
Create an array styles with items “Jazz” and “Blues”.
Append “Rock-n-Roll” to the end.
Replace the value in the middle by “Classics”.
Your code for finding the middle value should work for any arrays with odd length.
Strip off the first value of the array and show it.
Prepend Rap and Reggae to the array.
The array in the process:
Jazz, Blues
Jazz, Blues, Rock-n-Roll
Jazz, Classics, Rock-n-Roll
Classics, Rock-n-Roll
Rap, Reggae, Classics, Rock-n-Rolllet styles = ["Jazz", "Blues"];
styles.push("Rock-n-Roll");
styles[Math.floor((styles.length - 1) / 2)] = "Classics";
alert( styles.shift() );
styles.unshift("Rap", "Reggae");
Calling in an array context
importance: 5
What is the result? Why?
let arr = ["a", "b"];
arr.push(function() {
alert( this );
})
arr[2](); // ?
The call arr[2]() is syntactically the good old obj[method](), in the role of obj we have arr, and in the role of method we have 2.
So we have a call of the function arr[2] as an object method.
Naturally, it receives this referencing the object arr and outputs the array:
let arr = ["a", "b"];
arr.push(function() {
alert( this );
})
arr[2](); // a,b,function(){...}
The array has 3 values: initially it had two, plus the function.
Sum input numbers
importance: 4
Write the function sumInput() that:
Asks the user for values using prompt and stores the values in the array.
Finishes asking when the user enters a non-numeric value, an empty string, or presses “Cancel”.
Calculates and returns the sum of array items.
P.S.
A zero 0 is a valid number, please don't stop the input on zero.
Run the demo
Please note the subtle, but important detail of the solution.
We don't convert value to number instantly after prompt, because after value = +value we would not be able to tell an empty string (stop sign) from the zero (valid number).
We do it later instead.
function sumInput() {
let numbers = [];
while (true) {
let value = prompt("A number please?", 0);
// should we cancel?
if (value === "" || value === null || !isFinite(value)) break;
numbers.push(+value);
}
let sum = 0;
for (let number of numbers) {
sum += number;
}
return sum;
}
alert( sumInput() );
A maximal subarray
importance: 2
The input is an array of numbers, e.g.
arr = [1, -2, 3, 4, -9, 6].
The task is: find the contiguous subarray of arr with the maximal sum of items.
Write the function getMaxSubSum(arr) that will return that sum.
For instance:
getMaxSubSum([-1, 2, 3, -9]) == 5 (the sum of highlighted items)
getMaxSubSum([2, -1, 2, 3, -9]) == 6
getMaxSubSum([-1, 2, 3, -9, 11]) == 11
getMaxSubSum([-2, -1, 1, 2]) == 3
getMaxSubSum([100, -9, 2, -3, 5]) == 100
getMaxSubSum([1, 2, 3]) == 6 (take all)
If all items are negative, it means that we take none (the subarray is empty), so the sum is zero:
getMaxSubSum([-1, -2, -3]) = 0
Please try to think of a fast solution: O(n2) or even O(n) if you can.
Open a sandbox with tests.
Slow solution
We can calculate all possible subsums.
The simplest way is to take every element and calculate sums of all subarrays starting from it.
For instance, for [-1, 2, 3, -9, 11]:
// Starting from -1:
-1
-1 + 2
-1 + 2 + 3
-1 + 2 + 3 + (-9)
-1 + 2 + 3 + (-9) + 11
// Starting from 2:
2
2 + 3
2 + 3 + (-9)
2 + 3 + (-9) + 11
// Starting from 3:
3
3 + (-9)
3 + (-9) + 11
// Starting from -9
-9
-9 + 11
// Starting from 11
11
The code is actually a nested loop: the external loop over array elements, and the internal counts subsums starting with the current element.
function getMaxSubSum(arr) {
let maxSum = 0; // if we take no elements, zero will be returned
for (let i = 0; i < arr.length; i++) {
let sumFixedStart = 0;
for (let j = i; j < arr.length; j++) {
sumFixedStart += arr[j];
maxSum = Math.max(maxSum, sumFixedStart);
}
}
return maxSum;
}
alert( getMaxSubSum([-1, 2, 3, -9]) ); // 5
alert( getMaxSubSum([-1, 2, 3, -9, 11]) ); // 11
alert( getMaxSubSum([-2, -1, 1, 2]) ); // 3
alert( getMaxSubSum([1, 2, 3]) ); // 6
alert( getMaxSubSum([100, -9, 2, -3, 5]) ); // 100
The solution has a time complexity of O(n2).
In other words, if we increase the array size 2 times, the algorithm will work 4 times longer.
For big arrays (1000, 10000 or more items) such algorithms can lead to a serious sluggishness.
Fast solution
Let's walk the array and keep the current partial sum of elements in the variable s.
If s becomes negative at some point, then assign s=0.
The maximum of all such s will be the answer.
If the description is too vague, please see the code, it's short enough:
function getMaxSubSum(arr) {
let maxSum = 0;
let partialSum = 0;
for (let item of arr) { // for each item of arr
partialSum += item; // add it to partialSum
maxSum = Math.max(maxSum, partialSum); // remember the maximum
if (partialSum < 0) partialSum = 0; // zero if negative
}
return maxSum;
}
alert( getMaxSubSum([-1, 2, 3, -9]) ); // 5
alert( getMaxSubSum([-1, 2, 3, -9, 11]) ); // 11
alert( getMaxSubSum([-2, -1, 1, 2]) ); // 3
alert( getMaxSubSum([100, -9, 2, -3, 5]) ); // 100
alert( getMaxSubSum([1, 2, 3]) ); // 6
alert( getMaxSubSum([-1, -2, -3]) ); // 0
The algorithm requires exactly 1 array pass, so the time complexity is O(n).
You can find more detail information about the algorithm here: Maximum subarray problem.
If it's still not obvious why that works, then please trace the algorithm on the examples above, see how it works, that's better than any words.
Open the solution with tests in a sandbox.Data types
Array methods
Arrays provide a lot of methods.
To make things easier, in this chapter they are split into groups.
- Add/remove items
We already know methods that add and remove items from the beginning or the end:
arr.push(...items) – adds items to the end,
arr.pop() – extracts an item from the end,
arr.shift() – extracts an item from the beginning,
arr.unshift(...items) – adds items to the beginning.
Here are a few others.
splice
How to delete an element from the array?
The arrays are objects, so we can try to use delete:
let arr = ["I", "go", "home"];
delete arr[1]; // remove "go"
alert( arr[1] ); // undefined
// now arr = ["I", , "home"];
alert( arr.length ); // 3
The element was removed, but the array still has 3 elements, we can see that arr.length == 3.
That's natural, because delete obj.key removes a value by the key.
It's all it does.
Fine for objects.
But for arrays we usually want the rest of elements to shift and occupy the freed place.
We expect to have a shorter array now.
So, special methods should be used.
The arr.splice method is a swiss army knife for arrays.
It can do everything: insert, remove and replace elements.
The syntax is:
arr.splice(start[, deleteCount, elem1, ..., elemN])
It modifies arr starting from the index start: removes deleteCount elements and then inserts elem1, ..., elemN at their place.
Returns the array of removed elements.
This method is easy to grasp by examples.
Let's start with the deletion:
let arr = ["I", "study", "JavaScript"];
arr.splice(1, 1); // from index 1 remove 1 element
alert( arr ); // ["I", "JavaScript"]
Easy, right? Starting from the index 1 it removed 1 element.
In the next example we remove 3 elements and replace them with the other two:
let arr = ["I", "study", "JavaScript", "right", "now"];
// remove 3 first elements and replace them with another
arr.splice(0, 3, "Let's", "dance");
alert( arr ) // now ["Let's", "dance", "right", "now"]
Here we can see that splice returns the array of removed elements:
let arr = ["I", "study", "JavaScript", "right", "now"];
// remove 2 first elements
let removed = arr.splice(0, 2);
alert( removed ); // "I", "study" <-- array of removed elements
The splice method is also able to insert the elements without any removals.
For that we need to set deleteCount to 0:
let arr = ["I", "study", "JavaScript"];
// from index 2
// delete 0
// then insert "complex" and "language"
arr.splice(2, 0, "complex", "language");
alert( arr ); // "I", "study", "complex", "language", "JavaScript"
Negative indexes allowed
Here and in other array methods, negative indexes are allowed.
They specify the position from the end of the array, like here:
let arr = [1, 2, 5];
// from index -1 (one step from the end)
// delete 0 elements,
// then insert 3 and 4
arr.splice(-1, 0, 3, 4);
alert( arr ); // 1,2,3,4,5
slice
The method arr.slice is much simpler than similar-looking arr.splice.
The syntax is:
arr.slice([start], [end])
It returns a new array copying to it all items from index start to end (not including end).
Both start and end can be negative, in that case position from array end is assumed.
It's similar to a string method str.slice, but instead of substrings it makes subarrays.
For instance:
let arr = ["t", "e", "s", "t"];
alert( arr.slice(1, 3) ); // e,s (copy from 1 to 3)
alert( arr.slice(-2) ); // s,t (copy from -2 till the end)
We can also call it without arguments: arr.slice() creates a copy of arr.
That's often used to obtain a copy for further transformations that should not affect the original array.
concat
The method arr.concat creates a new array that includes values from other arrays and additional items.
The syntax is:
arr.concat(arg1, arg2...)
It accepts any number of arguments – either arrays or values.
The result is a new array containing items from arr, then arg1, arg2 etc.
If an argument argN is an array, then all its elements are copied.
Otherwise, the argument itself is copied.
For instance:
let arr = [1, 2];
// create an array from: arr and [3,4]
alert( arr.concat([3, 4]) ); // 1,2,3,4
// create an array from: arr and [3,4] and [5,6]
alert( arr.concat([3, 4], [5, 6]) ); // 1,2,3,4,5,6
// create an array from: arr and [3,4], then add values 5 and 6
alert( arr.concat([3, 4], 5, 6) ); // 1,2,3,4,5,6
Normally, it only copies elements from arrays.
Other objects, even if they look like arrays, are added as a whole:
let arr = [1, 2];
let arrayLike = {
0: "something",
length: 1
};
alert( arr.concat(arrayLike) ); // 1,2,[object Object]
…But if an array-like object has a special Symbol.isConcatSpreadable property, then it's treated as an array by concat: its elements are added instead:
let arr = [1, 2];
let arrayLike = {
0: "something",
1: "else",
[Symbol.isConcatSpreadable]: true,
length: 2
};
alert( arr.concat(arrayLike) ); // 1,2,something,else
- Iterate: forEach
The arr.forEach method allows to run a function for every element of the array.
The syntax:
arr.forEach(function(item, index, array) {
// ...
do something with item
});
For instance, this shows each element of the array:
// for each element call alert
["Bilbo", "Gandalf", "Nazgul"].forEach(alert);
And this code is more elaborate about their positions in the target array:
["Bilbo", "Gandalf", "Nazgul"].forEach((item, index, array) => {
alert(`${item} is at index ${index} in ${array}`);
});
The result of the function (if it returns any) is thrown away and ignored.
- Searching in array
Now let's cover methods that search in an array.
indexOf/lastIndexOf and includes
The methods arr.indexOf, arr.lastIndexOf and arr.includes have the same syntax and do essentially the same as their string counterparts, but operate on items instead of characters:
arr.indexOf(item, from) – looks for item starting from index from, and returns the index where it was found, otherwise -1.
arr.lastIndexOf(item, from) – same, but looks for from right to left.
arr.includes(item, from) – looks for item starting from index from, returns true if found.
For instance:
let arr = [1, 0, false];
alert( arr.indexOf(0) ); // 1
alert( arr.indexOf(false) ); // 2
alert( arr.indexOf(null) ); // -1
alert( arr.includes(1) ); // true
Note that the methods use === comparison.
So, if we look for false, it finds exactly false and not the zero.
If we want to check for inclusion, and don't want to know the exact index, then arr.includes is preferred.
Also, a very minor difference of includes is that it correctly handles NaN, unlike indexOf/lastIndexOf:
const arr = [NaN];
alert( arr.indexOf(NaN) ); // -1 (should be 0, but === equality doesn't work for NaN)
alert( arr.includes(NaN) );// true (correct)
find and findIndex
Imagine we have an array of objects.
How do we find an object with the specific condition?
Here the arr.find(fn) method comes in handy.
The syntax is:
let result = arr.find(function(item, index, array) {
// if true is returned, item is returned and iteration is stopped
// for falsy scenario returns undefined
});
The function is called for elements of the array, one after another:
item is the element.
index is its index.
array is the array itself.
If it returns true, the search is stopped, the item is returned.
If nothing found, undefined is returned.
For example, we have an array of users, each with the fields id and name.
Let's find the one with id == 1:
let users = [
{id: 1, name: "John"},
{id: 2, name: "Pete"},
{id: 3, name: "Mary"}
];
let user = users.find(item => item.id == 1);
alert(user.name); // John
In real life arrays of objects is a common thing, so the find method is very useful.
Note that in the example we provide to find the function item => item.id == 1 with one argument.
That's typical, other arguments of this function are rarely used.
The arr.findIndex method is essentially the same, but it returns the index where the element was found instead of the element itself and -1 is returned when nothing is found.
filter
The find method looks for a single (first) element that makes the function return true.
If there may be many, we can use arr.filter(fn).
The syntax is similar to find, but filter returns an array of all matching elements:
let results = arr.filter(function(item, index, array) {
// if true item is pushed to results and the iteration continues
// returns empty array if nothing found
});
For instance:
let users = [
{id: 1, name: "John"},
{id: 2, name: "Pete"},
{id: 3, name: "Mary"}
];
// returns array of the first two users
let someUsers = users.filter(item => item.id < 3);
alert(someUsers.length); // 2
- Transform an array
Let's move on to methods that transform and reorder an array.
map
The arr.map method is one of the most useful and often used.
It calls the function for each element of the array and returns the array of results.
The syntax is:
let result = arr.map(function(item, index, array) {
// returns the new value instead of item
});
For instance, here we transform each element into its length:
let lengths = ["Bilbo", "Gandalf", "Nazgul"].map(item => item.length);
alert(lengths); // 5,7,6
sort(fn)
The call to arr.sort() sorts the array in place, changing its element order.
It also returns the sorted array, but the returned value is usually ignored, as arr itself is modified.
For instance:
let arr = [ 1, 2, 15 ];
// the method reorders the content of arr
arr.sort();
alert( arr ); // 1, 15, 2
Did you notice anything strange in the outcome?
The order became 1, 15, 2.
Incorrect.
But why?
The items are sorted as strings by default.
Literally, all elements are converted to strings for comparisons.
For strings, lexicographic ordering is applied and indeed "2" > "15".
To use our own sorting order, we need to supply a function as the argument of arr.sort().
The function should compare two arbitrary values and return:
function compare(a, b) {
if (a > b) return 1; // if the first value is greater than the second
if (a == b) return 0; // if values are equal
if (a < b) return -1; // if the first value is less than the second
}
For instance, to sort as numbers:
function compareNumeric(a, b) {
if (a > b) return 1;
if (a == b) return 0;
if (a < b) return -1;
}
let arr = [ 1, 2, 15 ];
arr.sort(compareNumeric);
alert(arr); // 1, 2, 15
Now it works as intended.
Let's step aside and think what's happening.
The arr can be array of anything, right? It may contain numbers or strings or objects or whatever.
We have a set of some items.
To sort it, we need an ordering function that knows how to compare its elements.
The default is a string order.
The arr.sort(fn) method implements a generic sorting algorithm.
We don't need to care how it internally works (an optimized quicksort or Timsort most of the time).
It will walk the array, compare its elements using the provided function and reorder them, all we need is to provide the fn which does the comparison.
By the way, if we ever want to know which elements are compared – nothing prevents from alerting them:
[1, -2, 15, 2, 0, 8].sort(function(a, b) {
alert( a + " <> " + b );
return a - b;
});
The algorithm may compare an element with multiple others in the process, but it tries to make as few comparisons as possible.
A comparison function may return any number
Actually, a comparison function is only required to return a positive number to say “greater” and a negative number to say “less”.
That allows to write shorter functions:
let arr = [ 1, 2, 15 ];
arr.sort(function(a, b) { return a - b; });
alert(arr); // 1, 2, 15
Arrow functions for the best
Remember arrow functions? We can use them here for neater sorting:
arr.sort( (a, b) => a - b );
This works exactly the same as the longer version above.
Use localeCompare for strings
Remember strings comparison algorithm? It compares letters by their codes by default.
For many alphabets, it's better to use str.localeCompare method to correctly sort letters, such as .
For example, let's sort a few countries in German:
let countries = [' sterreich', 'Andorra', 'Vietnam'];
alert( countries.sort( (a, b) => a > b ? 1 : -1) ); // Andorra, Vietnam, sterreich (wrong)
alert( countries.sort( (a, b) => a.localeCompare(b) ) ); // Andorra, sterreich,Vietnam (correct!)
reverse
The method arr.reverse reverses the order of elements in arr.
For instance:
let arr = [1, 2, 3, 4, 5];
arr.reverse();
alert( arr ); // 5,4,3,2,1
It also returns the array arr after the reversal.
split and join
Here's the situation from real life.
We are writing a messaging app, and the person enters the comma-delimited list of receivers: John, Pete, Mary.
But for us an array of names would be much more comfortable than a single string.
How to get it?
The str.split(delim) method does exactly that.
It splits the string into an array by the given delimiter delim.
In the example below, we split by a comma followed by space:
let names = 'Bilbo, Gandalf, Nazgul';
let arr = names.split(', ');
for (let name of arr) {
alert( `A message to ${name}.` ); // A message to Bilbo (and other names)
}
The split method has an optional second numeric argument – a limit on the array length.
If it is provided, then the extra elements are ignored.
In practice it is rarely used though:
let arr = 'Bilbo, Gandalf, Nazgul, Saruman'.split(', ', 2);
alert(arr); // Bilbo, Gandalf
Split into letters
The call to split(s) with an empty s would split the string into an array of letters:
let str = "test";
alert( str.split('') ); // t,e,s,t
The call arr.join(glue) does the reverse to split.
It creates a string of arr items joined by glue between them.
For instance:
let arr = ['Bilbo', 'Gandalf', 'Nazgul'];
let str = arr.join(';'); // glue the array into a string using ;
alert( str ); // Bilbo;Gandalf;Nazgul
reduce/reduceRight
When we need to iterate over an array – we can use forEach, for or for..of.
When we need to iterate and return the data for each element – we can use map.
The methods arr.reduce and arr.reduceRight also belong to that breed, but are a little bit more intricate.
They are used to calculate a single value based on the array.
The syntax is:
let value = arr.reduce(function(accumulator, item, index, array) {
// ...
}, [initial]);
The function is applied to all array elements one after another and “carries on” its result to the next call.
Arguments:
accumulator – is the result of the previous function call, equals initial the first time (if initial is provided).
item – is the current array item.
index – is its position.
array – is the array.
As function is applied, the result of the previous function call is passed to the next one as the first argument.
So, the first argument is essentially the accumulator that stores the combined result of all previous executions.
And at the end it becomes the result of reduce.
Sounds complicated?
The easiest way to grasp that is by example.
Here we get a sum of an array in one line:
let arr = [1, 2, 3, 4, 5];
let result = arr.reduce((sum, current) => sum + current, 0);
alert(result); // 15
The function passed to reduce uses only 2 arguments, that's typically enough.
Let's see the details of what's going on.
On the first run, sum is the initial value (the last argument of reduce), equals 0, and current is the first array element, equals 1.
So the function result is 1.
On the second run, sum = 1, we add the second array element (2) to it and return.
On the 3rd run, sum = 3 and we add one more element to it, and so on…
The calculation flow:
Or in the form of a table, where each row represents a function call on the next array element:
sum
current
result
the first call
0
1
1
the second call
1
2
3
the third call
3
3
6
the fourth call
6
4
10
the fifth call
10
5
15
Here we can clearly see how the result of the previous call becomes the first argument of the next one.
We also can omit the initial value:
let arr = [1, 2, 3, 4, 5];
// removed initial value from reduce (no 0)
let result = arr.reduce((sum, current) => sum + current);
alert( result ); // 15
The result is the same.
That's because if there's no initial, then reduce takes the first element of the array as the initial value and starts the iteration from the 2nd element.
The calculation table is the same as above, minus the first row.
But such use requires an extreme care.
If the array is empty, then reduce call without initial value gives an error.
Here's an example:
let arr = [];
// Error: Reduce of empty array with no initial value
// if the initial value existed, reduce would return it for the empty arr.
arr.reduce((sum, current) => sum + current);
So it's advised to always specify the initial value.
The method arr.reduceRight does the same, but goes from right to left.
- Array.isArray
Arrays do not form a separate language type.
They are based on objects.
So typeof does not help to distinguish a plain object from an array:
alert(typeof {}); // object
alert(typeof []); // same
…But arrays are used so often that there's a special method for that: Array.isArray(value).
It returns true if the value is an array, and false otherwise.
alert(Array.isArray({})); // false
alert(Array.isArray([])); // true
- Most methods support “thisArg”
Almost all array methods that call functions – like find, filter, map, with a notable exception of sort, accept an optional additional parameter thisArg.
That parameter is not explained in the sections above, because it's rarely used.
But for completeness we have to cover it.
Here's the full syntax of these methods:
arr.find(func, thisArg);
arr.filter(func, thisArg);
arr.map(func, thisArg);
// ...
// thisArg is the optional last argument
The value of thisArg parameter becomes this for func.
For example, here we use a method of army object as a filter, and thisArg passes the context:
let army = {
minAge: 18,
maxAge: 27,
canJoin(user) {
return user.age >= this.minAge && user.age < this.maxAge;
}
};
let users = [
{age: 16},
{age: 20},
{age: 23},
{age: 30}
];
// find users, for who army.canJoin returns true
let soldiers = users.filter(army.canJoin, army);
alert(soldiers.length); // 2
alert(soldiers[0].age); // 20
alert(soldiers[1].age); // 23
If in the example above we used users.filter(army.canJoin), then army.canJoin would be called as a standalone function, with this=undefined, thus leading to an instant error.
A call to users.filter(army.canJoin, army) can be replaced with users.filter(user => army.canJoin(user)), that does the same.
The latter is used more often, as it's a bit easier to understand for most people.
- Summary
A cheat sheet of array methods:
To add/remove elements:
push(...items) – adds items to the end,
pop() – extracts an item from the end,
shift() – extracts an item from the beginning,
unshift(...items) – adds items to the beginning.
splice(pos, deleteCount, ...items) – at index pos deletes deleteCount elements and inserts items.
slice(start, end) – creates a new array, copies elements from index start till end (not inclusive) into it.
concat(...items) – returns a new array: copies all members of the current one and adds items to it.
If any of items is an array, then its elements are taken.
To search among elements:
indexOf/lastIndexOf(item, pos) – look for item starting from position pos, return the index or -1 if not found.
includes(value) – returns true if the array has value, otherwise false.
find/filter(func) – filter elements through the function, return first/all values that make it return true.
findIndex is like find, but returns the index instead of a value.
To iterate over elements:
forEach(func) – calls func for every element, does not return anything.
To transform the array:
map(func) – creates a new array from results of calling func for every element.
sort(func) – sorts the array in-place, then returns it.
reverse() – reverses the array in-place, then returns it.
split/join – convert a string to array and back.
reduce/reduceRight(func, initial) – calculate a single value over the array by calling func for each element and passing an intermediate result between the calls.
Additionally:
Array.isArray(arr) checks arr for being an array.
Please note that methods sort, reverse and splice modify the array itself.
These methods are the most used ones, they cover 99% of use cases.
But there are few others:
arr.some(fn)/arr.every(fn) check the array.
The function fn is called on each element of the array similar to map.
If any/all results are true, returns true, otherwise false.
These methods behave sort of like || and && operators: if fn returns a truthy value, arr.some() immediately returns true and stops iterating over the rest of items; if fn returns a falsy value, arr.every() immediately returns false and stops iterating over the rest of items as well.
We can use every to compare arrays:
function arraysEqual(arr1, arr2) {
return arr1.length === arr2.length && arr1.every((value, index) => value === arr2[index]);
}
alert( arraysEqual([1, 2], [1, 2])); // truearr.fill(value, start, end) – fills the array with repeating value from index start to end.
arr.copyWithin(target, start, end) – copies its elements from position start till position end into itself, at position target (overwrites existing).
arr.flat(depth)/arr.flatMap(fn) create a new flat array from a multidimensional array.
For the full list, see the manual.
From the first sight it may seem that there are so many methods, quite difficult to remember.
But actually that's much easier.
Look through the cheat sheet just to be aware of them.
Then solve the tasks of this chapter to practice, so that you have experience with array methods.
Afterwards whenever you need to do something with an array, and you don't know how – come here, look at the cheat sheet and find the right method.
Examples will help you to write it correctly.
Soon you'll automatically remember the methods, without specific efforts from your side.
importance: 5
Write the function camelize(str) that changes dash-separated words like “my-short-string” into camel-cased “myShortString”.
That is: removes all dashes, each word after dash becomes uppercased.
Examples:
camelize("background-color") == 'backgroundColor';
camelize("list-style-image") == 'listStyleImage';
camelize("-webkit-transition") == 'WebkitTransition';
P.S.
Hint: use split to split the string into an array, transform it and join back.
Open a sandbox with tests.function camelize(str) {
return str
.split('-') // splits 'my-long-word' into array ['my', 'long', 'word']
.map(
// capitalizes first letters of all array items except the first one
// converts ['my', 'long', 'word'] into ['my', 'Long', 'Word']
(word, index) => index == 0 ? word : word[0].toUpperCase() + word.slice(1)
)
.join(''); // joins ['my', 'Long', 'Word'] into 'myLongWord'
}Open the solution with tests in a sandbox.
Filter range
importance: 4
Write a function filterRange(arr, a, b) that gets an array arr, looks for elements with values higher or equal to a and lower or equal to b and return a result as an array.
The function should not modify the array.
It should return the new array.
For instance:
let arr = [5, 3, 8, 1];
let filtered = filterRange(arr, 1, 4);
alert( filtered ); // 3,1 (matching values)
alert( arr ); // 5,3,8,1 (not modified)Open a sandbox with tests.function filterRange(arr, a, b) {
// added brackets around the expression for better readability
return arr.filter(item => (a <= item && item <= b));
}
let arr = [5, 3, 8, 1];
let filtered = filterRange(arr, 1, 4);
alert( filtered ); // 3,1 (matching values)
alert( arr ); // 5,3,8,1 (not modified)Open the solution with tests in a sandbox.
Filter range "in place"
importance: 4
Write a function filterRangeInPlace(arr, a, b) that gets an array arr and removes from it all values except those that are between a and b.
The test is: a ≤ arr[i] ≤ b.
The function should only modify the array.
It should not return anything.
For instance:
let arr = [5, 3, 8, 1];
filterRangeInPlace(arr, 1, 4); // removed the numbers except from 1 to 4
alert( arr ); // [3, 1]Open a sandbox with tests.function filterRangeInPlace(arr, a, b) {
for (let i = 0; i < arr.length; i++) {
let val = arr[i];
// remove if outside of the interval
if (val < a || val > b) {
arr.splice(i, 1);
i--;
}
}
}
let arr = [5, 3, 8, 1];
filterRangeInPlace(arr, 1, 4); // removed the numbers except from 1 to 4
alert( arr ); // [3, 1]Open the solution with tests in a sandbox.
Sort in decreasing order
importance: 4
let arr = [5, 2, 1, -10, 8];
// ...
your code to sort it in decreasing order
alert( arr ); // 8, 5, 2, 1, -10let arr = [5, 2, 1, -10, 8];
arr.sort((a, b) => b - a);
alert( arr );
Copy and sort array
importance: 5
We have an array of strings arr.
We'd like to have a sorted copy of it, but keep arr unmodified.
Create a function copySorted(arr) that returns such a copy.
let arr = ["HTML", "JavaScript", "CSS"];
let sorted = copySorted(arr);
alert( sorted ); // CSS, HTML, JavaScript
alert( arr ); // HTML, JavaScript, CSS (no changes)
We can use slice() to make a copy and run the sort on it:
function copySorted(arr) {
return arr.slice().sort();
}
let arr = ["HTML", "JavaScript", "CSS"];
let sorted = copySorted(arr);
alert( sorted );
alert( arr );
Create an extendable calculator
importance: 5
Create a constructor function Calculator that creates “extendable” calculator objects.
The task consists of two parts.
First, implement the method calculate(str) that takes a string like "1 + 2" in the format “NUMBER operator NUMBER” (space-delimited) and returns the result.
Should understand plus + and minus -.
Usage example:
let calc = new Calculator;
alert( calc.calculate("3 + 7") ); // 10
Then add the method addMethod(name, func) that teaches the calculator a new operation.
It takes the operator name and the two-argument function func(a,b) that implements it.
For instance, let's add the multiplication *, division / and power **:
let powerCalc = new Calculator;
powerCalc.addMethod("*", (a, b) => a * b);
powerCalc.addMethod("/", (a, b) => a / b);
powerCalc.addMethod("**", (a, b) => a ** b);
let result = powerCalc.calculate("2 ** 3");
alert( result ); // 8
No parentheses or complex expressions in this task.
The numbers and the operator are delimited with exactly one space.
There may be error handling if you'd like to add it.
Open a sandbox with tests.
Please note how methods are stored.
They are simply added to this.methods property.
All tests and numeric conversions are done in the calculate method.
In future it may be extended to support more complex expressions.
function Calculator() {
this.methods = {
"-": (a, b) => a - b,
"+": (a, b) => a + b
};
this.calculate = function(str) {
let split = str.split(' '),
a = +split[0],
op = split[1],
b = +split[2];
if (!this.methods[op] || isNaN(a) || isNaN(b)) {
return NaN;
}
return this.methods[op](a, b);
};
this.addMethod = function(name, func) {
this.methods[name] = func;
};
}Open the solution with tests in a sandbox.
Map to names
importance: 5
You have an array of user objects, each one has user.name.
Write the code that converts it into an array of names.
For instance:
let john = { name: "John", age: 25 };
let pete = { name: "Pete", age: 30 };
let mary = { name: "Mary", age: 28 };
let users = [ john, pete, mary ];
let names = /* ...
your code */
alert( names ); // John, Pete, Marylet john = { name: "John", age: 25 };
let pete = { name: "Pete", age: 30 };
let mary = { name: "Mary", age: 28 };
let users = [ john, pete, mary ];
let names = users.map(item => item.name);
alert( names ); // John, Pete, Mary
Map to objects
importance: 5
You have an array of user objects, each one has name, surname and id.
Write the code to create another array from it, of objects with id and fullName, where fullName is generated from name and surname.
For instance:
let john = { name: "John", surname: "Smith", id: 1 };
let pete = { name: "Pete", surname: "Hunt", id: 2 };
let mary = { name: "Mary", surname: "Key", id: 3 };
let users = [ john, pete, mary ];
let usersMapped = /* ...
your code ...
*/
/*
usersMapped = [
{ fullName: "John Smith", id: 1 },
{ fullName: "Pete Hunt", id: 2 },
{ fullName: "Mary Key", id: 3 }
]
*/
alert( usersMapped[0].id ) // 1
alert( usersMapped[0].fullName ) // John Smith
So, actually you need to map one array of objects to another.
Try using => here.
There's a small catch.
let john = { name: "John", surname: "Smith", id: 1 };
let pete = { name: "Pete", surname: "Hunt", id: 2 };
let mary = { name: "Mary", surname: "Key", id: 3 };
let users = [ john, pete, mary ];
let usersMapped = users.map(user => ({
fullName: `${user.name} ${user.surname}`,
id: user.id
}));
/*
usersMapped = [
{ fullName: "John Smith", id: 1 },
{ fullName: "Pete Hunt", id: 2 },
{ fullName: "Mary Key", id: 3 }
]
*/
alert( usersMapped[0].id ); // 1
alert( usersMapped[0].fullName ); // John Smith
Please note that in the arrow functions we need to use additional brackets.
We can't write like this:
let usersMapped = users.map(user => {
fullName: `${user.name} ${user.surname}`,
id: user.id
});
As we remember, there are two arrow functions: without body value => expr and with body value => {...}.
Here JavaScript would treat { as the start of function body, not the start of the object.
The workaround is to wrap them in the “normal” brackets:
let usersMapped = users.map(user => ({
fullName: `${user.name} ${user.surname}`,
id: user.id
}));
Now fine.
Sort users by age
importance: 5
Write the function sortByAge(users) that gets an array of objects with the age property and sorts them by age.
For instance:
let john = { name: "John", age: 25 };
let pete = { name: "Pete", age: 30 };
let mary = { name: "Mary", age: 28 };
let arr = [ pete, john, mary ];
sortByAge(arr);
// now: [john, mary, pete]
alert(arr[0].name); // John
alert(arr[1].name); // Mary
alert(arr[2].name); // Petefunction sortByAge(arr) {
arr.sort((a, b) => a.age - b.age);
}
let john = { name: "John", age: 25 };
let pete = { name: "Pete", age: 30 };
let mary = { name: "Mary", age: 28 };
let arr = [ pete, john, mary ];
sortByAge(arr);
// now sorted is: [john, mary, pete]
alert(arr[0].name); // John
alert(arr[1].name); // Mary
alert(arr[2].name); // Pete
Shuffle an array
importance: 3
Write the function shuffle(array) that shuffles (randomly reorders) elements of the array.
Multiple runs of shuffle may lead to different orders of elements.
For instance:
let arr = [1, 2, 3];
shuffle(arr);
// arr = [3, 2, 1]
shuffle(arr);
// arr = [2, 1, 3]
shuffle(arr);
// arr = [3, 1, 2]
// ...
All element orders should have an equal probability.
For instance, [1,2,3] can be reordered as [1,2,3] or [1,3,2] or [3,1,2] etc, with equal probability of each case.
The simple solution could be:
function shuffle(array) {
array.sort(() => Math.random() - 0.5);
}
let arr = [1, 2, 3];
shuffle(arr);
alert(arr);
That somewhat works, because Math.random() - 0.5 is a random number that may be positive or negative, so the sorting function reorders elements randomly.
But because the sorting function is not meant to be used this way, not all permutations have the same probability.
For instance, consider the code below.
It runs shuffle 1000000 times and counts appearances of all possible results:
function shuffle(array) {
array.sort(() => Math.random() - 0.5);
}
// counts of appearances for all possible permutations
let count = {
'123': 0,
'132': 0,
'213': 0,
'231': 0,
'321': 0,
'312': 0
};
for (let i = 0; i < 1000000; i++) {
let array = [1, 2, 3];
shuffle(array);
count[array.join('')]++;
}
// show counts of all possible permutations
for (let key in count) {
alert(`${key}: ${count[key]}`);
}
An example result (depends on JS engine):
123: 250706
132: 124425
213: 249618
231: 124880
312: 125148
321: 125223
We can see the bias clearly: 123 and 213 appear much more often than others.
The result of the code may vary between JavaScript engines, but we can already see that the approach is unreliable.
Why it doesn't work? Generally speaking, sort is a “black box”: we throw an array and a comparison function into it and expect the array to be sorted.
But due to the utter randomness of the comparison the black box goes mad, and how exactly it goes mad depends on the concrete implementation that differs between engines.
There are other good ways to do the task.
For instance, there's a great algorithm called Fisher-Yates shuffle.
The idea is to walk the array in the reverse order and swap each element with a random one before it:
function shuffle(array) {
for (let i = array.length - 1; i > 0; i--) {
let j = Math.floor(Math.random() * (i + 1)); // random index from 0 to i
// swap elements array[i] and array[j]
// we use "destructuring assignment" syntax to achieve that
// you'll find more details about that syntax in later chapters
// same can be written as:
// let t = array[i]; array[i] = array[j]; array[j] = t
[array[i], array[j]] = [array[j], array[i]];
}
}
Let's test it the same way:
function shuffle(array) {
for (let i = array.length - 1; i > 0; i--) {
let j = Math.floor(Math.random() * (i + 1));
[array[i], array[j]] = [array[j], array[i]];
}
}
// counts of appearances for all possible permutations
let count = {
'123': 0,
'132': 0,
'213': 0,
'231': 0,
'321': 0,
'312': 0
};
for (let i = 0; i < 1000000; i++) {
let array = [1, 2, 3];
shuffle(array);
count[array.join('')]++;
}
// show counts of all possible permutations
for (let key in count) {
alert(`${key}: ${count[key]}`);
}
The example output:
123: 166693
132: 166647
213: 166628
231: 167517
312: 166199
321: 166316
Looks good now: all permutations appear with the same probability.
Also, performance-wise the Fisher-Yates algorithm is much better, there's no “sorting” overhead.
Get average age
importance: 4
Write the function getAverageAge(users) that gets an array of objects with property age and returns the average age.
The formula for the average is (age1 + age2 + ...
+ ageN) / N.
For instance:
let john = { name: "John", age: 25 };
let pete = { name: "Pete", age: 30 };
let mary = { name: "Mary", age: 29 };
let arr = [ john, pete, mary ];
alert( getAverageAge(arr) ); // (25 + 30 + 29) / 3 = 28function getAverageAge(users) {
return users.reduce((prev, user) => prev + user.age, 0) / users.length;
}
let john = { name: "John", age: 25 };
let pete = { name: "Pete", age: 30 };
let mary = { name: "Mary", age: 29 };
let arr = [ john, pete, mary ];
alert( getAverageAge(arr) ); // 28
Filter unique array members
importance: 4
Let arr be an array.
Create a function unique(arr) that should return an array with unique items of arr.
For instance:
function unique(arr) {
/* your code */
}
let strings = ["Hare", "Krishna", "Hare", "Krishna",
"Krishna", "Krishna", "Hare", "Hare", ":-O"
];
alert( unique(strings) ); // Hare, Krishna, :-OOpen a sandbox with tests.
Let's walk the array items:
For each item we'll check if the resulting array already has that item.
If it is so, then ignore, otherwise add to results.
function unique(arr) {
let result = [];
for (let str of arr) {
if (!result.includes(str)) {
result.push(str);
}
}
return result;
}
let strings = ["Hare", "Krishna", "Hare", "Krishna",
"Krishna", "Krishna", "Hare", "Hare", ":-O"
];
alert( unique(strings) ); // Hare, Krishna, :-O
The code works, but there's a potential performance problem in it.
The method result.includes(str) internally walks the array result and compares each element against str to find the match.
So if there are 100 elements in result and no one matches str, then it will walk the whole result and do exactly 100 comparisons.
And if result is large, like 10000, then there would be 10000 comparisons.
That's not a problem by itself, because JavaScript engines are very fast, so walk 10000 array is a matter of microseconds.
But we do such test for each element of arr, in the for loop.
So if arr.length is 10000 we'll have something like 10000*10000 = 100 millions of comparisons.
That's a lot.
So the solution is only good for small arrays.
Further in the chapter Map and Set we'll see how to optimize it.
Open the solution with tests in a sandbox.
Create keyed object from array
importance: 4
Let's say we received an array of users in the form {id:..., name:..., age...
}.
Create a function groupById(arr) that creates an object from it, with id as the key, and array items as values.
For example:
let users = [
{id: 'john', name: "John Smith", age: 20},
{id: 'ann', name: "Ann Smith", age: 24},
{id: 'pete', name: "Pete Peterson", age: 31},
];
let usersById = groupById(users);
/*
// after the call we should have:
usersById = {
john: {id: 'john', name: "John Smith", age: 20},
ann: {id: 'ann', name: "Ann Smith", age: 24},
pete: {id: 'pete', name: "Pete Peterson", age: 31},
}
*/
Such function is really handy when working with server data.
In this task we assume that id is unique.
There may be no two array items with the same id.
Please use array .reduce method in the solution.
Open a sandbox with tests.function groupById(array) {
return array.reduce((obj, value) => {
obj[value.id] = value;
return obj;
}, {})
}Open the solution with tests in a sandbox.Data types
Iterables
Iterable objects are a generalization of arrays.
That's a concept that allows us to make any object useable in a for..of loop.
Of course, Arrays are iterable.
But there are many other built-in objects, that are iterable as well.
For instance, strings are also iterable.
If an object isn't technically an array, but represents a collection (list, set) of something, then for..of is a great syntax to loop over it, so let's see how to make it work.
- Symbol.iterator
We can easily grasp the concept of iterables by making one of our own.
For instance, we have an object that is not an array, but looks suitable for for..of.
Like a range object that represents an interval of numbers:
let range = {
from: 1,
to: 5
};
// We want the for..of to work:
// for(let num of range) ...
num=1,2,3,4,5
To make the range object iterable (and thus let for..of work) we need to add a method to the object named Symbol.iterator (a special built-in symbol just for that).
When for..of starts, it calls that method once (or errors if not found).
The method must return an iterator – an object with the method next.
Onward, for..of works only with that returned object.
When for..of wants the next value, it calls next() on that object.
The result of next() must have the form {done: Boolean, value: any}, where done=true means that the iteration is finished, otherwise value is the next value.
Here's the full implementation for range with remarks:
let range = {
from: 1,
to: 5
};
// 1.
call to for..of initially calls this
range[Symbol.iterator] = function() {
// ...it returns the iterator object:
// 2.
Onward, for..of works only with this iterator, asking it for next values
return {
current: this.from,
last: this.to,
// 3.
next() is called on each iteration by the for..of loop
next() {
// 4.
it should return the value as an object {done:.., value :...}
if (this.current <= this.last) {
return { done: false, value: this.current++ };
} else {
return { done: true };
}
}
};
};
// now it works!
for (let num of range) {
alert(num); // 1, then 2, 3, 4, 5
}
Please note the core feature of iterables: separation of concerns.
The range itself does not have the next() method.
Instead, another object, a so-called “iterator” is created by the call to range[Symbol.iterator](), and its next() generates values for the iteration.
So, the iterator object is separate from the object it iterates over.
Technically, we may merge them and use range itself as the iterator to make the code simpler.
Like this:
let range = {
from: 1,
to: 5,
[Symbol.iterator]() {
this.current = this.from;
return this;
},
next() {
if (this.current <= this.to) {
return { done: false, value: this.current++ };
} else {
return { done: true };
}
}
};
for (let num of range) {
alert(num); // 1, then 2, 3, 4, 5
}
Now range[Symbol.iterator]() returns the range object itself: it has the necessary next() method and remembers the current iteration progress in this.current.
Shorter? Yes.
And sometimes that's fine too.
The downside is that now it's impossible to have two for..of loops running over the object simultaneously: they'll share the iteration state, because there's only one iterator – the object itself.
But two parallel for-ofs is a rare thing, even in async scenarios.
Infinite iterators
Infinite iterators are also possible.
For instance, the range becomes infinite for range.to = Infinity.
Or we can make an iterable object that generates an infinite sequence of pseudorandom numbers.
Also can be useful.
There are no limitations on next, it can return more and more values, that's normal.
Of course, the for..of loop over such an iterable would be endless.
But we can always stop it using break.
- String is iterable
Arrays and strings are most widely used built-in iterables.
For a string, for..of loops over its characters:
for (let char of "test") {
// triggers 4 times: once for each character
alert( char ); // t, then e, then s, then t
}
And it works correctly with surrogate pairs!
let str = ' ';
for (let char of str) {
alert( char ); // , and then
}
- Calling an iterator explicitly
For deeper understanding, let's see how to use an iterator explicitly.
We'll iterate over a string in exactly the same way as for..of, but with direct calls.
This code creates a string iterator and gets values from it “manually”:
let str = "Hello";
// does the same as
// for (let char of str) alert(char);
let iterator = str[Symbol.iterator]();
while (true) {
let result = iterator.next();
if (result.done) break;
alert(result.value); // outputs characters one by one
}
That is rarely needed, but gives us more control over the process than for..of.
For instance, we can split the iteration process: iterate a bit, then stop, do something else, and then resume later.
- Iterables and array-likes
Two official terms look similar, but are very different.
Please make sure you understand them well to avoid the confusion.
Iterables are objects that implement the Symbol.iterator method, as described above.
Array-likes are objects that have indexes and length, so they look like arrays.
When we use JavaScript for practical tasks in a browser or any other environment, we may meet objects that are iterables or array-likes, or both.
For instance, strings are both iterable (for..of works on them) and array-like (they have numeric indexes and length).
But an iterable may be not array-like.
And vice versa an array-like may be not iterable.
For example, the range in the example above is iterable, but not array-like, because it does not have indexed properties and length.
And here's the object that is array-like, but not iterable:
let arrayLike = { // has indexes and length => array-like
0: "Hello",
1: "World",
length: 2
};
// Error (no Symbol.iterator)
for (let item of arrayLike) {}
Both iterables and array-likes are usually not arrays, they don't have push, pop etc.
That's rather inconvenient if we have such an object and want to work with it as with an array.
E.g.
we would like to work with range using array methods.
How to achieve that?
- Array.from
There's a universal method Array.from that takes an iterable or array-like value and makes a “real” Array from it.
Then we can call array methods on it.
For instance:
let arrayLike = {
0: "Hello",
1: "World",
length: 2
};
let arr = Array.from(arrayLike); // (*)
alert(arr.pop()); // World (method works)Array.from at the line (*) takes the object, examines it for being an iterable or array-like, then makes a new array and copies all items to it.
The same happens for an iterable:
// assuming that range is taken from the example above
let arr = Array.from(range);
alert(arr); // 1,2,3,4,5 (array toString conversion works)
The full syntax for Array.from also allows us to provide an optional “mapping” function:
Array.from(obj[, mapFn, thisArg])
The optional second argument mapFn can be a function that will be applied to each element before adding it to the array, and thisArg allows us to set this for it.
For instance:
// assuming that range is taken from the example above
// square each number
let arr = Array.from(range, num => num * num);
alert(arr); // 1,4,9,16,25
Here we use Array.from to turn a string into an array of characters:
let str = ' ';
// splits str into array of characters
let chars = Array.from(str);
alert(chars[0]); //
alert(chars[1]); //
alert(chars.length); // 2
Unlike str.split, it relies on the iterable nature of the string and so, just like for..of, correctly works with surrogate pairs.
Technically here it does the same as:
let str = ' ';
let chars = []; // Array.from internally does the same loop
for (let char of str) {
chars.push(char);
}
alert(chars);
…But it is shorter.
We can even build surrogate-aware slice on it:
function slice(str, start, end) {
return Array.from(str).slice(start, end).join('');
}
let str = ' ';
alert( slice(str, 1, 3) ); //
// the native method does not support surrogate pairs
alert( str.slice(1, 3) ); // garbage (two pieces from different surrogate pairs)
- Summary
Objects that can be used in for..of are called iterable.
Technically, iterables must implement the method named Symbol.iterator.
The result of obj[Symbol.iterator]() is called an iterator.
It handles further iteration process.
An iterator must have the method named next() that returns an object {done: Boolean, value: any}, here done:true denotes the end of the iteration process, otherwise the value is the next value.
The Symbol.iterator method is called automatically by for..of, but we also can do it directly.
Built-in iterables like strings or arrays, also implement Symbol.iterator.
String iterator knows about surrogate pairs.
Objects that have indexed properties and length are called array-like.
Such objects may also have other properties and methods, but lack the built-in methods of arrays.
If we look inside the specification – we'll see that most built-in methods assume that they work with iterables or array-likes instead of “real” arrays, because that's more abstract.
Array.from(obj[, mapFn, thisArg]) makes a real Array from an iterable or array-like obj, and we can then use array methods on it.
The optional arguments mapFn and thisArg allow us to apply a function to each item.
Data types
Map and Set
Till now, we've learned about the following complex data structures:
Objects are used for storing keyed collections.
Arrays are used for storing ordered collections.
But that's not enough for real life.
That's why Map and Set also exist.
- Map
Map is a collection of keyed data items, just like an Object.
But the main difference is that Map allows keys of any type.
Methods and properties are:
new Map() – creates the map.
map.set(key, value) – stores the value by the key.
map.get(key) – returns the value by the key, undefined if key doesn't exist in map.
map.has(key) – returns true if the key exists, false otherwise.
map.delete(key) – removes the value by the key.
map.clear() – removes everything from the map.
map.size – returns the current element count.
For instance:
let map = new Map();
map.set('1', 'str1'); // a string key
map.set(1, 'num1'); // a numeric key
map.set(true, 'bool1'); // a boolean key
// remember the regular Object? it would convert keys to string
// Map keeps the type, so these two are different:
alert( map.get(1) ); // 'num1'
alert( map.get('1') ); // 'str1'
alert( map.size ); // 3
As we can see, unlike objects, keys are not converted to strings.
Any type of key is possible.
map[key] isn't the right way to use a Map
Although map[key] also works, e.g.
we can set map[key] = 2, this is treating map as a plain JavaScript object, so it implies all corresponding limitations (only string/symbol keys and so on).
So we should use map methods: set, get and so on.
Map can also use objects as keys.
For instance:
let john = { name: "John" };
// for every user, let's store their visits count
let visitsCountMap = new Map();
// john is the key for the map
visitsCountMap.set(john, 123);
alert( visitsCountMap.get(john) ); // 123
Using objects as keys is one of the most notable and important Map features.
The same does not count for Object.
String as a key in Object is fine, but we can't use another Object as a key in Object.
Let's try:
let john = { name: "John" };
let ben = { name: "Ben" };
let visitsCountObj = {}; // try to use an object
visitsCountObj[ben] = 234; // try to use ben object as the key
visitsCountObj[john] = 123; // try to use john object as the key, ben object will get replaced
// That's what got written!
alert( visitsCountObj["[object Object]"] ); // 123
As visitsCountObj is an object, it converts all Object keys, such as john and ben above, to same string "[object Object]".
Definitely not what we want.
How Map compares keys
To test keys for equivalence, Map uses the algorithm SameValueZero.
It is roughly the same as strict equality ===, but the difference is that NaN is considered equal to NaN.
So NaN can be used as the key as well.
This algorithm can't be changed or customized.
Chaining
Every map.set call returns the map itself, so we can “chain” the calls:
map.set('1', 'str1')
.set(1, 'num1')
.set(true, 'bool1');
- Iteration over Map
For looping over a map, there are 3 methods:
map.keys() – returns an iterable for keys,
map.values() – returns an iterable for values,
map.entries() – returns an iterable for entries [key, value], it's used by default in for..of.
For instance:
let recipeMap = new Map([
['cucumber', 500],
['tomatoes', 350],
['onion', 50]
]);
// iterate over keys (vegetables)
for (let vegetable of recipeMap.keys()) {
alert(vegetable); // cucumber, tomatoes, onion
}
// iterate over values (amounts)
for (let amount of recipeMap.values()) {
alert(amount); // 500, 350, 50
}
// iterate over [key, value] entries
for (let entry of recipeMap) { // the same as of recipeMap.entries()
alert(entry); // cucumber,500 (and so on)
}
The insertion order is used
The iteration goes in the same order as the values were inserted.
Map preserves this order, unlike a regular Object.
Besides that, Map has a built-in forEach method, similar to Array:
// runs the function for each (key, value) pair
recipeMap.forEach( (value, key, map) => {
alert(`${key}: ${value}`); // cucumber: 500 etc
});
- Object.entries: Map from Object
When a Map is created, we can pass an array (or another iterable) with key/value pairs for initialization, like this:
// array of [key, value] pairs
let map = new Map([
['1', 'str1'],
[1, 'num1'],
[true, 'bool1']
]);
alert( map.get('1') ); // str1
If we have a plain object, and we'd like to create a Map from it, then we can use built-in method Object.entries(obj) that returns an array of key/value pairs for an object exactly in that format.
So we can create a map from an object like this:
let obj = {
name: "John",
age: 30
};
let map = new Map(Object.entries(obj));
alert( map.get('name') ); // John
Here, Object.entries returns the array of key/value pairs: [ ["name","John"], ["age", 30] ].
That's what Map needs.
- Object.fromEntries: Object from Map
We've just seen how to create Map from a plain object with Object.entries(obj).
There's Object.fromEntries method that does the reverse: given an array of [key, value] pairs, it creates an object from them:
let prices = Object.fromEntries([
['banana', 1],
['orange', 2],
['meat', 4]
]);
// now prices = { banana: 1, orange: 2, meat: 4 }
alert(prices.orange); // 2
We can use Object.fromEntries to get a plain object from Map.
E.g.
we store the data in a Map, but we need to pass it to a 3rd-party code that expects a plain object.
Here we go:
let map = new Map();
map.set('banana', 1);
map.set('orange', 2);
map.set('meat', 4);
let obj = Object.fromEntries(map.entries()); // make a plain object (*)
// done!
// obj = { banana: 1, orange: 2, meat: 4 }
alert(obj.orange); // 2
A call to map.entries() returns an iterable of key/value pairs, exactly in the right format for Object.fromEntries.
We could also make line (*) shorter:
let obj = Object.fromEntries(map); // omit .entries()
That's the same, because Object.fromEntries expects an iterable object as the argument.
Not necessarily an array.
And the standard iteration for map returns same key/value pairs as map.entries().
So we get a plain object with same key/values as the map.
- Set
A Set is a special type collection – “set of values” (without keys), where each value may occur only once.
Its main methods are:
new Set(iterable) – creates the set, and if an iterable object is provided (usually an array), copies values from it into the set.
set.add(value) – adds a value, returns the set itself.
set.delete(value) – removes the value, returns true if value existed at the moment of the call, otherwise false.
set.has(value) – returns true if the value exists in the set, otherwise false.
set.clear() – removes everything from the set.
set.size – is the elements count.
The main feature is that repeated calls of set.add(value) with the same value don't do anything.
That's the reason why each value appears in a Set only once.
For example, we have visitors coming, and we'd like to remember everyone.
But repeated visits should not lead to duplicates.
A visitor must be “counted” only once.
Set is just the right thing for that:
let set = new Set();
let john = { name: "John" };
let pete = { name: "Pete" };
let mary = { name: "Mary" };
// visits, some users come multiple times
set.add(john);
set.add(pete);
set.add(mary);
set.add(john);
set.add(mary);
// set keeps only unique values
alert( set.size ); // 3
for (let user of set) {
alert(user.name); // John (then Pete and Mary)
}
The alternative to Set could be an array of users, and the code to check for duplicates on every insertion using arr.find.
But the performance would be much worse, because this method walks through the whole array checking every element.
Set is much better optimized internally for uniqueness checks.
- Iteration over Set
We can loop over a set either with for..of or using forEach:
let set = new Set(["oranges", "apples", "bananas"]);
for (let value of set) alert(value);
// the same with forEach:
set.forEach((value, valueAgain, set) => {
alert(value);
});
Note the funny thing.
The callback function passed in forEach has 3 arguments: a value, then the same valuevalueAgain, and then the target object.
Indeed, the same value appears in the arguments twice.
That's for compatibility with Map where the callback passed forEach has three arguments.
Looks a bit strange, for sure.
But may help to replace Map with Set in certain cases with ease, and vice versa.
The same methods Map has for iterators are also supported:
set.keys() – returns an iterable object for values,
set.values() – same as set.keys(), for compatibility with Map,
set.entries() – returns an iterable object for entries [value, value], exists for compatibility with Map.
- Summary
Map – is a collection of keyed values.
Methods and properties:
new Map([iterable]) – creates the map, with optional iterable (e.g.
array) of [key,value] pairs for initialization.
map.set(key, value) – stores the value by the key, returns the map itself.
map.get(key) – returns the value by the key, undefined if key doesn't exist in map.
map.has(key) – returns true if the key exists, false otherwise.
map.delete(key) – removes the value by the key, returns true if key existed at the moment of the call, otherwise false.
map.clear() – removes everything from the map.
map.size – returns the current element count.
The differences from a regular Object:
Any keys, objects can be keys.
Additional convenient methods, the size property.
Set – is a collection of unique values.
Methods and properties:
new Set([iterable]) – creates the set, with optional iterable (e.g.
array) of values for initialization.
set.add(value) – adds a value (does nothing if value exists), returns the set itself.
set.delete(value) – removes the value, returns true if value existed at the moment of the call, otherwise false.
set.has(value) – returns true if the value exists in the set, otherwise false.
set.clear() – removes everything from the set.
set.size – is the elements count.
Iteration over Map and Set is always in the insertion order, so we can't say that these collections are unordered, but we can't reorder elements or directly get an element by its number.
importance: 5
Let arr be an array.
Create a function unique(arr) that should return an array with unique items of arr.
For instance:
function unique(arr) {
/* your code */
}
let values = ["Hare", "Krishna", "Hare", "Krishna",
"Krishna", "Krishna", "Hare", "Hare", ":-O"
];
alert( unique(values) ); // Hare, Krishna, :-O
P.S.
Here strings are used, but can be values of any type.
P.P.S.
Use Set to store unique values.
Open a sandbox with tests.function unique(arr) {
return Array.from(new Set(arr));
}Open the solution with tests in a sandbox.
Filter anagrams
importance: 4
Anagrams are words that have the same number of same letters, but in different order.
For instance:
nap - pan
ear - are - era
cheaters - hectares - teachers
Write a function aclean(arr) that returns an array cleaned from anagrams.
For instance:
let arr = ["nap", "teachers", "cheaters", "PAN", "ear", "era", "hectares"];
alert( aclean(arr) ); // "nap,teachers,ear" or "PAN,cheaters,era"
From every anagram group should remain only one word, no matter which one.
Open a sandbox with tests.
To find all anagrams, let's split every word to letters and sort them.
When letter-sorted, all anagrams are same.
For instance:
nap, pan -> anp
ear, era, are -> aer
cheaters, hectares, teachers -> aceehrst
...
We'll use the letter-sorted variants as map keys to store only one value per each key:
function aclean(arr) {
let map = new Map();
for (let word of arr) {
// split the word by letters, sort them and join back
let sorted = word.toLowerCase().split('').sort().join(''); // (*)
map.set(sorted, word);
}
return Array.from(map.values());
}
let arr = ["nap", "teachers", "cheaters", "PAN", "ear", "era", "hectares"];
alert( aclean(arr) );
Letter-sorting is done by the chain of calls in the line (*).
For convenience let's split it into multiple lines:
let sorted = word // PAN
.toLowerCase() // pan
.split('') // ['p','a','n']
.sort() // ['a','n','p']
.join(''); // anp
Two different words 'PAN' and 'nap' receive the same letter-sorted form 'anp'.
The next line put the word into the map:
map.set(sorted, word);
If we ever meet a word the same letter-sorted form again, then it would overwrite the previous value with the same key in the map.
So we'll always have at maximum one word per letter-form.
At the end Array.from(map.values()) takes an iterable over map values (we don't need keys in the result) and returns an array of them.
Here we could also use a plain object instead of the Map, because keys are strings.
That's how the solution can look:
function aclean(arr) {
let obj = {};
for (let i = 0; i < arr.length; i++) {
let sorted = arr[i].toLowerCase().split("").sort().join("");
obj[sorted] = arr[i];
}
return Object.values(obj);
}
let arr = ["nap", "teachers", "cheaters", "PAN", "ear", "era", "hectares"];
alert( aclean(arr) );Open the solution with tests in a sandbox.
Iterable keys
importance: 5
We'd like to get an array of map.keys() in a variable and then apply array-specific methods to it, e.g.
.push.
But that doesn't work:
let map = new Map();
map.set("name", "John");
let keys = map.keys();
// Error: keys.push is not a function
keys.push("more");
Why? How can we fix the code to make keys.push work?
That's because map.keys() returns an iterable, but not an array.
We can convert it into an array using Array.from:
let map = new Map();
map.set("name", "John");
let keys = Array.from(map.keys());
keys.push("more");
alert(keys); // name, moreData types
WeakMap and WeakSet
As we know from the chapter Garbage collection, JavaScript engine stores a value in memory while it is reachable (and can potentially be used).
For instance:
let john = { name: "John" };
// the object can be accessed, john is the reference to it
// overwrite the reference
john = null;
// the object will be removed from memory
Usually, properties of an object or elements of an array or another data structure are considered reachable and kept in memory while that data structure is in memory.
For instance, if we put an object into an array, then while the array is alive, the object will be alive as well, even if there are no other references to it.
Like this:
let john = { name: "John" };
let array = [ john ];
john = null; // overwrite the reference
// the object previously referenced by john is stored inside the array
// therefore it won't be garbage-collected
// we can get it as array[0]
Similar to that, if we use an object as the key in a regular Map, then while the Map exists, that object exists as well.
It occupies memory and may not be garbage collected.
For instance:
let john = { name: "John" };
let map = new Map();
map.set(john, "...");
john = null; // overwrite the reference
// john is stored inside the map,
// we can get it by using map.keys()WeakMap is fundamentally different in this aspect.
It doesn't prevent garbage-collection of key objects.
Let's see what it means on examples.
- WeakMap
The first difference between Map and WeakMap is that keys must be objects, not primitive values:
let weakMap = new WeakMap();
let obj = {};
weakMap.set(obj, "ok"); // works fine (object key)
// can't use a string as the key
weakMap.set("test", "Whoops"); // Error, because "test" is not an object
Now, if we use an object as the key in it, and there are no other references to that object – it will be removed from memory (and from the map) automatically.
let john = { name: "John" };
let weakMap = new WeakMap();
weakMap.set(john, "...");
john = null; // overwrite the reference
// john is removed from memory!
Compare it with the regular Map example above.
Now if john only exists as the key of WeakMap – it will be automatically deleted from the map (and memory).
WeakMap does not support iteration and methods keys(), values(), entries(), so there's no way to get all keys or values from it.
WeakMap has only the following methods:
weakMap.get(key)weakMap.set(key, value)weakMap.delete(key)weakMap.has(key)
Why such a limitation? That's for technical reasons.
If an object has lost all other references (like john in the code above), then it is to be garbage-collected automatically.
But technically it's not exactly specified when the cleanup happens.
The JavaScript engine decides that.
It may choose to perform the memory cleanup immediately or to wait and do the cleaning later when more deletions happen.
So, technically, the current element count of a WeakMap is not known.
The engine may have cleaned it up or not, or did it partially.
For that reason, methods that access all keys/values are not supported.
Now, where do we need such a data structure?
- Use case: additional data
The main area of application for WeakMap is an additional data storage.
If we're working with an object that “belongs” to another code, maybe even a third-party library, and would like to store some data associated with it, that should only exist while the object is alive – then WeakMap is exactly what's needed.
We put the data to a WeakMap, using the object as the key, and when the object is garbage collected, that data will automatically disappear as well.
weakMap.set(john, "secret documents");
// if john dies, secret documents will be destroyed automatically
Let's look at an example.
For instance, we have code that keeps a visit count for users.
The information is stored in a map: a user object is the key and the visit count is the value.
When a user leaves (its object gets garbage collected), we don't want to store their visit count anymore.
Here's an example of a counting function with Map:
// visitsCount.js
let visitsCountMap = new Map(); // map: user => visits count
// increase the visits count
function countUser(user) {
let count = visitsCountMap.get(user) || 0;
visitsCountMap.set(user, count + 1);
}
And here's another part of the code, maybe another file using it:
// main.js
let john = { name: "John" };
countUser(john); // count his visits
// later john leaves us
john = null;
Now, john object should be garbage collected, but remains in memory, as it's a key in visitsCountMap.
We need to clean visitsCountMap when we remove users, otherwise it will grow in memory indefinitely.
Such cleaning can become a tedious task in complex architectures.
We can avoid it by switching to WeakMap instead:
// visitsCount.js
let visitsCountMap = new WeakMap(); // weakmap: user => visits count
// increase the visits count
function countUser(user) {
let count = visitsCountMap.get(user) || 0;
visitsCountMap.set(user, count + 1);
}
Now we don't have to clean visitsCountMap.
After john object becomes unreachable, by all means except as a key of WeakMap, it gets removed from memory, along with the information by that key from WeakMap.
- Use case: caching
Another common example is caching.
We can store (“cache”) results from a function, so that future calls on the same object can reuse it.
To achieve that, we can use Map (not optimal scenario):
// cache.js
let cache = new Map();
// calculate and remember the result
function process(obj) {
if (!cache.has(obj)) {
let result = /* calculations of the result for */ obj;
cache.set(obj, result);
}
return cache.get(obj);
}
// Now we use process() in another file:
// main.js
let obj = {/* let's say we have an object */};
let result1 = process(obj); // calculated
// ...later, from another place of the code...
let result2 = process(obj); // remembered result taken from cache
// ...later, when the object is not needed any more:
obj = null;
alert(cache.size); // 1 (Ouch! The object is still in cache, taking memory!)
For multiple calls of process(obj) with the same object, it only calculates the result the first time, and then just takes it from cache.
The downside is that we need to clean cache when the object is not needed any more.
If we replace Map with WeakMap, then this problem disappears.
The cached result will be removed from memory automatically after the object gets garbage collected.
// cache.js
let cache = new WeakMap();
// calculate and remember the result
function process(obj) {
if (!cache.has(obj)) {
let result = /* calculate the result for */ obj;
cache.set(obj, result);
}
return cache.get(obj);
}
// main.js
let obj = {/* some object */};
let result1 = process(obj);
let result2 = process(obj);
// ...later, when the object is not needed any more:
obj = null;
// Can't get cache.size, as it's a WeakMap,
// but it's 0 or soon be 0
// When obj gets garbage collected, cached data will be removed as well
- WeakSet
WeakSet behaves similarly:
It is analogous to Set, but we may only add objects to WeakSet (not primitives).
An object exists in the set while it is reachable from somewhere else.
Like Set, it supports add, has and delete, but not size, keys() and no iterations.
Being “weak”, it also serves as additional storage.
But not for arbitrary data, rather for “yes/no” facts.
A membership in WeakSet may mean something about the object.
For instance, we can add users to WeakSet to keep track of those who visited our site:
let visitedSet = new WeakSet();
let john = { name: "John" };
let pete = { name: "Pete" };
let mary = { name: "Mary" };
visitedSet.add(john); // John visited us
visitedSet.add(pete); // Then Pete
visitedSet.add(john); // John again
// visitedSet has 2 users now
// check if John visited?
alert(visitedSet.has(john)); // true
// check if Mary visited?
alert(visitedSet.has(mary)); // false
john = null;
// visitedSet will be cleaned automatically
The most notable limitation of WeakMap and WeakSet is the absence of iterations, and the inability to get all current content.
That may appear inconvenient, but does not prevent WeakMap/WeakSet from doing their main job – be an “additional” storage of data for objects which are stored/managed at another place.
- Summary
WeakMap is Map-like collection that allows only objects as keys and removes them together with associated value once they become inaccessible by other means.
WeakSet is Set-like collection that stores only objects and removes them once they become inaccessible by other means.
Their main advantages are that they have weak reference to objects, so they can easily be removed by garbage collector.
That comes at the cost of not having support for clear, size, keys, values…
WeakMap and WeakSet are used as “secondary” data structures in addition to the “primary” object storage.
Once the object is removed from the primary storage, if it is only found as the key of WeakMap or in a WeakSet, it will be cleaned up automatically.
importance: 5
There's an array of messages:
let messages = [
{text: "Hello", from: "John"},
{text: "How goes?", from: "John"},
{text: "See you soon", from: "Alice"}
];
Your code can access it, but the messages are managed by someone else's code.
New messages are added, old ones are removed regularly by that code, and you don't know the exact moments when it happens.
Now, which data structure could you use to store information about whether the message “has been read”? The structure must be well-suited to give the answer “was it read?” for the given message object.
P.S.
When a message is removed from messages, it should disappear from your structure as well.
P.P.S.
We shouldn't modify message objects, add our properties to them.
As they are managed by someone else's code, that may lead to bad consequences.
Let's store read messages in WeakSet:
let messages = [
{text: "Hello", from: "John"},
{text: "How goes?", from: "John"},
{text: "See you soon", from: "Alice"}
];
let readMessages = new WeakSet();
// two messages have been read
readMessages.add(messages[0]);
readMessages.add(messages[1]);
// readMessages has 2 elements
// ...let's read the first message again!
readMessages.add(messages[0]);
// readMessages still has 2 unique elements
// answer: was the message[0] read?
alert("Read message 0: " + readMessages.has(messages[0])); // true
messages.shift();
// now readMessages has 1 element (technically memory may be cleaned later)
The WeakSet allows to store a set of messages and easily check for the existance of a message in it.
It cleans up itself automatically.
The tradeoff is that we can't iterate over it, can't get “all read messages” from it directly.
But we can do it by iterating over all messages and filtering those that are in the set.
Another, different solution could be to add a property like message.isRead=true to a message after it's read.
As messages objects are managed by another code, that's generally discouraged, but we can use a symbolic property to avoid conflicts.
Like this:
// the symbolic property is only known to our code
let isRead = Symbol("isRead");
messages[0][isRead] = true;
Now third-party code probably won't see our extra property.
Although symbols allow to lower the probability of problems, using WeakSet is better from the architectural point of view.
Store read dates
importance: 5
There's an array of messages as in the previous task.
The situation is similar.
let messages = [
{text: "Hello", from: "John"},
{text: "How goes?", from: "John"},
{text: "See you soon", from: "Alice"}
];
The question now is: which data structure you'd suggest to store the information: “when the message was read?”.
In the previous task we only needed to store the “yes/no” fact.
Now we need to store the date, and it should only remain in memory until the message is garbage collected.
P.S.
Dates can be stored as objects of built-in Date class, that we'll cover later.
To store a date, we can use WeakMap:
let messages = [
{text: "Hello", from: "John"},
{text: "How goes?", from: "John"},
{text: "See you soon", from: "Alice"}
];
let readMap = new WeakMap();
readMap.set(messages[0], new Date(2017, 1, 1));
// Date object we'll study laterData types
Object.keys, values, entries
Let's step away from the individual data structures and talk about the iterations over them.
In the previous chapter we saw methods map.keys(), map.values(), map.entries().
These methods are generic, there is a common agreement to use them for data structures.
If we ever create a data structure of our own, we should implement them too.
They are supported for:
MapSetArray
Plain objects also support similar methods, but the syntax is a bit different.
- Object.keys, values, entries
For plain objects, the following methods are available:
Object.keys(obj) – returns an array of keys.
Object.values(obj) – returns an array of values.
Object.entries(obj) – returns an array of [key, value] pairs.
Please note the distinctions (compared to map for example):
Map
Object
Call syntax
map.keys()
Object.keys(obj), but not obj.keys()
Returns
iterable
“real” Array
The first difference is that we have to call Object.keys(obj), and not obj.keys().
Why so? The main reason is flexibility.
Remember, objects are a base of all complex structures in JavaScript.
So we may have an object of our own like data that implements its own data.values() method.
And we still can call Object.values(data) on it.
The second difference is that Object.* methods return “real” array objects, not just an iterable.
That's mainly for historical reasons.
For instance:
let user = {
name: "John",
age: 30
};Object.keys(user) = ["name", "age"]Object.values(user) = ["John", 30]Object.entries(user) = [ ["name","John"], ["age",30] ]
Here's an example of using Object.values to loop over property values:
let user = {
name: "John",
age: 30
};
// loop over values
for (let value of Object.values(user)) {
alert(value); // John, then 30
}
Object.keys/values/entries ignore symbolic properties
Just like a for..in loop, these methods ignore properties that use Symbol(...) as keys.
Usually that's convenient.
But if we want symbolic keys too, then there's a separate method Object.getOwnPropertySymbols that returns an array of only symbolic keys.
Also, there exist a method Reflect.ownKeys(obj) that returns all keys.
- Transforming objects
Objects lack many methods that exist for arrays, e.g.
map, filter and others.
If we'd like to apply them, then we can use Object.entries followed by Object.fromEntries:
Use Object.entries(obj) to get an array of key/value pairs from obj.
Use array methods on that array, e.g.
map.
Use Object.fromEntries(array) on the resulting array to turn it back into an object.
For example, we have an object with prices, and would like to double them:
let prices = {
banana: 1,
orange: 2,
meat: 4,
};
let doublePrices = Object.fromEntries(
// convert to array, map, and then fromEntries gives back the object
Object.entries(prices).map(([key, value]) => [key, value * 2])
);
alert(doublePrices.meat); // 8
It may look difficult from the first sight, but becomes easy to understand after you use it once or twice.
We can make powerful chains of transforms this way.
importance: 5
There is a salaries object with arbitrary number of salaries.
Write the function sumSalaries(salaries) that returns the sum of all salaries using Object.values and the for..of loop.
If salaries is empty, then the result must be 0.
For instance:
let salaries = {
"John": 100,
"Pete": 300,
"Mary": 250
};
alert( sumSalaries(salaries) ); // 650Open a sandbox with tests.function sumSalaries(salaries) {
let sum = 0;
for (let salary of Object.values(salaries)) {
sum += salary;
}
return sum; // 650
}
let salaries = {
"John": 100,
"Pete": 300,
"Mary": 250
};
alert( sumSalaries(salaries) ); // 650
Or, optionally, we could also get the sum using Object.values and reduce:
// reduce loops over array of salaries,
// adding them up
// and returns the result
function sumSalaries(salaries) {
return Object.values(salaries).reduce((a, b) => a + b, 0) // 650
}Open the solution with tests in a sandbox.
Count properties
importance: 5
Write a function count(obj) that returns the number of properties in the object:
let user = {
name: 'John',
age: 30
};
alert( count(user) ); // 2
Try to make the code as short as possible.
P.S.
Ignore symbolic properties, count only “regular” ones.
Open a sandbox with tests.function count(obj) {
return Object.keys(obj).length;
}Open the solution with tests in a sandbox.Data types
Destructuring assignment
The two most used data structures in JavaScript are Object and Array.
Objects allow us to create a single entity that stores data items by key.
Arrays allow us to gather data items into an ordered list.
Although, when we pass those to a function, it may need not an object/array as a whole.
It may need individual pieces.
Destructuring assignment is a special syntax that allows us to “unpack” arrays or objects into a bunch of variables, as sometimes that's more convenient.
Destructuring also works great with complex functions that have a lot of parameters, default values, and so on.
Soon we'll see that.
- Array destructuring
Here's an example of how an array is destructured into variables:
// we have an array with the name and surname
let arr = ["John", "Smith"]
// destructuring assignment
// sets firstName = arr[0]
// and surname = arr[1]
let [firstName, surname] = arr;
alert(firstName); // John
alert(surname); // Smith
Now we can work with variables instead of array members.
It looks great when combined with split or other array-returning methods:
let [firstName, surname] = "John Smith".split(' ');
alert(firstName); // John
alert(surname); // Smith
As you can see, the syntax is simple.
There are several peculiar details though.
Let's see more examples, to better understand it.
“Destructuring” does not mean “destructive”.
It's called “destructuring assignment,” because it “destructurizes” by copying items into variables.
But the array itself is not modified.
It's just a shorter way to write:
// let [firstName, surname] = arr;
let firstName = arr[0];
let surname = arr[1];
Ignore elements using commas
Unwanted elements of the array can also be thrown away via an extra comma:
// second element is not needed
let [firstName, , title] = ["Julius", "Caesar", "Consul", "of the Roman Republic"];
alert( title ); // Consul
In the code above, the second element of the array is skipped, the third one is assigned to title, and the rest of the array items is also skipped (as there are no variables for them).
Works with any iterable on the right-side
…Actually, we can use it with any iterable, not only arrays:
let [a, b, c] = "abc"; // ["a", "b", "c"]
let [one, two, three] = new Set([1, 2, 3]);
That works, because internally a destructuring assignment works by iterating over the right value.
It's kind of syntax sugar for calling for..of over the value to the right of = and assigning the values.
Assign to anything at the left-side
We can use any “assignables” at the left side.
For instance, an object property:
let user = {};
[user.name, user.surname] = "John Smith".split(' ');
alert(user.name); // John
alert(user.surname); // Smith
Looping with .entries()
In the previous chapter we saw the Object.entries(obj) method.
We can use it with destructuring to loop over keys-and-values of an object:
let user = {
name: "John",
age: 30
};
// loop over keys-and-values
for (let [key, value] of Object.entries(user)) {
alert(`${key}:${value}`); // name:John, then age:30
}
The similar code for a Map is simpler, as it's iterable:
let user = new Map();
user.set("name", "John");
user.set("age", "30");
// Map iterates as [key, value] pairs, very convenient for destructuring
for (let [key, value] of user) {
alert(`${key}:${value}`); // name:John, then age:30
}
Swap variables trick
There's a well-known trick for swapping values of two variables using a destructuring assignment:
let guest = "Jane";
let admin = "Pete";
// Let's swap the values: make guest=Pete, admin=Jane
[guest, admin] = [admin, guest];
alert(`${guest} ${admin}`); // Pete Jane (successfully swapped!)
Here we create a temporary array of two variables and immediately destructure it in swapped order.
We can swap more than two variables this way.
The rest ‘…'
Usually, if the array is longer when the list at the left, the “extra” items are omitted.
For example, here only two items are taken, and the rest is just ignored:
let [name1, name2] = ["Julius", "Caesar", "Consul", "of the Roman Republic"];
alert(name1); // Julius
alert(name2); // Caesar
// Further items aren't assigned anywhere
If we'd like also to gather all that follows – we can add one more parameter that gets “the rest” using three dots "...":
let [name1, name2, ...rest] = ["Julius", "Caesar", "Consul", "of the Roman Republic"];
// rest is array of items, starting from the 3rd one
alert(rest[0]); // Consul
alert(rest[1]); // of the Roman Republic
alert(rest.length); // 2
The value of rest is the array of the remaining array elements.
We can use any other variable name in place of rest, just make sure it has three dots before it and goes last in the destructuring assignment.
let [name1, name2, ...titles] = ["Julius", "Caesar", "Consul", "of the Roman Republic"];
// now titles = ["Consul", "of the Roman Republic"]
Default values
If the array is shorter than the list of variables at the left, there'll be no errors.
Absent values are considered undefined:
let [firstName, surname] = [];
alert(firstName); // undefined
alert(surname); // undefined
If we want a “default” value to replace the missing one, we can provide it using =:
// default values
let [name = "Guest", surname = "Anonymous"] = ["Julius"];
alert(name); // Julius (from array)
alert(surname); // Anonymous (default used)
Default values can be more complex expressions or even function calls.
They are evaluated only if the value is not provided.
For instance, here we use the prompt function for two defaults:
// runs only prompt for surname
let [name = prompt('name?'), surname = prompt('surname?')] = ["Julius"];
alert(name); // Julius (from array)
alert(surname); // whatever prompt gets
Please note: the prompt will run only for the missing value (surname).
- Object destructuring
The destructuring assignment also works with objects.
The basic syntax is:
let {var1, var2} = {var1:…, var2:…}
We should have an existing object at the right side, that we want to split into variables.
The left side contains an object-like “pattern” for corresponding properties.
In the simplest case, that's a list of variable names in {...}.
For instance:
let options = {
title: "Menu",
width: 100,
height: 200
};
let {title, width, height} = options;
alert(title); // Menu
alert(width); // 100
alert(height); // 200
Properties options.title, options.width and options.height are assigned to the corresponding variables.
The order does not matter.
This works too:
// changed the order in let {...}
let {height, width, title} = { title: "Menu", height: 200, width: 100 }
The pattern on the left side may be more complex and specify the mapping between properties and variables.
If we want to assign a property to a variable with another name, for instance, make options.width go into the variable named w, then we can set the variable name using a colon:
let options = {
title: "Menu",
width: 100,
height: 200
};
// { sourceProperty: targetVariable }
let {width: w, height: h, title} = options;
// width -> w
// height -> h
// title -> title
alert(title); // Menu
alert(w); // 100
alert(h); // 200
The colon shows “what : goes where”.
In the example above the property width goes to w, property height goes to h, and title is assigned to the same name.
For potentially missing properties we can set default values using "=", like this:
let options = {
title: "Menu"
};
let {width = 100, height = 200, title} = options;
alert(title); // Menu
alert(width); // 100
alert(height); // 200
Just like with arrays or function parameters, default values can be any expressions or even function calls.
They will be evaluated if the value is not provided.
In the code below prompt asks for width, but not for title:
let options = {
title: "Menu"
};
let {width = prompt("width?"), title = prompt("title?")} = options;
alert(title); // Menu
alert(width); // (whatever the result of prompt is)
We also can combine both the colon and equality:
let options = {
title: "Menu"
};
let {width: w = 100, height: h = 200, title} = options;
alert(title); // Menu
alert(w); // 100
alert(h); // 200
If we have a complex object with many properties, we can extract only what we need:
let options = {
title: "Menu",
width: 100,
height: 200
};
// only extract title as a variable
let { title } = options;
alert(title); // Menu
The rest pattern “…”
What if the object has more properties than we have variables? Can we take some and then assign the “rest” somewhere?
We can use the rest pattern, just like we did with arrays.
It's not supported by some older browsers (IE, use Babel to polyfill it), but works in modern ones.
It looks like this:
let options = {
title: "Menu",
height: 200,
width: 100
};
// title = property named title
// rest = object with the rest of properties
let {title, ...rest} = options;
// now title="Menu", rest={height: 200, width: 100}
alert(rest.height); // 200
alert(rest.width); // 100
Gotcha if there's no let
In the examples above variables were declared right in the assignment: let {…} = {…}.
Of course, we could use existing variables too, without let.
But there's a catch.
This won't work:
let title, width, height;
// error in this line
{title, width, height} = {title: "Menu", width: 200, height: 100};
The problem is that JavaScript treats {...} in the main code flow (not inside another expression) as a code block.
Such code blocks can be used to group statements, like this:
{
// a code block
let message = "Hello";
// ...
alert( message );
}
So here JavaScript assumes that we have a code block, that's why there's an error.
We want destructuring instead.
To show JavaScript that it's not a code block, we can wrap the expression in parentheses (...):
let title, width, height;
// okay now
({title, width, height} = {title: "Menu", width: 200, height: 100});
alert( title ); // Menu
- Nested destructuring
If an object or an array contain other nested objects and arrays, we can use more complex left-side patterns to extract deeper portions.
In the code below options has another object in the property size and an array in the property items.
The pattern at the left side of the assignment has the same structure to extract values from them:
let options = {
size: {
width: 100,
height: 200
},
items: ["Cake", "Donut"],
extra: true
};
// destructuring assignment split in multiple lines for clarity
let {
size: { // put size here
width,
height
},
items: [item1, item2], // assign items here
title = "Menu" // not present in the object (default value is used)
} = options;
alert(title); // Menu
alert(width); // 100
alert(height); // 200
alert(item1); // Cake
alert(item2); // Donut
All properties of options object except extra that is absent in the left part, are assigned to corresponding variables:
Finally, we have width, height, item1, item2 and title from the default value.
Note that there are no variables for size and items, as we take their content instead.
- Smart function parameters
There are times when a function has many parameters, most of which are optional.
That's especially true for user interfaces.
Imagine a function that creates a menu.
It may have a width, a height, a title, items list and so on.
Here's a bad way to write such function:
function showMenu(title = "Untitled", width = 200, height = 100, items = []) {
// ...
}
In real-life, the problem is how to remember the order of arguments.
Usually IDEs try to help us, especially if the code is well-documented, but still… Another problem is how to call a function when most parameters are ok by default.
Like this?
// undefined where default values are fine
showMenu("My Menu", undefined, undefined, ["Item1", "Item2"])
That's ugly.
And becomes unreadable when we deal with more parameters.
Destructuring comes to the rescue!
We can pass parameters as an object, and the function immediately destructurizes them into variables:
// we pass object to function
let options = {
title: "My menu",
items: ["Item1", "Item2"]
};
// ...and it immediately expands it to variables
function showMenu({title = "Untitled", width = 200, height = 100, items = []}) {
// title, items – taken from options,
// width, height – defaults used
alert( `${title} ${width} ${height}` ); // My Menu 200 100
alert( items ); // Item1, Item2
}
showMenu(options);
We can also use more complex destructuring with nested objects and colon mappings:
let options = {
title: "My menu",
items: ["Item1", "Item2"]
};
function showMenu({
title = "Untitled",
width: w = 100, // width goes to w
height: h = 200, // height goes to h
items: [item1, item2] // items first element goes to item1, second to item2
}) {
alert( `${title} ${w} ${h}` ); // My Menu 100 200
alert( item1 ); // Item1
alert( item2 ); // Item2
}
showMenu(options);
The full syntax is the same as for a destructuring assignment:
function({
incomingProperty: varName = defaultValue
...
})
Then, for an object of parameters, there will be a variable varName for property incomingProperty, with defaultValue by default.
Please note that such destructuring assumes that showMenu() does have an argument.
If we want all values by default, then we should specify an empty object:
showMenu({}); // ok, all values are default
showMenu(); // this would give an error
We can fix this by making {} the default value for the whole object of parameters:
function showMenu({ title = "Menu", width = 100, height = 200 } = {}) {
alert( `${title} ${width} ${height}` );
}
showMenu(); // Menu 100 200
In the code above, the whole arguments object is {} by default, so there's always something to destructurize.
- Summary
Destructuring assignment allows for instantly mapping an object or array onto many variables.
The full object syntax:
let {prop : varName = default, ...rest} = object
This means that property prop should go into the variable varName and, if no such property exists, then the default value should be used.
Object properties that have no mapping are copied to the rest object.
The full array syntax:
let [item1 = default, item2, ...rest] = array
The first item goes to item1; the second goes into item2, all the rest makes the array rest.
It's possible to extract data from nested arrays/objects, for that the left side must have the same structure as the right one.
importance: 5
We have an object:
let user = {
name: "John",
years: 30
};
Write the destructuring assignment that reads:
name property into the variable name.
years property into the variable age.
isAdmin property into the variable isAdmin (false, if no such property)
Here's an example of the values after your assignment:
let user = { name: "John", years: 30 };
// your code to the left side:
// ...
= user
alert( name ); // John
alert( age ); // 30
alert( isAdmin ); // falselet user = {
name: "John",
years: 30
};
let {name, years: age, isAdmin = false} = user;
alert( name ); // John
alert( age ); // 30
alert( isAdmin ); // false
The maximal salary
importance: 5
There is a salaries object:
let salaries = {
"John": 100,
"Pete": 300,
"Mary": 250
};
Create the function topSalary(salaries) that returns the name of the top-paid person.
If salaries is empty, it should return null.
If there are multiple top-paid persons, return any of them.
P.S.
Use Object.entries and destructuring to iterate over key/value pairs.
Open a sandbox with tests.function topSalary(salaries) {
let max = 0;
let maxName = null;
for(const [name, salary] of Object.entries(salaries)) {
if (max < salary) {
max = salary;
maxName = name;
}
}
return maxName;
}Open the solution with tests in a sandbox.Data types
Date and time
Let's meet a new built-in object: Date.
It stores the date, time and provides methods for date/time management.
For instance, we can use it to store creation/modification times, to measure time, or just to print out the current date.
- Creation
To create a new Date object call new Date() with one of the following arguments:
new Date()
Without arguments – create a Date object for the current date and time:
let now = new Date();
alert( now ); // shows current date/time
new Date(milliseconds)
Create a Date object with the time equal to number of milliseconds (1/1000 of a second) passed after the Jan 1st of 1970 UTC+0.
// 0 means 01.01.1970 UTC+0
let Jan01_1970 = new Date(0);
alert( Jan01_1970 );
// now add 24 hours, get 02.01.1970 UTC+0
let Jan02_1970 = new Date(24 * 3600 * 1000);
alert( Jan02_1970 );
An integer number representing the number of milliseconds that has passed since the beginning of 1970 is called a timestamp.
It's a lightweight numeric representation of a date.
We can always create a date from a timestamp using new Date(timestamp) and convert the existing Date object to a timestamp using the date.getTime() method (see below).
Dates before 01.01.1970 have negative timestamps, e.g.:
// 31 Dec 1969
let Dec31_1969 = new Date(-24 * 3600 * 1000);
alert( Dec31_1969 );
new Date(datestring)
If there is a single argument, and it's a string, then it is parsed automatically.
The algorithm is the same as Date.parse uses, we'll cover it later.
let date = new Date("2017-01-26");
alert(date);
// The time is not set, so it's assumed to be midnight GMT and
// is adjusted according to the timezone the code is run in
// So the result could be
// Thu Jan 26 2017 11:00:00 GMT+1100 (Australian Eastern Daylight Time)
// or
// Wed Jan 25 2017 16:00:00 GMT-0800 (Pacific Standard Time)
new Date(year, month, date, hours, minutes, seconds, ms)
Create the date with the given components in the local time zone.
Only the first two arguments are obligatory.
The year must have 4 digits: 2013 is okay, 98 is not.
The month count starts with 0 (Jan), up to 11 (Dec).
The date parameter is actually the day of month, if absent then 1 is assumed.
If hours/minutes/seconds/ms is absent, they are assumed to be equal 0.
For instance:
new Date(2011, 0, 1, 0, 0, 0, 0); // 1 Jan 2011, 00:00:00
new Date(2011, 0, 1); // the same, hours etc are 0 by default
The maximal precision is 1 ms (1/1000 sec):
let date = new Date(2011, 0, 1, 2, 3, 4, 567);
alert( date ); // 1.01.2011, 02:03:04.567
- Access date components
There are methods to access the year, month and so on from the Date object:
Not getYear(), but getFullYear()
Many JavaScript engines implement a non-standard method getYear().
This method is deprecated.
It returns 2-digit year sometimes.
Please never use it.
There is getFullYear() for the year.
Additionally, we can get a day of week:
Get the day of week, from 0 (Sunday) to 6 (Saturday).
The first day is always Sunday, in some countries that's not so, but can't be changed.
All the methods above return the components relative to the local time zone.
There are also their UTC-counterparts, that return day, month, year and so on for the time zone UTC+0: getUTCFullYear(), getUTCMonth(), getUTCDay().
Just insert the "UTC" right after "get".
If your local time zone is shifted relative to UTC, then the code below shows different hours:
// current date
let date = new Date();
// the hour in your current time zone
alert( date.getHours() );
// the hour in UTC+0 time zone (London time without daylight savings)
alert( date.getUTCHours() );
Besides the given methods, there are two special ones that do not have a UTC-variant:
Returns the difference between UTC and the local time zone, in minutes:
// if you are in timezone UTC-1, outputs 60
// if you are in timezone UTC+3, outputs -180
alert( new Date().getTimezoneOffset() );
The autocorrection is a very handy feature of Date objects.
We can set out-of-range values, and it will auto-adjust itself.
For instance:
let date = new Date(2013, 0, 32); // 32 Jan 2013 ?!?
alert(date); // ...is 1st Feb 2013!
Out-of-range date components are distributed automatically.
Let's say we need to increase the date “28 Feb 2016” by 2 days.
It may be “2 Mar” or “1 Mar” in case of a leap-year.
We don't need to think about it.
Just add 2 days.
The Date object will do the rest:
let date = new Date(2016, 1, 28);
date.setDate(date.getDate() + 2);
alert( date ); // 1 Mar 2016
That feature is often used to get the date after the given period of time.
For instance, let's get the date for “70 seconds after now”:
let date = new Date();
date.setSeconds(date.getSeconds() + 70);
alert( date ); // shows the correct date
We can also set zero or even negative values.
For example:
let date = new Date(2016, 0, 2); // 2 Jan 2016
date.setDate(1); // set day 1 of month
alert( date );
date.setDate(0); // min day is 1, so the last day of the previous month is assumed
alert( date ); // 31 Dec 2015
- Date to number, date diff
When a Date object is converted to number, it becomes the timestamp same as date.getTime():
let date = new Date();
alert(+date); // the number of milliseconds, same as date.getTime()
The important side effect: dates can be subtracted, the result is their difference in ms.
That can be used for time measurements:
let start = new Date(); // start measuring time
// do the job
for (let i = 0; i < 100000; i++) {
let doSomething = i * i * i;
}
let end = new Date(); // end measuring time
alert( `The loop took ${end - start} ms` );
- Date.now()
If we only want to measure time, we don't need the Date object.
There's a special method Date.now() that returns the current timestamp.
It is semantically equivalent to new Date().getTime(), but it doesn't create an intermediate Date object.
So it's faster and doesn't put pressure on garbage collection.
It is used mostly for convenience or when performance matters, like in games in JavaScript or other specialized applications.
So this is probably better:
let start = Date.now(); // milliseconds count from 1 Jan 1970
// do the job
for (let i = 0; i < 100000; i++) {
let doSomething = i * i * i;
}
let end = Date.now(); // done
alert( `The loop took ${end - start} ms` ); // subtract numbers, not dates
- Benchmarking
If we want a reliable benchmark of CPU-hungry function, we should be careful.
For instance, let's measure two functions that calculate the difference between two dates: which one is faster?
Such performance measurements are often called “benchmarks”.
// we have date1 and date2, which function faster returns their difference in ms?
function diffSubtract(date1, date2) {
return date2 - date1;
}
// or
function diffGetTime(date1, date2) {
return date2.getTime() - date1.getTime();
}
These two do exactly the same thing, but one of them uses an explicit date.getTime() to get the date in ms, and the other one relies on a date-to-number transform.
Their result is always the same.
So, which one is faster?
The first idea may be to run them many times in a row and measure the time difference.
For our case, functions are very simple, so we have to do it at least 100000 times.
Let's measure:
function diffSubtract(date1, date2) {
return date2 - date1;
}
function diffGetTime(date1, date2) {
return date2.getTime() - date1.getTime();
}
function bench(f) {
let date1 = new Date(0);
let date2 = new Date();
let start = Date.now();
for (let i = 0; i < 100000; i++) f(date1, date2);
return Date.now() - start;
}
alert( 'Time of diffSubtract: ' + bench(diffSubtract) + 'ms' );
alert( 'Time of diffGetTime: ' + bench(diffGetTime) + 'ms' );
Wow! Using getTime() is so much faster! That's because there's no type conversion, it is much easier for engines to optimize.
Okay, we have something.
But that's not a good benchmark yet.
Imagine that at the time of running bench(diffSubtract) CPU was doing something in parallel, and it was taking resources.
And by the time of running bench(diffGetTime) that work has finished.
A pretty real scenario for a modern multi-process OS.
As a result, the first benchmark will have less CPU resources than the second.
That may lead to wrong results.
For more reliable benchmarking, the whole pack of benchmarks should be rerun multiple times.
For example, like this:
function diffSubtract(date1, date2) {
return date2 - date1;
}
function diffGetTime(date1, date2) {
return date2.getTime() - date1.getTime();
}
function bench(f) {
let date1 = new Date(0);
let date2 = new Date();
let start = Date.now();
for (let i = 0; i < 100000; i++) f(date1, date2);
return Date.now() - start;
}
let time1 = 0;
let time2 = 0;
// run bench(upperSlice) and bench(upperLoop) each 10 times alternating
for (let i = 0; i < 10; i++) {
time1 += bench(diffSubtract);
time2 += bench(diffGetTime);
}
alert( 'Total time for diffSubtract: ' + time1 );
alert( 'Total time for diffGetTime: ' + time2 );
Modern JavaScript engines start applying advanced optimizations only to “hot code” that executes many times (no need to optimize rarely executed things).
So, in the example above, first executions are not well-optimized.
We may want to add a heat-up run:
// added for "heating up" prior to the main loop
bench(diffSubtract);
bench(diffGetTime);
// now benchmark
for (let i = 0; i < 10; i++) {
time1 += bench(diffSubtract);
time2 += bench(diffGetTime);
}
Be careful doing microbenchmarking
Modern JavaScript engines perform many optimizations.
They may tweak results of “artificial tests” compared to “normal usage”, especially when we benchmark something very small, such as how an operator works, or a built-in function.
So if you seriously want to understand performance, then please study how the JavaScript engine works.
And then you probably won't need microbenchmarks at all.
The great pack of articles about V8 can be found at http://mrale.ph.
- Date.parse from a string
The method Date.parse(str) can read a date from a string.
The string format should be: YYYY-MM-DDTHH:mm:ss.sssZ, where:
YYYY-MM-DD – is the date: year-month-day.
The character "T" is used as the delimiter.
HH:mm:ss.sss – is the time: hours, minutes, seconds and milliseconds.
The optional 'Z' part denotes the time zone in the format +-hh:mm.
A single letter Z would mean UTC+0.
Shorter variants are also possible, like YYYY-MM-DD or YYYY-MM or even YYYY.
The call to Date.parse(str) parses the string in the given format and returns the timestamp (number of milliseconds from 1 Jan 1970 UTC+0).
If the format is invalid, returns NaN.
For instance:
let ms = Date.parse('2012-01-26T13:51:50.417-07:00');
alert(ms); // 1327611110417 (timestamp)
We can instantly create a new Date object from the timestamp:
let date = new Date( Date.parse('2012-01-26T13:51:50.417-07:00') );
alert(date);
- Summary
Date and time in JavaScript are represented with the Date object.
We can't create “only date” or “only time”: Date objects always carry both.
Months are counted from zero (yes, January is a zero month).
Days of week in getDay() are also counted from zero (that's Sunday).
Date auto-corrects itself when out-of-range components are set.
Good for adding/subtracting days/months/hours.
Dates can be subtracted, giving their difference in milliseconds.
That's because a Date becomes the timestamp when converted to a number.
Use Date.now() to get the current timestamp fast.
Note that unlike many other systems, timestamps in JavaScript are in milliseconds, not in seconds.
Sometimes we need more precise time measurements.
JavaScript itself does not have a way to measure time in microseconds (1 millionth of a second), but most environments provide it.
For instance, browser has performance.now() that gives the number of milliseconds from the start of page loading with microsecond precision (3 digits after the point):
alert(`Loading started ${performance.now()}ms ago`);
// Something like: "Loading started 34731.26000000001ms ago"
// .26 is microseconds (260 microseconds)
// more than 3 digits after the decimal point are precision errors, only the first 3 are correct
Node.js has microtime module and other ways.
Technically, almost any device and environment allows to get more precision, it's just not in Date.
importance: 5
Create a Date object for the date: Feb 20, 2012, 3:12am.
The time zone is local.
Show it using alert.
The new Date constructor uses the local time zone.
So the only important thing to remember is that months start from zero.
So February has number 1.
Here's an example with numbers as date components:
//new Date(year, month, date, hour, minute, second, millisecond)
let d1 = new Date(2012, 1, 20, 3, 12);
alert( d1 );
We could also create a date from a string, like this:
//new Date(datastring)
let d2 = new Date("February 20, 2012 03:12:00");
alert( d2 );
Show a weekday
importance: 5
Write a function getWeekDay(date) to show the weekday in short format: ‘MO', ‘TU', ‘WE', ‘TH', ‘FR', ‘SA', ‘SU'.
For instance:
let date = new Date(2012, 0, 3); // 3 Jan 2012
alert( getWeekDay(date) ); // should output "TU"Open a sandbox with tests.
The method date.getDay() returns the number of the weekday, starting from sunday.
Let's make an array of weekdays, so that we can get the proper day name by its number:
function getWeekDay(date) {
let days = ['SU', 'MO', 'TU', 'WE', 'TH', 'FR', 'SA'];
return days[date.getDay()];
}
let date = new Date(2014, 0, 3); // 3 Jan 2014
alert( getWeekDay(date) ); // FROpen the solution with tests in a sandbox.
European weekday
importance: 5
European countries have days of week starting with Monday (number 1), then Tuesday (number 2) and till Sunday (number 7).
Write a function getLocalDay(date) that returns the “European” day of week for date.
let date = new Date(2012, 0, 3); // 3 Jan 2012
alert( getLocalDay(date) ); // tuesday, should show 2Open a sandbox with tests.function getLocalDay(date) {
let day = date.getDay();
if (day == 0) { // weekday 0 (sunday) is 7 in european
day = 7;
}
return day;
}Open the solution with tests in a sandbox.
Which day of month was many days ago?
importance: 4
Create a function getDateAgo(date, days) to return the day of month days ago from the date.
For instance, if today is 20th, then getDateAgo(new Date(), 1) should be 19th and getDateAgo(new Date(), 2) should be 18th.
Should work reliably for days=365 or more:
let date = new Date(2015, 0, 2);
alert( getDateAgo(date, 1) ); // 1, (1 Jan 2015)
alert( getDateAgo(date, 2) ); // 31, (31 Dec 2014)
alert( getDateAgo(date, 365) ); // 2, (2 Jan 2014)
P.S.
The function should not modify the given date.
Open a sandbox with tests.
The idea is simple: to substract given number of days from date:
function getDateAgo(date, days) {
date.setDate(date.getDate() - days);
return date.getDate();
}
…But the function should not change date.
That's an important thing, because the outer code which gives us the date does not expect it to change.
To implement it let's clone the date, like this:
function getDateAgo(date, days) {
let dateCopy = new Date(date);
dateCopy.setDate(date.getDate() - days);
return dateCopy.getDate();
}
let date = new Date(2015, 0, 2);
alert( getDateAgo(date, 1) ); // 1, (1 Jan 2015)
alert( getDateAgo(date, 2) ); // 31, (31 Dec 2014)
alert( getDateAgo(date, 365) ); // 2, (2 Jan 2014)Open the solution with tests in a sandbox.
Last day of month?
importance: 5
Write a function getLastDayOfMonth(year, month) that returns the last day of month.
Sometimes it is 30th, 31st or even 28/29th for Feb.
Parameters:
year – four-digits year, for instance 2012.
month – month, from 0 to 11.
For instance, getLastDayOfMonth(2012, 1) = 29 (leap year, Feb).
Open a sandbox with tests.
Let's create a date using the next month, but pass zero as the day:
function getLastDayOfMonth(year, month) {
let date = new Date(year, month + 1, 0);
return date.getDate();
}
alert( getLastDayOfMonth(2012, 0) ); // 31
alert( getLastDayOfMonth(2012, 1) ); // 29
alert( getLastDayOfMonth(2013, 1) ); // 28
Normally, dates start from 1, but technically we can pass any number, the date will autoadjust itself.
So when we pass 0, then it means “one day before 1st day of the month”, in other words: “the last day of the previous month”.
Open the solution with tests in a sandbox.
How many seconds have passed today?
importance: 5
Write a function getSecondsToday() that returns the number of seconds from the beginning of today.
For instance, if now were 10:00 am, and there was no daylight savings shift, then:
getSecondsToday() == 36000 // (3600 * 10)
The function should work in any day.
That is, it should not have a hard-coded value of “today”.
To get the number of seconds, we can generate a date using the current day and time 00:00:00, then substract it from “now”.
The difference is the number of milliseconds from the beginning of the day, that we should divide by 1000 to get seconds:
function getSecondsToday() {
let now = new Date();
// create an object using the current day/month/year
let today = new Date(now.getFullYear(), now.getMonth(), now.getDate());
let diff = now - today; // ms difference
return Math.round(diff / 1000); // make seconds
}
alert( getSecondsToday() );
An alternative solution would be to get hours/minutes/seconds and convert them to seconds:
function getSecondsToday() {
let d = new Date();
return d.getHours() * 3600 + d.getMinutes() * 60 + d.getSeconds();
}
alert( getSecondsToday() );
How many seconds till tomorrow?
importance: 5
Create a function getSecondsToTomorrow() that returns the number of seconds till tomorrow.
For instance, if now is 23:00, then:
getSecondsToTomorrow() == 3600
P.S.
The function should work at any day, the “today” is not hardcoded.
To get the number of milliseconds till tomorrow, we can from “tomorrow 00:00:00” substract the current date.
First, we generate that “tomorrow”, and then do it:
function getSecondsToTomorrow() {
let now = new Date();
// tomorrow date
let tomorrow = new Date(now.getFullYear(), now.getMonth(), now.getDate()+1);
let diff = tomorrow - now; // difference in ms
return Math.round(diff / 1000); // convert to seconds
}
Alternative solution:
function getSecondsToTomorrow() {
let now = new Date();
let hour = now.getHours();
let minutes = now.getMinutes();
let seconds = now.getSeconds();
let totalSecondsToday = (hour * 60 + minutes) * 60 + seconds;
let totalSecondsInADay = 86400;
return totalSecondsInADay - totalSecondsToday;
}
Please note that many countries have Daylight Savings Time (DST), so there may be days with 23 or 25 hours.
We may want to treat such days separately.
Format the relative date
importance: 4
Write a function formatDate(date) that should format date as follows:
If since date passed less than 1 second, then "right now".
Otherwise, if since date passed less than 1 minute, then "n sec.
ago".
Otherwise, if less than an hour, then "m min.
ago".
Otherwise, the full date in the format "DD.MM.YY HH:mm".
That is: "day.month.year hours:minutes", all in 2-digit format, e.g.
31.12.16 10:00.
For instance:
alert( formatDate(new Date(new Date - 1)) ); // "right now"
alert( formatDate(new Date(new Date - 30 * 1000)) ); // "30 sec.
ago"
alert( formatDate(new Date(new Date - 5 * 60 * 1000)) ); // "5 min.
ago"
// yesterday's date like 31.12.16 20:00
alert( formatDate(new Date(new Date - 86400 * 1000)) );Open a sandbox with tests.
To get the time from date till now – let's substract the dates.
function formatDate(date) {
let diff = new Date() - date; // the difference in milliseconds
if (diff < 1000) { // less than 1 second
return 'right now';
}
let sec = Math.floor(diff / 1000); // convert diff to seconds
if (sec < 60) {
return sec + ' sec.
ago';
}
let min = Math.floor(diff / 60000); // convert diff to minutes
if (min < 60) {
return min + ' min.
ago';
}
// format the date
// add leading zeroes to single-digit day/month/hours/minutes
let d = date;
d = [
'0' + d.getDate(),
'0' + (d.getMonth() + 1),
'' + d.getFullYear(),
'0' + d.getHours(),
'0' + d.getMinutes()
].map(component => component.slice(-2)); // take last 2 digits of every component
// join the components into date
return d.slice(0, 3).join('.') + ' ' + d.slice(3).join(':');
}
alert( formatDate(new Date(new Date - 1)) ); // "right now"
alert( formatDate(new Date(new Date - 30 * 1000)) ); // "30 sec.
ago"
alert( formatDate(new Date(new Date - 5 * 60 * 1000)) ); // "5 min.
ago"
// yesterday's date like 31.12.2016 20:00
alert( formatDate(new Date(new Date - 86400 * 1000)) );
Alternative solution:
function formatDate(date) {
let dayOfMonth = date.getDate();
let month = date.getMonth() + 1;
let year = date.getFullYear();
let hour = date.getHours();
let minutes = date.getMinutes();
let diffMs = new Date() - date;
let diffSec = Math.round(diffMs / 1000);
let diffMin = diffSec / 60;
let diffHour = diffMin / 60;
// formatting
year = year.toString().slice(-2);
month = month < 10 ? '0' + month : month;
dayOfMonth = dayOfMonth < 10 ? '0' + dayOfMonth : dayOfMonth;
hour = hour < 10 ? '0' + hour : hour;
minutes = minutes < 10 ? '0' + minutes : minutes;
if (diffSec < 1) {
return 'right now';
} else if (diffMin < 1) {
return `${diffSec} sec.
ago`
} else if (diffHour < 1) {
return `${diffMin} min.
ago`
} else {
return `${dayOfMonth}.${month}.${year} ${hour}:${minutes}`
}
}Open the solution with tests in a sandbox.Data types
JSON methods, toJSON
Let's say we have a complex object, and we'd like to convert it into a string, to send it over a network, or just to output it for logging purposes.
Naturally, such a string should include all important properties.
We could implement the conversion like this:
let user = {
name: "John",
age: 30,
toString() {
return `{name: "${this.name}", age: ${this.age}}`;
}
};
alert(user); // {name: "John", age: 30}
…But in the process of development, new properties are added, old properties are renamed and removed.
Updating such toString every time can become a pain.
We could try to loop over properties in it, but what if the object is complex and has nested objects in properties? We'd need to implement their conversion as well.
Luckily, there's no need to write the code to handle all this.
The task has been solved already.
- JSON.stringify
The JSON (JavaScript Object Notation) is a general format to represent values and objects.
It is described as in RFC 4627 standard.
Initially it was made for JavaScript, but many other languages have libraries to handle it as well.
So it's easy to use JSON for data exchange when the client uses JavaScript and the server is written on Ruby/PHP/Java/Whatever.
JavaScript provides methods:
JSON.stringify to convert objects into JSON.
JSON.parse to convert JSON back into an object.
For instance, here we JSON.stringify a student:
let student = {
name: 'John',
age: 30,
isAdmin: false,
courses: ['html', 'css', 'js'],
wife: null
};
let json = JSON.stringify(student);
alert(typeof json); // we've got a string!
alert(json);
/* JSON-encoded object:
{
"name": "John",
"age": 30,
"isAdmin": false,
"courses": ["html", "css", "js"],
"wife": null
}
*/
The method JSON.stringify(student) takes the object and converts it into a string.
The resulting json string is called a JSON-encoded or serialized or stringified or marshalled object.
We are ready to send it over the wire or put into a plain data store.
Please note that a JSON-encoded object has several important differences from the object literal:
Strings use double quotes.
No single quotes or backticks in JSON.
So 'John' becomes "John".
Object property names are double-quoted also.
That's obligatory.
So age:30 becomes "age":30.
JSON.stringify can be applied to primitives as well.
JSON supports following data types:
Objects { ...
}
Arrays [ ...
]
Primitives:
strings,
numbers,
boolean values true/false,
null.
For instance:
// a number in JSON is just a number
alert( JSON.stringify(1) ) // 1
// a string in JSON is still a string, but double-quoted
alert( JSON.stringify('test') ) // "test"
alert( JSON.stringify(true) ); // true
alert( JSON.stringify([1, 2, 3]) ); // [1,2,3]
JSON is data-only language-independent specification, so some JavaScript-specific object properties are skipped by JSON.stringify.
Namely:
Function properties (methods).
Symbolic keys and values.
Properties that store undefined.
let user = {
sayHi() { // ignored
alert("Hello");
},
[Symbol("id")]: 123, // ignored
something: undefined // ignored
};
alert( JSON.stringify(user) ); // {} (empty object)
Usually that's fine.
If that's not what we want, then soon we'll see how to customize the process.
The great thing is that nested objects are supported and converted automatically.
For instance:
let meetup = {
title: "Conference",
room: {
number: 23,
participants: ["john", "ann"]
}
};
alert( JSON.stringify(meetup) );
/* The whole structure is stringified:
{
"title":"Conference",
"room":{"number":23,"participants":["john","ann"]},
}
*/
The important limitation: there must be no circular references.
For instance:
let room = {
number: 23
};
let meetup = {
title: "Conference",
participants: ["john", "ann"]
};
meetup.place = room; // meetup references room
room.occupiedBy = meetup; // room references meetup
JSON.stringify(meetup); // Error: Converting circular structure to JSON
Here, the conversion fails, because of circular reference: room.occupiedBy references meetup, and meetup.place references room:
- Excluding and transforming: replacer
The full syntax of JSON.stringify is:
let json = JSON.stringify(value[, replacer, space])
value
A value to encode.
replacer
Array of properties to encode or a mapping function function(key, value).
space
Amount of space to use for formatting
Most of the time, JSON.stringify is used with the first argument only.
But if we need to fine-tune the replacement process, like to filter out circular references, we can use the second argument of JSON.stringify.
If we pass an array of properties to it, only these properties will be encoded.
For instance:
let room = {
number: 23
};
let meetup = {
title: "Conference",
participants: [{name: "John"}, {name: "Alice"}],
place: room // meetup references room
};
room.occupiedBy = meetup; // room references meetup
alert( JSON.stringify(meetup, ['title', 'participants']) );
// {"title":"Conference","participants":[{},{}]}
Here we are probably too strict.
The property list is applied to the whole object structure.
So the objects in participants are empty, because name is not in the list.
Let's include in the list every property except room.occupiedBy that would cause the circular reference:
let room = {
number: 23
};
let meetup = {
title: "Conference",
participants: [{name: "John"}, {name: "Alice"}],
place: room // meetup references room
};
room.occupiedBy = meetup; // room references meetup
alert( JSON.stringify(meetup, ['title', 'participants', 'place', 'name', 'number']) );
/*
{
"title":"Conference",
"participants":[{"name":"John"},{"name":"Alice"}],
"place":{"number":23}
}
*/
Now everything except occupiedBy is serialized.
But the list of properties is quite long.
Fortunately, we can use a function instead of an array as the replacer.
The function will be called for every (key, value) pair and should return the “replaced” value, which will be used instead of the original one.
Or undefined if the value is to be skipped.
In our case, we can return value “as is” for everything except occupiedBy.
To ignore occupiedBy, the code below returns undefined:
let room = {
number: 23
};
let meetup = {
title: "Conference",
participants: [{name: "John"}, {name: "Alice"}],
place: room // meetup references room
};
room.occupiedBy = meetup; // room references meetup
alert( JSON.stringify(meetup, function replacer(key, value) {
alert(`${key}: ${value}`);
return (key == 'occupiedBy') ? undefined : value;
}));
/* key:value pairs that come to replacer:
: [object Object]
title: Conference
participants: [object Object],[object Object]
0: [object Object]
name: John
1: [object Object]
name: Alice
place: [object Object]
number: 23
occupiedBy: [object Object]
*/
Please note that replacer function gets every key/value pair including nested objects and array items.
It is applied recursively.
The value of this inside replacer is the object that contains the current property.
The first call is special.
It is made using a special “wrapper object”: {"": meetup}.
In other words, the first (key, value) pair has an empty key, and the value is the target object as a whole.
That's why the first line is ":[object Object]" in the example above.
The idea is to provide as much power for replacer as possible: it has a chance to analyze and replace/skip even the whole object if necessary.
- Formatting: space
The third argument of JSON.stringify(value, replacer, space) is the number of spaces to use for pretty formatting.
Previously, all stringified objects had no indents and extra spaces.
That's fine if we want to send an object over a network.
The space argument is used exclusively for a nice output.
Here space = 2 tells JavaScript to show nested objects on multiple lines, with indentation of 2 spaces inside an object:
let user = {
name: "John",
age: 25,
roles: {
isAdmin: false,
isEditor: true
}
};
alert(JSON.stringify(user, null, 2));
/* two-space indents:
{
"name": "John",
"age": 25,
"roles": {
"isAdmin": false,
"isEditor": true
}
}
*/
/* for JSON.stringify(user, null, 4) the result would be more indented:
{
"name": "John",
"age": 25,
"roles": {
"isAdmin": false,
"isEditor": true
}
}
*/
The third argument can also be a string.
In this case, the string is used for indentation instead of a number of spaces.
The space parameter is used solely for logging and nice-output purposes.
- Custom “toJSON”
Like toString for string conversion, an object may provide method toJSON for to-JSON conversion.
JSON.stringify automatically calls it if available.
For instance:
let room = {
number: 23
};
let meetup = {
title: "Conference",
date: new Date(Date.UTC(2017, 0, 1)),
room
};
alert( JSON.stringify(meetup) );
/*
{
"title":"Conference",
"date":"2017-01-01T00:00:00.000Z", // (1)
"room": {"number":23} // (2)
}
*/
Here we can see that date(1) became a string.
That's because all dates have a built-in toJSON method which returns such kind of string.
Now let's add a custom toJSON for our object room(2):
let room = {
number: 23,
toJSON() {
return this.number;
}
};
let meetup = {
title: "Conference",
room
};
alert( JSON.stringify(room) ); // 23
alert( JSON.stringify(meetup) );
/*
{
"title":"Conference",
"room": 23
}
*/
As we can see, toJSON is used both for the direct call JSON.stringify(room) and when room is nested in another encoded object.
- JSON.parse
To decode a JSON-string, we need another method named JSON.parse.
The syntax:
let value = JSON.parse(str, [reviver]);
str
JSON-string to parse.
reviver
Optional function(key,value) that will be called for each (key, value) pair and can transform the value.
For instance:
// stringified array
let numbers = "[0, 1, 2, 3]";
numbers = JSON.parse(numbers);
alert( numbers[1] ); // 1
Or for nested objects:
let userData = '{ "name": "John", "age": 35, "isAdmin": false, "friends": [0,1,2,3] }';
let user = JSON.parse(userData);
alert( user.friends[1] ); // 1
The JSON may be as complex as necessary, objects and arrays can include other objects and arrays.
But they must obey the same JSON format.
Here are typical mistakes in hand-written JSON (sometimes we have to write it for debugging purposes):
let json = `{
name: "John", // mistake: property name without quotes
"surname": 'Smith', // mistake: single quotes in value (must be double)
'isAdmin': false // mistake: single quotes in key (must be double)
"birthday": new Date(2000, 2, 3), // mistake: no "new" is allowed, only bare values
"friends": [0,1,2,3] // here all fine
}`;
Besides, JSON does not support comments.
Adding a comment to JSON makes it invalid.
There's another format named JSON5, which allows unquoted keys, comments etc.
But this is a standalone library, not in the specification of the language.
The regular JSON is that strict not because its developers are lazy, but to allow easy, reliable and very fast implementations of the parsing algorithm.
- Using reviver
Imagine, we got a stringified meetup object from the server.
It looks like this:
// title: (meetup title), date: (meetup date)
let str = '{"title":"Conference","date":"2017-11-30T12:00:00.000Z"}';
…And now we need to deserialize it, to turn back into JavaScript object.
Let's do it by calling JSON.parse:
let str = '{"title":"Conference","date":"2017-11-30T12:00:00.000Z"}';
let meetup = JSON.parse(str);
alert( meetup.date.getDate() ); // Error!
Whoops! An error!
The value of meetup.date is a string, not a Date object.
How could JSON.parse know that it should transform that string into a Date?
Let's pass to JSON.parse the reviving function as the second argument, that returns all values “as is”, but date will become a Date:
let str = '{"title":"Conference","date":"2017-11-30T12:00:00.000Z"}';
let meetup = JSON.parse(str, function(key, value) {
if (key == 'date') return new Date(value);
return value;
});
alert( meetup.date.getDate() ); // now works!
By the way, that works for nested objects as well:
let schedule = `{
"meetups": [
{"title":"Conference","date":"2017-11-30T12:00:00.000Z"},
{"title":"Birthday","date":"2017-04-18T12:00:00.000Z"}
]
}`;
schedule = JSON.parse(schedule, function(key, value) {
if (key == 'date') return new Date(value);
return value;
});
alert( schedule.meetups[1].date.getDate() ); // works!
- Summary
JSON is a data format that has its own independent standard and libraries for most programming languages.
JSON supports plain objects, arrays, strings, numbers, booleans, and null.
JavaScript provides methods JSON.stringify to serialize into JSON and JSON.parse to read from JSON.
Both methods support transformer functions for smart reading/writing.
If an object has toJSON, then it is called by JSON.stringify.
importance: 5
Turn the user into JSON and then read it back into another variable.
let user = {
name: "John Smith",
age: 35
};let user = {
name: "John Smith",
age: 35
};
let user2 = JSON.parse(JSON.stringify(user));
Exclude backreferences
importance: 5
In simple cases of circular references, we can exclude an offending property from serialization by its name.
But sometimes we can't just use the name, as it may be used both in circular references and normal properties.
So we can check the property by its value.
Write replacer function to stringify everything, but remove properties that reference meetup:
let room = {
number: 23
};
let meetup = {
title: "Conference",
occupiedBy: [{name: "John"}, {name: "Alice"}],
place: room
};
// circular references
room.occupiedBy = meetup;
meetup.self = meetup;
alert( JSON.stringify(meetup, function replacer(key, value) {
/* your code */
}));
/* result should be:
{
"title":"Conference",
"occupiedBy":[{"name":"John"},{"name":"Alice"}],
"place":{"number":23}
}
*/let room = {
number: 23
};
let meetup = {
title: "Conference",
occupiedBy: [{name: "John"}, {name: "Alice"}],
place: room
};
room.occupiedBy = meetup;
meetup.self = meetup;
alert( JSON.stringify(meetup, function replacer(key, value) {
return (key != "" && value == meetup) ? undefined : value;
}));
/*
{
"title":"Conference",
"occupiedBy":[{"name":"John"},{"name":"Alice"}],
"place":{"number":23}
}
*/
Here we also need to test key=="" to exclude the first call where it is normal that value is meetup.
Let's return to functions and study them more in-depth.
Our first topic will be recursion.
If you are not new to programming, then it is probably familiar and you could skip this chapter.
Recursion is a programming pattern that is useful in situations when a task can be naturally split into several tasks of the same kind, but simpler.
Or when a task can be simplified into an easy action plus a simpler variant of the same task.
Or, as we'll see soon, to deal with certain data structures.
When a function solves a task, in the process it can call many other functions.
A partial case of this is when a function calls itself.
That's called recursion.
- Two ways of thinking
For something simple to start with – let's write a function pow(x, n) that raises x to a natural power of n.
In other words, multiplies x by itself n times.
pow(2, 2) = 4
pow(2, 3) = 8
pow(2, 4) = 16
There are two ways to implement it.
Iterative thinking: the for loop:
function pow(x, n) {
let result = 1;
// multiply result by x n times in the loop
for (let i = 0; i < n; i++) {
result *= x;
}
return result;
}
alert( pow(2, 3) ); // 8
Recursive thinking: simplify the task and call self:
function pow(x, n) {
if (n == 1) {
return x;
} else {
return x * pow(x, n - 1);
}
}
alert( pow(2, 3) ); // 8
Please note how the recursive variant is fundamentally different.
When pow(x, n) is called, the execution splits into two branches:
if n==1 = x
/
pow(x, n) =
\
else = x * pow(x, n - 1)
If n == 1, then everything is trivial.
It is called the base of recursion, because it immediately produces the obvious result: pow(x, 1) equals x.
Otherwise, we can represent pow(x, n) as x * pow(x, n - 1).
In maths, one would write xn = x * xn-1.
This is called a recursive step: we transform the task into a simpler action (multiplication by x) and a simpler call of the same task (pow with lower n).
Next steps simplify it further and further until n reaches 1.
We can also say that powrecursively calls itself till n == 1.
For example, to calculate pow(2, 4) the recursive variant does these steps:
pow(2, 4) = 2 * pow(2, 3)pow(2, 3) = 2 * pow(2, 2)pow(2, 2) = 2 * pow(2, 1)pow(2, 1) = 2
So, the recursion reduces a function call to a simpler one, and then – to even more simpler, and so on, until the result becomes obvious.
Recursion is usually shorter
A recursive solution is usually shorter than an iterative one.
Here we can rewrite the same using the conditional operator ? instead of if to make pow(x, n) more terse and still very readable:
function pow(x, n) {
return (n == 1) ? x : (x * pow(x, n - 1));
}
The maximal number of nested calls (including the first one) is called recursion depth.
In our case, it will be exactly n.
The maximal recursion depth is limited by JavaScript engine.
We can rely on it being 10000, some engines allow more, but 100000 is probably out of limit for the majority of them.
There are automatic optimizations that help alleviate this (“tail calls optimizations”), but they are not yet supported everywhere and work only in simple cases.
That limits the application of recursion, but it still remains very wide.
There are many tasks where recursive way of thinking gives simpler code, easier to maintain.
- The execution context and stack
Now let's examine how recursive calls work.
For that we'll look under the hood of functions.
The information about the process of execution of a running function is stored in its execution context.
The execution context is an internal data structure that contains details about the execution of a function: where the control flow is now, the current variables, the value of this (we don't use it here) and few other internal details.
One function call has exactly one execution context associated with it.
When a function makes a nested call, the following happens:
The current function is paused.
The execution context associated with it is remembered in a special data structure called execution context stack.
The nested call executes.
After it ends, the old execution context is retrieved from the stack, and the outer function is resumed from where it stopped.
Let's see what happens during the pow(2, 3) call.
pow(2, 3)
In the beginning of the call pow(2, 3) the execution context will store variables: x = 2, n = 3, the execution flow is at line 1 of the function.
We can sketch it as:
Context: { x: 2, n: 3, at line 1 }
pow(2, 3)
That's when the function starts to execute.
The condition n == 1 is falsy, so the flow continues into the second branch of if:
function pow(x, n) {
if (n == 1) {
return x;
} else {
return x * pow(x, n - 1);
}
}
alert( pow(2, 3) );
The variables are same, but the line changes, so the context is now:
Context: { x: 2, n: 3, at line 5 }
pow(2, 3)
To calculate x * pow(x, n - 1), we need to make a subcall of pow with new arguments pow(2, 2).
pow(2, 2)
To do a nested call, JavaScript remembers the current execution context in the execution context stack.
Here we call the same function pow, but it absolutely doesn't matter.
The process is the same for all functions:
The current context is “remembered” on top of the stack.
The new context is created for the subcall.
When the subcall is finished – the previous context is popped from the stack, and its execution continues.
Here's the context stack when we entered the subcall pow(2, 2):
Context: { x: 2, n: 2, at line 1 }
pow(2, 2)
Context: { x: 2, n: 3, at line 5 }
pow(2, 3)
The new current execution context is on top (and bold), and previous remembered contexts are below.
When we finish the subcall – it is easy to resume the previous context, because it keeps both variables and the exact place of the code where it stopped.
Please note:
Here in the picture we use the word “line”, as in our example there's only one subcall in line, but generally a single line of code may contain multiple subcalls, like pow(…) + pow(…) + somethingElse(…).
So it would be more precise to say that the execution resumes “immediately after the subcall”.
pow(2, 1)
The process repeats: a new subcall is made at line 5, now with arguments x=2, n=1.
A new execution context is created, the previous one is pushed on top of the stack:
Context: { x: 2, n: 1, at line 1 }
pow(2, 1)
Context: { x: 2, n: 2, at line 5 }
pow(2, 2)
Context: { x: 2, n: 3, at line 5 }
pow(2, 3)
There are 2 old contexts now and 1 currently running for pow(2, 1).
The exit
During the execution of pow(2, 1), unlike before, the condition n == 1 is truthy, so the first branch of if works:
function pow(x, n) {
if (n == 1) {
return x;
} else {
return x * pow(x, n - 1);
}
}
There are no more nested calls, so the function finishes, returning 2.
As the function finishes, its execution context is not needed anymore, so it's removed from the memory.
The previous one is restored off the top of the stack:
Context: { x: 2, n: 2, at line 5 }
pow(2, 2)
Context: { x: 2, n: 3, at line 5 }
pow(2, 3)
The execution of pow(2, 2) is resumed.
It has the result of the subcall pow(2, 1), so it also can finish the evaluation of x * pow(x, n - 1), returning 4.
Then the previous context is restored:
Context: { x: 2, n: 3, at line 5 }
pow(2, 3)
When it finishes, we have a result of pow(2, 3) = 8.
The recursion depth in this case was: 3.
As we can see from the illustrations above, recursion depth equals the maximal number of context in the stack.
Note the memory requirements.
Contexts take memory.
In our case, raising to the power of n actually requires the memory for n contexts, for all lower values of n.
A loop-based algorithm is more memory-saving:
function pow(x, n) {
let result = 1;
for (let i = 0; i < n; i++) {
result *= x;
}
return result;
}
The iterative pow uses a single context changing i and result in the process.
Its memory requirements are small, fixed and do not depend on n.
Any recursion can be rewritten as a loop.
The loop variant usually can be made more effective.
…But sometimes the rewrite is non-trivial, especially when function uses different recursive subcalls depending on conditions and merges their results or when the branching is more intricate.
And the optimization may be unneeded and totally not worth the efforts.
Recursion can give a shorter code, easier to understand and support.
Optimizations are not required in every place, mostly we need a good code, that's why it's used.
- Recursive traversals
Another great application of the recursion is a recursive traversal.
Imagine, we have a company.
The staff structure can be presented as an object:
let company = {
sales: [{
name: 'John',
salary: 1000
}, {
name: 'Alice',
salary: 1600
}],
development: {
sites: [{
name: 'Peter',
salary: 2000
}, {
name: 'Alex',
salary: 1800
}],
internals: [{
name: 'Jack',
salary: 1300
}]
}
};
In other words, a company has departments.
A department may have an array of staff.
For instance, sales department has 2 employees: John and Alice.
Or a department may split into subdepartments, like development has two branches: sites and internals.
Each of them has their own staff.
It is also possible that when a subdepartment grows, it divides into subsubdepartments (or teams).
For instance, the sites department in the future may be split into teams for siteA and siteB.
And they, potentially, can split even more.
That's not on the picture, just something to have in mind.
Now let's say we want a function to get the sum of all salaries.
How can we do that?
An iterative approach is not easy, because the structure is not simple.
The first idea may be to make a for loop over company with nested subloop over 1st level departments.
But then we need more nested subloops to iterate over the staff in 2nd level departments like sites… And then another subloop inside those for 3rd level departments that might appear in the future? If we put 3-4 nested subloops in the code to traverse a single object, it becomes rather ugly.
Let's try recursion.
As we can see, when our function gets a department to sum, there are two possible cases:
Either it's a “simple” department with an array of people – then we can sum the salaries in a simple loop.
Or it's an object with N subdepartments – then we can make N recursive calls to get the sum for each of the subdeps and combine the results.
The 1st case is the base of recursion, the trivial case, when we get an array.
The 2nd case when we get an object is the recursive step.
A complex task is split into subtasks for smaller departments.
They may in turn split again, but sooner or later the split will finish at (1).
The algorithm is probably even easier to read from the code:
let company = { // the same object, compressed for brevity
sales: [{name: 'John', salary: 1000}, {name: 'Alice', salary: 1600 }],
development: {
sites: [{name: 'Peter', salary: 2000}, {name: 'Alex', salary: 1800 }],
internals: [{name: 'Jack', salary: 1300}]
}
};
// The function to do the job
function sumSalaries(department) {
if (Array.isArray(department)) { // case (1)
return department.reduce((prev, current) => prev + current.salary, 0); // sum the array
} else { // case (2)
let sum = 0;
for (let subdep of Object.values(department)) {
sum += sumSalaries(subdep); // recursively call for subdepartments, sum the results
}
return sum;
}
}
alert(sumSalaries(company)); // 7700
The code is short and easy to understand (hopefully?).
That's the power of recursion.
It also works for any level of subdepartment nesting.
Here's the diagram of calls:
We can easily see the principle: for an object {...} subcalls are made, while arrays [...] are the “leaves” of the recursion tree, they give immediate result.
Note that the code uses smart features that we've covered before:
Method arr.reduce explained in the chapter Array methods to get the sum of the array.
Loop for(val of Object.values(obj)) to iterate over object values: Object.values returns an array of them.
- Recursive structures
A recursive (recursively-defined) data structure is a structure that replicates itself in parts.
We've just seen it in the example of a company structure above.
A company department is:
Either an array of people.
Or an object with departments.
For web-developers there are much better-known examples: HTML and XML documents.
In the HTML document, an HTML-tag may contain a list of:
Text pieces.
HTML-comments.
Other HTML-tags (that in turn may contain text pieces/comments or other tags etc).
That's once again a recursive definition.
For better understanding, we'll cover one more recursive structure named “Linked list” that might be a better alternative for arrays in some cases.
Linked list
Imagine, we want to store an ordered list of objects.
The natural choice would be an array:
let arr = [obj1, obj2, obj3];
…But there's a problem with arrays.
The “delete element” and “insert element” operations are expensive.
For instance, arr.unshift(obj) operation has to renumber all elements to make room for a new obj, and if the array is big, it takes time.
Same with arr.shift().
The only structural modifications that do not require mass-renumbering are those that operate with the end of array: arr.push/pop.
So an array can be quite slow for big queues, when we have to work with the beginning.
Alternatively, if we really need fast insertion/deletion, we can choose another data structure called a linked list.
The linked list element is recursively defined as an object with:
value.
next property referencing the next linked list element or null if that's the end.
For instance:
let list = {
value: 1,
next: {
value: 2,
next: {
value: 3,
next: {
value: 4,
next: null
}
}
}
};
Graphical representation of the list:
An alternative code for creation:
let list = { value: 1 };
list.next = { value: 2 };
list.next.next = { value: 3 };
list.next.next.next = { value: 4 };
list.next.next.next.next = null;
Here we can even more clearly see that there are multiple objects, each one has the value and next pointing to the neighbour.
The list variable is the first object in the chain, so following next pointers from it we can reach any element.
The list can be easily split into multiple parts and later joined back:
let secondList = list.next.next;
list.next.next = null;To join:
list.next.next = secondList;
And surely we can insert or remove items in any place.
For instance, to prepend a new value, we need to update the head of the list:
let list = { value: 1 };
list.next = { value: 2 };
list.next.next = { value: 3 };
list.next.next.next = { value: 4 };
// prepend the new value to the list
list = { value: "new item", next: list };To remove a value from the middle, change next of the previous one:
list.next = list.next.next;We made list.next jump over 1 to value 2.
The value 1 is now excluded from the chain.
If it's not stored anywhere else, it will be automatically removed from the memory.
Unlike arrays, there's no mass-renumbering, we can easily rearrange elements.
Naturally, lists are not always better than arrays.
Otherwise everyone would use only lists.
The main drawback is that we can't easily access an element by its number.
In an array that's easy: arr[n] is a direct reference.
But in the list we need to start from the first item and go nextN times to get the Nth element.
…But we don't always need such operations.
For instance, when we need a queue or even a deque – the ordered structure that must allow very fast adding/removing elements from both ends, but access to its middle is not needed.
Lists can be enhanced:
We can add property prev in addition to next to reference the previous element, to move back easily.
We can also add a variable named tail referencing the last element of the list (and update it when adding/removing elements from the end).
…The data structure may vary according to our needs.
- Summary
Terms:
Recursion is a programming term that means calling a function from itself.
Recursive functions can be used to solve tasks in elegant ways.
When a function calls itself, that's called a recursion step.
The basis of recursion is function arguments that make the task so simple that the function does not make further calls.
A recursively-defined data structure is a data structure that can be defined using itself.
For instance, the linked list can be defined as a data structure consisting of an object referencing a list (or null).
list = { value, next -> list }
Trees like HTML elements tree or the department tree from this chapter are also naturally recursive: they branch and every branch can have other branches.
Recursive functions can be used to walk them as we've seen in the sumSalary example.
Any recursive function can be rewritten into an iterative one.
And that's sometimes required to optimize stuff.
But for many tasks a recursive solution is fast enough and easier to write and support.
importance: 5
Write a function sumTo(n) that calculates the sum of numbers 1 + 2 + ...
+ n.
For instance:
sumTo(1) = 1
sumTo(2) = 2 + 1 = 3
sumTo(3) = 3 + 2 + 1 = 6
sumTo(4) = 4 + 3 + 2 + 1 = 10
...
sumTo(100) = 100 + 99 + ...
+ 2 + 1 = 5050
Make 3 solution variants:
Using a for loop.
Using a recursion, cause sumTo(n) = n + sumTo(n-1) for n > 1.
Using the arithmetic progression formula.
An example of the result:
function sumTo(n) { /*...
your code ...
*/ }
alert( sumTo(100) ); // 5050
P.S.
Which solution variant is the fastest? The slowest? Why?
P.P.S.
Can we use recursion to count sumTo(100000)?
The solution using a loop:
function sumTo(n) {
let sum = 0;
for (let i = 1; i <= n; i++) {
sum += i;
}
return sum;
}
alert( sumTo(100) );
The solution using recursion:
function sumTo(n) {
if (n == 1) return 1;
return n + sumTo(n - 1);
}
alert( sumTo(100) );
The solution using the formula: sumTo(n) = n*(n+1)/2:
function sumTo(n) {
return n * (n + 1) / 2;
}
alert( sumTo(100) );
P.S.
Naturally, the formula is the fastest solution.
It uses only 3 operations for any number n.
The math helps!
The loop variant is the second in terms of speed.
In both the recursive and the loop variant we sum the same numbers.
But the recursion involves nested calls and execution stack management.
That also takes resources, so it's slower.
P.P.S.
Some engines support the “tail call” optimization: if a recursive call is the very last one in the function (like in sumTo above), then the outer function will not need to resume the execution, so the engine doesn't need to remember its execution context.
That removes the burden on memory, so counting sumTo(100000) becomes possible.
But if the JavaScript engine does not support tail call optimization (most of them don't), there will be an error: maximum stack size exceeded, because there's usually a limitation on the total stack size.
Calculate factorial
importance: 4
The factorial of a natural number is a number multiplied by "number minus one", then by "number minus two", and so on till 1.
The factorial of n is denoted as n!
We can write a definition of factorial like this:
n! = n * (n - 1) * (n - 2) * ...*1
Values of factorials for different n:
1! = 1
2! = 2 * 1 = 2
3! = 3 * 2 * 1 = 6
4! = 4 * 3 * 2 * 1 = 24
5! = 5 * 4 * 3 * 2 * 1 = 120
The task is to write a function factorial(n) that calculates n! using recursive calls.
alert( factorial(5) ); // 120
P.S.
Hint: n! can be written as n * (n-1)! For instance: 3! = 3*2! = 3*2*1! = 6
By definition, a factorial n! can be written as n * (n-1)!.
In other words, the result of factorial(n) can be calculated as n multiplied by the result of factorial(n-1).
And the call for n-1 can recursively descend lower, and lower, till 1.
function factorial(n) {
return (n != 1) ? n * factorial(n - 1) : 1;
}
alert( factorial(5) ); // 120
The basis of recursion is the value 1.
We can also make 0 the basis here, doesn't matter much, but gives one more recursive step:
function factorial(n) {
return n ? n * factorial(n - 1) : 1;
}
alert( factorial(5) ); // 120
Fibonacci numbers
importance: 5
The sequence of Fibonacci numbers has the formula Fn = Fn-1 + Fn-2.
In other words, the next number is a sum of the two preceding ones.
First two numbers are 1, then 2(1+1), then 3(1+2), 5(2+3) and so on: 1, 1, 2, 3, 5, 8, 13, 21....
Fibonacci numbers are related to the Golden ratio and many natural phenomena around us.
Write a function fib(n) that returns the n-th Fibonacci number.
An example of work:
function fib(n) { /* your code */ }
alert(fib(3)); // 2
alert(fib(7)); // 13
alert(fib(77)); // 5527939700884757
P.S.
The function should be fast.
The call to fib(77) should take no more than a fraction of a second.
The first solution we could try here is the recursive one.
Fibonacci numbers are recursive by definition:
function fib(n) {
return n <= 1 ? n : fib(n - 1) + fib(n - 2);
}
alert( fib(3) ); // 2
alert( fib(7) ); // 13
// fib(77); // will be extremely slow!
…But for big values of n it's very slow.
For instance, fib(77) may hang up the engine for some time eating all CPU resources.
That's because the function makes too many subcalls.
The same values are re-evaluated again and again.
For instance, let's see a piece of calculations for fib(5):
...
fib(5) = fib(4) + fib(3)
fib(4) = fib(3) + fib(2)
...
Here we can see that the value of fib(3) is needed for both fib(5) and fib(4).
So fib(3) will be called and evaluated two times completely independently.
Here's the full recursion tree:
We can clearly notice that fib(3) is evaluated two times and fib(2) is evaluated three times.
The total amount of computations grows much faster than n, making it enormous even for n=77.
We can optimize that by remembering already-evaluated values: if a value of say fib(3) is calculated once, then we can just reuse it in future computations.
Another variant would be to give up recursion and use a totally different loop-based algorithm.
Instead of going from n down to lower values, we can make a loop that starts from 1 and 2, then gets fib(3) as their sum, then fib(4) as the sum of two previous values, then fib(5) and goes up and up, till it gets to the needed value.
On each step we only need to remember two previous values.
Here are the steps of the new algorithm in details.
The start:
// a = fib(1), b = fib(2), these values are by definition 1
let a = 1, b = 1;
// get c = fib(3) as their sum
let c = a + b;
/* we now have fib(1), fib(2), fib(3)
a b c
1, 1, 2
*/
Now we want to get fib(4) = fib(2) + fib(3).
Let's shift the variables: a,b will get fib(2),fib(3), and c will get their sum:
a = b; // now a = fib(2)
b = c; // now b = fib(3)
c = a + b; // c = fib(4)
/* now we have the sequence:
a b c
1, 1, 2, 3
*/
The next step gives another sequence number:
a = b; // now a = fib(3)
b = c; // now b = fib(4)
c = a + b; // c = fib(5)
/* now the sequence is (one more number):
a b c
1, 1, 2, 3, 5
*/
…And so on until we get the needed value.
That's much faster than recursion and involves no duplicate computations.
The full code:
function fib(n) {
let a = 1;
let b = 1;
for (let i = 3; i <= n; i++) {
let c = a + b;
a = b;
b = c;
}
return b;
}
alert( fib(3) ); // 2
alert( fib(7) ); // 13
alert( fib(77) ); // 5527939700884757
The loop starts with i=3, because the first and the second sequence values are hard-coded into variables a=1, b=1.
The approach is called dynamic programming bottom-up.
Output a single-linked list
importance: 5
Let's say we have a single-linked list (as described in the chapter Recursion and stack):
let list = {
value: 1,
next: {
value: 2,
next: {
value: 3,
next: {
value: 4,
next: null
}
}
}
};
Write a function printList(list) that outputs list items one-by-one.
Make two variants of the solution: using a loop and using recursion.
What's better: with recursion or without it?
Loop-based solution
The loop-based variant of the solution:
let list = {
value: 1,
next: {
value: 2,
next: {
value: 3,
next: {
value: 4,
next: null
}
}
}
};
function printList(list) {
let tmp = list;
while (tmp) {
alert(tmp.value);
tmp = tmp.next;
}
}
printList(list);
Please note that we use a temporary variable tmp to walk over the list.
Technically, we could use a function parameter list instead:
function printList(list) {
while(list) {
alert(list.value);
list = list.next;
}
}
…But that would be unwise.
In the future we may need to extend a function, do something else with the list.
If we change list, then we lose such ability.
Talking about good variable names, list here is the list itself.
The first element of it.
And it should remain like that.
That's clear and reliable.
From the other side, the role of tmp is exclusively a list traversal, like i in the for loop.
Recursive solution
The recursive variant of printList(list) follows a simple logic: to output a list we should output the current element list, then do the same for list.next:
let list = {
value: 1,
next: {
value: 2,
next: {
value: 3,
next: {
value: 4,
next: null
}
}
}
};
function printList(list) {
alert(list.value); // output the current item
if (list.next) {
printList(list.next); // do the same for the rest of the list
}
}
printList(list);
Now what's better?
Technically, the loop is more effective.
These two variants do the same, but the loop does not spend resources for nested function calls.
From the other side, the recursive variant is shorter and sometimes easier to understand.
Output a single-linked list in the reverse order
importance: 5
Output a single-linked list from the previous task Output a single-linked list in the reverse order.
Make two solutions: using a loop and using a recursion.
Using a recursion
The recursive logic is a little bit tricky here.
We need to first output the rest of the list and then output the current one:
let list = {
value: 1,
next: {
value: 2,
next: {
value: 3,
next: {
value: 4,
next: null
}
}
}
};
function printReverseList(list) {
if (list.next) {
printReverseList(list.next);
}
alert(list.value);
}
printReverseList(list);
Using a loop
The loop variant is also a little bit more complicated then the direct output.
There is no way to get the last value in our list.
We also can't “go back”.
So what we can do is to first go through the items in the direct order and remember them in an array, and then output what we remembered in the reverse order:
let list = {
value: 1,
next: {
value: 2,
next: {
value: 3,
next: {
value: 4,
next: null
}
}
}
};
function printReverseList(list) {
let arr = [];
let tmp = list;
while (tmp) {
arr.push(tmp.value);
tmp = tmp.next;
}
for (let i = arr.length - 1; i >= 0; i--) {
alert( arr[i] );
}
}
printReverseList(list);
Please note that the recursive solution actually does exactly the same: it follows the list, remembers the items in the chain of nested calls (in the execution context stack), and then outputs them.
Advanced working with functions
Rest parameters and spread syntax
Many JavaScript built-in functions support an arbitrary number of arguments.
For instance:
Math.max(arg1, arg2, ..., argN) – returns the greatest of the arguments.
Object.assign(dest, src1, ..., srcN) – copies properties from src1..N into dest.
…and so on.
In this chapter we'll learn how to do the same.
And also, how to pass arrays to such functions as parameters.
- Rest parameters ...
A function can be called with any number of arguments, no matter how it is defined.
Like here:
function sum(a, b) {
return a + b;
}
alert( sum(1, 2, 3, 4, 5) );
There will be no error because of “excessive” arguments.
But of course in the result only the first two will be counted.
The rest of the parameters can be included in the function definition by using three dots ... followed by the name of the array that will contain them.
The dots literally mean “gather the remaining parameters into an array”.
For instance, to gather all arguments into array args:
function sumAll(...args) { // args is the name for the array
let sum = 0;
for (let arg of args) sum += arg;
return sum;
}
alert( sumAll(1) ); // 1
alert( sumAll(1, 2) ); // 3
alert( sumAll(1, 2, 3) ); // 6
We can choose to get the first parameters as variables, and gather only the rest.
Here the first two arguments go into variables and the rest go into titles array:
function showName(firstName, lastName, ...titles) {
alert( firstName + ' ' + lastName ); // Julius Caesar
// the rest go into titles array
// i.e.
titles = ["Consul", "Imperator"]
alert( titles[0] ); // Consul
alert( titles[1] ); // Imperator
alert( titles.length ); // 2
}
showName("Julius", "Caesar", "Consul", "Imperator");
The rest parameters must be at the end
The rest parameters gather all remaining arguments, so the following does not make sense and causes an error:
function f(arg1, ...rest, arg2) { // arg2 after ...rest ?!
// error
}
The ...rest must always be last.
- The “arguments” variable
There is also a special array-like object named arguments that contains all arguments by their index.
For instance:
function showName() {
alert( arguments.length );
alert( arguments[0] );
alert( arguments[1] );
// it's iterable
// for(let arg of arguments) alert(arg);
}
// shows: 2, Julius, Caesar
showName("Julius", "Caesar");
// shows: 1, Ilya, undefined (no second argument)
showName("Ilya");
In old times, rest parameters did not exist in the language, and using arguments was the only way to get all arguments of the function.
And it still works, we can find it in the old code.
But the downside is that although arguments is both array-like and iterable, it's not an array.
It does not support array methods, so we can't call arguments.map(...) for example.
Also, it always contains all arguments.
We can't capture them partially, like we did with rest parameters.
So when we need these features, then rest parameters are preferred.
Arrow functions do not have "arguments"
If we access the arguments object from an arrow function, it takes them from the outer “normal” function.
Here's an example:
function f() {
let showArg = () => alert(arguments[0]);
showArg();
}
f(1); // 1
As we remember, arrow functions don't have their own this.
Now we know they don't have the special arguments object either.
- Spread syntax
We've just seen how to get an array from the list of parameters.
But sometimes we need to do exactly the reverse.
For instance, there's a built-in function Math.max that returns the greatest number from a list:
alert( Math.max(3, 5, 1) ); // 5
Now let's say we have an array [3, 5, 1].
How do we call Math.max with it?
Passing it “as is” won't work, because Math.max expects a list of numeric arguments, not a single array:
let arr = [3, 5, 1];
alert( Math.max(arr) ); // NaN
And surely we can't manually list items in the code Math.max(arr[0], arr[1], arr[2]), because we may be unsure how many there are.
As our script executes, there could be a lot, or there could be none.
And that would get ugly.
Spread syntax to the rescue! It looks similar to rest parameters, also using ..., but does quite the opposite.
When ...arr is used in the function call, it “expands” an iterable object arr into the list of arguments.
For Math.max:
let arr = [3, 5, 1];
alert( Math.max(...arr) ); // 5 (spread turns array into a list of arguments)
We also can pass multiple iterables this way:
let arr1 = [1, -2, 3, 4];
let arr2 = [8, 3, -8, 1];
alert( Math.max(...arr1, ...arr2) ); // 8
We can even combine the spread syntax with normal values:
let arr1 = [1, -2, 3, 4];
let arr2 = [8, 3, -8, 1];
alert( Math.max(1, ...arr1, 2, ...arr2, 25) ); // 25
Also, the spread syntax can be used to merge arrays:
let arr = [3, 5, 1];
let arr2 = [8, 9, 15];
let merged = [0, ...arr, 2, ...arr2];
alert(merged); // 0,3,5,1,2,8,9,15 (0, then arr, then 2, then arr2)
In the examples above we used an array to demonstrate the spread syntax, but any iterable will do.
For instance, here we use the spread syntax to turn the string into array of characters:
let str = "Hello";
alert( [...str] ); // H,e,l,l,o
The spread syntax internally uses iterators to gather elements, the same way as for..of does.
So, for a string, for..of returns characters and ...str becomes "H","e","l","l","o".
The list of characters is passed to array initializer [...str].
For this particular task we could also use Array.from, because it converts an iterable (like a string) into an array:
let str = "Hello";
// Array.from converts an iterable into an array
alert( Array.from(str) ); // H,e,l,l,o
The result is the same as [...str].
But there's a subtle difference between Array.from(obj) and [...obj]:
Array.from operates on both array-likes and iterables.
The spread syntax works only with iterables.
So, for the task of turning something into an array, Array.from tends to be more universal.
- Get a new copy of an array/object
Remember when we talked about Object.assign()in the past?
It is possible to do the same thing with the spread syntax.
let arr = [1, 2, 3];
let arrCopy = [...arr]; // spread the array into a list of parameters
// then put the result into a new array
// do the arrays have the same contents?
alert(JSON.stringify(arr) === JSON.stringify(arrCopy)); // true
// are the arrays equal?
alert(arr === arrCopy); // false (not same reference)
// modifying our initial array does not modify the copy:
arr.push(4);
alert(arr); // 1, 2, 3, 4
alert(arrCopy); // 1, 2, 3
Note that it is possible to do the same thing to make a copy of an object:
let obj = { a: 1, b: 2, c: 3 };
let objCopy = { ...obj }; // spread the object into a list of parameters
// then return the result in a new object
// do the objects have the same contents?
alert(JSON.stringify(obj) === JSON.stringify(objCopy)); // true
// are the objects equal?
alert(obj === objCopy); // false (not same reference)
// modifying our initial object does not modify the copy:
obj.d = 4;
alert(JSON.stringify(obj)); // {"a":1,"b":2,"c":3,"d":4}
alert(JSON.stringify(objCopy)); // {"a":1,"b":2,"c":3}
This way of copying an object is much shorter than let objCopy = Object.assign({}, obj); or for an array let arrCopy = Object.assign([], arr); so we prefer to use it whenever we can.
- Summary
When we see "..." in the code, it is either rest parameters or the spread syntax.
There's an easy way to distinguish between them:
When ... is at the end of function parameters, it's “rest parameters” and gathers the rest of the list of arguments into an array.
When ... occurs in a function call or alike, it's called a “spread syntax” and expands an array into a list.
Use patterns:
Rest parameters are used to create functions that accept any number of arguments.
The spread syntax is used to pass an array to functions that normally require a list of many arguments.
Together they help to travel between a list and an array of parameters with ease.
All arguments of a function call are also available in “old-style” arguments: array-like iterable object.
Advanced working with functions
Variable scope, closure
JavaScript is a very function-oriented language.
It gives us a lot of freedom.
A function can be created at any moment, passed as an argument to another function, and then called from a totally different place of code later.
We already know that a function can access variables outside of it (“outer” variables).
But what happens if outer variables change since a function is created? Will the function get newer values or the old ones?
And what if a function is passed along as a parameter and called from another place of code, will it get access to outer variables at the new place?
Let's expand our knowledge to understand these scenarios and more complex ones.
We'll talk about let/const variables here
In JavaScript, there are 3 ways to declare a variable: let, const (the modern ones), and var (the remnant of the past).
In this article we'll use let variables in examples.
Variables, declared with const, behave the same, so this article is about const too.
The old var has some notable differences, they will be covered in the article The old "var".
- Code blocks
If a variable is declared inside a code block {...}, it's only visible inside that block.
For example:
{
// do some job with local variables that should not be seen outside
let message = "Hello"; // only visible in this block
alert(message); // Hello
}
alert(message); // Error: message is not defined
We can use this to isolate a piece of code that does its own task, with variables that only belong to it:
{
// show message
let message = "Hello";
alert(message);
}
{
// show another message
let message = "Goodbye";
alert(message);
}
There'd be an error without blocks
Please note, without separate blocks there would be an error, if we use let with the existing variable name:
// show message
let message = "Hello";
alert(message);
// show another message
let message = "Goodbye"; // Error: variable already declared
alert(message);
For if, for, while and so on, variables declared in {...} are also only visible inside:
if (true) {
let phrase = "Hello!";
alert(phrase); // Hello!
}
alert(phrase); // Error, no such variable!
Here, after if finishes, the alert below won't see the phrase, hence the error.
That's great, as it allows us to create block-local variables, specific to an if branch.
The similar thing holds true for for and while loops:
for (let i = 0; i < 3; i++) {
// the variable i is only visible inside this for
alert(i); // 0, then 1, then 2
}
alert(i); // Error, no such variable
Visually, let i is outside of {...}.
But the for construct is special here: the variable, declared inside it, is considered a part of the block.
- Nested functions
A function is called “nested” when it is created inside another function.
It is easily possible to do this with JavaScript.
We can use it to organize our code, like this:
function sayHiBye(firstName, lastName) {
// helper nested function to use below
function getFullName() {
return firstName + " " + lastName;
}
alert( "Hello, " + getFullName() );
alert( "Bye, " + getFullName() );
}
Here the nested function getFullName() is made for convenience.
It can access the outer variables and so can return the full name.
Nested functions are quite common in JavaScript.
What's much more interesting, a nested function can be returned: either as a property of a new object or as a result by itself.
It can then be used somewhere else.
No matter where, it still has access to the same outer variables.
Below, makeCounter creates the “counter” function that returns the next number on each invocation:
function makeCounter() {
let count = 0;
return function() {
return count++;
};
}
let counter = makeCounter();
alert( counter() ); // 0
alert( counter() ); // 1
alert( counter() ); // 2
Despite being simple, slightly modified variants of that code have practical uses, for instance, as a random number generator to generate random values for automated tests.
How does this work? If we create multiple counters, will they be independent? What's going on with the variables here?
Undestanding such things is great for the overall knowledge of JavaScript and beneficial for more complex scenarios.
So let's go a bit in-depth.
- Lexical Environment
Here be dragons!
The in-depth technical explanation lies ahead.
As far as I'd like to avoid low-level language details, any understanding without them would be lacking and incomplete, so get ready.
For clarity, the explanation is split into multiple steps.
In JavaScript, every running function, code block {...}, and the script as a whole have an internal (hidden) associated object known as the Lexical Environment.
The Lexical Environment object consists of two parts:
Environment Record – an object that stores all local variables as its properties (and some other information like the value of this).
A reference to the outer lexical environment, the one associated with the outer code.
A “variable” is just a property of the special internal object, Environment Record.
“To get or change a variable” means “to get or change a property of that object”.
In this simple code without functions, there is only one Lexical Environment:
This is the so-called global Lexical Environment, associated with the whole script.
On the picture above, the rectangle means Environment Record (variable store) and the arrow means the outer reference.
The global Lexical Environment has no outer reference, that's why the arrow points to null.
As the code starts executing and goes on, the Lexical Environment changes.
Here's a little bit longer code:
Rectangles on the right-hand side demonstrate how the global Lexical Environment changes during the execution:
When the script starts, the Lexical Environment is pre-populated with all declared variables.
Initially, they are in the “Uninitialized” state.
That's a special internal state, it means that the engine knows about the variable, but it cannot be referenced until it has been declared with let.
It's almost the same as if the variable didn't exist.
Then let phrase definition appears.
There's no assignment yet, so its value is undefined.
We can use the variable from this point forward.
phrase is assigned a value.
phrase changes the value.
Everything looks simple for now, right?
A variable is a property of a special internal object, associated with the currently executing block/function/script.
Working with variables is actually working with the properties of that object.
Lexical Environment is a specification object
“Lexical Environment” is a specification object: it only exists “theoretically” in the language specification to describe how things work.
We can't get this object in our code and manipulate it directly.
JavaScript engines also may optimize it, discard variables that are unused to save memory and perform other internal tricks, as long as the visible behavior remains as described.
A function is also a value, like a variable.
The difference is that a Function Declaration is instantly fully initialized.
When a Lexical Environment is created, a Function Declaration immediately becomes a ready-to-use function (unlike let, that is unusable till the declaration).
That's why we can use a function, declared as Function Declaration, even before the declaration itself.
For example, here's the initial state of the global Lexical Environment when we add a function:
Naturally, this behavior only applies to Function Declarations, not Function Expressions where we assign a function to a variable, such as let say = function(name)....
When a function runs, at the beginning of the call, a new Lexical Environment is created automatically to store local variables and parameters of the call.
For instance, for say("John"), it looks like this (the execution is at the line, labelled with an arrow):
During the function call we have two Lexical Environments: the inner one (for the function call) and the outer one (global):
The inner Lexical Environment corresponds to the current execution of say.
It has a single property: name, the function argument.
We called say("John"), so the value of the name is "John".
The outer Lexical Environment is the global Lexical Environment.
It has the phrase variable and the function itself.
The inner Lexical Environment has a reference to the outer one.
When the code wants to access a variable – the inner Lexical Environment is searched first, then the outer one, then the more outer one and so on until the global one.
If a variable is not found anywhere, that's an error in strict mode (without use strict, an assignment to a non-existing variable creates a new global variable, for compatibility with old code).
In this example the search proceeds as follows:
For the name variable, the alert inside say finds it immediately in the inner Lexical Environment.
When it wants to access phrase, then there is no phrase locally, so it follows the reference to the outer Lexical Environment and finds it there.
Let's return to the makeCounter example.
function makeCounter() {
let count = 0;
return function() {
return count++;
};
}
let counter = makeCounter();
At the beginning of each makeCounter() call, a new Lexical Environment object is created, to store variables for this makeCounter run.
So we have two nested Lexical Environments, just like in the example above:
What's different is that, during the execution of makeCounter(), a tiny nested function is created of only one line: return count++.
We don't run it yet, only create.
All functions remember the Lexical Environment in which they were made.
Technically, there's no magic here: all functions have the hidden property named [[Environment]], that keeps the reference to the Lexical Environment where the function was created:
So, counter.[[Environment]] has the reference to {count: 0} Lexical Environment.
That's how the function remembers where it was created, no matter where it's called.
The [[Environment]] reference is set once and forever at function creation time.
Later, when counter() is called, a new Lexical Environment is created for the call, and its outer Lexical Environment reference is taken from counter.[[Environment]]:
Now when the code inside counter() looks for count variable, it first searches its own Lexical Environment (empty, as there are no local variables there), then the Lexical Environment of the outer makeCounter() call, where it finds and changes it.
A variable is updated in the Lexical Environment where it lives.
Here's the state after the execution:
If we call counter() multiple times, the count variable will be increased to 2, 3 and so on, at the same place.
Closure
There is a general programming term “closure”, that developers generally should know.
A closure is a function that remembers its outer variables and can access them.
In some languages, that's not possible, or a function should be written in a special way to make it happen.
But as explained above, in JavaScript, all functions are naturally closures (there is only one exception, to be covered in The "new Function" syntax).
That is: they automatically remember where they were created using a hidden [[Environment]] property, and then their code can access outer variables.
When on an interview, a frontend developer gets a question about “what's a closure?”, a valid answer would be a definition of the closure and an explanation that all functions in JavaScript are closures, and maybe a few more words about technical details: the [[Environment]] property and how Lexical Environments work.
- Garbage collection
Usually, a Lexical Environment is removed from memory with all the variables after the function call finishes.
That's because there are no references to it.
As any JavaScript object, it's only kept in memory while it's reachable.
However, if there's a nested function that is still reachable after the end of a function, then it has [[Environment]] property that references the lexical environment.
In that case the Lexical Environment is still reachable even after the completion of the function, so it stays alive.
For example:
function f() {
let value = 123;
return function() {
alert(value);
}
}
let g = f(); // g.[[Environment]] stores a reference to the Lexical Environment
// of the corresponding f() call
Please note that if f() is called many times, and resulting functions are saved, then all corresponding Lexical Environment objects will also be retained in memory.
In the code below, all 3 of them:
function f() {
let value = Math.random();
return function() { alert(value); };
}
// 3 functions in array, every one of them links to Lexical Environment
// from the corresponding f() run
let arr = [f(), f(), f()];
A Lexical Environment object dies when it becomes unreachable (just like any other object).
In other words, it exists only while there's at least one nested function referencing it.
In the code below, after the nested function is removed, its enclosing Lexical Environment (and hence the value) is cleaned from memory:
function f() {
let value = 123;
return function() {
alert(value);
}
}
let g = f(); // while g function exists, the value stays in memory
g = null; // ...and now the memory is cleaned up
Real-life optimizations
As we've seen, in theory while a function is alive, all outer variables are also retained.
But in practice, JavaScript engines try to optimize that.
They analyze variable usage and if it's obvious from the code that an outer variable is not used – it is removed.
An important side effect in V8 (Chrome, Edge, Opera) is that such variable will become unavailable in debugging.
Try running the example below in Chrome with the Developer Tools open.
When it pauses, in the console type alert(value).
function f() {
let value = Math.random();
function g() {
debugger; // in console: type alert(value); No such variable!
}
return g;
}
let g = f();
g();
As you could see – there is no such variable! In theory, it should be accessible, but the engine optimized it out.
That may lead to funny (if not such time-consuming) debugging issues.
One of them – we can see a same-named outer variable instead of the expected one:
let value = "Surprise!";
function f() {
let value = "the closest value";
function g() {
debugger; // in console: type alert(value); Surprise!
}
return g;
}
let g = f();
g();
This feature of V8 is good to know.
If you are debugging with Chrome/Edge/Opera, sooner or later you will meet it.
That is not a bug in the debugger, but rather a special feature of V8.
Perhaps it will be changed sometime.
You can always check for it by running the examples on this page.
importance: 5
The function sayHi uses an external variable name.
When the function runs, which value is it going to use?
let name = "John";
function sayHi() {
alert("Hi, " + name);
}
name = "Pete";
sayHi(); // what will it show: "John" or "Pete"?
Such situations are common both in browser and server-side development.
A function may be scheduled to execute later than it is created, for instance after a user action or a network request.
So, the question is: does it pick up the latest changes?
The answer is: Pete.
A function gets outer variables as they are now, it uses the most recent values.
Old variable values are not saved anywhere.
When a function wants a variable, it takes the current value from its own Lexical Environment or the outer one.
Which variables are available?
importance: 5
The function makeWorker below makes another function and returns it.
That new function can be called from somewhere else.
Will it have access to the outer variables from its creation place, or the invocation place, or both?
function makeWorker() {
let name = "Pete";
return function() {
alert(name);
};
}
let name = "John";
// create a function
let work = makeWorker();
// call it
work(); // what will it show?
Which value it will show? “Pete” or “John”?
The answer is: Pete.
The work() function in the code below gets name from the place of its origin through the outer lexical environment reference:
So, the result is "Pete" here.
But if there were no let name in makeWorker(), then the search would go outside and take the global variable as we can see from the chain above.
In that case the result would be "John".
Are counters independent?
importance: 5
Here we make two counters: counter and counter2 using the same makeCounter function.
Are they independent? What is the second counter going to show? 0,1 or 2,3 or something else?
function makeCounter() {
let count = 0;
return function() {
return count++;
};
}
let counter = makeCounter();
let counter2 = makeCounter();
alert( counter() ); // 0
alert( counter() ); // 1
alert( counter2() ); // ?
alert( counter2() ); // ?
The answer: 0,1.
Functions counter and counter2 are created by different invocations of makeCounter.
So they have independent outer Lexical Environments, each one has its own count.
Counter object
importance: 5
Here a counter object is made with the help of the constructor function.
Will it work? What will it show?
function Counter() {
let count = 0;
this.up = function() {
return ++count;
};
this.down = function() {
return --count;
};
}
let counter = new Counter();
alert( counter.up() ); // ?
alert( counter.up() ); // ?
alert( counter.down() ); // ?
Surely it will work just fine.
Both nested functions are created within the same outer Lexical Environment, so they share access to the same count variable:
function Counter() {
let count = 0;
this.up = function() {
return ++count;
};
this.down = function() {
return --count;
};
}
let counter = new Counter();
alert( counter.up() ); // 1
alert( counter.up() ); // 2
alert( counter.down() ); // 1
Function in if
Look at the code.
What will be the result of the call at the last line?
let phrase = "Hello";
if (true) {
let user = "John";
function sayHi() {
alert(`${phrase}, ${user}`);
}
}
sayHi();
The result is an error.
The function sayHi is declared inside the if, so it only lives inside it.
There is no sayHi outside.
Sum with closures
importance: 4
Write function sum that works like this: sum(a)(b) = a+b.
Yes, exactly this way, using double parentheses (not a mistype).
For instance:
sum(1)(2) = 3
sum(5)(-1) = 4
For the second parentheses to work, the first ones must return a function.
Like this:
function sum(a) {
return function(b) {
return a + b; // takes "a" from the outer lexical environment
};
}
alert( sum(1)(2) ); // 3
alert( sum(5)(-1) ); // 4
Is variable visible?
importance: 4
What will be the result of this code?
let x = 1;
function func() {
console.log(x); // ?
let x = 2;
}
func();
P.S.
There's a pitfall in this task.
The solution is not obvious.
The result is: error.
Try running it:
let x = 1;
function func() {
console.log(x); // ReferenceError: Cannot access 'x' before initialization
let x = 2;
}
func();
In this example we can observe the peculiar difference between a “non-existing” and “uninitialized” variable.
As you may have read in the article Variable scope, closure, a variable starts in the “uninitialized” state from the moment when the execution enters a code block (or a function).
And it stays uninitalized until the corresponding let statement.
In other words, a variable technically exists, but can't be used before let.
The code above demonstrates it.
function func() {
// the local variable x is known to the engine from the beginning of the function,
// but "unitialized" (unusable) until let ("dead zone")
// hence the error
console.log(x); // ReferenceError: Cannot access 'x' before initialization
let x = 2;
}
This zone of temporary unusability of a variable (from the beginning of the code block till let) is sometimes called the “dead zone”.
Filter through function
importance: 5
We have a built-in method arr.filter(f) for arrays.
It filters all elements through the function f.
If it returns true, then that element is returned in the resulting array.
Make a set of “ready to use” filters:
inBetween(a, b) – between a and b or equal to them (inclusively).
inArray([...]) – in the given array.
The usage must be like this:
arr.filter(inBetween(3,6)) – selects only values between 3 and 6.
arr.filter(inArray([1,2,3])) – selects only elements matching with one of the members of [1,2,3].
For instance:
/* ..
your code for inBetween and inArray */
let arr = [1, 2, 3, 4, 5, 6, 7];
alert( arr.filter(inBetween(3, 6)) ); // 3,4,5,6
alert( arr.filter(inArray([1, 2, 10])) ); // 1,2Open a sandbox with tests.
Filter inBetween
function inBetween(a, b) {
return function(x) {
return x >= a && x <= b;
};
}
let arr = [1, 2, 3, 4, 5, 6, 7];
alert( arr.filter(inBetween(3, 6)) ); // 3,4,5,6
Filter inArray
function inArray(arr) {
return function(x) {
return arr.includes(x);
};
}
let arr = [1, 2, 3, 4, 5, 6, 7];
alert( arr.filter(inArray([1, 2, 10])) ); // 1,2Open the solution with tests in a sandbox.
Sort by field
importance: 5
We've got an array of objects to sort:
let users = [
{ name: "John", age: 20, surname: "Johnson" },
{ name: "Pete", age: 18, surname: "Peterson" },
{ name: "Ann", age: 19, surname: "Hathaway" }
];
The usual way to do that would be:
// by name (Ann, John, Pete)
users.sort((a, b) => a.name > b.name ? 1 : -1);
// by age (Pete, Ann, John)
users.sort((a, b) => a.age > b.age ? 1 : -1);
Can we make it even less verbose, like this?
users.sort(byField('name'));
users.sort(byField('age'));
So, instead of writing a function, just put byField(fieldName).
Write the function byField that can be used for that.
Open a sandbox with tests.function byField(fieldName){
return (a, b) => a[fieldName] > b[fieldName] ? 1 : -1;
}Open the solution with tests in a sandbox.
Army of functions
importance: 5
The following code creates an array of shooters.
Every function is meant to output its number.
But something is wrong…
function makeArmy() {
let shooters = [];
let i = 0;
while (i < 10) {
let shooter = function() { // create a shooter function,
alert( i ); // that should show its number
};
shooters.push(shooter); // and add it to the array
i++;
}
// ...and return the array of shooters
return shooters;
}
let army = makeArmy();
// all shooters show 10 instead of their numbers 0, 1, 2, 3...
army[0](); // 10 from the shooter number 0
army[1](); // 10 from the shooter number 1
army[2](); // 10 ...and so on.
Why do all of the shooters show the same value?
Fix the code so that they work as intended.
Open a sandbox with tests.
Let's examine what exactly happens inside makeArmy, and the solution will become obvious.
It creates an empty array shooters:
let shooters = [];
Fills it with functions via shooters.push(function) in the loop.
Every element is a function, so the resulting array looks like this:
shooters = [
function () { alert(i); },
function () { alert(i); },
function () { alert(i); },
function () { alert(i); },
function () { alert(i); },
function () { alert(i); },
function () { alert(i); },
function () { alert(i); },
function () { alert(i); },
function () { alert(i); }
];
The array is returned from the function.
Then, later, the call to any member, e.g.
army[5]() will get the element army[5] from the array (which is a function) and calls it.
Now why do all such functions show the same value, 10?
That's because there's no local variable i inside shooter functions.
When such a function is called, it takes i from its outer lexical environment.
Then, what will be the value of i?
If we look at the source:
function makeArmy() {
...
let i = 0;
while (i < 10) {
let shooter = function() { // shooter function
alert( i ); // should show its number
};
shooters.push(shooter); // add function to the array
i++;
}
...
}
We can see that all shooter functions are created in the lexical environment of makeArmy() function.
But when army[5]() is called, makeArmy has already finished its job, and the final value of i is 10 (while stops at i=10).
As the result, all shooter functions get the same value from the outer lexical environment and that is, the last value, i=10.
As you can see above, on each iteration of a while {...} block, a new lexical environment is created.
So, to fix this, we can copy the value of i into a variable within the while {...} block, like this:
function makeArmy() {
let shooters = [];
let i = 0;
while (i < 10) {
let j = i;
let shooter = function() { // shooter function
alert( j ); // should show its number
};
shooters.push(shooter);
i++;
}
return shooters;
}
let army = makeArmy();
// Now the code works correctly
army[0](); // 0
army[5](); // 5
Here let j = i declares an “iteration-local” variable j and copies i into it.
Primitives are copied “by value”, so we actually get an independent copy of i, belonging to the current loop iteration.
The shooters work correctly, because the value of i now lives a little bit closer.
Not in makeArmy() Lexical Environment, but in the Lexical Environment that corresponds the current loop iteration:
Such problem could also be avoided if we used for in the beginning, like this:
function makeArmy() {
let shooters = [];
for(let i = 0; i < 10; i++) {
let shooter = function() { // shooter function
alert( i ); // should show its number
};
shooters.push(shooter);
}
return shooters;
}
let army = makeArmy();
army[0](); // 0
army[5](); // 5
That's essentially the same, because for on each iteration generates a new lexical environment, with its own variable i.
So shooter generated in every iteration references its own i, from that very iteration.
Now, as you've put so much effort into reading this, and the final recipe is so simple – just use for, you may wonder – was it worth that?
Well, if you could easily answer the question, you wouldn't read the solution.
So, hopefully this task must have helped you to understand things a bit better.
Besides, there are indeed cases when one prefers while to for, and other scenarios, where such problems are real.
Open the solution with tests in a sandbox.Advanced working with functions
The old "var"
This article is for understanding old scripts
The information in this article is useful for understanding old scripts.
That's not how we write a new code.
In the very first chapter about variables, we mentioned three ways of variable declaration:
letconstvar
The var declaration is similar to let.
Most of the time we can replace let by var or vice-versa and expect things to work:
var message = "Hi";
alert(message); // Hi
But internally var is a very different beast, that originates from very old times.
It's generally not used in modern scripts, but still lurks in the old ones.
If you don't plan on meeting such scripts you may even skip this chapter or postpone it.
On the other hand, it's important to understand differences when migrating old scripts from var to let, to avoid odd errors.
- “var” has no block scope
Variables, declared with var, are either function-scoped or global-scoped.
They are visible through blocks.
For instance:
if (true) {
var test = true; // use "var" instead of "let"
}
alert(test); // true, the variable lives after if
As var ignores code blocks, we've got a global variable test.
If we used let test instead of var test, then the variable would only be visible inside if:
if (true) {
let test = true; // use "let"
}
alert(test); // ReferenceError: test is not defined
The same thing for loops: var cannot be block- or loop-local:
for (var i = 0; i < 10; i++) {
var one = 1;
// ...
}
alert(i); // 10, "i" is visible after loop, it's a global variable
alert(one); // 1, "one" is visible after loop, it's a global variable
If a code block is inside a function, then var becomes a function-level variable:
function sayHi() {
if (true) {
var phrase = "Hello";
}
alert(phrase); // works
}
sayHi();
alert(phrase); // ReferenceError: phrase is not defined
As we can see, var pierces through if, for or other code blocks.
That's because a long time ago in JavaScript, blocks had no Lexical Environments, and var is a remnant of that.
- “var” tolerates redeclarations
If we declare the same variable with let twice in the same scope, that's an error:
let user;
let user; // SyntaxError: 'user' has already been declared
With var, we can redeclare a variable any number of times.
If we use var with an already-declared variable, it's just ignored:
var user = "Pete";
var user = "John"; // this "var" does nothing (already declared)
// ...it doesn't trigger an error
alert(user); // John
- “var” variables can be declared below their use
var declarations are processed when the function starts (or script starts for globals).
In other words, var variables are defined from the beginning of the function, no matter where the definition is (assuming that the definition is not in the nested function).
So this code:
function sayHi() {
phrase = "Hello";
alert(phrase);
var phrase;
}
sayHi();
…Is technically the same as this (moved var phrase above):
function sayHi() {
var phrase;
phrase = "Hello";
alert(phrase);
}
sayHi();
…Or even as this (remember, code blocks are ignored):
function sayHi() {
phrase = "Hello"; // (*)
if (false) {
var phrase;
}
alert(phrase);
}
sayHi();
People also call such behavior “hoisting” (raising), because all var are “hoisted” (raised) to the top of the function.
So in the example above, if (false) branch never executes, but that doesn't matter.
The var inside it is processed in the beginning of the function, so at the moment of (*) the variable exists.
Declarations are hoisted, but assignments are not.
That's best demonstrated with an example:
function sayHi() {
alert(phrase);
var phrase = "Hello";
}
sayHi();
The line var phrase = "Hello" has two actions in it:
Variable declaration var
Variable assignment =.
The declaration is processed at the start of function execution (“hoisted”), but the assignment always works at the place where it appears.
So the code works essentially like this:
function sayHi() {
var phrase; // declaration works at the start...
alert(phrase); // undefined
phrase = "Hello"; // ...assignment - when the execution reaches it.
}
sayHi();
Because all var declarations are processed at the function start, we can reference them at any place.
But variables are undefined until the assignments.
In both examples above, alert runs without an error, because the variable phrase exists.
But its value is not yet assigned, so it shows undefined.
- IIFE
In the past, as there was only var, and it has no block-level visibility, programmers invented a way to emulate it.
What they did was called “immediately-invoked function expressions” (abbreviated as IIFE).
That's not something we should use nowadays, but you can find them in old scripts.
An IIFE looks like this:
(function() {
var message = "Hello";
alert(message); // Hello
})();
Here, a Function Expression is created and immediately called.
So the code executes right away and has its own private variables.
The Function Expression is wrapped with parenthesis (function {...}), because when JavaScript engine encounters "function" in the main code, it understands it as the start of a Function Declaration.
But a Function Declaration must have a name, so this kind of code will give an error:
// Tries to declare and immediately call a function
function() { // <-- SyntaxError: Function statements require a function name
var message = "Hello";
alert(message); // Hello
}();
Even if we say: “okay, let's add a name”, that won't work, as JavaScript does not allow Function Declarations to be called immediately:
// syntax error because of parentheses below
function go() {
}(); // <-- can't call Function Declaration immediately
So, the parentheses around the function is a trick to show JavaScript that the function is created in the context of another expression, and hence it's a Function Expression: it needs no name and can be called immediately.
There exist other ways besides parentheses to tell JavaScript that we mean a Function Expression:
// Ways to create IIFE
(function() {
alert("Parentheses around the function");
})();
(function() {
alert("Parentheses around the whole thing");
}());
!function() {
alert("Bitwise NOT operator starts the expression");
}();
+function() {
alert("Unary plus starts the expression");
}();
In all the above cases we declare a Function Expression and run it immediately.
Let's note again: nowadays there's no reason to write such code.
- Summary
There are two main differences of var compared to let/const:
var variables have no block scope, their visibility is scoped to current function, or global, if declared outside function.
var declarations are processed at function start (script start for globals).
There's one more very minor difference related to the global object, that we'll cover in the next chapter.
These differences make var worse than let most of the time.
Block-level variables is such a great thing.
That's why let was introduced in the standard long ago, and is now a major way (along with const) to declare a variable.
Advanced working with functions
Global object
The global object provides variables and functions that are available anywhere.
By default, those that are built into the language or the environment.
In a browser it is named window, for Node.js it is global, for other environments it may have another name.
Recently, globalThis was added to the language, as a standardized name for a global object, that should be supported across all environments.
It's supported in all major browsers.
We'll use window here, assuming that our environment is a browser.
If your script may run in other environments, it's better to use globalThis instead.
All properties of the global object can be accessed directly:
alert("Hello");
// is the same as
window.alert("Hello");
In a browser, global functions and variables declared with var (not let/const!) become the property of the global object:
var gVar = 5;
alert(window.gVar); // 5 (became a property of the global object)
The same effect have function declarations (statements with function keyword in the main code flow, not function expressions).
Please don't rely on that! This behavior exists for compatibility reasons.
Modern scripts use JavaScript modules where such thing doesn't happen.
If we used let instead, such thing wouldn't happen:
let gLet = 5;
alert(window.gLet); // undefined (doesn't become a property of the global object)
If a value is so important that you'd like to make it available globally, write it directly as a property:
// make current user information global, to let all scripts access it
window.currentUser = {
name: "John"
};
// somewhere else in code
alert(currentUser.name); // John
// or, if we have a local variable with the name "currentUser"
// get it from window explicitly (safe!)
alert(window.currentUser.name); // John
That said, using global variables is generally discouraged.
There should be as few global variables as possible.
The code design where a function gets “input” variables and produces certain “outcome” is clearer, less prone to errors and easier to test than if it uses outer or global variables.
- Using for polyfills
We use the global object to test for support of modern language features.
For instance, test if a built-in Promise object exists (it doesn't in really old browsers):
if (!window.Promise) {
alert("Your browser is really old!");
}
If there's none (say, we're in an old browser), we can create “polyfills”: add functions that are not supported by the environment, but exist in the modern standard.
if (!window.Promise) {
window.Promise = ...
// custom implementation of the modern language feature
}
- Summary
The global object holds variables that should be available everywhere.
That includes JavaScript built-ins, such as Array and environment-specific values, such as window.innerHeight – the window height in the browser.
The global object has a universal name globalThis.
…But more often is referred by “old-school” environment-specific names, such as window (browser) and global (Node.js).
We should store values in the global object only if they're truly global for our project.
And keep their number at minimum.
In-browser, unless we're using modules, global functions and variables declared with var become a property of the global object.
To make our code future-proof and easier to understand, we should access properties of the global object directly, as window.x.
Advanced working with functions
Function object, NFE
As we already know, a function in JavaScript is a value.
Every value in JavaScript has a type.
What type is a function?
In JavaScript, functions are objects.
A good way to imagine functions is as callable “action objects”.
We can not only call them, but also treat them as objects: add/remove properties, pass by reference etc.
- The “name” property
Function objects contain some useable properties.
For instance, a function's name is accessible as the “name” property:
function sayHi() {
alert("Hi");
}
alert(sayHi.name); // sayHi
What's kind of funny, the name-assigning logic is smart.
It also assigns the correct name to a function even if it's created without one, and then immediately assigned:
let sayHi = function() {
alert("Hi");
};
alert(sayHi.name); // sayHi (there's a name!)
It also works if the assignment is done via a default value:
function f(sayHi = function() {}) {
alert(sayHi.name); // sayHi (works!)
}
f();
In the specification, this feature is called a “contextual name”.
If the function does not provide one, then in an assignment it is figured out from the context.
Object methods have names too:
let user = {
sayHi() {
// ...
},
sayBye: function() {
// ...
}
}
alert(user.sayHi.name); // sayHi
alert(user.sayBye.name); // sayBye
There's no magic though.
There are cases when there's no way to figure out the right name.
In that case, the name property is empty, like here:
// function created inside array
let arr = [function() {}];
alert( arr[0].name ); // <empty string>
// the engine has no way to set up the right name, so there is none
In practice, however, most functions do have a name.
- The “length” property
There is another built-in property “length” that returns the number of function parameters, for instance:
function f1(a) {}
function f2(a, b) {}
function many(a, b, ...more) {}
alert(f1.length); // 1
alert(f2.length); // 2
alert(many.length); // 2
Here we can see that rest parameters are not counted.
The length property is sometimes used for introspection in functions that operate on other functions.
For instance, in the code below the ask function accepts a question to ask and an arbitrary number of handler functions to call.
Once a user provides their answer, the function calls the handlers.
We can pass two kinds of handlers:
A zero-argument function, which is only called when the user gives a positive answer.
A function with arguments, which is called in either case and returns an answer.
To call handler the right way, we examine the handler.length property.
The idea is that we have a simple, no-arguments handler syntax for positive cases (most frequent variant), but are able to support universal handlers as well:
function ask(question, ...handlers) {
let isYes = confirm(question);
for(let handler of handlers) {
if (handler.length == 0) {
if (isYes) handler();
} else {
handler(isYes);
}
}
}
// for positive answer, both handlers are called
// for negative answer, only the second one
ask("Question?", () => alert('You said yes'), result => alert(result));
This is a particular case of so-called polymorphism – treating arguments differently depending on their type or, in our case depending on the length.
The idea does have a use in JavaScript libraries.
- Custom properties
We can also add properties of our own.
Here we add the counter property to track the total calls count:
function sayHi() {
alert("Hi");
// let's count how many times we run
sayHi.counter++;
}
sayHi.counter = 0; // initial value
sayHi(); // Hi
sayHi(); // Hi
alert( `Called ${sayHi.counter} times` ); // Called 2 times
A property is not a variable
A property assigned to a function like sayHi.counter = 0 does not define a local variable counter inside it.
In other words, a property counter and a variable let counter are two unrelated things.
We can treat a function as an object, store properties in it, but that has no effect on its execution.
Variables are not function properties and vice versa.
These are just parallel worlds.
Function properties can replace closures sometimes.
For instance, we can rewrite the counter function example from the chapter Variable scope, closure to use a function property:
function makeCounter() {
// instead of:
// let count = 0
function counter() {
return counter.count++;
};
counter.count = 0;
return counter;
}
let counter = makeCounter();
alert( counter() ); // 0
alert( counter() ); // 1
The count is now stored in the function directly, not in its outer Lexical Environment.
Is it better or worse than using a closure?
The main difference is that if the value of count lives in an outer variable, then external code is unable to access it.
Only nested functions may modify it.
And if it's bound to a function, then such a thing is possible:
function makeCounter() {
function counter() {
return counter.count++;
};
counter.count = 0;
return counter;
}
let counter = makeCounter();
counter.count = 10;
alert( counter() ); // 10
So the choice of implementation depends on our aims.
- Named Function Expression
Named Function Expression, or NFE, is a term for Function Expressions that have a name.
For instance, let's take an ordinary Function Expression:
let sayHi = function(who) {
alert(`Hello, ${who}`);
};
And add a name to it:
let sayHi = function func(who) {
alert(`Hello, ${who}`);
};
Did we achieve anything here? What's the purpose of that additional "func" name?
First let's note, that we still have a Function Expression.
Adding the name "func" after function did not make it a Function Declaration, because it is still created as a part of an assignment expression.
Adding such a name also did not break anything.
The function is still available as sayHi():
let sayHi = function func(who) {
alert(`Hello, ${who}`);
};
sayHi("John"); // Hello, John
There are two special things about the name func, that are the reasons for it:
It allows the function to reference itself internally.
It is not visible outside of the function.
For instance, the function sayHi below calls itself again with "Guest" if no who is provided:
let sayHi = function func(who) {
if (who) {
alert(`Hello, ${who}`);
} else {
func("Guest"); // use func to re-call itself
}
};
sayHi(); // Hello, Guest
// But this won't work:
func(); // Error, func is not defined (not visible outside of the function)
Why do we use func? Maybe just use sayHi for the nested call?
Actually, in most cases we can:
let sayHi = function(who) {
if (who) {
alert(`Hello, ${who}`);
} else {
sayHi("Guest");
}
};
The problem with that code is that sayHi may change in the outer code.
If the function gets assigned to another variable instead, the code will start to give errors:
let sayHi = function(who) {
if (who) {
alert(`Hello, ${who}`);
} else {
sayHi("Guest"); // Error: sayHi is not a function
}
};
let welcome = sayHi;
sayHi = null;
welcome(); // Error, the nested sayHi call doesn't work any more!
That happens because the function takes sayHi from its outer lexical environment.
There's no local sayHi, so the outer variable is used.
And at the moment of the call that outer sayHi is null.
The optional name which we can put into the Function Expression is meant to solve exactly these kinds of problems.
Let's use it to fix our code:
let sayHi = function func(who) {
if (who) {
alert(`Hello, ${who}`);
} else {
func("Guest"); // Now all fine
}
};
let welcome = sayHi;
sayHi = null;
welcome(); // Hello, Guest (nested call works)
Now it works, because the name "func" is function-local.
It is not taken from outside (and not visible there).
The specification guarantees that it will always reference the current function.
The outer code still has it's variable sayHi or welcome.
And func is an “internal function name”, how the function can call itself internally.
There's no such thing for Function Declaration
The “internal name” feature described here is only available for Function Expressions, not for Function Declarations.
For Function Declarations, there is no syntax for adding an “internal” name.
Sometimes, when we need a reliable internal name, it's the reason to rewrite a Function Declaration to Named Function Expression form.
- Summary
Functions are objects.
Here we covered their properties:
name – the function name.
Usually taken from the function definition, but if there's none, JavaScript tries to guess it from the context (e.g.
an assignment).
length – the number of arguments in the function definition.
Rest parameters are not counted.
If the function is declared as a Function Expression (not in the main code flow), and it carries the name, then it is called a Named Function Expression.
The name can be used inside to reference itself, for recursive calls or such.
Also, functions may carry additional properties.
Many well-known JavaScript libraries make great use of this feature.
They create a “main” function and attach many other “helper” functions to it.
For instance, the jQuery library creates a function named $.
The lodash library creates a function _, and then adds _.clone, _.keyBy and other properties to it (see the docs when you want to learn more about them).
Actually, they do it to lessen their pollution of the global space, so that a single library gives only one global variable.
That reduces the possibility of naming conflicts.
So, a function can do a useful job by itself and also carry a bunch of other functionality in properties.
importance: 5
Modify the code of makeCounter() so that the counter can also decrease and set the number:
counter() should return the next number (as before).
counter.set(value) should set the counter to value.
counter.decrease() should decrease the counter by 1.
See the sandbox code for the complete usage example.
P.S.
You can use either a closure or the function property to keep the current count.
Or write both variants.
Open a sandbox with tests.
The solution uses count in the local variable, but addition methods are written right into the counter.
They share the same outer lexical environment and also can access the current count.
function makeCounter() {
let count = 0;
function counter() {
return count++;
}
counter.set = value => count = value;
counter.decrease = () => count--;
return counter;
}Open the solution with tests in a sandbox.
Sum with an arbitrary amount of brackets
importance: 2
Write function sum that would work like this:
sum(1)(2) == 3; // 1 + 2
sum(1)(2)(3) == 6; // 1 + 2 + 3
sum(5)(-1)(2) == 6
sum(6)(-1)(-2)(-3) == 0
sum(0)(1)(2)(3)(4)(5) == 15
P.S.
Hint: you may need to setup custom object to primitive conversion for your function.
Open a sandbox with tests.
For the whole thing to work anyhow, the result of sum must be function.
That function must keep in memory the current value between calls.
According to the task, the function must become the number when used in ==.
Functions are objects, so the conversion happens as described in the chapter Object to primitive conversion, and we can provide our own method that returns the number.
Now the code:
function sum(a) {
let currentSum = a;
function f(b) {
currentSum += b;
return f;
}
f.toString = function() {
return currentSum;
};
return f;
}
alert( sum(1)(2) ); // 3
alert( sum(5)(-1)(2) ); // 6
alert( sum(6)(-1)(-2)(-3) ); // 0
alert( sum(0)(1)(2)(3)(4)(5) ); // 15
Please note that the sum function actually works only once.
It returns function f.
Then, on each subsequent call, f adds its parameter to the sum currentSum, and returns itself.
There is no recursion in the last line of f.
Here is what recursion looks like:
function f(b) {
currentSum += b;
return f(); // <-- recursive call
}
And in our case, we just return the function, without calling it:
function f(b) {
currentSum += b;
return f; // <-- does not call itself, returns itself
}
This f will be used in the next call, again return itself, so many times as needed.
Then, when used as a number or a string – the toString returns the currentSum.
We could also use Symbol.toPrimitive or valueOf here for the conversion.
Open the solution with tests in a sandbox.Advanced working with functions
The "new Function" syntax
There's one more way to create a function.
It's rarely used, but sometimes there's no alternative.
- Syntax
The syntax for creating a function:
let func = new Function ([arg1, arg2, ...argN], functionBody);
The function is created with the arguments arg1...argN and the given functionBody.
It's easier to understand by looking at an example.
Here's a function with two arguments:
let sum = new Function('a', 'b', 'return a + b');
alert( sum(1, 2) ); // 3
And here there's a function without arguments, with only the function body:
let sayHi = new Function('alert("Hello")');
sayHi(); // Hello
The major difference from other ways we've seen is that the function is created literally from a string, that is passed at run time.
All previous declarations required us, programmers, to write the function code in the script.
But new Function allows to turn any string into a function.
For example, we can receive a new function from a server and then execute it:
let str = ...
receive the code from a server dynamically ...
let func = new Function(str);
func();
It is used in very specific cases, like when we receive code from a server, or to dynamically compile a function from a template, in complex web-applications.
- Closure
Usually, a function remembers where it was born in the special property [[Environment]].
It references the Lexical Environment from where it's created (we covered that in the chapter Variable scope, closure).
But when a function is created using new Function, its [[Environment]] is set to reference not the current Lexical Environment, but the global one.
So, such function doesn't have access to outer variables, only to the global ones.
function getFunc() {
let value = "test";
let func = new Function('alert(value)');
return func;
}
getFunc()(); // error: value is not defined
Compare it with the regular behavior:
function getFunc() {
let value = "test";
let func = function() { alert(value); };
return func;
}
getFunc()(); // "test", from the Lexical Environment of getFunc
This special feature of new Function looks strange, but appears very useful in practice.
Imagine that we must create a function from a string.
The code of that function is not known at the time of writing the script (that's why we don't use regular functions), but will be known in the process of execution.
We may receive it from the server or from another source.
Our new function needs to interact with the main script.
What if it could access the outer variables?
The problem is that before JavaScript is published to production, it's compressed using a minifier – a special program that shrinks code by removing extra comments, spaces and – what's important, renames local variables into shorter ones.
For instance, if a function has let userName, minifier replaces it with let a (or another letter if this one is occupied), and does it everywhere.
That's usually a safe thing to do, because the variable is local, nothing outside the function can access it.
And inside the function, minifier replaces every mention of it.
Minifiers are smart, they analyze the code structure, so they don't break anything.
They're not just a dumb find-and-replace.
So if new Function had access to outer variables, it would be unable to find renamed userName.
If new Function had access to outer variables, it would have problems with minifiers.
Besides, such code would be architecturally bad and prone to errors.
To pass something to a function, created as new Function, we should use its arguments.
- Summary
The syntax:
let func = new Function ([arg1, arg2, ...argN], functionBody);
For historical reasons, arguments can also be given as a comma-separated list.
These three declarations mean the same:
new Function('a', 'b', 'return a + b'); // basic syntax
new Function('a,b', 'return a + b'); // comma-separated
new Function('a , b', 'return a + b'); // comma-separated with spaces
Functions created with new Function, have [[Environment]] referencing the global Lexical Environment, not the outer one.
Hence, they cannot use outer variables.
But that's actually good, because it insures us from errors.
Passing parameters explicitly is a much better method architecturally and causes no problems with minifiers.
Advanced working with functions
Scheduling: setTimeout and setInterval
We may decide to execute a function not right now, but at a certain time later.
That's called “scheduling a call”.
There are two methods for it:
setTimeout allows us to run a function once after the interval of time.
setInterval allows us to run a function repeatedly, starting after the interval of time, then repeating continuously at that interval.
These methods are not a part of JavaScript specification.
But most environments have the internal scheduler and provide these methods.
In particular, they are supported in all browsers and Node.js.
- setTimeout
The syntax:
let timerId = setTimeout(func|code, [delay], [arg1], [arg2], ...)
Parameters:
func|code
Function or a string of code to execute.
Usually, that's a function.
For historical reasons, a string of code can be passed, but that's not recommended.
delay
The delay before run, in milliseconds (1000 ms = 1 second), by default 0.
arg1, arg2…
Arguments for the function (not supported in IE9-)
For instance, this code calls sayHi() after one second:
function sayHi() {
alert('Hello');
}
setTimeout(sayHi, 1000);
With arguments:
function sayHi(phrase, who) {
alert( phrase + ', ' + who );
}
setTimeout(sayHi, 1000, "Hello", "John"); // Hello, John
If the first argument is a string, then JavaScript creates a function from it.
So, this will also work:
setTimeout("alert('Hello')", 1000);
But using strings is not recommended, use arrow functions instead of them, like this:
setTimeout(() => alert('Hello'), 1000);
Pass a function, but don't run it
Novice developers sometimes make a mistake by adding brackets () after the function:
// wrong!
setTimeout(sayHi(), 1000);
That doesn't work, because setTimeout expects a reference to a function.
And here sayHi() runs the function, and the result of its execution is passed to setTimeout.
In our case the result of sayHi() is undefined (the function returns nothing), so nothing is scheduled.
Canceling with clearTimeout
A call to setTimeout returns a “timer identifier” timerId that we can use to cancel the execution.
The syntax to cancel:
let timerId = setTimeout(...);
clearTimeout(timerId);
In the code below, we schedule the function and then cancel it (changed our mind).
As a result, nothing happens:
let timerId = setTimeout(() => alert("never happens"), 1000);
alert(timerId); // timer identifier
clearTimeout(timerId);
alert(timerId); // same identifier (doesn't become null after canceling)
As we can see from alert output, in a browser the timer identifier is a number.
In other environments, this can be something else.
For instance, Node.js returns a timer object with additional methods.
Again, there is no universal specification for these methods, so that's fine.
For browsers, timers are described in the timers section of HTML5 standard.
- setInterval
The setInterval method has the same syntax as setTimeout:
let timerId = setInterval(func|code, [delay], [arg1], [arg2], ...)
All arguments have the same meaning.
But unlike setTimeout it runs the function not only once, but regularly after the given interval of time.
To stop further calls, we should call clearInterval(timerId).
The following example will show the message every 2 seconds.
After 5 seconds, the output is stopped:
// repeat with the interval of 2 seconds
let timerId = setInterval(() => alert('tick'), 2000);
// after 5 seconds stop
setTimeout(() => { clearInterval(timerId); alert('stop'); }, 5000);
Time goes on while alert is shown
In most browsers, including Chrome and Firefox the internal timer continues “ticking” while showing alert/confirm/prompt.
So if you run the code above and don't dismiss the alert window for some time, then the next alert will be shown immediately as you do it.
The actual interval between alerts will be shorter than 2 seconds.
- Nested setTimeout
There are two ways of running something regularly.
One is setInterval.
The other one is a nested setTimeout, like this:
/** instead of:
let timerId = setInterval(() => alert('tick'), 2000);
*/
let timerId = setTimeout(function tick() {
alert('tick');
timerId = setTimeout(tick, 2000); // (*)
}, 2000);
The setTimeout above schedules the next call right at the end of the current one (*).
The nested setTimeout is a more flexible method than setInterval.
This way the next call may be scheduled differently, depending on the results of the current one.
For instance, we need to write a service that sends a request to the server every 5 seconds asking for data, but in case the server is overloaded, it should increase the interval to 10, 20, 40 seconds…
Here's the pseudocode:
let delay = 5000;
let timerId = setTimeout(function request() {
...send request...
if (request failed due to server overload) {
// increase the interval to the next run
delay *= 2;
}
timerId = setTimeout(request, delay);
}, delay);
And if the functions that we're scheduling are CPU-hungry, then we can measure the time taken by the execution and plan the next call sooner or later.
Nested setTimeout allows to set the delay between the executions more precisely than setInterval.
Let's compare two code fragments.
The first one uses setInterval:
let i = 1;
setInterval(function() {
func(i++);
}, 100);
The second one uses nested setTimeout:
let i = 1;
setTimeout(function run() {
func(i++);
setTimeout(run, 100);
}, 100);
For setInterval the internal scheduler will run func(i++) every 100ms:
Did you notice?
The real delay between func calls for setInterval is less than in the code!
That's normal, because the time taken by func's execution “consumes” a part of the interval.
It is possible that func's execution turns out to be longer than we expected and takes more than 100ms.
In this case the engine waits for func to complete, then checks the scheduler and if the time is up, runs it again immediately.
In the edge case, if the function always executes longer than delay ms, then the calls will happen without a pause at all.
And here is the picture for the nested setTimeout:
The nested setTimeout guarantees the fixed delay (here 100ms).
That's because a new call is planned at the end of the previous one.
Garbage collection and setInterval/setTimeout callback
When a function is passed in setInterval/setTimeout, an internal reference is created to it and saved in the scheduler.
It prevents the function from being garbage collected, even if there are no other references to it.
// the function stays in memory until the scheduler calls it
setTimeout(function() {...}, 100);
For setInterval the function stays in memory until clearInterval is called.
There's a side-effect.
A function references the outer lexical environment, so, while it lives, outer variables live too.
They may take much more memory than the function itself.
So when we don't need the scheduled function anymore, it's better to cancel it, even if it's very small.
- Zero delay setTimeout
There's a special use case: setTimeout(func, 0), or just setTimeout(func).
This schedules the execution of func as soon as possible.
But the scheduler will invoke it only after the currently executing script is complete.
So the function is scheduled to run “right after” the current script.
For instance, this outputs “Hello”, then immediately “World”:
setTimeout(() => alert("World"));
alert("Hello");
The first line “puts the call into calendar after 0ms”.
But the scheduler will only “check the calendar” after the current script is complete, so "Hello" is first, and "World" – after it.
There are also advanced browser-related use cases of zero-delay timeout, that we'll discuss in the chapter Event loop: microtasks and macrotasks.
Zero delay is in fact not zero (in a browser)
In the browser, there's a limitation of how often nested timers can run.
The HTML5 standard says: “after five nested timers, the interval is forced to be at least 4 milliseconds.”.
Let's demonstrate what it means with the example below.
The setTimeout call in it re-schedules itself with zero delay.
Each call remembers the real time from the previous one in the times array.
What do the real delays look like? Let's see:
let start = Date.now();
let times = [];
setTimeout(function run() {
times.push(Date.now() - start); // remember delay from the previous call
if (start + 100 < Date.now()) alert(times); // show the delays after 100ms
else setTimeout(run); // else re-schedule
});
// an example of the output:
// 1,1,1,1,9,15,20,24,30,35,40,45,50,55,59,64,70,75,80,85,90,95,100
First timers run immediately (just as written in the spec), and then we see 9, 15, 20, 24....
The 4+ ms obligatory delay between invocations comes into play.
The similar thing happens if we use setInterval instead of setTimeout: setInterval(f) runs f few times with zero-delay, and afterwards with 4+ ms delay.
That limitation comes from ancient times and many scripts rely on it, so it exists for historical reasons.
For server-side JavaScript, that limitation does not exist, and there exist other ways to schedule an immediate asynchronous job, like setImmediate for Node.js.
So this note is browser-specific.
- Summary
Methods setTimeout(func, delay, ...args) and setInterval(func, delay, ...args) allow us to run the func once/regularly after delay milliseconds.
To cancel the execution, we should call clearTimeout/clearInterval with the value returned by setTimeout/setInterval.
Nested setTimeout calls are a more flexible alternative to setInterval, allowing us to set the time between executions more precisely.
Zero delay scheduling with setTimeout(func, 0) (the same as setTimeout(func)) is used to schedule the call “as soon as possible, but after the current script is complete”.
The browser limits the minimal delay for five or more nested calls of setTimeout or for setInterval (after 5th call) to 4ms.
That's for historical reasons.
Please note that all scheduling methods do not guarantee the exact delay.
For example, the in-browser timer may slow down for a lot of reasons:
The CPU is overloaded.
The browser tab is in the background mode.
The laptop is on battery.
All that may increase the minimal timer resolution (the minimal delay) to 300ms or even 1000ms depending on the browser and OS-level performance settings.
importance: 5
Write a function printNumbers(from, to) that outputs a number every second, starting from from and ending with to.
Make two variants of the solution.
Using setInterval.
Using nested setTimeout.
Using setInterval:
function printNumbers(from, to) {
let current = from;
let timerId = setInterval(function() {
alert(current);
if (current == to) {
clearInterval(timerId);
}
current++;
}, 1000);
}
// usage:
printNumbers(5, 10);
Using nested setTimeout:
function printNumbers(from, to) {
let current = from;
setTimeout(function go() {
alert(current);
if (current < to) {
setTimeout(go, 1000);
}
current++;
}, 1000);
}
// usage:
printNumbers(5, 10);
Note that in both solutions, there is an initial delay before the first output.
The function is called after 1000ms the first time.
If we also want the function to run immediately, then we can add an additional call on a separate line, like this:
function printNumbers(from, to) {
let current = from;
function go() {
alert(current);
if (current == to) {
clearInterval(timerId);
}
current++;
}
go();
let timerId = setInterval(go, 1000);
}
printNumbers(5, 10);
What will setTimeout show?
importance: 5
In the code below there's a setTimeout call scheduled, then a heavy calculation is run, that takes more than 100ms to finish.
When will the scheduled function run?
After the loop.
Before the loop.
In the beginning of the loop.
What is alert going to show?
let i = 0;
setTimeout(() => alert(i), 100); // ?
// assume that the time to execute this function is >100ms
for(let j = 0; j < 100000000; j++) {
i++;
}
Any setTimeout will run only after the current code has finished.
The i will be the last one: 100000000.
let i = 0;
setTimeout(() => alert(i), 100); // 100000000
// assume that the time to execute this function is >100ms
for(let j = 0; j < 100000000; j++) {
i++;
}Advanced working with functions
Decorators and forwarding, call/apply
JavaScript gives exceptional flexibility when dealing with functions.
They can be passed around, used as objects, and now we'll see how to forward calls between them and decorate them.
- Transparent caching
Let's say we have a function slow(x) which is CPU-heavy, but its results are stable.
In other words, for the same x it always returns the same result.
If the function is called often, we may want to cache (remember) the results to avoid spending extra-time on recalculations.
But instead of adding that functionality into slow() we'll create a wrapper function, that adds caching.
As we'll see, there are many benefits of doing so.
Here's the code, and explanations follow:
function slow(x) {
// there can be a heavy CPU-intensive job here
alert(`Called with ${x}`);
return x;
}
function cachingDecorator(func) {
let cache = new Map();
return function(x) {
if (cache.has(x)) { // if there's such key in cache
return cache.get(x); // read the result from it
}
let result = func(x); // otherwise call func
cache.set(x, result); // and cache (remember) the result
return result;
};
}
slow = cachingDecorator(slow);
alert( slow(1) ); // slow(1) is cached
alert( "Again: " + slow(1) ); // the same
alert( slow(2) ); // slow(2) is cached
alert( "Again: " + slow(2) ); // the same as the previous line
In the code above cachingDecorator is a decorator: a special function that takes another function and alters its behavior.
The idea is that we can call cachingDecorator for any function, and it will return the caching wrapper.
That's great, because we can have many functions that could use such a feature, and all we need to do is to apply cachingDecorator to them.
By separating caching from the main function code we also keep the main code simpler.
The result of cachingDecorator(func) is a “wrapper”: function(x) that “wraps” the call of func(x) into caching logic:
From an outside code, the wrapped slow function still does the same.
It just got a caching aspect added to its behavior.
To summarize, there are several benefits of using a separate cachingDecorator instead of altering the code of slow itself:
The cachingDecorator is reusable.
We can apply it to another function.
The caching logic is separate, it did not increase the complexity of slow itself (if there was any).
We can combine multiple decorators if needed (other decorators will follow).
- Using “func.call” for the context
The caching decorator mentioned above is not suited to work with object methods.
For instance, in the code below worker.slow() stops working after the decoration:
// we'll make worker.slow caching
let worker = {
someMethod() {
return 1;
},
slow(x) {
// scary CPU-heavy task here
alert("Called with " + x);
return x * this.someMethod(); // (*)
}
};
// same code as before
function cachingDecorator(func) {
let cache = new Map();
return function(x) {
if (cache.has(x)) {
return cache.get(x);
}
let result = func(x); // (**)
cache.set(x, result);
return result;
};
}
alert( worker.slow(1) ); // the original method works
worker.slow = cachingDecorator(worker.slow); // now make it caching
alert( worker.slow(2) ); // Whoops! Error: Cannot read property 'someMethod' of undefined
The error occurs in the line (*) that tries to access this.someMethod and fails.
Can you see why?
The reason is that the wrapper calls the original function as func(x) in the line (**).
And, when called like that, the function gets this = undefined.
We would observe a similar symptom if we tried to run:
let func = worker.slow;
func(2);
So, the wrapper passes the call to the original method, but without the context this.
Hence the error.
Let's fix it.
There's a special built-in function method func.call(context, …args) that allows to call a function explicitly setting this.
The syntax is:
func.call(context, arg1, arg2, ...)
It runs func providing the first argument as this, and the next as the arguments.
To put it simply, these two calls do almost the same:
func(1, 2, 3);
func.call(obj, 1, 2, 3)
They both call func with arguments 1, 2 and 3.
The only difference is that func.call also sets this to obj.
As an example, in the code below we call sayHi in the context of different objects: sayHi.call(user) runs sayHi providing this=user, and the next line sets this=admin:
function sayHi() {
alert(this.name);
}
let user = { name: "John" };
let admin = { name: "Admin" };
// use call to pass different objects as "this"
sayHi.call( user ); // John
sayHi.call( admin ); // Admin
And here we use call to call say with the given context and phrase:
function say(phrase) {
alert(this.name + ': ' + phrase);
}
let user = { name: "John" };
// user becomes this, and "Hello" becomes the first argument
say.call( user, "Hello" ); // John: Hello
In our case, we can use call in the wrapper to pass the context to the original function:
let worker = {
someMethod() {
return 1;
},
slow(x) {
alert("Called with " + x);
return x * this.someMethod(); // (*)
}
};
function cachingDecorator(func) {
let cache = new Map();
return function(x) {
if (cache.has(x)) {
return cache.get(x);
}
let result = func.call(this, x); // "this" is passed correctly now
cache.set(x, result);
return result;
};
}
worker.slow = cachingDecorator(worker.slow); // now make it caching
alert( worker.slow(2) ); // works
alert( worker.slow(2) ); // works, doesn't call the original (cached)
Now everything is fine.
To make it all clear, let's see more deeply how this is passed along:
After the decoration worker.slow is now the wrapper function (x) { ...
}.
So when worker.slow(2) is executed, the wrapper gets 2 as an argument and this=worker (it's the object before dot).
Inside the wrapper, assuming the result is not yet cached, func.call(this, x) passes the current this (=worker) and the current argument (=2) to the original method.
- Going multi-argument
Now let's make cachingDecorator even more universal.
Till now it was working only with single-argument functions.
Now how to cache the multi-argument worker.slow method?
let worker = {
slow(min, max) {
return min + max; // scary CPU-hogger is assumed
}
};
// should remember same-argument calls
worker.slow = cachingDecorator(worker.slow);
Previously, for a single argument x we could just cache.set(x, result) to save the result and cache.get(x) to retrieve it.
But now we need to remember the result for a combination of arguments(min,max).
The native Map takes single value only as the key.
There are many solutions possible:
Implement a new (or use a third-party) map-like data structure that is more versatile and allows multi-keys.
Use nested maps: cache.set(min) will be a Map that stores the pair (max, result).
So we can get result as cache.get(min).get(max).
Join two values into one.
In our particular case we can just use a string "min,max" as the Map key.
For flexibility, we can allow to provide a hashing function for the decorator, that knows how to make one value from many.
For many practical applications, the 3rd variant is good enough, so we'll stick to it.
Also we need to pass not just x, but all arguments in func.call.
Let's recall that in a function() we can get a pseudo-array of its arguments as arguments, so func.call(this, x) should be replaced with func.call(this, ...arguments).
Here's a more powerful cachingDecorator:
let worker = {
slow(min, max) {
alert(`Called with ${min},${max}`);
return min + max;
}
};
function cachingDecorator(func, hash) {
let cache = new Map();
return function() {
let key = hash(arguments); // (*)
if (cache.has(key)) {
return cache.get(key);
}
let result = func.call(this, ...arguments); // (**)
cache.set(key, result);
return result;
};
}
function hash(args) {
return args[0] + ',' + args[1];
}
worker.slow = cachingDecorator(worker.slow, hash);
alert( worker.slow(3, 5) ); // works
alert( "Again " + worker.slow(3, 5) ); // same (cached)
Now it works with any number of arguments (though the hash function would also need to be adjusted to allow any number of arguments.
An interesting way to handle this will be covered below).
There are two changes:
In the line (*) it calls hash to create a single key from arguments.
Here we use a simple “joining” function that turns arguments (3, 5) into the key "3,5".
More complex cases may require other hashing functions.
Then (**) uses func.call(this, ...arguments) to pass both the context and all arguments the wrapper got (not just the first one) to the original function.
- func.apply
Instead of func.call(this, ...arguments) we could use func.apply(this, arguments).
The syntax of built-in method func.apply is:
func.apply(context, args)
It runs the func setting this=context and using an array-like object args as the list of arguments.
The only syntax difference between call and apply is that call expects a list of arguments, while apply takes an array-like object with them.
So these two calls are almost equivalent:
func.call(context, ...args); // pass an array as list with spread syntax
func.apply(context, args); // is same as using call
There's only a subtle difference:
The spread syntax ... allows to pass iterableargs as the list to call.
The apply accepts only array-likeargs.
So, where we expect an iterable, call works, and where we expect an array-like, apply works.
And for objects that are both iterable and array-like, like a real array, we can use any of them, but apply will probably be faster, because most JavaScript engines internally optimize it better.
Passing all arguments along with the context to another function is called call forwarding.
That's the simplest form of it:
let wrapper = function() {
return func.apply(this, arguments);
};
When an external code calls such wrapper, it is indistinguishable from the call of the original function func.
- Borrowing a method
Now let's make one more minor improvement in the hashing function:
function hash(args) {
return args[0] + ',' + args[1];
}
As of now, it works only on two arguments.
It would be better if it could glue any number of args.
The natural solution would be to use arr.join method:
function hash(args) {
return args.join();
}
…Unfortunately, that won't work.
Because we are calling hash(arguments), and arguments object is both iterable and array-like, but not a real array.
So calling join on it would fail, as we can see below:
function hash() {
alert( arguments.join() ); // Error: arguments.join is not a function
}
hash(1, 2);
Still, there's an easy way to use array join:
function hash() {
alert( [].join.call(arguments) ); // 1,2
}
hash(1, 2);
The trick is called method borrowing.
We take (borrow) a join method from a regular array ([].join) and use [].join.call to run it in the context of arguments.
Why does it work?
That's because the internal algorithm of the native method arr.join(glue) is very simple.
Taken from the specification almost “as-is”:
Let glue be the first argument or, if no arguments, then a comma ",".
Let result be an empty string.
Append this[0] to result.
Append glue and this[1].
Append glue and this[2].
…Do so until this.length items are glued.
Return result.
So, technically it takes this and joins this[0], this[1] …etc together.
It's intentionally written in a way that allows any array-like this (not a coincidence, many methods follow this practice).
That's why it also works with this=arguments.
- Decorators and function properties
It is generally safe to replace a function or a method with a decorated one, except for one little thing.
If the original function had properties on it, like func.calledCount or whatever, then the decorated one will not provide them.
Because that is a wrapper.
So one needs to be careful if one uses them.
E.g.
in the example above if slow function had any properties on it, then cachingDecorator(slow) is a wrapper without them.
Some decorators may provide their own properties.
E.g.
a decorator may count how many times a function was invoked and how much time it took, and expose this information via wrapper properties.
There exists a way to create decorators that keep access to function properties, but this requires using a special Proxy object to wrap a function.
We'll discuss it later in the article Proxy and Reflect.
- Summary
Decorator is a wrapper around a function that alters its behavior.
The main job is still carried out by the function.
Decorators can be seen as “features” or “aspects” that can be added to a function.
We can add one or add many.
And all this without changing its code!
To implement cachingDecorator, we studied methods:
func.call(context, arg1, arg2…) – calls func with given context and arguments.
func.apply(context, args) – calls func passing context as this and array-like args into a list of arguments.
The generic call forwarding is usually done with apply:
let wrapper = function() {
return original.apply(this, arguments);
};
We also saw an example of method borrowing when we take a method from an object and call it in the context of another object.
It is quite common to take array methods and apply them to arguments.
The alternative is to use rest parameters object that is a real array.
There are many decorators there in the wild.
Check how well you got them by solving the tasks of this chapter.
importance: 5
Create a decorator spy(func) that should return a wrapper that saves all calls to function in its calls property.
Every call is saved as an array of arguments.
For instance:
function work(a, b) {
alert( a + b ); // work is an arbitrary function or method
}
work = spy(work);
work(1, 2); // 3
work(4, 5); // 9
for (let args of work.calls) {
alert( 'call:' + args.join() ); // "call:1,2", "call:4,5"
}
P.S.
That decorator is sometimes useful for unit-testing.
Its advanced form is sinon.spy in Sinon.JS library.
Open a sandbox with tests.
The wrapper returned by spy(f) should store all arguments and then use f.apply to forward the call.
function spy(func) {
function wrapper(...args) {
// using ...args instead of arguments to store "real" array in wrapper.calls
wrapper.calls.push(args);
return func.apply(this, args);
}
wrapper.calls = [];
return wrapper;
}Open the solution with tests in a sandbox.
Delaying decorator
importance: 5
Create a decorator delay(f, ms) that delays each call of f by ms milliseconds.
For instance:
function f(x) {
alert(x);
}
// create wrappers
let f1000 = delay(f, 1000);
let f1500 = delay(f, 1500);
f1000("test"); // shows "test" after 1000ms
f1500("test"); // shows "test" after 1500ms
In other words, delay(f, ms) returns a "delayed by ms" variant of f.
In the code above, f is a function of a single argument, but your solution should pass all arguments and the context this.
Open a sandbox with tests.
The solution:
function delay(f, ms) {
return function() {
setTimeout(() => f.apply(this, arguments), ms);
};
}
let f1000 = delay(alert, 1000);
f1000("test"); // shows "test" after 1000ms
Please note how an arrow function is used here.
As we know, arrow functions do not have own this and arguments, so f.apply(this, arguments) takes this and arguments from the wrapper.
If we pass a regular function, setTimeout would call it without arguments and this=window (assuming we're in the browser).
We still can pass the right this by using an intermediate variable, but that's a little bit more cumbersome:
function delay(f, ms) {
return function(...args) {
let savedThis = this; // store this into an intermediate variable
setTimeout(function() {
f.apply(savedThis, args); // use it here
}, ms);
};
}Open the solution with tests in a sandbox.
Debounce decorator
importance: 5
The result of debounce(f, ms) decorator is a wrapper that suspends calls to f until there's ms milliseconds of inactivity (no calls, “cooldown period”), then invokes f once with the latest arguments.
In other words, debounce is like a secretary that accepts “phone calls”, and waits until there's ms milliseconds of being quiet.
And only then it transfers the latest call information to “the boss” (calls the actual f).
For instance, we had a function f and replaced it with f = debounce(f, 1000).
Then if the wrapped function is called at 0ms, 200ms and 500ms, and then there are no calls, then the actual f will be only called once, at 1500ms.
That is: after the cooldown period of 1000ms from the last call.
…And it will get the arguments of the very last call, other calls are ignored.
Here's the code for it (uses the debounce decorator from the Lodash library):
let f = _.debounce(alert, 1000);
f("a");
setTimeout( () => f("b"), 200);
setTimeout( () => f("c"), 500);
// debounced function waits 1000ms after the last call and then runs: alert("c")
Now a practical example.
Let's say, the user types something, and we'd like to send a request to the server when the input is finished.
There's no point in sending the request for every character typed.
Instead we'd like to wait, and then process the whole result.
In a web-browser, we can setup an event handler – a function that's called on every change of an input field.
Normally, an event handler is called very often, for every typed key.
But if we debounce it by 1000ms, then it will be only called once, after 1000ms after the last input.
In this live example, the handler puts the result into a box below, try it:
See? The second input calls the debounced function, so its content is processed after 1000ms from the last input.
So, debounce is a great way to process a sequence of events: be it a sequence of key presses, mouse movements or something else.
It waits the given time after the last call, and then runs its function, that can process the result.
The task is to implement debounce decorator.
Hint: that's just a few lines if you think about it :)
Open a sandbox with tests.function debounce(func, ms) {
let timeout;
return function() {
clearTimeout(timeout);
timeout = setTimeout(() => func.apply(this, arguments), ms);
};
}
A call to debounce returns a wrapper.
When called, it schedules the original function call after given ms and cancels the previous such timeout.
Open the solution with tests in a sandbox.
Throttle decorator
importance: 5
Create a “throttling” decorator throttle(f, ms) – that returns a wrapper.
When it's called multiple times, it passes the call to f at maximum once per ms milliseconds.
The difference with debounce is that it's completely different decorator:
debounce runs the function once after the “cooldown” period.
Good for processing the final result.
throttle runs it not more often than given ms time.
Good for regular updates that shouldn't be very often.
In other words, throttle is like a secretary that accepts phone calls, but bothers the boss (calls the actual f) not more often than once per ms milliseconds.
Let's check the real-life application to better understand that requirement and to see where it comes from.
For instance, we want to track mouse movements.
In a browser we can setup a function to run at every mouse movement and get the pointer location as it moves.
During an active mouse usage, this function usually runs very frequently, can be something like 100 times per second (every 10 ms).
We'd like to update some information on the web-page when the pointer moves.
…But updating function update() is too heavy to do it on every micro-movement.
There is also no sense in updating more often than once per 100ms.
So we'll wrap it into the decorator: use throttle(update, 100) as the function to run on each mouse move instead of the original update().
The decorator will be called often, but forward the call to update() at maximum once per 100ms.
Visually, it will look like this:
For the first mouse movement the decorated variant immediately passes the call to update.
That's important, the user sees our reaction to their move immediately.
Then as the mouse moves on, until 100ms nothing happens.
The decorated variant ignores calls.
At the end of 100ms – one more update happens with the last coordinates.
Then, finally, the mouse stops somewhere.
The decorated variant waits until 100ms expire and then runs update with last coordinates.
So, quite important, the final mouse coordinates are processed.
A code example:
function f(a) {
console.log(a);
}
// f1000 passes calls to f at maximum once per 1000 ms
let f1000 = throttle(f, 1000);
f1000(1); // shows 1
f1000(2); // (throttling, 1000ms not out yet)
f1000(3); // (throttling, 1000ms not out yet)
// when 1000 ms time out...
// ...outputs 3, intermediate value 2 was ignored
P.S.
Arguments and the context this passed to f1000 should be passed to the original f.
Open a sandbox with tests.function throttle(func, ms) {
let isThrottled = false,
savedArgs,
savedThis;
function wrapper() {
if (isThrottled) { // (2)
savedArgs = arguments;
savedThis = this;
return;
}
func.apply(this, arguments); // (1)
isThrottled = true;
setTimeout(function() {
isThrottled = false; // (3)
if (savedArgs) {
wrapper.apply(savedThis, savedArgs);
savedArgs = savedThis = null;
}
}, ms);
}
return wrapper;
}
A call to throttle(func, ms) returns wrapper.
During the first call, the wrapper just runs func and sets the cooldown state (isThrottled = true).
In this state all calls are memorized in savedArgs/savedThis.
Please note that both the context and the arguments are equally important and should be memorized.
We need them simultaneously to reproduce the call.
After ms milliseconds pass, setTimeout triggers.
The cooldown state is removed (isThrottled = false) and, if we had ignored calls, wrapper is executed with the last memorized arguments and context.
The 3rd step runs not func, but wrapper, because we not only need to execute func, but once again enter the cooldown state and setup the timeout to reset it.
Open the solution with tests in a sandbox.Advanced working with functions
Function binding
When passing object methods as callbacks, for instance to setTimeout, there's a known problem: "losing this".
In this chapter we'll see the ways to fix it.
- Losing “this”
We've already seen examples of losing this.
Once a method is passed somewhere separately from the object – this is lost.
Here's how it may happen with setTimeout:
let user = {
firstName: "John",
sayHi() {
alert(`Hello, ${this.firstName}!`);
}
};
setTimeout(user.sayHi, 1000); // Hello, undefined!
As we can see, the output shows not “John” as this.firstName, but undefined!
That's because setTimeout got the function user.sayHi, separately from the object.
The last line can be rewritten as:
let f = user.sayHi;
setTimeout(f, 1000); // lost user context
The method setTimeout in-browser is a little special: it sets this=window for the function call (for Node.js, this becomes the timer object, but doesn't really matter here).
So for this.firstName it tries to get window.firstName, which does not exist.
In other similar cases, usually this just becomes undefined.
The task is quite typical – we want to pass an object method somewhere else (here – to the scheduler) where it will be called.
How to make sure that it will be called in the right context?
- Solution 1: a wrapper
The simplest solution is to use a wrapping function:
let user = {
firstName: "John",
sayHi() {
alert(`Hello, ${this.firstName}!`);
}
};
setTimeout(function() {
user.sayHi(); // Hello, John!
}, 1000);
Now it works, because it receives user from the outer lexical environment, and then calls the method normally.
The same, but shorter:
setTimeout(() => user.sayHi(), 1000); // Hello, John!
Looks fine, but a slight vulnerability appears in our code structure.
What if before setTimeout triggers (there's one second delay!) user changes value? Then, suddenly, it will call the wrong object!
let user = {
firstName: "John",
sayHi() {
alert(`Hello, ${this.firstName}!`);
}
};
setTimeout(() => user.sayHi(), 1000);
// ...the value of user changes within 1 second
user = {
sayHi() { alert("Another user in setTimeout!"); }
};
// Another user in setTimeout!
The next solution guarantees that such thing won't happen.
- Solution 2: bind
Functions provide a built-in method bind that allows to fix this.
The basic syntax is:
// more complex syntax will come a little later
let boundFunc = func.bind(context);
The result of func.bind(context) is a special function-like “exotic object”, that is callable as function and transparently passes the call to func setting this=context.
In other words, calling boundFunc is like func with fixed this.
For instance, here funcUser passes a call to func with this=user:
let user = {
firstName: "John"
};
function func() {
alert(this.firstName);
}
let funcUser = func.bind(user);
funcUser(); // John
Here func.bind(user) as a “bound variant” of func, with fixed this=user.
All arguments are passed to the original func “as is”, for instance:
let user = {
firstName: "John"
};
function func(phrase) {
alert(phrase + ', ' + this.firstName);
}
// bind this to user
let funcUser = func.bind(user);
funcUser("Hello"); // Hello, John (argument "Hello" is passed, and this=user)
Now let's try with an object method:
let user = {
firstName: "John",
sayHi() {
alert(`Hello, ${this.firstName}!`);
}
};
let sayHi = user.sayHi.bind(user); // (*)
// can run it without an object
sayHi(); // Hello, John!
setTimeout(sayHi, 1000); // Hello, John!
// even if the value of user changes within 1 second
// sayHi uses the pre-bound value which is reference to the old user object
user = {
sayHi() { alert("Another user in setTimeout!"); }
};
In the line (*) we take the method user.sayHi and bind it to user.
The sayHi is a “bound” function, that can be called alone or passed to setTimeout – doesn't matter, the context will be right.
Here we can see that arguments are passed “as is”, only this is fixed by bind:
let user = {
firstName: "John",
say(phrase) {
alert(`${phrase}, ${this.firstName}!`);
}
};
let say = user.say.bind(user);
say("Hello"); // Hello, John ("Hello" argument is passed to say)
say("Bye"); // Bye, John ("Bye" is passed to say)
Convenience method: bindAll
If an object has many methods and we plan to actively pass it around, then we could bind them all in a loop:
for (let key in user) {
if (typeof user[key] == 'function') {
user[key] = user[key].bind(user);
}
}
JavaScript libraries also provide functions for convenient mass binding , e.g.
_.bindAll(object, methodNames) in lodash.
- Partial functions
Until now we have only been talking about binding this.
Let's take it a step further.
We can bind not only this, but also arguments.
That's rarely done, but sometimes can be handy.
The full syntax of bind:
let bound = func.bind(context, [arg1], [arg2], ...);
It allows to bind context as this and starting arguments of the function.
For instance, we have a multiplication function mul(a, b):
function mul(a, b) {
return a * b;
}
Let's use bind to create a function double on its base:
function mul(a, b) {
return a * b;
}
let double = mul.bind(null, 2);
alert( double(3) ); // = mul(2, 3) = 6
alert( double(4) ); // = mul(2, 4) = 8
alert( double(5) ); // = mul(2, 5) = 10
The call to mul.bind(null, 2) creates a new function double that passes calls to mul, fixing null as the context and 2 as the first argument.
Further arguments are passed “as is”.
That's called partial function application – we create a new function by fixing some parameters of the existing one.
Please note that we actually don't use this here.
But bind requires it, so we must put in something like null.
The function triple in the code below triples the value:
function mul(a, b) {
return a * b;
}
let triple = mul.bind(null, 3);
alert( triple(3) ); // = mul(3, 3) = 9
alert( triple(4) ); // = mul(3, 4) = 12
alert( triple(5) ); // = mul(3, 5) = 15
Why do we usually make a partial function?
The benefit is that we can create an independent function with a readable name (double, triple).
We can use it and not provide the first argument every time as it's fixed with bind.
In other cases, partial application is useful when we have a very generic function and want a less universal variant of it for convenience.
For instance, we have a function send(from, to, text).
Then, inside a user object we may want to use a partial variant of it: sendTo(to, text) that sends from the current user.
- Going partial without context
What if we'd like to fix some arguments, but not the context this? For example, for an object method.
The native bind does not allow that.
We can't just omit the context and jump to arguments.
Fortunately, a function partial for binding only arguments can be easily implemented.
Like this:
function partial(func, ...argsBound) {
return function(...args) { // (*)
return func.call(this, ...argsBound, ...args);
}
}
// Usage:
let user = {
firstName: "John",
say(time, phrase) {
alert(`[${time}] ${this.firstName}: ${phrase}!`);
}
};
// add a partial method with fixed time
user.sayNow = partial(user.say, new Date().getHours() + ':' + new Date().getMinutes());
user.sayNow("Hello");
// Something like:
// [10:00] John: Hello!
The result of partial(func[, arg1, arg2...]) call is a wrapper (*) that calls func with:
Same this as it gets (for user.sayNow call it's user)
Then gives it ...argsBound – arguments from the partial call ("10:00")
Then gives it ...args – arguments given to the wrapper ("Hello")
So easy to do it with the spread syntax, right?
Also there's a ready _.partial implementation from lodash library.
- Summary
Method func.bind(context, ...args) returns a “bound variant” of function func that fixes the context this and first arguments if given.
Usually we apply bind to fix this for an object method, so that we can pass it somewhere.
For example, to setTimeout.
When we fix some arguments of an existing function, the resulting (less universal) function is called partially applied or partial.
Partials are convenient when we don't want to repeat the same argument over and over again.
Like if we have a send(from, to) function, and from should always be the same for our task, we can get a partial and go on with it.
importance: 5
What will be the output?
function f() {
alert( this ); // ?
}
let user = {
g: f.bind(null)
};
user.g();
The answer: null.
function f() {
alert( this ); // null
}
let user = {
g: f.bind(null)
};
user.g();
The context of a bound function is hard-fixed.
There's just no way to further change it.
So even while we run user.g(), the original function is called with this=null.
Second bind
importance: 5
Can we change this by additional binding?
What will be the output?
function f() {
alert(this.name);
}
f = f.bind( {name: "John"} ).bind( {name: "Ann" } );
f();
The answer: John.
function f() {
alert(this.name);
}
f = f.bind( {name: "John"} ).bind( {name: "Pete"} );
f(); // John
The exotic bound function object returned by f.bind(...) remembers the context (and arguments if provided) only at creation time.
A function cannot be re-bound.
Function property after bind
importance: 5
There's a value in the property of a function.
Will it change after bind? Why, or why not?
function sayHi() {
alert( this.name );
}
sayHi.test = 5;
let bound = sayHi.bind({
name: "John"
});
alert( bound.test ); // what will be the output? why?
The answer: undefined.
The result of bind is another object.
It does not have the test property.
Fix a function that loses "this"
importance: 5
The call to askPassword() in the code below should check the password and then call user.loginOk/loginFail depending on the answer.
But it leads to an error.
Why?
Fix the highlighted line for everything to start working right (other lines are not to be changed).
function askPassword(ok, fail) {
let password = prompt("Password?", '');
if (password == "rockstar") ok();
else fail();
}
let user = {
name: 'John',
loginOk() {
alert(`${this.name} logged in`);
},
loginFail() {
alert(`${this.name} failed to log in`);
},
};
askPassword(user.loginOk, user.loginFail);
The error occurs because ask gets functions loginOk/loginFail without the object.
When it calls them, they naturally assume this=undefined.
Let's bind the context:
function askPassword(ok, fail) {
let password = prompt("Password?", '');
if (password == "rockstar") ok();
else fail();
}
let user = {
name: 'John',
loginOk() {
alert(`${this.name} logged in`);
},
loginFail() {
alert(`${this.name} failed to log in`);
},
};
askPassword(user.loginOk.bind(user), user.loginFail.bind(user));
Now it works.
An alternative solution could be:
//...
askPassword(() => user.loginOk(), () => user.loginFail());
Usually that also works and looks good.
It's a bit less reliable though in more complex situations where user variable might change afteraskPassword is called, but before the visitor answers and calls () => user.loginOk().
Partial application for login
importance: 5
The task is a little more complex variant of Fix a function that loses "this".
The user object was modified.
Now instead of two functions loginOk/loginFail, it has a single function user.login(true/false).
What should we pass askPassword in the code below, so that it calls user.login(true) as ok and user.login(false) as fail?
function askPassword(ok, fail) {
let password = prompt("Password?", '');
if (password == "rockstar") ok();
else fail();
}
let user = {
name: 'John',
login(result) {
alert( this.name + (result ? ' logged in' : ' failed to log in') );
}
};
askPassword(?, ?); // ?
Your changes should only modify the highlighted fragment.
Either use a wrapper function, an arrow to be concise:
askPassword(() => user.login(true), () => user.login(false));
Now it gets user from outer variables and runs it the normal way.
Or create a partial function from user.login that uses user as the context and has the correct first argument:
askPassword(user.login.bind(user, true), user.login.bind(user, false));Advanced working with functions
Arrow functions revisited
Let's revisit arrow functions.
Arrow functions are not just a “shorthand” for writing small stuff.
They have some very specific and useful features.
JavaScript is full of situations where we need to write a small function that's executed somewhere else.
For instance:
arr.forEach(func) – func is executed by forEach for every array item.
setTimeout(func) – func is executed by the built-in scheduler.
…there are more.
It's in the very spirit of JavaScript to create a function and pass it somewhere.
And in such functions we usually don't want to leave the current context.
That's where arrow functions come in handy.
- Arrow functions have no “this”
As we remember from the chapter Object methods, "this", arrow functions do not have this.
If this is accessed, it is taken from the outside.
For instance, we can use it to iterate inside an object method:
let group = {
title: "Our Group",
students: ["John", "Pete", "Alice"],
showList() {
this.students.forEach(
student => alert(this.title + ': ' + student)
);
}
};
group.showList();
Here in forEach, the arrow function is used, so this.title in it is exactly the same as in the outer method showList.
That is: group.title.
If we used a “regular” function, there would be an error:
let group = {
title: "Our Group",
students: ["John", "Pete", "Alice"],
showList() {
this.students.forEach(function(student) {
// Error: Cannot read property 'title' of undefined
alert(this.title + ': ' + student)
});
}
};
group.showList();
The error occurs because forEach runs functions with this=undefined by default, so the attempt to access undefined.title is made.
That doesn't affect arrow functions, because they just don't have this.
Arrow functions can't run with new
Not having this naturally means another limitation: arrow functions can't be used as constructors.
They can't be called with new.
Arrow functions VS bind
There's a subtle difference between an arrow function => and a regular function called with .bind(this):
.bind(this) creates a “bound version” of the function.
The arrow => doesn't create any binding.
The function simply doesn't have this.
The lookup of this is made exactly the same way as a regular variable search: in the outer lexical environment.
- Arrows have no “arguments”
Arrow functions also have no arguments variable.
That's great for decorators, when we need to forward a call with the current this and arguments.
For instance, defer(f, ms) gets a function and returns a wrapper around it that delays the call by ms milliseconds:
function defer(f, ms) {
return function() {
setTimeout(() => f.apply(this, arguments), ms)
};
}
function sayHi(who) {
alert('Hello, ' + who);
}
let sayHiDeferred = defer(sayHi, 2000);
sayHiDeferred("John"); // Hello, John after 2 seconds
The same without an arrow function would look like:
function defer(f, ms) {
return function(...args) {
let ctx = this;
setTimeout(function() {
return f.apply(ctx, args);
}, ms);
};
}
Here we had to create additional variables args and ctx so that the function inside setTimeout could take them.
- Summary
Arrow functions:
Do not have this
Do not have arguments
Can't be called with new
They also don't have super, but we didn't study it yet.
We will on the chapter Class inheritance
That's because they are meant for short pieces of code that do not have their own “context”, but rather work in the current one.
And they really shine in that use case.
As we know, objects can store properties.
Until now, a property was a simple “key-value” pair to us.
But an object property is actually a more flexible and powerful thing.
In this chapter we'll study additional configuration options, and in the next we'll see how to invisibly turn them into getter/setter functions.
- Property flags
Object properties, besides a value, have three special attributes (so-called “flags”):
writable – if true, the value can be changed, otherwise it's read-only.
enumerable – if true, then listed in loops, otherwise not listed.
configurable – if true, the property can be deleted and these attributes can be modified, otherwise not.
We didn't see them yet, because generally they do not show up.
When we create a property “the usual way”, all of them are true.
But we also can change them anytime.
First, let's see how to get those flags.
The method Object.getOwnPropertyDescriptor allows to query the full information about a property.
The syntax is:
let descriptor = Object.getOwnPropertyDescriptor(obj, propertyName);
obj
The object to get information from.
propertyName
The name of the property.
The returned value is a so-called “property descriptor” object: it contains the value and all the flags.
For instance:
let user = {
name: "John"
};
let descriptor = Object.getOwnPropertyDescriptor(user, 'name');
alert( JSON.stringify(descriptor, null, 2 ) );
/* property descriptor:
{
"value": "John",
"writable": true,
"enumerable": true,
"configurable": true
}
*/
To change the flags, we can use Object.defineProperty.
The syntax is:
Object.defineProperty(obj, propertyName, descriptor)
obj, propertyName
The object and its property to apply the descriptor.
descriptor
Property descriptor object to apply.
If the property exists, defineProperty updates its flags.
Otherwise, it creates the property with the given value and flags; in that case, if a flag is not supplied, it is assumed false.
For instance, here a property name is created with all falsy flags:
let user = {};
Object.defineProperty(user, "name", {
value: "John"
});
let descriptor = Object.getOwnPropertyDescriptor(user, 'name');
alert( JSON.stringify(descriptor, null, 2 ) );
/*
{
"value": "John",
"writable": false,
"enumerable": false,
"configurable": false
}
*/
Compare it with “normally created” user.name above: now all flags are falsy.
If that's not what we want then we'd better set them to true in descriptor.
Now let's see effects of the flags by example.
- Non-writable
Let's make user.name non-writable (can't be reassigned) by changing writable flag:
let user = {
name: "John"
};
Object.defineProperty(user, "name", {
writable: false
});
user.name = "Pete"; // Error: Cannot assign to read only property 'name'
Now no one can change the name of our user, unless they apply their own defineProperty to override ours.
Errors appear only in strict mode
In the non-strict mode, no errors occur when writing to non-writable properties and such.
But the operation still won't succeed.
Flag-violating actions are just silently ignored in non-strict.
Here's the same example, but the property is created from scratch:
let user = { };
Object.defineProperty(user, "name", {
value: "John",
// for new properties we need to explicitly list what's true
enumerable: true,
configurable: true
});
alert(user.name); // John
user.name = "Pete"; // Error
- Non-enumerable
Now let's add a custom toString to user.
Normally, a built-in toString for objects is non-enumerable, it does not show up in for..in.
But if we add a toString of our own, then by default it shows up in for..in, like this:
let user = {
name: "John",
toString() {
return this.name;
}
};
// By default, both our properties are listed:
for (let key in user) alert(key); // name, toString
If we don't like it, then we can set enumerable:false.
Then it won't appear in a for..in loop, just like the built-in one:
let user = {
name: "John",
toString() {
return this.name;
}
};
Object.defineProperty(user, "toString", {
enumerable: false
});
// Now our toString disappears:
for (let key in user) alert(key); // name
Non-enumerable properties are also excluded from Object.keys:
alert(Object.keys(user)); // name
- Non-configurable
The non-configurable flag (configurable:false) is sometimes preset for built-in objects and properties.
A non-configurable property can not be deleted.
For instance, Math.PI is non-writable, non-enumerable and non-configurable:
let descriptor = Object.getOwnPropertyDescriptor(Math, 'PI');
alert( JSON.stringify(descriptor, null, 2 ) );
/*
{
"value": 3.141592653589793,
"writable": false,
"enumerable": false,
"configurable": false
}
*/
So, a programmer is unable to change the value of Math.PI or overwrite it.
Math.PI = 3; // Error
// delete Math.PI won't work either
Making a property non-configurable is a one-way road.
We cannot change it back with defineProperty.
To be precise, non-configurability imposes several restrictions on defineProperty:
Can't change configurable flag.
Can't change enumerable flag.
Can't change writable: false to true (the other way round works).
Can't change get/set for an accessor property (but can assign them if absent).
The idea of “configurable: false” is to prevent changes of property flags and its deletion, while allowing to change its value.
Here user.name is non-configurable, but we can still change it (as it's writable):
let user = {
name: "John"
};
Object.defineProperty(user, "name", {
configurable: false
});
user.name = "Pete"; // works fine
delete user.name; // Error
And here we make user.name a “forever sealed” constant:
let user = {
name: "John"
};
Object.defineProperty(user, "name", {
writable: false,
configurable: false
});
// won't be able to change user.name or its flags
// all this won't work:
user.name = "Pete";
delete user.name;
Object.defineProperty(user, "name", { value: "Pete" });
- Object.defineProperties
There's a method Object.defineProperties(obj, descriptors) that allows to define many properties at once.
The syntax is:
Object.defineProperties(obj, {
prop1: descriptor1,
prop2: descriptor2
// ...
});
For instance:
Object.defineProperties(user, {
name: { value: "John", writable: false },
surname: { value: "Smith", writable: false },
// ...
});
So, we can set many properties at once.
- Object.getOwnPropertyDescriptors
To get all property descriptors at once, we can use the method Object.getOwnPropertyDescriptors(obj).
Together with Object.defineProperties it can be used as a “flags-aware” way of cloning an object:
let clone = Object.defineProperties({}, Object.getOwnPropertyDescriptors(obj));
Normally when we clone an object, we use an assignment to copy properties, like this:
for (let key in user) {
clone[key] = user[key]
}
…But that does not copy flags.
So if we want a “better” clone then Object.defineProperties is preferred.
Another difference is that for..in ignores symbolic properties, but Object.getOwnPropertyDescriptors returns all property descriptors including symbolic ones.
- Sealing an object globally
Property descriptors work at the level of individual properties.
There are also methods that limit access to the whole object:
There are two kinds of object properties.
The first kind is data properties.
We already know how to work with them.
All properties that we've been using until now were data properties.
The second type of properties is something new.
It's accessor properties.
They are essentially functions that execute on getting and setting a value, but look like regular properties to an external code.
- Getters and setters
Accessor properties are represented by “getter” and “setter” methods.
In an object literal they are denoted by get and set:
let obj = {
get propName() {
// getter, the code executed on getting obj.propName
},
set propName(value) {
// setter, the code executed on setting obj.propName = value
}
};
The getter works when obj.propName is read, the setter – when it is assigned.
For instance, we have a user object with name and surname:
let user = {
name: "John",
surname: "Smith"
};
Now we want to add a fullName property, that should be "John Smith".
Of course, we don't want to copy-paste existing information, so we can implement it as an accessor:
let user = {
name: "John",
surname: "Smith",
get fullName() {
return `${this.name} ${this.surname}`;
}
};
alert(user.fullName); // John Smith
From the outside, an accessor property looks like a regular one.
That's the idea of accessor properties.
We don't calluser.fullName as a function, we read it normally: the getter runs behind the scenes.
As of now, fullName has only a getter.
If we attempt to assign user.fullName=, there will be an error:
let user = {
get fullName() {
return `...`;
}
};
user.fullName = "Test"; // Error (property has only a getter)
Let's fix it by adding a setter for user.fullName:
let user = {
name: "John",
surname: "Smith",
get fullName() {
return `${this.name} ${this.surname}`;
},
set fullName(value) {
[this.name, this.surname] = value.split(" ");
}
};
// set fullName is executed with the given value.
user.fullName = "Alice Cooper";
alert(user.name); // Alice
alert(user.surname); // Cooper
As the result, we have a “virtual” property fullName.
It is readable and writable.
- Accessor descriptors
Descriptors for accessor properties are different from those for data properties.
For accessor properties, there is no value or writable, but instead there are get and set functions.
That is, an accessor descriptor may have:
get – a function without arguments, that works when a property is read,
set – a function with one argument, that is called when the property is set,
enumerable – same as for data properties,
configurable – same as for data properties.
For instance, to create an accessor fullName with defineProperty, we can pass a descriptor with get and set:
let user = {
name: "John",
surname: "Smith"
};
Object.defineProperty(user, 'fullName', {
get() {
return `${this.name} ${this.surname}`;
},
set(value) {
[this.name, this.surname] = value.split(" ");
}
});
alert(user.fullName); // John Smith
for(let key in user) alert(key); // name, surname
Please note that a property can be either an accessor (has get/set methods) or a data property (has a value), not both.
If we try to supply both get and value in the same descriptor, there will be an error:
// Error: Invalid property descriptor.
Object.defineProperty({}, 'prop', {
get() {
return 1
},
value: 2
});
- Smarter getters/setters
Getters/setters can be used as wrappers over “real” property values to gain more control over operations with them.
For instance, if we want to forbid too short names for user, we can have a setter name and keep the value in a separate property _name:
let user = {
get name() {
return this._name;
},
set name(value) {
if (value.length < 4) {
alert("Name is too short, need at least 4 characters");
return;
}
this._name = value;
}
};
user.name = "Pete";
alert(user.name); // Pete
user.name = ""; // Name is too short...
So, the name is stored in _name property, and the access is done via getter and setter.
Technically, external code is able to access the name directly by using user._name.
But there is a widely known convention that properties starting with an underscore "_" are internal and should not be touched from outside the object.
- Using for compatibility
One of the great uses of accessors is that they allow to take control over a “regular” data property at any moment by replacing it with a getter and a setter and tweak its behavior.
Imagine we started implementing user objects using data properties name and age:
function User(name, age) {
this.name = name;
this.age = age;
}
let john = new User("John", 25);
alert( john.age ); // 25
…But sooner or later, things may change.
Instead of age we may decide to store birthday, because it's more precise and convenient:
function User(name, birthday) {
this.name = name;
this.birthday = birthday;
}
let john = new User("John", new Date(1992, 6, 1));
Now what to do with the old code that still uses age property?
We can try to find all such places and fix them, but that takes time and can be hard to do if that code is used by many other people.
And besides, age is a nice thing to have in user, right?
Let's keep it.
Adding a getter for age solves the problem:
function User(name, birthday) {
this.name = name;
this.birthday = birthday;
// age is calculated from the current date and birthday
Object.defineProperty(this, "age", {
get() {
let todayYear = new Date().getFullYear();
return todayYear - this.birthday.getFullYear();
}
});
}
let john = new User("John", new Date(1992, 6, 1));
alert( john.birthday ); // birthday is available
alert( john.age ); // ...as well as the age
Now the old code works too and we've got a nice additional property.
In programming, we often want to take something and extend it.
For instance, we have a user object with its properties and methods, and want to make admin and guest as slightly modified variants of it.
We'd like to reuse what we have in user, not copy/reimplement its methods, just build a new object on top of it.
Prototypal inheritance is a language feature that helps in that.
- [[Prototype]]
In JavaScript, objects have a special hidden property [[Prototype]] (as named in the specification), that is either null or references another object.
That object is called “a prototype”:
When we read a property from object, and it's missing, JavaScript automatically takes it from the prototype.
In programming, such thing is called “prototypal inheritance”.
And soon we'll study many examples of such inheritance, as well as cooler language features built upon it.
The property [[Prototype]] is internal and hidden, but there are many ways to set it.
One of them is to use the special name __proto__, like this:
let animal = {
eats: true
};
let rabbit = {
jumps: true
};
rabbit.__proto__ = animal; // sets rabbit.[[Prototype]] = animal
Now if we read a property from rabbit, and it's missing, JavaScript will automatically take it from animal.
For instance:
let animal = {
eats: true
};
let rabbit = {
jumps: true
};
rabbit.__proto__ = animal; // (*)
// we can find both properties in rabbit now:
alert( rabbit.eats ); // true (**)
alert( rabbit.jumps ); // true
Here the line (*) sets animal to be a prototype of rabbit.
Then, when alert tries to read property rabbit.eats(**), it's not in rabbit, so JavaScript follows the [[Prototype]] reference and finds it in animal (look from the bottom up):
Here we can say that "animal is the prototype of rabbit" or "rabbit prototypically inherits from animal".
So if animal has a lot of useful properties and methods, then they become automatically available in rabbit.
Such properties are called “inherited”.
If we have a method in animal, it can be called on rabbit:
let animal = {
eats: true,
walk() {
alert("Animal walk");
}
};
let rabbit = {
jumps: true,
__proto__: animal
};
// walk is taken from the prototype
rabbit.walk(); // Animal walk
The method is automatically taken from the prototype, like this:
The prototype chain can be longer:
let animal = {
eats: true,
walk() {
alert("Animal walk");
}
};
let rabbit = {
jumps: true,
__proto__: animal
};
let longEar = {
earLength: 10,
__proto__: rabbit
};
// walk is taken from the prototype chain
longEar.walk(); // Animal walk
alert(longEar.jumps); // true (from rabbit)Now if we read something from longEar, and it's missing, JavaScript will look for it in rabbit, and then in animal.
There are only two limitations:
The references can't go in circles.
JavaScript will throw an error if we try to assign __proto__ in a circle.
The value of __proto__ can be either an object or null.
Other types are ignored.
Also it may be obvious, but still: there can be only one [[Prototype]].
An object may not inherit from two others.
__proto__ is a historical getter/setter for [[Prototype]]
It's a common mistake of novice developers not to know the difference between these two.
Please note that __proto__ is not the same as the internal [[Prototype]] property.
It's a getter/setter for [[Prototype]].
Later we'll see situations where it matters, for now let's just keep it in mind, as we build our understanding of JavaScript language.
The __proto__ property is a bit outdated.
It exists for historical reasons, modern JavaScript suggests that we should use Object.getPrototypeOf/Object.setPrototypeOf functions instead that get/set the prototype.
We'll also cover these functions later.
By the specification, __proto__ must only be supported by browsers.
In fact though, all environments including server-side support __proto__, so we're quite safe using it.
As the __proto__ notation is a bit more intuitively obvious, we use it in the examples.
- Writing doesn't use prototype
The prototype is only used for reading properties.
Write/delete operations work directly with the object.
In the example below, we assign its own walk method to rabbit:
let animal = {
eats: true,
walk() {
/* this method won't be used by rabbit */
}
};
let rabbit = {
__proto__: animal
};
rabbit.walk = function() {
alert("Rabbit! Bounce-bounce!");
};
rabbit.walk(); // Rabbit! Bounce-bounce!
From now on, rabbit.walk() call finds the method immediately in the object and executes it, without using the prototype:
Accessor properties are an exception, as assignment is handled by a setter function.
So writing to such a property is actually the same as calling a function.
For that reason admin.fullName works correctly in the code below:
let user = {
name: "John",
surname: "Smith",
set fullName(value) {
[this.name, this.surname] = value.split(" ");
},
get fullName() {
return `${this.name} ${this.surname}`;
}
};
let admin = {
__proto__: user,
isAdmin: true
};
alert(admin.fullName); // John Smith (*)
// setter triggers!
admin.fullName = "Alice Cooper"; // (**)
alert(admin.fullName); // Alice Cooper, state of admin modified
alert(user.fullName); // John Smith, state of user protected
Here in the line (*) the property admin.fullName has a getter in the prototype user, so it is called.
And in the line (**) the property has a setter in the prototype, so it is called.
- The value of “this”
An interesting question may arise in the example above: what's the value of this inside set fullName(value)? Where are the properties this.name and this.surname written: into user or admin?
The answer is simple: this is not affected by prototypes at all.
No matter where the method is found: in an object or its prototype.
In a method call, this is always the object before the dot.
So, the setter call admin.fullName= uses admin as this, not user.
That is actually a super-important thing, because we may have a big object with many methods, and have objects that inherit from it.
And when the inheriting objects run the inherited methods, they will modify only their own states, not the state of the big object.
For instance, here animal represents a “method storage”, and rabbit makes use of it.
The call rabbit.sleep() sets this.isSleeping on the rabbit object:
// animal has methods
let animal = {
walk() {
if (!this.isSleeping) {
alert(`I walk`);
}
},
sleep() {
this.isSleeping = true;
}
};
let rabbit = {
name: "White Rabbit",
__proto__: animal
};
// modifies rabbit.isSleeping
rabbit.sleep();
alert(rabbit.isSleeping); // true
alert(animal.isSleeping); // undefined (no such property in the prototype)
The resulting picture:
If we had other objects, like bird, snake, etc., inheriting from animal, they would also gain access to methods of animal.
But this in each method call would be the corresponding object, evaluated at the call-time (before dot), not animal.
So when we write data into this, it is stored into these objects.
As a result, methods are shared, but the object state is not.
- for…in loop
The for..in loop iterates over inherited properties too.
For instance:
let animal = {
eats: true
};
let rabbit = {
jumps: true,
__proto__: animal
};
// Object.keys only returns own keys
alert(Object.keys(rabbit)); // jumps
// for..in loops over both own and inherited keys
for(let prop in rabbit) alert(prop); // jumps, then eats
If that's not what we want, and we'd like to exclude inherited properties, there's a built-in method obj.hasOwnProperty(key): it returns true if obj has its own (not inherited) property named key.
So we can filter out inherited properties (or do something else with them):
let animal = {
eats: true
};
let rabbit = {
jumps: true,
__proto__: animal
};
for(let prop in rabbit) {
let isOwn = rabbit.hasOwnProperty(prop);
if (isOwn) {
alert(`Our: ${prop}`); // Our: jumps
} else {
alert(`Inherited: ${prop}`); // Inherited: eats
}
}
Here we have the following inheritance chain: rabbit inherits from animal, that inherits from Object.prototype (because animal is a literal object {...}, so it's by default), and then null above it:
Note, there's one funny thing.
Where is the method rabbit.hasOwnProperty coming from? We did not define it.
Looking at the chain we can see that the method is provided by Object.prototype.hasOwnProperty.
In other words, it's inherited.
…But why does hasOwnProperty not appear in the for..in loop like eats and jumps do, if for..in lists inherited properties?
The answer is simple: it's not enumerable.
Just like all other properties of Object.prototype, it has enumerable:false flag.
And for..in only lists enumerable properties.
That's why it and the rest of the Object.prototype properties are not listed.
Almost all other key/value-getting methods ignore inherited properties
Almost all other key/value-getting methods, such as Object.keys, Object.values and so on ignore inherited properties.
They only operate on the object itself.
Properties from the prototype are not taken into account.
- Summary
In JavaScript, all objects have a hidden [[Prototype]] property that's either another object or null.
We can use obj.__proto__ to access it (a historical getter/setter, there are other ways, to be covered soon).
The object referenced by [[Prototype]] is called a “prototype”.
If we want to read a property of obj or call a method, and it doesn't exist, then JavaScript tries to find it in the prototype.
Write/delete operations act directly on the object, they don't use the prototype (assuming it's a data property, not a setter).
If we call obj.method(), and the method is taken from the prototype, this still references obj.
So methods always work with the current object even if they are inherited.
The for..in loop iterates over both its own and its inherited properties.
All other key/value-getting methods only operate on the object itself.
importance: 5
Here's the code that creates a pair of objects, then modifies them.
Which values are shown in the process?
let animal = {
jumps: null
};
let rabbit = {
__proto__: animal,
jumps: true
};
alert( rabbit.jumps ); // ? (1)
delete rabbit.jumps;
alert( rabbit.jumps ); // ? (2)
delete animal.jumps;
alert( rabbit.jumps ); // ? (3)
There should be 3 answers.
true, taken from rabbit.
null, taken from animal.
undefined, there's no such property any more.
Searching algorithm
importance: 5
The task has two parts.
Given the following objects:
let head = {
glasses: 1
};
let table = {
pen: 3
};
let bed = {
sheet: 1,
pillow: 2
};
let pockets = {
money: 2000
};
Use __proto__ to assign prototypes in a way that any property lookup will follow the path: pockets → bed → table → head.
For instance, pockets.pen should be 3 (found in table), and bed.glasses should be 1 (found in head).
Answer the question: is it faster to get glasses as pockets.glasses or head.glasses? Benchmark if needed.
Let's add __proto__:
let head = {
glasses: 1
};
let table = {
pen: 3,
__proto__: head
};
let bed = {
sheet: 1,
pillow: 2,
__proto__: table
};
let pockets = {
money: 2000,
__proto__: bed
};
alert( pockets.pen ); // 3
alert( bed.glasses ); // 1
alert( table.money ); // undefined
In modern engines, performance-wise, there's no difference whether we take a property from an object or its prototype.
They remember where the property was found and reuse it in the next request.
For instance, for pockets.glasses they remember where they found glasses (in head), and next time will search right there.
They are also smart enough to update internal caches if something changes, so that optimization is safe.
Where does it write?
importance: 5
We have rabbit inheriting from animal.
If we call rabbit.eat(), which object receives the full property: animal or rabbit?
let animal = {
eat() {
this.full = true;
}
};
let rabbit = {
__proto__: animal
};
rabbit.eat();The answer: rabbit.
That's because this is an object before the dot, so rabbit.eat() modifies rabbit.
Property lookup and execution are two different things.
The method rabbit.eat is first found in the prototype, then executed with this=rabbit.
Why are both hamsters full?
importance: 5
We have two hamsters: speedy and lazy inheriting from the general hamster object.
When we feed one of them, the other one is also full.
Why? How can we fix it?
let hamster = {
stomach: [],
eat(food) {
this.stomach.push(food);
}
};
let speedy = {
__proto__: hamster
};
let lazy = {
__proto__: hamster
};
// This one found the food
speedy.eat("apple");
alert( speedy.stomach ); // apple
// This one also has it, why? fix please.
alert( lazy.stomach ); // apple
Let's look carefully at what's going on in the call speedy.eat("apple").
The method speedy.eat is found in the prototype (=hamster), then executed with this=speedy (the object before the dot).
Then this.stomach.push() needs to find stomach property and call push on it.
It looks for stomach in this (=speedy), but nothing found.
Then it follows the prototype chain and finds stomach in hamster.
Then it calls push on it, adding the food into the stomach of the prototype.
So all hamsters share a single stomach!
Both for lazy.stomach.push(...) and speedy.stomach.push(), the property stomach is found in the prototype (as it's not in the object itself), then the new data is pushed into it.
Please note that such thing doesn't happen in case of a simple assignment this.stomach=:
let hamster = {
stomach: [],
eat(food) {
// assign to this.stomach instead of this.stomach.push
this.stomach = [food];
}
};
let speedy = {
__proto__: hamster
};
let lazy = {
__proto__: hamster
};
// Speedy one found the food
speedy.eat("apple");
alert( speedy.stomach ); // apple
// Lazy one's stomach is empty
alert( lazy.stomach ); // <nothing>
Now all works fine, because this.stomach= does not perform a lookup of stomach.
The value is written directly into this object.
Also we can totally avoid the problem by making sure that each hamster has their own stomach:
let hamster = {
stomach: [],
eat(food) {
this.stomach.push(food);
}
};
let speedy = {
__proto__: hamster,
stomach: []
};
let lazy = {
__proto__: hamster,
stomach: []
};
// Speedy one found the food
speedy.eat("apple");
alert( speedy.stomach ); // apple
// Lazy one's stomach is empty
alert( lazy.stomach ); // <nothing>
As a common solution, all properties that describe the state of a particular object, like stomach above, should be written into that object.
That prevents such problems.
Prototypes, inheritance
F.prototype
Remember, new objects can be created with a constructor function, like new F().
If F.prototype is an object, then the new operator uses it to set [[Prototype]] for the new object.
Please note:
JavaScript had prototypal inheritance from the beginning.
It was one of the core features of the language.
But in the old times, there was no direct access to it.
The only thing that worked reliably was a "prototype" property of the constructor function, described in this chapter.
So there are many scripts that still use it.
Please note that F.prototype here means a regular property named "prototype" on F.
It sounds something similar to the term “prototype”, but here we really mean a regular property with this name.
Here's the example:
let animal = {
eats: true
};
function Rabbit(name) {
this.name = name;
}
Rabbit.prototype = animal;
let rabbit = new Rabbit("White Rabbit"); // rabbit.__proto__ == animal
alert( rabbit.eats ); // true
Setting Rabbit.prototype = animal literally states the following: "When a new Rabbit is created, assign its [[Prototype]] to animal".
That's the resulting picture:
On the picture, "prototype" is a horizontal arrow, meaning a regular property, and [[Prototype]] is vertical, meaning the inheritance of rabbit from animal.
F.prototype only used at new F time
F.prototype property is only used when new F is called, it assigns [[Prototype]] of the new object.
If, after the creation, F.prototype property changes (F.prototype = <another object>), then new objects created by new F will have another object as [[Prototype]], but already existing objects keep the old one.
- Default F.prototype, constructor property
Every function has the "prototype" property even if we don't supply it.
The default "prototype" is an object with the only property constructor that points back to the function itself.
Like this:
function Rabbit() {}
/* default prototype
Rabbit.prototype = { constructor: Rabbit };
*/We can check it:
function Rabbit() {}
// by default:
// Rabbit.prototype = { constructor: Rabbit }
alert( Rabbit.prototype.constructor == Rabbit ); // true
Naturally, if we do nothing, the constructor property is available to all rabbits through [[Prototype]]:
function Rabbit() {}
// by default:
// Rabbit.prototype = { constructor: Rabbit }
let rabbit = new Rabbit(); // inherits from {constructor: Rabbit}
alert(rabbit.constructor == Rabbit); // true (from prototype)We can use constructor property to create a new object using the same constructor as the existing one.
Like here:
function Rabbit(name) {
this.name = name;
alert(name);
}
let rabbit = new Rabbit("White Rabbit");
let rabbit2 = new rabbit.constructor("Black Rabbit");
That's handy when we have an object, don't know which constructor was used for it (e.g.
it comes from a 3rd party library), and we need to create another one of the same kind.
But probably the most important thing about "constructor" is that…
…JavaScript itself does not ensure the right "constructor" value.
Yes, it exists in the default "prototype" for functions, but that's all.
What happens with it later – is totally on us.
In particular, if we replace the default prototype as a whole, then there will be no "constructor" in it.
For instance:
function Rabbit() {}
Rabbit.prototype = {
jumps: true
};
let rabbit = new Rabbit();
alert(rabbit.constructor === Rabbit); // false
So, to keep the right "constructor" we can choose to add/remove properties to the default "prototype" instead of overwriting it as a whole:
function Rabbit() {}
// Not overwrite Rabbit.prototype totally
// just add to it
Rabbit.prototype.jumps = true
// the default Rabbit.prototype.constructor is preserved
Or, alternatively, recreate the constructor property manually:
Rabbit.prototype = {
jumps: true,
constructor: Rabbit
};
// now constructor is also correct, because we added it
- Summary
In this chapter we briefly described the way of setting a [[Prototype]] for objects created via a constructor function.
Later we'll see more advanced programming patterns that rely on it.
Everything is quite simple, just a few notes to make things clear:
The F.prototype property (don't mistake it for [[Prototype]]) sets [[Prototype]] of new objects when new F() is called.
The value of F.prototype should be either an object or null: other values won't work.
The "prototype" property only has such a special effect when set on a constructor function, and invoked with new.
On regular objects the prototype is nothing special:
let user = {
name: "John",
prototype: "Bla-bla" // no magic at all
};
By default all functions have F.prototype = { constructor: F }, so we can get the constructor of an object by accessing its "constructor" property.
importance: 5
In the code below we create new Rabbit, and then try to modify its prototype.
In the start, we have this code:
function Rabbit() {}
Rabbit.prototype = {
eats: true
};
let rabbit = new Rabbit();
alert( rabbit.eats ); // true
We added one more string (emphasized).
What will alert show now?
function Rabbit() {}
Rabbit.prototype = {
eats: true
};
let rabbit = new Rabbit();
Rabbit.prototype = {};
alert( rabbit.eats ); // ?
…And if the code is like this (replaced one line)?
function Rabbit() {}
Rabbit.prototype = {
eats: true
};
let rabbit = new Rabbit();
Rabbit.prototype.eats = false;
alert( rabbit.eats ); // ?
And like this (replaced one line)?
function Rabbit() {}
Rabbit.prototype = {
eats: true
};
let rabbit = new Rabbit();
delete rabbit.eats;
alert( rabbit.eats ); // ?
The last variant:
function Rabbit() {}
Rabbit.prototype = {
eats: true
};
let rabbit = new Rabbit();
delete Rabbit.prototype.eats;
alert( rabbit.eats ); // ?
Answers:
true.
The assignment to Rabbit.prototype sets up [[Prototype]] for new objects, but it does not affect the existing ones.
false.
Objects are assigned by reference.
The object from Rabbit.prototype is not duplicated, it's still a single object referenced both by Rabbit.prototype and by the [[Prototype]] of rabbit.
So when we change its content through one reference, it is visible through the other one.
true.
All delete operations are applied directly to the object.
Here delete rabbit.eats tries to remove eats property from rabbit, but it doesn't have it.
So the operation won't have any effect.
undefined.
The property eats is deleted from the prototype, it doesn't exist any more.
Create an object with the same constructor
importance: 5
Imagine, we have an arbitrary object obj, created by a constructor function – we don't know which one, but we'd like to create a new object using it.
Can we do it like that?
let obj2 = new obj.constructor();
Give an example of a constructor function for obj which lets such code work right.
And an example that makes it work wrong.
We can use such approach if we are sure that "constructor" property has the correct value.
For instance, if we don't touch the default "prototype", then this code works for sure:
function User(name) {
this.name = name;
}
let user = new User('John');
let user2 = new user.constructor('Pete');
alert( user2.name ); // Pete (worked!)
It worked, because User.prototype.constructor == User.
…But if someone, so to speak, overwrites User.prototype and forgets to recreate constructor to reference User, then it would fail.
For instance:
function User(name) {
this.name = name;
}
User.prototype = {}; // (*)
let user = new User('John');
let user2 = new user.constructor('Pete');
alert( user2.name ); // undefined
Why user2.name is undefined?
Here's how new user.constructor('Pete') works:
First, it looks for constructor in user.
Nothing.
Then it follows the prototype chain.
The prototype of user is User.prototype, and it also has nothing.
The value of User.prototype is a plain object {}, its prototype is Object.prototype.
And there is Object.prototype.constructor == Object.
So it is used.
At the end, we have let user2 = new Object('Pete').
The built-in Object constructor ignores arguments, it always creates an empty object, similar to let user2 = {}, that's what we have in user2 after all.
Prototypes, inheritance
Native prototypes
The "prototype" property is widely used by the core of JavaScript itself.
All built-in constructor functions use it.
First we'll see at the details, and then how to use it for adding new capabilities to built-in objects.
- Object.prototype
Let's say we output an empty object:
let obj = {};
alert( obj ); // "[object Object]" ?
Where's the code that generates the string "[object Object]"? That's a built-in toString method, but where is it? The obj is empty!
…But the short notation obj = {} is the same as obj = new Object(), where Object is a built-in object constructor function, with its own prototype referencing a huge object with toString and other methods.
Here's what's going on:
When new Object() is called (or a literal object {...} is created), the [[Prototype]] of it is set to Object.prototype according to the rule that we discussed in the previous chapter:
So then when obj.toString() is called the method is taken from Object.prototype.
We can check it like this:
let obj = {};
alert(obj.__proto__ === Object.prototype); // true
alert(obj.toString === obj.__proto__.toString); //true
alert(obj.toString === Object.prototype.toString); //true
Please note that there is no more [[Prototype]] in the chain above Object.prototype:
alert(Object.prototype.__proto__); // null
- Other built-in prototypes
Other built-in objects such as Array, Date, Function and others also keep methods in prototypes.
For instance, when we create an array [1, 2, 3], the default new Array() constructor is used internally.
So Array.prototype becomes its prototype and provides methods.
That's very memory-efficient.
By specification, all of the built-in prototypes have Object.prototype on the top.
That's why some people say that “everything inherits from objects”.
Here's the overall picture (for 3 built-ins to fit):
Let's check the prototypes manually:
let arr = [1, 2, 3];
// it inherits from Array.prototype?
alert( arr.__proto__ === Array.prototype ); // true
// then from Object.prototype?
alert( arr.__proto__.__proto__ === Object.prototype ); // true
// and null on the top.
alert( arr.__proto__.__proto__.__proto__ ); // null
Some methods in prototypes may overlap, for instance, Array.prototype has its own toString that lists comma-delimited elements:
let arr = [1, 2, 3]
alert(arr); // 1,2,3 <-- the result of Array.prototype.toString
As we've seen before, Object.prototype has toString as well, but Array.prototype is closer in the chain, so the array variant is used.
In-browser tools like Chrome developer console also show inheritance (console.dir may need to be used for built-in objects):
Other built-in objects also work the same way.
Even functions – they are objects of a built-in Function constructor, and their methods (call/apply and others) are taken from Function.prototype.
Functions have their own toString too.
function f() {}
alert(f.__proto__ == Function.prototype); // true
alert(f.__proto__.__proto__ == Object.prototype); // true, inherit from objects
- Primitives
The most intricate thing happens with strings, numbers and booleans.
As we remember, they are not objects.
But if we try to access their properties, temporary wrapper objects are created using built-in constructors String, Number and Boolean.
They provide the methods and disappear.
These objects are created invisibly to us and most engines optimize them out, but the specification describes it exactly this way.
Methods of these objects also reside in prototypes, available as String.prototype, Number.prototype and Boolean.prototype.
Values null and undefined have no object wrappers
Special values null and undefined stand apart.
They have no object wrappers, so methods and properties are not available for them.
And there are no corresponding prototypes either.
- Changing native prototypes
Native prototypes can be modified.
For instance, if we add a method to String.prototype, it becomes available to all strings:
String.prototype.show = function() {
alert(this);
};
"BOOM!".show(); // BOOM!
During the process of development, we may have ideas for new built-in methods we'd like to have, and we may be tempted to add them to native prototypes.
But that is generally a bad idea.
Important:
Prototypes are global, so it's easy to get a conflict.
If two libraries add a method String.prototype.show, then one of them will be overwriting the method of the other.
So, generally, modifying a native prototype is considered a bad idea.
In modern programming, there is only one case where modifying native prototypes is approved.
That's polyfilling.
Polyfilling is a term for making a substitute for a method that exists in the JavaScript specification, but is not yet supported by a particular JavaScript engine.
We may then implement it manually and populate the built-in prototype with it.
For instance:
if (!String.prototype.repeat) { // if there's no such method
// add it to the prototype
String.prototype.repeat = function(n) {
// repeat the string n times
// actually, the code should be a little bit more complex than that
// (the full algorithm is in the specification)
// but even an imperfect polyfill is often considered good enough
return new Array(n + 1).join(this);
};
}
alert( "La".repeat(3) ); // LaLaLa
- Borrowing from prototypes
In the chapter Decorators and forwarding, call/apply we talked about method borrowing.
That's when we take a method from one object and copy it into another.
Some methods of native prototypes are often borrowed.
For instance, if we're making an array-like object, we may want to copy some Array methods to it.
E.g.
let obj = {
0: "Hello",
1: "world!",
length: 2,
};
obj.join = Array.prototype.join;
alert( obj.join(',') ); // Hello,world!
It works because the internal algorithm of the built-in join method only cares about the correct indexes and the length property.
It doesn't check if the object is indeed an array.
Many built-in methods are like that.
Another possibility is to inherit by setting obj.__proto__ to Array.prototype, so all Array methods are automatically available in obj.
But that's impossible if obj already inherits from another object.
Remember, we only can inherit from one object at a time.
Borrowing methods is flexible, it allows to mix functionalities from different objects if needed.
- Summary
All built-in objects follow the same pattern:
The methods are stored in the prototype (Array.prototype, Object.prototype, Date.prototype, etc.)
The object itself stores only the data (array items, object properties, the date)
Primitives also store methods in prototypes of wrapper objects: Number.prototype, String.prototype and Boolean.prototype.
Only undefined and null do not have wrapper objects
Built-in prototypes can be modified or populated with new methods.
But it's not recommended to change them.
The only allowable case is probably when we add-in a new standard, but it's not yet supported by the JavaScript engine
importance: 5
Add to the prototype of all functions the method defer(ms), that runs the function after ms milliseconds.
After you do it, such code should work:
function f() {
alert("Hello!");
}
f.defer(1000); // shows "Hello!" after 1 secondFunction.prototype.defer = function(ms) {
setTimeout(this, ms);
};
function f() {
alert("Hello!");
}
f.defer(1000); // shows "Hello!" after 1 sec
Add the decorating "defer()" to functions
importance: 4
Add to the prototype of all functions the method defer(ms), that returns a wrapper, delaying the call by ms milliseconds.
Here's an example of how it should work:
function f(a, b) {
alert( a + b );
}
f.defer(1000)(1, 2); // shows 3 after 1 second
Please note that the arguments should be passed to the original function.
Function.prototype.defer = function(ms) {
let f = this;
return function(...args) {
setTimeout(() => f.apply(this, args), ms);
}
};
// check it
function f(a, b) {
alert( a + b );
}
f.defer(1000)(1, 2); // shows 3 after 1 sec
Please note: we use this in f.apply to make our decoration work for object methods.
So if the wrapper function is called as an object method, then this is passed to the original method f.
Function.prototype.defer = function(ms) {
let f = this;
return function(...args) {
setTimeout(() => f.apply(this, args), ms);
}
};
let user = {
name: "John",
sayHi() {
alert(this.name);
}
}
user.sayHi = user.sayHi.defer(1000);
user.sayHi();Prototypes, inheritance
Prototype methods, objects without __proto__
In the first chapter of this section, we mentioned that there are modern methods to setup a prototype.
The __proto__ is considered outdated and somewhat deprecated (in browser-only part of the JavaScript standard).
The modern methods are:
Object.create(proto, [descriptors]) – creates an empty object with given proto as [[Prototype]] and optional property descriptors.
Object.getPrototypeOf(obj) – returns the [[Prototype]] of obj.
Object.setPrototypeOf(obj, proto) – sets the [[Prototype]] of obj to proto.
These should be used instead of __proto__.
For instance:
let animal = {
eats: true
};
// create a new object with animal as a prototype
let rabbit = Object.create(animal);
alert(rabbit.eats); // true
alert(Object.getPrototypeOf(rabbit) === animal); // true
Object.setPrototypeOf(rabbit, {}); // change the prototype of rabbit to {}Object.create has an optional second argument: property descriptors.
We can provide additional properties to the new object there, like this:
let animal = {
eats: true
};
let rabbit = Object.create(animal, {
jumps: {
value: true
}
});
alert(rabbit.jumps); // true
The descriptors are in the same format as described in the chapter Property flags and descriptors.
We can use Object.create to perform an object cloning more powerful than copying properties in for..in:
let clone = Object.create(Object.getPrototypeOf(obj), Object.getOwnPropertyDescriptors(obj));
This call makes a truly exact copy of obj, including all properties: enumerable and non-enumerable, data properties and setters/getters – everything, and with the right [[Prototype]].
- Brief history
If we count all the ways to manage [[Prototype]], there are a lot! Many ways to do the same thing!
Why?
That's for historical reasons.
The "prototype" property of a constructor function has worked since very ancient times.
Later, in the year 2012, Object.create appeared in the standard.
It gave the ability to create objects with a given prototype, but did not provide the ability to get/set it.
So browsers implemented the non-standard __proto__ accessor that allowed the user to get/set a prototype at any time.
Later, in the year 2015, Object.setPrototypeOf and Object.getPrototypeOf were added to the standard, to perform the same functionality as __proto__.
As __proto__ was de-facto implemented everywhere, it was kind-of deprecated and made its way to the Annex B of the standard, that is: optional for non-browser environments.
As of now we have all these ways at our disposal.
Why was __proto__ replaced by the functions getPrototypeOf/setPrototypeOf? That's an interesting question, requiring us to understand why __proto__ is bad.
Read on to get the answer.
Don't change [[Prototype]] on existing objects if speed matters
Technically, we can get/set [[Prototype]] at any time.
But usually we only set it once at the object creation time and don't modify it anymore: rabbit inherits from animal, and that is not going to change.
And JavaScript engines are highly optimized for this.
Changing a prototype “on-the-fly” with Object.setPrototypeOf or obj.__proto__= is a very slow operation as it breaks internal optimizations for object property access operations.
So avoid it unless you know what you're doing, or JavaScript speed totally doesn't matter for you.
- "Very plain" objects
As we know, objects can be used as associative arrays to store key/value pairs.
…But if we try to store user-provided keys in it (for instance, a user-entered dictionary), we can see an interesting glitch: all keys work fine except "__proto__".
Check out the example:
let obj = {};
let key = prompt("What's the key?", "__proto__");
obj[key] = "some value";
alert(obj[key]); // [object Object], not "some value"!
Here, if the user types in __proto__, the assignment is ignored!
That shouldn't surprise us.
The __proto__ property is special: it must be either an object or null.
A string can not become a prototype.
But we didn't intend to implement such behavior, right? We want to store key/value pairs, and the key named "__proto__" was not properly saved.
So that's a bug!
Here the consequences are not terrible.
But in other cases we may be assigning object values, and then the prototype may indeed be changed.
As a result, the execution will go wrong in totally unexpected ways.
What's worse – usually developers do not think about such possibility at all.
That makes such bugs hard to notice and even turn them into vulnerabilities, especially when JavaScript is used on server-side.
Unexpected things also may happen when assigning to toString, which is a function by default, and to other built-in methods.
How can we avoid this problem?
First, we can just switch to using Map for storage instead of plain objects, then everything's fine.
But Object can also serve us well here, because language creators gave thought to that problem long ago.
__proto__ is not a property of an object, but an accessor property of Object.prototype:
So, if obj.__proto__ is read or set, the corresponding getter/setter is called from its prototype, and it gets/sets [[Prototype]].
As it was said in the beginning of this tutorial section: __proto__ is a way to access [[Prototype]], it is not [[Prototype]] itself.
Now, if we intend to use an object as an associative array and be free of such problems, we can do it with a little trick:
let obj = Object.create(null);
let key = prompt("What's the key?", "__proto__");
obj[key] = "some value";
alert(obj[key]); // "some value"Object.create(null) creates an empty object without a prototype ([[Prototype]] is null):
So, there is no inherited getter/setter for __proto__.
Now it is processed as a regular data property, so the example above works right.
We can call such objects “very plain” or “pure dictionary” objects, because they are even simpler than the regular plain object {...}.
A downside is that such objects lack any built-in object methods, e.g.
toString:
let obj = Object.create(null);
alert(obj); // Error (no toString)
…But that's usually fine for associative arrays.
Note that most object-related methods are Object.something(...), like Object.keys(obj) – they are not in the prototype, so they will keep working on such objects:
let chineseDictionary = Object.create(null);
chineseDictionary.hello = "你好";
chineseDictionary.bye = "再见";
alert(Object.keys(chineseDictionary)); // hello,bye
- Summary
Modern methods to set up and directly access the prototype are:
Object.create(proto, [descriptors]) – creates an empty object with a given proto as [[Prototype]] (can be null) and optional property descriptors.
Object.getPrototypeOf(obj) – returns the [[Prototype]] of obj (same as __proto__ getter).
Object.setPrototypeOf(obj, proto) – sets the [[Prototype]] of obj to proto (same as __proto__ setter).
The built-in __proto__ getter/setter is unsafe if we'd want to put user-generated keys into an object.
Just because a user may enter "__proto__" as the key, and there'll be an error, with hopefully light, but generally unpredictable consequences.
So we can either use Object.create(null) to create a “very plain” object without __proto__, or stick to Map objects for that.
Also, Object.create provides an easy way to shallow-copy an object with all descriptors:
let clone = Object.create(Object.getPrototypeOf(obj), Object.getOwnPropertyDescriptors(obj));
We also made it clear that __proto__ is a getter/setter for [[Prototype]] and resides in Object.prototype, just like other methods.
We can create an object without a prototype by Object.create(null).
Such objects are used as “pure dictionaries”, they have no issues with "__proto__" as the key.
Other methods:
Object.keys(obj) / Object.values(obj) / Object.entries(obj) – returns an array of enumerable own string property names/values/key-value pairs.
Object.getOwnPropertySymbols(obj) – returns an array of all own symbolic keys.
Object.getOwnPropertyNames(obj) – returns an array of all own string keys.
Reflect.ownKeys(obj) – returns an array of all own keys.
obj.hasOwnProperty(key): returns true if obj has its own (not inherited) key named key.
All methods that return object properties (like Object.keys and others) – return “own” properties.
If we want inherited ones, we can use for..in.
importance: 5
There's an object dictionary, created as Object.create(null), to store any key/value pairs.
Add method dictionary.toString() into it, that should return a comma-delimited list of keys.
Your toString should not show up in for..in over the object.
Here's how it should work:
let dictionary = Object.create(null);
// your code to add dictionary.toString method
// add some data
dictionary.apple = "Apple";
dictionary.__proto__ = "test"; // __proto__ is a regular property key here
// only apple and __proto__ are in the loop
for(let key in dictionary) {
alert(key); // "apple", then "__proto__"
}
// your toString in action
alert(dictionary); // "apple,__proto__"
The method can take all enumerable keys using Object.keys and output their list.
To make toString non-enumerable, let's define it using a property descriptor.
The syntax of Object.create allows us to provide an object with property descriptors as the second argument.
let dictionary = Object.create(null, {
toString: { // define toString property
value() { // the value is a function
return Object.keys(this).join();
}
}
});
dictionary.apple = "Apple";
dictionary.__proto__ = "test";
// apple and __proto__ is in the loop
for(let key in dictionary) {
alert(key); // "apple", then "__proto__"
}
// comma-separated list of properties by toString
alert(dictionary); // "apple,__proto__"
When we create a property using a descriptor, its flags are false by default.
So in the code above, dictionary.toString is non-enumerable.
See the the chapter Property flags and descriptors for review.
The difference between calls
importance: 5
Let's create a new rabbit object:
function Rabbit(name) {
this.name = name;
}
Rabbit.prototype.sayHi = function() {
alert(this.name);
};
let rabbit = new Rabbit("Rabbit");
These calls do the same thing or not?
rabbit.sayHi();
Rabbit.prototype.sayHi();
Object.getPrototypeOf(rabbit).sayHi();
rabbit.__proto__.sayHi();
The first call has this == rabbit, the other ones have this equal to Rabbit.prototype, because it's actually the object before the dot.
So only the first call shows Rabbit, other ones show undefined:
function Rabbit(name) {
this.name = name;
}
Rabbit.prototype.sayHi = function() {
alert( this.name );
}
let rabbit = new Rabbit("Rabbit");
rabbit.sayHi(); // Rabbit
Rabbit.prototype.sayHi(); // undefined
Object.getPrototypeOf(rabbit).sayHi(); // undefined
rabbit.__proto__.sayHi(); // undefined
In object-oriented programming, a class is an extensible program-code-template for creating objects, providing initial values for state (member variables) and implementations of behavior (member functions or methods).
In practice, we often need to create many objects of the same kind, like users, or goods or whatever.
As we already know from the chapter Constructor, operator "new", new function can help with that.
But in the modern JavaScript, there's a more advanced “class” construct, that introduces great new features which are useful for object-oriented programming.
- The “class” syntax
The basic syntax is:
class MyClass {
// class methods
constructor() { ...
}
method1() { ...
}
method2() { ...
}
method3() { ...
}
...
}
Then use new MyClass() to create a new object with all the listed methods.
The constructor() method is called automatically by new, so we can initialize the object there.
For example:
class User {
constructor(name) {
this.name = name;
}
sayHi() {
alert(this.name);
}
}
// Usage:
let user = new User("John");
user.sayHi();
When new User("John") is called:
A new object is created.
The constructor runs with the given argument and assigns this.name to it.
…Then we can call object methods, such as user.sayHi().
No comma between class methods
A common pitfall for novice developers is to put a comma between class methods, which would result in a syntax error.
The notation here is not to be confused with object literals.
Within the class, no commas are required.
- What is a class?
So, what exactly is a class? That's not an entirely new language-level entity, as one might think.
Let's unveil any magic and see what a class really is.
That'll help in understanding many complex aspects.
In JavaScript, a class is a kind of function.
Here, take a look:
class User {
constructor(name) { this.name = name; }
sayHi() { alert(this.name); }
}
// proof: User is a function
alert(typeof User); // function
What class User {...} construct really does is:
Creates a function named User, that becomes the result of the class declaration.
The function code is taken from the constructor method (assumed empty if we don't write such method).
Stores class methods, such as sayHi, in User.prototype.
After new User object is created, when we call its method, it's taken from the prototype, just as described in the chapter F.prototype.
So the object has access to class methods.
We can illustrate the result of class User declaration as:
Here's the code to introspect it:
class User {
constructor(name) { this.name = name; }
sayHi() { alert(this.name); }
}
// class is a function
alert(typeof User); // function
// ...or, more precisely, the constructor method
alert(User === User.prototype.constructor); // true
// The methods are in User.prototype, e.g:
alert(User.prototype.sayHi); // alert(this.name);
// there are exactly two methods in the prototype
alert(Object.getOwnPropertyNames(User.prototype)); // constructor, sayHi
- Not just a syntactic sugar
Sometimes people say that class is a “syntactic sugar” (syntax that is designed to make things easier to read, but doesn't introduce anything new), because we could actually declare the same without class keyword at all:
// rewriting class User in pure functions
// 1.
Create constructor function
function User(name) {
this.name = name;
}
// a function prototype has "constructor" property by default,
// so we don't need to create it
// 2.
Add the method to prototype
User.prototype.sayHi = function() {
alert(this.name);
};
// Usage:
let user = new User("John");
user.sayHi();
The result of this definition is about the same.
So, there are indeed reasons why class can be considered a syntactic sugar to define a constructor together with its prototype methods.
Still, there are important differences.
First, a function created by class is labelled by a special internal property [[FunctionKind]]:"classConstructor".
So it's not entirely the same as creating it manually.
The language checks for that property in a variety of places.
For example, unlike a regular function, it must be called with new:
class User {
constructor() {}
}
alert(typeof User); // function
User(); // Error: Class constructor User cannot be invoked without 'new'
Also, a string representation of a class constructor in most JavaScript engines starts with the “class…”
class User {
constructor() {}
}
alert(User); // class User { ...
}
There are other differences, we'll see them soon.
Class methods are non-enumerable.
A class definition sets enumerable flag to false for all methods in the "prototype".
That's good, because if we for..in over an object, we usually don't want its class methods.
Classes always use strict.
All code inside the class construct is automatically in strict mode.
Besides, class syntax brings many other features that we'll explore later.
- Class Expression
Just like functions, classes can be defined inside another expression, passed around, returned, assigned, etc.
Here's an example of a class expression:
let User = class {
sayHi() {
alert("Hello");
}
};
Similar to Named Function Expressions, class expressions may have a name.
If a class expression has a name, it's visible inside the class only:
// "Named Class Expression"
// (no such term in the spec, but that's similar to Named Function Expression)
let User = class MyClass {
sayHi() {
alert(MyClass); // MyClass name is visible only inside the class
}
};
new User().sayHi(); // works, shows MyClass definition
alert(MyClass); // error, MyClass name isn't visible outside of the class
We can even make classes dynamically “on-demand”, like this:
function makeClass(phrase) {
// declare a class and return it
return class {
sayHi() {
alert(phrase);
}
};
}
// Create a new class
let User = makeClass("Hello");
new User().sayHi(); // Hello
- Getters/setters
Just like literal objects, classes may include getters/setters, computed properties etc.
Here's an example for user.name implemented using get/set:
class User {
constructor(name) {
// invokes the setter
this.name = name;
}
get name() {
return this._name;
}
set name(value) {
if (value.length < 4) {
alert("Name is too short.");
return;
}
this._name = value;
}
}
let user = new User("John");
alert(user.name); // John
user = new User(""); // Name is too short.
Technically, such class declaration works by creating getters and setters in User.prototype.
- Computed names […]
Here's an example with a computed method name using brackets [...]:
class User {
['say' + 'Hi']() {
alert("Hello");
}
}
new User().sayHi();
Such features are easy to remember, as they resemble that of literal objects.
- Class fields
Old browsers may need a polyfill
Class fields are a recent addition to the language.
Previously, our classes only had methods.
“Class fields” is a syntax that allows to add any properties.
For instance, let's add name property to class User:
class User {
name = "John";
sayHi() {
alert(`Hello, ${this.name}!`);
}
}
new User().sayHi(); // Hello, John!
So, we just write " = " in the declaration, and that's it.
The important difference of class fields is that they are set on individual objects, not User.prototype:
class User {
name = "John";
}
let user = new User();
alert(user.name); // John
alert(User.prototype.name); // undefined
We can also assign values using more complex expressions and function calls:
class User {
name = prompt("Name, please?", "John");
}
let user = new User();
alert(user.name); // John
Making bound methods with class fields
As demonstrated in the chapter Function binding functions in JavaScript have a dynamic this.
It depends on the context of the call.
So if an object method is passed around and called in another context, this won't be a reference to its object any more.
For instance, this code will show undefined:
class Button {
constructor(value) {
this.value = value;
}
click() {
alert(this.value);
}
}
let button = new Button("hello");
setTimeout(button.click, 1000); // undefined
The problem is called "losing this".
There are two approaches to fixing it, as discussed in the chapter Function binding:
Pass a wrapper-function, such as setTimeout(() => button.click(), 1000).
Bind the method to object, e.g.
in the constructor.
Class fields provide another, quite elegant syntax:
class Button {
constructor(value) {
this.value = value;
}
click = () => {
alert(this.value);
}
}
let button = new Button("hello");
setTimeout(button.click, 1000); // hello
The class field click = () => {...} is created on a per-object basis, there's a separate function for each Button object, with this inside it referencing that object.
We can pass button.click around anywhere, and the value of this will always be correct.
That's especially useful in browser environment, for event listeners.
- Summary
The basic class syntax looks like this:
class MyClass {
prop = value; // property
constructor(...) { // constructor
// ...
}
method(...) {} // method
get something(...) {} // getter method
set something(...) {} // setter method
[Symbol.iterator]() {} // method with computed name (symbol here)
// ...
}MyClass is technically a function (the one that we provide as constructor), while methods, getters and setters are written to MyClass.prototype.
In the next chapters we'll learn more about classes, including inheritance and other features.
importance: 5
The Clock class (see the sandbox) is written in functional style.
Rewrite it in the “class” syntax.
P.S.
The clock ticks in the console, open it to see.
Open a sandbox for the task.class Clock {
constructor({ template }) {
this.template = template;
}
render() {
let date = new Date();
let hours = date.getHours();
if (hours < 10) hours = '0' + hours;
let mins = date.getMinutes();
if (mins < 10) mins = '0' + mins;
let secs = date.getSeconds();
if (secs < 10) secs = '0' + secs;
let output = this.template
.replace('h', hours)
.replace('m', mins)
.replace('s', secs);
console.log(output);
}
stop() {
clearInterval(this.timer);
}
start() {
this.render();
this.timer = setInterval(() => this.render(), 1000);
}
}
let clock = new Clock({template: 'h:m:s'});
clock.start();Open the solution in a sandbox.Classes
Class inheritance
Class inheritance is a way for one class to extend another class.
So we can create new functionality on top of the existing.
- The “extends” keyword
Let's say we have class Animal:
class Animal {
constructor(name) {
this.speed = 0;
this.name = name;
}
run(speed) {
this.speed = speed;
alert(`${this.name} runs with speed ${this.speed}.`);
}
stop() {
this.speed = 0;
alert(`${this.name} stands still.`);
}
}
let animal = new Animal("My animal");
Here's how we can represent animal object and Animal class graphically:
…And we would like to create another class Rabbit.
As rabbits are animals, Rabbit class should be based on Animal, have access to animal methods, so that rabbits can do what “generic” animals can do.
The syntax to extend another class is: class Child extends Parent.
Let's create class Rabbit that inherits from Animal:
class Rabbit extends Animal {
hide() {
alert(`${this.name} hides!`);
}
}
let rabbit = new Rabbit("White Rabbit");
rabbit.run(5); // White Rabbit runs with speed 5.
rabbit.hide(); // White Rabbit hides!
Object of Rabbit class have access to both Rabbit methods, such as rabbit.hide(), and also to Animal methods, such as rabbit.run().
Internally, extends keyword works using the good old prototype mechanics.
It sets Rabbit.prototype.[[Prototype]] to Animal.prototype.
So, if a method is not found in Rabbit.prototype, JavaScript takes it from Animal.prototype.
For instance, to find rabbit.run method, the engine checks (bottom-up on the picture):
The rabbit object (has no run).
Its prototype, that is Rabbit.prototype (has hide, but not run).
Its prototype, that is (due to extends) Animal.prototype, that finally has the run method.
As we can recall from the chapter Native prototypes, JavaScript itself uses prototypal inheritance for built-in objects.
E.g.
Date.prototype.[[Prototype]] is Object.prototype.
That's why dates have access to generic object methods.
Any expression is allowed after extends
Class syntax allows to specify not just a class, but any expression after extends.
For instance, a function call that generates the parent class:
function f(phrase) {
return class {
sayHi() { alert(phrase); }
};
}
class User extends f("Hello") {}
new User().sayHi(); // Hello
Here class User inherits from the result of f("Hello").
That may be useful for advanced programming patterns when we use functions to generate classes depending on many conditions and can inherit from them.
- Overriding a method
Now let's move forward and override a method.
By default, all methods that are not specified in class Rabbit are taken directly “as is” from class Animal.
But if we specify our own method in Rabbit, such as stop() then it will be used instead:
class Rabbit extends Animal {
stop() {
// ...now this will be used for rabbit.stop()
// instead of stop() from class Animal
}
}
Usually we don't want to totally replace a parent method, but rather to build on top of it to tweak or extend its functionality.
We do something in our method, but call the parent method before/after it or in the process.
Classes provide "super" keyword for that.
super.method(...) to call a parent method.
super(...) to call a parent constructor (inside our constructor only).
For instance, let our rabbit autohide when stopped:
class Animal {
constructor(name) {
this.speed = 0;
this.name = name;
}
run(speed) {
this.speed = speed;
alert(`${this.name} runs with speed ${this.speed}.`);
}
stop() {
this.speed = 0;
alert(`${this.name} stands still.`);
}
}
class Rabbit extends Animal {
hide() {
alert(`${this.name} hides!`);
}
stop() {
super.stop(); // call parent stop
this.hide(); // and then hide
}
}
let rabbit = new Rabbit("White Rabbit");
rabbit.run(5); // White Rabbit runs with speed 5.
rabbit.stop(); // White Rabbit stands still.
White Rabbit hides!
Now Rabbit has the stop method that calls the parent super.stop() in the process.
Arrow functions have no super
As was mentioned in the chapter Arrow functions revisited, arrow functions do not have super.
If accessed, it's taken from the outer function.
For instance:
class Rabbit extends Animal {
stop() {
setTimeout(() => super.stop(), 1000); // call parent stop after 1sec
}
}
The super in the arrow function is the same as in stop(), so it works as intended.
If we specified a “regular” function here, there would be an error:
// Unexpected super
setTimeout(function() { super.stop() }, 1000);
- Overriding constructor
With constructors it gets a little bit tricky.
Until now, Rabbit did not have its own constructor.
According to the specification, if a class extends another class and has no constructor, then the following “empty” constructor is generated:
class Rabbit extends Animal {
// generated for extending classes without own constructors
constructor(...args) {
super(...args);
}
}
As we can see, it basically calls the parent constructor passing it all the arguments.
That happens if we don't write a constructor of our own.
Now let's add a custom constructor to Rabbit.
It will specify the earLength in addition to name:
class Animal {
constructor(name) {
this.speed = 0;
this.name = name;
}
// ...
}
class Rabbit extends Animal {
constructor(name, earLength) {
this.speed = 0;
this.name = name;
this.earLength = earLength;
}
// ...
}
// Doesn't work!
let rabbit = new Rabbit("White Rabbit", 10); // Error: this is not defined.
Whoops! We've got an error.
Now we can't create rabbits.
What went wrong?
The short answer is:
Constructors in inheriting classes must call super(...), and (!) do it before using this.
…But why? What's going on here? Indeed, the requirement seems strange.
Of course, there's an explanation.
Let's get into details, so you'll really understand what's going on.
In JavaScript, there's a distinction between a constructor function of an inheriting class (so-called “derived constructor”) and other functions.
A derived constructor has a special internal property [[ConstructorKind]]:"derived".
That's a special internal label.
That label affects its behavior with new.
When a regular function is executed with new, it creates an empty object and assigns it to this.
But when a derived constructor runs, it doesn't do this.
It expects the parent constructor to do this job.
So a derived constructor must call super in order to execute its parent (base) constructor, otherwise the object for this won't be created.
And we'll get an error.
For the Rabbit constructor to work, it needs to call super() before using this, like here:
class Animal {
constructor(name) {
this.speed = 0;
this.name = name;
}
// ...
}
class Rabbit extends Animal {
constructor(name, earLength) {
super(name);
this.earLength = earLength;
}
// ...
}
// now fine
let rabbit = new Rabbit("White Rabbit", 10);
alert(rabbit.name); // White Rabbit
alert(rabbit.earLength); // 10
Overriding class fields: a tricky note
Advanced note
This note assumes you have a certain experience with classes, maybe in other programming languages.
It provides better insight into the language and also explains the behavior that might be a source of bugs (but not very often).
If you find it difficult to understand, just go on, continue reading, then return to it some time later.
We can override not only methods, but also class fields.
Although, there's a tricky behavior when we access an overridden field in parent constructor, quite different from most other programming languages.
Consider this example:
class Animal {
name = 'animal';
constructor() {
alert(this.name); // (*)
}
}
class Rabbit extends Animal {
name = 'rabbit';
}
new Animal(); // animal
new Rabbit(); // animal
Here, class Rabbit extends Animal and overrides name field with its own value.
There's no own constructor in Rabbit, so Animal constructor is called.
What's interesting is that in both cases: new Animal() and new Rabbit(), the alert in the line (*) shows animal.
In other words, parent constructor always uses its own field value, not the overridden one.
What's odd about it?
If it's not clear yet, please compare with methods.
Here's the same code, but instead of this.name field we call this.showName() method:
class Animal {
showName() { // instead of this.name = 'animal'
alert('animal');
}
constructor() {
this.showName(); // instead of alert(this.name);
}
}
class Rabbit extends Animal {
showName() {
alert('rabbit');
}
}
new Animal(); // animal
new Rabbit(); // rabbit
Please note: now the output is different.
And that's what we naturally expect.
When the parent constructor is called in the derived class, it uses the overridden method.
…But for class fields it's not so.
As said, the parent constructor always uses the parent field.
Why is there the difference?
Well, the reason is in the field initialization order.
The class field is initialized:
Before constructor for the base class (that doesn't extend anything),
Immediately after super() for the derived class.
In our case, Rabbit is the derived class.
There's no constructor() in it.
As said previously, that's the same as if there was an empty constructor with only super(...args).
So, new Rabbit() calls super(), thus executing the parent constructor, and (per the rule for derived classes) only after that its class fields are initialized.
At the time of the parent constructor execution, there are no Rabbit class fields yet, that's why Animal fields are used.
This subtle difference between fields and methods is specific to JavaScript
Luckily, this behavior only reveals itself if an overridden field is used in the parent constructor.
Then it may be difficult to understand what's going on, so we're explaining it here.
If it becomes a problem, one can fix it by using methods or getters/setters instead of fields.
- Super: internals, [[HomeObject]]
Advanced information
If you're reading the tutorial for the first time – this section may be skipped.
It's about the internal mechanisms behind inheritance and super.
Let's get a little deeper under the hood of super.
We'll see some interesting things along the way.
First to say, from all that we've learned till now, it's impossible for super to work at all!
Yeah, indeed, let's ask ourselves, how it should technically work? When an object method runs, it gets the current object as this.
If we call super.method() then, the engine needs to get the method from the prototype of the current object.
But how?
The task may seem simple, but it isn't.
The engine knows the current object this, so it could get the parent method as this.__proto__.method.
Unfortunately, such a “naive” solution won't work.
Let's demonstrate the problem.
Without classes, using plain objects for the sake of simplicity.
You may skip this part and go below to the [[HomeObject]] subsection if you don't want to know the details.
That won't harm.
Or read on if you're interested in understanding things in-depth.
In the example below, rabbit.__proto__ = animal.
Now let's try: in rabbit.eat() we'll call animal.eat(), using this.__proto__:
let animal = {
name: "Animal",
eat() {
alert(`${this.name} eats.`);
}
};
let rabbit = {
__proto__: animal,
name: "Rabbit",
eat() {
// that's how super.eat() could presumably work
this.__proto__.eat.call(this); // (*)
}
};
rabbit.eat(); // Rabbit eats.
At the line (*) we take eat from the prototype (animal) and call it in the context of the current object.
Please note that .call(this) is important here, because a simple this.__proto__.eat() would execute parent eat in the context of the prototype, not the current object.
And in the code above it actually works as intended: we have the correct alert.
Now let's add one more object to the chain.
We'll see how things break:
let animal = {
name: "Animal",
eat() {
alert(`${this.name} eats.`);
}
};
let rabbit = {
__proto__: animal,
eat() {
// ...bounce around rabbit-style and call parent (animal) method
this.__proto__.eat.call(this); // (*)
}
};
let longEar = {
__proto__: rabbit,
eat() {
// ...do something with long ears and call parent (rabbit) method
this.__proto__.eat.call(this); // (**)
}
};
longEar.eat(); // Error: Maximum call stack size exceeded
The code doesn't work anymore! We can see the error trying to call longEar.eat().
It may be not that obvious, but if we trace longEar.eat() call, then we can see why.
In both lines (*) and (**) the value of this is the current object (longEar).
That's essential: all object methods get the current object as this, not a prototype or something.
So, in both lines (*) and (**) the value of this.__proto__ is exactly the same: rabbit.
They both call rabbit.eat without going up the chain in the endless loop.
Here's the picture of what happens:
Inside longEar.eat(), the line (**) calls rabbit.eat providing it with this=longEar.
// inside longEar.eat() we have this = longEar
this.__proto__.eat.call(this) // (**)
// becomes
longEar.__proto__.eat.call(this)
// that is
rabbit.eat.call(this);
Then in the line (*) of rabbit.eat, we'd like to pass the call even higher in the chain, but this=longEar, so this.__proto__.eat is again rabbit.eat!
// inside rabbit.eat() we also have this = longEar
this.__proto__.eat.call(this) // (*)
// becomes
longEar.__proto__.eat.call(this)
// or (again)
rabbit.eat.call(this);
…So rabbit.eat calls itself in the endless loop, because it can't ascend any further.
The problem can't be solved by using this alone.
[[HomeObject]]
To provide the solution, JavaScript adds one more special internal property for functions: [[HomeObject]].
When a function is specified as a class or object method, its [[HomeObject]] property becomes that object.
Then super uses it to resolve the parent prototype and its methods.
Let's see how it works, first with plain objects:
let animal = {
name: "Animal",
eat() { // animal.eat.[[HomeObject]] == animal
alert(`${this.name} eats.`);
}
};
let rabbit = {
__proto__: animal,
name: "Rabbit",
eat() { // rabbit.eat.[[HomeObject]] == rabbit
super.eat();
}
};
let longEar = {
__proto__: rabbit,
name: "Long Ear",
eat() { // longEar.eat.[[HomeObject]] == longEar
super.eat();
}
};
// works correctly
longEar.eat(); // Long Ear eats.
It works as intended, due to [[HomeObject]] mechanics.
A method, such as longEar.eat, knows its [[HomeObject]] and takes the parent method from its prototype.
Without any use of this.
Methods are not “free”
As we've known before, generally functions are “free”, not bound to objects in JavaScript.
So they can be copied between objects and called with another this.
The very existence of [[HomeObject]] violates that principle, because methods remember their objects.
[[HomeObject]] can't be changed, so this bond is forever.
The only place in the language where [[HomeObject]] is used – is super.
So, if a method does not use super, then we can still consider it free and copy between objects.
But with super things may go wrong.
Here's the demo of a wrong super result after copying:
let animal = {
sayHi() {
alert(`I'm an animal`);
}
};
// rabbit inherits from animal
let rabbit = {
__proto__: animal,
sayHi() {
super.sayHi();
}
};
let plant = {
sayHi() {
alert("I'm a plant");
}
};
// tree inherits from plant
let tree = {
__proto__: plant,
sayHi: rabbit.sayHi // (*)
};
tree.sayHi(); // I'm an animal (?!?)
A call to tree.sayHi() shows “I'm an animal”.
Definitely wrong.
The reason is simple:
In the line (*), the method tree.sayHi was copied from rabbit.
Maybe we just wanted to avoid code duplication?
Its [[HomeObject]] is rabbit, as it was created in rabbit.
There's no way to change [[HomeObject]].
The code of tree.sayHi() has super.sayHi() inside.
It goes up from rabbit and takes the method from animal.
Here's the diagram of what happens:
Methods, not function properties
[[HomeObject]] is defined for methods both in classes and in plain objects.
But for objects, methods must be specified exactly as method(), not as "method: function()".
The difference may be non-essential for us, but it's important for JavaScript.
In the example below a non-method syntax is used for comparison.
[[HomeObject]] property is not set and the inheritance doesn't work:
let animal = {
eat: function() { // intentionally writing like this instead of eat() {...
// ...
}
};
let rabbit = {
__proto__: animal,
eat: function() {
super.eat();
}
};
rabbit.eat(); // Error calling super (because there's no [[HomeObject]])
- Summary
To extend a class: class Child extends Parent:
That means Child.prototype.__proto__ will be Parent.prototype, so methods are inherited.
When overriding a constructor:
We must call parent constructor as super() in Child constructor before using this.
When overriding another method:
We can use super.method() in a Child method to call Parent method.
Internals:
Methods remember their class/object in the internal [[HomeObject]] property.
That's how super resolves parent methods.
So it's not safe to copy a method with super from one object to another.
Also:
Arrow functions don't have their own this or super, so they transparently fit into the surrounding context.
importance: 5
Here's the code with Rabbit extending Animal.
Unfortunately, Rabbit objects can't be created.
What's wrong? Fix it.
class Animal {
constructor(name) {
this.name = name;
}
}
class Rabbit extends Animal {
constructor(name) {
this.name = name;
this.created = Date.now();
}
}
let rabbit = new Rabbit("White Rabbit"); // Error: this is not defined
alert(rabbit.name);
That's because the child constructor must call super().
Here's the corrected code:
class Animal {
constructor(name) {
this.name = name;
}
}
class Rabbit extends Animal {
constructor(name) {
super(name);
this.created = Date.now();
}
}
let rabbit = new Rabbit("White Rabbit"); // ok now
alert(rabbit.name); // White Rabbit
Extended clock
importance: 5
We've got a Clock class.
As of now, it prints the time every second.
class Clock {
constructor({ template }) {
this.template = template;
}
render() {
let date = new Date();
let hours = date.getHours();
if (hours < 10) hours = '0' + hours;
let mins = date.getMinutes();
if (mins < 10) mins = '0' + mins;
let secs = date.getSeconds();
if (secs < 10) secs = '0' + secs;
let output = this.template
.replace('h', hours)
.replace('m', mins)
.replace('s', secs);
console.log(output);
}
stop() {
clearInterval(this.timer);
}
start() {
this.render();
this.timer = setInterval(() => this.render(), 1000);
}
}
Create a new class ExtendedClock that inherits from Clock and adds the parameter precision – the number of ms between “ticks”.
Should be 1000 (1 second) by default.
Your code should be in the file extended-clock.js
Don't modify the original clock.js.
Extend it.
Open a sandbox for the task.class ExtendedClock extends Clock {
constructor(options) {
super(options);
let { precision = 1000 } = options;
this.precision = precision;
}
start() {
this.render();
this.timer = setInterval(() => this.render(), this.precision);
}
};Open the solution in a sandbox.Classes
Static properties and methods
We can also assign a method to the class function itself, not to its "prototype".
Such methods are called static.
In a class, they are prepended by static keyword, like this:
class User {
static staticMethod() {
alert(this === User);
}
}
User.staticMethod(); // true
That actually does the same as assigning it as a property directly:
class User { }
User.staticMethod = function() {
alert(this === User);
};
User.staticMethod(); // true
The value of this in User.staticMethod() call is the class constructor User itself (the “object before dot” rule).
Usually, static methods are used to implement functions that belong to the class, but not to any particular object of it.
For instance, we have Article objects and need a function to compare them.
A natural solution would be to add Article.compare method, like this:
class Article {
constructor(title, date) {
this.title = title;
this.date = date;
}
static compare(articleA, articleB) {
return articleA.date - articleB.date;
}
}
// usage
let articles = [
new Article("HTML", new Date(2019, 1, 1)),
new Article("CSS", new Date(2019, 0, 1)),
new Article("JavaScript", new Date(2019, 11, 1))
];
articles.sort(Article.compare);
alert( articles[0].title ); // CSS
Here Article.compare stands “above” articles, as a means to compare them.
It's not a method of an article, but rather of the whole class.
Another example would be a so-called “factory” method.
Imagine, we need few ways to create an article:
Create by given parameters (title, date etc).
Create an empty article with today's date.
…or else somehow.
The first way can be implemented by the constructor.
And for the second one we can make a static method of the class.
Like Article.createTodays() here:
class Article {
constructor(title, date) {
this.title = title;
this.date = date;
}
static createTodays() {
// remember, this = Article
return new this("Today's digest", new Date());
}
}
let article = Article.createTodays();
alert( article.title ); // Today's digest
Now every time we need to create a today's digest, we can call Article.createTodays().
Once again, that's not a method of an article, but a method of the whole class.
Static methods are also used in database-related classes to search/save/remove entries from the database, like this:
// assuming Article is a special class for managing articles
// static method to remove the article:
Article.remove({id: 12345});
- Static properties
A recent addition
This is a recent addition to the language.
Examples work in the recent Chrome.
Static properties are also possible, they look like regular class properties, but prepended by static:
class Article {
static publisher = "Ilya Kantor";
}
alert( Article.publisher ); // Ilya Kantor
That is the same as a direct assignment to Article:
Article.publisher = "Ilya Kantor";
- Inheritance of static properties and methods
Static properties and methods are inherited.
For instance, Animal.compare and Animal.planet in the code below are inherited and accessible as Rabbit.compare and Rabbit.planet:
class Animal {
static planet = "Earth";
constructor(name, speed) {
this.speed = speed;
this.name = name;
}
run(speed = 0) {
this.speed += speed;
alert(`${this.name} runs with speed ${this.speed}.`);
}
static compare(animalA, animalB) {
return animalA.speed - animalB.speed;
}
}
// Inherit from Animal
class Rabbit extends Animal {
hide() {
alert(`${this.name} hides!`);
}
}
let rabbits = [
new Rabbit("White Rabbit", 10),
new Rabbit("Black Rabbit", 5)
];
rabbits.sort(Rabbit.compare);
rabbits[0].run(); // Black Rabbit runs with speed 5.
alert(Rabbit.planet); // Earth
Now when we call Rabbit.compare, the inherited Animal.compare will be called.
How does it work? Again, using prototypes.
As you might have already guessed, extends gives Rabbit the [[Prototype]] reference to Animal.
So, Rabbit extends Animal creates two [[Prototype]] references:
Rabbit function prototypally inherits from Animal function.
Rabbit.prototype prototypally inherits from Animal.prototype.
As a result, inheritance works both for regular and static methods.
Here, let's check that by code:
class Animal {}
class Rabbit extends Animal {}
// for statics
alert(Rabbit.__proto__ === Animal); // true
// for regular methods
alert(Rabbit.prototype.__proto__ === Animal.prototype); // true
- Summary
Static methods are used for the functionality that belongs to the class “as a whole”.
It doesn't relate to a concrete class instance.
For example, a method for comparison Article.compare(article1, article2) or a factory method Article.createTodays().
They are labeled by the word static in class declaration.
Static properties are used when we'd like to store class-level data, also not bound to an instance.
The syntax is:
class MyClass {
static property = ...;
static method() {
...
}
}
Technically, static declaration is the same as assigning to the class itself:
MyClass.property = ...
MyClass.method = ...
Static properties and methods are inherited.
For class B extends A the prototype of the class B itself points to A: B.[[Prototype]] = A.
So if a field is not found in B, the search continues in A.
importance: 3
As we know, all objects normally inherit from Object.prototype and get access to “generic” object methods like hasOwnProperty etc.
For instance:
class Rabbit {
constructor(name) {
this.name = name;
}
}
let rabbit = new Rabbit("Rab");
// hasOwnProperty method is from Object.prototype
alert( rabbit.hasOwnProperty('name') ); // true
But if we spell it out explicitly like "class Rabbit extends Object", then the result would be different from a simple "class Rabbit"?
What's the difference?
Here's an example of such code (it doesn't work – why? fix it?):
class Rabbit extends Object {
constructor(name) {
this.name = name;
}
}
let rabbit = new Rabbit("Rab");
alert( rabbit.hasOwnProperty('name') ); // Error
First, let's see why the latter code doesn't work.
The reason becomes obvious if we try to run it.
An inheriting class constructor must call super().
Otherwise "this" won't be “defined”.
So here's the fix:
class Rabbit extends Object {
constructor(name) {
super(); // need to call the parent constructor when inheriting
this.name = name;
}
}
let rabbit = new Rabbit("Rab");
alert( rabbit.hasOwnProperty('name') ); // true
But that's not all yet.
Even after the fix, there's still important difference in "class Rabbit extends Object" versus class Rabbit.
As we know, the “extends” syntax sets up two prototypes:
Between "prototype" of the constructor functions (for methods).
Between the constructor functions themselves (for static methods).
In our case, for class Rabbit extends Object it means:
class Rabbit extends Object {}
alert( Rabbit.prototype.__proto__ === Object.prototype ); // (1) true
alert( Rabbit.__proto__ === Object ); // (2) true
So Rabbit now provides access to static methods of Object via Rabbit, like this:
class Rabbit extends Object {}
// normally we call Object.getOwnPropertyNames
alert ( Rabbit.getOwnPropertyNames({a: 1, b: 2})); // a,b
But if we don't have extends Object, then Rabbit.__proto__ is not set to Object.
Here's the demo:
class Rabbit {}
alert( Rabbit.prototype.__proto__ === Object.prototype ); // (1) true
alert( Rabbit.__proto__ === Object ); // (2) false (!)
alert( Rabbit.__proto__ === Function.prototype ); // as any function by default
// error, no such function in Rabbit
alert ( Rabbit.getOwnPropertyNames({a: 1, b: 2})); // Error
So Rabbit doesn't provide access to static methods of Object in that case.
By the way, Function.prototype has “generic” function methods, like call, bind etc.
They are ultimately available in both cases, because for the built-in Object constructor, Object.__proto__ === Function.prototype.
Here's the picture:
So, to put it short, there are two differences:
One of the most important principles of object oriented programming – delimiting internal interface from the external one.
That is “a must” practice in developing anything more complex than a “hello world” app.
To understand this, let's break away from development and turn our eyes into the real world.
Usually, devices that we're using are quite complex.
But delimiting the internal interface from the external one allows to use them without problems.
- A real-life example
For instance, a coffee machine.
Simple from outside: a button, a display, a few holes…And, surely, the result – great coffee! :)
But inside… (a picture from the repair manual)
A lot of details.
But we can use it without knowing anything.
Coffee machines are quite reliable, aren't they? We can use one for years, and only if something goes wrong – bring it for repairs.
The secret of reliability and simplicity of a coffee machine – all details are well-tuned and hidden inside.
If we remove the protective cover from the coffee machine, then using it will be much more complex (where to press?), and dangerous (it can electrocute).
As we'll see, in programming objects are like coffee machines.
But in order to hide inner details, we'll use not a protective cover, but rather special syntax of the language and conventions.
- Internal and external interface
In object-oriented programming, properties and methods are split into two groups:
Internal interface – methods and properties, accessible from other methods of the class, but not from the outside.
External interface – methods and properties, accessible also from outside the class.
If we continue the analogy with the coffee machine – what's hidden inside: a boiler tube, heating element, and so on – is its internal interface.
An internal interface is used for the object to work, its details use each other.
For instance, a boiler tube is attached to the heating element.
But from the outside a coffee machine is closed by the protective cover, so that no one can reach those.
Details are hidden and inaccessible.
We can use its features via the external interface.
So, all we need to use an object is to know its external interface.
We may be completely unaware how it works inside, and that's great.
That was a general introduction.
In JavaScript, there are two types of object fields (properties and methods):
Public: accessible from anywhere.
They comprise the external interface.
Until now we were only using public properties and methods.
Private: accessible only from inside the class.
These are for the internal interface.
In many other languages there also exist “protected” fields: accessible only from inside the class and those extending it (like private, but plus access from inheriting classes).
They are also useful for the internal interface.
They are in a sense more widespread than private ones, because we usually want inheriting classes to gain access to them.
Protected fields are not implemented in JavaScript on the language level, but in practice they are very convenient, so they are emulated.
Now we'll make a coffee machine in JavaScript with all these types of properties.
A coffee machine has a lot of details, we won't model them to stay simple (though we could).
- Protecting “waterAmount”
Let's make a simple coffee machine class first:
class CoffeeMachine {
waterAmount = 0; // the amount of water inside
constructor(power) {
this.power = power;
alert( `Created a coffee-machine, power: ${power}` );
}
}
// create the coffee machine
let coffeeMachine = new CoffeeMachine(100);
// add water
coffeeMachine.waterAmount = 200;
Right now the properties waterAmount and power are public.
We can easily get/set them from the outside to any value.
Let's change waterAmount property to protected to have more control over it.
For instance, we don't want anyone to set it below zero.
Protected properties are usually prefixed with an underscore _.
That is not enforced on the language level, but there's a well-known convention between programmers that such properties and methods should not be accessed from the outside.
So our property will be called _waterAmount:
class CoffeeMachine {
_waterAmount = 0;
set waterAmount(value) {
if (value < 0) {
value = 0;
}
this._waterAmount = value;
}
get waterAmount() {
return this._waterAmount;
}
constructor(power) {
this._power = power;
}
}
// create the coffee machine
let coffeeMachine = new CoffeeMachine(100);
// add water
coffeeMachine.waterAmount = -10; // Error: Negative water
Now the access is under control, so setting the water amount below zero becomes impossible.
- Read-only “power”
For power property, let's make it read-only.
It sometimes happens that a property must be set at creation time only, and then never modified.
That's exactly the case for a coffee machine: power never changes.
To do so, we only need to make getter, but not the setter:
class CoffeeMachine {
// ...
constructor(power) {
this._power = power;
}
get power() {
return this._power;
}
}
// create the coffee machine
let coffeeMachine = new CoffeeMachine(100);
alert(`Power is: ${coffeeMachine.power}W`); // Power is: 100W
coffeeMachine.power = 25; // Error (no setter)
Getter/setter functions
Here we used getter/setter syntax.
But most of the time get.../set... functions are preferred, like this:
class CoffeeMachine {
_waterAmount = 0;
setWaterAmount(value) {
if (value < 0) value = 0;
this._waterAmount = value;
}
getWaterAmount() {
return this._waterAmount;
}
}
new CoffeeMachine().setWaterAmount(100);
That looks a bit longer, but functions are more flexible.
They can accept multiple arguments (even if we don't need them right now).
On the other hand, get/set syntax is shorter, so ultimately there's no strict rule, it's up to you to decide.
Protected fields are inherited
If we inherit class MegaMachine extends CoffeeMachine, then nothing prevents us from accessing this._waterAmount or this._power from the methods of the new class.
So protected fields are naturally inheritable.
Unlike private ones that we'll see below.
- Private “#waterLimit”
A recent addition
This is a recent addition to the language.
Not supported in JavaScript engines, or supported partially yet, requires polyfilling.
There's a finished JavaScript proposal, almost in the standard, that provides language-level support for private properties and methods.
Privates should start with #.
They are only accessible from inside the class.
For instance, here's a private #waterLimit property and the water-checking private method #checkWater:
class CoffeeMachine {
#waterLimit = 200;
#fixWaterAmount(value) {
if (value < 0) return 0;
if (value > this.#waterLimit) return this.#waterLimit;
}
setWaterAmount(value) {
this.#waterLimit = this.#fixWaterAmount(value);
}
}
let coffeeMachine = new CoffeeMachine();
// can't access privates from outside of the class
coffeeMachine.#fixWaterAmount(123); // Error
coffeeMachine.#waterLimit = 1000; // Error
On the language level, # is a special sign that the field is private.
We can't access it from outside or from inheriting classes.
Private fields do not conflict with public ones.
We can have both private #waterAmount and public waterAmount fields at the same time.
For instance, let's make waterAmount an accessor for #waterAmount:
class CoffeeMachine {
#waterAmount = 0;
get waterAmount() {
return this.#waterAmount;
}
set waterAmount(value) {
if (value < 0) value = 0;
this.#waterAmount = value;
}
}
let machine = new CoffeeMachine();
machine.waterAmount = 100;
alert(machine.#waterAmount); // Error
Unlike protected ones, private fields are enforced by the language itself.
That's a good thing.
But if we inherit from CoffeeMachine, then we'll have no direct access to #waterAmount.
We'll need to rely on waterAmount getter/setter:
class MegaCoffeeMachine extends CoffeeMachine {
method() {
alert( this.#waterAmount ); // Error: can only access from CoffeeMachine
}
}
In many scenarios such limitation is too severe.
If we extend a CoffeeMachine, we may have legitimate reasons to access its internals.
That's why protected fields are used more often, even though they are not supported by the language syntax.
Private fields are not available as this[name]
Private fields are special.
As we know, usually we can access fields using this[name]:
class User {
...
sayHi() {
let fieldName = "name";
alert(`Hello, ${this[fieldName]}`);
}
}
With private fields that's impossible: this['#name'] doesn't work.
That's a syntax limitation to ensure privacy.
- Summary
In terms of OOP, delimiting of the internal interface from the external one is called encapsulation.
It gives the following benefits:
Protection for users, so that they don't shoot themselves in the foot
Imagine, there's a team of developers using a coffee machine.
It was made by the “Best CoffeeMachine” company, and works fine, but a protective cover was removed.
So the internal interface is exposed.
All developers are civilized – they use the coffee machine as intended.
But one of them, John, decided that he's the smartest one, and made some tweaks in the coffee machine internals.
So the coffee machine failed two days later.
That's surely not John's fault, but rather the person who removed the protective cover and let John do his manipulations.
The same in programming.
If a user of a class will change things not intended to be changed from the outside – the consequences are unpredictable.
Supportable
The situation in programming is more complex than with a real-life coffee machine, because we don't just buy it once.
The code constantly undergoes development and improvement.
If we strictly delimit the internal interface, then the developer of the class can freely change its internal properties and methods, even without informing the users.
If you're a developer of such class, it's great to know that private methods can be safely renamed, their parameters can be changed, and even removed, because no external code depends on them.
For users, when a new version comes out, it may be a total overhaul internally, but still simple to upgrade if the external interface is the same.
Hiding complexity
People adore using things that are simple.
At least from outside.
What's inside is a different thing.
Programmers are not an exception.
It's always convenient when implementation details are hidden, and a simple, well-documented external interface is available.
To hide an internal interface we use either protected or private properties:
Protected fields start with _.
That's a well-known convention, not enforced at the language level.
Programmers should only access a field starting with _ from its class and classes inheriting from it.
Private fields start with #.
JavaScript makes sure we can only access those from inside the class.
Right now, private fields are not well-supported among browsers, but can be polyfilled.
Classes
Extending built-in classes
Built-in classes like Array, Map and others are extendable also.
For instance, here PowerArray inherits from the native Array:
// add one more method to it (can do more)
class PowerArray extends Array {
isEmpty() {
return this.length === 0;
}
}
let arr = new PowerArray(1, 2, 5, 10, 50);
alert(arr.isEmpty()); // false
let filteredArr = arr.filter(item => item >= 10);
alert(filteredArr); // 10, 50
alert(filteredArr.isEmpty()); // false
Please note a very interesting thing.
Built-in methods like filter, map and others – return new objects of exactly the inherited type PowerArray.
Their internal implementation uses the object's constructor property for that.
In the example above,
arr.constructor === PowerArray
When arr.filter() is called, it internally creates the new array of results using exactly arr.constructor, not basic Array.
That's actually very cool, because we can keep using PowerArray methods further on the result.
Even more, we can customize that behavior.
We can add a special static getter Symbol.species to the class.
If it exists, it should return the constructor that JavaScript will use internally to create new entities in map, filter and so on.
If we'd like built-in methods like map or filter to return regular arrays, we can return Array in Symbol.species, like here:
class PowerArray extends Array {
isEmpty() {
return this.length === 0;
}
// built-in methods will use this as the constructor
static get [Symbol.species]() {
return Array;
}
}
let arr = new PowerArray(1, 2, 5, 10, 50);
alert(arr.isEmpty()); // false
// filter creates new array using arr.constructor[Symbol.species] as constructor
let filteredArr = arr.filter(item => item >= 10);
// filteredArr is not PowerArray, but Array
alert(filteredArr.isEmpty()); // Error: filteredArr.isEmpty is not a function
As you can see, now .filter returns Array.
So the extended functionality is not passed any further.
Other collections work similarly
Other collections, such as Map and Set, work alike.
They also use Symbol.species.
- No static inheritance in built-ins
Built-in objects have their own static methods, for instance Object.keys, Array.isArray etc.
As we already know, native classes extend each other.
For instance, Array extends Object.
Normally, when one class extends another, both static and non-static methods are inherited.
That was thoroughly explained in the article Static properties and methods.
But built-in classes are an exception.
They don't inherit statics from each other.
For example, both Array and Date inherit from Object, so their instances have methods from Object.prototype.
But Array.[[Prototype]] does not reference Object, so there's no, for instance, Array.keys() (or Date.keys()) static method.
Here's the picture structure for Date and Object:
As you can see, there's no link between Date and Object.
They are independent, only Date.prototype inherits from Object.prototype.
That's an important difference of inheritance between built-in objects compared to what we get with extends.
Classes
Class checking: "instanceof"
The instanceof operator allows to check whether an object belongs to a certain class.
It also takes inheritance into account.
Such a check may be necessary in many cases.
For example, it can be used for building a polymorphic function, the one that treats arguments differently depending on their type.
- The instanceof operator
The syntax is:
obj instanceof Class
It returns true if obj belongs to the Class or a class inheriting from it.
For instance:
class Rabbit {}
let rabbit = new Rabbit();
// is it an object of Rabbit class?
alert( rabbit instanceof Rabbit ); // true
It also works with constructor functions:
// instead of class
function Rabbit() {}
alert( new Rabbit() instanceof Rabbit ); // true
…And with built-in classes like Array:
let arr = [1, 2, 3];
alert( arr instanceof Array ); // true
alert( arr instanceof Object ); // true
Please note that arr also belongs to the Object class.
That's because Array prototypically inherits from Object.
Normally, instanceof examines the prototype chain for the check.
We can also set a custom logic in the static method Symbol.hasInstance.
The algorithm of obj instanceof Class works roughly as follows:
If there's a static method Symbol.hasInstance, then just call it: Class[Symbol.hasInstance](obj).
It should return either true or false, and we're done.
That's how we can customize the behavior of instanceof.
For example:
// setup instanceOf check that assumes that
// anything with canEat property is an animal
class Animal {
static [Symbol.hasInstance](obj) {
if (obj.canEat) return true;
}
}
let obj = { canEat: true };
alert(obj instanceof Animal); // true: Animal[Symbol.hasInstance](obj) is called
Most classes do not have Symbol.hasInstance.
In that case, the standard logic is used: obj instanceOf Class checks whether Class.prototype is equal to one of the prototypes in the obj prototype chain.
In other words, compare one after another:
obj.__proto__ === Class.prototype?
obj.__proto__.__proto__ === Class.prototype?
obj.__proto__.__proto__.__proto__ === Class.prototype?
...
// if any answer is true, return true
// otherwise, if we reached the end of the chain, return false
In the example above rabbit.__proto__ === Rabbit.prototype, so that gives the answer immediately.
In the case of an inheritance, the match will be at the second step:
class Animal {}
class Rabbit extends Animal {}
let rabbit = new Rabbit();
alert(rabbit instanceof Animal); // true
// rabbit.__proto__ === Rabbit.prototype
// rabbit.__proto__.__proto__ === Animal.prototype (match!)
Here's the illustration of what rabbit instanceof Animal compares with Animal.prototype:
By the way, there's also a method objA.isPrototypeOf(objB), that returns true if objA is somewhere in the chain of prototypes for objB.
So the test of obj instanceof Class can be rephrased as Class.prototype.isPrototypeOf(obj).
It's funny, but the Class constructor itself does not participate in the check! Only the chain of prototypes and Class.prototype matters.
That can lead to interesting consequences when a prototype property is changed after the object is created.
Like here:
function Rabbit() {}
let rabbit = new Rabbit();
// changed the prototype
Rabbit.prototype = {};
// ...not a rabbit any more!
alert( rabbit instanceof Rabbit ); // false
- Bonus: Object.prototype.toString for the type
We already know that plain objects are converted to string as [object Object]:
let obj = {};
alert(obj); // [object Object]
alert(obj.toString()); // the same
That's their implementation of toString.
But there's a hidden feature that makes toString actually much more powerful than that.
We can use it as an extended typeof and an alternative for instanceof.
Sounds strange? Indeed.
Let's demystify.
By specification, the built-in toString can be extracted from the object and executed in the context of any other value.
And its result depends on that value.
For a number, it will be [object Number]
For a boolean, it will be [object Boolean]
For null: [object Null]
For undefined: [object Undefined]
For arrays: [object Array]
…etc (customizable).
Let's demonstrate:
// copy toString method into a variable for convenience
let objectToString = Object.prototype.toString;
// what type is this?
let arr = [];
alert( objectToString.call(arr) ); // [object Array]
Here we used call as described in the chapter Decorators and forwarding, call/apply to execute the function objectToString in the context this=arr.
Internally, the toString algorithm examines this and returns the corresponding result.
More examples:
let s = Object.prototype.toString;
alert( s.call(123) ); // [object Number]
alert( s.call(null) ); // [object Null]
alert( s.call(alert) ); // [object Function]
Symbol.toStringTag
The behavior of Object toString can be customized using a special object property Symbol.toStringTag.
For instance:
let user = {
[Symbol.toStringTag]: "User"
};
alert( {}.toString.call(user) ); // [object User]
For most environment-specific objects, there is such a property.
Here are some browser specific examples:
// toStringTag for the environment-specific object and class:
alert( window[Symbol.toStringTag]); // Window
alert( XMLHttpRequest.prototype[Symbol.toStringTag] ); // XMLHttpRequest
alert( {}.toString.call(window) ); // [object Window]
alert( {}.toString.call(new XMLHttpRequest()) ); // [object XMLHttpRequest]
As you can see, the result is exactly Symbol.toStringTag (if exists), wrapped into [object ...].
At the end we have “typeof on steroids” that not only works for primitive data types, but also for built-in objects and even can be customized.
We can use {}.toString.call instead of instanceof for built-in objects when we want to get the type as a string rather than just to check.
- Summary
Let's summarize the type-checking methods that we know:
works for
returns
typeof
primitives
string
{}.toString
primitives, built-in objects, objects with Symbol.toStringTag
string
instanceof
objects
true/false
As we can see, {}.toString is technically a “more advanced” typeof.
And instanceof operator really shines when we are working with a class hierarchy and want to check for the class taking into account inheritance.
importance: 5
In the code below, why does instanceof return true? We can easily see that a is not created by B().
function A() {}
function B() {}
A.prototype = B.prototype = {};
let a = new A();
alert( a instanceof B ); // true
Yeah, looks strange indeed.
But instanceof does not care about the function, but rather about its prototype, that it matches against the prototype chain.
And here a.__proto__ == B.prototype, so instanceof returns true.
So, by the logic of instanceof, the prototype actually defines the type, not the constructor function.
Classes
Mixins
In JavaScript we can only inherit from a single object.
There can be only one [[Prototype]] for an object.
And a class may extend only one other class.
But sometimes that feels limiting.
For instance, we have a class StreetSweeper and a class Bicycle, and want to make their mix: a StreetSweepingBicycle.
Or we have a class User and a class EventEmitter that implements event generation, and we'd like to add the functionality of EventEmitter to User, so that our users can emit events.
There's a concept that can help here, called “mixins”.
As defined in Wikipedia, a mixin is a class containing methods that can be used by other classes without a need to inherit from it.
In other words, a mixin provides methods that implement a certain behavior, but we do not use it alone, we use it to add the behavior to other classes.
- A mixin example
The simplest way to implement a mixin in JavaScript is to make an object with useful methods, so that we can easily merge them into a prototype of any class.
For instance here the mixin sayHiMixin is used to add some “speech” for User:
// mixin
let sayHiMixin = {
sayHi() {
alert(`Hello ${this.name}`);
},
sayBye() {
alert(`Bye ${this.name}`);
}
};
// usage:
class User {
constructor(name) {
this.name = name;
}
}
// copy the methods
Object.assign(User.prototype, sayHiMixin);
// now User can say hi
new User("Dude").sayHi(); // Hello Dude!
There's no inheritance, but a simple method copying.
So User may inherit from another class and also include the mixin to “mix-in” the additional methods, like this:
class User extends Person {
// ...
}
Object.assign(User.prototype, sayHiMixin);
Mixins can make use of inheritance inside themselves.
For instance, here sayHiMixin inherits from sayMixin:
let sayMixin = {
say(phrase) {
alert(phrase);
}
};
let sayHiMixin = {
__proto__: sayMixin, // (or we could use Object.create to set the prototype here)
sayHi() {
// call parent method
super.say(`Hello ${this.name}`); // (*)
},
sayBye() {
super.say(`Bye ${this.name}`); // (*)
}
};
class User {
constructor(name) {
this.name = name;
}
}
// copy the methods
Object.assign(User.prototype, sayHiMixin);
// now User can say hi
new User("Dude").sayHi(); // Hello Dude!
Please note that the call to the parent method super.say() from sayHiMixin (at lines labelled with (*)) looks for the method in the prototype of that mixin, not the class.
Here's the diagram (see the right part):
That's because methods sayHi and sayBye were initially created in sayHiMixin.
So even though they got copied, their [[HomeObject]] internal property references sayHiMixin, as shown in the picture above.
As super looks for parent methods in [[HomeObject]].[[Prototype]], that means it searches sayHiMixin.[[Prototype]], not User.[[Prototype]].
- EventMixin
Now let's make a mixin for real life.
An important feature of many browser objects (for instance) is that they can generate events.
Events are a great way to “broadcast information” to anyone who wants it.
So let's make a mixin that allows us to easily add event-related functions to any class/object.
The mixin will provide a method .trigger(name, [...data]) to “generate an event” when something important happens to it.
The name argument is a name of the event, optionally followed by additional arguments with event data.
Also the method .on(name, handler) that adds handler function as the listener to events with the given name.
It will be called when an event with the given name triggers, and get the arguments from the .trigger call.
…And the method .off(name, handler) that removes the handler listener.
After adding the mixin, an object user will be able to generate an event "login" when the visitor logs in.
And another object, say, calendar may want to listen for such events to load the calendar for the logged-in person.
Or, a menu can generate the event "select" when a menu item is selected, and other objects may assign handlers to react on that event.
And so on.
Here's the code:
let eventMixin = {
/**
* Subscribe to event, usage:
* menu.on('select', function(item) { ...
}
*/
on(eventName, handler) {
if (!this._eventHandlers) this._eventHandlers = {};
if (!this._eventHandlers[eventName]) {
this._eventHandlers[eventName] = [];
}
this._eventHandlers[eventName].push(handler);
},
/**
* Cancel the subscription, usage:
* menu.off('select', handler)
*/
off(eventName, handler) {
let handlers = this._eventHandlers?.[eventName];
if (!handlers) return;
for (let i = 0; i < handlers.length; i++) {
if (handlers[i] === handler) {
handlers.splice(i--, 1);
}
}
},
/**
* Generate an event with the given name and data
* this.trigger('select', data1, data2);
*/
trigger(eventName, ...args) {
if (!this._eventHandlers?.[eventName]) {
return; // no handlers for that event name
}
// call the handlers
this._eventHandlers[eventName].forEach(handler => handler.apply(this, args));
}
};.on(eventName, handler) – assigns function handler to run when the event with that name occurs.
Technically, there's an _eventHandlers property that stores an array of handlers for each event name, and it just adds it to the list.
.off(eventName, handler) – removes the function from the handlers list.
.trigger(eventName, ...args) – generates the event: all handlers from _eventHandlers[eventName] are called, with a list of arguments ...args.
Usage:
// Make a class
class Menu {
choose(value) {
this.trigger("select", value);
}
}
// Add the mixin with event-related methods
Object.assign(Menu.prototype, eventMixin);
let menu = new Menu();
// add a handler, to be called on selection:
menu.on("select", value => alert(`Value selected: ${value}`));
// triggers the event => the handler above runs and shows:
// Value selected: 123
menu.choose("123");
Now, if we'd like any code to react to a menu selection, we can listen for it with menu.on(...).
And eventMixin mixin makes it easy to add such behavior to as many classes as we'd like, without interfering with the inheritance chain.
- Summary
Mixin – is a generic object-oriented programming term: a class that contains methods for other classes.
Some other languages allow multiple inheritance.
JavaScript does not support multiple inheritance, but mixins can be implemented by copying methods into prototype.
We can use mixins as a way to augment a class by adding multiple behaviors, like event-handling as we have seen above.
Mixins may become a point of conflict if they accidentally overwrite existing class methods.
So generally one should think well about the naming methods of a mixin, to minimize the probability of that happening.
No matter how great we are at programming, sometimes our scripts have errors.
They may occur because of our mistakes, an unexpected user input, an erroneous server response, and for a thousand other reasons.
Usually, a script “dies” (immediately stops) in case of an error, printing it to console.
But there's a syntax construct try..catch that allows us to “catch” errors so the script can, instead of dying, do something more reasonable.
- The “try…catch” syntax
The try..catch construct has two main blocks: try, and then catch:
try {
// code...
} catch (err) {
// error handling
}
It works like this:
First, the code in try {...} is executed.
If there were no errors, then catch(err) is ignored: the execution reaches the end of try and goes on, skipping catch.
If an error occurs, then the try execution is stopped, and control flows to the beginning of catch(err).
The err variable (we can use any name for it) will contain an error object with details about what happened.
So, an error inside the try {…} block does not kill the script – we have a chance to handle it in catch.
Let's look at some examples.
An errorless example: shows alert(1) and (2):
try {
alert('Start of try runs'); // (1) <--
// ...no errors here
alert('End of try runs'); // (2) <--
} catch(err) {
alert('Catch is ignored, because there are no errors'); // (3)
}
An example with an error: shows (1) and (3):
try {
alert('Start of try runs'); // (1) <--
lalala; // error, variable is not defined!
alert('End of try (never reached)'); // (2)
} catch(err) {
alert(`Error has occurred!`); // (3) <--
}try..catch only works for runtime errors
For try..catch to work, the code must be runnable.
In other words, it should be valid JavaScript.
It won't work if the code is syntactically wrong, for instance it has unmatched curly braces:
try {
{{{{{{{{{{{{
} catch(e) {
alert("The engine can't understand this code, it's invalid");
}
The JavaScript engine first reads the code, and then runs it.
The errors that occur on the reading phase are called “parse-time” errors and are unrecoverable (from inside that code).
That's because the engine can't understand the code.
So, try..catch can only handle errors that occur in valid code.
Such errors are called “runtime errors” or, sometimes, “exceptions”.
try..catch works synchronously
If an exception happens in “scheduled” code, like in setTimeout, then try..catch won't catch it:
try {
setTimeout(function() {
noSuchVariable; // script will die here
}, 1000);
} catch (e) {
alert( "won't work" );
}
That's because the function itself is executed later, when the engine has already left the try..catch construct.
To catch an exception inside a scheduled function, try..catch must be inside that function:
setTimeout(function() {
try {
noSuchVariable; // try..catch handles the error!
} catch {
alert( "error is caught here!" );
}
}, 1000);
- Error object
When an error occurs, JavaScript generates an object containing the details about it.
The object is then passed as an argument to catch:
try {
// ...
} catch(err) { // <-- the "error object", could use another word instead of err
// ...
}
For all built-in errors, the error object has two main properties:
name
Error name.
For instance, for an undefined variable that's "ReferenceError".
message
Textual message about error details.
There are other non-standard properties available in most environments.
One of most widely used and supported is:
stack
Current call stack: a string with information about the sequence of nested calls that led to the error.
Used for debugging purposes.
For instance:
try {
lalala; // error, variable is not defined!
} catch(err) {
alert(err.name); // ReferenceError
alert(err.message); // lalala is not defined
alert(err.stack); // ReferenceError: lalala is not defined at (...call stack)
// Can also show an error as a whole
// The error is converted to string as "name: message"
alert(err); // ReferenceError: lalala is not defined
}
- Optional “catch” binding
A recent addition
This is a recent addition to the language.
Old browsers may need polyfills.
If we don't need error details, catch may omit it:
try {
// ...
} catch { // <-- without (err)
// ...
}
- Using “try…catch”
Let's explore a real-life use case of try..catch.
As we already know, JavaScript supports the JSON.parse(str) method to read JSON-encoded values.
Usually it's used to decode data received over the network, from the server or another source.
We receive it and call JSON.parse like this:
let json = '{"name":"John", "age": 30}'; // data from the server
let user = JSON.parse(json); // convert the text representation to JS object
// now user is an object with properties from the string
alert( user.name ); // John
alert( user.age ); // 30
You can find more detailed information about JSON in the JSON methods, toJSON chapter.
If json is malformed, JSON.parse generates an error, so the script “dies”.
Should we be satisfied with that? Of course not!
This way, if something's wrong with the data, the visitor will never know that (unless they open the developer console).
And people really don't like when something “just dies” without any error message.
Let's use try..catch to handle the error:
let json = "{ bad json }";
try {
let user = JSON.parse(json); // <-- when an error occurs...
alert( user.name ); // doesn't work
} catch (e) {
// ...the execution jumps here
alert( "Our apologies, the data has errors, we'll try to request it one more time." );
alert( e.name );
alert( e.message );
}
Here we use the catch block only to show the message, but we can do much more: send a new network request, suggest an alternative to the visitor, send information about the error to a logging facility, … .
All much better than just dying.
- Throwing our own errors
What if json is syntactically correct, but doesn't have a required name property?
Like this:
let json = '{ "age": 30 }'; // incomplete data
try {
let user = JSON.parse(json); // <-- no errors
alert( user.name ); // no name!
} catch (e) {
alert( "doesn't execute" );
}
Here JSON.parse runs normally, but the absence of name is actually an error for us.
To unify error handling, we'll use the throw operator.
“Throw” operator
The throw operator generates an error.
The syntax is:
throw <error object>
Technically, we can use anything as an error object.
That may be even a primitive, like a number or a string, but it's better to use objects, preferably with name and message properties (to stay somewhat compatible with built-in errors).
JavaScript has many built-in constructors for standard errors: Error, SyntaxError, ReferenceError, TypeError and others.
We can use them to create error objects as well.
Their syntax is:
let error = new Error(message);
// or
let error = new SyntaxError(message);
let error = new ReferenceError(message);
// ...
For built-in errors (not for any objects, just for errors), the name property is exactly the name of the constructor.
And message is taken from the argument.
For instance:
let error = new Error("Things happen o_O");
alert(error.name); // Error
alert(error.message); // Things happen o_O
Let's see what kind of error JSON.parse generates:
try {
JSON.parse("{ bad json o_O }");
} catch(e) {
alert(e.name); // SyntaxError
alert(e.message); // Unexpected token b in JSON at position 2
}
As we can see, that's a SyntaxError.
And in our case, the absence of name is an error, as users must have a name.
So let's throw it:
let json = '{ "age": 30 }'; // incomplete data
try {
let user = JSON.parse(json); // <-- no errors
if (!user.name) {
throw new SyntaxError("Incomplete data: no name"); // (*)
}
alert( user.name );
} catch(e) {
alert( "JSON Error: " + e.message ); // JSON Error: Incomplete data: no name
}
In the line (*), the throw operator generates a SyntaxError with the given message, the same way as JavaScript would generate it itself.
The execution of try immediately stops and the control flow jumps into catch.
Now catch became a single place for all error handling: both for JSON.parse and other cases.
- Rethrowing
In the example above we use try..catch to handle incorrect data.
But is it possible that another unexpected error occurs within the try {...} block? Like a programming error (variable is not defined) or something else, not just this “incorrect data” thing.
For example:
let json = '{ "age": 30 }'; // incomplete data
try {
user = JSON.parse(json); // <-- forgot to put "let" before user
// ...
} catch(err) {
alert("JSON Error: " + err); // JSON Error: ReferenceError: user is not defined
// (no JSON Error actually)
}
Of course, everything's possible! Programmers do make mistakes.
Even in open-source utilities used by millions for decades – suddenly a bug may be discovered that leads to terrible hacks.
In our case, try..catch is placed to catch “incorrect data” errors.
But by its nature, catch gets all errors from try.
Here it gets an unexpected error, but still shows the same "JSON Error" message.
That's wrong and also makes the code more difficult to debug.
To avoid such problems, we can employ the “rethrowing” technique.
The rule is simple:
Catch should only process errors that it knows and “rethrow” all others.
The “rethrowing” technique can be explained in more detail as:
Catch gets all errors.
In the catch(err) {...} block we analyze the error object err.
If we don't know how to handle it, we do throw err.
Usually, we can check the error type using the instanceof operator:
try {
user = { /*...*/ };
} catch(err) {
if (err instanceof ReferenceError) {
alert('ReferenceError'); // "ReferenceError" for accessing an undefined variable
}
}
We can also get the error class name from err.name property.
All native errors have it.
Another option is to read err.constructor.name.
In the code below, we use rethrowing so that catch only handles SyntaxError:
let json = '{ "age": 30 }'; // incomplete data
try {
let user = JSON.parse(json);
if (!user.name) {
throw new SyntaxError("Incomplete data: no name");
}
blabla(); // unexpected error
alert( user.name );
} catch(e) {
if (e instanceof SyntaxError) {
alert( "JSON Error: " + e.message );
} else {
throw e; // rethrow (*)
}
}
The error throwing on line (*) from inside catch block “falls out” of try..catch and can be either caught by an outer try..catch construct (if it exists), or it kills the script.
So the catch block actually handles only errors that it knows how to deal with and “skips” all others.
The example below demonstrates how such errors can be caught by one more level of try..catch:
function readData() {
let json = '{ "age": 30 }';
try {
// ...
blabla(); // error!
} catch (e) {
// ...
if (!(e instanceof SyntaxError)) {
throw e; // rethrow (don't know how to deal with it)
}
}
}
try {
readData();
} catch (e) {
alert( "External catch got: " + e ); // caught it!
}
Here readData only knows how to handle SyntaxError, while the outer try..catch knows how to handle everything.
- try…catch…finally
Wait, that's not all.
The try..catch construct may have one more code clause: finally.
If it exists, it runs in all cases:
after try, if there were no errors,
after catch, if there were errors.
The extended syntax looks like this:
try {
...
try to execute the code ...
} catch(e) {
...
handle errors ...
} finally {
...
execute always ...
}
Try running this code:
try {
alert( 'try' );
if (confirm('Make an error?')) BAD_CODE();
} catch (e) {
alert( 'catch' );
} finally {
alert( 'finally' );
}
The code has two ways of execution:
If you answer “Yes” to “Make an error?”, then try -> catch -> finally.
If you say “No”, then try -> finally.
The finally clause is often used when we start doing something and want to finalize it in any case of outcome.
For instance, we want to measure the time that a Fibonacci numbers function fib(n) takes.
Naturally, we can start measuring before it runs and finish afterwards.
But what if there's an error during the function call? In particular, the implementation of fib(n) in the code below returns an error for negative or non-integer numbers.
The finally clause is a great place to finish the measurements no matter what.
Here finally guarantees that the time will be measured correctly in both situations – in case of a successful execution of fib and in case of an error in it:
let num = +prompt("Enter a positive integer number?", 35)
let diff, result;
function fib(n) {
if (n < 0 || Math.trunc(n) != n) {
throw new Error("Must not be negative, and also an integer.");
}
return n <= 1 ? n : fib(n - 1) + fib(n - 2);
}
let start = Date.now();
try {
result = fib(num);
} catch (e) {
result = 0;
} finally {
diff = Date.now() - start;
}
alert(result || "error occurred");
alert( `execution took ${diff}ms` );
You can check by running the code with entering 35 into prompt – it executes normally, finally after try.
And then enter -1 – there will be an immediate error, and the execution will take 0ms.
Both measurements are done correctly.
In other words, the function may finish with return or throw, that doesn't matter.
The finally clause executes in both cases.
Variables are local inside try..catch..finally
Please note that result and diff variables in the code above are declared beforetry..catch.
Otherwise, if we declared let in try block, it would only be visible inside of it.
finally and return
The finally clause works for any exit from try..catch.
That includes an explicit return.
In the example below, there's a return in try.
In this case, finally is executed just before the control returns to the outer code.
function func() {
try {
return 1;
} catch (e) {
/* ...
*/
} finally {
alert( 'finally' );
}
}
alert( func() ); // first works alert from finally, and then this onetry..finally
The try..finally construct, without catch clause, is also useful.
We apply it when we don't want to handle errors here (let them fall through), but want to be sure that processes that we started are finalized.
function func() {
// start doing something that needs completion (like measurements)
try {
// ...
} finally {
// complete that thing even if all dies
}
}
In the code above, an error inside try always falls out, because there's no catch.
But finally works before the execution flow leaves the function.
- Global catch
Environment-specific
The information from this section is not a part of the core JavaScript.
Let's imagine we've got a fatal error outside of try..catch, and the script died.
Like a programming error or some other terrible thing.
Is there a way to react on such occurrences? We may want to log the error, show something to the user (normally they don't see error messages), etc.
There is none in the specification, but environments usually provide it, because it's really useful.
For instance, Node.js has process.on("uncaughtException") for that.
And in the browser we can assign a function to the special window.onerror property, that will run in case of an uncaught error.
The syntax:
window.onerror = function(message, url, line, col, error) {
// ...
};
message
Error message.
url
URL of the script where error happened.
line, col
Line and column numbers where error happened.
error
Error object.
For instance:
<script>
window.onerror = function(message, url, line, col, error) {
alert(`${message}\n At ${line}:${col} of ${url}`);
};
function readData() {
badFunc(); // Whoops, something went wrong!
}
readData();
</script>
The role of the global handler window.onerror is usually not to recover the script execution – that's probably impossible in case of programming errors, but to send the error message to developers.
There are also web-services that provide error-logging for such cases, like https://errorception.com or http://www.muscula.com.
They work like this:
We register at the service and get a piece of JS (or a script URL) from them to insert on pages.
That JS script sets a custom window.onerror function.
When an error occurs, it sends a network request about it to the service.
We can log in to the service web interface and see errors.
- Summary
The try..catch construct allows to handle runtime errors.
It literally allows to “try” running the code and “catch” errors that may occur in it.
The syntax is:
try {
// run this code
} catch(err) {
// if an error happened, then jump here
// err is the error object
} finally {
// do in any case after try/catch
}
There may be no catch section or no finally, so shorter constructs try..catch and try..finally are also valid.
Error objects have following properties:
message – the human-readable error message.
name – the string with error name (error constructor name).
stack (non-standard, but well-supported) – the stack at the moment of error creation.
If an error object is not needed, we can omit it by using catch { instead of catch(err) {.
We can also generate our own errors using the throw operator.
Technically, the argument of throw can be anything, but usually it's an error object inheriting from the built-in Error class.
More on extending errors in the next chapter.
Rethrowing is a very important pattern of error handling: a catch block usually expects and knows how to handle the particular error type, so it should rethrow errors it doesn't know.
Even if we don't have try..catch, most environments allow us to setup a “global” error handler to catch errors that “fall out”.
In-browser, that's window.onerror.
importance: 5
Compare the two code fragments.
The first one uses finally to execute the code after try..catch:
try {
work work
} catch (e) {
handle errors
} finally {
cleanup the working space
}
The second fragment puts the cleaning right after try..catch:
try {
work work
} catch (e) {
handle errors
}
cleanup the working space
We definitely need the cleanup after the work, doesn't matter if there was an error or not.
Is there an advantage here in using finally or both code fragments are equal? If there is such an advantage, then give an example when it matters.
The difference becomes obvious when we look at the code inside a function.
The behavior is different if there's a “jump out” of try..catch.
For instance, when there's a return inside try..catch.
The finally clause works in case of any exit from try..catch, even via the return statement: right after try..catch is done, but before the calling code gets the control.
function f() {
try {
alert('start');
return "result";
} catch (e) {
/// ...
} finally {
alert('cleanup!');
}
}
f(); // cleanup!
…Or when there's a throw, like here:
function f() {
try {
alert('start');
throw new Error("an error");
} catch (e) {
// ...
if("can't handle the error") {
throw e;
}
} finally {
alert('cleanup!')
}
}
f(); // cleanup!
It's finally that guarantees the cleanup here.
If we just put the code at the end of f, it wouldn't run in these situations.
Error handling
Custom errors, extending Error
When we develop something, we often need our own error classes to reflect specific things that may go wrong in our tasks.
For errors in network operations we may need HttpError, for database operations DbError, for searching operations NotFoundError and so on.
Our errors should support basic error properties like message, name and, preferably, stack.
But they also may have other properties of their own, e.g.
HttpError objects may have a statusCode property with a value like 404 or 403 or 500.
JavaScript allows to use throw with any argument, so technically our custom error classes don't need to inherit from Error.
But if we inherit, then it becomes possible to use obj instanceof Error to identify error objects.
So it's better to inherit from it.
As the application grows, our own errors naturally form a hierarchy.
For instance, HttpTimeoutError may inherit from HttpError, and so on.
- Extending Error
As an example, let's consider a function readUser(json) that should read JSON with user data.
Here's an example of how a valid json may look:
let json = `{ "name": "John", "age": 30 }`;
Internally, we'll use JSON.parse.
If it receives malformed json, then it throws SyntaxError.
But even if json is syntactically correct, that doesn't mean that it's a valid user, right? It may miss the necessary data.
For instance, it may not have name and age properties that are essential for our users.
Our function readUser(json) will not only read JSON, but check (“validate”) the data.
If there are no required fields, or the format is wrong, then that's an error.
And that's not a SyntaxError, because the data is syntactically correct, but another kind of error.
We'll call it ValidationError and create a class for it.
An error of that kind should also carry the information about the offending field.
Our ValidationError class should inherit from the built-in Error class.
That class is built-in, but here's its approximate code so we can understand what we're extending:
// The "pseudocode" for the built-in Error class defined by JavaScript itself
class Error {
constructor(message) {
this.message = message;
this.name = "Error"; // (different names for different built-in error classes)
this.stack = <call stack>; // non-standard, but most environments support it
}
}
Now let's inherit ValidationError from it and try it in action:
class ValidationError extends Error {
constructor(message) {
super(message); // (1)
this.name = "ValidationError"; // (2)
}
}
function test() {
throw new ValidationError("Whoops!");
}
try {
test();
} catch(err) {
alert(err.message); // Whoops!
alert(err.name); // ValidationError
alert(err.stack); // a list of nested calls with line numbers for each
}
Please note: in the line (1) we call the parent constructor.
JavaScript requires us to call super in the child constructor, so that's obligatory.
The parent constructor sets the message property.
The parent constructor also sets the name property to "Error", so in the line (2) we reset it to the right value.
Let's try to use it in readUser(json):
class ValidationError extends Error {
constructor(message) {
super(message);
this.name = "ValidationError";
}
}
// Usage
function readUser(json) {
let user = JSON.parse(json);
if (!user.age) {
throw new ValidationError("No field: age");
}
if (!user.name) {
throw new ValidationError("No field: name");
}
return user;
}
// Working example with try..catch
try {
let user = readUser('{ "age": 25 }');
} catch (err) {
if (err instanceof ValidationError) {
alert("Invalid data: " + err.message); // Invalid data: No field: name
} else if (err instanceof SyntaxError) { // (*)
alert("JSON Syntax Error: " + err.message);
} else {
throw err; // unknown error, rethrow it (**)
}
}
The try..catch block in the code above handles both our ValidationError and the built-in SyntaxError from JSON.parse.
Please take a look at how we use instanceof to check for the specific error type in the line (*).
We could also look at err.name, like this:
// ...
// instead of (err instanceof SyntaxError)
} else if (err.name == "SyntaxError") { // (*)
// ...
The instanceof version is much better, because in the future we are going to extend ValidationError, make subtypes of it, like PropertyRequiredError.
And instanceof check will continue to work for new inheriting classes.
So that's future-proof.
Also it's important that if catch meets an unknown error, then it rethrows it in the line (**).
The catch block only knows how to handle validation and syntax errors, other kinds (due to a typo in the code or other unknown ones) should fall through.
- Further inheritance
The ValidationError class is very generic.
Many things may go wrong.
The property may be absent or it may be in a wrong format (like a string value for age).
Let's make a more concrete class PropertyRequiredError, exactly for absent properties.
It will carry additional information about the property that's missing.
class ValidationError extends Error {
constructor(message) {
super(message);
this.name = "ValidationError";
}
}
class PropertyRequiredError extends ValidationError {
constructor(property) {
super("No property: " + property);
this.name = "PropertyRequiredError";
this.property = property;
}
}
// Usage
function readUser(json) {
let user = JSON.parse(json);
if (!user.age) {
throw new PropertyRequiredError("age");
}
if (!user.name) {
throw new PropertyRequiredError("name");
}
return user;
}
// Working example with try..catch
try {
let user = readUser('{ "age": 25 }');
} catch (err) {
if (err instanceof ValidationError) {
alert("Invalid data: " + err.message); // Invalid data: No property: name
alert(err.name); // PropertyRequiredError
alert(err.property); // name
} else if (err instanceof SyntaxError) {
alert("JSON Syntax Error: " + err.message);
} else {
throw err; // unknown error, rethrow it
}
}
The new class PropertyRequiredError is easy to use: we only need to pass the property name: new PropertyRequiredError(property).
The human-readable message is generated by the constructor.
Please note that this.name in PropertyRequiredError constructor is again assigned manually.
That may become a bit tedious – to assign this.name = <class name> in every custom error class.
We can avoid it by making our own “basic error” class that assigns this.name = this.constructor.name.
And then inherit all our custom errors from it.
Let's call it MyError.
Here's the code with MyError and other custom error classes, simplified:
class MyError extends Error {
constructor(message) {
super(message);
this.name = this.constructor.name;
}
}
class ValidationError extends MyError { }
class PropertyRequiredError extends ValidationError {
constructor(property) {
super("No property: " + property);
this.property = property;
}
}
// name is correct
alert( new PropertyRequiredError("field").name ); // PropertyRequiredError
Now custom errors are much shorter, especially ValidationError, as we got rid of the "this.name = ..." line in the constructor.
- Wrapping exceptions
The purpose of the function readUser in the code above is “to read the user data”.
There may occur different kinds of errors in the process.
Right now we have SyntaxError and ValidationError, but in the future readUser function may grow and probably generate other kinds of errors.
The code which calls readUser should handle these errors.
Right now it uses multiple ifs in the catch block, that check the class and handle known errors and rethrow the unknown ones.
The scheme is like this:
try {
...
readUser() // the potential error source
...
} catch (err) {
if (err instanceof ValidationError) {
// handle validation errors
} else if (err instanceof SyntaxError) {
// handle syntax errors
} else {
throw err; // unknown error, rethrow it
}
}
In the code above we can see two types of errors, but there can be more.
If the readUser function generates several kinds of errors, then we should ask ourselves: do we really want to check for all error types one-by-one every time?
Often the answer is “No”: we'd like to be “one level above all that”.
We just want to know if there was a “data reading error” – why exactly it happened is often irrelevant (the error message describes it).
Or, even better, we'd like to have a way to get the error details, but only if we need to.
The technique that we describe here is called “wrapping exceptions”.
We'll make a new class ReadError to represent a generic “data reading” error.
The function readUser will catch data reading errors that occur inside it, such as ValidationError and SyntaxError, and generate a ReadError instead.
The ReadError object will keep the reference to the original error in its cause property.
Then the code that calls readUser will only have to check for ReadError, not for every kind of data reading errors.
And if it needs more details of an error, it can check its cause property.
Here's the code that defines ReadError and demonstrates its use in readUser and try..catch:
class ReadError extends Error {
constructor(message, cause) {
super(message);
this.cause = cause;
this.name = 'ReadError';
}
}
class ValidationError extends Error { /*...*/ }
class PropertyRequiredError extends ValidationError { /* ...
*/ }
function validateUser(user) {
if (!user.age) {
throw new PropertyRequiredError("age");
}
if (!user.name) {
throw new PropertyRequiredError("name");
}
}
function readUser(json) {
let user;
try {
user = JSON.parse(json);
} catch (err) {
if (err instanceof SyntaxError) {
throw new ReadError("Syntax Error", err);
} else {
throw err;
}
}
try {
validateUser(user);
} catch (err) {
if (err instanceof ValidationError) {
throw new ReadError("Validation Error", err);
} else {
throw err;
}
}
}
try {
readUser('{bad json}');
} catch (e) {
if (e instanceof ReadError) {
alert(e);
// Original error: SyntaxError: Unexpected token b in JSON at position 1
alert("Original error: " + e.cause);
} else {
throw e;
}
}
In the code above, readUser works exactly as described – catches syntax and validation errors and throws ReadError errors instead (unknown errors are rethrown as usual).
So the outer code checks instanceof ReadError and that's it.
No need to list all possible error types.
The approach is called “wrapping exceptions”, because we take “low level” exceptions and “wrap” them into ReadError that is more abstract.
It is widely used in object-oriented programming.
- Summary
We can inherit from Error and other built-in error classes normally.
We just need to take care of the name property and don't forget to call super.
We can use instanceof to check for particular errors.
It also works with inheritance.
But sometimes we have an error object coming from a 3rd-party library and there's no easy way to get its class.
Then name property can be used for such checks.
Wrapping exceptions is a widespread technique: a function handles low-level exceptions and creates higher-level errors instead of various low-level ones.
Low-level exceptions sometimes become properties of that object like err.cause in the examples above, but that's not strictly required.
We use browser methods in examples here
To demonstrate the use of callbacks, promises and other abstract concepts, we'll be using some browser methods: specifically, loading scripts and performing simple document manipulations.
If you're not familiar with these methods, and their usage in the examples is confusing, you may want to read a few chapters from the next part of the tutorial.
Although, we'll try to make things clear anyway.
There won't be anything really complex browser-wise.
Many functions are provided by JavaScript host environments that allow you to schedule asynchronous actions.
In other words, actions that we initiate now, but they finish later.
For instance, one such function is the setTimeout function.
There are other real-world examples of asynchronous actions, e.g.
loading scripts and modules (we'll cover them in later chapters).
Take a look at the function loadScript(src), that loads a script with the given src:
function loadScript(src) {
// creates a <script> tag and append it to the page
// this causes the script with given src to start loading and run when complete
let script = document.createElement('script');
script.src = src;
document.head.append(script);
}
It appends to the document the new, dynamically created, tag <script src="…"> with given src.
The browser automatically starts loading it and executes when complete.
We can use this function like this:
// load and execute the script at the given path
loadScript('/my/script.js');
The script is executed “asynchronously”, as it starts loading now, but runs later, when the function has already finished.
If there's any code below loadScript(…), it doesn't wait until the script loading finishes.
loadScript('/my/script.js');
// the code below loadScript
// doesn't wait for the script loading to finish
// ...
Let's say we need to use the new script as soon as it loads.
It declares new functions, and we want to run them.
But if we do that immediately after the loadScript(…) call, that wouldn't work:
loadScript('/my/script.js'); // the script has "function newFunction() {…}"
newFunction(); // no such function!
Naturally, the browser probably didn't have time to load the script.
As of now, the loadScript function doesn't provide a way to track the load completion.
The script loads and eventually runs, that's all.
But we'd like to know when it happens, to use new functions and variables from that script.
Let's add a callback function as a second argument to loadScript that should execute when the script loads:
function loadScript(src, callback) {
let script = document.createElement('script');
script.src = src;
script.onload = () => callback(script);
document.head.append(script);
}
Now if we want to call new functions from the script, we should write that in the callback:
loadScript('/my/script.js', function() {
// the callback runs after the script is loaded
newFunction(); // so now it works
...
});
That's the idea: the second argument is a function (usually anonymous) that runs when the action is completed.
Here's a runnable example with a real script:
function loadScript(src, callback) {
let script = document.createElement('script');
script.src = src;
script.onload = () => callback(script);
document.head.append(script);
}
loadScript('https://cdnjs.cloudflare.com/ajax/libs/lodash.js/3.2.0/lodash.js', script => {
alert(`Cool, the script ${script.src} is loaded`);
alert( _ ); // function declared in the loaded script
});
That's called a “callback-based” style of asynchronous programming.
A function that does something asynchronously should provide a callback argument where we put the function to run after it's complete.
Here we did it in loadScript, but of course it's a general approach.
- Callback in callback
How can we load two scripts sequentially: the first one, and then the second one after it?
The natural solution would be to put the second loadScript call inside the callback, like this:
loadScript('/my/script.js', function(script) {
alert(`Cool, the ${script.src} is loaded, let's load one more`);
loadScript('/my/script2.js', function(script) {
alert(`Cool, the second script is loaded`);
});
});
After the outer loadScript is complete, the callback initiates the inner one.
What if we want one more script…?
loadScript('/my/script.js', function(script) {
loadScript('/my/script2.js', function(script) {
loadScript('/my/script3.js', function(script) {
// ...continue after all scripts are loaded
});
});
});
So, every new action is inside a callback.
That's fine for few actions, but not good for many, so we'll see other variants soon.
- Handling errors
In the above examples we didn't consider errors.
What if the script loading fails? Our callback should be able to react on that.
Here's an improved version of loadScript that tracks loading errors:
function loadScript(src, callback) {
let script = document.createElement('script');
script.src = src;
script.onload = () => callback(null, script);
script.onerror = () => callback(new Error(`Script load error for ${src}`));
document.head.append(script);
}
It calls callback(null, script) for successful load and callback(error) otherwise.
The usage:
loadScript('/my/script.js', function(error, script) {
if (error) {
// handle error
} else {
// script loaded successfully
}
});
Once again, the recipe that we used for loadScript is actually quite common.
It's called the “error-first callback” style.
The convention is:
The first argument of the callback is reserved for an error if it occurs.
Then callback(err) is called.
The second argument (and the next ones if needed) are for the successful result.
Then callback(null, result1, result2…) is called.
So the single callback function is used both for reporting errors and passing back results.
- Pyramid of Doom
From the first look, it's a viable way of asynchronous coding.
And indeed it is.
For one or maybe two nested calls it looks fine.
But for multiple asynchronous actions that follow one after another we'll have code like this:
loadScript('1.js', function(error, script) {
if (error) {
handleError(error);
} else {
// ...
loadScript('2.js', function(error, script) {
if (error) {
handleError(error);
} else {
// ...
loadScript('3.js', function(error, script) {
if (error) {
handleError(error);
} else {
// ...continue after all scripts are loaded (*)
}
});
}
});
}
});
In the code above:
We load 1.js, then if there's no error.
We load 2.js, then if there's no error.
We load 3.js, then if there's no error – do something else (*).
As calls become more nested, the code becomes deeper and increasingly more difficult to manage, especially if we have real code instead of ... that may include more loops, conditional statements and so on.
That's sometimes called “callback hell” or “pyramid of doom.”
The “pyramid” of nested calls grows to the right with every asynchronous action.
Soon it spirals out of control.
So this way of coding isn't very good.
We can try to alleviate the problem by making every action a standalone function, like this:
loadScript('1.js', step1);
function step1(error, script) {
if (error) {
handleError(error);
} else {
// ...
loadScript('2.js', step2);
}
}
function step2(error, script) {
if (error) {
handleError(error);
} else {
// ...
loadScript('3.js', step3);
}
}
function step3(error, script) {
if (error) {
handleError(error);
} else {
// ...continue after all scripts are loaded (*)
}
}
See? It does the same, and there's no deep nesting now because we made every action a separate top-level function.
It works, but the code looks like a torn apart spreadsheet.
It's difficult to read, and you probably noticed that one needs to eye-jump between pieces while reading it.
That's inconvenient, especially if the reader is not familiar with the code and doesn't know where to eye-jump.
Also, the functions named step* are all of single use, they are created only to avoid the “pyramid of doom.” No one is going to reuse them outside of the action chain.
So there's a bit of namespace cluttering here.
We'd like to have something better.
Luckily, there are other ways to avoid such pyramids.
One of the best ways is to use “promises,” described in the next chapter.
Promises, async/await
Promise
Imagine that you're a top singer, and fans ask day and night for your upcoming single.
To get some relief, you promise to send it to them when it's published.
You give your fans a list.
They can fill in their email addresses, so that when the song becomes available, all subscribed parties instantly receive it.
And even if something goes very wrong, say, a fire in the studio, so that you can't publish the song, they will still be notified.
Everyone is happy: you, because the people don't crowd you anymore, and fans, because they won't miss the single.
This is a real-life analogy for things we often have in programming:
A “producing code” that does something and takes time.
For instance, some code that loads the data over a network.
That's a “singer”.
A “consuming code” that wants the result of the “producing code” once it's ready.
Many functions may need that result.
These are the “fans”.
A promise is a special JavaScript object that links the “producing code” and the “consuming code” together.
In terms of our analogy: this is the “subscription list”.
The “producing code” takes whatever time it needs to produce the promised result, and the “promise” makes that result available to all of the subscribed code when it's ready.
The analogy isn't terribly accurate, because JavaScript promises are more complex than a simple subscription list: they have additional features and limitations.
But it's fine to begin with.
The constructor syntax for a promise object is:
let promise = new Promise(function(resolve, reject) {
// executor (the producing code, "singer")
});
The function passed to new Promise is called the executor.
When new Promise is created, the executor runs automatically.
It contains the producing code which should eventually produce the result.
In terms of the analogy above: the executor is the “singer”.
Its arguments resolve and reject are callbacks provided by JavaScript itself.
Our code is only inside the executor.
When the executor obtains the result, be it soon or late, doesn't matter, it should call one of these callbacks:
resolve(value) — if the job finished successfully, with result value.
reject(error) — if an error occurred, error is the error object.
So to summarize: the executor runs automatically and attempts to perform a job.
When it is finished with the attempt it calls resolve if it was successful or reject if there was an error.
The promise object returned by the new Promise constructor has these internal properties:
state — initially "pending", then changes to either "fulfilled" when resolve is called or "rejected" when reject is called.
result — initially undefined, then changes to value when resolve(value) called or error when reject(error) is called.
So the executor eventually moves promise to one of these states:
Later we'll see how “fans” can subscribe to these changes.
Here's an example of a promise constructor and a simple executor function with “producing code” that takes time (via setTimeout):
let promise = new Promise(function(resolve, reject) {
// the function is executed automatically when the promise is constructed
// after 1 second signal that the job is done with the result "done"
setTimeout(() => resolve("done"), 1000);
});
We can see two things by running the code above:
The executor is called automatically and immediately (by new Promise).
The executor receives two arguments: resolve and reject.
These functions are pre-defined by the JavaScript engine, so we don't need to create them.
We should only call one of them when ready.
After one second of “processing” the executor calls resolve("done") to produce the result.
This changes the state of the promise object:
That was an example of a successful job completion, a “fulfilled promise”.
And now an example of the executor rejecting the promise with an error:
let promise = new Promise(function(resolve, reject) {
// after 1 second signal that the job is finished with an error
setTimeout(() => reject(new Error("Whoops!")), 1000);
});
The call to reject(...) moves the promise object to "rejected" state:
To summarize, the executor should perform a job (usually something that takes time) and then call resolve or reject to change the state of the corresponding promise object.
A promise that is either resolved or rejected is called “settled”, as opposed to an initially “pending” promise.
There can be only a single result or an error
The executor should call only one resolve or one reject.
Any state change is final.
All further calls of resolve and reject are ignored:
let promise = new Promise(function(resolve, reject) {
resolve("done");
reject(new Error("…")); // ignored
setTimeout(() => resolve("…")); // ignored
});
The idea is that a job done by the executor may have only one result or an error.
Also, resolve/reject expect only one argument (or none) and will ignore additional arguments.
Reject with Error objects
In case something goes wrong, the executor should call reject.
That can be done with any type of argument (just like resolve).
But it is recommended to use Error objects (or objects that inherit from Error).
The reasoning for that will soon become apparent.
Immediately calling resolve/reject
In practice, an executor usually does something asynchronously and calls resolve/reject after some time, but it doesn't have to.
We also can call resolve or reject immediately, like this:
let promise = new Promise(function(resolve, reject) {
// not taking our time to do the job
resolve(123); // immediately give the result: 123
});
For instance, this might happen when we start to do a job but then see that everything has already been completed and cached.
That's fine.
We immediately have a resolved promise.
The state and result are internal
The properties state and result of the Promise object are internal.
We can't directly access them.
We can use the methods .then/.catch/.finally for that.
They are described below.
- Consumers: then, catch, finally
A Promise object serves as a link between the executor (the “producing code” or “singer”) and the consuming functions (the “fans”), which will receive the result or error.
Consuming functions can be registered (subscribed) using methods .then, .catch and .finally.
then
The most important, fundamental one is .then.
The syntax is:
promise.then(
function(result) { /* handle a successful result */ },
function(error) { /* handle an error */ }
);
The first argument of .then is a function that runs when the promise is resolved, and receives the result.
The second argument of .then is a function that runs when the promise is rejected, and receives the error.
For instance, here's a reaction to a successfully resolved promise:
let promise = new Promise(function(resolve, reject) {
setTimeout(() => resolve("done!"), 1000);
});
// resolve runs the first function in .then
promise.then(
result => alert(result), // shows "done!" after 1 second
error => alert(error) // doesn't run
);
The first function was executed.
And in the case of a rejection, the second one:
let promise = new Promise(function(resolve, reject) {
setTimeout(() => reject(new Error("Whoops!")), 1000);
});
// reject runs the second function in .then
promise.then(
result => alert(result), // doesn't run
error => alert(error) // shows "Error: Whoops!" after 1 second
);
If we're interested only in successful completions, then we can provide only one function argument to .then:
let promise = new Promise(resolve => {
setTimeout(() => resolve("done!"), 1000);
});
promise.then(alert); // shows "done!" after 1 second
catch
If we're interested only in errors, then we can use null as the first argument: .then(null, errorHandlingFunction).
Or we can use .catch(errorHandlingFunction), which is exactly the same:
let promise = new Promise((resolve, reject) => {
setTimeout(() => reject(new Error("Whoops!")), 1000);
});
// .catch(f) is the same as promise.then(null, f)
promise.catch(alert); // shows "Error: Whoops!" after 1 second
The call .catch(f) is a complete analog of .then(null, f), it's just a shorthand.
finally
Just like there's a finally clause in a regular try {...} catch {...}, there's finally in promises.
The call .finally(f) is similar to .then(f, f) in the sense that f always runs when the promise is settled: be it resolve or reject.
finally is a good handler for performing cleanup, e.g.
stopping our loading indicators, as they are not needed anymore, no matter what the outcome is.
Like this:
new Promise((resolve, reject) => {
/* do something that takes time, and then call resolve/reject */
})
// runs when the promise is settled, doesn't matter successfully or not
.finally(() => stop loading indicator)
// so the loading indicator is always stopped before we process the result/error
.then(result => show result, err => show error)
That said, finally(f) isn't exactly an alias of then(f,f) though.
There are few subtle differences:
A finally handler has no arguments.
In finally we don't know whether the promise is successful or not.
That's all right, as our task is usually to perform “general” finalizing procedures.
A finally handler passes through results and errors to the next handler.
For instance, here the result is passed through finally to then:
new Promise((resolve, reject) => {
setTimeout(() => resolve("result"), 2000)
})
.finally(() => alert("Promise ready"))
.then(result => alert(result)); // <-- .then handles the result
And here there's an error in the promise, passed through finally to catch:
new Promise((resolve, reject) => {
throw new Error("error");
})
.finally(() => alert("Promise ready"))
.catch(err => alert(err)); // <-- .catch handles the error object
That's very convenient, because finally is not meant to process a promise result.
So it passes it through.
We'll talk more about promise chaining and result-passing between handlers in the next chapter.
We can attach handlers to settled promises
If a promise is pending, .then/catch/finally handlers wait for it.
Otherwise, if a promise has already settled, they just run:
// the promise becomes resolved immediately upon creation
let promise = new Promise(resolve => resolve("done!"));
promise.then(alert); // done! (shows up right now)
Note that this makes promises more powerful than the real life “subscription list” scenario.
If the singer has already released their song and then a person signs up on the subscription list, they probably won't receive that song.
Subscriptions in real life must be done prior to the event.
Promises are more flexible.
We can add handlers any time: if the result is already there, they just execute.
Next, let's see more practical examples of how promises can help us write asynchronous code.
- Example: loadScript
We've got the loadScript function for loading a script from the previous chapter.
Here's the callback-based variant, just to remind us of it:
function loadScript(src, callback) {
let script = document.createElement('script');
script.src = src;
script.onload = () => callback(null, script);
script.onerror = () => callback(new Error(`Script load error for ${src}`));
document.head.append(script);
}
Let's rewrite it using Promises.
The new function loadScript will not require a callback.
Instead, it will create and return a Promise object that resolves when the loading is complete.
The outer code can add handlers (subscribing functions) to it using .then:
function loadScript(src) {
return new Promise(function(resolve, reject) {
let script = document.createElement('script');
script.src = src;
script.onload = () => resolve(script);
script.onerror = () => reject(new Error(`Script load error for ${src}`));
document.head.append(script);
});
}
Usage:
let promise = loadScript("https://cdnjs.cloudflare.com/ajax/libs/lodash.js/4.17.11/lodash.js");
promise.then(
script => alert(`${script.src} is loaded!`),
error => alert(`Error: ${error.message}`)
);
promise.then(script => alert('Another handler...'));
We can immediately see a few benefits over the callback-based pattern:
Promises
Callbacks
Promises allow us to do things in the natural order.
First, we run loadScript(script), and .then we write what to do with the result.
We must have a callback function at our disposal when calling loadScript(script, callback).
In other words, we must know what to do with the result beforeloadScript is called.
We can call .then on a Promise as many times as we want.
Each time, we're adding a new “fan”, a new subscribing function, to the “subscription list”.
More about this in the next chapter: Promises chaining.
There can be only one callback.
So promises give us better code flow and flexibility.
But there's more.
We'll see that in the next chapters.
What's the output of the code below?
let promise = new Promise(function(resolve, reject) {
resolve(1);
setTimeout(() => resolve(2), 1000);
});
promise.then(alert);
The output is: 1.
The second call to resolve is ignored, because only the first call of reject/resolve is taken into account.
Further calls are ignored.
Delay with a promise
The built-in function setTimeout uses callbacks.
Create a promise-based alternative.
The function delay(ms) should return a promise.
That promise should resolve after ms milliseconds, so that we can add .then to it, like this:
function delay(ms) {
// your code
}
delay(3000).then(() => alert('runs after 3 seconds'));function delay(ms) {
return new Promise(resolve => setTimeout(resolve, ms));
}
delay(3000).then(() => alert('runs after 3 seconds'));
Please note that in this task resolve is called without arguments.
We don't return any value from delay, just ensure the delay.
Let's return to the problem mentioned in the chapter Introduction: callbacks: we have a sequence of asynchronous tasks to be performed one after another — for instance, loading scripts.
How can we code it well?
Promises provide a couple of recipes to do that.
In this chapter we cover promise chaining.
It looks like this:
new Promise(function(resolve, reject) {
setTimeout(() => resolve(1), 1000); // (*)
}).then(function(result) { // (**)
alert(result); // 1
return result * 2;
}).then(function(result) { // (***)
alert(result); // 2
return result * 2;
}).then(function(result) {
alert(result); // 4
return result * 2;
});
The idea is that the result is passed through the chain of .then handlers.
Here the flow is:
The initial promise resolves in 1 second (*),
Then the .then handler is called (**).
The value that it returns is passed to the next .then handler (***)
…and so on.
As the result is passed along the chain of handlers, we can see a sequence of alert calls: 1 → 2 → 4.
The whole thing works, because a call to promise.then returns a promise, so that we can call the next .then on it.
When a handler returns a value, it becomes the result of that promise, so the next .then is called with it.
A classic newbie error: technically we can also add many .then to a single promise.
This is not chaining.
For example:
let promise = new Promise(function(resolve, reject) {
setTimeout(() => resolve(1), 1000);
});
promise.then(function(result) {
alert(result); // 1
return result * 2;
});
promise.then(function(result) {
alert(result); // 1
return result * 2;
});
promise.then(function(result) {
alert(result); // 1
return result * 2;
});
What we did here is just several handlers to one promise.
They don't pass the result to each other; instead they process it independently.
Here's the picture (compare it with the chaining above):
All .then on the same promise get the same result – the result of that promise.
So in the code above all alert show the same: 1.
In practice we rarely need multiple handlers for one promise.
Chaining is used much more often.
- Returning promises
A handler, used in .then(handler) may create and return a promise.
In that case further handlers wait until it settles, and then get its result.
For instance:
new Promise(function(resolve, reject) {
setTimeout(() => resolve(1), 1000);
}).then(function(result) {
alert(result); // 1
return new Promise((resolve, reject) => { // (*)
setTimeout(() => resolve(result * 2), 1000);
});
}).then(function(result) { // (**)
alert(result); // 2
return new Promise((resolve, reject) => {
setTimeout(() => resolve(result * 2), 1000);
});
}).then(function(result) {
alert(result); // 4
});
Here the first .then shows 1 and returns new Promise(…) in the line (*).
After one second it resolves, and the result (the argument of resolve, here it's result * 2) is passed on to handler of the second .then.
That handler is in the line (**), it shows 2 and does the same thing.
So the output is the same as in the previous example: 1 → 2 → 4, but now with 1 second delay between alert calls.
Returning promises allows us to build chains of asynchronous actions.
- Example: loadScript
Let's use this feature with the promisified loadScript, defined in the previous chapter, to load scripts one by one, in sequence:
loadScript("/article/promise-chaining/one.js")
.then(function(script) {
return loadScript("/article/promise-chaining/two.js");
})
.then(function(script) {
return loadScript("/article/promise-chaining/three.js");
})
.then(function(script) {
// use functions declared in scripts
// to show that they indeed loaded
one();
two();
three();
});
This code can be made bit shorter with arrow functions:
loadScript("/article/promise-chaining/one.js")
.then(script => loadScript("/article/promise-chaining/two.js"))
.then(script => loadScript("/article/promise-chaining/three.js"))
.then(script => {
// scripts are loaded, we can use functions declared there
one();
two();
three();
});
Here each loadScript call returns a promise, and the next .then runs when it resolves.
Then it initiates the loading of the next script.
So scripts are loaded one after another.
We can add more asynchronous actions to the chain.
Please note that the code is still “flat” — it grows down, not to the right.
There are no signs of the “pyramid of doom”.
Technically, we could add .then directly to each loadScript, like this:
loadScript("/article/promise-chaining/one.js").then(script1 => {
loadScript("/article/promise-chaining/two.js").then(script2 => {
loadScript("/article/promise-chaining/three.js").then(script3 => {
// this function has access to variables script1, script2 and script3
one();
two();
three();
});
});
});
This code does the same: loads 3 scripts in sequence.
But it “grows to the right”.
So we have the same problem as with callbacks.
People who start to use promises sometimes don't know about chaining, so they write it this way.
Generally, chaining is preferred.
Sometimes it's ok to write .then directly, because the nested function has access to the outer scope.
In the example above the most nested callback has access to all variables script1, script2, script3.
But that's an exception rather than a rule.
Thenables
To be precise, a handler may return not exactly a promise, but a so-called “thenable” object – an arbitrary object that has a method .then.
It will be treated the same way as a promise.
The idea is that 3rd-party libraries may implement “promise-compatible” objects of their own.
They can have an extended set of methods, but also be compatible with native promises, because they implement .then.
Here's an example of a thenable object:
class Thenable {
constructor(num) {
this.num = num;
}
then(resolve, reject) {
alert(resolve); // function() { native code }
// resolve with this.num*2 after the 1 second
setTimeout(() => resolve(this.num * 2), 1000); // (**)
}
}
new Promise(resolve => resolve(1))
.then(result => {
return new Thenable(result); // (*)
})
.then(alert); // shows 2 after 1000ms
JavaScript checks the object returned by the .then handler in line (*): if it has a callable method named then, then it calls that method providing native functions resolve, reject as arguments (similar to an executor) and waits until one of them is called.
In the example above resolve(2) is called after 1 second (**).
Then the result is passed further down the chain.
This feature allows us to integrate custom objects with promise chains without having to inherit from Promise.
- Bigger example: fetch
In frontend programming promises are often used for network requests.
So let's see an extended example of that.
We'll use the fetch method to load the information about the user from the remote server.
It has a lot of optional parameters covered in separate chapters, but the basic syntax is quite simple:
let promise = fetch(url);
This makes a network request to the url and returns a promise.
The promise resolves with a response object when the remote server responds with headers, but before the full response is downloaded.
To read the full response, we should call the method response.text(): it returns a promise that resolves when the full text is downloaded from the remote server, with that text as a result.
The code below makes a request to user.json and loads its text from the server:
fetch('/article/promise-chaining/user.json')
// .then below runs when the remote server responds
.then(function(response) {
// response.text() returns a new promise that resolves with the full response text
// when it loads
return response.text();
})
.then(function(text) {
// ...and here's the content of the remote file
alert(text); // {"name": "iliakan", "isAdmin": true}
});
The response object returned from fetch also includes the method response.json() that reads the remote data and parses it as JSON.
In our case that's even more convenient, so let's switch to it.
We'll also use arrow functions for brevity:
// same as above, but response.json() parses the remote content as JSON
fetch('/article/promise-chaining/user.json')
.then(response => response.json())
.then(user => alert(user.name)); // iliakan, got user name
Now let's do something with the loaded user.
For instance, we can make one more request to GitHub, load the user profile and show the avatar:
// Make a request for user.json
fetch('/article/promise-chaining/user.json')
// Load it as json
.then(response => response.json())
// Make a request to GitHub
.then(user => fetch(`https://api.github.com/users/${user.name}`))
// Load the response as json
.then(response => response.json())
// Show the avatar image (githubUser.avatar_url) for 3 seconds (maybe animate it)
.then(githubUser => {
let img = document.createElement('img');
img.src = githubUser.avatar_url;
img.className = "promise-avatar-example";
document.body.append(img);
setTimeout(() => img.remove(), 3000); // (*)
});
The code works; see comments about the details.
However, there's a potential problem in it, a typical error for those who begin to use promises.
Look at the line (*): how can we do something after the avatar has finished showing and gets removed? For instance, we'd like to show a form for editing that user or something else.
As of now, there's no way.
To make the chain extendable, we need to return a promise that resolves when the avatar finishes showing.
Like this:
fetch('/article/promise-chaining/user.json')
.then(response => response.json())
.then(user => fetch(`https://api.github.com/users/${user.name}`))
.then(response => response.json())
.then(githubUser => new Promise(function(resolve, reject) { // (*)
let img = document.createElement('img');
img.src = githubUser.avatar_url;
img.className = "promise-avatar-example";
document.body.append(img);
setTimeout(() => {
img.remove();
resolve(githubUser); // (**)
}, 3000);
}))
// triggers after 3 seconds
.then(githubUser => alert(`Finished showing ${githubUser.name}`));
That is, the .then handler in line (*) now returns new Promise, that becomes settled only after the call of resolve(githubUser) in setTimeout(**).
The next .then in the chain will wait for that.
As a good practice, an asynchronous action should always return a promise.
That makes it possible to plan actions after it; even if we don't plan to extend the chain now, we may need it later.
Finally, we can split the code into reusable functions:
function loadJson(url) {
return fetch(url)
.then(response => response.json());
}
function loadGithubUser(name) {
return fetch(`https://api.github.com/users/${name}`)
.then(response => response.json());
}
function showAvatar(githubUser) {
return new Promise(function(resolve, reject) {
let img = document.createElement('img');
img.src = githubUser.avatar_url;
img.className = "promise-avatar-example";
document.body.append(img);
setTimeout(() => {
img.remove();
resolve(githubUser);
}, 3000);
});
}
// Use them:
loadJson('/article/promise-chaining/user.json')
.then(user => loadGithubUser(user.name))
.then(showAvatar)
.then(githubUser => alert(`Finished showing ${githubUser.name}`));
// ...
- Summary
If a .then (or catch/finally, doesn't matter) handler returns a promise, the rest of the chain waits until it settles.
When it does, its result (or error) is passed further.
Here's a full picture:
Are these code fragments equal? In other words, do they behave the same way in any circumstances, for any handler functions?
promise.then(f1).catch(f2);
Versus:
promise.then(f1, f2);
The short answer is: no, they are not equal:
The difference is that if an error happens in f1, then it is handled by .catch here:
promise
.then(f1)
.catch(f2);
…But not here:
promise
.then(f1, f2);
That's because an error is passed down the chain, and in the second code piece there's no chain below f1.
In other words, .then passes results/errors to the next .then/catch.
So in the first example, there's a catch below, and in the second one there isn't, so the error is unhandled.
Promises, async/await
Error handling with promises
Promise chains are great at error handling.
When a promise rejects, the control jumps to the closest rejection handler.
That's very convenient in practice.
For instance, in the code below the URL to fetch is wrong (no such site) and .catch handles the error:
fetch('https://no-such-server.blabla') // rejects
.then(response => response.json())
.catch(err => alert(err)) // TypeError: failed to fetch (the text may vary)
As you can see, the .catch doesn't have to be immediate.
It may appear after one or maybe several .then.
Or, maybe, everything is all right with the site, but the response is not valid JSON.
The easiest way to catch all errors is to append .catch to the end of chain:
fetch('/article/promise-chaining/user.json')
.then(response => response.json())
.then(user => fetch(`https://api.github.com/users/${user.name}`))
.then(response => response.json())
.then(githubUser => new Promise((resolve, reject) => {
let img = document.createElement('img');
img.src = githubUser.avatar_url;
img.className = "promise-avatar-example";
document.body.append(img);
setTimeout(() => {
img.remove();
resolve(githubUser);
}, 3000);
}))
.catch(error => alert(error.message));
Normally, such .catch doesn't trigger at all.
But if any of the promises above rejects (a network problem or invalid json or whatever), then it would catch it.
- Implicit try…catch
The code of a promise executor and promise handlers has an "invisible try..catch" around it.
If an exception happens, it gets caught and treated as a rejection.
For instance, this code:
new Promise((resolve, reject) => {
throw new Error("Whoops!");
}).catch(alert); // Error: Whoops!
…Works exactly the same as this:
new Promise((resolve, reject) => {
reject(new Error("Whoops!"));
}).catch(alert); // Error: Whoops!
The "invisible try..catch" around the executor automatically catches the error and turns it into rejected promise.
This happens not only in the executor function, but in its handlers as well.
If we throw inside a .then handler, that means a rejected promise, so the control jumps to the nearest error handler.
Here's an example:
new Promise((resolve, reject) => {
resolve("ok");
}).then((result) => {
throw new Error("Whoops!"); // rejects the promise
}).catch(alert); // Error: Whoops!
This happens for all errors, not just those caused by the throw statement.
For example, a programming error:
new Promise((resolve, reject) => {
resolve("ok");
}).then((result) => {
blabla(); // no such function
}).catch(alert); // ReferenceError: blabla is not defined
The final .catch not only catches explicit rejections, but also accidental errors in the handlers above.
- Rethrowing
As we already noticed, .catch at the end of the chain is similar to try..catch.
We may have as many .then handlers as we want, and then use a single .catch at the end to handle errors in all of them.
In a regular try..catch we can analyze the error and maybe rethrow it if it can't be handled.
The same thing is possible for promises.
If we throw inside .catch, then the control goes to the next closest error handler.
And if we handle the error and finish normally, then it continues to the next closest successful .then handler.
In the example below the .catch successfully handles the error:
// the execution: catch -> then
new Promise((resolve, reject) => {
throw new Error("Whoops!");
}).catch(function(error) {
alert("The error is handled, continue normally");
}).then(() => alert("Next successful handler runs"));
Here the .catch block finishes normally.
So the next successful .then handler is called.
In the example below we see the other situation with .catch.
The handler (*) catches the error and just can't handle it (e.g.
it only knows how to handle URIError), so it throws it again:
// the execution: catch -> catch
new Promise((resolve, reject) => {
throw new Error("Whoops!");
}).catch(function(error) { // (*)
if (error instanceof URIError) {
// handle it
} else {
alert("Can't handle such error");
throw error; // throwing this or another error jumps to the next catch
}
}).then(function() {
/* doesn't run here */
}).catch(error => { // (**)
alert(`The unknown error has occurred: ${error}`);
// don't return anything => execution goes the normal way
});
The execution jumps from the first .catch(*) to the next one (**) down the chain.
- Unhandled rejections
What happens when an error is not handled? For instance, we forgot to append .catch to the end of the chain, like here:
new Promise(function() {
noSuchFunction(); // Error here (no such function)
})
.then(() => {
// successful promise handlers, one or more
}); // without .catch at the end!
In case of an error, the promise becomes rejected, and the execution should jump to the closest rejection handler.
But there is none.
So the error gets “stuck”.
There's no code to handle it.
In practice, just like with regular unhandled errors in code, it means that something has gone terribly wrong.
What happens when a regular error occurs and is not caught by try..catch? The script dies with a message in the console.
A similar thing happens with unhandled promise rejections.
The JavaScript engine tracks such rejections and generates a global error in that case.
You can see it in the console if you run the example above.
In the browser we can catch such errors using the event unhandledrejection:
window.addEventListener('unhandledrejection', function(event) {
// the event object has two special properties:
alert(event.promise); // [object Promise] - the promise that generated the error
alert(event.reason); // Error: Whoops! - the unhandled error object
});
new Promise(function() {
throw new Error("Whoops!");
}); // no catch to handle the error
The event is the part of the HTML standard.
If an error occurs, and there's no .catch, the unhandledrejection handler triggers, and gets the event object with the information about the error, so we can do something.
Usually such errors are unrecoverable, so our best way out is to inform the user about the problem and probably report the incident to the server.
In non-browser environments like Node.js there are other ways to track unhandled errors.
- Summary
.catch handles errors in promises of all kinds: be it a reject() call, or an error thrown in a handler.
We should place .catch exactly in places where we want to handle errors and know how to handle them.
The handler should analyze errors (custom error classes help) and rethrow unknown ones (maybe they are programming mistakes).
It's ok not to use .catch at all, if there's no way to recover from an error.
In any case we should have the unhandledrejection event handler (for browsers, and analogs for other environments) to track unhandled errors and inform the user (and probably our server) about them, so that our app never “just dies”.
What do you think? Will the .catch trigger? Explain your answer.
new Promise(function(resolve, reject) {
setTimeout(() => {
throw new Error("Whoops!");
}, 1000);
}).catch(alert);
The answer is: no, it won't:
new Promise(function(resolve, reject) {
setTimeout(() => {
throw new Error("Whoops!");
}, 1000);
}).catch(alert);
As said in the chapter, there's an "implicit try..catch" around the function code.
So all synchronous errors are handled.
But here the error is generated not while the executor is running, but later.
So the promise can't handle it.
Promises, async/await
Promise API
There are 5 static methods in the Promise class.
We'll quickly cover their use cases here.
- Promise.all
Let's say we want many promises to execute in parallel and wait until all of them are ready.
For instance, download several URLs in parallel and process the content once they are all done.
That's what Promise.all is for.
The syntax is:
let promise = Promise.all([...promises...]);Promise.all takes an array of promises (it technically can be any iterable, but is usually an array) and returns a new promise.
The new promise resolves when all listed promises are settled, and the array of their results becomes its result.
For instance, the Promise.all below settles after 3 seconds, and then its result is an array [1, 2, 3]:
Promise.all([
new Promise(resolve => setTimeout(() => resolve(1), 3000)), // 1
new Promise(resolve => setTimeout(() => resolve(2), 2000)), // 2
new Promise(resolve => setTimeout(() => resolve(3), 1000)) // 3
]).then(alert); // 1,2,3 when promises are ready: each promise contributes an array member
Please note that the order of the resulting array members is the same as in its source promises.
Even though the first promise takes the longest time to resolve, it's still first in the array of results.
A common trick is to map an array of job data into an array of promises, and then wrap that into Promise.all.
For instance, if we have an array of URLs, we can fetch them all like this:
let urls = [
'https://api.github.com/users/iliakan',
'https://api.github.com/users/remy',
'https://api.github.com/users/jeresig'
];
// map every url to the promise of the fetch
let requests = urls.map(url => fetch(url));
// Promise.all waits until all jobs are resolved
Promise.all(requests)
.then(responses => responses.forEach(
response => alert(`${response.url}: ${response.status}`)
));
A bigger example with fetching user information for an array of GitHub users by their names (we could fetch an array of goods by their ids, the logic is identical):
let names = ['iliakan', 'remy', 'jeresig'];
let requests = names.map(name => fetch(`https://api.github.com/users/${name}`));
Promise.all(requests)
.then(responses => {
// all responses are resolved successfully
for(let response of responses) {
alert(`${response.url}: ${response.status}`); // shows 200 for every url
}
return responses;
})
// map array of responses into an array of response.json() to read their content
.then(responses => Promise.all(responses.map(r => r.json())))
// all JSON answers are parsed: "users" is the array of them
.then(users => users.forEach(user => alert(user.name)));If any of the promises is rejected, the promise returned by Promise.all immediately rejects with that error.
For instance:
Promise.all([
new Promise((resolve, reject) => setTimeout(() => resolve(1), 1000)),
new Promise((resolve, reject) => setTimeout(() => reject(new Error("Whoops!")), 2000)),
new Promise((resolve, reject) => setTimeout(() => resolve(3), 3000))
]).catch(alert); // Error: Whoops!
Here the second promise rejects in two seconds.
That leads to an immediate rejection of Promise.all, so .catch executes: the rejection error becomes the outcome of the entire Promise.all.
In case of an error, other promises are ignored
If one promise rejects, Promise.all immediately rejects, completely forgetting about the other ones in the list.
Their results are ignored.
For example, if there are multiple fetch calls, like in the example above, and one fails, the others will still continue to execute, but Promise.all won't watch them anymore.
They will probably settle, but their results will be ignored.
Promise.all does nothing to cancel them, as there's no concept of “cancellation” in promises.
In another chapter we'll cover AbortController that can help with that, but it's not a part of the Promise API.
Promise.all(iterable) allows non-promise “regular” values in iterable
Normally, Promise.all(...) accepts an iterable (in most cases an array) of promises.
But if any of those objects is not a promise, it's passed to the resulting array “as is”.
For instance, here the results are [1, 2, 3]:
Promise.all([
new Promise((resolve, reject) => {
setTimeout(() => resolve(1), 1000)
}),
2,
3
]).then(alert); // 1, 2, 3
So we are able to pass ready values to Promise.all where convenient.
- Promise.allSettled
A recent addition
This is a recent addition to the language.
Old browsers may need polyfills.
Promise.all rejects as a whole if any promise rejects.
That's good for “all or nothing” cases, when we need all results successful to proceed:
Promise.all([
fetch('/template.html'),
fetch('/style.css'),
fetch('/data.json')
]).then(render); // render method needs results of all fetchesPromise.allSettled just waits for all promises to settle, regardless of the result.
The resulting array has:
{status:"fulfilled", value:result} for successful responses,
{status:"rejected", reason:error} for errors.
For example, we'd like to fetch the information about multiple users.
Even if one request fails, we're still interested in the others.
Let's use Promise.allSettled:
let urls = [
'https://api.github.com/users/iliakan',
'https://api.github.com/users/remy',
'https://no-such-url'
];
Promise.allSettled(urls.map(url => fetch(url)))
.then(results => { // (*)
results.forEach((result, num) => {
if (result.status == "fulfilled") {
alert(`${urls[num]}: ${result.value.status}`);
}
if (result.status == "rejected") {
alert(`${urls[num]}: ${result.reason}`);
}
});
});
The results in the line (*) above will be:
[
{status: 'fulfilled', value: ...response...},
{status: 'fulfilled', value: ...response...},
{status: 'rejected', reason: ...error object...}
]
So for each promise we get its status and value/error.
Polyfill
If the browser doesn't support Promise.allSettled, it's easy to polyfill:
if (!Promise.allSettled) {
const rejectHandler = reason => ({ status: 'rejected', reason });
const resolveHandler = value => ({ status: 'fulfilled', value });
Promise.allSettled = function (promises) {
const convertedPromises = promises.map(p => Promise.resolve(p).then(resolveHandler, rejectHandler));
return Promise.all(convertedPromises);
};
}
In this code, promises.map takes input values, turns them into promises (just in case a non-promise was passed) with p => Promise.resolve(p), and then adds .then handler to every one.
That handler turns a successful result value into {status:'fulfilled', value}, and an error reason into {status:'rejected', reason}.
That's exactly the format of Promise.allSettled.
Now we can use Promise.allSettled to get the results of all given promises, even if some of them reject.
- Promise.race
Similar to Promise.all, but waits only for the first settled promise and gets its result (or error).
The syntax is:
let promise = Promise.race(iterable);
For instance, here the result will be 1:
Promise.race([
new Promise((resolve, reject) => setTimeout(() => resolve(1), 1000)),
new Promise((resolve, reject) => setTimeout(() => reject(new Error("Whoops!")), 2000)),
new Promise((resolve, reject) => setTimeout(() => resolve(3), 3000))
]).then(alert); // 1
The first promise here was fastest, so it became the result.
After the first settled promise “wins the race”, all further results/errors are ignored.
- Promise.any
Similar to Promise.race, but waits only for the first fulfilled promise and gets its result.
If all of the given promises are rejected, then the returned promise is rejected with AggregateError – a special error object that stores all promise errors in its errors property.
The syntax is:
let promise = Promise.any(iterable);
For instance, here the result will be 1:
Promise.any([
new Promise((resolve, reject) => setTimeout(() => reject(new Error("Whoops!")), 1000)),
new Promise((resolve, reject) => setTimeout(() => resolve(1), 2000)),
new Promise((resolve, reject) => setTimeout(() => resolve(3), 3000))
]).then(alert); // 1
The first promise here was fastest, but it was rejected, so the second promise became the result.
After the first fulfilled promise “wins the race”, all further results are ignored.
Here's an example when all promises fail:
Promise.any([
new Promise((resolve, reject) => setTimeout(() => reject(new Error("Ouch!")), 1000)),
new Promise((resolve, reject) => setTimeout(() => reject(new Error("Error!")), 2000))
]).catch(error => {
console.log(error.constructor.name); // AggregateError
console.log(error.errors[0]); // Error: Ouch!
console.log(error.errors[1]); // Error: Error
});
As you can see, error objects for failed promises are available in the errors property of the AggregateError object.
- Promise.resolve/reject
Methods Promise.resolve and Promise.reject are rarely needed in modern code, because async/await syntax (we'll cover it a bit later) makes them somewhat obsolete.
We cover them here for completeness and for those who can't use async/await for some reason.
Promise.resolve
Promise.resolve(value) creates a resolved promise with the result value.
Same as:
let promise = new Promise(resolve => resolve(value));
The method is used for compatibility, when a function is expected to return a promise.
For example, the loadCached function below fetches a URL and remembers (caches) its content.
For future calls with the same URL it immediately gets the previous content from cache, but uses Promise.resolve to make a promise of it, so the returned value is always a promise:
let cache = new Map();
function loadCached(url) {
if (cache.has(url)) {
return Promise.resolve(cache.get(url)); // (*)
}
return fetch(url)
.then(response => response.text())
.then(text => {
cache.set(url,text);
return text;
});
}
We can write loadCached(url).then(…), because the function is guaranteed to return a promise.
We can always use .then after loadCached.
That's the purpose of Promise.resolve in the line (*).
Promise.reject
Promise.reject(error) creates a rejected promise with error.
Same as:
let promise = new Promise((resolve, reject) => reject(error));
In practice, this method is almost never used.
- Summary
There are 6 static methods of Promise class:
Promise.all(promises) – waits for all promises to resolve and returns an array of their results.
If any of the given promises rejects, it becomes the error of Promise.all, and all other results are ignored.
Promise.allSettled(promises) (recently added method) – waits for all promises to settle and returns their results as an array of objects with:
status: "fulfilled" or "rejected"value (if fulfilled) or reason (if rejected).
Promise.race(promises) – waits for the first promise to settle, and its result/error becomes the outcome.
Promise.any(promises) (recently added method) – waits for the first promise to fulfill, and its result becomes the outcome.
If all of the given promises are rejected, AggregateError becomes the error of Promise.any.
Promise.resolve(value) – makes a resolved promise with the given value.
Promise.reject(error) – makes a rejected promise with the given error.
Of all these, Promise.all is probably the most common in practice.
Promises, async/await
Promisification
“Promisification” is a long word for a simple transformation.
It's the conversion of a function that accepts a callback into a function that returns a promise.
Such transformations are often required in real-life, as many functions and libraries are callback-based.
But promises are more convenient, so it makes sense to promisify them.
For better understanding, let's see an example.
For instance, we have loadScript(src, callback) from the chapter Introduction: callbacks.
function loadScript(src, callback) {
let script = document.createElement('script');
script.src = src;
script.onload = () => callback(null, script);
script.onerror = () => callback(new Error(`Script load error for ${src}`));
document.head.append(script);
}
// usage:
// loadScript('path/script.js', (err, script) => {...})
The function loads a script with the given src, and then calls callback(err) in case of an error, or callback(null, script) in case of successful loading.
That's a widespread agreement for using callbacks, we saw it before.
Let's promisify it.
We'll make a new function loadScriptPromise(src), that does the same (loads the script), but returns a promise instead of using callbacks.
In other words, we pass it only src (no callback) and get a promise in return, that resolves with script when the load is successful, and rejects with the error otherwise.
Here it is:
let loadScriptPromise = function(src) {
return new Promise((resolve, reject) => {
loadScript(src, (err, script) => {
if (err) reject(err);
else resolve(script);
});
});
};
// usage:
// loadScriptPromise('path/script.js').then(...)
As we can see, the new function is a wrapper around the original loadScript function.
It calls it providing its own callback that translates to promise resolve/reject.
Now loadScriptPromise fits well in promise-based code.
If we like promises more than callbacks (and soon we'll see more reasons for that), then we will use it instead.
In practice we may need to promisify more than one function, so it makes sense to use a helper.
We'll call it promisify(f): it accepts a to-promisify function f and returns a wrapper function.
function promisify(f) {
return function (...args) { // return a wrapper-function (*)
return new Promise((resolve, reject) => {
function callback(err, result) { // our custom callback for f (**)
if (err) {
reject(err);
} else {
resolve(result);
}
}
args.push(callback); // append our custom callback to the end of f arguments
f.call(this, ...args); // call the original function
});
};
}
// usage:
let loadScriptPromise = promisify(loadScript);
loadScriptPromise(...).then(...);
The code may look a bit complex, but it's essentially the same that we wrote above, while promisifying loadScript function.
A call to promisify(f) returns a wrapper around f(*).
That wrapper returns a promise and forwards the call to the original f, tracking the result in the custom callback (**).
Here, promisify assumes that the original function expects a callback with exactly two arguments (err, result).
That's what we encounter most often.
Then our custom callback is in exactly the right format, and promisify works great for such a case.
But what if the original f expects a callback with more arguments callback(err, res1, res2, ...)?
We can improve our helper.
Let's make a more advanced version of promisify.
When called as promisify(f) it should work similar to the version above.
When called as promisify(f, true), it should return the promise that resolves with the array of callback results.
That's exactly for callbacks with many arguments.
// promisify(f, true) to get array of results
function promisify(f, manyArgs = false) {
return function (...args) {
return new Promise((resolve, reject) => {
function callback(err, ...results) { // our custom callback for f
if (err) {
reject(err);
} else {
// resolve with all callback results if manyArgs is specified
resolve(manyArgs ? results : results[0]);
}
}
args.push(callback);
f.call(this, ...args);
});
};
}
// usage:
f = promisify(f, true);
f(...).then(arrayOfResults => ..., err => ...);
As you can see it's essentially the same as above, but resolve is called with only one or all arguments depending on whether manyArgs is truthy.
For more exotic callback formats, like those without err at all: callback(result), we can promisify such functions manually without using the helper.
There are also modules with a bit more flexible promisification functions, e.g.
es6-promisify.
In Node.js, there's a built-in util.promisify function for that.
Please note:
Promisification is a great approach, especially when you use async/await (see the next chapter), but not a total replacement for callbacks.
Remember, a promise may have only one result, but a callback may technically be called many times.
So promisification is only meant for functions that call the callback once.
Further calls will be ignored.
Promises, async/await
Microtasks
Promise handlers .then/.catch/.finally are always asynchronous.
Even when a Promise is immediately resolved, the code on the lines below.then/.catch/.finally will still execute before these handlers.
Here's a demo:
let promise = Promise.resolve();
promise.then(() => alert("promise done!"));
alert("code finished"); // this alert shows first
If you run it, you see code finished first, and then promise done!.
That's strange, because the promise is definitely done from the beginning.
Why did the .then trigger afterwards? What's going on?
- Microtasks queue
Asynchronous tasks need proper management.
For that, the ECMA standard specifies an internal queue PromiseJobs, more often referred to as the “microtask queue” (V8 term).
As stated in the specification:
The queue is first-in-first-out: tasks enqueued first are run first.
Execution of a task is initiated only when nothing else is running.
Or, to say more simply, when a promise is ready, its .then/catch/finally handlers are put into the queue; they are not executed yet.
When the JavaScript engine becomes free from the current code, it takes a task from the queue and executes it.
That's why “code finished” in the example above shows first.
Promise handlers always go through this internal queue.
If there's a chain with multiple .then/catch/finally, then every one of them is executed asynchronously.
That is, it first gets queued, then executed when the current code is complete and previously queued handlers are finished.
What if the order matters for us? How can we make code finished run after promise done?
Easy, just put it into the queue with .then:
Promise.resolve()
.then(() => alert("promise done!"))
.then(() => alert("code finished"));
Now the order is as intended.
- Unhandled rejection
Remember the unhandledrejection event from the article Error handling with promises?
Now we can see exactly how JavaScript finds out that there was an unhandled rejection.
An “unhandled rejection” occurs when a promise error is not handled at the end of the microtask queue.
Normally, if we expect an error, we add .catch to the promise chain to handle it:
let promise = Promise.reject(new Error("Promise Failed!"));
promise.catch(err => alert('caught'));
// doesn't run: error handled
window.addEventListener('unhandledrejection', event => alert(event.reason));
But if we forget to add .catch, then, after the microtask queue is empty, the engine triggers the event:
let promise = Promise.reject(new Error("Promise Failed!"));
// Promise Failed!
window.addEventListener('unhandledrejection', event => alert(event.reason));
What if we handle the error later? Like this:
let promise = Promise.reject(new Error("Promise Failed!"));
setTimeout(() => promise.catch(err => alert('caught')), 1000);
// Error: Promise Failed!
window.addEventListener('unhandledrejection', event => alert(event.reason));
Now, if we run it, we'll see Promise Failed! first and then caught.
If we didn't know about the microtasks queue, we could wonder: “Why did unhandledrejection handler run? We did catch and handle the error!”
But now we understand that unhandledrejection is generated when the microtask queue is complete: the engine examines promises and, if any of them is in the “rejected” state, then the event triggers.
In the example above, .catch added by setTimeout also triggers.
But it does so later, after unhandledrejection has already occurred, so it doesn't change anything.
- Summary
Promise handling is always asynchronous, as all promise actions pass through the internal “promise jobs” queue, also called “microtask queue” (V8 term).
So .then/catch/finally handlers are always called after the current code is finished.
If we need to guarantee that a piece of code is executed after .then/catch/finally, we can add it into a chained .then call.
In most Javascript engines, including browsers and Node.js, the concept of microtasks is closely tied with the “event loop” and “macrotasks”.
As these have no direct relation to promises, they are covered in another part of the tutorial, in the article Event loop: microtasks and macrotasks.
Promises, async/await
Async/await
There's a special syntax to work with promises in a more comfortable fashion, called “async/await”.
It's surprisingly easy to understand and use.
- Async functions
Let's start with the async keyword.
It can be placed before a function, like this:
async function f() {
return 1;
}
The word “async” before a function means one simple thing: a function always returns a promise.
Other values are wrapped in a resolved promise automatically.
For instance, this function returns a resolved promise with the result of 1; let's test it:
async function f() {
return 1;
}
f().then(alert); // 1
…We could explicitly return a promise, which would be the same:
async function f() {
return Promise.resolve(1);
}
f().then(alert); // 1
So, async ensures that the function returns a promise, and wraps non-promises in it.
Simple enough, right? But not only that.
There's another keyword, await, that works only inside async functions, and it's pretty cool.
- Await
The syntax:
// works only inside async functions
let value = await promise;
The keyword await makes JavaScript wait until that promise settles and returns its result.
Here's an example with a promise that resolves in 1 second:
async function f() {
let promise = new Promise((resolve, reject) => {
setTimeout(() => resolve("done!"), 1000)
});
let result = await promise; // wait until the promise resolves (*)
alert(result); // "done!"
}
f();
The function execution “pauses” at the line (*) and resumes when the promise settles, with result becoming its result.
So the code above shows “done!” in one second.
Let's emphasize: await literally suspends the function execution until the promise settles, and then resumes it with the promise result.
That doesn't cost any CPU resources, because the JavaScript engine can do other jobs in the meantime: execute other scripts, handle events, etc.
It's just a more elegant syntax of getting the promise result than promise.then, easier to read and write.
Can't use await in regular functions
If we try to use await in non-async function, there would be a syntax error:
function f() {
let promise = Promise.resolve(1);
let result = await promise; // Syntax error
}
We may get this error if we forget to put async before a function.
As said, await only works inside an async function.
Let's take the showAvatar() example from the chapter Promises chaining and rewrite it using async/await:
We'll need to replace .then calls with await.
Also we should make the function async for them to work.
async function showAvatar() {
// read our JSON
let response = await fetch('/article/promise-chaining/user.json');
let user = await response.json();
// read github user
let githubResponse = await fetch(`https://api.github.com/users/${user.name}`);
let githubUser = await githubResponse.json();
// show the avatar
let img = document.createElement('img');
img.src = githubUser.avatar_url;
img.className = "promise-avatar-example";
document.body.append(img);
// wait 3 seconds
await new Promise((resolve, reject) => setTimeout(resolve, 3000));
img.remove();
return githubUser;
}
showAvatar();
Pretty clean and easy to read, right? Much better than before.
await won't work in the top-level code
People who are just starting to use await tend to forget the fact that we can't use await in top-level code.
For example, this will not work:
// syntax error in top-level code
let response = await fetch('/article/promise-chaining/user.json');
let user = await response.json();
But we can wrap it into an anonymous async function, like this:
(async () => {
let response = await fetch('/article/promise-chaining/user.json');
let user = await response.json();
...
})();
P.S.
New feature: starting from V8 engine version 8.9+, top-level await works in modules.
await accepts “thenables”
Like promise.then, await allows us to use thenable objects (those with a callable then method).
The idea is that a third-party object may not be a promise, but promise-compatible: if it supports .then, that's enough to use it with await.
Here's a demo Thenable class; the await below accepts its instances:
class Thenable {
constructor(num) {
this.num = num;
}
then(resolve, reject) {
alert(resolve);
// resolve with this.num*2 after 1000ms
setTimeout(() => resolve(this.num * 2), 1000); // (*)
}
}
async function f() {
// waits for 1 second, then result becomes 2
let result = await new Thenable(1);
alert(result);
}
f();
If await gets a non-promise object with .then, it calls that method providing the built-in functions resolve and reject as arguments (just as it does for a regular Promise executor).
Then await waits until one of them is called (in the example above it happens in the line (*)) and then proceeds with the result.
Async class methods
To declare an async class method, just prepend it with async:
class Waiter {
async wait() {
return await Promise.resolve(1);
}
}
new Waiter()
.wait()
.then(alert); // 1
The meaning is the same: it ensures that the returned value is a promise and enables await.
- Error handling
If a promise resolves normally, then await promise returns the result.
But in the case of a rejection, it throws the error, just as if there were a throw statement at that line.
This code:
async function f() {
await Promise.reject(new Error("Whoops!"));
}
…is the same as this:
async function f() {
throw new Error("Whoops!");
}
In real situations, the promise may take some time before it rejects.
In that case there will be a delay before await throws an error.
We can catch that error using try..catch, the same way as a regular throw:
async function f() {
try {
let response = await fetch('http://no-such-url');
} catch(err) {
alert(err); // TypeError: failed to fetch
}
}
f();
In the case of an error, the control jumps to the catch block.
We can also wrap multiple lines:
async function f() {
try {
let response = await fetch('/no-user-here');
let user = await response.json();
} catch(err) {
// catches errors both in fetch and response.json
alert(err);
}
}
f();
If we don't have try..catch, then the promise generated by the call of the async function f() becomes rejected.
We can append .catch to handle it:
async function f() {
let response = await fetch('http://no-such-url');
}
// f() becomes a rejected promise
f().catch(alert); // TypeError: failed to fetch // (*)
If we forget to add .catch there, then we get an unhandled promise error (viewable in the console).
We can catch such errors using a global unhandledrejection event handler as described in the chapter Error handling with promises.
async/await and promise.then/catch
When we use async/await, we rarely need .then, because await handles the waiting for us.
And we can use a regular try..catch instead of .catch.
That's usually (but not always) more convenient.
But at the top level of the code, when we're outside any async function, we're syntactically unable to use await, so it's a normal practice to add .then/catch to handle the final result or falling-through error, like in the line (*) of the example above.
async/await works well with Promise.all
When we need to wait for multiple promises, we can wrap them in Promise.all and then await:
// wait for the array of results
let results = await Promise.all([
fetch(url1),
fetch(url2),
...
]);
In the case of an error, it propagates as usual, from the failed promise to Promise.all, and then becomes an exception that we can catch using try..catch around the call.
- Summary
The async keyword before a function has two effects:
Makes it always return a promise.
Allows await to be used in it.
The await keyword before a promise makes JavaScript wait until that promise settles, and then:
If it's an error, the exception is generated — same as if throw error were called at that very place.
Otherwise, it returns the result.
Together they provide a great framework to write asynchronous code that is easy to both read and write.
With async/await we rarely need to write promise.then/catch, but we still shouldn't forget that they are based on promises, because sometimes (e.g.
in the outermost scope) we have to use these methods.
Also Promise.all is nice when we are waiting for many tasks simultaneously.
Rewrite this example code from the chapter Promises chaining using async/await instead of .then/catch:
function loadJson(url) {
return fetch(url)
.then(response => {
if (response.status == 200) {
return response.json();
} else {
throw new Error(response.status);
}
});
}
loadJson('no-such-user.json')
.catch(alert); // Error: 404
The notes are below the code:
async function loadJson(url) { // (1)
let response = await fetch(url); // (2)
if (response.status == 200) {
let json = await response.json(); // (3)
return json;
}
throw new Error(response.status);
}
loadJson('no-such-user.json')
.catch(alert); // Error: 404 (4)
Notes:
The function loadJson becomes async.
All .then inside are replaced with await.
We can return response.json() instead of awaiting for it, like this:
if (response.status == 200) {
return response.json(); // (3)
}
Then the outer code would have to await for that promise to resolve.
In our case it doesn't matter.
The error thrown from loadJson is handled by .catch.
We can't use await loadJson(…) there, because we're not in an async function.
Rewrite "rethrow" with async/await
Below you can find the “rethrow” example.
Rewrite it using async/await instead of .then/catch.
And get rid of the recursion in favour of a loop in demoGithubUser: with async/await that becomes easy to do.
class HttpError extends Error {
constructor(response) {
super(`${response.status} for ${response.url}`);
this.name = 'HttpError';
this.response = response;
}
}
function loadJson(url) {
return fetch(url)
.then(response => {
if (response.status == 200) {
return response.json();
} else {
throw new HttpError(response);
}
});
}
// Ask for a user name until github returns a valid user
function demoGithubUser() {
let name = prompt("Enter a name?", "iliakan");
return loadJson(`https://api.github.com/users/${name}`)
.then(user => {
alert(`Full name: ${user.name}.`);
return user;
})
.catch(err => {
if (err instanceof HttpError && err.response.status == 404) {
alert("No such user, please reenter.");
return demoGithubUser();
} else {
throw err;
}
});
}
demoGithubUser();
There are no tricks here.
Just replace .catch with try...catch inside demoGithubUser and add async/await where needed:
class HttpError extends Error {
constructor(response) {
super(`${response.status} for ${response.url}`);
this.name = 'HttpError';
this.response = response;
}
}
async function loadJson(url) {
let response = await fetch(url);
if (response.status == 200) {
return response.json();
} else {
throw new HttpError(response);
}
}
// Ask for a user name until github returns a valid user
async function demoGithubUser() {
let user;
while(true) {
let name = prompt("Enter a name?", "iliakan");
try {
user = await loadJson(`https://api.github.com/users/${name}`);
break; // no error, exit loop
} catch(err) {
if (err instanceof HttpError && err.response.status == 404) {
// loop continues after the alert
alert("No such user, please reenter.");
} else {
// unknown error, rethrow
throw err;
}
}
}
alert(`Full name: ${user.name}.`);
return user;
}
demoGithubUser();
Call async from non-async
We have a “regular” function called f.
How can you call the async function wait() and use its result inside of f?
async function wait() {
await new Promise(resolve => setTimeout(resolve, 1000));
return 10;
}
function f() {
// ...what should you write here?
// we need to call async wait() and wait to get 10
// remember, we can't use "await"
}
P.S.
The task is technically very simple, but the question is quite common for developers new to async/await.
That's the case when knowing how it works inside is helpful.
Just treat async call as promise and attach .then to it:
async function wait() {
await new Promise(resolve => setTimeout(resolve, 1000));
return 10;
}
function f() {
// shows 10 after 1 second
wait().then(result => alert(result));
}
f();
Regular functions return only one, single value (or nothing).
Generators can return (“yield”) multiple values, one after another, on-demand.
They work great with iterables, allowing to create data streams with ease.
- Generator functions
To create a generator, we need a special syntax construct: function*, so-called “generator function”.
It looks like this:
function* generateSequence() {
yield 1;
yield 2;
return 3;
}
Generator functions behave differently from regular ones.
When such function is called, it doesn't run its code.
Instead it returns a special object, called “generator object”, to manage the execution.
Here, take a look:
function* generateSequence() {
yield 1;
yield 2;
return 3;
}
// "generator function" creates "generator object"
let generator = generateSequence();
alert(generator); // [object Generator]
The function code execution hasn't started yet:
The main method of a generator is next().
When called, it runs the execution until the nearest yield <value> statement (value can be omitted, then it's undefined).
Then the function execution pauses, and the yielded value is returned to the outer code.
The result of next() is always an object with two properties:
value: the yielded value.
done: true if the function code has finished, otherwise false.
For instance, here we create the generator and get its first yielded value:
function* generateSequence() {
yield 1;
yield 2;
return 3;
}
let generator = generateSequence();
let one = generator.next();
alert(JSON.stringify(one)); // {value: 1, done: false}
As of now, we got the first value only, and the function execution is on the second line:
Let's call generator.next() again.
It resumes the code execution and returns the next yield:
let two = generator.next();
alert(JSON.stringify(two)); // {value: 2, done: false}And, if we call it a third time, the execution reaches the return statement that finishes the function:
let three = generator.next();
alert(JSON.stringify(three)); // {value: 3, done: true}Now the generator is done.
We should see it from done:true and process value:3 as the final result.
New calls to generator.next() don't make sense any more.
If we do them, they return the same object: {done: true}.
function* f(…) or function *f(…)?
Both syntaxes are correct.
But usually the first syntax is preferred, as the star * denotes that it's a generator function, it describes the kind, not the name, so it should stick with the function keyword.
- Generators are iterable
As you probably already guessed looking at the next() method, generators are iterable.
We can loop over their values using for..of:
function* generateSequence() {
yield 1;
yield 2;
return 3;
}
let generator = generateSequence();
for(let value of generator) {
alert(value); // 1, then 2
}
Looks a lot nicer than calling .next().value, right?
…But please note: the example above shows 1, then 2, and that's all.
It doesn't show 3!
It's because for..of iteration ignores the last value, when done: true.
So, if we want all results to be shown by for..of, we must return them with yield:
function* generateSequence() {
yield 1;
yield 2;
yield 3;
}
let generator = generateSequence();
for(let value of generator) {
alert(value); // 1, then 2, then 3
}
As generators are iterable, we can call all related functionality, e.g.
the spread syntax ...:
function* generateSequence() {
yield 1;
yield 2;
yield 3;
}
let sequence = [0, ...generateSequence()];
alert(sequence); // 0, 1, 2, 3
In the code above, ...generateSequence() turns the iterable generator object into an array of items (read more about the spread syntax in the chapter Rest parameters and spread syntax)
- Using generators for iterables
Some time ago, in the chapter Iterables we created an iterable range object that returns values from..to.
Here, let's remember the code:
let range = {
from: 1,
to: 5,
// for..of range calls this method once in the very beginning
[Symbol.iterator]() {
// ...it returns the iterator object:
// onward, for..of works only with that object, asking it for next values
return {
current: this.from,
last: this.to,
// next() is called on each iteration by the for..of loop
next() {
// it should return the value as an object {done:.., value :...}
if (this.current <= this.last) {
return { done: false, value: this.current++ };
} else {
return { done: true };
}
}
};
}
};
// iteration over range returns numbers from range.from to range.to
alert([...range]); // 1,2,3,4,5
We can use a generator function for iteration by providing it as Symbol.iterator.
Here's the same range, but much more compact:
let range = {
from: 1,
to: 5,
*[Symbol.iterator]() { // a shorthand for [Symbol.iterator]: function*()
for(let value = this.from; value <= this.to; value++) {
yield value;
}
}
};
alert( [...range] ); // 1,2,3,4,5
That works, because range[Symbol.iterator]() now returns a generator, and generator methods are exactly what for..of expects:
it has a .next() method
that returns values in the form {value: ..., done: true/false}
That's not a coincidence, of course.
Generators were added to JavaScript language with iterators in mind, to implement them easily.
The variant with a generator is much more concise than the original iterable code of range, and keeps the same functionality.
Generators may generate values forever
In the examples above we generated finite sequences, but we can also make a generator that yields values forever.
For instance, an unending sequence of pseudo-random numbers.
That surely would require a break (or return) in for..of over such generator.
Otherwise, the loop would repeat forever and hang.
- Generator composition
Generator composition is a special feature of generators that allows to transparently “embed” generators in each other.
For instance, we have a function that generates a sequence of numbers:
function* generateSequence(start, end) {
for (let i = start; i <= end; i++) yield i;
}
Now we'd like to reuse it to generate a more complex sequence:
first, digits 0..9 (with character codes 48…57),
followed by uppercase alphabet letters A..Z (character codes 65…90)
followed by lowercase alphabet letters a..z (character codes 97…122)
We can use this sequence e.g.
to create passwords by selecting characters from it (could add syntax characters as well), but let's generate it first.
In a regular function, to combine results from multiple other functions, we call them, store the results, and then join at the end.
For generators, there's a special yield* syntax to “embed” (compose) one generator into another.
The composed generator:
function* generateSequence(start, end) {
for (let i = start; i <= end; i++) yield i;
}
function* generatePasswordCodes() {
// 0..9
yield* generateSequence(48, 57);
// A..Z
yield* generateSequence(65, 90);
// a..z
yield* generateSequence(97, 122);
}
let str = '';
for(let code of generatePasswordCodes()) {
str += String.fromCharCode(code);
}
alert(str); // 0..9A..Za..z
The yield* directive delegates the execution to another generator.
This term means that yield* gen iterates over the generator gen and transparently forwards its yields outside.
As if the values were yielded by the outer generator.
The result is the same as if we inlined the code from nested generators:
function* generateSequence(start, end) {
for (let i = start; i <= end; i++) yield i;
}
function* generateAlphaNum() {
// yield* generateSequence(48, 57);
for (let i = 48; i <= 57; i++) yield i;
// yield* generateSequence(65, 90);
for (let i = 65; i <= 90; i++) yield i;
// yield* generateSequence(97, 122);
for (let i = 97; i <= 122; i++) yield i;
}
let str = '';
for(let code of generateAlphaNum()) {
str += String.fromCharCode(code);
}
alert(str); // 0..9A..Za..z
A generator composition is a natural way to insert a flow of one generator into another.
It doesn't use extra memory to store intermediate results.
- “yield” is a two-way street
Until this moment, generators were similar to iterable objects, with a special syntax to generate values.
But in fact they are much more powerful and flexible.
That's because yield is a two-way street: it not only returns the result to the outside, but also can pass the value inside the generator.
To do so, we should call generator.next(arg), with an argument.
That argument becomes the result of yield.
Let's see an example:
function* gen() {
// Pass a question to the outer code and wait for an answer
let result = yield "2 + 2 = ?"; // (*)
alert(result);
}
let generator = gen();
let question = generator.next().value; // <-- yield returns the value
generator.next(4); // --> pass the result into the generator
The first call generator.next() should be always made without an argument (the argument is ignored if passed).
It starts the execution and returns the result of the first yield "2+2=?".
At this point the generator pauses the execution, while staying on the line (*).
Then, as shown at the picture above, the result of yield gets into the question variable in the calling code.
On generator.next(4), the generator resumes, and 4 gets in as the result: let result = 4.
Please note, the outer code does not have to immediately call next(4).
It may take time.
That's not a problem: the generator will wait.
For instance:
// resume the generator after some time
setTimeout(() => generator.next(4), 1000);
As we can see, unlike regular functions, a generator and the calling code can exchange results by passing values in next/yield.
To make things more obvious, here's another example, with more calls:
function* gen() {
let ask1 = yield "2 + 2 = ?";
alert(ask1); // 4
let ask2 = yield "3 * 3 = ?"
alert(ask2); // 9
}
let generator = gen();
alert( generator.next().value ); // "2 + 2 = ?"
alert( generator.next(4).value ); // "3 * 3 = ?"
alert( generator.next(9).done ); // true
The execution picture:
The first .next() starts the execution… It reaches the first yield.
The result is returned to the outer code.
The second .next(4) passes 4 back to the generator as the result of the first yield, and resumes the execution.
…It reaches the second yield, that becomes the result of the generator call.
The third next(9) passes 9 into the generator as the result of the second yield and resumes the execution that reaches the end of the function, so done: true.
It's like a “ping-pong” game.
Each next(value) (excluding the first one) passes a value into the generator, that becomes the result of the current yield, and then gets back the result of the next yield.
- generator.throw
As we observed in the examples above, the outer code may pass a value into the generator, as the result of yield.
…But it can also initiate (throw) an error there.
That's natural, as an error is a kind of result.
To pass an error into a yield, we should call generator.throw(err).
In that case, the err is thrown in the line with that yield.
For instance, here the yield of "2 + 2 = ?" leads to an error:
function* gen() {
try {
let result = yield "2 + 2 = ?"; // (1)
alert("The execution does not reach here, because the exception is thrown above");
} catch(e) {
alert(e); // shows the error
}
}
let generator = gen();
let question = generator.next().value;
generator.throw(new Error("The answer is not found in my database")); // (2)
The error, thrown into the generator at line (2) leads to an exception in line (1) with yield.
In the example above, try..catch catches it and shows it.
If we don't catch it, then just like any exception, it “falls out” the generator into the calling code.
The current line of the calling code is the line with generator.throw, labelled as (2).
So we can catch it here, like this:
function* generate() {
let result = yield "2 + 2 = ?"; // Error in this line
}
let generator = generate();
let question = generator.next().value;
try {
generator.throw(new Error("The answer is not found in my database"));
} catch(e) {
alert(e); // shows the error
}
If we don't catch the error there, then, as usual, it falls through to the outer calling code (if any) and, if uncaught, kills the script.
- Summary
Generators are created by generator functions function* f(…) {…}.
Inside generators (only) there exists a yield operator.
The outer code and the generator may exchange results via next/yield calls.
In modern JavaScript, generators are rarely used.
But sometimes they come in handy, because the ability of a function to exchange data with the calling code during the execution is quite unique.
And, surely, they are great for making iterable objects.
Also, in the next chapter we'll learn async generators, which are used to read streams of asynchronously generated data (e.g paginated fetches over a network) in for await ...
of loops.
In web-programming we often work with streamed data, so that's another very important use case.
There are many areas where we need random data.
One of them is testing.
We may need random data: text, numbers, etc.
to test things out well.
In JavaScript, we could use Math.random().
But if something goes wrong, we'd like to be able to repeat the test, using exactly the same data.
For that, so called “seeded pseudo-random generators” are used.
They take a “seed”, the first value, and then generate the next ones using a formula so that the same seed yields the same sequence, and hence the whole flow is easily reproducible.
We only need to remember the seed to repeat it.
An example of such formula, that generates somewhat uniformly distributed values:
next = previous * 16807 % 2147483647
If we use 1 as the seed, the values will be:
168072824752491622650073
…and so on…
The task is to create a generator function pseudoRandom(seed) that takes seed and creates the generator with this formula.
Usage example:
let generator = pseudoRandom(1);
alert(generator.next().value); // 16807
alert(generator.next().value); // 282475249
alert(generator.next().value); // 1622650073Open a sandbox with tests.function* pseudoRandom(seed) {
let value = seed;
while(true) {
value = value * 16807 % 2147483647
yield value;
}
};
let generator = pseudoRandom(1);
alert(generator.next().value); // 16807
alert(generator.next().value); // 282475249
alert(generator.next().value); // 1622650073
Please note, the same can be done with a regular function, like this:
function pseudoRandom(seed) {
let value = seed;
return function() {
value = value * 16807 % 2147483647;
return value;
}
}
let generator = pseudoRandom(1);
alert(generator()); // 16807
alert(generator()); // 282475249
alert(generator()); // 1622650073
That also works.
But then we lose ability to iterate with for..of and to use generator composition, that may be useful elsewhere.
Open the solution with tests in a sandbox.Generators, advanced iteration
Async iteration and generators
Asynchronous iteration allow us to iterate over data that comes asynchronously, on-demand.
Like, for instance, when we download something chunk-by-chunk over a network.
And asynchronous generators make it even more convenient.
Let's see a simple example first, to grasp the syntax, and then review a real-life use case.
- Recall iterables
Let's recall the topic about iterables.
The idea is that we have an object, such as range here:
let range = {
from: 1,
to: 5
};
…And we'd like to use for..of loop on it, such as for(value of range), to get values from 1 to 5.
In other words, we want to add an iteration ability to the object.
That can be implemented using a special method with the name Symbol.iterator:
This method is called in by the for..of construct when the loop is started, and it should return an object with the next method.
For each iteration, the next() method is invoked for the next value.
The next() should return a value in the form {done: true/false, value:<loop value>}, where done:true means the end of the loop.
Here's an implementation for the iterable range:
let range = {
from: 1,
to: 5,
[Symbol.iterator]() { // called once, in the beginning of for..of
return {
current: this.from,
last: this.to,
next() { // called every iteration, to get the next value
if (this.current <= this.last) {
return { done: false, value: this.current++ };
} else {
return { done: true };
}
}
};
}
};
for(let value of range) {
alert(value); // 1 then 2, then 3, then 4, then 5
}
If anything is unclear, please visit the chapter Iterables, it gives all the details about regular iterables.
- Async iterables
Asynchronous iteration is needed when values come asynchronously: after setTimeout or another kind of delay.
The most common case is that the object needs to make a network request to deliver the next value, we'll see a real-life example of it a bit later.
To make an object iterable asynchronously:
Use Symbol.asyncIterator instead of Symbol.iterator.
The next() method should return a promise (to be fulfilled with the next value).
The async keyword handles it, we can simply make async next().
To iterate over such an object, we should use a for await (let item of iterable) loop.
Note the await word.
As a starting example, let's make an iterable range object, similar like the one before, but now it will return values asynchronously, one per second.
All we need to do is to perform a few replacements in the code above:
let range = {
from: 1,
to: 5,
[Symbol.asyncIterator]() { // (1)
return {
current: this.from,
last: this.to,
async next() { // (2)
// note: we can use "await" inside the async next:
await new Promise(resolve => setTimeout(resolve, 1000)); // (3)
if (this.current <= this.last) {
return { done: false, value: this.current++ };
} else {
return { done: true };
}
}
};
}
};
(async () => {
for await (let value of range) { // (4)
alert(value); // 1,2,3,4,5
}
})()
As we can see, the structure is similar to regular iterators:
To make an object asynchronously iterable, it must have a method Symbol.asyncIterator(1).
This method must return the object with next() method returning a promise (2).
The next() method doesn't have to be async, it may be a regular method returning a promise, but async allows us to use await, so that's convenient.
Here we just delay for a second (3).
To iterate, we use for await(let value of range)(4), namely add “await” after “for”.
It calls range[Symbol.asyncIterator]() once, and then its next() for values.
Here's a small table with the differences:
Iterators
Async iterators
Object method to provide iterator
Symbol.iterator
Symbol.asyncIterator
next() return value is
any value
Promise
to loop, use
for..of
for await..of
The spread syntax ... doesn't work asynchronously
Features that require regular, synchronous iterators, don't work with asynchronous ones.
For instance, a spread syntax won't work:
alert( [...range] ); // Error, no Symbol.iterator
That's natural, as it expects to find Symbol.iterator, not Symbol.asyncIterator.
It's also the case for for..of: the syntax without await needs Symbol.iterator.
- Recall generators
Now let's recall generators, as they allow to make iteration code much shorter.
Most of the time, when we'd like to make an iterable, we'll use generators.
For sheer simplicity, omitting some important stuff, they are “functions that generate (yield) values”.
They are explained in detail in the chapter Generators.
Generators are labelled with function* (note the star) and use yield to generate a value, then we can use for..of to loop over them.
This example generates a sequence of values from start to end:
function* generateSequence(start, end) {
for (let i = start; i <= end; i++) {
yield i;
}
}
for(let value of generateSequence(1, 5)) {
alert(value); // 1, then 2, then 3, then 4, then 5
}
As we already know, to make an object iterable, we should add Symbol.iterator to it.
let range = {
from: 1,
to: 5,
[Symbol.iterator]() {
return <object with next to make range iterable>
}
}
A common practice for Symbol.iterator is to return a generator, it makes the code shorter, as you can see:
let range = {
from: 1,
to: 5,
*[Symbol.iterator]() { // a shorthand for [Symbol.iterator]: function*()
for(let value = this.from; value <= this.to; value++) {
yield value;
}
}
};
for(let value of range) {
alert(value); // 1, then 2, then 3, then 4, then 5
}
Please see the chapter Generators if you'd like more details.
In regular generators we can't use await.
All values must come synchronously, as required by the for..of construct.
What if we'd like to generate values asynchronously? From network requests, for instance.
Let's switch to asynchronous generators to make it possible.
- Async generators (finally)
For most practical applications, when we'd like to make an object that asynchronously generates a sequence of values, we can use an asynchronous generator.
The syntax is simple: prepend function* with async.
That makes the generator asynchronous.
And then use for await (...) to iterate over it, like this:
async function* generateSequence(start, end) {
for (let i = start; i <= end; i++) {
// Wow, can use await!
await new Promise(resolve => setTimeout(resolve, 1000));
yield i;
}
}
(async () => {
let generator = generateSequence(1, 5);
for await (let value of generator) {
alert(value); // 1, then 2, then 3, then 4, then 5 (with delay between)
}
})();
As the generator is asynchronous, we can use await inside it, rely on promises, perform network requests and so on.
Under-the-hood difference
Technically, if you're an advanced reader who remembers the details about generators, there's an internal difference.
For async generators, the generator.next() method is asynchronous, it returns promises.
In a regular generator we'd use result = generator.next() to get values.
In an async generator, we should add await, like this:
result = await generator.next(); // result = {value: ..., done: true/false}
That's why async generators work with for await...of.
Async iterable range
Regular generators can be used as Symbol.iterator to make the iteration code shorter.
Similar to that, async generators can be used as Symbol.asyncIterator to implement the asynchronous iteration.
For instance, we can make the range object generate values asynchronously, once per second, by replacing synchronous Symbol.iterator with asynchronous Symbol.asyncIterator:
let range = {
from: 1,
to: 5,
// this line is same as [Symbol.asyncIterator]: async function*() {
async *[Symbol.asyncIterator]() {
for(let value = this.from; value <= this.to; value++) {
// make a pause between values, wait for something
await new Promise(resolve => setTimeout(resolve, 1000));
yield value;
}
}
};
(async () => {
for await (let value of range) {
alert(value); // 1, then 2, then 3, then 4, then 5
}
})();
Now values come with a delay of 1 second between them.
Please note:
Technically, we can add both Symbol.iterator and Symbol.asyncIterator to the object, so it's both synchronously (for..of) and asynchronously (for await..of) iterable.
In practice though, that would be a weird thing to do.
- Real-life example: paginated data
So far we've seen basic examples, to gain understanding.
Now let's review a real-life use case.
There are many online services that deliver paginated data.
For instance, when we need a list of users, a request returns a pre-defined count (e.g.
100 users) – “one page”, and provides a URL to the next page.
This pattern is very common.
It's not about users, but just about anything.
For instance, GitHub allows us to retrieve commits in the same, paginated fashion:
We should make a request to fetch in the form https://api.github.com/repos/<repo>/commits.
It responds with a JSON of 30 commits, and also provides a link to the next page in the Link header.
Then we can use that link for the next request, to get more commits, and so on.
For our code, we'd like to have a simpler way to get commits.
Let's make a function fetchCommits(repo) that gets commits for us, making requests whenever needed.
And let it care about all pagination stuff.
For us it'll be a simple async iteration for await..of.
So the usage will be like this:
for await (let commit of fetchCommits("username/repository")) {
// process commit
}
Here's such function, implemented as async generator:
async function* fetchCommits(repo) {
let url = `https://api.github.com/repos/${repo}/commits`;
while (url) {
const response = await fetch(url, { // (1)
headers: {'User-Agent': 'Our script'}, // github needs any user-agent header
});
const body = await response.json(); // (2) response is JSON (array of commits)
// (3) the URL of the next page is in the headers, extract it
let nextPage = response.headers.get('Link').match(/<(.*?)>; rel="next"/);
nextPage = nextPage?.[1];
url = nextPage;
for(let commit of body) { // (4) yield commits one by one, until the page ends
yield commit;
}
}
}
More explanations about how it works:
We use the browser fetch method to download the commits.
The initial URL is https://api.github.com/repos/<repo>/commits, and the next page will be in the Link header of the response.
The fetch method allows us to supply authorization and other headers if needed – here GitHub requires User-Agent.
The commits are returned in JSON format.
We should get the next page URL from the Link header of the response.
It has a special format, so we use a regular expression for that (we will learn this feature in Regular expressions).
The next page URL may look like https://api.github.com/repositories/93253246/commits?page=2.
It's generated by GitHub itself.
Then we yield the received commits one by one, and when they finish, the next while(url) iteration will trigger, making one more request.
An example of use (shows commit authors in console):
(async () => {
let count = 0;
for await (const commit of fetchCommits('javascript-tutorial/en.javascript.info')) {
console.log(commit.author.login);
if (++count == 100) { // let's stop at 100 commits
break;
}
}
})();
That's just what we wanted.
The internal mechanics of paginated requests is invisible from the outside.
For us it's just an async generator that returns commits.
- Summary
Regular iterators and generators work fine with the data that doesn't take time to generate.
When we expect the data to come asynchronously, with delays, their async counterparts can be used, and for await..of instead of for..of.
Syntax differences between async and regular iterators:
Iterable
Async Iterable
Method to provide iterator
Symbol.iterator
Symbol.asyncIterator
next() return value is
{value:…, done: true/false}
Promise that resolves to {value:…, done: true/false}
Syntax differences between async and regular generators:
Generators
Async generators
Declaration
function*
async function*
next() return value is
{value:…, done: true/false}
Promise that resolves to {value:…, done: true/false}
In web-development we often meet streams of data, when it flows chunk-by-chunk.
For instance, downloading or uploading a big file.
We can use async generators to process such data.
It's also noteworthy that in some environments, like in browsers, there's also another API called Streams, that provides special interfaces to work with such streams, to transform the data and to pass it from one stream to another (e.g.
download from one place and immediately send elsewhere).
As our application grows bigger, we want to split it into multiple files, so called “modules”.
A module may contain a class or a library of functions for a specific purpose.
For a long time, JavaScript existed without a language-level module syntax.
That wasn't a problem, because initially scripts were small and simple, so there was no need.
But eventually scripts became more and more complex, so the community invented a variety of ways to organize code into modules, special libraries to load modules on demand.
To name some (for historical reasons):
AMD – one of the most ancient module systems, initially implemented by the library require.js.
CommonJS – the module system created for Node.js server.
UMD – one more module system, suggested as a universal one, compatible with AMD and CommonJS.
Now all these slowly become a part of history, but we still can find them in old scripts.
The language-level module system appeared in the standard in 2015, gradually evolved since then, and is now supported by all major browsers and in Node.js.
So we'll study the modern JavaScript modules from now on.
- What is a module?
A module is just a file.
One script is one module.
As simple as that.
Modules can load each other and use special directives export and import to interchange functionality, call functions of one module from another one:
export keyword labels variables and functions that should be accessible from outside the current module.
import allows the import of functionality from other modules.
For instance, if we have a file sayHi.js exporting a function:
// sayHi.js
export function sayHi(user) {
alert(`Hello, ${user}!`);
}
…Then another file may import and use it:
// main.js
import {sayHi} from './sayHi.js';
alert(sayHi); // function...
sayHi('John'); // Hello, John!
The import directive loads the module by path ./sayHi.js relative to the current file, and assigns exported function sayHi to the corresponding variable.
Let's run the example in-browser.
As modules support special keywords and features, we must tell the browser that a script should be treated as a module, by using the attribute <script type="module">.
Like this:
Result
say.js
index.html
export function sayHi(user) {
return `Hello, ${user}!`;
}<!doctype html>
<script type="module">
import {sayHi} from './say.js';
document.body.innerHTML = sayHi('John');
</script>
The browser automatically fetches and evaluates the imported module (and its imports if needed), and then runs the script.
Modules work only via HTTP(s), not in local files
If you try to open a web-page locally, via file:// protocol, you'll find that import/export directives don't work.
Use a local web-server, such as static-server or use the “live server” capability of your editor, such as VS Code Live Server Extension to test modules.
- Core module features
What's different in modules, compared to “regular” scripts?
There are core features, valid both for browser and server-side JavaScript.
Always “use strict”
Modules always use strict, by default.
E.g.
assigning to an undeclared variable will give an error.
<script type="module">
a = 5; // error
</script>
Module-level scope
Each module has its own top-level scope.
In other words, top-level variables and functions from a module are not seen in other scripts.
In the example below, two scripts are imported, and hello.js tries to use user variable declared in user.js, and fails:
Result
hello.js
user.js
index.html
alert(user); // no such variable (each module has independent variables)let user = "John";<!doctype html>
<script type="module" src="user.js"></script>
<script type="module" src="hello.js"></script>
Modules are expected to export what they want to be accessible from outside and import what they need.
So we should import user.js into hello.js and get the required functionality from it instead of relying on global variables.
This is the correct variant:
Result
hello.js
user.js
index.html
import {user} from './user.js';
document.body.innerHTML = user; // Johnexport let user = "John";<!doctype html>
<script type="module" src="hello.js"></script>
In the browser, independent top-level scope also exists for each <script type="module">:
<script type="module">
// The variable is only visible in this module script
let user = "John";
</script>
<script type="module">
alert(user); // Error: user is not defined
</script>
If we really need to make a window-level global variable, we can explicitly assign it to window and access as window.user.
But that's an exception requiring a good reason.
A module code is evaluated only the first time when imported
If the same module is imported into multiple other places, its code is executed only the first time, then exports are given to all importers.
That has important consequences.
Let's look at them using examples:
First, if executing a module code brings side-effects, like showing a message, then importing it multiple times will trigger it only once – the first time:
// alert.js
alert("Module is evaluated!");// Import the same module from different files
// 1.js
import `./alert.js`; // Module is evaluated!
// 2.js
import `./alert.js`; // (shows nothing)
In practice, top-level module code is mostly used for initialization, creation of internal data structures, and if we want something to be reusable – export it.
Now, a more advanced example.
Let's say, a module exports an object:
// admin.js
export let admin = {
name: "John"
};
If this module is imported from multiple files, the module is only evaluated the first time, admin object is created, and then passed to all further importers.
All importers get exactly the one and only admin object:
// 1.js
import {admin} from './admin.js';
admin.name = "Pete";
// 2.js
import {admin} from './admin.js';
alert(admin.name); // Pete
// Both 1.js and 2.js imported the same object
// Changes made in 1.js are visible in 2.js
So, let's reiterate – the module is executed only once.
Exports are generated, and then they are shared between importers, so if something changes the admin object, other modules will see that.
Such behavior allows us to configure modules on first import.
We can setup its properties once, and then in further imports it's ready.
For instance, the admin.js module may provide certain functionality, but expect the credentials to come into the admin object from outside:
// admin.js
export let admin = { };
export function sayHi() {
alert(`Ready to serve, ${admin.name}!`);
}
In init.js, the first script of our app, we set admin.name.
Then everyone will see it, including calls made from inside admin.js itself:
// init.js
import {admin} from './admin.js';
admin.name = "Pete";
Another module can also see admin.name:
// other.js
import {admin, sayHi} from './admin.js';
alert(admin.name); // Pete
sayHi(); // Ready to serve, Pete!
import.meta
The object import.meta contains the information about the current module.
Its content depends on the environment.
In the browser, it contains the url of the script, or a current webpage url if inside HTML:
<script type="module">
alert(import.meta.url); // script url (url of the html page for an inline script)
</script>
In a module, “this” is undefined
That's kind of a minor feature, but for completeness we should mention it.
In a module, top-level this is undefined.
Compare it to non-module scripts, where this is a global object:
<script>
alert(this); // window
</script>
<script type="module">
alert(this); // undefined
</script>
- Browser-specific features
There are also several browser-specific differences of scripts with type="module" compared to regular ones.
You may want skip this section for now if you're reading for the first time, or if you don't use JavaScript in a browser.
Module scripts are deferred
Module scripts are always deferred, same effect as defer attribute (described in the chapter Scripts: async, defer), for both external and inline scripts.
In other words:
downloading external module scripts <script type="module" src="..."> doesn't block HTML processing, they load in parallel with other resources.
module scripts wait until the HTML document is fully ready (even if they are tiny and load faster than HTML), and then run.
relative order of scripts is maintained: scripts that go first in the document, execute first.
As a side-effect, module scripts always “see” the fully loaded HTML-page, including HTML elements below them.
For instance:
<script type="module">
alert(typeof button); // object: the script can 'see' the button below
// as modules are deferred, the script runs after the whole page is loaded
</script>
Compare to regular script below:
<script>
alert(typeof button); // button is undefined, the script can't see elements below
// regular scripts run immediately, before the rest of the page is processed
</script>
<button id="button">Button</button>
Please note: the second script actually runs before the first! So we'll see undefined first, and then object.
That's because modules are deferred, so we wait for the document to be processed.
The regular script runs immediately, so we see its output first.
When using modules, we should be aware that the HTML page shows up as it loads, and JavaScript modules run after that, so the user may see the page before the JavaScript application is ready.
Some functionality may not work yet.
We should put “loading indicators”, or otherwise ensure that the visitor won't be confused by that.
Async works on inline scripts
For non-module scripts, the async attribute only works on external scripts.
Async scripts run immediately when ready, independently of other scripts or the HTML document.
For module scripts, it works on inline scripts as well.
For example, the inline script below has async, so it doesn't wait for anything.
It performs the import (fetches ./analytics.js) and runs when ready, even if the HTML document is not finished yet, or if other scripts are still pending.
That's good for functionality that doesn't depend on anything, like counters, ads, document-level event listeners.
<!-- all dependencies are fetched (analytics.js), and the script runs -->
<!-- doesn't wait for the document or other <script> tags -->
<script async type="module">
import {counter} from './analytics.js';
counter.count();
</script>
External scripts
External scripts that have type="module" are different in two aspects:
External scripts with the same src run only once:
<!-- the script my.js is fetched and executed only once -->
<script type="module" src="my.js"></script>
<script type="module" src="my.js"></script>
External scripts that are fetched from another origin (e.g.
another site) require CORS headers, as described in the chapter Fetch: Cross-Origin Requests.
In other words, if a module script is fetched from another origin, the remote server must supply a header Access-Control-Allow-Origin allowing the fetch.
<!-- another-site.com must supply Access-Control-Allow-Origin -->
<!-- otherwise, the script won't execute -->
<script type="module" src="http://another-site.com/their.js"></script>
That ensures better security by default.
No “bare” modules allowed
In the browser, import must get either a relative or absolute URL.
Modules without any path are called “bare” modules.
Such modules are not allowed in import.
For instance, this import is invalid:
import {sayHi} from 'sayHi'; // Error, "bare" module
// the module must have a path, e.g.
'./sayHi.js' or wherever the module is
Certain environments, like Node.js or bundle tools allow bare modules, without any path, as they have their own ways for finding modules and hooks to fine-tune them.
But browsers do not support bare modules yet.
Compatibility, “nomodule”
Old browsers do not understand type="module".
Scripts of an unknown type are just ignored.
For them, it's possible to provide a fallback using the nomodule attribute:
<script type="module">
alert("Runs in modern browsers");
</script>
<script nomodule>
alert("Modern browsers know both type=module and nomodule, so skip this")
alert("Old browsers ignore script with unknown type=module, but execute this.");
</script>
- Build tools
In real-life, browser modules are rarely used in their “raw” form.
Usually, we bundle them together with a special tool such as Webpack and deploy to the production server.
One of the benefits of using bundlers – they give more control over how modules are resolved, allowing bare modules and much more, like CSS/HTML modules.
Build tools do the following:
Take a “main” module, the one intended to be put in <script type="module"> in HTML.
Analyze its dependencies: imports and then imports of imports etc.
Build a single file with all modules (or multiple files, that's tunable), replacing native import calls with bundler functions, so that it works.
“Special” module types like HTML/CSS modules are also supported.
In the process, other transformations and optimizations may be applied:
Unreachable code removed.
Unused exports removed (“tree-shaking”).
Development-specific statements like console and debugger removed.
Modern, bleeding-edge JavaScript syntax may be transformed to older one with similar functionality using Babel.
The resulting file is minified (spaces removed, variables replaced with shorter names, etc).
If we use bundle tools, then as scripts are bundled together into a single file (or few files), import/export statements inside those scripts are replaced by special bundler functions.
So the resulting “bundled” script does not contain any import/export, it doesn't require type="module", and we can put it into a regular script:
<!-- Assuming we got bundle.js from a tool like Webpack -->
<script src="bundle.js"></script>
That said, native modules are also usable.
So we won't be using Webpack here: you can configure it later.
- Summary
To summarize, the core concepts are:
A module is a file.
To make import/export work, browsers need <script type="module">.
Modules have several differences:
Deferred by default.
Async works on inline scripts.
To load external scripts from another origin (domain/protocol/port), CORS headers are needed.
Duplicate external scripts are ignored.
Modules have their own, local top-level scope and interchange functionality via import/export.
Modules always use strict.
Module code is executed only once.
Exports are created once and shared between importers.
When we use modules, each module implements the functionality and exports it.
Then we use import to directly import it where it's needed.
The browser loads and evaluates the scripts automatically.
In production, people often use bundlers such as Webpack to bundle modules together for performance and other reasons.
In the next chapter we'll see more examples of modules, and how things can be exported/imported.
Modules
Export and Import
Export and import directives have several syntax variants.
In the previous article we saw a simple use, now let's explore more examples.
- Export before declarations
We can label any declaration as exported by placing export before it, be it a variable, function or a class.
For instance, here all exports are valid:
// export an array
export let months = ['Jan', 'Feb', 'Mar','Apr', 'Aug', 'Sep', 'Oct', 'Nov', 'Dec'];
// export a constant
export const MODULES_BECAME_STANDARD_YEAR = 2015;
// export a class
export class User {
constructor(name) {
this.name = name;
}
}
No semicolons after export class/function
Please note that export before a class or a function does not make it a function expression.
It's still a function declaration, albeit exported.
Most JavaScript style guides don't recommend semicolons after function and class declarations.
That's why there's no need for a semicolon at the end of export class and export function:
export function sayHi(user) {
alert(`Hello, ${user}!`);
} // no ; at the end
- Export apart from declarations
Also, we can put export separately.
Here we first declare, and then export:
// say.js
function sayHi(user) {
alert(`Hello, ${user}!`);
}
function sayBye(user) {
alert(`Bye, ${user}!`);
}
export {sayHi, sayBye}; // a list of exported variables
…Or, technically we could put export above functions as well.
- Import *
Usually, we put a list of what to import in curly braces import {...}, like this:
// main.js
import {sayHi, sayBye} from './say.js';
sayHi('John'); // Hello, John!
sayBye('John'); // Bye, John!
But if there's a lot to import, we can import everything as an object using import * as <obj>, for instance:
// main.js
import * as say from './say.js';
say.sayHi('John');
say.sayBye('John');
At first sight, “import everything” seems such a cool thing, short to write, why should we ever explicitly list what we need to import?
Well, there are few reasons.
Modern build tools (webpack and others) bundle modules together and optimize them to speedup loading and remove unused stuff.
Let's say, we added a 3rd-party library say.js to our project with many functions:
// say.js
export function sayHi() { ...
}
export function sayBye() { ...
}
export function becomeSilent() { ...
}
Now if we only use one of say.js functions in our project:
// main.js
import {sayHi} from './say.js';
…Then the optimizer will see that and remove the other functions from the bundled code, thus making the build smaller.
That is called “tree-shaking”.
Explicitly listing what to import gives shorter names: sayHi() instead of say.sayHi().
Explicit list of imports gives better overview of the code structure: what is used and where.
It makes code support and refactoring easier.
- Import “as”
We can also use as to import under different names.
For instance, let's import sayHi into the local variable hi for brevity, and import sayBye as bye:
// main.js
import {sayHi as hi, sayBye as bye} from './say.js';
hi('John'); // Hello, John!
bye('John'); // Bye, John!
- Export “as”
The similar syntax exists for export.
Let's export functions as hi and bye:
// say.js
...
export {sayHi as hi, sayBye as bye};
Now hi and bye are official names for outsiders, to be used in imports:
// main.js
import * as say from './say.js';
say.hi('John'); // Hello, John!
say.bye('John'); // Bye, John!
- Export default
In practice, there are mainly two kinds of modules.
Modules that contain a library, pack of functions, like say.js above.
Modules that declare a single entity, e.g.
a module user.js exports only class User.
Mostly, the second approach is preferred, so that every “thing” resides in its own module.
Naturally, that requires a lot of files, as everything wants its own module, but that's not a problem at all.
Actually, code navigation becomes easier if files are well-named and structured into folders.
Modules provide a special export default (“the default export”) syntax to make the “one thing per module” way look better.
Put export default before the entity to export:
// user.js
export default class User { // just add "default"
constructor(name) {
this.name = name;
}
}
There may be only one export default per file.
…And then import it without curly braces:
// main.js
import User from './user.js'; // not {User}, just User
new User('John');
Imports without curly braces look nicer.
A common mistake when starting to use modules is to forget curly braces at all.
So, remember, import needs curly braces for named exports and doesn't need them for the default one.
Named export
Default export
export class User {...}
export default class User {...}
import {User} from ...
import User from ...
Technically, we may have both default and named exports in a single module, but in practice people usually don't mix them.
A module has either named exports or the default one.
As there may be at most one default export per file, the exported entity may have no name.
For instance, these are all perfectly valid default exports:
export default class { // no class name
constructor() { ...
}
}export default function(user) { // no function name
alert(`Hello, ${user}!`);
}// export a single value, without making a variable
export default ['Jan', 'Feb', 'Mar','Apr', 'Aug', 'Sep', 'Oct', 'Nov', 'Dec'];
Not giving a name is fine, because there is only one export default per file, so import without curly braces knows what to import.
Without default, such an export would give an error:
export class { // Error! (non-default export needs a name)
constructor() {}
}
The “default” name
In some situations the default keyword is used to reference the default export.
For example, to export a function separately from its definition:
function sayHi(user) {
alert(`Hello, ${user}!`);
}
// same as if we added "export default" before the function
export {sayHi as default};
Or, another situation, let's say a module user.js exports one main “default” thing, and a few named ones (rarely the case, but it happens):
// user.js
export default class User {
constructor(name) {
this.name = name;
}
}
export function sayHi(user) {
alert(`Hello, ${user}!`);
}
Here's how to import the default export along with a named one:
// main.js
import {default as User, sayHi} from './user.js';
new User('John');
And, finally, if importing everything * as an object, then the default property is exactly the default export:
// main.js
import * as user from './user.js';
let User = user.default; // the default export
new User('John');
A word against default exports
Named exports are explicit.
They exactly name what they import, so we have that information from them; that's a good thing.
Named exports force us to use exactly the right name to import:
import {User} from './user.js';
// import {MyUser} won't work, the name must be {User}
…While for a default export, we always choose the name when importing:
import User from './user.js'; // works
import MyUser from './user.js'; // works too
// could be import Anything...
and it'll still work
So team members may use different names to import the same thing, and that's not good.
Usually, to avoid that and keep the code consistent, there's a rule that imported variables should correspond to file names, e.g:
import User from './user.js';
import LoginForm from './loginForm.js';
import func from '/path/to/func.js';
...
Still, some teams consider it a serious drawback of default exports.
So they prefer to always use named exports.
Even if only a single thing is exported, it's still exported under a name, without default.
That also makes re-export (see below) a little bit easier.
- Re-export
“Re-export” syntax export ...
from ... allows to import things and immediately export them (possibly under another name), like this:
export {sayHi} from './say.js'; // re-export sayHi
export {default as User} from './user.js'; // re-export default
Why would that be needed? Let's see a practical use case.
Imagine, we're writing a “package”: a folder with a lot of modules, with some of the functionality exported outside (tools like NPM allow us to publish and distribute such packages, but we don't have to use them), and many modules are just “helpers”, for internal use in other package modules.
The file structure could be like this:
auth/
index.js
user.js
helpers.js
tests/
login.js
providers/
github.js
facebook.js
...
We'd like to expose the package functionality via a single entry point, the “main file” auth/index.js, to be used like this:
import {login, logout} from 'auth/index.js'
The idea is that outsiders, developers who use our package, should not meddle with its internal structure, search for files inside our package folder.
We export only what's necessary in auth/index.js and keep the rest hidden from prying eyes.
As the actual exported functionality is scattered among the package, we can import it into auth/index.js and export from it:
// auth/index.js
// import login/logout and immediately export them
import {login, logout} from './helpers.js';
export {login, logout};
// import default as User and export it
import User from './user.js';
export {User};
...
Now users of our package can import {login} from "auth/index.js".
The syntax export ...
from ... is just a shorter notation for such import-export:
// auth/index.js
// import login/logout and immediately export them
export {login, logout} from './helpers.js';
// import default as User and export it
export {default as User} from './user.js';
...
Re-exporting the default export
The default export needs separate handling when re-exporting.
Let's say we have user.js with the export default class User and would like to re-export it:
// user.js
export default class User {
// ...
}
We can come across two problems with it:
export User from './user.js' won't work.
That would lead to a syntax error.
To re-export the default export, we have to write export {default as User}, as in the example above.
export * from './user.js' re-exports only named exports, but ignores the default one.
If we'd like to re-export both named and the default export, then two statements are needed:
export * from './user.js'; // to re-export named exports
export {default} from './user.js'; // to re-export the default export
Such oddities of re-exporting a default export are one of the reasons why some developers don't like default exports and prefer named ones.
- Summary
Here are all types of export that we covered in this and previous articles.
You can check yourself by reading them and recalling what they mean:
Before declaration of a class/function/…:
export [default] class/function/variable ...
Standalone export:
export {x [as y], ...}.
Re-export:
export {x [as y], ...} from "module"export * from "module" (doesn't re-export default).
export {default [as y]} from "module" (re-export default).
Import:
Named exports from module:
import {x [as y], ...} from "module"
Default export:
import x from "module"import {default as x} from "module"
Everything:
import * as obj from "module"
Import the module (its code runs), but do not assign it to a variable:
import "module"
We can put import/export statements at the top or at the bottom of a script, that doesn't matter.
So, technically this code is fine:
sayHi();
// ...
import {sayHi} from './say.js'; // import at the end of the file
In practice imports are usually at the start of the file, but that's only for more convenience.
Please note that import/export statements don't work if inside {...}.
A conditional import, like this, won't work:
if (something) {
import {sayHi} from "./say.js"; // Error: import must be at top level
}
…But what if we really need to import something conditionally? Or at the right time? Like, load a module upon request, when it's really needed?
We'll see dynamic imports in the next article.
Modules
Dynamic imports
Export and import statements that we covered in previous chapters are called “static”.
The syntax is very simple and strict.
First, we can't dynamically generate any parameters of import.
The module path must be a primitive string, can't be a function call.
This won't work:
import ...
from getModuleName(); // Error, only from "string" is allowed
Second, we can't import conditionally or at run-time:
if(...) {
import ...; // Error, not allowed!
}
{
import ...; // Error, we can't put import in any block
}
That's because import/export aim to provide a backbone for the code structure.
That's a good thing, as code structure can be analyzed, modules can be gathered and bundled into one file by special tools, unused exports can be removed (“tree-shaken”).
That's possible only because the structure of imports/exports is simple and fixed.
But how can we import a module dynamically, on-demand?
- The import() expression
The import(module) expression loads the module and returns a promise that resolves into a module object that contains all its exports.
It can be called from any place in the code.
We can use it dynamically in any place of the code, for instance:
let modulePath = prompt("Which module to load?");
import(modulePath)
.then(obj => <module object>)
.catch(err => <loading error, e.g.
if no such module>)
Or, we could use let module = await import(modulePath) if inside an async function.
For instance, if we have the following module say.js:
// say.js
export function hi() {
alert(`Hello`);
}
export function bye() {
alert(`Bye`);
}
…Then dynamic import can be like this:
let {hi, bye} = await import('./say.js');
hi();
bye();
Or, if say.js has the default export:
// say.js
export default function() {
alert("Module loaded (export default)!");
}
…Then, in order to access it, we can use default property of the module object:
let obj = await import('./say.js');
let say = obj.default;
// or, in one line: let {default: say} = await import('./say.js');
say();
Here's the full example:
Result
say.js
index.html
export function hi() {
alert(`Hello`);
}
export function bye() {
alert(`Bye`);
}
export default function() {
alert("Module loaded (export default)!");
}<!doctype html>
<script>
async function load() {
let say = await import('./say.js');
say.hi(); // Hello!
say.bye(); // Bye!
say.default(); // Module loaded (export default)!
}
</script>
<button onclick="load()">Click me</button>
Please note:
Dynamic imports work in regular scripts, they don't require script type="module".
Please note:
Although import() looks like a function call, it's a special syntax that just happens to use parentheses (similar to super()).
So we can't copy import to a variable or use call/apply with it.
It's not a function.
A Proxy object wraps another object and intercepts operations, like reading/writing properties and others, optionally handling them on its own, or transparently allowing the object to handle them.
Proxies are used in many libraries and some browser frameworks.
We'll see many practical applications in this article.
- Proxy
The syntax:
let proxy = new Proxy(target, handler)target – is an object to wrap, can be anything, including functions.
handler – proxy configuration: an object with “traps”, methods that intercept operations.
– e.g.
get trap for reading a property of target, set trap for writing a property into target, and so on.
For operations on proxy, if there's a corresponding trap in handler, then it runs, and the proxy has a chance to handle it, otherwise the operation is performed on target.
As a starting example, let's create a proxy without any traps:
let target = {};
let proxy = new Proxy(target, {}); // empty handler
proxy.test = 5; // writing to proxy (1)
alert(target.test); // 5, the property appeared in target!
alert(proxy.test); // 5, we can read it from proxy too (2)
for(let key in proxy) alert(key); // test, iteration works (3)
As there are no traps, all operations on proxy are forwarded to target.
A writing operation proxy.test= sets the value on target.
A reading operation proxy.test returns the value from target.
Iteration over proxy returns values from target.
As we can see, without any traps, proxy is a transparent wrapper around target.
Proxy is a special “exotic object”.
It doesn't have own properties.
With an empty handler it transparently forwards operations to target.
To activate more capabilities, let's add traps.
What can we intercept with them?
For most operations on objects, there's a so-called “internal method” in the JavaScript specification that describes how it works at the lowest level.
For instance [[Get]], the internal method to read a property, [[Set]], the internal method to write a property, and so on.
These methods are only used in the specification, we can't call them directly by name.
Proxy traps intercept invocations of these methods.
They are listed in the Proxy specification and in the table below.
For every internal method, there's a trap in this table: the name of the method that we can add to the handler parameter of new Proxy to intercept the operation:
Invariants
JavaScript enforces some invariants – conditions that must be fulfilled by internal methods and traps.
Most of them are for return values:
[[Set]] must return true if the value was written successfully, otherwise false.
[[Delete]] must return true if the value was deleted successfully, otherwise false.
…and so on, we'll see more in examples below.
There are some other invariants, like:
[[GetPrototypeOf]], applied to the proxy object must return the same value as [[GetPrototypeOf]] applied to the proxy object's target object.
In other words, reading prototype of a proxy must always return the prototype of the target object.
Traps can intercept these operations, but they must follow these rules.
Invariants ensure correct and consistent behavior of language features.
The full invariants list is in the specification.
You probably won't violate them if you're not doing something weird.
Let's see how that works in practical examples.
- Default value with “get” trap
The most common traps are for reading/writing properties.
To intercept reading, the handler should have a method get(target, property, receiver).
It triggers when a property is read, with following arguments:
target – is the target object, the one passed as the first argument to new Proxy,
property – property name,
receiver – if the target property is a getter, then receiver is the object that's going to be used as this in its call.
Usually that's the proxy object itself (or an object that inherits from it, if we inherit from proxy).
Right now we don't need this argument, so it will be explained in more detail later.
Let's use get to implement default values for an object.
We'll make a numeric array that returns 0 for nonexistent values.
Usually when one tries to get a non-existing array item, they get undefined, but we'll wrap a regular array into the proxy that traps reading and returns 0 if there's no such property:
let numbers = [0, 1, 2];
numbers = new Proxy(numbers, {
get(target, prop) {
if (prop in target) {
return target[prop];
} else {
return 0; // default value
}
}
});
alert( numbers[1] ); // 1
alert( numbers[123] ); // 0 (no such item)
As we can see, it's quite easy to do with a get trap.
We can use Proxy to implement any logic for “default” values.
Imagine we have a dictionary, with phrases and their translations:
let dictionary = {
'Hello': 'Hola',
'Bye': 'Adiós'
};
alert( dictionary['Hello'] ); // Hola
alert( dictionary['Welcome'] ); // undefined
Right now, if there's no phrase, reading from dictionary returns undefined.
But in practice, leaving a phrase untranslated is usually better than undefined.
So let's make it return an untranslated phrase in that case instead of undefined.
To achieve that, we'll wrap dictionary in a proxy that intercepts reading operations:
let dictionary = {
'Hello': 'Hola',
'Bye': 'Adiós'
};
dictionary = new Proxy(dictionary, {
get(target, phrase) { // intercept reading a property from dictionary
if (phrase in target) { // if we have it in the dictionary
return target[phrase]; // return the translation
} else {
// otherwise, return the non-translated phrase
return phrase;
}
}
});
// Look up arbitrary phrases in the dictionary!
// At worst, they're not translated.
alert( dictionary['Hello'] ); // Hola
alert( dictionary['Welcome to Proxy']); // Welcome to Proxy (no translation)
Please note:
Please note how the proxy overwrites the variable:
dictionary = new Proxy(dictionary, ...);
The proxy should totally replace the target object everywhere.
No one should ever reference the target object after it got proxied.
Otherwise it's easy to mess up.
- Validation with “set” trap
Let's say we want an array exclusively for numbers.
If a value of another type is added, there should be an error.
The set trap triggers when a property is written.
set(target, property, value, receiver):
target – is the target object, the one passed as the first argument to new Proxy,
property – property name,
value – property value,
receiver – similar to get trap, matters only for setter properties.
The set trap should return true if setting is successful, and false otherwise (triggers TypeError).
Let's use it to validate new values:
let numbers = [];
numbers = new Proxy(numbers, { // (*)
set(target, prop, val) { // to intercept property writing
if (typeof val == 'number') {
target[prop] = val;
return true;
} else {
return false;
}
}
});
numbers.push(1); // added successfully
numbers.push(2); // added successfully
alert("Length is: " + numbers.length); // 2
numbers.push("test"); // TypeError ('set' on proxy returned false)
alert("This line is never reached (error in the line above)");
Please note: the built-in functionality of arrays is still working! Values are added by push.
The length property auto-increases when values are added.
Our proxy doesn't break anything.
We don't have to override value-adding array methods like push and unshift, and so on, to add checks in there, because internally they use the [[Set]] operation that's intercepted by the proxy.
So the code is clean and concise.
Don't forget to return true
As said above, there are invariants to be held.
For set, it must return true for a successful write.
If we forget to do it or return any falsy value, the operation triggers TypeError.
- Iteration with “ownKeys” and “getOwnPropertyDescriptor”
Object.keys, for..in loop and most other methods that iterate over object properties use [[OwnPropertyKeys]] internal method (intercepted by ownKeys trap) to get a list of properties.
Such methods differ in details:
Object.getOwnPropertyNames(obj) returns non-symbol keys.
Object.getOwnPropertySymbols(obj) returns symbol keys.
Object.keys/values() returns non-symbol keys/values with enumerable flag (property flags were explained in the article Property flags and descriptors).
for..in loops over non-symbol keys with enumerable flag, and also prototype keys.
…But all of them start with that list.
In the example below we use ownKeys trap to make for..in loop over user, and also Object.keys and Object.values, to skip properties starting with an underscore _:
let user = {
name: "John",
age: 30,
_password: "***"
};
user = new Proxy(user, {
ownKeys(target) {
return Object.keys(target).filter(key => !key.startsWith('_'));
}
});
// "ownKeys" filters out _password
for(let key in user) alert(key); // name, then: age
// same effect on these methods:
alert( Object.keys(user) ); // name,age
alert( Object.values(user) ); // John,30
So far, it works.
Although, if we return a key that doesn't exist in the object, Object.keys won't list it:
let user = { };
user = new Proxy(user, {
ownKeys(target) {
return ['a', 'b', 'c'];
}
});
alert( Object.keys(user) ); // <empty>
Why? The reason is simple: Object.keys returns only properties with the enumerable flag.
To check for it, it calls the internal method [[GetOwnProperty]] for every property to get its descriptor.
And here, as there's no property, its descriptor is empty, no enumerable flag, so it's skipped.
For Object.keys to return a property, we need it to either exist in the object, with the enumerable flag, or we can intercept calls to [[GetOwnProperty]] (the trap getOwnPropertyDescriptor does it), and return a descriptor with enumerable: true.
Here's an example of that:
let user = { };
user = new Proxy(user, {
ownKeys(target) { // called once to get a list of properties
return ['a', 'b', 'c'];
},
getOwnPropertyDescriptor(target, prop) { // called for every property
return {
enumerable: true,
configurable: true
/* ...other flags, probable "value:..." */
};
}
});
alert( Object.keys(user) ); // a, b, c
Let's note once again: we only need to intercept [[GetOwnProperty]] if the property is absent in the object.
- Protected properties with “deleteProperty” and other traps
There's a widespread convention that properties and methods prefixed by an underscore _ are internal.
They shouldn't be accessed from outside the object.
Technically that's possible though:
let user = {
name: "John",
_password: "secret"
};
alert(user._password); // secret
Let's use proxies to prevent any access to properties starting with _.
We'll need the traps:
get to throw an error when reading such property,
set to throw an error when writing,
deleteProperty to throw an error when deleting,
ownKeys to exclude properties starting with _ from for..in and methods like Object.keys.
Here's the code:
let user = {
name: "John",
_password: "***"
};
user = new Proxy(user, {
get(target, prop) {
if (prop.startsWith('_')) {
throw new Error("Access denied");
}
let value = target[prop];
return (typeof value === 'function') ? value.bind(target) : value; // (*)
},
set(target, prop, val) { // to intercept property writing
if (prop.startsWith('_')) {
throw new Error("Access denied");
} else {
target[prop] = val;
return true;
}
},
deleteProperty(target, prop) { // to intercept property deletion
if (prop.startsWith('_')) {
throw new Error("Access denied");
} else {
delete target[prop];
return true;
}
},
ownKeys(target) { // to intercept property list
return Object.keys(target).filter(key => !key.startsWith('_'));
}
});
// "get" doesn't allow to read _password
try {
alert(user._password); // Error: Access denied
} catch(e) { alert(e.message); }
// "set" doesn't allow to write _password
try {
user._password = "test"; // Error: Access denied
} catch(e) { alert(e.message); }
// "deleteProperty" doesn't allow to delete _password
try {
delete user._password; // Error: Access denied
} catch(e) { alert(e.message); }
// "ownKeys" filters out _password
for(let key in user) alert(key); // name
Please note the important detail in the get trap, in the line (*):
get(target, prop) {
// ...
let value = target[prop];
return (typeof value === 'function') ? value.bind(target) : value; // (*)
}
Why do we need a function to call value.bind(target)?
The reason is that object methods, such as user.checkPassword(), must be able to access _password:
user = {
// ...
checkPassword(value) {
// object method must be able to read _password
return value === this._password;
}
}
A call to user.checkPassword() gets proxied user as this (the object before dot becomes this), so when it tries to access this._password, the get trap activates (it triggers on any property read) and throws an error.
So we bind the context of object methods to the original object, target, in the line (*).
Then their future calls will use target as this, without any traps.
That solution usually works, but isn't ideal, as a method may pass the unproxied object somewhere else, and then we'll get messed up: where's the original object, and where's the proxied one?
Besides, an object may be proxied multiple times (multiple proxies may add different “tweaks” to the object), and if we pass an unwrapped object to a method, there may be unexpected consequences.
So, such a proxy shouldn't be used everywhere.
Private properties of a class
Modern JavaScript engines natively support private properties in classes, prefixed with #.
They are described in the article Private and protected properties and methods.
No proxies required.
Such properties have their own issues though.
In particular, they are not inherited.
- “In range” with “has” trap
Let's see more examples.
We have a range object:
let range = {
start: 1,
end: 10
};
We'd like to use the in operator to check that a number is in range.
The has trap intercepts in calls.
has(target, property)target – is the target object, passed as the first argument to new Proxy,
property – property name
Here's the demo:
let range = {
start: 1,
end: 10
};
range = new Proxy(range, {
has(target, prop) {
return prop >= target.start && prop <= target.end;
}
});
alert(5 in range); // true
alert(50 in range); // false
Nice syntactic sugar, isn't it? And very simple to implement.
- Wrapping functions: "apply"
We can wrap a proxy around a function as well.
The apply(target, thisArg, args) trap handles calling a proxy as function:
target is the target object (function is an object in JavaScript),
thisArg is the value of this.
args is a list of arguments.
For example, let's recall delay(f, ms) decorator, that we did in the article Decorators and forwarding, call/apply.
In that article we did it without proxies.
A call to delay(f, ms) returned a function that forwards all calls to f after ms milliseconds.
Here's the previous, function-based implementation:
function delay(f, ms) {
// return a wrapper that passes the call to f after the timeout
return function() { // (*)
setTimeout(() => f.apply(this, arguments), ms);
};
}
function sayHi(user) {
alert(`Hello, ${user}!`);
}
// after this wrapping, calls to sayHi will be delayed for 3 seconds
sayHi = delay(sayHi, 3000);
sayHi("John"); // Hello, John! (after 3 seconds)
As we've seen already, that mostly works.
The wrapper function (*) performs the call after the timeout.
But a wrapper function does not forward property read/write operations or anything else.
After the wrapping, the access is lost to properties of the original functions, such as name, length and others:
function delay(f, ms) {
return function() {
setTimeout(() => f.apply(this, arguments), ms);
};
}
function sayHi(user) {
alert(`Hello, ${user}!`);
}
alert(sayHi.length); // 1 (function length is the arguments count in its declaration)
sayHi = delay(sayHi, 3000);
alert(sayHi.length); // 0 (in the wrapper declaration, there are zero arguments)Proxy is much more powerful, as it forwards everything to the target object.
Let's use Proxy instead of a wrapping function:
function delay(f, ms) {
return new Proxy(f, {
apply(target, thisArg, args) {
setTimeout(() => target.apply(thisArg, args), ms);
}
});
}
function sayHi(user) {
alert(`Hello, ${user}!`);
}
sayHi = delay(sayHi, 3000);
alert(sayHi.length); // 1 (*) proxy forwards "get length" operation to the target
sayHi("John"); // Hello, John! (after 3 seconds)
The result is the same, but now not only calls, but all operations on the proxy are forwarded to the original function.
So sayHi.length is returned correctly after the wrapping in the line (*).
We've got a “richer” wrapper.
Other traps exist: the full list is in the beginning of this article.
Their usage pattern is similar to the above.
- Reflect
Reflect is a built-in object that simplifies creation of Proxy.
It was said previously that internal methods, such as [[Get]], [[Set]] and others are specification-only, they can't be called directly.
The Reflect object makes that somewhat possible.
Its methods are minimal wrappers around the internal methods.
Here are examples of operations and Reflect calls that do the same:
Operation
Reflect call
Internal method
obj[prop]
Reflect.get(obj, prop)
[[Get]]
obj[prop] = value
Reflect.set(obj, prop, value)
[[Set]]
delete obj[prop]
Reflect.deleteProperty(obj, prop)
[[Delete]]
new F(value)
Reflect.construct(F, value)
[[Construct]]
…
…
…
For example:
let user = {};
Reflect.set(user, 'name', 'John');
alert(user.name); // John
In particular, Reflect allows us to call operators (new, delete…) as functions (Reflect.construct, Reflect.deleteProperty, …).
That's an interesting capability, but here another thing is important.
For every internal method, trappable by Proxy, there's a corresponding method in Reflect, with the same name and arguments as the Proxy trap.
So we can use Reflect to forward an operation to the original object.
In this example, both traps get and set transparently (as if they didn't exist) forward reading/writing operations to the object, showing a message:
let user = {
name: "John",
};
user = new Proxy(user, {
get(target, prop, receiver) {
alert(`GET ${prop}`);
return Reflect.get(target, prop, receiver); // (1)
},
set(target, prop, val, receiver) {
alert(`SET ${prop}=${val}`);
return Reflect.set(target, prop, val, receiver); // (2)
}
});
let name = user.name; // shows "GET name"
user.name = "Pete"; // shows "SET name=Pete"
Here:
Reflect.get reads an object property.
Reflect.set writes an object property and returns true if successful, false otherwise.
That is, everything's simple: if a trap wants to forward the call to the object, it's enough to call Reflect.<method> with the same arguments.
In most cases we can do the same without Reflect, for instance, reading a property Reflect.get(target, prop, receiver) can be replaced by target[prop].
There are important nuances though.
Proxying a getter
Let's see an example that demonstrates why Reflect.get is better.
And we'll also see why get/set have the third argument receiver, that we didn't use before.
We have an object user with _name property and a getter for it.
Here's a proxy around it:
let user = {
_name: "Guest",
get name() {
return this._name;
}
};
let userProxy = new Proxy(user, {
get(target, prop, receiver) {
return target[prop];
}
});
alert(userProxy.name); // Guest
The get trap is “transparent” here, it returns the original property, and doesn't do anything else.
That's enough for our example.
Everything seems to be all right.
But let's make the example a little bit more complex.
After inheriting another object admin from user, we can observe the incorrect behavior:
let user = {
_name: "Guest",
get name() {
return this._name;
}
};
let userProxy = new Proxy(user, {
get(target, prop, receiver) {
return target[prop]; // (*) target = user
}
});
let admin = {
__proto__: userProxy,
_name: "Admin"
};
// Expected: Admin
alert(admin.name); // outputs: Guest (?!?)
Reading admin.name should return "Admin", not "Guest"!
What's the matter? Maybe we did something wrong with the inheritance?
But if we remove the proxy, then everything will work as expected.
The problem is actually in the proxy, in the line (*).
When we read admin.name, as admin object doesn't have such own property, the search goes to its prototype.
The prototype is userProxy.
When reading name property from the proxy, its get trap triggers and returns it from the original object as target[prop] in the line (*).
A call to target[prop], when prop is a getter, runs its code in the context this=target.
So the result is this._name from the original object target, that is: from user.
To fix such situations, we need receiver, the third argument of get trap.
It keeps the correct this to be passed to a getter.
In our case that's admin.
How to pass the context for a getter? For a regular function we could use call/apply, but that's a getter, it's not “called”, just accessed.
Reflect.get can do that.
Everything will work right if we use it.
Here's the corrected variant:
let user = {
_name: "Guest",
get name() {
return this._name;
}
};
let userProxy = new Proxy(user, {
get(target, prop, receiver) { // receiver = admin
return Reflect.get(target, prop, receiver); // (*)
}
});
let admin = {
__proto__: userProxy,
_name: "Admin"
};
alert(admin.name); // Admin
Now receiver that keeps a reference to the correct this (that is admin), is passed to the getter using Reflect.get in the line (*).
We can rewrite the trap even shorter:
get(target, prop, receiver) {
return Reflect.get(...arguments);
}Reflect calls are named exactly the same way as traps and accept the same arguments.
They were specifically designed this way.
So, return Reflect... provides a safe no-brainer to forward the operation and make sure we don't forget anything related to that.
- Proxy limitations
Proxies provide a unique way to alter or tweak the behavior of the existing objects at the lowest level.
Still, it's not perfect.
There are limitations.
Built-in objects: Internal slots
Many built-in objects, for example Map, Set, Date, Promise and others make use of so-called “internal slots”.
These are like properties, but reserved for internal, specification-only purposes.
For instance, Map stores items in the internal slot [[MapData]].
Built-in methods access them directly, not via [[Get]]/[[Set]] internal methods.
So Proxy can't intercept that.
Why care? They're internal anyway!
Well, here's the issue.
After a built-in object like that gets proxied, the proxy doesn't have these internal slots, so built-in methods will fail.
For example:
let map = new Map();
let proxy = new Proxy(map, {});
proxy.set('test', 1); // Error
Internally, a Map stores all data in its [[MapData]] internal slot.
The proxy doesn't have such a slot.
The built-in method Map.prototype.set method tries to access the internal property this.[[MapData]], but because this=proxy, can't find it in proxy and just fails.
Fortunately, there's a way to fix it:
let map = new Map();
let proxy = new Proxy(map, {
get(target, prop, receiver) {
let value = Reflect.get(...arguments);
return typeof value == 'function' ? value.bind(target) : value;
}
});
proxy.set('test', 1);
alert(proxy.get('test')); // 1 (works!)
Now it works fine, because get trap binds function properties, such as map.set, to the target object (map) itself.
Unlike the previous example, the value of this inside proxy.set(...) will be not proxy, but the original map.
So when the internal implementation of set tries to access this.[[MapData]] internal slot, it succeeds.
Array has no internal slots
A notable exception: built-in Array doesn't use internal slots.
That's for historical reasons, as it appeared so long ago.
So there's no such problem when proxying an array.
Private fields
A similar thing happens with private class fields.
For example, getName() method accesses the private #name property and breaks after proxying:
class User {
#name = "Guest";
getName() {
return this.#name;
}
}
let user = new User();
user = new Proxy(user, {});
alert(user.getName()); // Error
The reason is that private fields are implemented using internal slots.
JavaScript does not use [[Get]]/[[Set]] when accessing them.
In the call getName() the value of this is the proxied user, and it doesn't have the slot with private fields.
Once again, the solution with binding the method makes it work:
class User {
#name = "Guest";
getName() {
return this.#name;
}
}
let user = new User();
user = new Proxy(user, {
get(target, prop, receiver) {
let value = Reflect.get(...arguments);
return typeof value == 'function' ? value.bind(target) : value;
}
});
alert(user.getName()); // Guest
That said, the solution has drawbacks, as explained previously: it exposes the original object to the method, potentially allowing it to be passed further and breaking other proxied functionality.
Proxy != target
The proxy and the original object are different objects.
That's natural, right?
So if we use the original object as a key, and then proxy it, then the proxy can't be found:
let allUsers = new Set();
class User {
constructor(name) {
this.name = name;
allUsers.add(this);
}
}
let user = new User("John");
alert(allUsers.has(user)); // true
user = new Proxy(user, {});
alert(allUsers.has(user)); // false
As we can see, after proxying we can't find user in the set allUsers, because the proxy is a different object.
Proxies can't intercept a strict equality test ===
Proxies can intercept many operators, such as new (with construct), in (with has), delete (with deleteProperty) and so on.
But there's no way to intercept a strict equality test for objects.
An object is strictly equal to itself only, and no other value.
So all operations and built-in classes that compare objects for equality will differentiate between the object and the proxy.
No transparent replacement here.
- Revocable proxies
A revocable proxy is a proxy that can be disabled.
Let's say we have a resource, and would like to close access to it any moment.
What we can do is to wrap it into a revocable proxy, without any traps.
Such a proxy will forward operations to object, and we can disable it at any moment.
The syntax is:
let {proxy, revoke} = Proxy.revocable(target, handler)
The call returns an object with the proxy and revoke function to disable it.
Here's an example:
let object = {
data: "Valuable data"
};
let {proxy, revoke} = Proxy.revocable(object, {});
// pass the proxy somewhere instead of object...
alert(proxy.data); // Valuable data
// later in our code
revoke();
// the proxy isn't working any more (revoked)
alert(proxy.data); // Error
A call to revoke() removes all internal references to the target object from the proxy, so they are no longer connected.
Initially, revoke is separate from proxy, so that we can pass proxy around while leaving revoke in the current scope.
We can also bind revoke method to proxy by setting proxy.revoke = revoke.
Another option is to create a WeakMap that has proxy as the key and the corresponding revoke as the value, that allows to easily find revoke for a proxy:
let revokes = new WeakMap();
let object = {
data: "Valuable data"
};
let {proxy, revoke} = Proxy.revocable(object, {});
revokes.set(proxy, revoke);
// ..somewhere else in our code..
revoke = revokes.get(proxy);
revoke();
alert(proxy.data); // Error (revoked)
We use WeakMap instead of Map here because it won't block garbage collection.
If a proxy object becomes “unreachable” (e.g.
no variable references it any more), WeakMap allows it to be wiped from memory together with its revoke that we won't need any more.
Proxy is a wrapper around an object, that forwards operations on it to the object, optionally trapping some of them.
It can wrap any kind of object, including classes and functions.
The syntax is:
let proxy = new Proxy(target, {
/* traps */
});
…Then we should use proxy everywhere instead of target.
A proxy doesn't have its own properties or methods.
It traps an operation if the trap is provided, otherwise forwards it to target object.
We can trap:
Reading (get), writing (set), deleting (deleteProperty) a property (even a non-existing one).
Calling a function (apply trap).
The new operator (construct trap).
Many other operations (the full list is at the beginning of the article and in the docs).
That allows us to create “virtual” properties and methods, implement default values, observable objects, function decorators and so much more.
We can also wrap an object multiple times in different proxies, decorating it with various aspects of functionality.
The Reflect API is designed to complement Proxy.
For any Proxy trap, there's a Reflect call with same arguments.
We should use those to forward calls to target objects.
Proxies have some limitations:
Built-in objects have “internal slots”, access to those can't be proxied.
See the workaround above.
The same holds true for private class fields, as they are internally implemented using slots.
So proxied method calls must have the target object as this to access them.
Object equality tests === can't be intercepted.
Performance: benchmarks depend on an engine, but generally accessing a property using a simplest proxy takes a few times longer.
In practice that only matters for some “bottleneck” objects though.
Usually, an attempt to read a non-existent property returns undefined.
Create a proxy that throws an error for an attempt to read of a non-existent property instead.
That can help to detect programming mistakes early.
Write a function wrap(target) that takes an object target and return a proxy that adds this functionality aspect.
That's how it should work:
let user = {
name: "John"
};
function wrap(target) {
return new Proxy(target, {
/* your code */
});
}
user = wrap(user);
alert(user.name); // John
alert(user.age); // ReferenceError: Property doesn't exist: "age"let user = {
name: "John"
};
function wrap(target) {
return new Proxy(target, {
get(target, prop, receiver) {
if (prop in target) {
return Reflect.get(target, prop, receiver);
} else {
throw new ReferenceError(`Property doesn't exist: "${prop}"`)
}
}
});
}
user = wrap(user);
alert(user.name); // John
alert(user.age); // ReferenceError: Property doesn't exist: "age"
Accessing array[-1]
In some programming languages, we can access array elements using negative indexes, counted from the end.
Like this:
let array = [1, 2, 3];
array[-1]; // 3, the last element
array[-2]; // 2, one step from the end
array[-3]; // 1, two steps from the end
In other words, array[-N] is the same as array[array.length - N].
Create a proxy to implement that behavior.
That's how it should work:
let array = [1, 2, 3];
array = new Proxy(array, {
/* your code */
});
alert( array[-1] ); // 3
alert( array[-2] ); // 2
// Other array functionality should be kept "as is"let array = [1, 2, 3];
array = new Proxy(array, {
get(target, prop, receiver) {
if (prop < 0) {
// even if we access it like arr[1]
// prop is a string, so need to convert it to number
prop = +prop + target.length;
}
return Reflect.get(target, prop, receiver);
}
});
alert(array[-1]); // 3
alert(array[-2]); // 2
Observable
Create a function makeObservable(target) that “makes the object observable” by returning a proxy.
Here's how it should work:
function makeObservable(target) {
/* your code */
}
let user = {};
user = makeObservable(user);
user.observe((key, value) => {
alert(`SET ${key}=${value}`);
});
user.name = "John"; // alerts: SET name=John
In other words, an object returned by makeObservable is just like the original one, but also has the method observe(handler) that sets handler function to be called on any property change.
Whenever a property changes, handler(key, value) is called with the name and value of the property.
P.S.
In this task, please only take care about writing to a property.
Other operations can be implemented in a similar way.
The solution consists of two parts:
Whenever .observe(handler) is called, we need to remember the handler somewhere, to be able to call it later.
We can store handlers right in the object, using our symbol as the property key.
We need a proxy with set trap to call handlers in case of any change.
let handlers = Symbol('handlers');
function makeObservable(target) {
// 1.
Initialize handlers store
target[handlers] = [];
// Store the handler function in array for future calls
target.observe = function(handler) {
this[handlers].push(handler);
};
// 2.
Create a proxy to handle changes
return new Proxy(target, {
set(target, property, value, receiver) {
let success = Reflect.set(...arguments); // forward the operation to object
if (success) { // if there were no error while setting the property
// call all handlers
target[handlers].forEach(handler => handler(property, value));
}
return success;
}
});
}
let user = {};
user = makeObservable(user);
user.observe((key, value) => {
alert(`SET ${key}=${value}`);
});
user.name = "John";Miscellaneous
Eval: run a code string
The built-in eval function allows to execute a string of code.
The syntax is:
let result = eval(code);
For example:
let code = 'alert("Hello")';
eval(code); // Hello
A string of code may be long, contain line breaks, function declarations, variables and so on.
The result of eval is the result of the last statement.
For example:
let value = eval('1+1');
alert(value); // 2let value = eval('let i = 0; ++i');
alert(value); // 1
The eval'ed code is executed in the current lexical environment, so it can see outer variables:
let a = 1;
function f() {
let a = 2;
eval('alert(a)'); // 2
}
f();
It can change outer variables as well:
let x = 5;
eval("x = 10");
alert(x); // 10, value modified
In strict mode, eval has its own lexical environment.
So functions and variables, declared inside eval, are not visible outside:
// reminder: 'use strict' is enabled in runnable examples by default
eval("let x = 5; function f() {}");
alert(typeof x); // undefined (no such variable)
// function f is also not visible
Without use strict, eval doesn't have its own lexical environment, so we would see x and f outside.
- Using “eval”
In modern programming eval is used very sparingly.
It's often said that “eval is evil”.
The reason is simple: long, long time ago JavaScript was a much weaker language, many things could only be done with eval.
But that time passed a decade ago.
Right now, there's almost no reason to use eval.
If someone is using it, there's a good chance they can replace it with a modern language construct or a JavaScript Module.
Please note that its ability to access outer variables has side-effects.
Code minifiers (tools used before JS gets to production, to compress it) rename local variables into shorter ones (like a, b etc) to make the code smaller.
That's usually safe, but not if eval is used, as local variables may be accessed from eval'ed code string.
So minifiers don't do that renaming for all variables potentially visible from eval.
That negatively affects code compression ratio.
Using outer local variables inside eval is also considered a bad programming practice, as it makes maintaining the code more difficult.
There are two ways how to be totally safe from such problems.
If eval'ed code doesn't use outer variables, please call eval as window.eval(...):
This way the code is executed in the global scope:
let x = 1;
{
let x = 5;
window.eval('alert(x)'); // 1 (global variable)
}If eval'ed code needs local variables, change eval to new Function and pass them as arguments:let f = new Function('a', 'alert(a)');
f(5); // 5
The new Function construct is explained in the chapter The "new Function" syntax.
It creates a function from a string, also in the global scope.
So it can't see local variables.
But it's so much clearer to pass them explicitly as arguments, like in the example above.
- Summary
A call to eval(code) runs the string of code and returns the result of the last statement.
Rarely used in modern JavaScript, as there's usually no need.
Can access outer local variables.
That's considered bad practice.
Instead, to eval the code in the global scope, use window.eval(code).
Or, if your code needs some data from the outer scope, use new Function and pass it as arguments.
importance: 4
Create a calculator that prompts for an arithmetic expression and returns its result.
There's no need to check the expression for correctness in this task.
Just evaluate and return the result.
Run the demo
Let's use eval to calculate the maths expression:
let expr = prompt("Type an arithmetic expression?", '2*3+2');
alert( eval(expr) );
The user can input any text or code though.
To make things safe, and limit it to arithmetics only, we can check the expr using a regular expression, so that it only may contain digits and operators.
Miscellaneous
Currying
Currying is an advanced technique of working with functions.
It's used not only in JavaScript, but in other languages as well.
Currying is a transformation of functions that translates a function from callable as f(a, b, c) into callable as f(a)(b)(c).
Currying doesn't call a function.
It just transforms it.
Let's see an example first, to better understand what we're talking about, and then practical applications.
We'll create a helper function curry(f) that performs currying for a two-argument f.
In other words, curry(f) for two-argument f(a, b) translates it into a function that runs as f(a)(b):
function curry(f) { // curry(f) does the currying transform
return function(a) {
return function(b) {
return f(a, b);
};
};
}
// usage
function sum(a, b) {
return a + b;
}
let curriedSum = curry(sum);
alert( curriedSum(1)(2) ); // 3
As you can see, the implementation is straightforward: it's just two wrappers.
The result of curry(func) is a wrapper function(a).
When it is called like curriedSum(1), the argument is saved in the Lexical Environment, and a new wrapper is returned function(b).
Then this wrapper is called with 2 as an argument, and it passes the call to the original sum.
More advanced implementations of currying, such as _.curry from lodash library, return a wrapper that allows a function to be called both normally and partially:
function sum(a, b) {
return a + b;
}
let curriedSum = _.curry(sum); // using _.curry from lodash library
alert( curriedSum(1, 2) ); // 3, still callable normally
alert( curriedSum(1)(2) ); // 3, called partially
- Currying? What for?
To understand the benefits we need a worthy real-life example.
For instance, we have the logging function log(date, importance, message) that formats and outputs the information.
In real projects such functions have many useful features like sending logs over the network, here we'll just use alert:
function log(date, importance, message) {
alert(`[${date.getHours()}:${date.getMinutes()}] [${importance}] ${message}`);
}
Let's curry it!
log = _.curry(log);
After that log works normally:
log(new Date(), "DEBUG", "some debug"); // log(a, b, c)
…But also works in the curried form:
log(new Date())("DEBUG")("some debug"); // log(a)(b)(c)
Now we can easily make a convenience function for current logs:
// logNow will be the partial of log with fixed first argument
let logNow = log(new Date());
// use it
logNow("INFO", "message"); // [HH:mm] INFO message
Now logNow is log with fixed first argument, in other words “partially applied function” or “partial” for short.
We can go further and make a convenience function for current debug logs:
let debugNow = logNow("DEBUG");
debugNow("message"); // [HH:mm] DEBUG message
So:
We didn't lose anything after currying: log is still callable normally.
We can easily generate partial functions such as for today's logs.
- Advanced curry implementation
In case you'd like to get in to the details, here's the “advanced” curry implementation for multi-argument functions that we could use above.
It's pretty short:
function curry(func) {
return function curried(...args) {
if (args.length >= func.length) {
return func.apply(this, args);
} else {
return function(...args2) {
return curried.apply(this, args.concat(args2));
}
}
};
}
Usage examples:
function sum(a, b, c) {
return a + b + c;
}
let curriedSum = curry(sum);
alert( curriedSum(1, 2, 3) ); // 6, still callable normally
alert( curriedSum(1)(2,3) ); // 6, currying of 1st arg
alert( curriedSum(1)(2)(3) ); // 6, full currying
The new curry may look complicated, but it's actually easy to understand.
The result of curry(func) call is the wrapper curried that looks like this:
// func is the function to transform
function curried(...args) {
if (args.length >= func.length) { // (1)
return func.apply(this, args);
} else {
return function(...args2) { // (2)
return curried.apply(this, args.concat(args2));
}
}
};
When we run it, there are two if execution branches:
If passed args count is the same or more than the original function has in its definition (func.length) , then just pass the call to it using func.apply.
Otherwise, get a partial: we don't call func just yet.
Instead, another wrapper is returned, that will re-apply curried providing previous arguments together with the new ones.
Then, if we call it, again, we'll get either a new partial (if not enough arguments) or, finally, the result.
Fixed-length functions only
The currying requires the function to have a fixed number of arguments.
A function that uses rest parameters, such as f(...args), can't be curried this way.
A little more than currying
By definition, currying should convert sum(a, b, c) into sum(a)(b)(c).
But most implementations of currying in JavaScript are advanced, as described: they also keep the function callable in the multi-argument variant.
- Summary
Currying is a transform that makes f(a,b,c) callable as f(a)(b)(c).
JavaScript implementations usually both keep the function callable normally and return the partial if the arguments count is not enough.
Currying allows us to easily get partials.
As we've seen in the logging example, after currying the three argument universal function log(date, importance, message) gives us partials when called with one argument (like log(date)) or two arguments (like log(date, importance)).
Miscellaneous
Reference Type
In-depth language feature
This article covers an advanced topic, to understand certain edge-cases better.
It's not important.
Many experienced developers live fine without knowing it.
Read on if you're want to know how things work under the hood.
A dynamically evaluated method call can lose this.
For instance:
let user = {
name: "John",
hi() { alert(this.name); },
bye() { alert("Bye"); }
};
user.hi(); // works
// now let's call user.hi or user.bye depending on the name
(user.name == "John" ? user.hi : user.bye)(); // Error!
On the last line there is a conditional operator that chooses either user.hi or user.bye.
In this case the result is user.hi.
Then the method is immediately called with parentheses ().
But it doesn't work correctly!
As you can see, the call results in an error, because the value of "this" inside the call becomes undefined.
This works (object dot method):
user.hi();
This doesn't (evaluated method):
(user.name == "John" ? user.hi : user.bye)(); // Error!
Why? If we want to understand why it happens, let's get under the hood of how obj.method() call works.
- Reference type explained
Looking closely, we may notice two operations in obj.method() statement:
First, the dot '.' retrieves the property obj.method.
Then parentheses () execute it.
So, how does the information about this get passed from the first part to the second one?
If we put these operations on separate lines, then this will be lost for sure:
let user = {
name: "John",
hi() { alert(this.name); }
}
// split getting and calling the method in two lines
let hi = user.hi;
hi(); // Error, because this is undefined
Here hi = user.hi puts the function into the variable, and then on the last line it is completely standalone, and so there's no this.
To make user.hi() calls work, JavaScript uses a trick – the dot '.' returns not a function, but a value of the special Reference Type.
The Reference Type is a “specification type”.
We can't explicitly use it, but it is used internally by the language.
The value of Reference Type is a three-value combination (base, name, strict), where:
base is the object.
name is the property name.
strict is true if use strict is in effect.
The result of a property access user.hi is not a function, but a value of Reference Type.
For user.hi in strict mode it is:
// Reference Type value
(user, "hi", true)
When parentheses () are called on the Reference Type, they receive the full information about the object and its method, and can set the right this (=user in this case).
Reference type is a special “intermediary” internal type, with the purpose to pass information from dot . to calling parentheses ().
Any other operation like assignment hi = user.hi discards the reference type as a whole, takes the value of user.hi (a function) and passes it on.
So any further operation “loses” this.
So, as the result, the value of this is only passed the right way if the function is called directly using a dot obj.method() or square brackets obj['method']() syntax (they do the same here).
There are various ways to solve this problem such as func.bind().
- Summary
Reference Type is an internal type of the language.
Reading a property, such as with dot . in obj.method() returns not exactly the property value, but a special “reference type” value that stores both the property value and the object it was taken from.
That's for the subsequent method call () to get the object and set this to it.
For all other operations, the reference type automatically becomes the property value (a function in our case).
The whole mechanics is hidden from our eyes.
It only matters in subtle cases, such as when a method is obtained dynamically from the object, using an expression.
importance: 2
What is the result of this code?
let user = {
name: "John",
go: function() { alert(this.name) }
}
(user.go)()
P.S.
There's a pitfall :)
Error!
Try it:
let user = {
name: "John",
go: function() { alert(this.name) }
}
(user.go)() // error!
The error message in most browsers does not give us much of a clue about what went wrong.
The error appears because a semicolon is missing after user = {...}.
JavaScript does not auto-insert a semicolon before a bracket (user.go)(), so it reads the code like:
let user = { go:...
}(user.go)()
Then we can also see that such a joint expression is syntactically a call of the object { go: ...
} as a function with the argument (user.go).
And that also happens on the same line with let user, so the user object has not yet even been defined, hence the error.
If we insert the semicolon, all is fine:
let user = {
name: "John",
go: function() { alert(this.name) }
};
(user.go)() // John
Please note that parentheses around (user.go) do nothing here.
Usually they setup the order of operations, but here the dot . works first anyway, so there's no effect.
Only the semicolon thing matters.
Explain the value of "this"
importance: 3
In the code below we intend to call obj.go() method 4 times in a row.
But calls (1) and (2) works differently from (3) and (4).
Why?
let obj, method;
obj = {
go: function() { alert(this); }
};
obj.go(); // (1) [object Object]
(obj.go)(); // (2) [object Object]
(method = obj.go)(); // (3) undefined
(obj.go || obj.stop)(); // (4) undefined
Here's the explanations.
That's a regular object method call.
The same, parentheses do not change the order of operations here, the dot is first anyway.
Here we have a more complex call (expression)().
The call works as if it were split into two lines:
f = obj.go; // calculate the expression
f(); // call what we have
Here f() is executed as a function, without this.
The similar thing as (3), to the left of the parentheses () we have an expression.
To explain the behavior of (3) and (4) we need to recall that property accessors (dot or square brackets) return a value of the Reference Type.
Any operation on it except a method call (like assignment = or ||) turns it into an ordinary value, which does not carry the information allowing to set this.
Miscellaneous
BigInt
A recent addition
This is a recent addition to the language.
You can find the current state of support at https://caniuse.com/#feat=bigint.
BigInt is a special numeric type that provides support for integers of arbitrary length.
A bigint is created by appending n to the end of an integer literal or by calling the function BigInt that creates bigints from strings, numbers etc.
const bigint = 1234567890123456789012345678901234567890n;
const sameBigint = BigInt("1234567890123456789012345678901234567890");
const bigintFromNumber = BigInt(10); // same as 10n
- Math operators
BigInt can mostly be used like a regular number, for example:
alert(1n + 2n); // 3
alert(5n / 2n); // 2
Please note: the division 5/2 returns the result rounded towards zero, without the decimal part.
All operations on bigints return bigints.
We can't mix bigints and regular numbers:
alert(1n + 2); // Error: Cannot mix BigInt and other types
We should explicitly convert them if needed: using either BigInt() or Number(), like this:
let bigint = 1n;
let number = 2;
// number to bigint
alert(bigint + BigInt(number)); // 3
// bigint to number
alert(Number(bigint) + number); // 3
The conversion operations are always silent, never give errors, but if the bigint is too huge and won't fit the number type, then extra bits will be cut off, so we should be careful doing such conversion.
The unary plus is not supported on bigints
The unary plus operator +value is a well-known way to convert value to a number.
In order to avoid confusion, it's not supported on bigints:
let bigint = 1n;
alert( +bigint ); // error
So we should use Number() to convert a bigint to a number.
- Comparisons
Comparisons, such as <, > work with bigints and numbers just fine:
alert( 2n > 1n ); // true
alert( 2n > 1 ); // true
Please note though, as numbers and bigints belong to different types, they can be equal ==, but not strictly equal ===:
alert( 1 == 1n ); // true
alert( 1 === 1n ); // false
- Boolean operations
When inside if or other boolean operations, bigints behave like numbers.
For instance, in if, bigint 0n is falsy, other values are truthy:
if (0n) {
// never executes
}
Boolean operators, such as ||, && and others also work with bigints similar to numbers:
alert( 1n || 2 ); // 1 (1n is considered truthy)
alert( 0n || 2 ); // 2 (0n is considered falsy)
- Polyfills
Polyfilling bigints is tricky.
The reason is that many JavaScript operators, such as +, - and so on behave differently with bigints compared to regular numbers.
For example, division of bigints always returns a bigint (rounded if necessary).
To emulate such behavior, a polyfill would need to analyze the code and replace all such operators with its functions.
But doing so is cumbersome and would cost a lot of performance.
So, there's no well-known good polyfill.
Although, the other way around is proposed by the developers of JSBI library.
This library implements big numbers using its own methods.
We can use them instead of native bigints:
Operation
native BigInt
JSBI
Creation from Number
a = BigInt(789)
a = JSBI.BigInt(789)
Addition
c = a + b
c = JSBI.add(a, b)
Subtraction
c = a - b
c = JSBI.subtract(a, b)
…
…
…
…And then use the polyfill (Babel plugin) to convert JSBI calls to native bigints for those browsers that support them.
In other words, this approach suggests that we write code in JSBI instead of native bigints.
But JSBI works with numbers as with bigints internally, emulates them closely following the specification, so the code will be “bigint-ready”.
We can use such JSBI code “as is” for engines that don't support bigints and for those that do support – the polyfill will convert the calls to native bigints.
The JavaScript language was initially created for web browsers.
Since then it has evolved and become a language with many uses and platforms.
A platform may be a browser, or a web-server or another host, even a “smart” coffee machine, if it can run JavaScript.
Each of them provides platform-specific functionality.
The JavaScript specification calls that a host environment.
A host environment provides own objects and functions additional to the language core.
Web browsers give a means to control web pages.
Node.js provides server-side features, and so on.
Here's a bird's-eye view of what we have when JavaScript runs in a web browser:
There's a “root” object called window.
It has two roles:
First, it is a global object for JavaScript code, as described in the chapter Global object.
Second, it represents the “browser window” and provides methods to control it.
For instance, here we use it as a global object:
function sayHi() {
alert("Hello");
}
// global functions are methods of the global object:
window.sayHi();
And here we use it as a browser window, to see the window height:
alert(window.innerHeight); // inner window height
There are more window-specific methods and properties, we'll cover them later.
- DOM (Document Object Model)
Document Object Model, or DOM for short, represents all page content as objects that can be modified.
The document object is the main “entry point” to the page.
We can change or create anything on the page using it.
For instance:
// change the background color to red
document.body.style.background = "red";
// change it back after 1 second
setTimeout(() => document.body.style.background = "", 1000);
Here we used document.body.style, but there's much, much more.
Properties and methods are described in the specification: DOM Living Standard.
DOM is not only for browsers
The DOM specification explains the structure of a document and provides objects to manipulate it.
There are non-browser instruments that use DOM too.
For instance, server-side scripts that download HTML pages and process them can also use DOM.
They may support only a part of the specification though.
CSSOM for styling
There's also a separate specification, CSS Object Model (CSSOM) for CSS rules and stylesheets, that explains how they are represented as objects, and how to read and write them.
CSSOM is used together with DOM when we modify style rules for the document.
In practice though, CSSOM is rarely required, because we rarely need to modify CSS rules from JavaScript (usually we just add/remove CSS classes, not modify their CSS rules), but that's also possible.
- BOM (Browser Object Model)
The Browser Object Model (BOM) represents additional objects provided by the browser (host environment) for working with everything except the document.
For instance:
The navigator object provides background information about the browser and the operating system.
There are many properties, but the two most widely known are: navigator.userAgent – about the current browser, and navigator.platform – about the platform (can help to differ between Windows/Linux/Mac etc).
The location object allows us to read the current URL and can redirect the browser to a new one.
Here's how we can use the location object:
alert(location.href); // shows current URL
if (confirm("Go to Wikipedia?")) {
location.href = "https://wikipedia.org"; // redirect the browser to another URL
}
Functions alert/confirm/prompt are also a part of BOM: they are directly not related to the document, but represent pure browser methods of communicating with the user.
Specifications
BOM is the part of the general HTML specification.
Yes, you heard that right.
The HTML spec at https://html.spec.whatwg.org is not only about the “HTML language” (tags, attributes), but also covers a bunch of objects, methods and browser-specific DOM extensions.
That's “HTML in broad terms”.
Also, some parts have additional specs listed at https://spec.whatwg.org.
Describes stylesheets and style rules, manipulations with them and their binding to documents, see https://www.w3.org/TR/cssom-1/.
HTML specification
Describes the HTML language (e.g.
tags) and also the BOM (browser object model) – various browser functions: setTimeout, alert, location and so on, see https://html.spec.whatwg.org.
It takes the DOM specification and extends it with many additional properties and methods.
Additionally, some classes are described separately at https://spec.whatwg.org/.
Please note these links, as there's so much stuff to learn it's impossible to cover and remember everything.
When you'd like to read about a property or a method, the Mozilla manual at https://developer.mozilla.org/en-US/search is also a nice resource, but the corresponding spec may be better: it's more complex and longer to read, but will make your fundamental knowledge sound and complete.
To find something, it's often convenient to use an internet search “WHATWG [term]” or “MDN [term]”, e.g https://google.com?q=whatwg+localstorage, https://google.com?q=mdn+localstorage.
Now we'll get down to learning DOM, because the document plays the central role in the UI.
Browser: Document, Events, InterfacesDocument
DOM tree
The backbone of an HTML document is tags.
According to the Document Object Model (DOM), every HTML tag is an object.
Nested tags are “children” of the enclosing one.
The text inside a tag is an object as well.
All these objects are accessible using JavaScript, and we can use them to modify the page.
For example, document.body is the object representing the <body> tag.
Running this code will make the <body> red for 3 seconds:
document.body.style.background = 'red'; // make the background red
setTimeout(() => document.body.style.background = '', 3000); // return back
Here we used style.background to change the background color of document.body, but there are many other properties, such as:
innerHTML – HTML contents of the node.
offsetWidth – the node width (in pixels)
…and so on.
Soon we'll learn more ways to manipulate the DOM, but first we need to know about its structure.
- An example of the DOM
Let's start with the following simple document:
<!DOCTYPE HTML>
<html>
<head>
<title>About elk</title>
</head>
<body>
The truth about elk.
</body>
</html>
The DOM represents HTML as a tree structure of tags.
Here's how it looks:
On the picture above, you can click on element nodes and their children will open/collapse.
Every tree node is an object.
Tags are element nodes (or just elements) and form the tree structure: <html> is at the root, then <head> and <body> are its children, etc.
The text inside elements forms text nodes, labelled as #text.
A text node contains only a string.
It may not have children and is always a leaf of the tree.
For instance, the <title> tag has the text "About elk".
Please note the special characters in text nodes:
a newline: (in JavaScript known as \n)
a space:
Spaces and newlines are totally valid characters, like letters and digits.
They form text nodes and become a part of the DOM.
So, for instance, in the example above the <head> tag contains some spaces before <title>, and that text becomes a #text node (it contains a newline and some spaces only).
There are only two top-level exclusions:
Spaces and newlines before <head> are ignored for historical reasons.
If we put something after </body>, then that is automatically moved inside the body, at the end, as the HTML spec requires that all content must be inside <body>.
So there can't be any spaces after </body>.
In other cases everything's straightforward – if there are spaces (just like any character) in the document, then they become text nodes in the DOM, and if we remove them, then there won't be any.
Here are no space-only text nodes:
<!DOCTYPE HTML>
<html><head><title>About elk</title></head><body>The truth about elk.</body></html>
Spaces at string start/end and space-only text nodes are usually hidden in tools
Browser tools (to be covered soon) that work with DOM usually do not show spaces at the start/end of the text and empty text nodes (line-breaks) between tags.
Developer tools save screen space this way.
On further DOM pictures we'll sometimes omit them when they are irrelevant.
Such spaces usually do not affect how the document is displayed.
- Autocorrection
If the browser encounters malformed HTML, it automatically corrects it when making the DOM.
For instance, the top tag is always <html>.
Even if it doesn't exist in the document, it will exist in the DOM, because the browser will create it.
The same goes for <body>.
As an example, if the HTML file is the single word "Hello", the browser will wrap it into <html> and <body>, and add the required <head>, and the DOM will be:
While generating the DOM, browsers automatically process errors in the document, close tags and so on.
A document with unclosed tags:
<p>Hello
<li>Mom
<li>and
<li>Dad
…will become a normal DOM as the browser reads tags and restores the missing parts:
Tables always have <tbody>
An interesting “special case” is tables.
By DOM specification they must have <tbody> tag, but HTML text may omit it.
Then the browser creates <tbody> in the DOM automatically.
For the HTML:
<table id="table"><tr><td>1</td></tr></table>
DOM-structure will be:
You see? The <tbody> appeared out of nowhere.
We should keep this in mind while working with tables to avoid surprises.
- Other node types
There are some other node types besides elements and text nodes.
For example, comments:
<!DOCTYPE HTML>
<html>
<body>
The truth about elk.
<ol>
<li>An elk is a smart</li>
<!-- comment -->
<li>...and cunning animal!</li>
</ol>
</body>
</html>
We can see here a new tree node type – comment node, labeled as #comment, between two text nodes.
We may think – why is a comment added to the DOM? It doesn't affect the visual representation in any way.
But there's a rule – if something's in HTML, then it also must be in the DOM tree.
Everything in HTML, even comments, becomes a part of the DOM.
Even the <!DOCTYPE...> directive at the very beginning of HTML is also a DOM node.
It's in the DOM tree right before <html>.
Few people know about that.
We are not going to touch that node, we even don't draw it on diagrams, but it's there.
The document object that represents the whole document is, formally, a DOM node as well.
There are 12 node types.
In practice we usually work with 4 of them:
document – the “entry point” into DOM.
element nodes – HTML-tags, the tree building blocks.
text nodes – contain text.
comments – sometimes we can put information there, it won't be shown, but JS can read it from the DOM.
- See it for yourself
To see the DOM structure in real-time, try Live DOM Viewer.
Just type in the document, and it will show up as a DOM at an instant.
Another way to explore the DOM is to use the browser developer tools.
Actually, that's what we use when developing.
To do so, open the web page elk.html, turn on the browser developer tools and switch to the Elements tab.
It should look like this:
You can see the DOM, click on elements, see their details and so on.
Please note that the DOM structure in developer tools is simplified.
Text nodes are shown just as text.
And there are no “blank” (space only) text nodes at all.
That's fine, because most of the time we are interested in element nodes.
Clicking the button in the left-upper corner allows us to choose a node from the webpage using a mouse (or other pointer devices) and “inspect” it (scroll to it in the Elements tab).
This works great when we have a huge HTML page (and corresponding huge DOM) and would like to see the place of a particular element in it.
Another way to do it would be just right-clicking on a webpage and selecting “Inspect” in the context menu.
At the right part of the tools there are the following subtabs:
Styles – we can see CSS applied to the current element rule by rule, including built-in rules (gray).
Almost everything can be edited in-place, including the dimensions/margins/paddings of the box below.
Computed – to see CSS applied to the element by property: for each property we can see a rule that gives it (including CSS inheritance and such).
Event Listeners – to see event listeners attached to DOM elements (we'll cover them in the next part of the tutorial).
…and so on.
The best way to study them is to click around.
Most values are editable in-place.
- Interaction with console
As we work the DOM, we also may want to apply JavaScript to it.
Like: get a node and run some code to modify it, to see the result.
Here are few tips to travel between the Elements tab and the console.
For the start:
Select the first <li> in the Elements tab.
Press Esc – it will open console right below the Elements tab.
Now the last selected element is available as $0, the previously selected is $1 etc.
We can run commands on them.
For instance, $0.style.background = 'red' makes the selected list item red, like this:
That's how to get a node from Elements in Console.
There's also a road back.
If there's a variable referencing a DOM node, then we can use the command inspect(node) in Console to see it in the Elements pane.
Or we can just output the DOM node in the console and explore “in-place”, like document.body below:
That's for debugging purposes of course.
From the next chapter on we'll access and modify DOM using JavaScript.
The browser developer tools are a great help in development: we can explore the DOM, try things and see what goes wrong.
- Summary
An HTML/XML document is represented inside the browser as the DOM tree.
Tags become element nodes and form the structure.
Text becomes text nodes.
…etc, everything in HTML has its place in DOM, even comments.
We can use developer tools to inspect DOM and modify it manually.
Here we covered the basics, the most used and important actions to start with.
There's an extensive documentation about Chrome Developer Tools at https://developers.google.com/web/tools/chrome-devtools.
The best way to learn the tools is to click here and there, read menus: most options are obvious.
Later, when you know them in general, read the docs and pick up the rest.
DOM nodes have properties and methods that allow us to travel between them, modify them, move around the page, and more.
We'll get down to them in the next chapters.
Browser: Document, Events, InterfacesDocument
Walking the DOM
The DOM allows us to do anything with elements and their contents, but first we need to reach the corresponding DOM object.
All operations on the DOM start with the document object.
That's the main “entry point” to DOM.
From it we can access any node.
Here's a picture of links that allow for travel between DOM nodes:
Let's discuss them in more detail.
- On top: documentElement and body
The topmost tree nodes are available directly as document properties:
<html> = document.documentElement
The topmost document node is document.documentElement.
That's the DOM node of the <html> tag.
<body> = document.body
Another widely used DOM node is the <body> element – document.body.
<head> = document.head
The <head> tag is available as document.head.
There's a catch: document.body can be null
A script cannot access an element that doesn't exist at the moment of running.
In particular, if a script is inside <head>, then document.body is unavailable, because the browser did not read it yet.
So, in the example below the first alert shows null:
<html>
<head>
<script>
alert( "From HEAD: " + document.body ); // null, there's no <body> yet
</script>
</head>
<body>
<script>
alert( "From BODY: " + document.body ); // HTMLBodyElement, now it exists
</script>
</body>
</html>
In the DOM world null means “doesn't exist”
In the DOM, the null value means “doesn't exist” or “no such node”.
- Children: childNodes, firstChild, lastChild
There are two terms that we'll use from now on:
Child nodes (or children) – elements that are direct children.
In other words, they are nested exactly in the given one.
For instance, <head> and <body> are children of <html> element.
Descendants – all elements that are nested in the given one, including children, their children and so on.
For instance, here <body> has children <div> and <ul> (and few blank text nodes):
<html>
<body>
<div>Begin</div>
<ul>
<li>
<b>Information</b>
</li>
</ul>
</body>
</html>
…And descendants of <body> are not only direct children <div>, <ul> but also more deeply nested elements, such as <li> (a child of <ul>) and <b> (a child of <li>) – the entire subtree.
The childNodes collection lists all child nodes, including text nodes.
The example below shows children of document.body:
<html>
<body>
<div>Begin</div>
<ul>
<li>Information</li>
</ul>
<div>End</div>
<script>
for (let i = 0; i < document.body.childNodes.length; i++) {
alert( document.body.childNodes[i] ); // Text, DIV, Text, UL, ..., SCRIPT
}
</script>
...more stuff...
</body>
</html>
Please note an interesting detail here.
If we run the example above, the last element shown is <script>.
In fact, the document has more stuff below, but at the moment of the script execution the browser did not read it yet, so the script doesn't see it.
Properties firstChild and lastChild give fast access to the first and last children.
They are just shorthands.
If there exist child nodes, then the following is always true:
elem.childNodes[0] === elem.firstChild
elem.childNodes[elem.childNodes.length - 1] === elem.lastChild
There's also a special function elem.hasChildNodes() to check whether there are any child nodes.
DOM collections
As we can see, childNodes looks like an array.
But actually it's not an array, but rather a collection – a special array-like iterable object.
There are two important consequences:
We can use for..of to iterate over it:
for (let node of document.body.childNodes) {
alert(node); // shows all nodes from the collection
}
That's because it's iterable (provides the Symbol.iterator property, as required).
Array methods won't work, because it's not an array:
alert(document.body.childNodes.filter); // undefined (there's no filter method!)
The first thing is nice.
The second is tolerable, because we can use Array.from to create a “real” array from the collection, if we want array methods:
alert( Array.from(document.body.childNodes).filter ); // function
DOM collections are read-only
DOM collections, and even more – all navigation properties listed in this chapter are read-only.
We can't replace a child by something else by assigning childNodes[i] = ....
Changing DOM needs other methods.
We will see them in the next chapter.
DOM collections are live
Almost all DOM collections with minor exceptions are live.
In other words, they reflect the current state of DOM.
If we keep a reference to elem.childNodes, and add/remove nodes into DOM, then they appear in the collection automatically.
Don't use for..in to loop over collections
Collections are iterable using for..of.
Sometimes people try to use for..in for that.
Please, don't.
The for..in loop iterates over all enumerable properties.
And collections have some “extra” rarely used properties that we usually do not want to get:
<body>
<script>
// shows 0, 1, length, item, values and more.
for (let prop in document.body.childNodes) alert(prop);
</script>
</body>
- Siblings and the parent
Siblings are nodes that are children of the same parent.
For instance, here <head> and <body> are siblings:
<html>
<head>...</head><body>...</body>
</html><body> is said to be the “next” or “right” sibling of <head>,
<head> is said to be the “previous” or “left” sibling of <body>.
The next sibling is in nextSibling property, and the previous one – in previousSibling.
The parent is available as parentNode.
For example:
// parent of <body> is <html>
alert( document.body.parentNode === document.documentElement ); // true
// after <head> goes <body>
alert( document.head.nextSibling ); // HTMLBodyElement
// before <body> goes <head>
alert( document.body.previousSibling ); // HTMLHeadElement
- Element-only navigation
Navigation properties listed above refer to all nodes.
For instance, in childNodes we can see both text nodes, element nodes, and even comment nodes if there exist.
But for many tasks we don't want text or comment nodes.
We want to manipulate element nodes that represent tags and form the structure of the page.
So let's see more navigation links that only take element nodes into account:
The links are similar to those given above, just with Element word inside:
children – only those children that are element nodes.
firstElementChild, lastElementChild – first and last element children.
previousElementSibling, nextElementSibling – neighbor elements.
parentElement – parent element.
Why parentElement? Can the parent be not an element?
The parentElement property returns the “element” parent, while parentNode returns “any node” parent.
These properties are usually the same: they both get the parent.
With the one exception of document.documentElement:
alert( document.documentElement.parentNode ); // document
alert( document.documentElement.parentElement ); // null
The reason is that the root node document.documentElement (<html>) has document as its parent.
But document is not an element node, so parentNode returns it and parentElement does not.
This detail may be useful when we want to travel up from an arbitrary element elem to <html>, but not to the document:
while(elem = elem.parentElement) { // go up till <html>
alert( elem );
}
Let's modify one of the examples above: replace childNodes with children.
Now it shows only elements:
<html>
<body>
<div>Begin</div>
<ul>
<li>Information</li>
</ul>
<div>End</div>
<script>
for (let elem of document.body.children) {
alert(elem); // DIV, UL, DIV, SCRIPT
}
</script>
...
</body>
</html>
- More links: tables
Till now we described the basic navigation properties.
Certain types of DOM elements may provide additional properties, specific to their type, for convenience.
Tables are a great example of that, and represent a particularly important case:
The <table> element supports (in addition to the given above) these properties:
table.rows – the collection of <tr> elements of the table.
table.caption/tHead/tFoot – references to elements <caption>, <thead>, <tfoot>.
table.tBodies – the collection of <tbody> elements (can be many according to the standard, but there will always be at least one – even if it is not in the source HTML, the browser will put it in the DOM).
<thead>, <tfoot>, <tbody> elements provide the rows property:
tbody.rows – the collection of <tr> inside.
<tr>:tr.cells – the collection of <td> and <th> cells inside the given <tr>.
tr.sectionRowIndex – the position (index) of the given <tr> inside the enclosing <thead>/<tbody>/<tfoot>.
tr.rowIndex – the number of the <tr> in the table as a whole (including all table rows).
<td> and <th>:td.cellIndex – the number of the cell inside the enclosing <tr>.
An example of usage:
<table id="table">
<tr>
<td>one</td><td>two</td>
</tr>
<tr>
<td>three</td><td>four</td>
</tr>
</table>
<script>
// get td with "two" (first row, second column)
let td = table.rows[0].cells[1];
td.style.backgroundColor = "red"; // highlight it
</script>
The specification: tabular data.
There are also additional navigation properties for HTML forms.
We'll look at them later when we start working with forms.
- Summary
Given a DOM node, we can go to its immediate neighbors using navigation properties.
There are two main sets of them:
For all nodes: parentNode, childNodes, firstChild, lastChild, previousSibling, nextSibling.
For element nodes only: parentElement, children, firstElementChild, lastElementChild, previousElementSibling, nextElementSibling.
Some types of DOM elements, e.g.
tables, provide additional properties and collections to access their content.
importance: 5
Look at this page:
<html>
<body>
<div>Users:</div>
<ul>
<li>John</li>
<li>Pete</li>
</ul>
</body>
</html>
For each of the following, give at least one way of how to access them:
The <div> DOM node?
The <ul> DOM node?
The second <li> (with Pete)?
There are many ways, for instance:
The <div> DOM node:
document.body.firstElementChild
// or
document.body.children[0]
// or (the first node is space, so we take 2nd)
document.body.childNodes[1]
The <ul> DOM node:
document.body.lastElementChild
// or
document.body.children[1]
The second <li> (with Pete):
// get <ul>, and then get its last element child
document.body.lastElementChild.lastElementChild
The sibling question
importance: 5
If elem – is an arbitrary DOM element node…
Is it true that elem.lastChild.nextSibling is always null?
Is it true that elem.children[0].previousSibling is always null ?
Yes, true.
The element elem.lastChild is always the last one, it has no nextSibling.
No, wrong, because elem.children[0] is the first child among elements.
But there may exist non-element nodes before it.
So previousSibling may be a text node.
Please note: for both cases if there are no children, then there will be an error.
If there are no children, elem.lastChild is null, so we can't access elem.lastChild.nextSibling.
And the collection elem.children is empty (like an empty array []).
Select all diagonal cells
importance: 5
Write the code to paint all diagonal table cells in red.
You'll need to get all diagonal <td> from the <table> and paint them using the code:
// td should be the reference to the table cell
td.style.backgroundColor = 'red';
The result should be:
Open a sandbox for the task.
We'll be using rows and cells properties to access diagonal table cells.
Open the solution in a sandbox.Browser: Document, Events, InterfacesDocument
Searching: getElement*, querySelector*
DOM navigation properties are great when elements are close to each other.
What if they are not? How to get an arbitrary element of the page?
There are additional searching methods for that.
- document.getElementById or just id
If an element has the id attribute, we can get the element using the method document.getElementById(id), no matter where it is.
For instance:
<div id="elem">
<div id="elem-content">Element</div>
</div>
<script>
// get the element
let elem = document.getElementById('elem');
// make its background red
elem.style.background = 'red';
</script>
Also, there's a global variable named by id that references the element:
<div id="elem">
<div id="elem-content">Element</div>
</div>
<script>
// elem is a reference to DOM-element with id="elem"
elem.style.background = 'red';
// id="elem-content" has a hyphen inside, so it can't be a variable name
// ...but we can access it using square brackets: window['elem-content']
</script>
…That's unless we declare a JavaScript variable with the same name, then it takes precedence:
<div id="elem"></div>
<script>
let elem = 5; // now elem is 5, not a reference to <div id="elem">
alert(elem); // 5
</script>
Please don't use id-named global variables to access elements
This behavior is described in the specification, so it's kind of standard.
But it is supported mainly for compatibility.
The browser tries to help us by mixing namespaces of JS and DOM.
That's fine for simple scripts, inlined into HTML, but generally isn't a good thing.
There may be naming conflicts.
Also, when one reads JS code and doesn't have HTML in view, it's not obvious where the variable comes from.
Here in the tutorial we use id to directly reference an element for brevity, when it's obvious where the element comes from.
In real life document.getElementById is the preferred method.
The id must be unique
The id must be unique.
There can be only one element in the document with the given id.
If there are multiple elements with the same id, then the behavior of methods that use it is unpredictable, e.g.
document.getElementById may return any of such elements at random.
So please stick to the rule and keep id unique.
Only document.getElementById, not anyElem.getElementById
The method getElementById can be called only on document object.
It looks for the given id in the whole document.
- querySelectorAll
By far, the most versatile method, elem.querySelectorAll(css) returns all elements inside elem matching the given CSS selector.
Here we look for all <li> elements that are last children:
<ul>
<li>The</li>
<li>test</li>
</ul>
<ul>
<li>has</li>
<li>passed</li>
</ul>
<script>
let elements = document.querySelectorAll('ul > li:last-child');
for (let elem of elements) {
alert(elem.innerHTML); // "test", "passed"
}
</script>
This method is indeed powerful, because any CSS selector can be used.
Can use pseudo-classes as well
Pseudo-classes in the CSS selector like :hover and :active are also supported.
For instance, document.querySelectorAll(':hover') will return the collection with elements that the pointer is over now (in nesting order: from the outermost <html> to the most nested one).
- querySelector
The call to elem.querySelector(css) returns the first element for the given CSS selector.
In other words, the result is the same as elem.querySelectorAll(css)[0], but the latter is looking for all elements and picking one, while elem.querySelector just looks for one.
So it's faster and also shorter to write.
- matches
Previous methods were searching the DOM.
The elem.matches(css) does not look for anything, it merely checks if elem matches the given CSS-selector.
It returns true or false.
The method comes in handy when we are iterating over elements (like in an array or something) and trying to filter out those that interest us.
For instance:
<a href="http://example.com/file.zip">...</a>
<a href="http://ya.ru">...</a>
<script>
// can be any collection instead of document.body.children
for (let elem of document.body.children) {
if (elem.matches('a[href$="zip"]')) {
alert("The archive reference: " + elem.href );
}
}
</script>
- closest
Ancestors of an element are: parent, the parent of parent, its parent and so on.
The ancestors together form the chain of parents from the element to the top.
The method elem.closest(css) looks for the nearest ancestor that matches the CSS-selector.
The elem itself is also included in the search.
In other words, the method closest goes up from the element and checks each of parents.
If it matches the selector, then the search stops, and the ancestor is returned.
For instance:
<h1>Contents</h1>
<div class="contents">
<ul class="book">
<li class="chapter">Chapter 1</li>
<li class="chapter">Chapter 1</li>
</ul>
</div>
<script>
let chapter = document.querySelector('.chapter'); // LI
alert(chapter.closest('.book')); // UL
alert(chapter.closest('.contents')); // DIV
alert(chapter.closest('h1')); // null (because h1 is not an ancestor)
</script>
- getElementsBy*
There are also other methods to look for nodes by a tag, class, etc.
Today, they are mostly history, as querySelector is more powerful and shorter to write.
So here we cover them mainly for completeness, while you can still find them in the old scripts.
elem.getElementsByTagName(tag) looks for elements with the given tag and returns the collection of them.
The tag parameter can also be a star "*" for “any tags”.
elem.getElementsByClassName(className) returns elements that have the given CSS class.
document.getElementsByName(name) returns elements with the given name attribute, document-wide.
Very rarely used.
For instance:
// get all divs in the document
let divs = document.getElementsByTagName('div');
Let's find all input tags inside the table:
<table id="table">
<tr>
<td>Your age:</td>
<td>
<label>
<input type="radio" name="age" value="young" checked> less than 18
</label>
<label>
<input type="radio" name="age" value="mature"> from 18 to 50
</label>
<label>
<input type="radio" name="age" value="senior"> more than 60
</label>
</td>
</tr>
</table>
<script>
let inputs = table.getElementsByTagName('input');
for (let input of inputs) {
alert( input.value + ': ' + input.checked );
}
</script>
Don't forget the "s" letter!
Novice developers sometimes forget the letter "s".
That is, they try to call getElementByTagName instead of getElementsByTagName.
The "s" letter is absent in getElementById, because it returns a single element.
But getElementsByTagName returns a collection of elements, so there's "s" inside.
It returns a collection, not an element!
Another widespread novice mistake is to write:
// doesn't work
document.getElementsByTagName('input').value = 5;
That won't work, because it takes a collection of inputs and assigns the value to it rather than to elements inside it.
We should either iterate over the collection or get an element by its index, and then assign, like this:
// should work (if there's an input)
document.getElementsByTagName('input')[0].value = 5;
Looking for .article elements:
<form name="my-form">
<div class="article">Article</div>
<div class="long article">Long article</div>
</form>
<script>
// find by name attribute
let form = document.getElementsByName('my-form')[0];
// find by class inside the form
let articles = form.getElementsByClassName('article');
alert(articles.length); // 2, found two elements with class "article"
</script>
- Live collections
All methods "getElementsBy*" return a live collection.
Such collections always reflect the current state of the document and “auto-update” when it changes.
In the example below, there are two scripts.
The first one creates a reference to the collection of <div>.
As of now, its length is 1.
The second scripts runs after the browser meets one more <div>, so its length is 2.
<div>First div</div>
<script>
let divs = document.getElementsByTagName('div');
alert(divs.length); // 1
</script>
<div>Second div</div>
<script>
alert(divs.length); // 2
</script>
In contrast, querySelectorAll returns a static collection.
It's like a fixed array of elements.
If we use it instead, then both scripts output 1:
<div>First div</div>
<script>
let divs = document.querySelectorAll('div');
alert(divs.length); // 1
</script>
<div>Second div</div>
<script>
alert(divs.length); // 1
</script>
Now we can easily see the difference.
The static collection did not increase after the appearance of a new div in the document.
- Summary
There are 6 main methods to search for nodes in DOM:
Method
Searches by...
Can call on an element?
Live?
querySelector
CSS-selector
-
querySelectorAll
CSS-selector
-
getElementById
id
-
-
getElementsByName
name
-
getElementsByTagName
tag or '*'
getElementsByClassName
class
By far the most used are querySelector and querySelectorAll, but getElement(s)By* can be sporadically helpful or found in the old scripts.
Besides that:
There is elem.matches(css) to check if elem matches the given CSS selector.
There is elem.closest(css) to look for the nearest ancestor that matches the given CSS-selector.
The elem itself is also checked.
And let's mention one more method here to check for the child-parent relationship, as it's sometimes useful:
elemA.contains(elemB) returns true if elemB is inside elemA (a descendant of elemA) or when elemA==elemB.
importance: 4
Here's the document with the table and form.
How to find?…
The table with id="age-table".
All label elements inside that table (there should be 3 of them).
The first td in that table (with the word “Age”).
The form with name="search".
The first input in that form.
The last input in that form.
Open the page table.html in a separate window and make use of browser tools for that.
There are many ways to do it.
Here are some of them:
// 1.
The table with `id="age-table"`.
let table = document.getElementById('age-table')
// 2.
All label elements inside that table
table.getElementsByTagName('label')
// or
document.querySelectorAll('#age-table label')
// 3.
The first td in that table (with the word "Age")
table.rows[0].cells[0]
// or
table.getElementsByTagName('td')[0]
// or
table.querySelector('td')
// 4.
The form with the name "search"
// assuming there's only one element with name="search" in the document
let form = document.getElementsByName('search')[0]
// or, form specifically
document.querySelector('form[name="search"]')
// 5.
The first input in that form.
form.getElementsByTagName('input')[0]
// or
form.querySelector('input')
// 6.
The last input in that form
let inputs = form.querySelectorAll('input') // find all inputs
inputs[inputs.length-1] // take the last oneBrowser: Document, Events, InterfacesDocument
Node properties: type, tag and contents
Let's get a more in-depth look at DOM nodes.
In this chapter we'll see more into what they are and learn their most used properties.
- DOM node classes
Different DOM nodes may have different properties.
For instance, an element node corresponding to tag <a> has link-related properties, and the one corresponding to <input> has input-related properties and so on.
Text nodes are not the same as element nodes.
But there are also common properties and methods between all of them, because all classes of DOM nodes form a single hierarchy.
Each DOM node belongs to the corresponding built-in class.
The root of the hierarchy is EventTarget, that is inherited by Node, and other DOM nodes inherit from it.
Here's the picture, explanations to follow:
The classes are:
EventTarget – is the root “abstract” class.
Objects of that class are never created.
It serves as a base, so that all DOM nodes support so-called “events”, we'll study them later.
Node – is also an “abstract” class, serving as a base for DOM nodes.
It provides the core tree functionality: parentNode, nextSibling, childNodes and so on (they are getters).
Objects of Node class are never created.
But there are concrete node classes that inherit from it, namely: Text for text nodes, Element for element nodes and more exotic ones like Comment for comment nodes.
Element – is a base class for DOM elements.
It provides element-level navigation like nextElementSibling, children and searching methods like getElementsByTagName, querySelector.
A browser supports not only HTML, but also XML and SVG.
The Element class serves as a base for more specific classes: SVGElement, XMLElement and HTMLElement.
HTMLElement – is finally the basic class for all HTML elements.
It is inherited by concrete HTML elements:
HTMLInputElement – the class for <input> elements,
HTMLBodyElement – the class for <body> elements,
HTMLAnchorElement – the class for <a> elements,
…and so on, each tag has its own class that may provide specific properties and methods.
So, the full set of properties and methods of a given node comes as the result of the inheritance.
For example, let's consider the DOM object for an <input> element.
It belongs to HTMLInputElement class.
It gets properties and methods as a superposition of (listed in inheritance order):
HTMLInputElement – this class provides input-specific properties,
HTMLElement – it provides common HTML element methods (and getters/setters),
Element – provides generic element methods,
Node – provides common DOM node properties,
EventTarget – gives the support for events (to be covered),
…and finally it inherits from Object, so “plain object” methods like hasOwnProperty are also available.
To see the DOM node class name, we can recall that an object usually has the constructor property.
It references the class constructor, and constructor.name is its name:
alert( document.body.constructor.name ); // HTMLBodyElement
…Or we can just toString it:
alert( document.body ); // [object HTMLBodyElement]
We also can use instanceof to check the inheritance:
alert( document.body instanceof HTMLBodyElement ); // true
alert( document.body instanceof HTMLElement ); // true
alert( document.body instanceof Element ); // true
alert( document.body instanceof Node ); // true
alert( document.body instanceof EventTarget ); // true
As we can see, DOM nodes are regular JavaScript objects.
They use prototype-based classes for inheritance.
That's also easy to see by outputting an element with console.dir(elem) in a browser.
There in the console you can see HTMLElement.prototype, Element.prototype and so on.
console.dir(elem) versus console.log(elem)
Most browsers support two commands in their developer tools: console.log and console.dir.
They output their arguments to the console.
For JavaScript objects these commands usually do the same.
But for DOM elements they are different:
console.log(elem) shows the element DOM tree.
console.dir(elem) shows the element as a DOM object, good to explore its properties.
Try it on document.body.
IDL in the spec
In the specification, DOM classes aren't described by using JavaScript, but a special Interface description language (IDL), that is usually easy to understand.
In IDL all properties are prepended with their types.
For instance, DOMString, boolean and so on.
Here's an excerpt from it, with comments:
// Define HTMLInputElement
// The colon ":" means that HTMLInputElement inherits from HTMLElement
interface HTMLInputElement: HTMLElement {
// here go properties and methods of <input> elements
// "DOMString" means that the value of a property is a string
attribute DOMString accept;
attribute DOMString alt;
attribute DOMString autocomplete;
attribute DOMString value;
// boolean value property (true/false)
attribute boolean autofocus;
...
// now the method: "void" means that the method returns no value
void select();
...
}
- The “nodeType” property
The nodeType property provides one more, “old-fashioned” way to get the “type” of a DOM node.
It has a numeric value:
elem.nodeType == 1 for element nodes,
elem.nodeType == 3 for text nodes,
elem.nodeType == 9 for the document object,
there are few other values in the specification.
For instance:
<body>
<script>
let elem = document.body;
// let's examine what it is?
alert(elem.nodeType); // 1 => element
// and the first child is...
alert(elem.firstChild.nodeType); // 3 => text
// for the document object, the type is 9
alert( document.nodeType ); // 9
</script>
</body>
In modern scripts, we can use instanceof and other class-based tests to see the node type, but sometimes nodeType may be simpler.
We can only read nodeType, not change it.
- Tag: nodeName and tagName
Given a DOM node, we can read its tag name from nodeName or tagName properties:
For instance:
alert( document.body.nodeName ); // BODY
alert( document.body.tagName ); // BODY
Is there any difference between tagName and nodeName?
Sure, the difference is reflected in their names, but is indeed a bit subtle.
The tagName property exists only for Element nodes.
The nodeName is defined for any Node:
for elements it means the same as tagName.
for other node types (text, comment, etc.) it has a string with the node type.
In other words, tagName is only supported by element nodes (as it originates from Element class), while nodeName can say something about other node types.
For instance, let's compare tagName and nodeName for the document and a comment node:
<body><!-- comment -->
<script>
// for comment
alert( document.body.firstChild.tagName ); // undefined (not an element)
alert( document.body.firstChild.nodeName ); // #comment
// for document
alert( document.tagName ); // undefined (not an element)
alert( document.nodeName ); // #document
</script>
</body>
If we only deal with elements, then we can use both tagName and nodeName – there's no difference.
The tag name is always uppercase except in XML mode
The browser has two modes of processing documents: HTML and XML.
Usually the HTML-mode is used for webpages.
XML-mode is enabled when the browser receives an XML-document with the header: Content-Type: application/xml+xhtml.
In HTML mode tagName/nodeName is always uppercased: it's BODY either for <body> or <BoDy>.
In XML mode the case is kept “as is”.
Nowadays XML mode is rarely used.
- innerHTML: the contents
The innerHTML property allows to get the HTML inside the element as a string.
We can also modify it.
So it's one of the most powerful ways to change the page.
The example shows the contents of document.body and then replaces it completely:
<body>
<p>A paragraph</p>
<div>A div</div>
<script>
alert( document.body.innerHTML ); // read the current contents
document.body.innerHTML = 'The new BODY!'; // replace it
</script>
</body>
We can try to insert invalid HTML, the browser will fix our errors:
<body>
<script>
document.body.innerHTML = '<b>test'; // forgot to close the tag
alert( document.body.innerHTML ); // <b>test</b> (fixed)
</script>
</body>
Scripts don't execute
If innerHTML inserts a <script> tag into the document – it becomes a part of HTML, but doesn't execute.
Beware: “innerHTML+=” does a full overwrite
We can append HTML to an element by using elem.innerHTML+="more html".
Like this:
chatDiv.innerHTML += "<div>Hello<img src='smile.gif'/> !</div>";
chatDiv.innerHTML += "How goes?";
But we should be very careful about doing it, because what's going on is not an addition, but a full overwrite.
Technically, these two lines do the same:
elem.innerHTML += "...";
// is a shorter way to write:
elem.innerHTML = elem.innerHTML + "..."
In other words, innerHTML+= does this:
The old contents is removed.
The new innerHTML is written instead (a concatenation of the old and the new one).
As the content is “zeroed-out” and rewritten from the scratch, all images and other resources will be reloaded.
In the chatDiv example above the line chatDiv.innerHTML+="How goes?" re-creates the HTML content and reloads smile.gif (hope it's cached).
If chatDiv has a lot of other text and images, then the reload becomes clearly visible.
There are other side-effects as well.
For instance, if the existing text was selected with the mouse, then most browsers will remove the selection upon rewriting innerHTML.
And if there was an <input> with a text entered by the visitor, then the text will be removed.
And so on.
Luckily, there are other ways to add HTML besides innerHTML, and we'll study them soon.
- outerHTML: full HTML of the element
The outerHTML property contains the full HTML of the element.
That's like innerHTML plus the element itself.
Here's an example:
<div id="elem">Hello <b>World</b></div>
<script>
alert(elem.outerHTML); // <div id="elem">Hello <b>World</b></div>
</script>Beware: unlike innerHTML, writing to outerHTML does not change the element.
Instead, it replaces it in the DOM.
Yeah, sounds strange, and strange it is, that's why we make a separate note about it here.
Take a look.
Consider the example:
<div>Hello, world!</div>
<script>
let div = document.querySelector('div');
// replace div.outerHTML with <p>...</p>
div.outerHTML = '<p>A new element</p>'; // (*)
// Wow! 'div' is still the same!
alert(div.outerHTML); // <div>Hello, world!</div> (**)
</script>
Looks really odd, right?
In the line (*) we replaced div with <p>A new element</p>.
In the outer document (the DOM) we can see the new content instead of the <div>.
But, as we can see in line (**), the value of the old div variable hasn't changed!
The outerHTML assignment does not modify the DOM element (the object referenced by, in this case, the variable ‘div'), but removes it from the DOM and inserts the new HTML in its place.
So what happened in div.outerHTML=... is:
div was removed from the document.
Another piece of HTML <p>A new element</p> was inserted in its place.
div still has its old value.
The new HTML wasn't saved to any variable.
It's so easy to make an error here: modify div.outerHTML and then continue to work with div as if it had the new content in it.
But it doesn't.
Such thing is correct for innerHTML, but not for outerHTML.
We can write to elem.outerHTML, but should keep in mind that it doesn't change the element we're writing to (‘elem').
It puts the new HTML in its place instead.
We can get references to the new elements by querying the DOM.
- nodeValue/data: text node content
The innerHTML property is only valid for element nodes.
Other node types, such as text nodes, have their counterpart: nodeValue and data properties.
These two are almost the same for practical use, there are only minor specification differences.
So we'll use data, because it's shorter.
An example of reading the content of a text node and a comment:
<body>
Hello
<!-- Comment -->
<script>
let text = document.body.firstChild;
alert(text.data); // Hello
let comment = text.nextSibling;
alert(comment.data); // Comment
</script>
</body>
For text nodes we can imagine a reason to read or modify them, but why comments?
Sometimes developers embed information or template instructions into HTML in them, like this:
<!-- if isAdmin -->
<div>Welcome, Admin!</div>
<!-- /if -->
…Then JavaScript can read it from data property and process embedded instructions.
- textContent: pure text
The textContent provides access to the text inside the element: only text, minus all <tags>.
For instance:
<div id="news">
<h1>Headline!</h1>
<p>Martians attack people!</p>
</div>
<script>
// Headline! Martians attack people!
alert(news.textContent);
</script>
As we can see, only text is returned, as if all <tags> were cut out, but the text in them remained.
In practice, reading such text is rarely needed.
Writing to textContent is much more useful, because it allows to write text the “safe way”.
Let's say we have an arbitrary string, for instance entered by a user, and want to show it.
With innerHTML we'll have it inserted “as HTML”, with all HTML tags.
With textContent we'll have it inserted “as text”, all symbols are treated literally.
Compare the two:
<div id="elem1"></div>
<div id="elem2"></div>
<script>
let name = prompt("What's your name?", "<b>Winnie-the-Pooh!</b>");
elem1.innerHTML = name;
elem2.textContent = name;
</script>
The first <div> gets the name “as HTML”: all tags become tags, so we see the bold name.
The second <div> gets the name “as text”, so we literally see <b>Winnie-the-Pooh!</b>.
In most cases, we expect the text from a user, and want to treat it as text.
We don't want unexpected HTML in our site.
An assignment to textContent does exactly that.
- The “hidden” property
The “hidden” attribute and the DOM property specifies whether the element is visible or not.
We can use it in HTML or assign it using JavaScript, like this:
<div>Both divs below are hidden</div>
<div hidden>With the attribute "hidden"</div>
<div id="elem">JavaScript assigned the property "hidden"</div>
<script>
elem.hidden = true;
</script>
Technically, hidden works the same as style="display:none".
But it's shorter to write.
Here's a blinking element:
<div id="elem">A blinking element</div>
<script>
setInterval(() => elem.hidden = !elem.hidden, 1000);
</script>
- More properties
DOM elements also have additional properties, in particular those that depend on the class:
value – the value for <input>, <select> and <textarea> (HTMLInputElement, HTMLSelectElement…).
href – the “href” for <a href="..."> (HTMLAnchorElement).
id – the value of “id” attribute, for all elements (HTMLElement).
…and much more…
For instance:
<input type="text" id="elem" value="value">
<script>
alert(elem.type); // "text"
alert(elem.id); // "elem"
alert(elem.value); // value
</script>
Most standard HTML attributes have the corresponding DOM property, and we can access it like that.
If we want to know the full list of supported properties for a given class, we can find them in the specification.
For instance, HTMLInputElement is documented at https://html.spec.whatwg.org/#htmlinputelement.
Or if we'd like to get them fast or are interested in a concrete browser specification – we can always output the element using console.dir(elem) and read the properties.
Or explore “DOM properties” in the Elements tab of the browser developer tools.
- Summary
Each DOM node belongs to a certain class.
The classes form a hierarchy.
The full set of properties and methods come as the result of inheritance.
Main DOM node properties are:
nodeType
We can use it to see if a node is a text or an element node.
It has a numeric value: 1 for elements,3 for text nodes, and a few others for other node types.
Read-only.
nodeName/tagName
For elements, tag name (uppercased unless XML-mode).
For non-element nodes nodeName describes what it is.
Read-only.
innerHTML
The HTML content of the element.
Can be modified.
outerHTML
The full HTML of the element.
A write operation into elem.outerHTML does not touch elem itself.
Instead it gets replaced with the new HTML in the outer context.
nodeValue/data
The content of a non-element node (text, comment).
These two are almost the same, usually we use data.
Can be modified.
textContent
The text inside the element: HTML minus all <tags>.
Writing into it puts the text inside the element, with all special characters and tags treated exactly as text.
Can safely insert user-generated text and protect from unwanted HTML insertions.
hidden
When set to true, does the same as CSS display:none.
DOM nodes also have other properties depending on their class.
For instance, <input> elements (HTMLInputElement) support value, type, while <a> elements (HTMLAnchorElement) support href etc.
Most standard HTML attributes have a corresponding DOM property.
However, HTML attributes and DOM properties are not always the same, as we'll see in the next chapter.
importance: 5
There's a tree structured as nested ul/li.
Write the code that for each <li> shows:
What's the text inside it (without the subtree)
The number of nested <li> – all descendants, including the deeply nested ones.
Demo in new windowOpen a sandbox for the task.
Let's make a loop over <li>:
for (let li of document.querySelectorAll('li')) {
...
}
In the loop we need to get the text inside every li.
We can read the text from the first child node of li, that is the text node:
for (let li of document.querySelectorAll('li')) {
let title = li.firstChild.data;
// title is the text in <li> before any other nodes
}
Then we can get the number of descendants as li.getElementsByTagName('li').length.
Open the solution in a sandbox.
What's in the nodeType?
importance: 5
What does the script show?
<html>
<body>
<script>
alert(document.body.lastChild.nodeType);
</script>
</body>
</html>
There's a catch here.
At the time of <script> execution the last DOM node is exactly <script>, because the browser did not process the rest of the page yet.
So the result is 1 (element node).
<html>
<body>
<script>
alert(document.body.lastChild.nodeType);
</script>
</body>
</html>
Tag in comment
importance: 3
What does this code show?
<script>
let body = document.body;
body.innerHTML = "<!--" + body.tagName + "-->";
alert( body.firstChild.data ); // what's here?
</script>
The answer: BODY.
<script>
let body = document.body;
body.innerHTML = "<!--" + body.tagName + "-->";
alert( body.firstChild.data ); // BODY
</script>
What's going on step by step:
The content of <body> is replaced with the comment.
The comment is <!--BODY-->, because body.tagName == "BODY".
As we remember, tagName is always uppercase in HTML.
The comment is now the only child node, so we get it in body.firstChild.
The data property of the comment is its contents (inside <!--...-->): "BODY".
Where's the "document" in the hierarchy?
importance: 4
Which class does the document belong to?
What's its place in the DOM hierarchy?
Does it inherit from Node or Element, or maybe HTMLElement?
We can see which class it belongs by outputting it, like:
alert(document); // [object HTMLDocument]
Or:
alert(document.constructor.name); // HTMLDocument
So, document is an instance of HTMLDocument class.
What's its place in the hierarchy?
Yeah, we could browse the specification, but it would be faster to figure out manually.
Let's traverse the prototype chain via __proto__.
As we know, methods of a class are in the prototype of the constructor.
For instance, HTMLDocument.prototype has methods for documents.
Also, there's a reference to the constructor function inside the prototype:
alert(HTMLDocument.prototype.constructor === HTMLDocument); // true
To get a name of the class as a string, we can use constructor.name.
Let's do it for the whole document prototype chain, till class Node:
alert(HTMLDocument.prototype.constructor.name); // HTMLDocument
alert(HTMLDocument.prototype.__proto__.constructor.name); // Document
alert(HTMLDocument.prototype.__proto__.__proto__.constructor.name); // Node
That's the hierarchy.
We also could examine the object using console.dir(document) and see these names by opening __proto__.
The console takes them from constructor internally.
Browser: Document, Events, InterfacesDocument
Attributes and properties
When the browser loads the page, it “reads” (another word: “parses”) the HTML and generates DOM objects from it.
For element nodes, most standard HTML attributes automatically become properties of DOM objects.
For instance, if the tag is <body id="page">, then the DOM object has body.id="page".
But the attribute-property mapping is not one-to-one! In this chapter we'll pay attention to separate these two notions, to see how to work with them, when they are the same, and when they are different.
- DOM properties
We've already seen built-in DOM properties.
There are a lot.
But technically no one limits us, and if there aren't enough, we can add our own.
DOM nodes are regular JavaScript objects.
We can alter them.
For instance, let's create a new property in document.body:
document.body.myData = {
name: 'Caesar',
title: 'Imperator'
};
alert(document.body.myData.title); // Imperator
We can add a method as well:
document.body.sayTagName = function() {
alert(this.tagName);
};
document.body.sayTagName(); // BODY (the value of "this" in the method is document.body)
We can also modify built-in prototypes like Element.prototype and add new methods to all elements:
Element.prototype.sayHi = function() {
alert(`Hello, I'm ${this.tagName}`);
};
document.documentElement.sayHi(); // Hello, I'm HTML
document.body.sayHi(); // Hello, I'm BODY
So, DOM properties and methods behave just like those of regular JavaScript objects:
They can have any value.
They are case-sensitive (write elem.nodeType, not elem.NoDeTyPe).
- HTML attributes
In HTML, tags may have attributes.
When the browser parses the HTML to create DOM objects for tags, it recognizes standard attributes and creates DOM properties from them.
So when an element has id or another standard attribute, the corresponding property gets created.
But that doesn't happen if the attribute is non-standard.
For instance:
<body id="test" something="non-standard">
<script>
alert(document.body.id); // test
// non-standard attribute does not yield a property
alert(document.body.something); // undefined
</script>
</body>
Please note that a standard attribute for one element can be unknown for another one.
For instance, "type" is standard for <input> (HTMLInputElement), but not for <body> (HTMLBodyElement).
Standard attributes are described in the specification for the corresponding element class.
Here we can see it:
<body id="body" type="...">
<input id="input" type="text">
<script>
alert(input.type); // text
alert(body.type); // undefined: DOM property not created, because it's non-standard
</script>
</body>
So, if an attribute is non-standard, there won't be a DOM-property for it.
Is there a way to access such attributes?
Sure.
All attributes are accessible by using the following methods:
elem.hasAttribute(name) – checks for existence.
elem.getAttribute(name) – gets the value.
elem.setAttribute(name, value) – sets the value.
elem.removeAttribute(name) – removes the attribute.
These methods operate exactly with what's written in HTML.
Also one can read all attributes using elem.attributes: a collection of objects that belong to a built-in Attr class, with name and value properties.
Here's a demo of reading a non-standard property:
<body something="non-standard">
<script>
alert(document.body.getAttribute('something')); // non-standard
</script>
</body>
HTML attributes have the following features:
Their name is case-insensitive (id is same as ID).
Their values are always strings.
Here's an extended demo of working with attributes:
<body>
<div id="elem" about="Elephant"></div>
<script>
alert( elem.getAttribute('About') ); // (1) 'Elephant', reading
elem.setAttribute('Test', 123); // (2), writing
alert( elem.outerHTML ); // (3), see if the attribute is in HTML (yes)
for (let attr of elem.attributes) { // (4) list all
alert( `${attr.name} = ${attr.value}` );
}
</script>
</body>
Please note:
getAttribute('About') – the first letter is uppercase here, and in HTML it's all lowercase.
But that doesn't matter: attribute names are case-insensitive.
We can assign anything to an attribute, but it becomes a string.
So here we have "123" as the value.
All attributes including ones that we set are visible in outerHTML.
The attributes collection is iterable and has all the attributes of the element (standard and non-standard) as objects with name and value properties.
- Property-attribute synchronization
When a standard attribute changes, the corresponding property is auto-updated, and (with some exceptions) vice versa.
In the example below id is modified as an attribute, and we can see the property changed too.
And then the same backwards:
<input>
<script>
let input = document.querySelector('input');
// attribute => property
input.setAttribute('id', 'id');
alert(input.id); // id (updated)
// property => attribute
input.id = 'newId';
alert(input.getAttribute('id')); // newId (updated)
</script>
But there are exclusions, for instance input.value synchronizes only from attribute → to property, but not back:
<input>
<script>
let input = document.querySelector('input');
// attribute => property
input.setAttribute('value', 'text');
alert(input.value); // text
// NOT property => attribute
input.value = 'newValue';
alert(input.getAttribute('value')); // text (not updated!)
</script>
In the example above:
Changing the attribute value updates the property.
But the property change does not affect the attribute.
That “feature” may actually come in handy, because the user actions may lead to value changes, and then after them, if we want to recover the “original” value from HTML, it's in the attribute.
- DOM properties are typed
DOM properties are not always strings.
For instance, the input.checked property (for checkboxes) is a boolean:
<input id="input" type="checkbox" checked> checkbox
<script>
alert(input.getAttribute('checked')); // the attribute value is: empty string
alert(input.checked); // the property value is: true
</script>
There are other examples.
The style attribute is a string, but the style property is an object:
<div id="div" style="color:red;font-size:120%">Hello</div>
<script>
// string
alert(div.getAttribute('style')); // color:red;font-size:120%
// object
alert(div.style); // [object CSSStyleDeclaration]
alert(div.style.color); // red
</script>
Most properties are strings though.
Quite rarely, even if a DOM property type is a string, it may differ from the attribute.
For instance, the href DOM property is always a full URL, even if the attribute contains a relative URL or just a #hash.
Here's an example:
<a id="a" href="#hello">link</a>
<script>
// attribute
alert(a.getAttribute('href')); // #hello
// property
alert(a.href ); // full URL in the form http://site.com/page#hello
</script>
If we need the value of href or any other attribute exactly as written in the HTML, we can use getAttribute.
- Non-standard attributes, dataset
When writing HTML, we use a lot of standard attributes.
But what about non-standard, custom ones? First, let's see whether they are useful or not? What for?
Sometimes non-standard attributes are used to pass custom data from HTML to JavaScript, or to “mark” HTML-elements for JavaScript.
Like this:
<!-- mark the div to show "name" here -->
<div show-info="name"></div>
<!-- and age here -->
<div show-info="age"></div>
<script>
// the code finds an element with the mark and shows what's requested
let user = {
name: "Pete",
age: 25
};
for(let div of document.querySelectorAll('[show-info]')) {
// insert the corresponding info into the field
let field = div.getAttribute('show-info');
div.innerHTML = user[field]; // first Pete into "name", then 25 into "age"
}
</script>
Also they can be used to style an element.
For instance, here for the order state the attribute order-state is used:
<style>
/* styles rely on the custom attribute "order-state" */
.order[order-state="new"] {
color: green;
}
.order[order-state="pending"] {
color: blue;
}
.order[order-state="canceled"] {
color: red;
}
</style>
<div class="order" order-state="new">
A new order.
</div>
<div class="order" order-state="pending">
A pending order.
</div>
<div class="order" order-state="canceled">
A canceled order.
</div>
Why would using an attribute be preferable to having classes like .order-state-new, .order-state-pending, .order-state-canceled?
Because an attribute is more convenient to manage.
The state can be changed as easy as:
// a bit simpler than removing old/adding a new class
div.setAttribute('order-state', 'canceled');
But there may be a possible problem with custom attributes.
What if we use a non-standard attribute for our purposes and later the standard introduces it and makes it do something? The HTML language is alive, it grows, and more attributes appear to suit the needs of developers.
There may be unexpected effects in such case.
To avoid conflicts, there exist data-* attributes.
All attributes starting with “data-” are reserved for programmers' use.
They are available in the dataset property.
For instance, if an elem has an attribute named "data-about", it's available as elem.dataset.about.
Like this:
<body data-about="Elephants">
<script>
alert(document.body.dataset.about); // Elephants
</script>
Multiword attributes like data-order-state become camel-cased: dataset.orderState.
Here's a rewritten “order state” example:
<style>
.order[data-order-state="new"] {
color: green;
}
.order[data-order-state="pending"] {
color: blue;
}
.order[data-order-state="canceled"] {
color: red;
}
</style>
<div id="order" class="order" data-order-state="new">
A new order.
</div>
<script>
// read
alert(order.dataset.orderState); // new
// modify
order.dataset.orderState = "pending"; // (*)
</script>
Using data-* attributes is a valid, safe way to pass custom data.
Please note that we can not only read, but also modify data-attributes.
Then CSS updates the view accordingly: in the example above the last line (*) changes the color to blue.
- Summary
Attributes – is what's written in HTML.
Properties – is what's in DOM objects.
A small comparison:
Properties
Attributes
Type
Any value, standard properties have types described in the spec
A string
Name
Name is case-sensitive
Name is not case-sensitive
Methods to work with attributes are:
elem.hasAttribute(name) – to check for existence.
elem.getAttribute(name) – to get the value.
elem.setAttribute(name, value) – to set the value.
elem.removeAttribute(name) – to remove the attribute.
elem.attributes is a collection of all attributes.
For most situations using DOM properties is preferable.
We should refer to attributes only when DOM properties do not suit us, when we need exactly attributes, for instance:
We need a non-standard attribute.
But if it starts with data-, then we should use dataset.
We want to read the value “as written” in HTML.
The value of the DOM property may be different, for instance the href property is always a full URL, and we may want to get the “original” value.
importance: 5
Write the code to select the element with data-widget-name attribute from the document and to read its value.
<!DOCTYPE html>
<html>
<body>
<div data-widget-name="menu">Choose the genre</div>
<script>
/* your code */
</script>
</body>
</html><!DOCTYPE html>
<html>
<body>
<div data-widget-name="menu">Choose the genre</div>
<script>
// getting it
let elem = document.querySelector('[data-widget-name]');
// reading the value
alert(elem.dataset.widgetName);
// or
alert(elem.getAttribute('data-widget-name'));
</script>
</body>
</html>
Make external links orange
importance: 3
Make all external links orange by altering their style property.
A link is external if:
Its href has :// in it
But doesn't start with http://internal.com.
Example:
<a name="list">the list</a>
<ul>
<li><a href="http://google.com">http://google.com</a></li>
<li><a href="/tutorial">/tutorial.html</a></li>
<li><a href="local/path">local/path</a></li>
<li><a href="ftp://ftp.com/my.zip">ftp://ftp.com/my.zip</a></li>
<li><a href="http://nodejs.org">http://nodejs.org</a></li>
<li><a href="http://internal.com/test">http://internal.com/test</a></li>
</ul>
<script>
// setting style for a single link
let link = document.querySelector('a');
link.style.color = 'orange';
</script>
The result should be:
Open a sandbox for the task.
First, we need to find all external references.
There are two ways.
The first is to find all links using document.querySelectorAll('a') and then filter out what we need:
let links = document.querySelectorAll('a');
for (let link of links) {
let href = link.getAttribute('href');
if (!href) continue; // no attribute
if (!href.includes('://')) continue; // no protocol
if (href.startsWith('http://internal.com')) continue; // internal
link.style.color = 'orange';
}
Please note: we use link.getAttribute('href').
Not link.href, because we need the value from HTML.
…Another, simpler way would be to add the checks to CSS selector:
// look for all links that have :// in href
// but href doesn't start with http://internal.com
let selector = 'a[href*="://"]:not([href^="http://internal.com"])';
let links = document.querySelectorAll(selector);
links.forEach(link => link.style.color = 'orange');Open the solution in a sandbox.Browser: Document, Events, InterfacesDocument
Modifying the document
DOM modification is the key to creating “live” pages.
Here we'll see how to create new elements “on the fly” and modify the existing page content.
- Example: show a message
Let's demonstrate using an example.
We'll add a message on the page that looks nicer than alert.
Here's how it will look:
<style>
.alert {
padding: 15px;
border: 1px solid #d6e9c6;
border-radius: 4px;
color: #3c763d;
background-color: #dff0d8;
}
</style>
<div class="alert">
<strong>Hi there!</strong> You've read an important message.
</div>
That was the HTML example.
Now let's create the same div with JavaScript (assuming that the styles are in the HTML/CSS already).
- Creating an element
To create DOM nodes, there are two methods:
document.createElement(tag)
Creates a new element node with the given tag:
let div = document.createElement('div');
document.createTextNode(text)
Creates a new text node with the given text:
let textNode = document.createTextNode('Here I am');
Most of the time we need to create element nodes, such as the div for the message.
Creating the message
Creating the message div takes 3 steps:
// 1.
Create <div> element
let div = document.createElement('div');
// 2.
Set its class to "alert"
div.className = "alert";
// 3.
Fill it with the content
div.innerHTML = "<strong>Hi there!</strong> You've read an important message.";
We've created the element.
But as of now it's only in a variable named div, not in the page yet.
So we can't see it.
- Insertion methods
To make the div show up, we need to insert it somewhere into document.
For instance, into <body> element, referenced by document.body.
There's a special method append for that: document.body.append(div).
Here's the full code:
<style>
.alert {
padding: 15px;
border: 1px solid #d6e9c6;
border-radius: 4px;
color: #3c763d;
background-color: #dff0d8;
}
</style>
<script>
let div = document.createElement('div');
div.className = "alert";
div.innerHTML = "<strong>Hi there!</strong> You've read an important message.";
document.body.append(div);
</script>
Here we called append on document.body, but we can call append method on any other element, to put another element into it.
For instance, we can append something to <div> by calling div.append(anotherElement).
Here are more insertion methods, they specify different places where to insert:
node.append(...nodes or strings) – append nodes or strings at the end of node,
node.prepend(...nodes or strings) – insert nodes or strings at the beginning of node,
node.before(...nodes or strings) –- insert nodes or strings beforenode,
node.after(...nodes or strings) –- insert nodes or strings afternode,
node.replaceWith(...nodes or strings) –- replaces node with the given nodes or strings.
Arguments of these methods are an arbitrary list of DOM nodes to insert, or text strings (that become text nodes automatically).
Let's see them in action.
Here's an example of using these methods to add items to a list and the text before/after it:
<ol id="ol">
<li>0</li>
<li>1</li>
<li>2</li>
</ol>
<script>
ol.before('before'); // insert string "before" before <ol>
ol.after('after'); // insert string "after" after <ol>
let liFirst = document.createElement('li');
liFirst.innerHTML = 'prepend';
ol.prepend(liFirst); // insert liFirst at the beginning of <ol>
let liLast = document.createElement('li');
liLast.innerHTML = 'append';
ol.append(liLast); // insert liLast at the end of <ol>
</script>
Here's a visual picture of what the methods do:
So the final list will be:
before
<ol id="ol">
<li>prepend</li>
<li>0</li>
<li>1</li>
<li>2</li>
<li>append</li>
</ol>
after
As said, these methods can insert multiple nodes and text pieces in a single call.
For instance, here a string and an element are inserted:
<div id="div"></div>
<script>
div.before('<p>Hello</p>', document.createElement('hr'));
</script>
Please note: the text is inserted “as text”, not “as HTML”, with proper escaping of characters such as <, >.
So the final HTML is:
<p>Hello</p>
<hr>
<div id="div"></div>
In other words, strings are inserted in a safe way, like elem.textContent does it.
So, these methods can only be used to insert DOM nodes or text pieces.
But what if we'd like to insert an HTML string “as html”, with all tags and stuff working, in the same manner as elem.innerHTML does it?
- insertAdjacentHTML/Text/Element
For that we can use another, pretty versatile method: elem.insertAdjacentHTML(where, html).
The first parameter is a code word, specifying where to insert relative to elem.
Must be one of the following:
"beforebegin" – insert html immediately before elem,
"afterbegin" – insert html into elem, at the beginning,
"beforeend" – insert html into elem, at the end,
"afterend" – insert html immediately after elem.
The second parameter is an HTML string, that is inserted “as HTML”.
For instance:
<div id="div"></div>
<script>
div.insertAdjacentHTML('beforebegin', '<p>Hello</p>');
div.insertAdjacentHTML('afterend', '<p>Bye</p>');
</script>
…Would lead to:
<p>Hello</p>
<div id="div"></div>
<p>Bye</p>
That's how we can append arbitrary HTML to the page.
Here's the picture of insertion variants:
We can easily notice similarities between this and the previous picture.
The insertion points are actually the same, but this method inserts HTML.
The method has two brothers:
elem.insertAdjacentText(where, text) – the same syntax, but a string of text is inserted “as text” instead of HTML,
elem.insertAdjacentElement(where, elem) – the same syntax, but inserts an element.
They exist mainly to make the syntax “uniform”.
In practice, only insertAdjacentHTML is used most of the time.
Because for elements and text, we have methods append/prepend/before/after – they are shorter to write and can insert nodes/text pieces.
So here's an alternative variant of showing a message:
<style>
.alert {
padding: 15px;
border: 1px solid #d6e9c6;
border-radius: 4px;
color: #3c763d;
background-color: #dff0d8;
}
</style>
<script>
document.body.insertAdjacentHTML("afterbegin", `<div class="alert">
<strong>Hi there!</strong> You've read an important message.
</div>`);
</script>
- Node removal
To remove a node, there's a method node.remove().
Let's make our message disappear after a second:
<style>
.alert {
padding: 15px;
border: 1px solid #d6e9c6;
border-radius: 4px;
color: #3c763d;
background-color: #dff0d8;
}
</style>
<script>
let div = document.createElement('div');
div.className = "alert";
div.innerHTML = "<strong>Hi there!</strong> You've read an important message.";
document.body.append(div);
setTimeout(() => div.remove(), 1000);
</script>
Please note: if we want to move an element to another place – there's no need to remove it from the old one.
All insertion methods automatically remove the node from the old place.
For instance, let's swap elements:
<div id="first">First</div>
<div id="second">Second</div>
<script>
// no need to call remove
second.after(first); // take #second and after it insert #first
</script>
- Cloning nodes: cloneNode
How to insert one more similar message?
We could make a function and put the code there.
But the alternative way would be to clone the existing div and modify the text inside it (if needed).
Sometimes when we have a big element, that may be faster and simpler.
The call elem.cloneNode(true) creates a “deep” clone of the element – with all attributes and subelements.
If we call elem.cloneNode(false), then the clone is made without child elements.
An example of copying the message:
<style>
.alert {
padding: 15px;
border: 1px solid #d6e9c6;
border-radius: 4px;
color: #3c763d;
background-color: #dff0d8;
}
</style>
<div class="alert" id="div">
<strong>Hi there!</strong> You've read an important message.
</div>
<script>
let div2 = div.cloneNode(true); // clone the message
div2.querySelector('strong').innerHTML = 'Bye there!'; // change the clone
div.after(div2); // show the clone after the existing div
</script>
- DocumentFragment
DocumentFragment is a special DOM node that serves as a wrapper to pass around lists of nodes.
We can append other nodes to it, but when we insert it somewhere, then its content is inserted instead.
For example, getListContent below generates a fragment with <li> items, that are later inserted into <ul>:
<ul id="ul"></ul>
<script>
function getListContent() {
let fragment = new DocumentFragment();
for(let i=1; i<=3; i++) {
let li = document.createElement('li');
li.append(i);
fragment.append(li);
}
return fragment;
}
ul.append(getListContent()); // (*)
</script>
Please note, at the last line (*) we append DocumentFragment, but it “blends in”, so the resulting structure will be:
<ul>
<li>1</li>
<li>2</li>
<li>3</li>
</ul>DocumentFragment is rarely used explicitly.
Why append to a special kind of node, if we can return an array of nodes instead? Rewritten example:
<ul id="ul"></ul>
<script>
function getListContent() {
let result = [];
for(let i=1; i<=3; i++) {
let li = document.createElement('li');
li.append(i);
result.push(li);
}
return result;
}
ul.append(...getListContent()); // append + "..." operator = friends!
</script>
We mention DocumentFragment mainly because there are some concepts on top of it, like template element, that we'll cover much later.
- Old-school insert/remove methods
Old school
This information helps to understand old scripts, but not needed for new development.
There are also “old school” DOM manipulation methods, existing for historical reasons.
These methods come from really ancient times.
Nowadays, there's no reason to use them, as modern methods, such as append, prepend, before, after, remove, replaceWith, are more flexible.
The only reason we list these methods here is that you can find them in many old scripts:
parentElem.appendChild(node)
Appends node as the last child of parentElem.
The following example adds a new <li> to the end of <ol>:
<ol id="list">
<li>0</li>
<li>1</li>
<li>2</li>
</ol>
<script>
let newLi = document.createElement('li');
newLi.innerHTML = 'Hello, world!';
list.appendChild(newLi);
</script>
parentElem.insertBefore(node, nextSibling)
Inserts node before nextSibling into parentElem.
The following code inserts a new list item before the second <li>:
<ol id="list">
<li>0</li>
<li>1</li>
<li>2</li>
</ol>
<script>
let newLi = document.createElement('li');
newLi.innerHTML = 'Hello, world!';
list.insertBefore(newLi, list.children[1]);
</script>
To insert newLi as the first element, we can do it like this:
list.insertBefore(newLi, list.firstChild);
parentElem.replaceChild(node, oldChild)
Replaces oldChild with node among children of parentElem.
parentElem.removeChild(node)
Removes node from parentElem (assuming node is its child).
The following example removes first <li> from <ol>:
<ol id="list">
<li>0</li>
<li>1</li>
<li>2</li>
</ol>
<script>
let li = list.firstElementChild;
list.removeChild(li);
</script>
All these methods return the inserted/removed node.
In other words, parentElem.appendChild(node) returns node.
But usually the returned value is not used, we just run the method.
- A word about “document.write”
There's one more, very ancient method of adding something to a web-page: document.write.
The syntax:
<p>Somewhere in the page...</p>
<script>
document.write('<b>Hello from JS</b>');
</script>
<p>The end</p>
The call to document.write(html) writes the html into page “right here and now”.
The html string can be dynamically generated, so it's kind of flexible.
We can use JavaScript to create a full-fledged webpage and write it.
The method comes from times when there was no DOM, no standards… Really old times.
It still lives, because there are scripts using it.
In modern scripts we can rarely see it, because of the following important limitation:
The call to document.write only works while the page is loading.
If we call it afterwards, the existing document content is erased.
For instance:
<p>After one second the contents of this page will be replaced...</p>
<script>
// document.write after 1 second
// that's after the page loaded, so it erases the existing content
setTimeout(() => document.write('<b>...By this.</b>'), 1000);
</script>
So it's kind of unusable at “after loaded” stage, unlike other DOM methods we covered above.
That's the downside.
There's an upside also.
Technically, when document.write is called while the browser is reading (“parsing”) incoming HTML, and it writes something, the browser consumes it just as if it were initially there, in the HTML text.
So it works blazingly fast, because there's no DOM modification involved.
It writes directly into the page text, while the DOM is not yet built.
So if we need to add a lot of text into HTML dynamically, and we're at page loading phase, and the speed matters, it may help.
But in practice these requirements rarely come together.
And usually we can see this method in scripts just because they are old.
- Summary
Methods to create new nodes:
document.createElement(tag) – creates an element with the given tag,
document.createTextNode(value) – creates a text node (rarely used),
elem.cloneNode(deep) – clones the element, if deep==true then with all descendants.
Insertion and removal:
node.append(...nodes or strings) – insert into node, at the end,
node.prepend(...nodes or strings) – insert into node, at the beginning,
node.before(...nodes or strings) –- insert right before node,
node.after(...nodes or strings) –- insert right after node,
node.replaceWith(...nodes or strings) –- replace node.
node.remove() –- remove the node.
Text strings are inserted “as text”.
There are also “old school” methods:
parent.appendChild(node)parent.insertBefore(node, nextSibling)parent.removeChild(node)parent.replaceChild(newElem, node)
All these methods return node.
Given some HTML in html, elem.insertAdjacentHTML(where, html) inserts it depending on the value of where:
"beforebegin" – insert html right before elem,
"afterbegin" – insert html into elem, at the beginning,
"beforeend" – insert html into elem, at the end,
"afterend" – insert html right after elem.
Also there are similar methods, elem.insertAdjacentText and elem.insertAdjacentElement, that insert text strings and elements, but they are rarely used.
To append HTML to the page before it has finished loading:
document.write(html)
After the page is loaded such a call erases the document.
Mostly seen in old scripts.
importance: 5
We have an empty DOM element elem and a string text.
Which of these 3 commands do exactly the same?
elem.append(document.createTextNode(text))elem.innerHTML = textelem.textContent = text
Answer: 1 and 3.
Both commands result in adding the text “as text” into the elem.
Here's an example:
<div id="elem1"></div>
<div id="elem2"></div>
<div id="elem3"></div>
<script>
let text = '<b>text</b>';
elem1.append(document.createTextNode(text));
elem2.innerHTML = text;
elem3.textContent = text;
</script>
Clear the element
importance: 5
Create a function clear(elem) that removes everything from the element.
<ol id="elem">
<li>Hello</li>
<li>World</li>
</ol>
<script>
function clear(elem) { /* your code */ }
clear(elem); // clears the list
</script>
First, let's see how not to do it:
function clear(elem) {
for (let i=0; i < elem.childNodes.length; i++) {
elem.childNodes[i].remove();
}
}
That won't work, because the call to remove() shifts the collection elem.childNodes, so elements start from the index 0 every time.
But i increases, and some elements will be skipped.
The for..of loop also does the same.
The right variant could be:
function clear(elem) {
while (elem.firstChild) {
elem.firstChild.remove();
}
}
And also there's a simpler way to do the same:
function clear(elem) {
elem.innerHTML = '';
}
Why does "aaa" remain?
importance: 1
In the example below, the call table.remove() removes the table from the document.
But if you run it, you can see that the text "aaa" is still visible.
Why does that happen?
<table id="table">
aaa
<tr>
<td>Test</td>
</tr>
</table>
<script>
alert(table); // the table, as it should be
table.remove();
// why there's still aaa in the document?
</script>
The HTML in the task is incorrect.
That's the reason of the odd thing.
The browser has to fix it automatically.
But there may be no text inside the <table>: according to the spec only table-specific tags are allowed.
So the browser adds "aaa"before the <table>.
Now it's obvious that when we remove the table, it remains.
The question can be easily answered by exploring the DOM using the browser tools.
It shows "aaa" before the <table>.
The HTML standard specifies in detail how to process bad HTML, and such behavior of the browser is correct.
Create a list
importance: 4
Write an interface to create a list from user input.
For every list item:
Ask a user about its content using prompt.
Create the <li> with it and add it to <ul>.
Continue until the user cancels the input (by pressing Esc or CANCEL in prompt).
All elements should be created dynamically.
If a user types HTML-tags, they should be treated like a text.
Demo in new window
Please note the usage of textContent to assign the <li> content.
Open the solution in a sandbox.
Create a tree from the object
importance: 5
Write a function createTree that creates a nested ul/li list from the nested object.
For instance:
let data = {
"Fish": {
"trout": {},
"salmon": {}
},
"Tree": {
"Huge": {
"sequoia": {},
"oak": {}
},
"Flowering": {
"apple tree": {},
"magnolia": {}
}
}
};
The syntax:
let container = document.getElementById('container');
createTree(container, data); // creates the tree in the container
The result (tree) should look like this:
Choose one of two ways of solving this task:
Create the HTML for the tree and then assign to container.innerHTML.
Create tree nodes and append with DOM methods.
Would be great if you could do both.
P.S.
The tree should not have “extra” elements like empty <ul></ul> for the leaves.
Open a sandbox for the task.
The easiest way to walk the object is to use recursion.
The solution with innerHTML.
The solution with DOM.
Show descendants in a tree
importance: 5
There's a tree organized as nested ul/li.
Write the code that adds to each <li> the number of its descendants.
Skip leaves (nodes without children).
The result:
Open a sandbox for the task.
To append text to each <li> we can alter the text node data.
Open the solution in a sandbox.
Create a calendar
importance: 4
Write a function createCalendar(elem, year, month).
The call should create a calendar for the given year/month and put it inside elem.
The calendar should be a table, where a week is <tr>, and a day is <td>.
The table top should be <th> with weekday names: the first day should be Monday, and so on till Sunday.
For instance, createCalendar(cal, 2012, 9) should generate in element cal the following calendar:
P.S.
For this task it's enough to generate the calendar, should not yet be clickable.
Open a sandbox for the task.
We'll create the table as a string: "<table>...</table>", and then assign it to innerHTML.
The algorithm:
Create the table header with <th> and weekday names.
Create the date object d = new Date(year, month-1).
That's the first day of month (taking into account that months in JavaScript start from 0, not 1).
First few cells till the first day of the month d.getDay() may be empty.
Let's fill them in with <td></td>.
Increase the day in d: d.setDate(d.getDate()+1).
If d.getMonth() is not yet the next month, then add the new cell <td> to the calendar.
If that's a Sunday, then add a newline “</tr><tr>”.
If the month has finished, but the table row is not yet full, add empty <td> into it, to make it square.
Open the solution in a sandbox.
Colored clock with setInterval
importance: 4
Create a colored clock like here:
Use HTML/CSS for the styling, JavaScript only updates time in elements.
Open a sandbox for the task.
First, let's make HTML/CSS.
Each component of the time would look great in its own <span>:
<div id="clock">
<span class="hour">hh</span>:<span class="min">mm</span>:<span class="sec">ss</span>
</div>
Also we'll need CSS to color them.
The update function will refresh the clock, to be called by setInterval every second:
function update() {
let clock = document.getElementById('clock');
let date = new Date(); // (*)
let hours = date.getHours();
if (hours < 10) hours = '0' + hours;
clock.children[0].innerHTML = hours;
let minutes = date.getMinutes();
if (minutes < 10) minutes = '0' + minutes;
clock.children[1].innerHTML = minutes;
let seconds = date.getSeconds();
if (seconds < 10) seconds = '0' + seconds;
clock.children[2].innerHTML = seconds;
}
In the line (*) we every time check the current date.
The calls to setInterval are not reliable: they may happen with delays.
The clock-managing functions:
let timerId;
function clockStart() { // run the clock
if (!timerId) { // only set a new interval if the clock is not running
timerId = setInterval(update, 1000);
}
update(); // (*)
}
function clockStop() {
clearInterval(timerId);
timerId = null; // (**)
}
Please note that the call to update() is not only scheduled in clockStart(), but immediately run in the line (*).
Otherwise the visitor would have to wait till the first execution of setInterval.
And the clock would be empty till then.
Also it is important to set a new interval in clockStart() only when the clock is not running.
Otherways clicking the start button several times would set multiple concurrent intervals.
Even worse – we would only keep the timerID of the last interval, losing references to all others.
Then we wouldn't be able to stop the clock ever again! Note that we need to clear the timerID when the clock is stopped in the line (**), so that it can be started again by running clockStart().
Open the solution in a sandbox.
Insert the HTML in the list
importance: 5
Write the code to insert <li>2</li><li>3</li> between two <li> here:
<ul id="ul">
<li id="one">1</li>
<li id="two">4</li>
</ul>
When we need to insert a piece of HTML somewhere, insertAdjacentHTML is the best fit.
The solution:
one.insertAdjacentHTML('afterend', '<li>2</li><li>3</li>');
Sort the table
importance: 5
There's a table:
<table>
<thead>
<tr>
<th>Name</th><th>Surname</th><th>Age</th>
</tr>
</thead>
<tbody>
<tr>
<td>John</td><td>Smith</td><td>10</td>
</tr>
<tr>
<td>Pete</td><td>Brown</td><td>15</td>
</tr>
<tr>
<td>Ann</td><td>Lee</td><td>5</td>
</tr>
<tr>
<td>...</td><td>...</td><td>...</td>
</tr>
</tbody>
</table>
There may be more rows in it.
Write the code to sort it by the "name" column.
Open a sandbox for the task.
The solution is short, yet may look a bit tricky, so here I provide it with extensive comments:
let sortedRows = Array.from(table.tBodies[0].rows) // 1
.sort((rowA, rowB) => rowA.cells[0].innerHTML.localeCompare(rowB.cells[0].innerHTML));
table.tBodies[0].append(...sortedRows); // (3)
The step-by-step algorthm:
Get all <tr>, from <tbody>.
Then sort them comparing by the content of the first <td> (the name field).
Now insert nodes in the right order by .append(...sortedRows).
We don't have to remove row elements, just “re-insert”, they leave the old place automatically.
P.S.
In our case, there's an explicit <tbody> in the table, but even if HTML table doesn't have <tbody>, the DOM structure always has it.
Open the solution in a sandbox.Browser: Document, Events, InterfacesDocument
Styles and classes
Before we get into JavaScript's ways of dealing with styles and classes – here's an important rule.
Hopefully it's obvious enough, but we still have to mention it.
There are generally two ways to style an element:
Create a class in CSS and add it: <div class="...">
Write properties directly into style: <div style="...">.
JavaScript can modify both classes and style properties.
We should always prefer CSS classes to style.
The latter should only be used if classes “can't handle it”.
For example, style is acceptable if we calculate coordinates of an element dynamically and want to set them from JavaScript, like this:
let top = /* complex calculations */;
let left = /* complex calculations */;
elem.style.left = left; // e.g '123px', calculated at run-time
elem.style.top = top; // e.g '456px'
For other cases, like making the text red, adding a background icon – describe that in CSS and then add the class (JavaScript can do that).
That's more flexible and easier to support.
- className and classList
Changing a class is one of the most often used actions in scripts.
In the ancient time, there was a limitation in JavaScript: a reserved word like "class" could not be an object property.
That limitation does not exist now, but at that time it was impossible to have a "class" property, like elem.class.
So for classes the similar-looking property "className" was introduced: the elem.className corresponds to the "class" attribute.
For instance:
<body class="main page">
<script>
alert(document.body.className); // main page
</script>
</body>
If we assign something to elem.className, it replaces the whole string of classes.
Sometimes that's what we need, but often we want to add/remove a single class.
There's another property for that: elem.classList.
The elem.classList is a special object with methods to add/remove/toggle a single class.
For instance:
<body class="main page">
<script>
// add a class
document.body.classList.add('article');
alert(document.body.className); // main page article
</script>
</body>
So we can operate both on the full class string using className or on individual classes using classList.
What we choose depends on our needs.
Methods of classList:
elem.classList.add/remove("class") – adds/removes the class.
elem.classList.toggle("class") – adds the class if it doesn't exist, otherwise removes it.
elem.classList.contains("class") – checks for the given class, returns true/false.
Besides, classList is iterable, so we can list all classes with for..of, like this:
<body class="main page">
<script>
for (let name of document.body.classList) {
alert(name); // main, and then page
}
</script>
</body>
- Element style
The property elem.style is an object that corresponds to what's written in the "style" attribute.
Setting elem.style.width="100px" works the same as if we had in the attribute style a string width:100px.
For multi-word property the camelCase is used:
background-color => elem.style.backgroundColor
z-index => elem.style.zIndex
border-left-width => elem.style.borderLeftWidth
For instance:
document.body.style.backgroundColor = prompt('background color?', 'green');
Prefixed properties
Browser-prefixed properties like -moz-border-radius, -webkit-border-radius also follow the same rule: a dash means upper case.
For instance:
button.style.MozBorderRadius = '5px';
button.style.WebkitBorderRadius = '5px';
- Resetting the style property
Sometimes we want to assign a style property, and later remove it.
For instance, to hide an element, we can set elem.style.display = "none".
Then later we may want to remove the style.display as if it were not set.
Instead of delete elem.style.display we should assign an empty string to it: elem.style.display = "".
// if we run this code, the <body> will blink
document.body.style.display = "none"; // hide
setTimeout(() => document.body.style.display = "", 1000); // back to normal
If we set style.display to an empty string, then the browser applies CSS classes and its built-in styles normally, as if there were no such style.display property at all.
Full rewrite with style.cssText
Normally, we use style.* to assign individual style properties.
We can't set the full style like div.style="color: red; width: 100px", because div.style is an object, and it's read-only.
To set the full style as a string, there's a special property style.cssText:
<div id="div">Button</div>
<script>
// we can set special style flags like "important" here
div.style.cssText=`color: red !important;
background-color: yellow;
width: 100px;
text-align: center;
`;
alert(div.style.cssText);
</script>
This property is rarely used, because such assignment removes all existing styles: it does not add, but replaces them.
May occasionally delete something needed.
But we can safely use it for new elements, when we know we won't delete an existing style.
The same can be accomplished by setting an attribute: div.setAttribute('style', 'color: red...').
- Mind the units
Don't forget to add CSS units to values.
For instance, we should not set elem.style.top to 10, but rather to 10px.
Otherwise it wouldn't work:
<body>
<script>
// doesn't work!
document.body.style.margin = 20;
alert(document.body.style.margin); // '' (empty string, the assignment is ignored)
// now add the CSS unit (px) - and it works
document.body.style.margin = '20px';
alert(document.body.style.margin); // 20px
alert(document.body.style.marginTop); // 20px
alert(document.body.style.marginLeft); // 20px
</script>
</body>
Please note: the browser “unpacks” the property style.margin in the last lines and infers style.marginLeft and style.marginTop from it.
- Computed styles: getComputedStyle
So, modifying a style is easy.
But how to read it?
For instance, we want to know the size, margins, the color of an element.
How to do it?
The style property operates only on the value of the "style" attribute, without any CSS cascade.
So we can't read anything that comes from CSS classes using elem.style.
For instance, here style doesn't see the margin:
<head>
<style> body { color: red; margin: 5px } </style>
</head>
<body>
The red text
<script>
alert(document.body.style.color); // empty
alert(document.body.style.marginTop); // empty
</script>
</body>
…But what if we need, say, to increase the margin by 20px? We would want the current value of it.
There's another method for that: getComputedStyle.
The syntax is:
getComputedStyle(element, [pseudo])
element
Element to read the value for.
pseudo
A pseudo-element if required, for instance ::before.
An empty string or no argument means the element itself.
The result is an object with styles, like elem.style, but now with respect to all CSS classes.
For instance:
<head>
<style> body { color: red; margin: 5px } </style>
</head>
<body>
<script>
let computedStyle = getComputedStyle(document.body);
// now we can read the margin and the color from it
alert( computedStyle.marginTop ); // 5px
alert( computedStyle.color ); // rgb(255, 0, 0)
</script>
</body>
Computed and resolved values
There are two concepts in CSS:
A computed style value is the value after all CSS rules and CSS inheritance is applied, as the result of the CSS cascade.
It can look like height:1em or font-size:125%.
A resolved style value is the one finally applied to the element.
Values like 1em or 125% are relative.
The browser takes the computed value and makes all units fixed and absolute, for instance: height:20px or font-size:16px.
For geometry properties resolved values may have a floating point, like width:50.5px.
A long time ago getComputedStyle was created to get computed values, but it turned out that resolved values are much more convenient, and the standard changed.
So nowadays getComputedStyle actually returns the resolved value of the property, usually in px for geometry.
getComputedStyle requires the full property name
We should always ask for the exact property that we want, like paddingLeft or marginTop or borderTopWidth.
Otherwise the correct result is not guaranteed.
For instance, if there are properties paddingLeft/paddingTop, then what should we get for getComputedStyle(elem).padding? Nothing, or maybe a “generated” value from known paddings? There's no standard rule here.
There are other inconsistencies.
As an example, some browsers (Chrome) show 10px in the document below, and some of them (Firefox) – do not:
<style>
body {
margin: 10px;
}
</style>
<script>
let style = getComputedStyle(document.body);
alert(style.margin); // empty string in Firefox
</script>
Styles applied to :visited links are hidden!
Visited links may be colored using :visited CSS pseudoclass.
But getComputedStyle does not give access to that color, because otherwise an arbitrary page could find out whether the user visited a link by creating it on the page and checking the styles.
JavaScript may not see the styles applied by :visited.
And also, there's a limitation in CSS that forbids applying geometry-changing styles in :visited.
That's to guarantee that there's no side way for an evil page to test if a link was visited and hence to break the privacy.
- Summary
To manage classes, there are two DOM properties:
className – the string value, good to manage the whole set of classes.
classList – the object with methods add/remove/toggle/contains, good for individual classes.
To change the styles:
The style property is an object with camelCased styles.
Reading and writing to it has the same meaning as modifying individual properties in the "style" attribute.
To see how to apply important and other rare stuff – there's a list of methods at MDN.
The style.cssText property corresponds to the whole "style" attribute, the full string of styles.
To read the resolved styles (with respect to all classes, after all CSS is applied and final values are calculated):
The getComputedStyle(elem, [pseudo]) returns the style-like object with them.
Read-only.
importance: 5
Write a function showNotification(options) that creates a notification: <div class="notification"> with the given content.
The notification should automatically disappear after 1.5 seconds.
The options are:
// shows an element with the text "Hello" near the right-top of the window
showNotification({
top: 10, // 10px from the top of the window (by default 0px)
right: 10, // 10px from the right edge of the window (by default 0px)
html: "Hello!", // the HTML of notification
className: "welcome" // an additional class for the div (optional)
});Demo in new window
Use CSS positioning to show the element at given top/right coordinates.
The source document has the necessary styles.
Open a sandbox for the task.Open the solution in a sandbox.Browser: Document, Events, InterfacesDocument
Element size and scrolling
There are many JavaScript properties that allow us to read information about element width, height and other geometry features.
We often need them when moving or positioning elements in JavaScript.
- Sample element
As a sample element to demonstrate properties we'll use the one given below:
<div id="example">
...Text...
</div>
<style>
#example {
width: 300px;
height: 200px;
border: 25px solid #E8C48F;
padding: 20px;
overflow: auto;
}
</style>
It has the border, padding and scrolling.
The full set of features.
There are no margins, as they are not the part of the element itself, and there are no special properties for them.
The element looks like this:
You can open the document in the sandbox.
Mind the scrollbar
The picture above demonstrates the most complex case when the element has a scrollbar.
Some browsers (not all) reserve the space for it by taking it from the content (labeled as “content width” above).
So, without scrollbar the content width would be 300px, but if the scrollbar is 16px wide (the width may vary between devices and browsers) then only 300 - 16 = 284px remains, and we should take it into account.
That's why examples from this chapter assume that there's a scrollbar.
Without it, some calculations are simpler.
The padding-bottom area may be filled with text
Usually paddings are shown empty on our illustrations, but if there's a lot of text in the element and it overflows, then browsers show the “overflowing” text at padding-bottom, that's normal.
- Geometry
Here's the overall picture with geometry properties:
Values of these properties are technically numbers, but these numbers are “of pixels”, so these are pixel measurements.
Let's start exploring the properties starting from the outside of the element.
- offsetParent, offsetLeft/Top
These properties are rarely needed, but still they are the “most outer” geometry properties, so we'll start with them.
The offsetParent is the nearest ancestor that the browser uses for calculating coordinates during rendering.
That's the nearest ancestor that is one of the following:
CSS-positioned (position is absolute, relative, fixed or sticky), or
<td>, <th>, or <table>, or
<body>.
Properties offsetLeft/offsetTop provide x/y coordinates relative to offsetParent upper-left corner.
In the example below the inner <div> has <main> as offsetParent and offsetLeft/offsetTop shifts from its upper-left corner (180):
<main style="position: relative" id="main">
<article>
<div id="example" style="position: absolute; left: 180px; top: 180px">...</div>
</article>
</main>
<script>
alert(example.offsetParent.id); // main
alert(example.offsetLeft); // 180 (note: a number, not a string "180px")
alert(example.offsetTop); // 180
</script>There are several occasions when offsetParent is null:
For not shown elements (display:none or not in the document).
For <body> and <html>.
For elements with position:fixed.
- offsetWidth/Height
Now let's move on to the element itself.
These two properties are the simplest ones.
They provide the “outer” width/height of the element.
Or, in other words, its full size including borders.
For our sample element:
offsetWidth = 390 – the outer width, can be calculated as inner CSS-width (300px) plus paddings (2 * 20px) and borders (2 * 25px).
offsetHeight = 290 – the outer height.
Geometry properties are zero/null for elements that are not displayed
Geometry properties are calculated only for displayed elements.
If an element (or any of its ancestors) has display:none or is not in the document, then all geometry properties are zero (or null for offsetParent).
For example, offsetParent is null, and offsetWidth, offsetHeight are 0 when we created an element, but haven't inserted it into the document yet, or it (or it's ancestor) has display:none.
We can use this to check if an element is hidden, like this:
function isHidden(elem) {
return !elem.offsetWidth && !elem.offsetHeight;
}
Please note that such isHidden returns true for elements that are on-screen, but have zero sizes (like an empty <div>).
- clientTop/Left
Inside the element we have the borders.
To measure them, there are properties clientTop and clientLeft.
In our example:
clientLeft = 25 – left border width
clientTop = 25 – top border width
…But to be precise – these properties are not border width/height, but rather relative coordinates of the inner side from the outer side.
What's the difference?
It becomes visible when the document is right-to-left (the operating system is in Arabic or Hebrew languages).
The scrollbar is then not on the right, but on the left, and then clientLeft also includes the scrollbar width.
In that case, clientLeft would be not 25, but with the scrollbar width 25 + 16 = 41.
Here's the example in hebrew:
- clientWidth/Height
These properties provide the size of the area inside the element borders.
They include the content width together with paddings, but without the scrollbar:
On the picture above let's first consider clientHeight.
There's no horizontal scrollbar, so it's exactly the sum of what's inside the borders: CSS-height 200px plus top and bottom paddings (2 * 20px) total 240px.
Now clientWidth – here the content width is not 300px, but 284px, because 16px are occupied by the scrollbar.
So the sum is 284px plus left and right paddings, total 324px.
If there are no paddings, then clientWidth/Height is exactly the content area, inside the borders and the scrollbar (if any).So when there's no padding we can use clientWidth/clientHeight to get the content area size.
- scrollWidth/Height
These properties are like clientWidth/clientHeight, but they also include the scrolled out (hidden) parts:
On the picture above:
scrollHeight = 723 – is the full inner height of the content area including the scrolled out parts.
scrollWidth = 324 – is the full inner width, here we have no horizontal scroll, so it equals clientWidth.
We can use these properties to expand the element wide to its full width/height.
Like this:
// expand the element to the full content height
element.style.height = `${element.scrollHeight}px`;
Click the button to expand the element:
text text text text text text text text text text text text text text text text text text text text text text text text text text text text text text text text text text text text text text text text text text text text text text text text text text text text text text text text text text text text text text text text text text text text text text text text text text text text text text text text text text text text text text text text text text text text text text text text text text text text text text text text text text text text text text text text text text text text text text text text text text text text text text text text text text text text text text text text text text text text
- scrollLeft/scrollTop
Properties scrollLeft/scrollTop are the width/height of the hidden, scrolled out part of the element.
On the picture below we can see scrollHeight and scrollTop for a block with a vertical scroll.
In other words, scrollTop is “how much is scrolled up”.
scrollLeft/scrollTop can be modified
Most of the geometry properties here are read-only, but scrollLeft/scrollTop can be changed, and the browser will scroll the element.
If you click the element below, the code elem.scrollTop += 10 executes.
That makes the element content scroll 10px down.
Click Me 1 2 3 4 5 6 7 8 9
Setting scrollTop to 0 or a big value, such as 1e9 will make the element scroll to the very top/bottom respectively.
- Don't take width/height from CSS
We've just covered geometry properties of DOM elements, that can be used to get widths, heights and calculate distances.
But as we know from the chapter Styles and classes, we can read CSS-height and width using getComputedStyle.
So why not to read the width of an element with getComputedStyle, like this?
let elem = document.body;
alert( getComputedStyle(elem).width ); // show CSS width for elem
Why should we use geometry properties instead? There are two reasons:
First, CSS width/height depend on another property: box-sizing that defines “what is” CSS width and height.
A change in box-sizing for CSS purposes may break such JavaScript.
Second, CSS width/height may be auto, for instance for an inline element:
<span id="elem">Hello!</span>
<script>
alert( getComputedStyle(elem).width ); // auto
</script>
From the CSS standpoint, width:auto is perfectly normal, but in JavaScript we need an exact size in px that we can use in calculations.
So here CSS width is useless.
And there's one more reason: a scrollbar.
Sometimes the code that works fine without a scrollbar becomes buggy with it, because a scrollbar takes the space from the content in some browsers.
So the real width available for the content is less than CSS width.
And clientWidth/clientHeight take that into account.
…But with getComputedStyle(elem).width the situation is different.
Some browsers (e.g.
Chrome) return the real inner width, minus the scrollbar, and some of them (e.g.
Firefox) – CSS width (ignore the scrollbar).
Such cross-browser differences is the reason not to use getComputedStyle, but rather rely on geometry properties.
If your browser reserves the space for a scrollbar (most browsers for Windows do), then you can test it below.
The element with text has CSS width:300px.
On a Desktop Windows OS, Firefox, Chrome, Edge all reserve the space for the scrollbar.
But Firefox shows 300px, while Chrome and Edge show less.
That's because Firefox returns the CSS width and other browsers return the “real” width.
Please note that the described difference is only about reading getComputedStyle(...).width from JavaScript, visually everything is correct.
- Summary
Elements have the following geometry properties:
offsetParent – is the nearest positioned ancestor or td, th, table, body.
offsetLeft/offsetTop – coordinates relative to the upper-left edge of offsetParent.
offsetWidth/offsetHeight – “outer” width/height of an element including borders.
clientLeft/clientTop – the distances from the upper-left outer corner to the upper-left inner (content + padding) corner.
For left-to-right OS they are always the widths of left/top borders.
For right-to-left OS the vertical scrollbar is on the left so clientLeft includes its width too.
clientWidth/clientHeight – the width/height of the content including paddings, but without the scrollbar.
scrollWidth/scrollHeight – the width/height of the content, just like clientWidth/clientHeight, but also include scrolled-out, invisible part of the element.
scrollLeft/scrollTop – width/height of the scrolled out upper part of the element, starting from its upper-left corner.
All properties are read-only except scrollLeft/scrollTop that make the browser scroll the element if changed.
importance: 5
The elem.scrollTop property is the size of the scrolled out part from the top.
How to get the size of the bottom scroll (let's call it scrollBottom)?
Write the code that works for an arbitrary elem.
P.S.
Please check your code: if there's no scroll or the element is fully scrolled down, then it should return 0.
The solution is:
let scrollBottom = elem.scrollHeight - elem.scrollTop - elem.clientHeight;
In other words: (full height) minus (scrolled out top part) minus (visible part) – that's exactly the scrolled out bottom part.
What is the scrollbar width?
importance: 3
Write the code that returns the width of a standard scrollbar.
For Windows it usually varies between 12px and 20px.
If the browser doesn't reserve any space for it (the scrollbar is half-translucent over the text, also happens), then it may be 0px.
P.S.
The code should work for any HTML document, do not depend on its content.
To get the scrollbar width, we can create an element with the scroll, but without borders and paddings.
Then the difference between its full width offsetWidth and the inner content area width clientWidth will be exactly the scrollbar:
// create a div with the scroll
let div = document.createElement('div');
div.style.overflowY = 'scroll';
div.style.width = '50px';
div.style.height = '50px';
// must put it in the document, otherwise sizes will be 0
document.body.append(div);
let scrollWidth = div.offsetWidth - div.clientWidth;
div.remove();
alert(scrollWidth);
Place the ball in the field center
importance: 5
Here's how the source document looks:
What are coordinates of the field center?
Calculate them and use to place the ball into the center of the green field:
The element should be moved by JavaScript, not CSS.
The code should work with any ball size (10, 20, 30 pixels) and any field size, not be bound to the given values.
P.S.
Sure, centering could be done with CSS, but here we want exactly JavaScript.
Further we'll meet other topics and more complex situations when JavaScript must be used.
Here we do a “warm-up”.
Open a sandbox for the task.
The ball has position:absolute.
It means that its left/top coordinates are measured from the nearest positioned element, that is #field (because it has position:relative).
The coordinates start from the inner left-upper corner of the field:
The inner field width/height is clientWidth/clientHeight.
So the field center has coordinates (clientWidth/2, clientHeight/2).
…But if we set ball.style.left/top to such values, then not the ball as a whole, but the left-upper edge of the ball would be in the center:
ball.style.left = Math.round(field.clientWidth / 2) + 'px';
ball.style.top = Math.round(field.clientHeight / 2) + 'px';
Here's how it looks:
To align the ball center with the center of the field, we should move the ball to the half of its width to the left and to the half of its height to the top:
ball.style.left = Math.round(field.clientWidth / 2 - ball.offsetWidth / 2) + 'px';
ball.style.top = Math.round(field.clientHeight / 2 - ball.offsetHeight / 2) + 'px';
Now the ball is finally centered.
Attention: the pitfall!
The code won't work reliably while <img> has no width/height:
<img src="ball.png" id="ball">
When the browser does not know the width/height of an image (from tag attributes or CSS), then it assumes them to equal 0 until the image finishes loading.
So the value of ball.offsetWidth will be 0 until the image loads.
That leads to wrong coordinates in the code above.
After the first load, the browser usually caches the image, and on reloads it will have the size immediately.
But on the first load the value of ball.offsetWidth is 0.
We should fix that by adding width/height to <img>:
<img src="ball.png" width="40" height="40" id="ball">
…Or provide the size in CSS:
#ball {
width: 40px;
height: 40px;
}Open the solution in a sandbox.
The difference: CSS width versus clientWidth
importance: 5
What's the difference between getComputedStyle(elem).width and elem.clientWidth?
Give at least 3 differences.
The more the better.
Differences:
clientWidth is numeric, while getComputedStyle(elem).width returns a string with px at the end.
getComputedStyle may return non-numeric width like "auto" for an inline element.
clientWidth is the inner content area of the element plus paddings, while CSS width (with standard box-sizing) is the inner content area without paddings.
If there's a scrollbar and the browser reserves the space for it, some browser substract that space from CSS width (cause it's not available for content any more), and some do not.
The clientWidth property is always the same: scrollbar size is substracted if reserved.
Browser: Document, Events, InterfacesDocument
Window sizes and scrolling
How do we find the width and height of the browser window? How do we get the full width and height of the document, including the scrolled out part? How do we scroll the page using JavaScript?
For this type of information, we can use the root document element document.documentElement, that corresponds to the <html> tag.
But there are additional methods and peculiarities to consider.
- Width/height of the window
To get window width and height, we can use the clientWidth/clientHeight of document.documentElement:
For instance, this button shows the height of your window:
Not window.innerWidth/innerHeight
Browsers also support properties like window.innerWidth/innerHeight.
They look like what we want, so why not to use them instead?
If there exists a scrollbar, and it occupies some space, clientWidth/clientHeight provide the width/height without it (subtract it).
In other words, they return the width/height of the visible part of the document, available for the content.
window.innerWidth/innerHeight includes the scrollbar.
If there's a scrollbar, and it occupies some space, then these two lines show different values:
alert( window.innerWidth ); // full window width
alert( document.documentElement.clientWidth ); // window width minus the scrollbar
In most cases, we need the available window width in order to draw or position something within scrollbars (if there are any), so we should use documentElement.clientHeight/clientWidth.
DOCTYPE is important
Please note: top-level geometry properties may work a little bit differently when there's no <!DOCTYPE HTML> in HTML.
Odd things are possible.
In modern HTML we should always write DOCTYPE.
- Width/height of the document
Theoretically, as the root document element is document.documentElement, and it encloses all the content, we could measure the document's full size as document.documentElement.scrollWidth/scrollHeight.
But on that element, for the whole page, these properties do not work as intended.
In Chrome/Safari/Opera, if there's no scroll, then documentElement.scrollHeight may be even less than documentElement.clientHeight! Weird, right?
To reliably obtain the full document height, we should take the maximum of these properties:
let scrollHeight = Math.max(
document.body.scrollHeight, document.documentElement.scrollHeight,
document.body.offsetHeight, document.documentElement.offsetHeight,
document.body.clientHeight, document.documentElement.clientHeight
);
alert('Full document height, with scrolled out part: ' + scrollHeight);
Why so? Better don't ask.
These inconsistencies come from ancient times, not a “smart” logic.
- Get the current scroll
DOM elements have their current scroll state in their scrollLeft/scrollTop properties.
For document scroll, document.documentElement.scrollLeft/scrollTop works in most browsers, except older WebKit-based ones, like Safari (bug 5991), where we should use document.body instead of document.documentElement.
Luckily, we don't have to remember these peculiarities at all, because the scroll is available in the special properties, window.pageXOffset/pageYOffset:
alert('Current scroll from the top: ' + window.pageYOffset);
alert('Current scroll from the left: ' + window.pageXOffset);
These properties are read-only.
- Scrolling: scrollTo, scrollBy, scrollIntoView
Important:
To scroll the page with JavaScript, its DOM must be fully built.
For instance, if we try to scroll the page with a script in <head>, it won't work.
Regular elements can be scrolled by changing scrollTop/scrollLeft.
We can do the same for the page using document.documentElement.scrollTop/scrollLeft (except Safari, where document.body.scrollTop/Left should be used instead).
Alternatively, there's a simpler, universal solution: special methods window.scrollBy(x,y) and window.scrollTo(pageX,pageY).
The method scrollBy(x,y) scrolls the page relative to its current position.
For instance, scrollBy(0,10) scrolls the page 10px down.
The button below demonstrates this:
The method scrollTo(pageX,pageY) scrolls the page to absolute coordinates, so that the top-left corner of the visible part has coordinates (pageX, pageY) relative to the document's top-left corner.
It's like setting scrollLeft/scrollTop.
To scroll to the very beginning, we can use scrollTo(0,0).
These methods work for all browsers the same way.
- scrollIntoView
For completeness, let's cover one more method: elem.scrollIntoView(top).
The call to elem.scrollIntoView(top) scrolls the page to make elem visible.
It has one argument:
If top=true (that's the default), then the page will be scrolled to make elem appear on the top of the window.
The upper edge of the element will be aligned with the window top.
If top=false, then the page scrolls to make elem appear at the bottom.
The bottom edge of the element will be aligned with the window bottom.
The button below scrolls the page to position itself at the window top:
And this button scrolls the page to position itself at the bottom:
- Forbid the scrolling
Sometimes we need to make the document “unscrollable”.
For instance, when we need to cover the page with a large message requiring immediate attention, and we want the visitor to interact with that message, not with the document.
To make the document unscrollable, it's enough to set document.body.style.overflow = "hidden".
The page will “freeze” at its current scroll position.
Try it:
The first button freezes the scroll, while the second one releases it.
We can use the same technique to freeze the scroll for other elements, not just for document.body.
The drawback of the method is that the scrollbar disappears.
If it occupied some space, then that space is now free and the content “jumps” to fill it.
That looks a bit odd, but can be worked around if we compare clientWidth before and after the freeze.
If it increased (the scrollbar disappeared), then add padding to document.body in place of the scrollbar to keep the content width the same.
- Summary
Geometry:
Width/height of the visible part of the document (content area width/height): document.documentElement.clientWidth/clientHeight
Width/height of the whole document, with the scrolled out part:
let scrollHeight = Math.max(
document.body.scrollHeight, document.documentElement.scrollHeight,
document.body.offsetHeight, document.documentElement.offsetHeight,
document.body.clientHeight, document.documentElement.clientHeight
);
Scrolling:
Read the current scroll: window.pageYOffset/pageXOffset.
Change the current scroll:
window.scrollTo(pageX,pageY) – absolute coordinates,
window.scrollBy(x,y) – scroll relative the current place,
elem.scrollIntoView(top) – scroll to make elem visible (align with the top/bottom of the window).
Browser: Document, Events, InterfacesDocument
Coordinates
To move elements around we should be familiar with coordinates.
Most JavaScript methods deal with one of two coordinate systems:
Relative to the window – similar to position:fixed, calculated from the window top/left edge.
we'll denote these coordinates as clientX/clientY, the reasoning for such name will become clear later, when we study event properties.
Relative to the document – similar to position:absolute in the document root, calculated from the document top/left edge.
we'll denote them pageX/pageY.
When the page is scrolled to the very beginning, so that the top/left corner of the window is exactly the document top/left corner, these coordinates equal each other.
But after the document shifts, window-relative coordinates of elements change, as elements move across the window, while document-relative coordinates remain the same.
On this picture we take a point in the document and demonstrate its coordinates before the scroll (left) and after it (right):
When the document scrolled:
pageY – document-relative coordinate stayed the same, it's counted from the document top (now scrolled out).
clientY – window-relative coordinate did change (the arrow became shorter), as the same point became closer to window top.
- Element coordinates: getBoundingClientRect
The method elem.getBoundingClientRect() returns window coordinates for a minimal rectangle that encloses elem as an object of built-in DOMRect class.
Main DOMRect properties:
x/y – X/Y-coordinates of the rectangle origin relative to window,
width/height – width/height of the rectangle (can be negative).
Additionally, there are derived properties:
top/bottom – Y-coordinate for the top/bottom rectangle edge,
left/right – X-coordinate for the left/right rectangle edge.
For instance click this button to see its window coordinates:
If you scroll the page and repeat, you'll notice that as window-relative button position changes, its window coordinates (y/top/bottom if you scroll vertically) change as well.
Here's the picture of elem.getBoundingClientRect() output:
As you can see, x/y and width/height fully describe the rectangle.
Derived properties can be easily calculated from them:
left = xtop = yright = x + widthbottom = y + height
Please note:
Coordinates may be decimal fractions, such as 10.5.
That's normal, internally browser uses fractions in calculations.
We don't have to round them when setting to style.left/top.
Coordinates may be negative.
For instance, if the page is scrolled so that elem is now above the window, then elem.getBoundingClientRect().top is negative.
Why derived properties are needed? Why does top/left exist if there's x/y?
Mathematically, a rectangle is uniquely defined with its starting point (x,y) and the direction vector (width,height).
So the additional derived properties are for convenience.
Technically it's possible for width/height to be negative, that allows for “directed” rectangle, e.g.
to represent mouse selection with properly marked start and end.
Negative width/height values mean that the rectangle starts at its bottom-right corner and then “grows” left-upwards.
Here's a rectangle with negative width and height (e.g.
width=-200, height=-100):
As you can see, left/top do not equal x/y in such case.
In practice though, elem.getBoundingClientRect() always returns positive width/height, here we mention negative width/height only for you to understand why these seemingly duplicate properties are not actually duplicates.
Internet Explorer: no support for x/y
Internet Explorer doesn't support x/y properties for historical reasons.
So we can either make a polyfill (add getters in DomRect.prototype) or just use top/left, as they are always the same as x/y for positive width/height, in particular in the result of elem.getBoundingClientRect().
Coordinates right/bottom are different from CSS position properties
There are obvious similarities between window-relative coordinates and CSS position:fixed.
But in CSS positioning, right property means the distance from the right edge, and bottom property means the distance from the bottom edge.
If we just look at the picture above, we can see that in JavaScript it is not so.
All window coordinates are counted from the top-left corner, including these ones.
- elementFromPoint(x, y)
The call to document.elementFromPoint(x, y) returns the most nested element at window coordinates (x, y).
The syntax is:
let elem = document.elementFromPoint(x, y);
For instance, the code below highlights and outputs the tag of the element that is now in the middle of the window:
let centerX = document.documentElement.clientWidth / 2;
let centerY = document.documentElement.clientHeight / 2;
let elem = document.elementFromPoint(centerX, centerY);
elem.style.background = "red";
alert(elem.tagName);
As it uses window coordinates, the element may be different depending on the current scroll position.
For out-of-window coordinates the elementFromPoint returns null
The method document.elementFromPoint(x,y) only works if (x,y) are inside the visible area.
If any of the coordinates is negative or exceeds the window width/height, then it returns null.
Here's a typical error that may occur if we don't check for it:
let elem = document.elementFromPoint(x, y);
// if the coordinates happen to be out of the window, then elem = null
elem.style.background = ''; // Error!
- Using for “fixed” positioning
Most of time we need coordinates in order to position something.
To show something near an element, we can use getBoundingClientRect to get its coordinates, and then CSS position together with left/top (or right/bottom).
For instance, the function createMessageUnder(elem, html) below shows the message under elem:
let elem = document.getElementById("coords-show-mark");
function createMessageUnder(elem, html) {
// create message element
let message = document.createElement('div');
// better to use a css class for the style here
message.style.cssText = "position:fixed; color: red";
// assign coordinates, don't forget "px"!
let coords = elem.getBoundingClientRect();
message.style.left = coords.left + "px";
message.style.top = coords.bottom + "px";
message.innerHTML = html;
return message;
}
// Usage:
// add it for 5 seconds in the document
let message = createMessageUnder(elem, 'Hello, world!');
document.body.append(message);
setTimeout(() => message.remove(), 5000);
Click the button to run it:
The code can be modified to show the message at the left, right, below, apply CSS animations to “fade it in” and so on.
That's easy, as we have all the coordinates and sizes of the element.
But note the important detail: when the page is scrolled, the message flows away from the button.
The reason is obvious: the message element relies on position:fixed, so it remains at the same place of the window while the page scrolls away.
To change that, we need to use document-based coordinates and position:absolute.
- Document coordinates
Document-relative coordinates start from the upper-left corner of the document, not the window.
In CSS, window coordinates correspond to position:fixed, while document coordinates are similar to position:absolute on top.
We can use position:absolute and top/left to put something at a certain place of the document, so that it remains there during a page scroll.
But we need the right coordinates first.
There's no standard method to get the document coordinates of an element.
But it's easy to write it.
The two coordinate systems are connected by the formula:
pageY = clientY + height of the scrolled-out vertical part of the document.
pageX = clientX + width of the scrolled-out horizontal part of the document.
The function getCoords(elem) will take window coordinates from elem.getBoundingClientRect() and add the current scroll to them:
// get document coordinates of the element
function getCoords(elem) {
let box = elem.getBoundingClientRect();
return {
top: box.top + window.pageYOffset,
right: box.right + window.pageXOffset,
bottom: box.bottom + window.pageYOffset,
left: box.left + window.pageXOffset
};
}
If in the example above we used it with position:absolute, then the message would stay near the element on scroll.
The modified createMessageUnder function:
function createMessageUnder(elem, html) {
let message = document.createElement('div');
message.style.cssText = "position:absolute; color: red";
let coords = getCoords(elem);
message.style.left = coords.left + "px";
message.style.top = coords.bottom + "px";
message.innerHTML = html;
return message;
}
- Summary
Any point on the page has coordinates:
Relative to the window – elem.getBoundingClientRect().
Relative to the document – elem.getBoundingClientRect() plus the current page scroll.
Window coordinates are great to use with position:fixed, and document coordinates do well with position:absolute.
Both coordinate systems have their pros and cons; there are times we need one or the other one, just like CSS positionabsolute and fixed.
importance: 5
In the iframe below you can see a document with the green “field”.
Use JavaScript to find window coordinates of corners pointed by with arrows.
There's a small feature implemented in the document for convenience.
A click at any place shows coordinates there.
Your code should use DOM to get window coordinates of:
Upper-left, outer corner (that's simple).
Bottom-right, outer corner (simple too).
Upper-left, inner corner (a bit harder).
Bottom-right, inner corner (there are several ways, choose one).
The coordinates that you calculate should be the same as those returned by the mouse click.
P.S.
The code should also work if the element has another size or border, not bound to any fixed values.
Open a sandbox for the task.
Outer corners
Outer corners are basically what we get from elem.getBoundingClientRect().
Coordinates of the upper-left corner answer1 and the bottom-right corner answer2:
let coords = elem.getBoundingClientRect();
let answer1 = [coords.left, coords.top];
let answer2 = [coords.right, coords.bottom];
Left-upper inner corner
That differs from the outer corner by the border width.
A reliable way to get the distance is clientLeft/clientTop:
let answer3 = [coords.left + field.clientLeft, coords.top + field.clientTop];
Right-bottom inner corner
In our case we need to substract the border size from the outer coordinates.
We could use CSS way:
let answer4 = [
coords.right - parseInt(getComputedStyle(field).borderRightWidth),
coords.bottom - parseInt(getComputedStyle(field).borderBottomWidth)
];
An alternative way would be to add clientWidth/clientHeight to coordinates of the left-upper corner.
That's probably even better:
let answer4 = [
coords.left + elem.clientLeft + elem.clientWidth,
coords.top + elem.clientTop + elem.clientHeight
];Open the solution in a sandbox.
Show a note near the element
importance: 5
Create a function positionAt(anchor, position, elem) that positions elem, depending on position near anchor element.
The position must be a string with any one of 3 values:
"top" – position elem right above anchor"right" – position elem immediately at the right of anchor"bottom" – position elem right below anchor
It's used inside function showNote(anchor, position, html), provided in the task source code, that creates a “note” element with given html and shows it at the given position near the anchor.
Here's the demo of notes:
Open a sandbox for the task.
In this task we only need to accurately calculate the coordinates.
See the code for details.
Please note: the elements must be in the document to read offsetHeight and other properties.
A hidden (display:none) or out of the document element has no size.
Open the solution in a sandbox.
Show a note near the element (absolute)
importance: 5
Modify the solution of the previous task so that the note uses position:absolute instead of position:fixed.
That will prevent its “runaway” from the element when the page scrolls.
Take the solution of that task as a starting point.
To test the scroll, add the style <body style="height: 2000px">.
The solution is actually pretty simple:
Use position:absolute in CSS instead of position:fixed for .note.
Use the function getCoords() from the chapter Coordinates to get document-relative coordinates.
Open the solution in a sandbox.
Position the note inside (absolute)
importance: 5
Extend the previous task Show a note near the element (absolute): teach the function positionAt(anchor, position, elem) to insert elem inside the anchor.
New values for position:
top-out, right-out, bottom-out – work the same as before, they insert the elem over/right/under anchor.
top-in, right-in, bottom-in – insert elem inside the anchor: stick it to the upper/right/bottom edge.
For instance:
// shows the note above blockquote
positionAt(blockquote, "top-out", note);
// shows the note inside blockquote, at the top
positionAt(blockquote, "top-in", note);
The result:
As the source code, take the solution of the task Show a note near the element (absolute).
Open the solution in a sandbox.TutorialBrowser: Document, Events, Interfaces
An event is a signal that something has happened.
All DOM nodes generate such signals (but events are not limited to DOM).
Here's a list of the most useful DOM events, just to take a look at:
Mouse events:click – when the mouse clicks on an element (touchscreen devices generate it on a tap).
contextmenu – when the mouse right-clicks on an element.
mouseover / mouseout – when the mouse cursor comes over / leaves an element.
mousedown / mouseup – when the mouse button is pressed / released over an element.
mousemove – when the mouse is moved.
Keyboard events:keydown and keyup – when a keyboard key is pressed and released.
Form element events:submit – when the visitor submits a <form>.
focus – when the visitor focuses on an element, e.g.
on an <input>.
Document events:DOMContentLoaded – when the HTML is loaded and processed, DOM is fully built.
CSS events:transitionend – when a CSS-animation finishes.
There are many other events.
We'll get into more details of particular events in next chapters.
- Event handlers
To react on events we can assign a handler – a function that runs in case of an event.
Handlers are a way to run JavaScript code in case of user actions.
There are several ways to assign a handler.
Let's see them, starting from the simplest one.
HTML-attribute
A handler can be set in HTML with an attribute named on<event>.
For instance, to assign a click handler for an input, we can use onclick, like here:
<input value="Click me" onclick="alert('Click!')" type="button">
On mouse click, the code inside onclick runs.
Please note that inside onclick we use single quotes, because the attribute itself is in double quotes.
If we forget that the code is inside the attribute and use double quotes inside, like this: onclick="alert("Click!")", then it won't work right.
An HTML-attribute is not a convenient place to write a lot of code, so we'd better create a JavaScript function and call it there.
Here a click runs the function countRabbits():
<script>
function countRabbits() {
for(let i=1; i<=3; i++) {
alert("Rabbit number " + i);
}
}
</script>
<input type="button" onclick="countRabbits()" value="Count rabbits!">
As we know, HTML attribute names are not case-sensitive, so ONCLICK works as well as onClick and onCLICK… But usually attributes are lowercased: onclick.
DOM property
We can assign a handler using a DOM property on<event>.
For instance, elem.onclick:
<input id="elem" type="button" value="Click me">
<script>
elem.onclick = function() {
alert('Thank you');
};
</script>
If the handler is assigned using an HTML-attribute then the browser reads it, creates a new function from the attribute content and writes it to the DOM property.
So this way is actually the same as the previous one.
These two code pieces work the same:
Only HTML:
<input type="button" onclick="alert('Click!')" value="Button">
HTML + JS:
<input type="button" id="button" value="Button">
<script>
button.onclick = function() {
alert('Click!');
};
</script>
In the first example, the HTML attribute is used to initialize the button.onclick, while in the second example – the script, that's all the difference.
As there's only one onclick property, we can't assign more than one event handler.
In the example below adding a handler with JavaScript overwrites the existing handler:
<input type="button" id="elem" onclick="alert('Before')" value="Click me">
<script>
elem.onclick = function() { // overwrites the existing handler
alert('After'); // only this will be shown
};
</script>
To remove a handler – assign elem.onclick = null.
- Accessing the element: this
The value of this inside a handler is the element.
The one which has the handler on it.
In the code below button shows its contents using this.innerHTML:
<button onclick="alert(this.innerHTML)">Click me</button>
- Possible mistakes
If you're starting to work with events – please note some subtleties.
We can set an existing function as a handler:
function sayThanks() {
alert('Thanks!');
}
elem.onclick = sayThanks;
But be careful: the function should be assigned as sayThanks, not sayThanks().
// right
button.onclick = sayThanks;
// wrong
button.onclick = sayThanks();
If we add parentheses, then sayThanks() becomes is a function call.
So the last line actually takes the result of the function execution, that is undefined (as the function returns nothing), and assigns it to onclick.
That doesn't work.
…On the other hand, in the markup we do need the parentheses:
<input type="button" id="button" onclick="sayThanks()">
The difference is easy to explain.
When the browser reads the attribute, it creates a handler function with body from the attribute content.
So the markup generates this property:
button.onclick = function() {
sayThanks(); // <-- the attribute content goes here
};Don't use setAttribute for handlers.
Such a call won't work:
// a click on <body> will generate errors,
// because attributes are always strings, function becomes a string
document.body.setAttribute('onclick', function() { alert(1) });DOM-property case matters.
Assign a handler to elem.onclick, not elem.ONCLICK, because DOM properties are case-sensitive.
- addEventListener
The fundamental problem of the aforementioned ways to assign handlers – we can't assign multiple handlers to one event.
Let's say, one part of our code wants to highlight a button on click, and another one wants to show a message on the same click.
We'd like to assign two event handlers for that.
But a new DOM property will overwrite the existing one:
input.onclick = function() { alert(1); }
// ...
input.onclick = function() { alert(2); } // replaces the previous handler
Developers of web standards understood that long ago and suggested an alternative way of managing handlers using special methods addEventListener and removeEventListener.
They are free of such a problem.
The syntax to add a handler:
element.addEventListener(event, handler, [options]);
event
Event name, e.g.
"click".
handler
The handler function.
options
An additional optional object with properties:
once: if true, then the listener is automatically removed after it triggers.
capture: the phase where to handle the event, to be covered later in the chapter Bubbling and capturing.
For historical reasons, options can also be false/true, that's the same as {capture: false/true}.
passive: if true, then the handler will not call preventDefault(), we'll explain that later in Browser default actions.
To remove the handler, use removeEventListener:
element.removeEventListener(event, handler, [options]);
Removal requires the same function
To remove a handler we should pass exactly the same function as was assigned.
This doesn't work:
elem.addEventListener( "click" , () => alert('Thanks!'));
// ....
elem.removeEventListener( "click", () => alert('Thanks!'));
The handler won't be removed, because removeEventListener gets another function – with the same code, but that doesn't matter, as it's a different function object.
Here's the right way:
function handler() {
alert( 'Thanks!' );
}
input.addEventListener("click", handler);
// ....
input.removeEventListener("click", handler);
Please note – if we don't store the function in a variable, then we can't remove it.
There's no way to “read back” handlers assigned by addEventListener.
Multiple calls to addEventListener allow to add multiple handlers, like this:
<input id="elem" type="button" value="Click me"/>
<script>
function handler1() {
alert('Thanks!');
};
function handler2() {
alert('Thanks again!');
}
elem.onclick = () => alert("Hello");
elem.addEventListener("click", handler1); // Thanks!
elem.addEventListener("click", handler2); // Thanks again!
</script>
As we can see in the example above, we can set handlers both using a DOM-property and addEventListener.
But generally we use only one of these ways.
For some events, handlers only work with addEventListener
There exist events that can't be assigned via a DOM-property.
Only with addEventListener.
For instance, the DOMContentLoaded event, that triggers when the document is loaded and DOM is built.
// will never run
document.onDOMContentLoaded = function() {
alert("DOM built");
};// this way it works
document.addEventListener("DOMContentLoaded", function() {
alert("DOM built");
});
So addEventListener is more universal.
Although, such events are an exception rather than the rule.
- Event object
To properly handle an event we'd want to know more about what's happened.
Not just a “click” or a “keydown”, but what were the pointer coordinates? Which key was pressed? And so on.
When an event happens, the browser creates an event object, puts details into it and passes it as an argument to the handler.
Here's an example of getting pointer coordinates from the event object:
<input type="button" value="Click me" id="elem">
<script>
elem.onclick = function(event) {
// show event type, element and coordinates of the click
alert(event.type + " at " + event.currentTarget);
alert("Coordinates: " + event.clientX + ":" + event.clientY);
};
</script>
Some properties of event object:
event.type
Event type, here it's "click".
event.currentTarget
Element that handled the event.
That's exactly the same as this, unless the handler is an arrow function, or its this is bound to something else, then we can get the element from event.currentTarget.
event.clientX / event.clientY
Window-relative coordinates of the cursor, for pointer events.
There are more properties.
Many of them depend on the event type: keyboard events have one set of properties, pointer events – another one, we'll study them later when we come to different events in details.
The event object is also available in HTML handlers
If we assign a handler in HTML, we can also use the event object, like this:
<input type="button" onclick="alert(event.type)" value="Event type">
That's possible because when the browser reads the attribute, it creates a handler like this: function(event) { alert(event.type) }.
That is: its first argument is called "event", and the body is taken from the attribute.
- Object handlers: handleEvent
We can assign not just a function, but an object as an event handler using addEventListener.
When an event occurs, its handleEvent method is called.
For instance:
<button id="elem">Click me</button>
<script>
let obj = {
handleEvent(event) {
alert(event.type + " at " + event.currentTarget);
}
};
elem.addEventListener('click', obj);
</script>
As we can see, when addEventListener receives an object as the handler, it calls obj.handleEvent(event) in case of an event.
We could also use a class for that:
<button id="elem">Click me</button>
<script>
class Menu {
handleEvent(event) {
switch(event.type) {
case 'mousedown':
elem.innerHTML = "Mouse button pressed";
break;
case 'mouseup':
elem.innerHTML += "...and released.";
break;
}
}
}
let menu = new Menu();
elem.addEventListener('mousedown', menu);
elem.addEventListener('mouseup', menu);
</script>
Here the same object handles both events.
Please note that we need to explicitly setup the events to listen using addEventListener.
The menu object only gets mousedown and mouseup here, not any other types of events.
The method handleEvent does not have to do all the job by itself.
It can call other event-specific methods instead, like this:
<button id="elem">Click me</button>
<script>
class Menu {
handleEvent(event) {
// mousedown -> onMousedown
let method = 'on' + event.type[0].toUpperCase() + event.type.slice(1);
this[method](event);
}
onMousedown() {
elem.innerHTML = "Mouse button pressed";
}
onMouseup() {
elem.innerHTML += "...and released.";
}
}
let menu = new Menu();
elem.addEventListener('mousedown', menu);
elem.addEventListener('mouseup', menu);
</script>
Now event handlers are clearly separated, that may be easier to support.
- Summary
There are 3 ways to assign event handlers:
HTML attribute: onclick="...".
DOM property: elem.onclick = function.
Methods: elem.addEventListener(event, handler[, phase]) to add, removeEventListener to remove.
HTML attributes are used sparingly, because JavaScript in the middle of an HTML tag looks a little bit odd and alien.
Also can't write lots of code in there.
DOM properties are ok to use, but we can't assign more than one handler of the particular event.
In many cases that limitation is not pressing.
The last way is the most flexible, but it is also the longest to write.
There are few events that only work with it, for instance transitionend and DOMContentLoaded (to be covered).
Also addEventListener supports objects as event handlers.
In that case the method handleEvent is called in case of the event.
No matter how you assign the handler – it gets an event object as the first argument.
That object contains the details about what's happened.
We'll learn more about events in general and about different types of events in the next chapters.
importance: 5
Create a button that hides itself on click.
Like this:
Can use this in the handler to reference “the element itself” here:
<input type="button" onclick="this.hidden=true" value="Click to hide">
Which handlers run?
importance: 5
There's a button in the variable.
There are no handlers on it.
Which handlers run on click after the following code? Which alerts show up?
button.addEventListener("click", () => alert("1"));
button.removeEventListener("click", () => alert("1"));
button.onclick = () => alert(2);
The answer: 1 and 2.
The first handler triggers, because it's not removed by removeEventListener.
To remove the handler we need to pass exactly the function that was assigned.
And in the code a new function is passed, that looks the same, but is still another function.
To remove a function object, we need to store a reference to it, like this:
function handler() {
alert(1);
}
button.addEventListener("click", handler);
button.removeEventListener("click", handler);
The handler button.onclick works independently and in addition to addEventListener.
Move the ball across the field
importance: 5
Move the ball across the field to a click.
Like this:
Requirements:
The ball center should come exactly under the pointer on click (if possible without crossing the field edge).
CSS-animation is welcome.
The ball must not cross field boundaries.
When the page is scrolled, nothing should break.
Notes:
The code should also work with different ball and field sizes, not be bound to any fixed values.
Use properties event.clientX/event.clientY for click coordinates.
Open a sandbox for the task.
First we need to choose a method of positioning the ball.
We can't use position:fixed for it, because scrolling the page would move the ball from the field.
So we should use position:absolute and, to make the positioning really solid, make field itself positioned.
Then the ball will be positioned relatively to the field:
#field {
width: 200px;
height: 150px;
position: relative;
}
#ball {
position: absolute;
left: 0; /* relative to the closest positioned ancestor (field) */
top: 0;
transition: 1s all; /* CSS animation for left/top makes the ball fly */
}
Next we need to assign the correct ball.style.left/top.
They contain field-relative coordinates now.
Here's the picture:
We have event.clientX/clientY – window-relative coordinates of the click.
To get field-relative left coordinate of the click, we can substract the field left edge and the border width:
let left = event.clientX - fieldCoords.left - field.clientLeft;
Normally, ball.style.left means the “left edge of the element” (the ball).
So if we assign that left, then the ball edge, not center, would be under the mouse cursor.
We need to move the ball half-width left and half-height up to make it center.
So the final left would be:
let left = event.clientX - fieldCoords.left - field.clientLeft - ball.offsetWidth/2;
The vertical coordinate is calculated using the same logic.
Please note that the ball width/height must be known at the time we access ball.offsetWidth.
Should be specified in HTML or CSS.
Open the solution in a sandbox.
Create a sliding menu
importance: 5
Create a menu that opens/collapses on click:
P.S.
HTML/CSS of the source document is to be modified.
Open a sandbox for the task.
HTML/CSS
First let's create HTML/CSS.
A menu is a standalone graphical component on the page, so it's better to put it into a single DOM element.
A list of menu items can be laid out as a list ul/li.
Here's the example structure:
<div class="menu">
<span class="title">Sweeties (click me)!</span>
<ul>
<li>Cake</li>
<li>Donut</li>
<li>Honey</li>
</ul>
</div>
We use <span> for the title, because <div> has an implicit display:block on it, and it will occupy 100% of the horizontal width.
Like this:
<div style="border: solid red 1px" onclick="alert(1)">Sweeties (click me)!</div>
So if we set onclick on it, then it will catch clicks to the right of the text.
As <span> has an implicit display: inline, it occupies exactly enough place to fit all the text:
<span style="border: solid red 1px" onclick="alert(1)">Sweeties (click me)!</span>
Toggling the menu
Toggling the menu should change the arrow and show/hide the menu list.
All these changes are perfectly handled by CSS.
In JavaScript we should label the current state of the menu by adding/removing the class .open.
Without it, the menu will be closed:
.menu ul {
margin: 0;
list-style: none;
padding-left: 20px;
display: none;
}
.menu .title::before {
content: ' ';
font-size: 80%;
color: green;
}
…And with .open the arrow changes and the list shows up:
.menu.open .title::before {
content: '▼ ';
}
.menu.open ul {
display: block;
}Open the solution in a sandbox.
Add a closing button
importance: 5
There's a list of messages.
Use JavaScript to add a closing button to the right-upper corner of each message.
The result should look like this:
Open a sandbox for the task.
To add the button we can use either position:absolute (and make the pane position:relative) or float:right.
The float:right has the benefit that the button never overlaps the text, but position:absolute gives more freedom.
So the choice is yours.
Then for each pane the code can be like:
pane.insertAdjacentHTML("afterbegin", '<button class="remove-button">[x]</button>');
Then the <button> becomes pane.firstChild, so we can add a handler to it like this:
pane.firstChild.onclick = () => pane.remove();Open the solution in a sandbox.
Carousel
importance: 4
Create a “carousel” – a ribbon of images that can be scrolled by clicking on arrows.
Later we can add more features to it: infinite scrolling, dynamic loading etc.
P.S.
For this task HTML/CSS structure is actually 90% of the solution.
Open a sandbox for the task.
The images ribbon can be represented as ul/li list of images <img>.
Normally, such a ribbon is wide, but we put a fixed-size <div> around to “cut” it, so that only a part of the ribbon is visible:
To make the list show horizontally we need to apply correct CSS properties for <li>, like display: inline-block.
For <img> we should also adjust display, because by default it's inline.
There's extra space reserved under inline elements for “letter tails”, so we can use display:block to remove it.
To do the scrolling, we can shift <ul>.
There are many ways to do it, for instance by changing margin-left or (better performance) use transform: translateX():
The outer <div> has a fixed width, so “extra” images are cut.
The whole carousel is a self-contained “graphical component” on the page, so we'd better wrap it into a single <div class="carousel"> and style things inside it.
Open the solution in a sandbox.Browser: Document, Events, InterfacesIntroduction to Events
Bubbling and capturing
Let's start with an example.
This handler is assigned to <div>, but also runs if you click any nested tag like <em> or <code>:
<div onclick="alert('The handler!')">
<em>If you click on <code>EM</code>, the handler on <code>DIV</code> runs.</em>
</div>
Isn't it a bit strange? Why does the handler on <div> run if the actual click was on <em>?
- Bubbling
The bubbling principle is simple.
When an event happens on an element, it first runs the handlers on it, then on its parent, then all the way up on other ancestors.
Let's say we have 3 nested elements FORM > DIV > P with a handler on each of them:
<style>
body * {
margin: 10px;
border: 1px solid blue;
}
</style>
<form onclick="alert('form')">FORM
<div onclick="alert('div')">DIV
<p onclick="alert('p')">P</p>
</div>
</form>
A click on the inner <p> first runs onclick:
On that <p>.
Then on the outer <div>.
Then on the outer <form>.
And so on upwards till the document object.
So if we click on <p>, then we'll see 3 alerts: p → div → form.
The process is called “bubbling”, because events “bubble” from the inner element up through parents like a bubble in the water.
Almost all events bubble.
The key word in this phrase is “almost”.
For instance, a focus event does not bubble.
There are other examples too, we'll meet them.
But still it's an exception, rather than a rule, most events do bubble.
- event.target
A handler on a parent element can always get the details about where it actually happened.
The most deeply nested element that caused the event is called a target element, accessible as event.target.
Note the differences from this (=event.currentTarget):
event.target – is the “target” element that initiated the event, it doesn't change through the bubbling process.
this – is the “current” element, the one that has a currently running handler on it.
For instance, if we have a single handler form.onclick, then it can “catch” all clicks inside the form.
No matter where the click happened, it bubbles up to <form> and runs the handler.
In form.onclick handler:
this (=event.currentTarget) is the <form> element, because the handler runs on it.
event.target is the actual element inside the form that was clicked.
Check it out:
Result
script.js
example.css
index.html
form.onclick = function(event) {
event.target.style.backgroundColor = 'yellow';
// chrome needs some time to paint yellow
setTimeout(() => {
alert("target = " + event.target.tagName + ", this=" + this.tagName);
event.target.style.backgroundColor = ''
}, 0);
};form {
background-color: green;
position: relative;
width: 150px;
height: 150px;
text-align: center;
cursor: pointer;
}
div {
background-color: blue;
position: absolute;
top: 25px;
left: 25px;
width: 100px;
height: 100px;
}
p {
background-color: red;
position: absolute;
top: 25px;
left: 25px;
width: 50px;
height: 50px;
line-height: 50px;
margin: 0;
}
body {
line-height: 25px;
font-size: 16px;
}<!DOCTYPE HTML>
<html>
<head>
<meta charset="utf-8">
<link rel="stylesheet" href="example.css">
</head>
<body>
A click shows both <code>event.target</code> and <code>this</code> to compare:
<form id="form">FORM
<div>DIV
<p>P</p>
</div>
</form>
<script src="script.js"></script>
</body>
</html>
It's possible that event.target could equal this – it happens when the click is made directly on the <form> element.
- Stopping bubbling
A bubbling event goes from the target element straight up.
Normally it goes upwards till <html>, and then to document object, and some events even reach window, calling all handlers on the path.
But any handler may decide that the event has been fully processed and stop the bubbling.
The method for it is event.stopPropagation().
For instance, here body.onclick doesn't work if you click on <button>:
<body onclick="alert(`the bubbling doesn't reach here`)">
<button onclick="event.stopPropagation()">Click me</button>
</body>
event.stopImmediatePropagation()
If an element has multiple event handlers on a single event, then even if one of them stops the bubbling, the other ones still execute.
In other words, event.stopPropagation() stops the move upwards, but on the current element all other handlers will run.
To stop the bubbling and prevent handlers on the current element from running, there's a method event.stopImmediatePropagation().
After it no other handlers execute.
Don't stop bubbling without a need!
Bubbling is convenient.
Don't stop it without a real need: obvious and architecturally well thought out.
Sometimes event.stopPropagation() creates hidden pitfalls that later may become problems.
For instance:
We create a nested menu.
Each submenu handles clicks on its elements and calls stopPropagation so that the outer menu won't trigger.
Later we decide to catch clicks on the whole window, to track users' behavior (where people click).
Some analytic systems do that.
Usually the code uses document.addEventListener('click'…) to catch all clicks.
Our analytic won't work over the area where clicks are stopped by stopPropagation.
Sadly, we've got a “dead zone”.
There's usually no real need to prevent the bubbling.
A task that seemingly requires that may be solved by other means.
One of them is to use custom events, we'll cover them later.
Also we can write our data into the event object in one handler and read it in another one, so we can pass to handlers on parents information about the processing below.
- Capturing
There's another phase of event processing called “capturing”.
It is rarely used in real code, but sometimes can be useful.
The standard DOM Events describes 3 phases of event propagation:
Capturing phase – the event goes down to the element.
Target phase – the event reached the target element.
Bubbling phase – the event bubbles up from the element.
Here's the picture of a click on <td> inside a table, taken from the specification:
That is: for a click on <td> the event first goes through the ancestors chain down to the element (capturing phase), then it reaches the target and triggers there (target phase), and then it goes up (bubbling phase), calling handlers on its way.
Before we only talked about bubbling, because the capturing phase is rarely used.
Normally it is invisible to us.
Handlers added using on<event>-property or using HTML attributes or using two-argument addEventListener(event, handler) don't know anything about capturing, they only run on the 2nd and 3rd phases.
To catch an event on the capturing phase, we need to set the handler capture option to true:
elem.addEventListener(..., {capture: true})
// or, just "true" is an alias to {capture: true}
elem.addEventListener(..., true)
There are two possible values of the capture option:
If it's false (default), then the handler is set on the bubbling phase.
If it's true, then the handler is set on the capturing phase.
Note that while formally there are 3 phases, the 2nd phase (“target phase”: the event reached the element) is not handled separately: handlers on both capturing and bubbling phases trigger at that phase.
Let's see both capturing and bubbling in action:
<style>
body * {
margin: 10px;
border: 1px solid blue;
}
</style>
<form>FORM
<div>DIV
<p>P</p>
</div>
</form>
<script>
for(let elem of document.querySelectorAll('*')) {
elem.addEventListener("click", e => alert(`Capturing: ${elem.tagName}`), true);
elem.addEventListener("click", e => alert(`Bubbling: ${elem.tagName}`));
}
</script>
The code sets click handlers on every element in the document to see which ones are working.
If you click on <p>, then the sequence is:
HTML → BODY → FORM → DIV (capturing phase, the first listener):
P (target phase, triggers two times, as we've set two listeners: capturing and bubbling)
DIV → FORM → BODY → HTML (bubbling phase, the second listener).
There's a property event.eventPhase that tells us the number of the phase on which the event was caught.
But it's rarely used, because we usually know it in the handler.
To remove the handler, removeEventListener needs the same phase
If we addEventListener(..., true), then we should mention the same phase in removeEventListener(..., true) to correctly remove the handler.
Listeners on same element and same phase run in their set order
If we have multiple event handlers on the same phase, assigned to the same element with addEventListener, they run in the same order as they are created:
elem.addEventListener("click", e => alert(1)); // guaranteed to trigger first
elem.addEventListener("click", e => alert(2));
- Summary
When an event happens – the most nested element where it happens gets labeled as the “target element” (event.target).
Then the event moves down from the document root to event.target, calling handlers assigned with addEventListener(..., true) on the way (true is a shorthand for {capture: true}).
Then handlers are called on the target element itself.
Then the event bubbles up from event.target to the root, calling handlers assigned using on<event>, HTML attributes and addEventListener without the 3rd argument or with the 3rd argument false/{capture:false}.
Each handler can access event object properties:
event.target – the deepest element that originated the event.
event.currentTarget (=this) – the current element that handles the event (the one that has the handler on it)
event.eventPhase – the current phase (capturing=1, target=2, bubbling=3).
Any event handler can stop the event by calling event.stopPropagation(), but that's not recommended, because we can't really be sure we won't need it above, maybe for completely different things.
The capturing phase is used very rarely, usually we handle events on bubbling.
And there's a logic behind that.
In real world, when an accident happens, local authorities react first.
They know best the area where it happened.
Then higher-level authorities if needed.
The same for event handlers.
The code that set the handler on a particular element knows maximum details about the element and what it does.
A handler on a particular <td> may be suited for that exactly <td>, it knows everything about it, so it should get the chance first.
Then its immediate parent also knows about the context, but a little bit less, and so on till the very top element that handles general concepts and runs the last one.
Bubbling and capturing lay the foundation for “event delegation” – an extremely powerful event handling pattern that we study in the next chapter.
Browser: Document, Events, InterfacesIntroduction to Events
Event delegation
Capturing and bubbling allow us to implement one of most powerful event handling patterns called event delegation.
The idea is that if we have a lot of elements handled in a similar way, then instead of assigning a handler to each of them – we put a single handler on their common ancestor.
In the handler we get event.target to see where the event actually happened and handle it.
Let's see an example – the Ba-Gua diagram reflecting the ancient Chinese philosophy.
Here it is:
The HTML is like this:
<table>
<tr>
<th colspan="3"><em>Bagua</em> Chart: Direction, Element, Color, Meaning</th>
</tr>
<tr>
<td class="nw"><strong>Northwest</strong><br>Metal<br>Silver<br>Elders</td>
<td class="n">...</td>
<td class="ne">...</td>
</tr>
<tr>...2 more lines of this kind...</tr>
<tr>...2 more lines of this kind...</tr>
</table>
The table has 9 cells, but there could be 99 or 9999, doesn't matter.
Our task is to highlight a cell <td> on click.
Instead of assign an onclick handler to each <td> (can be many) – we'll setup the “catch-all” handler on <table> element.
It will use event.target to get the clicked element and highlight it.
The code:
let selectedTd;
table.onclick = function(event) {
let target = event.target; // where was the click?
if (target.tagName != 'TD') return; // not on TD? Then we're not interested
highlight(target); // highlight it
};
function highlight(td) {
if (selectedTd) { // remove the existing highlight if any
selectedTd.classList.remove('highlight');
}
selectedTd = td;
selectedTd.classList.add('highlight'); // highlight the new td
}
Such a code doesn't care how many cells there are in the table.
We can add/remove <td> dynamically at any time and the highlighting will still work.
Still, there's a drawback.
The click may occur not on the <td>, but inside it.
In our case if we take a look inside the HTML, we can see nested tags inside <td>, like <strong>:
<td>
<strong>Northwest</strong>
...
</td>
Naturally, if a click happens on that <strong> then it becomes the value of event.target.
In the handler table.onclick we should take such event.target and find out whether the click was inside <td> or not.
Here's the improved code:
table.onclick = function(event) {
let td = event.target.closest('td'); // (1)
if (!td) return; // (2)
if (!table.contains(td)) return; // (3)
highlight(td); // (4)
};
Explanations:
The method elem.closest(selector) returns the nearest ancestor that matches the selector.
In our case we look for <td> on the way up from the source element.
If event.target is not inside any <td>, then the call returns immediately, as there's nothing to do.
In case of nested tables, event.target may be a <td>, but lying outside of the current table.
So we check if that's actually our table's<td>.
And, if it's so, then highlight it.
As the result, we have a fast, efficient highlighting code, that doesn't care about the total number of <td> in the table.
- Delegation example: actions in markup
There are other uses for event delegation.
Let's say, we want to make a menu with buttons “Save”, “Load”, “Search” and so on.
And there's an object with methods save, load, search… How to match them?
The first idea may be to assign a separate handler to each button.
But there's a more elegant solution.
We can add a handler for the whole menu and data-action attributes for buttons that has the method to call:
<button data-action="save">Click to Save</button>
The handler reads the attribute and executes the method.
Take a look at the working example:
<div id="menu">
<button data-action="save">Save</button>
<button data-action="load">Load</button>
<button data-action="search">Search</button>
</div>
<script>
class Menu {
constructor(elem) {
this._elem = elem;
elem.onclick = this.onClick.bind(this); // (*)
}
save() {
alert('saving');
}
load() {
alert('loading');
}
search() {
alert('searching');
}
onClick(event) {
let action = event.target.dataset.action;
if (action) {
this[action]();
}
};
}
new Menu(menu);
</script>
Please note that this.onClick is bound to this in (*).
That's important, because otherwise this inside it would reference the DOM element (elem), not the Menu object, and this[action] would not be what we need.
So, what advantages does delegation give us here?
We don't need to write the code to assign a handler to each button.
Just make a method and put it in the markup.
The HTML structure is flexible, we can add/remove buttons at any time.
We could also use classes .action-save, .action-load, but an attribute data-action is better semantically.
And we can use it in CSS rules too.
- The “behavior” pattern
We can also use event delegation to add “behaviors” to elements declaratively, with special attributes and classes.
The pattern has two parts:
We add a custom attribute to an element that describes its behavior.
A document-wide handler tracks events, and if an event happens on an attributed element – performs the action.
Behavior: Counter
For instance, here the attribute data-counter adds a behavior: “increase value on click” to buttons:
Counter: <input type="button" value="1" data-counter>
One more counter: <input type="button" value="2" data-counter>
<script>
document.addEventListener('click', function(event) {
if (event.target.dataset.counter != undefined) { // if the attribute exists...
event.target.value++;
}
});
</script>
If we click a button – its value is increased.
Not buttons, but the general approach is important here.
There can be as many attributes with data-counter as we want.
We can add new ones to HTML at any moment.
Using the event delegation we “extended” HTML, added an attribute that describes a new behavior.
For document-level handlers – always addEventListener
When we assign an event handler to the document object, we should always use addEventListener, not document.on<event>, because the latter will cause conflicts: new handlers overwrite old ones.
For real projects it's normal that there are many handlers on document set by different parts of the code.
Behavior: Toggler
One more example of behavior.
A click on an element with the attribute data-toggle-id will show/hide the element with the given id:
<button data-toggle-id="subscribe-mail">
Show the subscription form
</button>
<form id="subscribe-mail" hidden>
Your mail: <input type="email">
</form>
<script>
document.addEventListener('click', function(event) {
let id = event.target.dataset.toggleId;
if (!id) return;
let elem = document.getElementById(id);
elem.hidden = !elem.hidden;
});
</script>
Let's note once again what we did.
Now, to add toggling functionality to an element – there's no need to know JavaScript, just use the attribute data-toggle-id.
That may become really convenient – no need to write JavaScript for every such element.
Just use the behavior.
The document-level handler makes it work for any element of the page.
We can combine multiple behaviors on a single element as well.
The “behavior” pattern can be an alternative to mini-fragments of JavaScript.
- Summary
Event delegation is really cool! It's one of the most helpful patterns for DOM events.
It's often used to add the same handling for many similar elements, but not only for that.
The algorithm:
Put a single handler on the container.
In the handler – check the source element event.target.
If the event happened inside an element that interests us, then handle the event.
Benefits:
Simplifies initialization and saves memory: no need to add many handlers.
Less code: when adding or removing elements, no need to add/remove handlers.
DOM modifications: we can mass add/remove elements with innerHTML and the like.
The delegation has its limitations of course:
First, the event must be bubbling.
Some events do not bubble.
Also, low-level handlers should not use event.stopPropagation().
Second, the delegation may add CPU load, because the container-level handler reacts on events in any place of the container, no matter whether they interest us or not.
But usually the load is negligible, so we don't take it into account.
importance: 5
There's a list of messages with removal buttons [x].
Make the buttons work.
Like this:
P.S.
Should be only one event listener on the container, use event delegation.
Open a sandbox for the task.Open the solution in a sandbox.
Tree menu
importance: 5
Create a tree that shows/hides node children on click:
Requirements:
Only one event handler (use delegation)
A click outside the node title (on an empty space) should not do anything.
Open a sandbox for the task.
The solution has two parts.
Wrap every tree node title into <span>.
Then we can CSS-style them on :hover and handle clicks exactly on text, because <span> width is exactly the text width (unlike without it).
Set a handler to the tree root node and handle clicks on that <span> titles.
Open the solution in a sandbox.
Sortable table
importance: 4
Make the table sortable: clicks on <th> elements should sort it by corresponding column.
Each <th> has the type in the attribute, like this:
<table id="grid">
<thead>
<tr>
<th data-type="number">Age</th>
<th data-type="string">Name</th>
</tr>
</thead>
<tbody>
<tr>
<td>5</td>
<td>John</td>
</tr>
<tr>
<td>10</td>
<td>Ann</td>
</tr>
...
</tbody>
</table>
In the example above the first column has numbers, and the second one – strings.
The sorting function should handle sort according to the type.
Only "string" and "number" types should be supported.
The working example:
P.S.
The table can be big, with any number of rows and columns.
Open a sandbox for the task.Open the solution in a sandbox.
Tooltip behavior
importance: 5
Create JS-code for the tooltip behavior.
When a mouse comes over an element with data-tooltip, the tooltip should appear over it, and when it's gone then hide.
An example of annotated HTML:
<button data-tooltip="the tooltip is longer than the element">Short button</button>
<button data-tooltip="HTML<br>tooltip">One more button</button>
Should work like this:
In this task we assume that all elements with data-tooltip have only text inside.
No nested tags (yet).
Details:
The distance between the element and the tooltip should be 5px.
The tooltip should be centered relative to the element, if possible.
The tooltip should not cross window edges.
Normally it should be above the element, but if the element is at the page top and there's no space for the tooltip, then below it.
The tooltip content is given in the data-tooltip attribute.
It can be arbitrary HTML.
You'll need two events here:
mouseover triggers when a pointer comes over an element.
mouseout triggers when a pointer leaves an element.
Please use event delegation: set up two handlers on document to track all “overs” and “outs” from elements with data-tooltip and manage tooltips from there.
After the behavior is implemented, even people unfamiliar with JavaScript can add annotated elements.
P.S.
Only one tooltip may show up at a time.
Open a sandbox for the task.Open the solution in a sandbox.Browser: Document, Events, InterfacesIntroduction to Events
Browser default actions
Many events automatically lead to certain actions performed by the browser.
For instance:
A click on a link – initiates navigation to its URL.
A click on a form submit button – initiates its submission to the server.
Pressing a mouse button over a text and moving it – selects the text.
If we handle an event in JavaScript, we may not want the corresponding browser action to happen, and want to implement another behavior instead.
- Preventing browser actions
There are two ways to tell the browser we don't want it to act:
The main way is to use the event object.
There's a method event.preventDefault().
If the handler is assigned using on<event> (not by addEventListener), then returning false also works the same.
In this HTML a click on a link doesn't lead to navigation, browser doesn't do anything:
<a href="/" onclick="return false">Click here</a>
or
<a href="/" onclick="event.preventDefault()">here</a>
In the next example we'll use this technique to create a JavaScript-powered menu.
Returning false from a handler is an exception
The value returned by an event handler is usually ignored.
The only exception is return false from a handler assigned using on<event>.
In all other cases, return value is ignored.
In particular, there's no sense in returning true.
Example: the menu
Consider a site menu, like this:
<ul id="menu" class="menu">
<li><a href="/html">HTML</a></li>
<li><a href="/javascript">JavaScript</a></li>
<li><a href="/css">CSS</a></li>
</ul>
Here's how it looks with some CSS:
Menu items are implemented as HTML-links <a>, not buttons <button>.
There are several reasons to do so, for instance:
Many people like to use “right click” – “open in a new window”.
If we use <button> or <span>, that doesn't work.
Search engines follow <a href="..."> links while indexing.
So we use <a> in the markup.
But normally we intend to handle clicks in JavaScript.
So we should prevent the default browser action.
Like here:
menu.onclick = function(event) {
if (event.target.nodeName != 'A') return;
let href = event.target.getAttribute('href');
alert( href ); // ...can be loading from the server, UI generation etc
return false; // prevent browser action (don't go to the URL)
};
If we omit return false, then after our code executes the browser will do its “default action” – navigating to the URL in href.
And we don't need that here, as we're handling the click by ourselves.
By the way, using event delegation here makes our menu very flexible.
We can add nested lists and style them using CSS to “slide down”.
Follow-up events
Certain events flow one into another.
If we prevent the first event, there will be no second.
For instance, mousedown on an <input> field leads to focusing in it, and the focus event.
If we prevent the mousedown event, there's no focus.
Try to click on the first <input> below – the focus event happens.
But if you click the second one, there's no focus.
<input value="Focus works" onfocus="this.value=''">
<input onmousedown="return false" onfocus="this.value=''" value="Click me">
That's because the browser action is canceled on mousedown.
The focusing is still possible if we use another way to enter the input.
For instance, the Tab key to switch from the 1st input into the 2nd.
But not with the mouse click any more.
- The “passive” handler option
The optional passive: true option of addEventListener signals the browser that the handler is not going to call preventDefault().
Why that may be needed?
There are some events like touchmove on mobile devices (when the user moves their finger across the screen), that cause scrolling by default, but that scrolling can be prevented using preventDefault() in the handler.
So when the browser detects such event, it has first to process all handlers, and then if preventDefault is not called anywhere, it can proceed with scrolling.
That may cause unnecessary delays and “jitters” in the UI.
The passive: true options tells the browser that the handler is not going to cancel scrolling.
Then browser scrolls immediately providing a maximally fluent experience, and the event is handled by the way.
For some browsers (Firefox, Chrome), passive is true by default for touchstart and touchmove events.
- event.defaultPrevented
The property event.defaultPrevented is true if the default action was prevented, and false otherwise.
There's an interesting use case for it.
You remember in the chapter Bubbling and capturing we talked about event.stopPropagation() and why stopping bubbling is bad?
Sometimes we can use event.defaultPrevented instead, to signal other event handlers that the event was handled.
Let's see a practical example.
By default the browser on contextmenu event (right mouse click) shows a context menu with standard options.
We can prevent it and show our own, like this:
<button>Right-click shows browser context menu</button>
<button oncontextmenu="alert('Draw our menu'); return false">
Right-click shows our context menu
</button>
Now, in addition to that context menu we'd like to implement document-wide context menu.
Upon right click, the closest context menu should show up.
<p>Right-click here for the document context menu</p>
<button id="elem">Right-click here for the button context menu</button>
<script>
elem.oncontextmenu = function(event) {
event.preventDefault();
alert("Button context menu");
};
document.oncontextmenu = function(event) {
event.preventDefault();
alert("Document context menu");
};
</script>
The problem is that when we click on elem, we get two menus: the button-level and (the event bubbles up) the document-level menu.
How to fix it? One of solutions is to think like: “When we handle right-click in the button handler, let's stop its bubbling” and use event.stopPropagation():
<p>Right-click for the document menu</p>
<button id="elem">Right-click for the button menu (fixed with event.stopPropagation)</button>
<script>
elem.oncontextmenu = function(event) {
event.preventDefault();
event.stopPropagation();
alert("Button context menu");
};
document.oncontextmenu = function(event) {
event.preventDefault();
alert("Document context menu");
};
</script>
Now the button-level menu works as intended.
But the price is high.
We forever deny access to information about right-clicks for any outer code, including counters that gather statistics and so on.
That's quite unwise.
An alternative solution would be to check in the document handler if the default action was prevented? If it is so, then the event was handled, and we don't need to react on it.
<p>Right-click for the document menu (added a check for event.defaultPrevented)</p>
<button id="elem">Right-click for the button menu</button>
<script>
elem.oncontextmenu = function(event) {
event.preventDefault();
alert("Button context menu");
};
document.oncontextmenu = function(event) {
if (event.defaultPrevented) return;
event.preventDefault();
alert("Document context menu");
};
</script>
Now everything also works correctly.
If we have nested elements, and each of them has a context menu of its own, that would also work.
Just make sure to check for event.defaultPrevented in each contextmenu handler.
event.stopPropagation() and event.preventDefault()
As we can clearly see, event.stopPropagation() and event.preventDefault() (also known as return false) are two different things.
They are not related to each other.
Nested context menus architecture
There are also alternative ways to implement nested context menus.
One of them is to have a single global object with a handler for document.oncontextmenu, and also methods that allow us to store other handlers in it.
The object will catch any right-click, look through stored handlers and run the appropriate one.
But then each piece of code that wants a context menu should know about that object and use its help instead of the own contextmenu handler.
- Summary
There are many default browser actions:
mousedown – starts the selection (move the mouse to select).
click on <input type="checkbox"> – checks/unchecks the input.
submit – clicking an <input type="submit"> or hitting Enter inside a form field causes this event to happen, and the browser submits the form after it.
keydown – pressing a key may lead to adding a character into a field, or other actions.
contextmenu – the event happens on a right-click, the action is to show the browser context menu.
…there are more…
All the default actions can be prevented if we want to handle the event exclusively by JavaScript.
To prevent a default action – use either event.preventDefault() or return false.
The second method works only for handlers assigned with on<event>.
The passive: true option of addEventListener tells the browser that the action is not going to be prevented.
That's useful for some mobile events, like touchstart and touchmove, to tell the browser that it should not wait for all handlers to finish before scrolling.
If the default action was prevented, the value of event.defaultPrevented becomes true, otherwise it's false.
Stay semantic, don't abuse
Technically, by preventing default actions and adding JavaScript we can customize the behavior of any elements.
For instance, we can make a link <a> work like a button, and a button <button> behave as a link (redirect to another URL or so).
But we should generally keep the semantic meaning of HTML elements.
For instance, <a> should perform navigation, not a button.
Besides being “just a good thing”, that makes your HTML better in terms of accessibility.
Also if we consider the example with <a>, then please note: a browser allows us to open such links in a new window (by right-clicking them and other means).
And people like that.
But if we make a button behave as a link using JavaScript and even look like a link using CSS, then <a>-specific browser features still won't work for it.
importance: 3
Why in the code below return false doesn't work at all?
<script>
function handler() {
alert( "..." );
return false;
}
</script>
<a href="https://w3.org" onclick="handler()">the browser will go to w3.org</a>
The browser follows the URL on click, but we don't want it.
How to fix?
When the browser reads the on* attribute like onclick, it creates the handler from its content.
For onclick="handler()" the function will be:
function(event) {
handler() // the content of onclick
}
Now we can see that the value returned by handler() is not used and does not affect the result.
The fix is simple:
<script>
function handler() {
alert("...");
return false;
}
</script>
<a href="https://w3.org" onclick="return handler()">w3.org</a>
Also we can use event.preventDefault(), like this:
<script>
function handler(event) {
alert("...");
event.preventDefault();
}
</script>
<a href="https://w3.org" onclick="handler(event)">w3.org</a>
Catch links in the element
importance: 5
Make all links inside the element with id="contents" ask the user if they really want to leave.
And if they don't then don't follow.
Like this:
Details:
HTML inside the element may be loaded or regenerated dynamically at any time, so we can't find all links and put handlers on them.
Use event delegation.
The content may have nested tags.
Inside links too, like <a href=".."><i>...</i></a>.
Open a sandbox for the task.
That's a great use of the event delegation pattern.
In real life instead of asking we can send a “logging” request to the server that saves the information about where the visitor left.
Or we can load the content and show it right in the page (if allowable).
All we need is to catch the contents.onclick and use confirm to ask the user.
A good idea would be to use link.getAttribute('href') instead of link.href for the URL.
See the solution for details.
Open the solution in a sandbox.
We can not only assign handlers, but also generate events from JavaScript.
Custom events can be used to create “graphical components”.
For instance, a root element of our own JS-based menu may trigger events telling what happens with the menu: open (menu open), select (an item is selected) and so on.
Another code may listen for the events and observe what's happening with the menu.
We can generate not only completely new events, that we invent for our own purposes, but also built-in ones, such as click, mousedown etc.
That may be helpful for automated testing.
- Event constructor
Built-in event classes form a hierarchy, similar to DOM element classes.
The root is the built-in Event class.
We can create Event objects like this:
let event = new Event(type[, options]);
Arguments:
type – event type, a string like "click" or our own like "my-event".
options – the object with two optional properties:
bubbles: true/false – if true, then the event bubbles.
cancelable: true/false – if true, then the “default action” may be prevented.
Later we'll see what it means for custom events.
By default both are false: {bubbles: false, cancelable: false}.
- dispatchEvent
After an event object is created, we should “run” it on an element using the call elem.dispatchEvent(event).
Then handlers react on it as if it were a regular browser event.
If the event was created with the bubbles flag, then it bubbles.
In the example below the click event is initiated in JavaScript.
The handler works same way as if the button was clicked:
<button id="elem" onclick="alert('Click!');">Autoclick</button>
<script>
let event = new Event("click");
elem.dispatchEvent(event);
</script>
event.isTrusted
There is a way to tell a “real” user event from a script-generated one.
The property event.isTrusted is true for events that come from real user actions and false for script-generated events.
- Bubbling example
We can create a bubbling event with the name "hello" and catch it on document.
All we need is to set bubbles to true:
<h1 id="elem">Hello from the script!</h1>
<script>
// catch on document...
document.addEventListener("hello", function(event) { // (1)
alert("Hello from " + event.target.tagName); // Hello from H1
});
// ...dispatch on elem!
let event = new Event("hello", {bubbles: true}); // (2)
elem.dispatchEvent(event);
// the handler on document will activate and display the message.
</script>
Notes:
We should use addEventListener for our custom events, because on<event> only exists for built-in events, document.onhello doesn't work.
Must set bubbles:true, otherwise the event won't bubble up.
The bubbling mechanics is the same for built-in (click) and custom (hello) events.
There are also capturing and bubbling stages.
- MouseEvent, KeyboardEvent and others
Here's a short list of classes for UI Events from the UI Event specification:
UIEventFocusEventMouseEventWheelEventKeyboardEvent
…
We should use them instead of new Event if we want to create such events.
For instance, new MouseEvent("click").
The right constructor allows to specify standard properties for that type of event.
Like clientX/clientY for a mouse event:
let event = new MouseEvent("click", {
bubbles: true,
cancelable: true,
clientX: 100,
clientY: 100
});
alert(event.clientX); // 100
Please note: the generic Event constructor does not allow that.
Let's try:
let event = new Event("click", {
bubbles: true, // only bubbles and cancelable
cancelable: true, // work in the Event constructor
clientX: 100,
clientY: 100
});
alert(event.clientX); // undefined, the unknown property is ignored!
Technically, we can work around that by assigning directly event.clientX=100 after creation.
So that's a matter of convenience and following the rules.
Browser-generated events always have the right type.
The full list of properties for different UI events is in the specification, for instance, MouseEvent.
- Custom events
For our own, completely new events types like "hello" we should use new CustomEvent.
Technically CustomEvent is the same as Event, with one exception.
In the second argument (object) we can add an additional property detail for any custom information that we want to pass with the event.
For instance:
<h1 id="elem">Hello for John!</h1>
<script>
// additional details come with the event to the handler
elem.addEventListener("hello", function(event) {
alert(event.detail.name);
});
elem.dispatchEvent(new CustomEvent("hello", {
detail: { name: "John" }
}));
</script>
The detail property can have any data.
Technically we could live without, because we can assign any properties into a regular new Event object after its creation.
But CustomEvent provides the special detail field for it to evade conflicts with other event properties.
Besides, the event class describes “what kind of event” it is, and if the event is custom, then we should use CustomEvent just to be clear about what it is.
- event.preventDefault()
Many browser events have a “default action”, such as navigating to a link, starting a selection, and so on.
For new, custom events, there are definitely no default browser actions, but a code that dispatches such event may have its own plans what to do after triggering the event.
By calling event.preventDefault(), an event handler may send a signal that those actions should be canceled.
In that case the call to elem.dispatchEvent(event) returns false.
And the code that dispatched it knows that it shouldn't continue.
Let's see a practical example – a hiding rabbit (could be a closing menu or something else).
Below you can see a #rabbit and hide() function that dispatches "hide" event on it, to let all interested parties know that the rabbit is going to hide.
Any handler can listen for that event with rabbit.addEventListener('hide',...) and, if needed, cancel the action using event.preventDefault().
Then the rabbit won't disappear:
<pre id="rabbit">
|\ /|
\|_|/
/.
.\
=\_Y_/=
{>o<}
</pre>
<button onclick="hide()">Hide()</button>
<script>
function hide() {
let event = new CustomEvent("hide", {
cancelable: true // without that flag preventDefault doesn't work
});
if (!rabbit.dispatchEvent(event)) {
alert('The action was prevented by a handler');
} else {
rabbit.hidden = true;
}
}
rabbit.addEventListener('hide', function(event) {
if (confirm("Call preventDefault?")) {
event.preventDefault();
}
});
</script>
Please note: the event must have the flag cancelable: true, otherwise the call event.preventDefault() is ignored.
- Events-in-events are synchronous
Usually events are processed in a queue.
That is: if the browser is processing onclick and a new event occurs, e.g.
mouse moved, then it's handling is queued up, corresponding mousemove handlers will be called after onclick processing is finished.
The notable exception is when one event is initiated from within another one, e.g.
using dispatchEvent.
Such events are processed immediately: the new event handlers are called, and then the current event handling is resumed.
For instance, in the code below the menu-open event is triggered during the onclick.
It's processed immediately, without waiting for onclick handler to end:
<button id="menu">Menu (click me)</button>
<script>
menu.onclick = function() {
alert(1);
menu.dispatchEvent(new CustomEvent("menu-open", {
bubbles: true
}));
alert(2);
};
// triggers between 1 and 2
document.addEventListener('menu-open', () => alert('nested'));
</script>
The output order is: 1 → nested → 2.
Please note that the nested event menu-open is caught on the document.
The propagation and handling of the nested event is finished before the processing gets back to the outer code (onclick).
That's not only about dispatchEvent, there are other cases.
If an event handler calls methods that trigger other events – they are processed synchronously too, in a nested fashion.
Let's say we don't like it.
We'd want onclick to be fully processed first, independently from menu-open or any other nested events.
Then we can either put the dispatchEvent (or another event-triggering call) at the end of onclick or, maybe better, wrap it in the zero-delay setTimeout:
<button id="menu">Menu (click me)</button>
<script>
menu.onclick = function() {
alert(1);
setTimeout(() => menu.dispatchEvent(new CustomEvent("menu-open", {
bubbles: true
})));
alert(2);
};
document.addEventListener('menu-open', () => alert('nested'));
</script>
Now dispatchEvent runs asynchronously after the current code execution is finished, including menu.onclick, so event handlers are totally separate.
The output order becomes: 1 → 2 → nested.
- Summary
To generate an event from code, we first need to create an event object.
The generic Event(name, options) constructor accepts an arbitrary event name and the options object with two properties:
bubbles: true if the event should bubble.
cancelable: true if the event.preventDefault() should work.
Other constructors of native events like MouseEvent, KeyboardEvent and so on accept properties specific to that event type.
For instance, clientX for mouse events.
For custom events we should use CustomEvent constructor.
It has an additional option named detail, we should assign the event-specific data to it.
Then all handlers can access it as event.detail.
Despite the technical possibility of generating browser events like click or keydown, we should use them with great care.
We shouldn't generate browser events as it's a hacky way to run handlers.
That's bad architecture most of the time.
Native events might be generated:
As a dirty hack to make 3rd-party libraries work the needed way, if they don't provide other means of interaction.
For automated testing, to “click the button” in the script and see if the interface reacts correctly.
Custom events with our own names are often generated for architectural purposes, to signal what happens inside our menus, sliders, carousels etc.
TutorialBrowser: Document, Events, Interfaces
In this chapter we'll get into more details about mouse events and their properties.
Please note: such events may come not only from “mouse devices”, but are also from other devices, such as phones and tablets, where they are emulated for compatibility.
- Mouse event types
We've already seen some of these events:
mousedown/mouseup
Mouse button is clicked/released over an element.
mouseover/mouseout
Mouse pointer comes over/out from an element.
mousemove
Every mouse move over an element triggers that event.
click
Triggers after mousedown and then mouseup over the same element if the left mouse button was used.
dblclick
Triggers after two clicks on the same element within a short timeframe.
Rarely used nowadays.
contextmenu
Triggers when the right mouse button is pressed.
There are other ways to open a context menu, e.g.
using a special keyboard key, it triggers in that case also, so it's not exactly the mouse event.
…There are several other events too, we'll cover them later.
- Events order
As you can see from the list above, a user action may trigger multiple events.
For instance, a left-button click first triggers mousedown, when the button is pressed, then mouseup and click when it's released.
In cases when a single action initiates multiple events, their order is fixed.
That is, the handlers are called in the order mousedown → mouseup → click.
Click the button below and you'll see the events.
Try double-click too.
On the teststand below all mouse events are logged, and if there is more than a 1 second delay between them they are separated by a horizontal ruler.
Also we can see the button property that allows to detect the mouse button, it's explained below.
- Mouse button
Click-related events always have the button property, which allows to get the exact mouse button.
We usually don't use it for click and contextmenu events, because the former happens only on left-click, and the latter – only on right-click.
From the other hand, mousedown and mouseup handlers may need event.button, because these events trigger on any button, so button allows to distinguish between “right-mousedown” and “left-mousedown”.
The possible values of event.button are:
Button state
event.button
Left button (primary)
0
Middle button (auxiliary)
1
Right button (secondary)
2
X1 button (back)
3
X2 button (forward)
4
Most mouse devices only have the left and right buttons, so possible values are 0 or 2.
Touch devices also generate similar events when one taps on them.
Also there's event.buttons property that has all currently pressed buttons as an integer, one bit per button.
In practice this property is very rarely used, you can find details at MDN if you ever need it.
The outdated event.which
Old code may use event.which property that's an old non-standard way of getting a button, with possible values:
event.which == 1 – left button,
event.which == 2 – middle button,
event.which == 3 – right button.
As of now, event.which is deprecated, we shouldn't use it.
- Modifiers: shift, alt, ctrl and meta
All mouse events include the information about pressed modifier keys.
Event properties:
shiftKey: ShiftaltKey: Alt (or Opt for Mac)
ctrlKey: CtrlmetaKey: Cmd for Mac
They are true if the corresponding key was pressed during the event.
For instance, the button below only works on Alt+Shift+click:
<button id="button">Alt+Shift+Click on me!</button>
<script>
button.onclick = function(event) {
if (event.altKey && event.shiftKey) {
alert('Hooray!');
}
};
</script>
Attention: on Mac it's usually Cmd instead of Ctrl
On Windows and Linux there are modifier keys Alt, Shift and Ctrl.
On Mac there's one more: Cmd, corresponding to the property metaKey.
In most applications, when Windows/Linux uses Ctrl, on Mac Cmd is used.
That is: where a Windows user presses Ctrl+Enter or Ctrl+A, a Mac user would press Cmd+Enter or Cmd+A, and so on.
So if we want to support combinations like Ctrl+click, then for Mac it makes sense to use Cmd+click.
That's more comfortable for Mac users.
Even if we'd like to force Mac users to Ctrl+click – that's kind of difficult.
The problem is: a left-click with Ctrl is interpreted as a right-click on MacOS, and it generates the contextmenu event, not click like Windows/Linux.
So if we want users of all operating systems to feel comfortable, then together with ctrlKey we should check metaKey.
For JS-code it means that we should check if (event.ctrlKey || event.metaKey).
There are also mobile devices
Keyboard combinations are good as an addition to the workflow.
So that if the visitor uses a keyboard – they work.
But if their device doesn't have it – then there should be a way to live without modifier keys.
- Coordinates: clientX/Y, pageX/Y
All mouse events provide coordinates in two flavours:
Window-relative: clientX and clientY.
Document-relative: pageX and pageY.
We already covered the difference between them in the chapter Coordinates.
In short, document-relative coordinates pageX/Y are counted from the left-upper corner of the document, and do not change when the page is scrolled, while clientX/Y are counted from the current window left-upper corner.
When the page is scrolled, they change.
For instance, if we have a window of the size 500x500, and the mouse is in the left-upper corner, then clientX and clientY are 0, no matter how the page is scrolled.
And if the mouse is in the center, then clientX and clientY are 250, no matter what place in the document it is.
They are similar to position:fixed in that aspect.
Move the mouse over the input field to see clientX/clientY (the example is in the iframe, so coordinates are relative to that iframe):
<input onmousemove="this.value=event.clientX+':'+event.clientY" value="Mouse over me">
- Preventing selection on mousedown
Double mouse click has a side-effect that may be disturbing in some interfaces: it selects text.
For instance, double-clicking on the text below selects it in addition to our handler:
<span ondblclick="alert('dblclick')">Double-click me</span>
If one presses the left mouse button and, without releasing it, moves the mouse, that also makes the selection, often unwanted.
There are multiple ways to prevent the selection, that you can read in the chapter Selection and Range.
In this particular case the most reasonable way is to prevent the browser action on mousedown.
It prevents both these selections:
Before...
<b ondblclick="alert('Click!')" onmousedown="return false">
Double-click me
</b>
...After
Now the bold element is not selected on double clicks, and pressing the left button on it won't start the selection.
Please note: the text inside it is still selectable.
However, the selection should start not on the text itself, but before or after it.
Usually that's fine for users.
Preventing copying
If we want to disable selection to protect our page content from copy-pasting, then we can use another event: oncopy.
<div oncopy="alert('Copying forbidden!');return false">
Dear user,
The copying is forbidden for you.
If you know JS or HTML, then you can get everything from the page source though.
</div>
If you try to copy a piece of text in the <div>, that won't work, because the default action oncopy is prevented.
Surely the user has access to HTML-source of the page, and can take the content from there, but not everyone knows how to do it.
- Summary
Mouse events have the following properties:
Button: button.
Modifier keys (true if pressed): altKey, ctrlKey, shiftKey and metaKey (Mac).
If you want to handle Ctrl, then don't forget Mac users, they usually use Cmd, so it's better to check if (e.metaKey || e.ctrlKey).
Window-relative coordinates: clientX/clientY.
Document-relative coordinates: pageX/pageY.
The default browser action of mousedown is text selection, if it's not good for the interface, then it should be prevented.
In the next chapter we'll see more details about events that follow pointer movement and how to track element changes under it.
importance: 5
Create a list where elements are selectable, like in file-managers.
A click on a list element selects only that element (adds the class .selected), deselects all others.
If a click is made with Ctrl (Cmd for Mac), then the selection is toggled on the element, but other elements are not modified.
The demo:
P.S.
For this task we can assume that list items are text-only.
No nested tags.
P.P.S.
Prevent the native browser selection of the text on clicks.
Open a sandbox for the task.Open the solution in a sandbox.Browser: Document, Events, InterfacesUI Events
Moving the mouse: mouseover/out, mouseenter/leave
Let's dive into more details about events that happen when the mouse moves between elements.
- Events mouseover/mouseout, relatedTarget
The mouseover event occurs when a mouse pointer comes over an element, and mouseout – when it leaves.
These events are special, because they have property relatedTarget.
This property complements target.
When a mouse leaves one element for another, one of them becomes target, and the other one – relatedTarget.
For mouseover:
event.target – is the element where the mouse came over.
event.relatedTarget – is the element from which the mouse came (relatedTarget → target).
For mouseout the reverse:
event.target – is the element that the mouse left.
event.relatedTarget – is the new under-the-pointer element, that mouse left for (target → relatedTarget).
In the example below each face and its features are separate elements.
When you move the mouse, you can see mouse events in the text area.
Each event has the information about both target and relatedTarget:
Result
script.js
style.css
index.html
container.onmouseover = container.onmouseout = handler;
function handler(event) {
function str(el) {
if (!el) return "null"
return el.className || el.tagName;
}
log.value += event.type + ': ' +
'target=' + str(event.target) +
', relatedTarget=' + str(event.relatedTarget) + "\n";
log.scrollTop = log.scrollHeight;
if (event.type == 'mouseover') {
event.target.style.background = 'pink'
}
if (event.type == 'mouseout') {
event.target.style.background = ''
}
}body,
html {
margin: 0;
padding: 0;
}
#container {
border: 1px solid brown;
padding: 10px;
width: 330px;
margin-bottom: 5px;
box-sizing: border-box;
}
#log {
height: 120px;
width: 350px;
display: block;
box-sizing: border-box;
}
[class^="smiley-"] {
display: inline-block;
width: 70px;
height: 70px;
border-radius: 50%;
margin-right: 20px;
}
.smiley-green {
background: #a9db7a;
border: 5px solid #92c563;
position: relative;
}
.smiley-green .left-eye {
width: 18%;
height: 18%;
background: #84b458;
position: relative;
top: 29%;
left: 22%;
border-radius: 50%;
float: left;
}
.smiley-green .right-eye {
width: 18%;
height: 18%;
border-radius: 50%;
position: relative;
background: #84b458;
top: 29%;
right: 22%;
float: right;
}
.smiley-green .smile {
position: absolute;
top: 67%;
left: 16.5%;
width: 70%;
height: 20%;
overflow: hidden;
}
.smiley-green .smile:after,
.smiley-green .smile:before {
content: "";
position: absolute;
top: -50%;
left: 0%;
border-radius: 50%;
background: #84b458;
height: 100%;
width: 97%;
}
.smiley-green .smile:after {
background: #84b458;
height: 80%;
top: -40%;
left: 0%;
}
.smiley-yellow {
background: #eed16a;
border: 5px solid #dbae51;
position: relative;
}
.smiley-yellow .left-eye {
width: 18%;
height: 18%;
background: #dba652;
position: relative;
top: 29%;
left: 22%;
border-radius: 50%;
float: left;
}
.smiley-yellow .right-eye {
width: 18%;
height: 18%;
border-radius: 50%;
position: relative;
background: #dba652;
top: 29%;
right: 22%;
float: right;
}
.smiley-yellow .smile {
position: absolute;
top: 67%;
left: 19%;
width: 65%;
height: 14%;
background: #dba652;
overflow: hidden;
border-radius: 8px;
}
.smiley-red {
background: #ee9295;
border: 5px solid #e27378;
position: relative;
}
.smiley-red .left-eye {
width: 18%;
height: 18%;
background: #d96065;
position: relative;
top: 29%;
left: 22%;
border-radius: 50%;
float: left;
}
.smiley-red .right-eye {
width: 18%;
height: 18%;
border-radius: 50%;
position: relative;
background: #d96065;
top: 29%;
right: 22%;
float: right;
}
.smiley-red .smile {
position: absolute;
top: 57%;
left: 16.5%;
width: 70%;
height: 20%;
overflow: hidden;
}
.smiley-red .smile:after,
.smiley-red .smile:before {
content: "";
position: absolute;
top: 50%;
left: 0%;
border-radius: 50%;
background: #d96065;
height: 100%;
width: 97%;
}
.smiley-red .smile:after {
background: #d96065;
height: 80%;
top: 60%;
left: 0%;
}<!DOCTYPE HTML>
<html>
<head>
<meta charset="utf-8">
<link rel="stylesheet" href="style.css">
</head>
<body>
<div id="container">
<div class="smiley-green">
<div class="left-eye"></div>
<div class="right-eye"></div>
<div class="smile"></div>
</div>
<div class="smiley-yellow">
<div class="left-eye"></div>
<div class="right-eye"></div>
<div class="smile"></div>
</div>
<div class="smiley-red">
<div class="left-eye"></div>
<div class="right-eye"></div>
<div class="smile"></div>
</div>
</div>
<textarea id="log">Events will show up here!
</textarea>
<script src="script.js"></script>
</body>
</html>relatedTarget can be null
The relatedTarget property can be null.
That's normal and just means that the mouse came not from another element, but from out of the window.
Or that it left the window.
We should keep that possibility in mind when using event.relatedTarget in our code.
If we access event.relatedTarget.tagName, then there will be an error.
- Skipping elements
The mousemove event triggers when the mouse moves.
But that doesn't mean that every pixel leads to an event.
The browser checks the mouse position from time to time.
And if it notices changes then triggers the events.
That means that if the visitor is moving the mouse very fast then some DOM-elements may be skipped:
If the mouse moves very fast from #FROM to #TO elements as painted above, then intermediate <div> elements (or some of them) may be skipped.
The mouseout event may trigger on #FROM and then immediately mouseover on #TO.
That's good for performance, because there may be many intermediate elements.
We don't really want to process in and out of each one.
On the other hand, we should keep in mind that the mouse pointer doesn't “visit” all elements along the way.
It can “jump”.
In particular, it's possible that the pointer jumps right inside the middle of the page from out of the window.
In that case relatedTarget is null, because it came from “nowhere”:
You can check it out “live” on a teststand below.
Its HTML has two nested elements: the <div id="child"> is inside the <div id="parent">.
If you move the mouse fast over them, then maybe only the child div triggers events, or maybe the parent one, or maybe there will be no events at all.
Also move the pointer into the child div, and then move it out quickly down through the parent one.
If the movement is fast enough, then the parent element is ignored.
The mouse will cross the parent element without noticing it.
Result
script.js
style.css
index.html
let parent = document.getElementById('parent');
parent.onmouseover = parent.onmouseout = parent.onmousemove = handler;
function handler(event) {
let type = event.type;
while (type < 11) type += ' ';
log(type + " target=" + event.target.id)
return false;
}
function clearText() {
text.value = "";
lastMessage = "";
}
let lastMessageTime = 0;
let lastMessage = "";
let repeatCounter = 1;
function log(message) {
if (lastMessageTime == 0) lastMessageTime = new Date();
let time = new Date();
if (time - lastMessageTime > 500) {
message = '------------------------------\n' + message;
}
if (message === lastMessage) {
repeatCounter++;
if (repeatCounter == 2) {
text.value = text.value.trim() + ' x 2\n';
} else {
text.value = text.value.slice(0, text.value.lastIndexOf('x') + 1) + repeatCounter + "\n";
}
} else {
repeatCounter = 1;
text.value += message + "\n";
}
text.scrollTop = text.scrollHeight;
lastMessageTime = time;
lastMessage = message;
}#parent {
background: #99C0C3;
width: 160px;
height: 120px;
position: relative;
}
#child {
background: #FFDE99;
width: 50%;
height: 50%;
position: absolute;
left: 50%;
top: 50%;
transform: translate(-50%, -50%);
}
textarea {
height: 140px;
width: 300px;
display: block;
}<!doctype html>
<html>
<head>
<meta charset="UTF-8">
<link rel="stylesheet" href="style.css">
</head>
<body>
<div id="parent">parent
<div id="child">child</div>
</div>
<textarea id="text"></textarea>
<input onclick="clearText()" value="Clear" type="button">
<script src="script.js"></script>
</body>
</html>
If mouseover triggered, there must be mouseout
In case of fast mouse movements, intermediate elements may be ignored, but one thing we know for sure: if the pointer “officially” entered an element (mouseover event generated), then upon leaving it we always get mouseout.
- Mouseout when leaving for a child
An important feature of mouseout – it triggers, when the pointer moves from an element to its descendant, e.g.
from #parent to #child in this HTML:
<div id="parent">
<div id="child">...</div>
</div>
If we're on #parent and then move the pointer deeper into #child, we get mouseout on #parent!
That may seem strange, but can be easily explained.
According to the browser logic, the mouse cursor may be only over a single element at any time – the most nested one and top by z-index.
So if it goes to another element (even a descendant), then it leaves the previous one.
Please note another important detail of event processing.
The mouseover event on a descendant bubbles up.
So, if #parent has mouseover handler, it triggers:
You can see that very well in the example below: <div id="child"> is inside the <div id="parent">.
There are mouseover/out handlers on #parent element that output event details.
If you move the mouse from #parent to #child, you see two events on #parent:
mouseout [target: parent] (left the parent), then
mouseover [target: child] (came to the child, bubbled).
Result
script.js
style.css
index.html
function mouselog(event) {
let d = new Date();
text.value += `${d.getHours()}:${d.getMinutes()}:${d.getSeconds()} | ${event.type} [target: ${event.target.id}]\n`.replace(/(:|^)(\d\D)/, '$10$2');
text.scrollTop = text.scrollHeight;
}#parent {
background: #99C0C3;
width: 160px;
height: 120px;
position: relative;
}
#child {
background: #FFDE99;
width: 50%;
height: 50%;
position: absolute;
left: 50%;
top: 50%;
transform: translate(-50%, -50%);
}
textarea {
height: 140px;
width: 300px;
display: block;
}<!doctype html>
<html>
<head>
<meta charset="UTF-8">
<link rel="stylesheet" href="style.css">
</head>
<body>
<div id="parent" onmouseover="mouselog(event)" onmouseout="mouselog(event)">parent
<div id="child">child</div>
</div>
<textarea id="text"></textarea>
<input type="button" onclick="text.value=''" value="Clear">
<script src="script.js"></script>
</body>
</html>
As shown, when the pointer moves from #parent element to #child, two handlers trigger on the parent element: mouseout and mouseover:
parent.onmouseout = function(event) {
/* event.target: parent element */
};
parent.onmouseover = function(event) {
/* event.target: child element (bubbled) */
};If we don't examine event.target inside the handlers, then it may seem that the mouse pointer left #parent element, and then immediately came back over it.
But that's not the case! The pointer is still over the parent, it just moved deeper into the child element.
If there are some actions upon leaving the parent element, e.g.
an animation runs in parent.onmouseout, we usually don't want it when the pointer just goes deeper into #parent.
To avoid it, we can check relatedTarget in the handler and, if the mouse is still inside the element, then ignore such event.
Alternatively we can use other events: mouseenter and mouseleave, that we'll be covering now, as they don't have such problems.
- Events mouseenter and mouseleave
Events mouseenter/mouseleave are like mouseover/mouseout.
They trigger when the mouse pointer enters/leaves the element.
But there are two important differences:
Transitions inside the element, to/from descendants, are not counted.
Events mouseenter/mouseleave do not bubble.
These events are extremely simple.
When the pointer enters an element – mouseenter triggers.
The exact location of the pointer inside the element or its descendants doesn't matter.
When the pointer leaves an element – mouseleave triggers.
This example is similar to the one above, but now the top element has mouseenter/mouseleave instead of mouseover/mouseout.
As you can see, the only generated events are the ones related to moving the pointer in and out of the top element.
Nothing happens when the pointer goes to the child and back.
Transitions between descendants are ignored
Result
script.js
style.css
index.html
function mouselog(event) {
let d = new Date();
text.value += `${d.getHours()}:${d.getMinutes()}:${d.getSeconds()} | ${event.type} [target: ${event.target.id}]\n`.replace(/(:|^)(\d\D)/, '$10$2');
text.scrollTop = text.scrollHeight;
}#parent {
background: #99C0C3;
width: 160px;
height: 120px;
position: relative;
}
#child {
background: #FFDE99;
width: 50%;
height: 50%;
position: absolute;
left: 50%;
top: 50%;
transform: translate(-50%, -50%);
}
textarea {
height: 140px;
width: 300px;
display: block;
}<!doctype html>
<html>
<head>
<meta charset="UTF-8">
<link rel="stylesheet" href="style.css">
</head>
<body>
<div id="parent" onmouseenter="mouselog(event)" onmouseleave="mouselog(event)">parent
<div id="child">child</div>
</div>
<textarea id="text"></textarea>
<input type="button" onclick="text.value=''" value="Clear">
<script src="script.js"></script>
</body>
</html>
- Event delegation
Events mouseenter/leave are very simple and easy to use.
But they do not bubble.
So we can't use event delegation with them.
Imagine we want to handle mouse enter/leave for table cells.
And there are hundreds of cells.
The natural solution would be – to set the handler on <table> and process events there.
But mouseenter/leave don't bubble.
So if such event happens on <td>, then only a handler on that <td> is able to catch it.
Handlers for mouseenter/leave on <table> only trigger when the pointer enters/leaves the table as a whole.
It's impossible to get any information about transitions inside it.
So, let's use mouseover/mouseout.
Let's start with simple handlers that highlight the element under mouse:
// let's highlight an element under the pointer
table.onmouseover = function(event) {
let target = event.target;
target.style.background = 'pink';
};
table.onmouseout = function(event) {
let target = event.target;
target.style.background = '';
};
Here they are in action.
As the mouse travels across the elements of this table, the current one is highlighted:
Result
script.js
style.css
index.html
table.onmouseover = function(event) {
let target = event.target;
target.style.background = 'pink';
text.value += `over -> ${target.tagName}\n`;
text.scrollTop = text.scrollHeight;
};
table.onmouseout = function(event) {
let target = event.target;
target.style.background = '';
text.value += `out <- ${target.tagName}\n`;
text.scrollTop = text.scrollHeight;
};#text {
display: block;
height: 100px;
width: 456px;
}
#table th {
text-align: center;
font-weight: bold;
}
#table td {
width: 150px;
white-space: nowrap;
text-align: center;
vertical-align: bottom;
padding-top: 5px;
padding-bottom: 12px;
cursor: pointer;
}
#table .nw {
background: #999;
}
#table .n {
background: #03f;
color: #fff;
}
#table .ne {
background: #ff6;
}
#table .w {
background: #ff0;
}
#table .c {
background: #60c;
color: #fff;
}
#table .e {
background: #09f;
color: #fff;
}
#table .sw {
background: #963;
color: #fff;
}
#table .s {
background: #f60;
color: #fff;
}
#table .se {
background: #0c3;
color: #fff;
}
#table .highlight {
background: red;
}<!DOCTYPE HTML>
<html>
<head>
<meta charset="utf-8">
<link rel="stylesheet" href="style.css">
</head>
<body>
<table id="table">
<tr>
<th colspan="3"><em>Bagua</em> Chart: Direction, Element, Color, Meaning</th>
</tr>
<tr>
<td class="nw"><strong>Northwest</strong>
<br>Metal
<br>Silver
<br>Elders
</td>
<td class="n"><strong>North</strong>
<br>Water
<br>Blue
<br>Change
</td>
<td class="ne"><strong>Northeast</strong>
<br>Earth
<br>Yellow
<br>Direction
</td>
</tr>
<tr>
<td class="w"><strong>West</strong>
<br>Metal
<br>Gold
<br>Youth
</td>
<td class="c"><strong>Center</strong>
<br>All
<br>Purple
<br>Harmony
</td>
<td class="e"><strong>East</strong>
<br>Wood
<br>Blue
<br>Future
</td>
</tr>
<tr>
<td class="sw"><strong>Southwest</strong>
<br>Earth
<br>Brown
<br>Tranquility
</td>
<td class="s"><strong>South</strong>
<br>Fire
<br>Orange
<br>Fame
</td>
<td class="se"><strong>Southeast</strong>
<br>Wood
<br>Green
<br>Romance
</td>
</tr>
</table>
<textarea id="text"></textarea>
<input type="button" onclick="text.value=''" value="Clear">
<script src="script.js"></script>
</body>
</html>
In our case we'd like to handle transitions between table cells <td>: entering a cell and leaving it.
Other transitions, such as inside the cell or outside of any cells, don't interest us.
Let's filter them out.
Here's what we can do:
Remember the currently highlighted <td> in a variable, let's call it currentElem.
On mouseover – ignore the event if we're still inside the current <td>.
On mouseout – ignore if we didn't leave the current <td>.
Here's an example of code that accounts for all possible situations:
// <td> under the mouse right now (if any)
let currentElem = null;
table.onmouseover = function(event) {
// before entering a new element, the mouse always leaves the previous one
// if currentElem is set, we didn't leave the previous <td>,
// that's a mouseover inside it, ignore the event
if (currentElem) return;
let target = event.target.closest('td');
// we moved not into a <td> - ignore
if (!target) return;
// moved into <td>, but outside of our table (possible in case of nested tables)
// ignore
if (!table.contains(target)) return;
// hooray! we entered a new <td>
currentElem = target;
onEnter(currentElem);
};
table.onmouseout = function(event) {
// if we're outside of any <td> now, then ignore the event
// that's probably a move inside the table, but out of <td>,
// e.g.
from <tr> to another <tr>
if (!currentElem) return;
// we're leaving the element – where to? Maybe to a descendant?
let relatedTarget = event.relatedTarget;
while (relatedTarget) {
// go up the parent chain and check – if we're still inside currentElem
// then that's an internal transition – ignore it
if (relatedTarget == currentElem) return;
relatedTarget = relatedTarget.parentNode;
}
// we left the <td>.
really.
onLeave(currentElem);
currentElem = null;
};
// any functions to handle entering/leaving an element
function onEnter(elem) {
elem.style.background = 'pink';
// show that in textarea
text.value += `over -> ${currentElem.tagName}.${currentElem.className}\n`;
text.scrollTop = 1e6;
}
function onLeave(elem) {
elem.style.background = '';
// show that in textarea
text.value += `out <- ${elem.tagName}.${elem.className}\n`;
text.scrollTop = 1e6;
}
Once again, the important features are:
It uses event delegation to handle entering/leaving of any <td> inside the table.
So it relies on mouseover/out instead of mouseenter/leave that don't bubble and hence allow no delegation.
Extra events, such as moving between descendants of <td> are filtered out, so that onEnter/Leave runs only if the pointer leaves or enters <td> as a whole.
Here's the full example with all details:
Result
script.js
style.css
index.html
// <td> under the mouse right now (if any)
let currentElem = null;
table.onmouseover = function(event) {
// before entering a new element, the mouse always leaves the previous one
// if currentElem is set, we didn't leave the previous <td>,
// that's a mouseover inside it, ignore the event
if (currentElem) return;
let target = event.target.closest('td');
// we moved not into a <td> - ignore
if (!target) return;
// moved into <td>, but outside of our table (possible in case of nested tables)
// ignore
if (!table.contains(target)) return;
// hooray! we entered a new <td>
currentElem = target;
onEnter(currentElem);
};
table.onmouseout = function(event) {
// if we're outside of any <td> now, then ignore the event
// that's probably a move inside the table, but out of <td>,
// e.g.
from <tr> to another <tr>
if (!currentElem) return;
// we're leaving the element – where to? Maybe to a descendant?
let relatedTarget = event.relatedTarget;
while (relatedTarget) {
// go up the parent chain and check – if we're still inside currentElem
// then that's an internal transition – ignore it
if (relatedTarget == currentElem) return;
relatedTarget = relatedTarget.parentNode;
}
// we left the <td>.
really.
onLeave(currentElem);
currentElem = null;
};
// any functions to handle entering/leaving an element
function onEnter(elem) {
elem.style.background = 'pink';
// show that in textarea
text.value += `over -> ${currentElem.tagName}.${currentElem.className}\n`;
text.scrollTop = 1e6;
}
function onLeave(elem) {
elem.style.background = '';
// show that in textarea
text.value += `out <- ${elem.tagName}.${elem.className}\n`;
text.scrollTop = 1e6;
}#text {
display: block;
height: 100px;
width: 456px;
}
#table th {
text-align: center;
font-weight: bold;
}
#table td {
width: 150px;
white-space: nowrap;
text-align: center;
vertical-align: bottom;
padding-top: 5px;
padding-bottom: 12px;
cursor: pointer;
}
#table .nw {
background: #999;
}
#table .n {
background: #03f;
color: #fff;
}
#table .ne {
background: #ff6;
}
#table .w {
background: #ff0;
}
#table .c {
background: #60c;
color: #fff;
}
#table .e {
background: #09f;
color: #fff;
}
#table .sw {
background: #963;
color: #fff;
}
#table .s {
background: #f60;
color: #fff;
}
#table .se {
background: #0c3;
color: #fff;
}
#table .highlight {
background: red;
}<!DOCTYPE HTML>
<html>
<head>
<meta charset="utf-8">
<link rel="stylesheet" href="style.css">
</head>
<body>
<table id="table">
<tr>
<th colspan="3"><em>Bagua</em> Chart: Direction, Element, Color, Meaning</th>
</tr>
<tr>
<td class="nw"><strong>Northwest</strong>
<br>Metal
<br>Silver
<br>Elders
</td>
<td class="n"><strong>North</strong>
<br>Water
<br>Blue
<br>Change
</td>
<td class="ne"><strong>Northeast</strong>
<br>Earth
<br>Yellow
<br>Direction
</td>
</tr>
<tr>
<td class="w"><strong>West</strong>
<br>Metal
<br>Gold
<br>Youth
</td>
<td class="c"><strong>Center</strong>
<br>All
<br>Purple
<br>Harmony
</td>
<td class="e"><strong>East</strong>
<br>Wood
<br>Blue
<br>Future
</td>
</tr>
<tr>
<td class="sw"><strong>Southwest</strong>
<br>Earth
<br>Brown
<br>Tranquility
</td>
<td class="s"><strong>South</strong>
<br>Fire
<br>Orange
<br>Fame
</td>
<td class="se"><strong>Southeast</strong>
<br>Wood
<br>Green
<br>Romance
</td>
</tr>
</table>
<textarea id="text"></textarea>
<input type="button" onclick="text.value=''" value="Clear">
<script src="script.js"></script>
</body>
</html>
Try to move the cursor in and out of table cells and inside them.
Fast or slow – doesn't matter.
Only <td> as a whole is highlighted, unlike the example before.
- Summary
We covered events mouseover, mouseout, mousemove, mouseenter and mouseleave.
These things are good to note:
A fast mouse move may skip intermediate elements.
Events mouseover/out and mouseenter/leave have an additional property: relatedTarget.
That's the element that we are coming from/to, complementary to target.
Events mouseover/out trigger even when we go from the parent element to a child element.
The browser assumes that the mouse can be only over one element at one time – the deepest one.
Events mouseenter/leave are different in that aspect: they only trigger when the mouse comes in and out the element as a whole.
Also they do not bubble.
importance: 5
Write JavaScript that shows a tooltip over an element with the attribute data-tooltip.
The value of this attribute should become the tooltip text.
That's like the task Tooltip behavior, but here the annotated elements can be nested.
The most deeply nested tooltip is shown.
Only one tooltip may show up at the same time.
For instance:
<div data-tooltip="Here – is the house interior" id="house">
<div data-tooltip="Here – is the roof" id="roof"></div>
...
<a href="https://en.wikipedia.org/wiki/The_Three_Little_Pigs" data-tooltip="Read on…">Hover over me</a>
</div>
The result in iframe:
Open a sandbox for the task.Open the solution in a sandbox.
"Smart" tooltip
importance: 5
Write a function that shows a tooltip over an element only if the visitor moves the mouse to it, but not through it.
In other words, if the visitor moves the mouse to the element and stops there – show the tooltip.
And if they just moved the mouse through, then no need, who wants extra blinking?
Technically, we can measure the mouse speed over the element, and if it's slow then we assume that it comes “over the element” and show the tooltip, if it's fast – then we ignore it.
Make a universal object new HoverIntent(options) for it.
Its options:
elem – element to track.
over – a function to call if the mouse came to the element: that is, it moves slowly or stopped over it.
out – a function to call when the mouse leaves the element (if over was called).
An example of using such object for the tooltip:
// a sample tooltip
let tooltip = document.createElement('div');
tooltip.className = "tooltip";
tooltip.innerHTML = "Tooltip";
// the object will track mouse and call over/out
new HoverIntent({
elem,
over() {
tooltip.style.left = elem.getBoundingClientRect().left + 'px';
tooltip.style.top = elem.getBoundingClientRect().bottom + 5 + 'px';
document.body.append(tooltip);
},
out() {
tooltip.remove();
}
});
The demo:
If you move the mouse over the “clock” fast then nothing happens, and if you do it slow or stop on them, then there will be a tooltip.
Please note: the tooltip doesn't “blink” when the cursor moves between the clock subelements.
Open a sandbox with tests.
The algorithm looks simple:
Put onmouseover/out handlers on the element.
Also can use onmouseenter/leave here, but they are less universal, won't work if we introduce delegation.
When a mouse cursor entered the element, start measuring the speed on mousemove.
If the speed is slow, then run over.
When we're going out of the element, and over was executed, run out.
But how to measure the speed?
The first idea can be: run a function every 100ms and measure the distance between previous and new coordinates.
If it's small, then the speed is small.
Unfortunately, there's no way to get “current mouse coordinates” in JavaScript.
There's no function like getCurrentMouseCoordinates().
The only way to get coordinates is to listen for mouse events, like mousemove, and take coordinates from the event object.
So let's set a handler on mousemove to track coordinates and remember them.
And then compare them, once per 100ms.
P.S.
Please note: the solution tests use dispatchEvent to see if the tooltip works right.
Open the solution with tests in a sandbox.Browser: Document, Events, InterfacesUI Events
Drag'n'Drop with mouse events
Drag'n'Drop is a great interface solution.
Taking something and dragging and dropping it is a clear and simple way to do many things, from copying and moving documents (as in file managers) to ordering (dropping items into a cart).
In the modern HTML standard there's a section about Drag and Drop with special events such as dragstart, dragend, and so on.
These events allow us to support special kinds of drag'n'drop, such as handling dragging a file from OS file-manager and dropping it into the browser window.
Then JavaScript can access the contents of such files.
But native Drag Events also have limitations.
For instance, we can't prevent dragging from a certain area.
Also we can't make the dragging “horizontal” or “vertical” only.
And there are many other drag'n'drop tasks that can't be done using them.
Also, mobile device support for such events is very weak.
So here we'll see how to implement Drag'n'Drop using mouse events.
- Drag'n'Drop algorithm
The basic Drag'n'Drop algorithm looks like this:
On mousedown – prepare the element for moving, if needed (maybe create a clone of it, add a class to it or whatever).
Then on mousemove move it by changing left/top with position:absolute.
On mouseup – perform all actions related to finishing the drag'n'drop.
These are the basics.
Later we'll see how to other features, such as highlighting current underlying elements while we drag over them.
Here's the implementation of dragging a ball:
ball.onmousedown = function(event) {
// (1) prepare to moving: make absolute and on top by z-index
ball.style.position = 'absolute';
ball.style.zIndex = 1000;
// move it out of any current parents directly into body
// to make it positioned relative to the body
document.body.append(ball);
// centers the ball at (pageX, pageY) coordinates
function moveAt(pageX, pageY) {
ball.style.left = pageX - ball.offsetWidth / 2 + 'px';
ball.style.top = pageY - ball.offsetHeight / 2 + 'px';
}
// move our absolutely positioned ball under the pointer
moveAt(event.pageX, event.pageY);
function onMouseMove(event) {
moveAt(event.pageX, event.pageY);
}
// (2) move the ball on mousemove
document.addEventListener('mousemove', onMouseMove);
// (3) drop the ball, remove unneeded handlers
ball.onmouseup = function() {
document.removeEventListener('mousemove', onMouseMove);
ball.onmouseup = null;
};
};
If we run the code, we can notice something strange.
On the beginning of the drag'n'drop, the ball “forks”: we start dragging its “clone”.
Here's an example in action:
Try to drag'n'drop with the mouse and you'll see such behavior.
That's because the browser has its own drag'n'drop support for images and some other elements.
It runs automatically and conflicts with ours.
To disable it:
ball.ondragstart = function() {
return false;
};
Now everything will be all right.
In action:
Another important aspect – we track mousemove on document, not on ball.
From the first sight it may seem that the mouse is always over the ball, and we can put mousemove on it.
But as we remember, mousemove triggers often, but not for every pixel.
So after swift move the pointer can jump from the ball somewhere in the middle of document (or even outside of the window).
So we should listen on document to catch it.
- Correct positioning
In the examples above the ball is always moved so, that it's center is under the pointer:
ball.style.left = pageX - ball.offsetWidth / 2 + 'px';
ball.style.top = pageY - ball.offsetHeight / 2 + 'px';
Not bad, but there's a side-effect.
To initiate the drag'n'drop, we can mousedown anywhere on the ball.
But if “take” it from its edge, then the ball suddenly “jumps” to become centered under the mouse pointer.
It would be better if we keep the initial shift of the element relative to the pointer.
For instance, if we start dragging by the edge of the ball, then the pointer should remain over the edge while dragging.
Let's update our algorithm:
When a visitor presses the button (mousedown) – remember the distance from the pointer to the left-upper corner of the ball in variables shiftX/shiftY.
We'll keep that distance while dragging.
To get these shifts we can substract the coordinates:
// onmousedown
let shiftX = event.clientX - ball.getBoundingClientRect().left;
let shiftY = event.clientY - ball.getBoundingClientRect().top;
Then while dragging we position the ball on the same shift relative to the pointer, like this:
// onmousemove
// ball has position:absoute
ball.style.left = event.pageX - shiftX + 'px';
ball.style.top = event.pageY - shiftY + 'px';
The final code with better positioning:
ball.onmousedown = function(event) {
let shiftX = event.clientX - ball.getBoundingClientRect().left;
let shiftY = event.clientY - ball.getBoundingClientRect().top;
ball.style.position = 'absolute';
ball.style.zIndex = 1000;
document.body.append(ball);
moveAt(event.pageX, event.pageY);
// moves the ball at (pageX, pageY) coordinates
// taking initial shifts into account
function moveAt(pageX, pageY) {
ball.style.left = pageX - shiftX + 'px';
ball.style.top = pageY - shiftY + 'px';
}
function onMouseMove(event) {
moveAt(event.pageX, event.pageY);
}
// move the ball on mousemove
document.addEventListener('mousemove', onMouseMove);
// drop the ball, remove unneeded handlers
ball.onmouseup = function() {
document.removeEventListener('mousemove', onMouseMove);
ball.onmouseup = null;
};
};
ball.ondragstart = function() {
return false;
};
In action (inside <iframe>):
The difference is especially noticeable if we drag the ball by its right-bottom corner.
In the previous example the ball “jumps” under the pointer.
Now it fluently follows the pointer from the current position.
- Potential drop targets (droppables)
In previous examples the ball could be dropped just “anywhere” to stay.
In real-life we usually take one element and drop it onto another.
For instance, a “file” into a “folder” or something else.
Speaking abstract, we take a “draggable” element and drop it onto “droppable” element.
We need to know:
where the element was dropped at the end of Drag'n'Drop – to do the corresponding action,
and, preferably, know the droppable we're dragging over, to highlight it.
The solution is kind-of interesting and just a little bit tricky, so let's cover it here.
What may be the first idea? Probably to set mouseover/mouseup handlers on potential droppables?
But that doesn't work.
The problem is that, while we're dragging, the draggable element is always above other elements.
And mouse events only happen on the top element, not on those below it.
For instance, below are two <div> elements, red one on top of the blue one (fully covers).
There's no way to catch an event on the blue one, because the red is on top:
<style>
div {
width: 50px;
height: 50px;
position: absolute;
top: 0;
}
</style>
<div style="background:blue" onmouseover="alert('never works')"></div>
<div style="background:red" onmouseover="alert('over red!')"></div>
The same with a draggable element.
The ball is always on top over other elements, so events happen on it.
Whatever handlers we set on lower elements, they won't work.
That's why the initial idea to put handlers on potential droppables doesn't work in practice.
They won't run.
So, what to do?
There's a method called document.elementFromPoint(clientX, clientY).
It returns the most nested element on given window-relative coordinates (or null if given coordinates are out of the window).
We can use it in any of our mouse event handlers to detect the potential droppable under the pointer, like this:
// in a mouse event handler
ball.hidden = true; // (*) hide the element that we drag
let elemBelow = document.elementFromPoint(event.clientX, event.clientY);
// elemBelow is the element below the ball, may be droppable
ball.hidden = false;
Please note: we need to hide the ball before the call (*).
Otherwise we'll usually have a ball on these coordinates, as it's the top element under the pointer: elemBelow=ball.
So we hide it and immediately show again.
We can use that code to check what element we're “flying over” at any time.
And handle the drop when it happens.
An extended code of onMouseMove to find “droppable” elements:
// potential droppable that we're flying over right now
let currentDroppable = null;
function onMouseMove(event) {
moveAt(event.pageX, event.pageY);
ball.hidden = true;
let elemBelow = document.elementFromPoint(event.clientX, event.clientY);
ball.hidden = false;
// mousemove events may trigger out of the window (when the ball is dragged off-screen)
// if clientX/clientY are out of the window, then elementFromPoint returns null
if (!elemBelow) return;
// potential droppables are labeled with the class "droppable" (can be other logic)
let droppableBelow = elemBelow.closest('.droppable');
if (currentDroppable != droppableBelow) {
// we're flying in or out...
// note: both values can be null
// currentDroppable=null if we were not over a droppable before this event (e.g over an empty space)
// droppableBelow=null if we're not over a droppable now, during this event
if (currentDroppable) {
// the logic to process "flying out" of the droppable (remove highlight)
leaveDroppable(currentDroppable);
}
currentDroppable = droppableBelow;
if (currentDroppable) {
// the logic to process "flying in" of the droppable
enterDroppable(currentDroppable);
}
}
}
In the example below when the ball is dragged over the soccer goal, the goal is highlighted.
Result
style.css
index.html
#gate {
cursor: pointer;
margin-bottom: 100px;
width: 83px;
height: 46px;
}
#ball {
cursor: pointer;
width: 40px;
height: 40px;
}<!doctype html>
<html>
<head>
<meta charset="UTF-8">
<link rel="stylesheet" href="style.css">
</head>
<body>
<p>Drag the ball.</p>
<img src="https://en.js.cx/clipart/soccer-gate.svg" id="gate" class="droppable">
<img src="https://en.js.cx/clipart/ball.svg" id="ball">
<script>
let currentDroppable = null;
ball.onmousedown = function(event) {
let shiftX = event.clientX - ball.getBoundingClientRect().left;
let shiftY = event.clientY - ball.getBoundingClientRect().top;
ball.style.position = 'absolute';
ball.style.zIndex = 1000;
document.body.append(ball);
moveAt(event.pageX, event.pageY);
function moveAt(pageX, pageY) {
ball.style.left = pageX - shiftX + 'px';
ball.style.top = pageY - shiftY + 'px';
}
function onMouseMove(event) {
moveAt(event.pageX, event.pageY);
ball.hidden = true;
let elemBelow = document.elementFromPoint(event.clientX, event.clientY);
ball.hidden = false;
if (!elemBelow) return;
let droppableBelow = elemBelow.closest('.droppable');
if (currentDroppable != droppableBelow) {
if (currentDroppable) { // null when we were not over a droppable before this event
leaveDroppable(currentDroppable);
}
currentDroppable = droppableBelow;
if (currentDroppable) { // null if we're not coming over a droppable now
// (maybe just left the droppable)
enterDroppable(currentDroppable);
}
}
}
document.addEventListener('mousemove', onMouseMove);
ball.onmouseup = function() {
document.removeEventListener('mousemove', onMouseMove);
ball.onmouseup = null;
};
};
function enterDroppable(elem) {
elem.style.background = 'pink';
}
function leaveDroppable(elem) {
elem.style.background = '';
}
ball.ondragstart = function() {
return false;
};
</script>
</body>
</html>
Now we have the current “drop target”, that we're flying over, in the variable currentDroppable during the whole process and can use it to highlight or any other stuff.
- Summary
We considered a basic Drag'n'Drop algorithm.
The key components:
Events flow: ball.mousedown → document.mousemove → ball.mouseup (don't forget to cancel native ondragstart).
At the drag start – remember the initial shift of the pointer relative to the element: shiftX/shiftY and keep it during the dragging.
Detect droppable elements under the pointer using document.elementFromPoint.
We can lay a lot on this foundation.
On mouseup we can intellectually finalize the drop: change data, move elements around.
We can highlight the elements we're flying over.
We can limit dragging by a certain area or direction.
We can use event delegation for mousedown/up.
A large-area event handler that checks event.target can manage Drag'n'Drop for hundreds of elements.
And so on.
There are frameworks that build architecture over it: DragZone, Droppable, Draggable and other classes.
Most of them do the similar stuff to what's described above, so it should be easy to understand them now.
Or roll your own, as you can see that that's easy enough to do, sometimes easier than adapting a third-party solution.
importance: 5
Create a slider:
Drag the blue thumb with the mouse and move it.
Important details:
When the mouse button is pressed, during the dragging the mouse may go over or below the slider.
The slider will still work (convenient for the user).
If the mouse moves very fast to the left or to the right, the thumb should stop exactly at the edge.
Open a sandbox for the task.
As we can see from HTML/CSS, the slider is a <div> with a colored background, that contains a runner – another <div> with position:relative.
To position the runner we use position:relative, to provide the coordinates relative to its parent, here it's more convenient here than position:absolute.
Then we implement horizontal-only Drag'n'Drop with limitation by width.
Open the solution in a sandbox.
Drag superheroes around the field
importance: 5
This task can help you to check understanding of several aspects of Drag'n'Drop and DOM.
Make all elements with class draggable – draggable.
Like a ball in the chapter.
Requirements:
Use event delegation to track drag start: a single event handler on document for mousedown.
If elements are dragged to top/bottom window edges – the page scrolls up/down to allow further dragging.
There is no horizontal scroll (this makes the task a bit simpler, adding it is easy).
Draggable elements or their parts should never leave the window, even after swift mouse moves.
The demo is too big to fit it here, so here's the link.
Demo in new windowOpen a sandbox for the task.
To drag the element we can use position:fixed, it makes coordinates easier to manage.
At the end we should switch it back to position:absolute to lay the element into the document.
When coordinates are at window top/bottom, we use window.scrollTo to scroll it.
More details in the code, in comments.
Open the solution in a sandbox.Browser: Document, Events, InterfacesUI Events
Pointer events
Pointer events are a modern way to handle input from a variety of pointing devices, such as a mouse, a pen/stylus, a touchscreen, and so on.
- The brief history
Let's make a small overview, so that you understand the general picture and the place of Pointer Events among other event types.
Long ago, in the past, there were only mouse events.
Then touch devices became widespread, phones and tablets in particular.
For the existing scripts to work, they generated (and still generate) mouse events.
For instance, tapping a touchscreen generates mousedown.
So touch devices worked well with web pages.
But touch devices have more capabilities than a mouse.
For example, it's possible to touch multiple points at once (“multi-touch”).
Although, mouse events don't have necessary properties to handle such multi-touches.
So touch events were introduced, such as touchstart, touchend, touchmove, that have touch-specific properties (we don't cover them in detail here, because pointer events are even better).
Still, it wasn't enough, as there are many other devices, such as pens, that have their own features.
Also, writing code that listens for both touch and mouse events was cumbersome.
To solve these issues, the new standard Pointer Events was introduced.
It provides a single set of events for all kinds of pointing devices.
As of now, Pointer Events Level 2 specification is supported in all major browsers, while the newer Pointer Events Level 3 is in the works and is mostly compartible with Pointer Events level 2.
Unless you develop for old browsers, such as Internet Explorer 10, or for Safari 12 or below, there's no point in using mouse or touch events any more – we can switch to pointer events.
Then your code will work well with both touch and mouse devices.
That said, there are some important peculiarities that one should know in order to use Pointer Events correctly and avoid surprises.
We'll make note of them in this article.
- Pointer event types
Pointer events are named similarly to mouse events:
Pointer event
Similar mouse event
pointerdown
mousedown
pointerup
mouseup
pointermove
mousemove
pointerover
mouseover
pointerout
mouseout
pointerenter
mouseenter
pointerleave
mouseleave
pointercancel
-
gotpointercapture
-
lostpointercapture
-
As we can see, for every mouse<event>, there's a pointer<event> that plays a similar role.
Also there are 3 additional pointer events that don't have a corresponding mouse... counterpart, we'll explain them soon.
Replacing mouse<event> with pointer<event> in our code
We can replace mouse<event> events with pointer<event> in our code and expect things to continue working fine with mouse.
The support for touch devices will also “magically” improve.
Although, we may need to add touch-action: none in some places in CSS.
We'll cover it below in the section about pointercancel.
- Pointer event properties
Pointer events have the same properties as mouse events, such as clientX/Y, target, etc., plus some others:
pointerId – the unique identifier of the pointer causing the event.
Browser-generated.
Allows us to handle multiple pointers, such as a touchscreen with stylus and multi-touch (examples will follow).
pointerType – the pointing device type.
Must be a string, one of: “mouse”, “pen” or “touch”.
We can use this property to react differently on various pointer types.
isPrimary – is true for the primary pointer (the first finger in multi-touch).
Some pointer devices measure contact area and pressure, e.g.
for a finger on the touchscreen, there are additional properties for that:
width – the width of the area where the pointer (e.g.
a finger) touches the device.
Where unsupported, e.g.
for a mouse, it's always 1.
height – the height of the area where the pointer touches the device.
Where unsupported, it's always 1.
pressure – the pressure of the pointer tip, in range from 0 to 1.
For devices that don't support pressure must be either 0.5 (pressed) or 0.
tangentialPressure – the normalized tangential pressure.
tiltX, tiltY, twist – pen-specific properties that describe how the pen is positioned relative the surface.
These properties aren't supported by most devices, so they are rarely used.
You can find the details about them in the specification if needed.
- Multi-touch
One of the things that mouse events totally don't support is multi-touch: a user can touch in several places at once on their phone or tablet, or perform special gestures.
Pointer Events allow handling multi-touch with the help of the pointerId and isPrimary properties.
Here's what happens when a user touches a touchscreen in one place, then puts another finger somewhere else on it:
At the first finger touch:
pointerdown with isPrimary=true and some pointerId.
For the second finger and more fingers (assuming the first one is still touching):
pointerdown with isPrimary=false and a different pointerId for every finger.
Please note: the pointerId is assigned not to the whole device, but for each touching finger.
If we use 5 fingers to simultaneously touch the screen, we have 5 pointerdown events, each with their respective coordinates and a different pointerId.
The events associated with the first finger always have isPrimary=true.
We can track multiple touching fingers using their pointerId.
When the user moves and then removes a finger, we get pointermove and pointerup events with the same pointerId as we had in pointerdown.
Here's the demo that logs pointerdown and pointerup events:
Please note: you must be using a touchscreen device, such as a phone or a tablet, to actually see the difference in pointerId/isPrimary.
For single-touch devices, such as a mouse, there'll be always same pointerId with isPrimary=true, for all pointer events.
- Event: pointercancel
The pointercancel event fires when there's an ongoing pointer interaction, and then something happens that causes it to be aborted, so that no more pointer events are generated.
Such causes are:
The pointer device hardware was physically disabled.
The device orientation changed (tablet rotated).
The browser decided to handle the interaction on its own, considering it a mouse gesture or zoom-and-pan action or something else.
We'll demonstrate pointercancel on a practical example to see how it affects us.
Let's say we're impelementing drag'n'drop for a ball, just as in the beginning of the article Drag'n'Drop with mouse events.
Here is the flow of user actions and the corresponding events:
The user presses on an image, to start dragging
pointerdown event fires
Then they start moving the pointer (thus dragging the image)
pointermove fires, maybe several times
And then the surprise happens! The browser has native drag'n'drop support for images, that kicks in and takes over the drag'n'drop process, thus generating pointercancel event.
The browser now handles drag'n'drop of the image on its own.
The user may even drag the ball image out of the browser, into their Mail program or a File Manager.
No more pointermove events for us.
So the issue is that the browser “hijacks” the interaction: pointercancel fires in the beginning of the “drag-and-drop” process, and no more pointermove events are generated.
Here's the drag'n'drop demo with loggin of pointer events (only up/down, move and cancel) in the textarea:
We'd like to implement the drag'n'drop on our own, so let's tell the browser not to take it over.
Prevent the default browser action to avoid pointercancel.
We need to do two things:
Prevent native drag'n'drop from happening:
We can do this by setting ball.ondragstart = () => false, just as described in the article Drag'n'Drop with mouse events.
That works well for mouse events.
For touch devices, there are other touch-related browser actions (besides drag'n'drop).
To avoid problems with them too:
Prevent them by setting #ball { touch-action: none } in CSS.
Then our code will start working on touch devices.
After we do that, the events will work as intended, the browser won't hijack the process and doesn't emit pointercancel.
This demo adds these lines:
As you can see, there's no pointercancel any more.
Now we can add the code to actually move the ball, and our drag'n'drop will work for mouse devices and touch devices.
- Pointer capturing
Pointer capturing is a special feature of pointer events.
The idea is very simple, but may seem quite odd at first, as nothing like that exists for any other event type.
The main method is:
elem.setPointerCapture(pointerId) – binds events with the given pointerId to elem.
After the call all pointer events with the same pointerId will have elem as the target (as if happened on elem), no matter where in document they really happened.
In other words, elem.setPointerCapture(pointerId) retargets all subsequent events with the given pointerId to elem.
The binding is removed:
automatically when pointerup or pointercancel events occur,
automatically when elem is removed from the document,
when elem.releasePointerCapture(pointerId) is called.
Pointer capturing can be used to simplify drag'n'drop kind of interactions.
As an example, let's recall how one can implement a custom slider, described in the Drag'n'Drop with mouse events.
We make a slider element with the strip and the “runner” (thumb) inside it.
Then it works like this:
The user presses on the slider thumb – pointerdown triggers.
Then they move the pointer – pointermove triggers, and we move the thumb along.
…As the pointer moves, it may leave the slider thumb: go above or below it.
The thumb should move strictly horizontally, remaining aligned with the pointer.
So, to track all pointer movements, including when it goes above/below the thumb, we had to assign pointermove event handler on the whole document.
That solution looks a bit “dirty”.
One of the problems is that pointer movements around the document may cause side effects, trigger other event handlers, totally not related to the slider.
Pointer capturing provides a means to bind pointermove to thumb and avoid any such problems:
We can call thumb.setPointerCapture(event.pointerId) in pointerdown handler,
Then future pointer events until pointerup/cancel will be retargeted to thumb.
When pointerup happens (dragging complete), the binding is removed automatically, we don't need to care about it.
So, even if the user moves the pointer around the whole document, events handlers will be called on thumb.
Besides, coordinate properties of the event objects, such as clientX/clientY will still be correct – the capturing only affects target/currentTarget.
Here's the essential code:
thumb.onpointerdown = function(event) {
// retarget all pointer events (until pointerup) to thumb
thumb.setPointerCapture(event.pointerId);
};
thumb.onpointermove = function(event) {
// moving the slider: listen on the thumb, as all pointer events are retargeted to it
let newLeft = event.clientX - slider.getBoundingClientRect().left;
thumb.style.left = newLeft + 'px';
};
// note: no need to call thumb.releasePointerCapture,
// it happens on pointerup automatically
The full demo:
At the end, pointer capturing gives us two benefits:
The code becomes cleaner as we don't need to add/remove handlers on the whole document any more.
The binding is released automatically.
If there are any pointermove handlers in the document, they won't be accidentally triggered by the pointer while the user is dragging the slider.
Pointer capturing events
There are two associated pointer events:
gotpointercapture fires when an element uses setPointerCapture to enable capturing.
lostpointercapture fires when the capture is released: either explicitly with releasePointerCapture call, or automatically on pointerup/pointercancel.
- Summary
Pointer events allow handling mouse, touch and pen events simultaneously, with a single piece of code.
Pointer events extend mouse events.
We can replace mouse with pointer in event names and expect our code to continue working for mouse, with better support for other device types.
For drag'n'drops and complex touch interactions that the browser may decide to hijack and handle on its own – remember to cancel the default action on events and set touch-events: none in CSS for elements that we engage.
Additional abilities of pointer events are:
Multi-touch support using pointerId and isPrimary.
Device-specific properties, such as pressure, width/height, and others.
Pointer capturing: we can retarget all pointer events to a specific element until pointerup/pointercancel.
As of now, pointer events are supported in all major browsers, so we can safely switch to them, especially if IE10- and Safari 12- are not needed.
And even with those browsers, there are polyfills that enable the support of pointer events.
Browser: Document, Events, InterfacesUI Events
Keyboard: keydown and keyup
Before we get to keyboard, please note that on modern devices there are other ways to “input something”.
For instance, people use speech recognition (especially on mobile devices) or copy/paste with the mouse.
So if we want to track any input into an <input> field, then keyboard events are not enough.
There's another event named input to track changes of an <input> field, by any means.
And it may be a better choice for such task.
We'll cover it later in the chapter Events: change, input, cut, copy, paste.
Keyboard events should be used when we want to handle keyboard actions (virtual keyboard also counts).
For instance, to react on arrow keys Up and Down or hotkeys (including combinations of keys).
- Teststand
To better understand keyboard events, you can use the teststand below.
Try different key combinations in the text field.
Result
script.js
style.css
index.html
kinput.onkeydown = kinput.onkeyup = kinput.onkeypress = handle;
let lastTime = Date.now();
function handle(e) {
if (form.elements[e.type + 'Ignore'].checked) return;
let text = e.type +
' key=' + e.key +
' code=' + e.code +
(e.shiftKey ? ' shiftKey' : '') +
(e.ctrlKey ? ' ctrlKey' : '') +
(e.altKey ? ' altKey' : '') +
(e.metaKey ? ' metaKey' : '') +
(e.repeat ? ' (repeat)' : '') +
"\n";
if (area.value && Date.now() - lastTime > 250) {
area.value += new Array(81).join('-') + '\n';
}
lastTime = Date.now();
area.value += text;
if (form.elements[e.type + 'Stop'].checked) {
e.preventDefault();
}
}#kinput {
font-size: 150%;
box-sizing: border-box;
width: 95%;
}
#area {
width: 95%;
box-sizing: border-box;
height: 250px;
border: 1px solid black;
display: block;
}
form label {
display: inline;
white-space: nowrap;
}<!DOCTYPE HTML>
<html>
<head>
<meta charset="utf-8">
<link rel="stylesheet" href="style.css">
</head>
<body>
<form id="form" onsubmit="return false">
Prevent default for:
<label>
<input type="checkbox" name="keydownStop" value="1"> keydown</label>
<label>
<input type="checkbox" name="keyupStop" value="1"> keyup</label>
<p>
Ignore:
<label>
<input type="checkbox" name="keydownIgnore" value="1"> keydown</label>
<label>
<input type="checkbox" name="keyupIgnore" value="1"> keyup</label>
</p>
<p>Focus on the input field and press a key.</p>
<input type="text" placeholder="Press keys here" id="kinput">
<textarea id="area"></textarea>
<input type="button" value="Clear" onclick="area.value = ''" />
</form>
<script src="script.js"></script>
</body>
</html>
- Keydown and keyup
The keydown events happens when a key is pressed down, and then keyup – when it's released.
event.code and event.key
The key property of the event object allows to get the character, while the code property of the event object allows to get the “physical key code”.
For instance, the same key Z can be pressed with or without Shift.
That gives us two different characters: lowercase z and uppercase Z.
The event.key is exactly the character, and it will be different.
But event.code is the same:
Key
event.key
event.code
Z
z (lowercase)
KeyZ
Shift+Z
Z (uppercase)
KeyZ
If a user works with different languages, then switching to another language would make a totally different character instead of "Z".
That will become the value of event.key, while event.code is always the same: "KeyZ".
“KeyZ” and other key codes
Every key has the code that depends on its location on the keyboard.
Key codes described in the UI Events code specification.
For instance:
Letter keys have codes "Key<letter>": "KeyA", "KeyB" etc.
Digit keys have codes: "Digit<number>": "Digit0", "Digit1" etc.
Special keys are coded by their names: "Enter", "Backspace", "Tab" etc.
There are several widespread keyboard layouts, and the specification gives key codes for each of them.
Read the alphanumeric section of the spec for more codes, or just press a key in the teststand above.
Case matters: "KeyZ", not "keyZ"
Seems obvious, but people still make mistakes.
Please evade mistypes: it's KeyZ, not keyZ.
The check like event.code=="keyZ" won't work: the first letter of "Key" must be uppercase.
What if a key does not give any character? For instance, Shift or F1 or others.
For those keys, event.key is approximately the same as event.code:
Key
event.key
event.code
F1
F1
F1
Backspace
Backspace
Backspace
Shift
Shift
ShiftRight or ShiftLeft
Please note that event.code specifies exactly which key is pressed.
For instance, most keyboards have two Shift keys: on the left and on the right side.
The event.code tells us exactly which one was pressed, and event.key is responsible for the “meaning” of the key: what it is (a “Shift”).
Let's say, we want to handle a hotkey: Ctrl+Z (or Cmd+Z for Mac).
Most text editors hook the “Undo” action on it.
We can set a listener on keydown and check which key is pressed.
There's a dilemma here: in such a listener, should we check the value of event.key or event.code?
On one hand, the value of event.key is a character, it changes depending on the language.
If the visitor has several languages in OS and switches between them, the same key gives different characters.
So it makes sense to check event.code, it's always the same.
Like this:
document.addEventListener('keydown', function(event) {
if (event.code == 'KeyZ' && (event.ctrlKey || event.metaKey)) {
alert('Undo!')
}
});
On the other hand, there's a problem with event.code.
For different keyboard layouts, the same key may have different characters.
For example, here are US layout (“QWERTY”) and German layout (“QWERTZ”) under it (from Wikipedia):
For the same key, US layout has “Z”, while German layout has “Y” (letters are swapped).
Literally, event.code will equal KeyZ for people with German layout when they press Y.
If we check event.code == 'KeyZ' in our code, then for people with German layout such test will pass when they press Y.
That sounds really odd, but so it is.
The specification explicitly mentions such behavior.
So, event.code may match a wrong character for unexpected layout.
Same letters in different layouts may map to different physical keys, leading to different codes.
Luckily, that happens only with several codes, e.g.
keyA, keyQ, keyZ (as we've seen), and doesn't happen with special keys such as Shift.
You can find the list in the specification.
To reliably track layout-dependent characters, event.key may be a better way.
On the other hand, event.code has the benefit of staying always the same, bound to the physical key location, even if the visitor changes languages.
So hotkeys that rely on it work well even in case of a language switch.
Do we want to handle layout-dependant keys? Then event.key is the way to go.
Or we want a hotkey to work even after a language switch? Then event.code may be better.
- Auto-repeat
If a key is being pressed for a long enough time, it starts to “auto-repeat”: the keydown triggers again and again, and then when it's released we finally get keyup.
So it's kind of normal to have many keydown and a single keyup.
For events triggered by auto-repeat, the event object has event.repeat property set to true.
- Default actions
Default actions vary, as there are many possible things that may be initiated by the keyboard.
For instance:
A character appears on the screen (the most obvious outcome).
A character is deleted (Delete key).
The page is scrolled (PageDown key).
The browser opens the “Save Page” dialog (Ctrl+S)
…and so on.
Preventing the default action on keydown can cancel most of them, with the exception of OS-based special keys.
For instance, on Windows Alt+F4 closes the current browser window.
And there's no way to stop it by preventing the default action in JavaScript.
For instance, the <input> below expects a phone number, so it does not accept keys except digits, +, () or -:
<script>
function checkPhoneKey(key) {
return (key >= '0' && key <= '9') || key == '+' || key == '(' || key == ')' || key == '-';
}
</script>
<input onkeydown="return checkPhoneKey(event.key)" placeholder="Phone, please" type="tel">
Please note that special keys, such as Backspace, Left, Right, Ctrl+V, do not work in the input.
That's a side-effect of the strict filter checkPhoneKey.
Let's relax it a little bit:
<script>
function checkPhoneKey(key) {
return (key >= '0' && key <= '9') || key == '+' || key == '(' || key == ')' || key == '-' ||
key == 'ArrowLeft' || key == 'ArrowRight' || key == 'Delete' || key == 'Backspace';
}
</script>
<input onkeydown="return checkPhoneKey(event.key)" placeholder="Phone, please" type="tel">
Now arrows and deletion works well.
…But we still can enter anything by using a mouse and right-click + Paste.
So the filter is not 100% reliable.
We can just let it be like that, because most of time it works.
Or an alternative approach would be to track the input event – it triggers after any modification.
There we can check the new value and highlight/modify it when it's invalid.
- Legacy
In the past, there was a keypress event, and also keyCode, charCode, which properties of the event object.
There were so many browser incompatibilities while working with them, that developers of the specification had no way, other than deprecating all of them and creating new, modern events (described above in this chapter).
The old code still works, as browsers keep supporting them, but there's totally no need to use those any more.
- Mobile Keyboards
When using virtual/mobile keyboards, formally known as IME (Input-Method Editor), the W3C standard states that a KeyboardEvent's e.keyCode should be 229 and e.key should be "Unidentified".
While some of these keyboards might still use the right values for e.key, e.code, e.keyCode… when pressing certain keys such as arrows or backspace, there's no guarantee, so your keyboard logic might not always work on mobile devices.
- Summary
Pressing a key always generates a keyboard event, be it symbol keys or special keys like Shift or Ctrl and so on.
The only exception is Fn key that sometimes presents on a laptop keyboard.
There's no keyboard event for it, because it's often implemented on lower level than OS.
Keyboard events:
keydown – on pressing the key (auto-repeats if the key is pressed for long),
keyup – on releasing the key.
Main keyboard event properties:
code – the “key code” ("KeyA", "ArrowLeft" and so on), specific to the physical location of the key on keyboard.
key – the character ("A", "a" and so on), for non-character keys, such as Esc, usually has the same value as code.
In the past, keyboard events were sometimes used to track user input in form fields.
That's not reliable, because the input can come from various sources.
We have input and change events to handle any input (covered later in the chapter Events: change, input, cut, copy, paste).
They trigger after any kind of input, including copy-pasting or speech recognition.
We should use keyboard events when we really want keyboard.
For example, to react on hotkeys or special keys.
importance: 5
Create a function runOnKeys(func, code1, code2, ...
code_n) that runs func on simultaneous pressing of keys with codes code1, code2, …, code_n.
For instance, the code below shows alert when "Q" and "W" are pressed together (in any language, with or without CapsLock)
runOnKeys(
() => alert("Hello!"),
"KeyQ",
"KeyW"
);Demo in new window
We should use two handlers: document.onkeydown and document.onkeyup.
Let's create a set pressed = new Set() to keep currently pressed keys.
The first handler adds to it, while the second one removes from it.
Every time on keydown we check if we have enough keys pressed, and run the function if it is so.
Open the solution in a sandbox.Browser: Document, Events, InterfacesUI Events
Scrolling
The scroll event allows reacting to a page or element scrolling.
There are quite a few good things we can do here.
For instance:
Show/hide additional controls or information depending on where in the document the user is.
Load more data when the user scrolls down till the end of the page.
Here's a small function to show the current scroll:
window.addEventListener('scroll', function() {
document.getElementById('showScroll').innerHTML = window.pageYOffset + 'px';
});
In action:
Current scroll = scroll the window
The scroll event works both on the window and on scrollable elements.
- Prevent scrolling
How do we make something unscrollable?
We can't prevent scrolling by using event.preventDefault() in onscroll listener, because it triggers after the scroll has already happened.
But we can prevent scrolling by event.preventDefault() on an event that causes the scroll, for instance keydown event for pageUp and pageDown.
If we add an event handler to these events and event.preventDefault() in it, then the scroll won't start.
There are many ways to initiate a scroll, so it's more reliable to use CSS, overflow property.
Here are few tasks that you can solve or look through to see applications of onscroll.
importance: 5
Create an endless page.
When a visitor scrolls it to the end, it auto-appends current date-time to the text (so that a visitor can scroll more).
Like this:
Please note two important features of the scroll:
The scroll is “elastic”. We can scroll a little beyond the document start or end in some browsers/devices (empty space below is shown, and then the document will automatically “bounces back” to normal).
The scroll is imprecise. When we scroll to page end, then we may be in fact like 0-50px away from the real document bottom.
So, “scrolling to the end” should mean that the visitor is no more than 100px away from the document end.
P.S.
In real life we may want to show “more messages” or “more goods”.
Open a sandbox for the task.
The core of the solution is a function that adds more dates to the page (or loads more stuff in real-life) while we're at the page end.
We can call it immediately and add as a window.onscroll handler.
The most important question is: “How do we detect that the page is scrolled to bottom?”
Let's use window-relative coordinates.
The document is represented (and contained) within <html> tag, that is document.documentElement.
We can get window-relative coordinates of the whole document as document.documentElement.getBoundingClientRect(), the bottom property will be window-relative coordinate of the document bottom.
For instance, if the height of the whole HTML document is 2000px, then:
// when we're on the top of the page
// window-relative top = 0
document.documentElement.getBoundingClientRect().top = 0
// window-relative bottom = 2000
// the document is long, so that is probably far beyond the window bottom
document.documentElement.getBoundingClientRect().bottom = 2000
If we scroll 500px below, then:
// document top is above the window 500px
document.documentElement.getBoundingClientRect().top = -500
// document bottom is 500px closer
document.documentElement.getBoundingClientRect().bottom = 1500
When we scroll till the end, assuming that the window height is 600px:
// document top is above the window 1400px
document.documentElement.getBoundingClientRect().top = -1400
// document bottom is below the window 600px
document.documentElement.getBoundingClientRect().bottom = 600
Please note that the bottom can't be 0, because it never reaches the window top.
The lowest limit of the bottom coordinate is the window height (we assumed it to be 600), we can't scroll it any more up.
We can obtain the window height as document.documentElement.clientHeight.
For our task, we need to know when the document bottom is not no more than 100px away from it (that is: 600-700px, if the height is 600).
So here's the function:
function populate() {
while(true) {
// document bottom
let windowRelativeBottom = document.documentElement.getBoundingClientRect().bottom;
// if the user hasn't scrolled far enough (>100px to the end)
if (windowRelativeBottom > document.documentElement.clientHeight + 100) break;
// let's add more data
document.body.insertAdjacentHTML("beforeend", `<p>Date: ${new Date()}</p>`);
}
}Open the solution in a sandbox.
Up/down button
importance: 5
Create a “to the top” button to help with page scrolling.
It should work like this:
While the page is not scrolled down at least for the window height – it's invisible.
When the page is scrolled down more than the window height – there appears an “upwards” arrow in the left-top corner.
If the page is scrolled back, it disappears.
When the arrow is clicked, the page scrolls to the top.
Like this (top-left corner, scroll to see):
Open a sandbox for the task.Open the solution in a sandbox.
Load visible images
importance: 4
Let's say we have a slow-speed client and want to save their mobile traffic.
For that purpose we decide not to show images immediately, but rather replace them with placeholders, like this:
<img src="placeholder.svg" width="128" height="128" data-src="real.jpg">
So, initially all images are placeholder.svg.
When the page scrolls to the position where the user can see the image – we change src to the one in data-src, and so the image loads.
Here's an example in iframe:
Scroll it to see images load “on-demand”.
Requirements:
When the page loads, those images that are on-screen should load immediately, prior to any scrolling.
Some images may be regular, without data-src.
The code should not touch them.
Once an image is loaded, it should not reload any more when scrolled in/out.
P.S.
If you can, make a more advanced solution that would “preload” images that are one page below/after the current position.
P.P.S.
Only vertical scroll is to be handled, no horizontal scrolling.
Open a sandbox for the task.
The onscroll handler should check which images are visible and show them.
We also want to run it when the page loads, to detect immediately visible images and load them.
The code should execute when the document is loaded, so that it has access to its content.
Or put it at the <body> bottom:
// ...the page content is above...
function isVisible(elem) {
let coords = elem.getBoundingClientRect();
let windowHeight = document.documentElement.clientHeight;
// top elem edge is visible?
let topVisible = coords.top > 0 && coords.top < windowHeight;
// bottom elem edge is visible?
let bottomVisible = coords.bottom < windowHeight && coords.bottom > 0;
return topVisible || bottomVisible;
}
The showVisible() function uses the visibility check, implemented by isVisible(), to load visible images:
function showVisible() {
for (let img of document.querySelectorAll('img')) {
let realSrc = img.dataset.src;
if (!realSrc) continue;
if (isVisible(img)) {
img.src = realSrc;
img.dataset.src = '';
}
}
}
showVisible();
window.onscroll = showVisible;
P.S.
The solution also has a variant of isVisible that “preloads” images that are within 1 page above/below the current document scroll.
Open the solution in a sandbox.TutorialBrowser: Document, Events, Interfaces
Forms and control elements, such as <input> have a lot of special properties and events.
Working with forms will be much more convenient when we learn them.
- Navigation: form and elements
Document forms are members of the special collection document.forms.
That's a so-called “named collection”: it's both named and ordered.
We can use both the name or the number in the document to get the form.
document.forms.my - the form with name="my"
document.forms[0] - the first form in the document
When we have a form, then any element is available in the named collection form.elements.
For instance:
<form name="my">
<input name="one" value="1">
<input name="two" value="2">
</form>
<script>
// get the form
let form = document.forms.my; // <form name="my"> element
// get the element
let elem = form.elements.one; // <input name="one"> element
alert(elem.value); // 1
</script>
There may be multiple elements with the same name, that's often the case with radio buttons.
In that case form.elements[name] is a collection, for instance:
<form>
<input type="radio" name="age" value="10">
<input type="radio" name="age" value="20">
</form>
<script>
let form = document.forms[0];
let ageElems = form.elements.age;
alert(ageElems[0]); // [object HTMLInputElement]
</script>
These navigation properties do not depend on the tag structure.
All control elements, no matter how deep they are in the form, are available in form.elements.
Fieldsets as “subforms”
A form may have one or many <fieldset> elements inside it.
They also have elements property that lists form controls inside them.
For instance:
<body>
<form id="form">
<fieldset name="userFields">
<legend>info</legend>
<input name="login" type="text">
</fieldset>
</form>
<script>
alert(form.elements.login); // <input name="login">
let fieldset = form.elements.userFields;
alert(fieldset); // HTMLFieldSetElement
// we can get the input by name both from the form and from the fieldset
alert(fieldset.elements.login == form.elements.login); // true
</script>
</body>
Shorter notation: form.name
There's a shorter notation: we can access the element as form[index/name].
In other words, instead of form.elements.login we can write form.login.
That also works, but there's a minor issue: if we access an element, and then change its name, then it is still available under the old name (as well as under the new one).
That's easy to see in an example:
<form id="form">
<input name="login">
</form>
<script>
alert(form.elements.login == form.login); // true, the same <input>
form.login.name = "username"; // change the name of the input
// form.elements updated the name:
alert(form.elements.login); // undefined
alert(form.elements.username); // input
// form allows both names: the new one and the old one
alert(form.username == form.login); // true
</script>
That's usually not a problem, because we rarely change names of form elements.
- Backreference: element.form
For any element, the form is available as element.form.
So a form references all elements, and elements reference the form.
Here's the picture:
For instance:
<form id="form">
<input type="text" name="login">
</form>
<script>
// form -> element
let login = form.login;
// element -> form
alert(login.form); // HTMLFormElement
</script>
- Form elements
Let's talk about form controls.
input and textarea
We can access their value as input.value (string) or input.checked (boolean) for checkboxes.
Like this:
input.value = "New value";
textarea.value = "New text";
input.checked = true; // for a checkbox or radio button
Use textarea.value, not textarea.innerHTML
Please note that even though <textarea>...</textarea> holds its value as nested HTML, we should never use textarea.innerHTML to access it.
It stores only the HTML that was initially on the page, not the current value.
select and option
A <select> element has 3 important properties:
select.options – the collection of <option> subelements,
select.value – the value of the currently selected <option>,
select.selectedIndex – the number of the currently selected <option>.
They provide three different ways of setting a value for a <select>:
Find the corresponding <option> element (e.g.
among select.options) and set its option.selected to true.
If we know a new value: set select.value to the new value.
If we know the new option number: set select.selectedIndex to that number.
Here is an example of all three methods:
<select id="select">
<option value="apple">Apple</option>
<option value="pear">Pear</option>
<option value="banana">Banana</option>
</select>
<script>
// all three lines do the same thing
select.options[2].selected = true;
select.selectedIndex = 2;
select.value = 'banana';
// please note: options start from zero, so index 2 means the 3rd option.
</script>
Unlike most other controls, <select> allows to select multiple options at once if it has multiple attribute.
This attribute is rarely used though.
For multiple selected values, use the first way of setting values: add/remove the selected property from <option> subelements.
Here's an example of how to get selected values from a multi-select:
<select id="select" multiple>
<option value="blues" selected>Blues</option>
<option value="rock" selected>Rock</option>
<option value="classic">Classic</option>
</select>
<script>
// get all selected values from multi-select
let selected = Array.from(select.options)
.filter(option => option.selected)
.map(option => option.value);
alert(selected); // blues,rock
</script>
The full specification of the <select> element is available in the specification https://html.spec.whatwg.org/multipage/forms.html#the-select-element.
new Option
In the specification there's a nice short syntax to create an <option> element:
option = new Option(text, value, defaultSelected, selected);
This syntax is optional.
We can use document.createElement('option') and set attributes manually.
Still, it may be shorter, so here are the parameters:
text – the text inside the option,
value – the option value,
defaultSelected – if true, then selected HTML-attribute is created,
selected – if true, then the option is selected.
The difference between defaultSelected and selected is that defaultSelected sets the HTML-attribute (that we can get using option.getAttribute('selected'), while selected sets whether the option is selected or not.
In practice, we usually should set both values to true or false (or omit, that's the same as false).
For instance, here's a new “unselected” option:
let option = new Option("Text", "value");
// creates <option value="value">Text</option>
The same option, but selected:
let option = new Option("Text", "value", true, true);
Option elements have properties:
option.selected
Is the option selected.
option.index
The number of the option among the others in its <select>.
A form is available as document.forms[name/index].
form.elements
Form elements are available as form.elements[name/index], or can use just form[name/index].
The elements property also works for <fieldset>.
element.form
Elements reference their form in the form property.
Value is available as input.value, textarea.value, select.value etc, or input.checked for checkboxes and radio buttons.
For <select> we can also get the value by the index select.selectedIndex or through the options collection select.options.
These are the basics to start working with forms.
We'll meet many examples further in the tutorial.
In the next chapter we'll cover focus and blur events that may occur on any element, but are mostly handled on forms.
importance: 5
There's a <select>:
<select id="genres">
<option value="rock">Rock</option>
<option value="blues" selected>Blues</option>
</select>
Use JavaScript to:
Show the value and the text of the selected option.
Add an option: <option value="classic">Classic</option>.
Make it selected.
Note, if you've done everything right, your alert should show blues.
The solution, step by step:
<select id="genres">
<option value="rock">Rock</option>
<option value="blues" selected>Blues</option>
</select>
<script>
// 1)
let selectedOption = genres.options[genres.selectedIndex];
alert( selectedOption.value );
// 2)
let newOption = new Option("Classic", "classic");
genres.append(newOption);
// 3)
newOption.selected = true;
</script>Browser: Document, Events, InterfacesForms, controls
Focusing: focus/blur
An element receives the focus when the user either clicks on it or uses the Tab key on the keyboard.
There's also an autofocus HTML attribute that puts the focus onto an element by default when a page loads and other means of getting the focus.
Focusing on an element generally means: “prepare to accept the data here”, so that's the moment when we can run the code to initialize the required functionality.
The moment of losing the focus (“blur”) can be even more important.
That's when a user clicks somewhere else or presses Tab to go to the next form field, or there are other means as well.
Losing the focus generally means: “the data has been entered”, so we can run the code to check it or even to save it to the server and so on.
There are important peculiarities when working with focus events.
We'll do the best to cover them further on.
- Events focus/blur
The focus event is called on focusing, and blur – when the element loses the focus.
Let's use them for validation of an input field.
In the example below:
The blur handler checks if the field has an email entered, and if not – shows an error.
The focus handler hides the error message (on blur it will be checked again):
<style>
.invalid { border-color: red; }
#error { color: red }
</style>
Your email please: <input type="email" id="input">
<div id="error"></div>
<script>
input.onblur = function() {
if (!input.value.includes('@')) { // not email
input.classList.add('invalid');
error.innerHTML = 'Please enter a correct email.'
}
};
input.onfocus = function() {
if (this.classList.contains('invalid')) {
// remove the "error" indication, because the user wants to re-enter something
this.classList.remove('invalid');
error.innerHTML = "";
}
};
</script>
Modern HTML allows us to do many validations using input attributes: required, pattern and so on.
And sometimes they are just what we need.
JavaScript can be used when we want more flexibility.
Also we could automatically send the changed value to the server if it's correct.
- Methods focus/blur
Methods elem.focus() and elem.blur() set/unset the focus on the element.
For instance, let's make the visitor unable to leave the input if the value is invalid:
<style>
.error {
background: red;
}
</style>
Your email please: <input type="email" id="input">
<input type="text" style="width:220px" placeholder="make email invalid and try to focus here">
<script>
input.onblur = function() {
if (!this.value.includes('@')) { // not email
// show the error
this.classList.add("error");
// ...and put the focus back
input.focus();
} else {
this.classList.remove("error");
}
};
</script>
It works in all browsers except Firefox (bug).
If we enter something into the input and then try to use Tab or click away from the <input>, then onblur returns the focus back.
Please note that we can't “prevent losing focus” by calling event.preventDefault() in onblur, because onblur works after the element lost the focus.
JavaScript-initiated focus loss
A focus loss can occur for many reasons.
One of them is when the visitor clicks somewhere else.
But also JavaScript itself may cause it, for instance:
An alert moves focus to itself, so it causes the focus loss at the element (blur event), and when the alert is dismissed, the focus comes back (focus event).
If an element is removed from DOM, then it also causes the focus loss.
If it is reinserted later, then the focus doesn't return.
These features sometimes cause focus/blur handlers to misbehave – to trigger when they are not needed.
The best recipe is to be careful when using these events.
If we want to track user-initiated focus-loss, then we should avoid causing it ourselves.
- Allow focusing on any element: tabindex
By default many elements do not support focusing.
The list varies a bit between browsers, but one thing is always correct: focus/blur support is guaranteed for elements that a visitor can interact with: <button>, <input>, <select>, <a> and so on.
On the other hand, elements that exist to format something, such as <div>, <span>, <table> – are unfocusable by default.
The method elem.focus() doesn't work on them, and focus/blur events are never triggered.
This can be changed using HTML-attribute tabindex.
Any element becomes focusable if it has tabindex.
The value of the attribute is the order number of the element when Tab (or something like that) is used to switch between them.
That is: if we have two elements, the first has tabindex="1", and the second has tabindex="2", then pressing Tab while in the first element – moves the focus into the second one.
The switch order is: elements with tabindex from 1 and above go first (in the tabindex order), and then elements without tabindex (e.g.
a regular <input>).
Elements with matching tabindex are switched in the document source order (the default order).
There are two special values:
tabindex="0" puts an element among those without tabindex.
That is, when we switch elements, elements with tabindex=0 go after elements with tabindex ≥ 1.
Usually it's used to make an element focusable, but keep the default switching order.
To make an element a part of the form on par with <input>.
tabindex="-1" allows only programmatic focusing on an element.
The Tab key ignores such elements, but method elem.focus() works.
For instance, here's a list.
Click the first item and press Tab:
Click the first item and press Tab.
Keep track of the order.
Please note that many subsequent Tabs can move the focus out of the iframe in the example.
<ul>
<li tabindex="1">One</li>
<li tabindex="0">Zero</li>
<li tabindex="2">Two</li>
<li tabindex="-1">Minus one</li>
</ul>
<style>
li { cursor: pointer; }
:focus { outline: 1px dashed green; }
</style>
The order is like this: 1 - 2 - 0.
Normally, <li> does not support focusing, but tabindex full enables it, along with events and styling with :focus.
The property elem.tabIndex works too
We can add tabindex from JavaScript by using the elem.tabIndex property.
That has the same effect.
- Delegation: focusin/focusout
Events focus and blur do not bubble.
For instance, we can't put onfocus on the <form> to highlight it, like this:
<!-- on focusing in the form -- add the class -->
<form onfocus="this.className='focused'">
<input type="text" name="name" value="Name">
<input type="text" name="surname" value="Surname">
</form>
<style> .focused { outline: 1px solid red; } </style>
The example above doesn't work, because when user focuses on an <input>, the focus event triggers on that input only.
It doesn't bubble up.
So form.onfocus never triggers.
There are two solutions.
First, there's a funny historical feature: focus/blur do not bubble up, but propagate down on the capturing phase.
This will work:
<form id="form">
<input type="text" name="name" value="Name">
<input type="text" name="surname" value="Surname">
</form>
<style> .focused { outline: 1px solid red; } </style>
<script>
// put the handler on capturing phase (last argument true)
form.addEventListener("focus", () => form.classList.add('focused'), true);
form.addEventListener("blur", () => form.classList.remove('focused'), true);
</script>
Second, there are focusin and focusout events – exactly the same as focus/blur, but they bubble.
Note that they must be assigned using elem.addEventListener, not on<event>.
So here's another working variant:
<form id="form">
<input type="text" name="name" value="Name">
<input type="text" name="surname" value="Surname">
</form>
<style> .focused { outline: 1px solid red; } </style>
<script>
form.addEventListener("focusin", () => form.classList.add('focused'));
form.addEventListener("focusout", () => form.classList.remove('focused'));
</script>
- Summary
Events focus and blur trigger on an element focusing/losing focus.
Their specials are:
They do not bubble.
Can use capturing state instead or focusin/focusout.
Most elements do not support focus by default.
Use tabindex to make anything focusable.
The current focused element is available as document.activeElement.
importance: 5
Create a <div> that turns into <textarea> when clicked.
The textarea allows to edit the HTML in the <div>.
When the user presses Enter or it loses focus, the <textarea> turns back into <div>, and its content becomes HTML in <div>.
Demo in new windowOpen a sandbox for the task.Open the solution in a sandbox.
Edit TD on click
importance: 5
Make table cells editable on click.
On click – the cell should became “editable” (textarea appears inside), we can change HTML.
There should be no resize, all geometry should remain the same.
Buttons OK and CANCEL appear below the cell to finish/cancel the editing.
Only one cell may be editable at a moment.
While a <td> is in “edit mode”, clicks on other cells are ignored.
The table may have many cells.
Use event delegation.
The demo:
Open a sandbox for the task.
On click – replace innerHTML of the cell by <textarea> with same sizes and no border.
Can use JavaScript or CSS to set the right size.
Set textarea.value to td.innerHTML.
Focus on the textarea.
Show buttons OK/CANCEL under the cell, handle clicks on them.
Open the solution in a sandbox.
Keyboard-driven mouse
importance: 4
Focus on the mouse.
Then use arrow keys to move it:
Demo in new window
P.S.
Don't put event handlers anywhere except the #mouse element.
P.P.S.
Don't modify HTML/CSS, the approach should be generic and work with any element.
Open a sandbox for the task.
We can use mouse.onclick to handle the click and make the mouse “moveable” with position:fixed, then mouse.onkeydown to handle arrow keys.
The only pitfall is that keydown only triggers on elements with focus.
So we need to add tabindex to the element.
As we're forbidden to change HTML, we can use mouse.tabIndex property for that.
P.S.
We also can replace mouse.onclick with mouse.onfocus.
Open the solution in a sandbox.Browser: Document, Events, InterfacesForms, controls
Events: change, input, cut, copy, paste
Let's cover various events that accompany data updates.
- Event: change
The change event triggers when the element has finished changing.
For text inputs that means that the event occurs when it loses focus.
For instance, while we are typing in the text field below – there's no event.
But when we move the focus somewhere else, for instance, click on a button – there will be a change event:
<input type="text" onchange="alert(this.value)">
<input type="button" value="Button">
For other elements: select, input type=checkbox/radio it triggers right after the selection changes:
<select onchange="alert(this.value)">
<option value="">Select something</option>
<option value="1">Option 1</option>
<option value="2">Option 2</option>
<option value="3">Option 3</option>
</select>
- Event: input
The input event triggers every time after a value is modified by the user.
Unlike keyboard events, it triggers on any value change, even those that does not involve keyboard actions: pasting with a mouse or using speech recognition to dictate the text.
For instance:
<input type="text" id="input"> oninput: <span id="result"></span>
<script>
input.oninput = function() {
result.innerHTML = input.value;
};
</script>
If we want to handle every modification of an <input> then this event is the best choice.
On the other hand, input event doesn't trigger on keyboard input and other actions that do not involve value change, e.g.
pressing arrow keys while in the input.
Can't prevent anything in oninput
The input event occurs after the value is modified.
So we can't use event.preventDefault() there – it's just too late, there would be no effect.
- Events: cut, copy, paste
These events occur on cutting/copying/pasting a value.
They belong to ClipboardEvent class and provide access to the data that is copied/pasted.
We also can use event.preventDefault() to abort the action, then nothing gets copied/pasted.
For instance, the code below prevents all such events and shows what we are trying to cut/copy/paste:
<input type="text" id="input">
<script>
input.oncut = input.oncopy = input.onpaste = function(event) {
alert(event.type + ' - ' + event.clipboardData.getData('text/plain'));
return false;
};
</script>
Please note, that it's possible to copy/paste not just text, but everything.
For instance, we can copy a file in the OS file manager, and paste it.
That's because clipboardData implements DataTransfer interface, commonly used for drag'n'drop and copy/pasting.
It's bit beyound our scope now, but you can find its methods in the specification.
ClipboardAPI: user safety restrictions
The clipboard is a “global” OS-level thing.
So most browsers allow read/write access to the clipboard only in the scope of certain user actions for the safety, e.g.
in onclick event handlers.
Also it's forbidden to generate “custom” clipboard events with dispatchEvent in all browsers except Firefox.
- Summary
Data change events:
Event
Description
Specials
change
A value was changed.
For text inputs triggers on focus loss.
input
For text inputs on every change.
Triggers immediately unlike change.
cut/copy/paste
Cut/copy/paste actions.
The action can be prevented.
The event.clipboardData property gives read/write access to the clipboard.
importance: 5
Create an interface that allows to enter a sum of bank deposit and percentage, then calculates how much it will be after given periods of time.
Here's the demo:
Any input change should be processed immediately.
The formula is:
// initial: the initial money sum
// interest: e.g.
0.05 means 5% per year
// years: how many years to wait
let result = Math.round(initial * (1 + interest * years));Open a sandbox for the task.Open the solution in a sandbox.Browser: Document, Events, InterfacesForms, controls
Forms: event and method submit
The submit event triggers when the form is submitted, it is usually used to validate the form before sending it to the server or to abort the submission and process it in JavaScript.
The method form.submit() allows to initiate form sending from JavaScript.
We can use it to dynamically create and send our own forms to server.
Let's see more details of them.
- Event: submit
There are two main ways to submit a form:
The first – to click <input type="submit"> or <input type="image">.
The second – press Enter on an input field.
Both actions lead to submit event on the form.
The handler can check the data, and if there are errors, show them and call event.preventDefault(), then the form won't be sent to the server.
In the form below:
Go into the text field and press Enter.
Click <input type="submit">.
Both actions show alert and the form is not sent anywhere due to return false:
<form onsubmit="alert('submit!');return false">
First: Enter in the input field <input type="text" value="text"><br>
Second: Click "submit": <input type="submit" value="Submit">
</form>
Relation between submit and click
When a form is sent using Enter on an input field, a click event triggers on the <input type="submit">.
That's rather funny, because there was no click at all.
Here's the demo:
<form onsubmit="return false">
<input type="text" size="30" value="Focus here and press enter">
<input type="submit" value="Submit" onclick="alert('click')">
</form>
- Method: submit
To submit a form to the server manually, we can call form.submit().
Then the submit event is not generated.
It is assumed that if the programmer calls form.submit(), then the script already did all related processing.
Sometimes that's used to manually create and send a form, like this:
let form = document.createElement('form');
form.action = 'https://google.com/search';
form.method = 'GET';
form.innerHTML = '<input name="q" value="test">';
// the form must be in the document to submit it
document.body.append(form);
form.submit();
importance: 5
Create a function showPrompt(html, callback) that shows a form with the message html, an input field and buttons OK/CANCEL.
A user should type something into a text field and press Enter or the OK button, then callback(value) is called with the value they entered.
Otherwise if the user presses Esc or CANCEL, then callback(null) is called.
In both cases that ends the input process and removes the form.
Requirements:
The form should be in the center of the window.
The form is modal.
In other words, no interaction with the rest of the page is possible until the user closes it.
When the form is shown, the focus should be inside the <input> for the user.
Keys Tab/Shift+Tab should shift the focus between form fields, don't allow it to leave for other page elements.
Usage example:
showPrompt("Enter something<br>...smart :)", function(value) {
alert(value);
});
A demo in the iframe:
P.S.
The source document has HTML/CSS for the form with fixed positioning, but it's up to you to make it modal.
Open a sandbox for the task.
A modal window can be implemented using a half-transparent <div id="cover-div"> that covers the whole window, like this:
#cover-div {
position: fixed;
top: 0;
left: 0;
z-index: 9000;
width: 100%;
height: 100%;
background-color: gray;
opacity: 0.3;
}
Because the <div> covers everything, it gets all clicks, not the page below it.
Also we can prevent page scroll by setting body.style.overflowY='hidden'.
The form should be not in the <div>, but next to it, because we don't want it to have opacity.
Open the solution in a sandbox.TutorialBrowser: Document, Events, Interfaces
The lifecycle of an HTML page has three important events:
DOMContentLoaded – the browser fully loaded HTML, and the DOM tree is built, but external resources like pictures <img> and stylesheets may not yet have loaded.
load – not only HTML is loaded, but also all the external resources: images, styles etc.
beforeunload/unload – the user is leaving the page.
Each event may be useful:
DOMContentLoaded event – DOM is ready, so the handler can lookup DOM nodes, initialize the interface.
load event – external resources are loaded, so styles are applied, image sizes are known etc.
beforeunload event – the user is leaving: we can check if the user saved the changes and ask them whether they really want to leave.
unload – the user almost left, but we still can initiate some operations, such as sending out statistics.
Let's explore the details of these events.
- DOMContentLoaded
The DOMContentLoaded event happens on the document object.
We must use addEventListener to catch it:
document.addEventListener("DOMContentLoaded", ready);
// not "document.onDOMContentLoaded = ..."
For instance:
<script>
function ready() {
alert('DOM is ready');
// image is not yet loaded (unless it was cached), so the size is 0x0
alert(`Image size: ${img.offsetWidth}x${img.offsetHeight}`);
}
document.addEventListener("DOMContentLoaded", ready);
</script>
<img id="img" src="https://en.js.cx/clipart/train.gif?speed=1&cache=0">
In the example the DOMContentLoaded handler runs when the document is loaded, so it can see all the elements, including <img> below.
But it doesn't wait for the image to load.
So alert shows zero sizes.
At first sight, the DOMContentLoaded event is very simple.
The DOM tree is ready – here's the event.
There are few peculiarities though.
DOMContentLoaded and scripts
When the browser processes an HTML-document and comes across a <script> tag, it needs to execute before continuing building the DOM.
That's a precaution, as scripts may want to modify DOM, and even document.write into it, so DOMContentLoaded has to wait.
So DOMContentLoaded definitely happens after such scripts:
<script>
document.addEventListener("DOMContentLoaded", () => {
alert("DOM ready!");
});
</script>
<script src="https://cdnjs.cloudflare.com/ajax/libs/lodash.js/4.3.0/lodash.js"></script>
<script>
alert("Library loaded, inline script executed");
</script>
In the example above, we first see “Library loaded…”, and then “DOM ready!” (all scripts are executed).
Scripts that don't block DOMContentLoaded
There are two exceptions from this rule:
Scripts with the async attribute, that we'll cover a bit later, don't block DOMContentLoaded.
Scripts that are generated dynamically with document.createElement('script') and then added to the webpage also don't block this event.
DOMContentLoaded and styles
External style sheets don't affect DOM, so DOMContentLoaded does not wait for them.
But there's a pitfall.
If we have a script after the style, then that script must wait until the stylesheet loads:
<link type="text/css" rel="stylesheet" href="style.css">
<script>
// the script doesn't not execute until the stylesheet is loaded
alert(getComputedStyle(document.body).marginTop);
</script>
The reason for this is that the script may want to get coordinates and other style-dependent properties of elements, like in the example above.
Naturally, it has to wait for styles to load.
As DOMContentLoaded waits for scripts, it now waits for styles before them as well.
Built-in browser autofill
Firefox, Chrome and Opera autofill forms on DOMContentLoaded.
For instance, if the page has a form with login and password, and the browser remembered the values, then on DOMContentLoaded it may try to autofill them (if approved by the user).
So if DOMContentLoaded is postponed by long-loading scripts, then autofill also awaits.
You probably saw that on some sites (if you use browser autofill) – the login/password fields don't get autofilled immediately, but there's a delay till the page fully loads.
That's actually the delay until the DOMContentLoaded event.
- window.onload
The load event on the window object triggers when the whole page is loaded including styles, images and other resources.
This event is available via the onload property.
The example below correctly shows image sizes, because window.onload waits for all images:
<script>
window.onload = function() { // same as window.addEventListener('load', (event) => {
alert('Page loaded');
// image is loaded at this time
alert(`Image size: ${img.offsetWidth}x${img.offsetHeight}`);
};
</script>
<img id="img" src="https://en.js.cx/clipart/train.gif?speed=1&cache=0">
- window.onunload
When a visitor leaves the page, the unload event triggers on window.
We can do something there that doesn't involve a delay, like closing related popup windows.
The notable exception is sending analytics.
Let's say we gather data about how the page is used: mouse clicks, scrolls, viewed page areas, and so on.
Naturally, unload event is when the user leaves us, and we'd like to save the data on our server.
There exists a special navigator.sendBeacon(url, data) method for such needs, described in the specification https://w3c.github.io/beacon/.
It sends the data in background.
The transition to another page is not delayed: the browser leaves the page, but still performs sendBeacon.
Here's how to use it:
let analyticsData = { /* object with gathered data */ };
window.addEventListener("unload", function() {
navigator.sendBeacon("/analytics", JSON.stringify(analyticsData));
});
The request is sent as POST.
We can send not only a string, but also forms and other formats, as described in the chapter Fetch, but usually it's a stringified object.
The data is limited by 64kb.
When the sendBeacon request is finished, the browser probably has already left the document, so there's no way to get server response (which is usually empty for analytics).
There's also a keepalive flag for doing such “after-page-left” requests in fetch method for generic network requests.
You can find more information in the chapter Fetch API.
If we want to cancel the transition to another page, we can't do it here.
But we can use another event – onbeforeunload.
- window.onbeforeunload
If a visitor initiated navigation away from the page or tries to close the window, the beforeunload handler asks for additional confirmation.
If we cancel the event, the browser may ask the visitor if they are sure.
You can try it by running this code and then reloading the page:
window.onbeforeunload = function() {
return false;
};
For historical reasons, returning a non-empty string also counts as canceling the event.
Some time ago browsers used to show it as a message, but as the modern specification says, they shouldn't.
Here's an example:
window.onbeforeunload = function() {
return "There are unsaved changes.
Leave now?";
};
The behavior was changed, because some webmasters abused this event handler by showing misleading and annoying messages.
So right now old browsers still may show it as a message, but aside of that – there's no way to customize the message shown to the user.
- readyState
What happens if we set the DOMContentLoaded handler after the document is loaded?
Naturally, it never runs.
There are cases when we are not sure whether the document is ready or not.
We'd like our function to execute when the DOM is loaded, be it now or later.
The document.readyState property tells us about the current loading state.
There are 3 possible values:
"loading" – the document is loading.
"interactive" – the document was fully read.
"complete" – the document was fully read and all resources (like images) are loaded too.
So we can check document.readyState and setup a handler or execute the code immediately if it's ready.
Like this:
function work() { /*...*/ }
if (document.readyState == 'loading') {
// still loading, wait for the event
document.addEventListener('DOMContentLoaded', work);
} else {
// DOM is ready!
work();
}
There's also the readystatechange event that triggers when the state changes, so we can print all these states like this:
// current state
console.log(document.readyState);
// print state changes
document.addEventListener('readystatechange', () => console.log(document.readyState));
The readystatechange event is an alternative mechanics of tracking the document loading state, it appeared long ago.
Nowadays, it is rarely used.
Let's see the full events flow for the completeness.
Here's a document with <iframe>, <img> and handlers that log events:
<script>
log('initial readyState:' + document.readyState);
document.addEventListener('readystatechange', () => log('readyState:' + document.readyState));
document.addEventListener('DOMContentLoaded', () => log('DOMContentLoaded'));
window.onload = () => log('window onload');
</script>
<iframe src="iframe.html" onload="log('iframe onload')"></iframe>
<img src="http://en.js.cx/clipart/train.gif" id="img">
<script>
img.onload = () => log('img onload');
</script>
The working example is in the sandbox.
The typical output:
[1] initial readyState:loading
[2] readyState:interactive
[2] DOMContentLoaded
[3] iframe onload
[4] img onload
[4] readyState:complete
[4] window onload
The numbers in square brackets denote the approximate time of when it happens.
Events labeled with the same digit happen approximately at the same time (± a few ms).
document.readyState becomes interactive right before DOMContentLoaded.
These two things actually mean the same.
document.readyState becomes complete when all resources (iframe and img) are loaded.
Here we can see that it happens in about the same time as img.onload (img is the last resource) and window.onload.
Switching to complete state means the same as window.onload.
The difference is that window.onload always works after all other load handlers.
- Summary
Page load events:
The DOMContentLoaded event triggers on document when the DOM is ready.
We can apply JavaScript to elements at this stage.
Script such as <script>...</script> or <script src="..."></script> block DOMContentLoaded, the browser waits for them to execute.
Images and other resources may also still continue loading.
The load event on window triggers when the page and all resources are loaded.
We rarely use it, because there's usually no need to wait for so long.
The beforeunload event on window triggers when the user wants to leave the page.
If we cancel the event, browser asks whether the user really wants to leave (e.g we have unsaved changes).
The unload event on window triggers when the user is finally leaving, in the handler we can only do simple things that do not involve delays or asking a user.
Because of that limitation, it's rarely used.
We can send out a network request with navigator.sendBeacon.
document.readyState is the current state of the document, changes can be tracked in the readystatechange event:
loading – the document is loading.
interactive – the document is parsed, happens at about the same time as DOMContentLoaded, but before it.
complete – the document and resources are loaded, happens at about the same time as window.onload, but before it.
Browser: Document, Events, InterfacesDocument and resource loading
Scripts: async, defer
In modern websites, scripts are often “heavier” than HTML: their download size is larger, and processing time is also longer.
When the browser loads HTML and comes across a <script>...</script> tag, it can't continue building the DOM.
It must execute the script right now.
The same happens for external scripts <script src="..."></script>: the browser must wait for the script to download, execute the downloaded script, and only then can it process the rest of the page.
That leads to two important issues:
Scripts can't see DOM elements below them, so they can't add handlers etc.
If there's a bulky script at the top of the page, it “blocks the page”.
Users can't see the page content till it downloads and runs:
<p>...content before script...</p>
<script src="https://javascript.info/article/script-async-defer/long.js?speed=1"></script>
<!-- This isn't visible until the script loads -->
<p>...content after script...</p>
There are some workarounds to that.
For instance, we can put a script at the bottom of the page.
Then it can see elements above it, and it doesn't block the page content from showing:
<body>
...all content is above the script...
<script src="https://javascript.info/article/script-async-defer/long.js?speed=1"></script>
</body>
But this solution is far from perfect.
For example, the browser notices the script (and can start downloading it) only after it downloaded the full HTML document.
For long HTML documents, that may be a noticeable delay.
Such things are invisible for people using very fast connections, but many people in the world still have slow internet speeds and use a far-from-perfect mobile internet connection.
Luckily, there are two <script> attributes that solve the problem for us: defer and async.
- defer
The defer attribute tells the browser not to wait for the script.
Instead, the browser will continue to process the HTML, build DOM.
The script loads “in the background”, and then runs when the DOM is fully built.
Here's the same example as above, but with defer:
<p>...content before script...</p>
<script defer src="https://javascript.info/article/script-async-defer/long.js?speed=1"></script>
<!-- visible immediately -->
<p>...content after script...</p>
In other words:
Scripts with defer never block the page.
Scripts with defer always execute when the DOM is ready (but before DOMContentLoaded event).
The following example demonstrates the second part:
<p>...content before scripts...</p>
<script>
document.addEventListener('DOMContentLoaded', () => alert("DOM ready after defer!"));
</script>
<script defer src="https://javascript.info/article/script-async-defer/long.js?speed=1"></script>
<p>...content after scripts...</p>
The page content shows up immediately.
DOMContentLoaded event handler waits for the deferred script.
It only triggers when the script is downloaded and executed.
Deferred scripts keep their relative order, just like regular scripts.
Let's say, we have two deferred scripts: the long.js and then small.js:
<script defer src="https://javascript.info/article/script-async-defer/long.js"></script>
<script defer src="https://javascript.info/article/script-async-defer/small.js"></script>
Browsers scan the page for scripts and download them in parallel, to improve performance.
So in the example above both scripts download in parallel.
The small.js probably finishes first.
…But the defer attribute, besides telling the browser “not to block”, ensures that the relative order is kept.
So even though small.js loads first, it still waits and runs after long.js executes.
That may be important for cases when we need to load a JavaScript library and then a script that depends on it.
The defer attribute is only for external scripts
The defer attribute is ignored if the <script> tag has no src.
- async
The async attribute is somewhat like defer.
It also makes the script non-blocking.
But it has important differences in the behavior.
The async attribute means that a script is completely independent:
The browser doesn't block on async scripts (like defer).
Other scripts don't wait for async scripts, and async scripts don't wait for them.
DOMContentLoaded and async scripts don't wait for each other:
DOMContentLoaded may happen both before an async script (if an async script finishes loading after the page is complete)
…or after an async script (if an async script is short or was in HTTP-cache)
In other words, async scripts load in the background and run when ready.
The DOM and other scripts don't wait for them, and they don't wait for anything.
A fully independent script that runs when loaded.
As simple, as it can get, right?
Here's an example similar to what we've seen with defer: two scripts long.js and small.js, but now with async instead of defer.
They don't wait for each other.
Whatever loads first (probably small.js) – runs first:
<p>...content before scripts...</p>
<script>
document.addEventListener('DOMContentLoaded', () => alert("DOM ready!"));
</script>
<script async src="https://javascript.info/article/script-async-defer/long.js"></script>
<script async src="https://javascript.info/article/script-async-defer/small.js"></script>
<p>...content after scripts...</p>
The page content shows up immediately: async doesn't block it.
DOMContentLoaded may happen both before and after async, no guarantees here.
A smaller script small.js goes second, but probably loads before long.js, so small.js runs first.
Although, it might be that long.js loads first, if cached, then it runs first.
In other words, async scripts run in the “load-first” order.
Async scripts are great when we integrate an independent third-party script into the page: counters, ads and so on, as they don't depend on our scripts, and our scripts shouldn't wait for them:
<!-- Google Analytics is usually added like this -->
<script async src="https://google-analytics.com/analytics.js"></script>
- Dynamic scripts
There's one more important way of adding a script to the page.
We can create a script and append it to the document dynamically using JavaScript:
let script = document.createElement('script');
script.src = "/article/script-async-defer/long.js";
document.body.append(script); // (*)
The script starts loading as soon as it's appended to the document (*).
Dynamic scripts behave as “async” by default.
That is:
They don't wait for anything, nothing waits for them.
The script that loads first – runs first (“load-first” order).
This can be changed if we explicitly set script.async=false.
Then scripts will be executed in the document order, just like defer.
In this example, loadScript(src) function adds a script and also sets async to false.
So long.js always runs first (as it's added first):
function loadScript(src) {
let script = document.createElement('script');
script.src = src;
script.async = false;
document.body.append(script);
}
// long.js runs first because of async=false
loadScript("/article/script-async-defer/long.js");
loadScript("/article/script-async-defer/small.js");
Without script.async=false, scripts would execute in default, load-first order (the small.js probably first).
Again, as with the defer, the order matters if we'd like to load a library and then another script that depends on it.
- Summary
Both async and defer have one common thing: downloading of such scripts doesn't block page rendering.
So the user can read page content and get acquainted with the page immediately.
But there are also essential differences between them:
Order
DOMContentLoaded
async
Load-first order.
Their document order doesn't matter – which loads first runs first
Irrelevant.
May load and execute while the document has not yet been fully downloaded.
That happens if scripts are small or cached, and the document is long enough.
defer
Document order (as they go in the document).
Execute after the document is loaded and parsed (they wait if needed), right before DOMContentLoaded.
In practice, defer is used for scripts that need the whole DOM and/or their relative execution order is important.
And async is used for independent scripts, like counters or ads.
And their relative execution order does not matter.
Page without scripts should be usable
Please note: if you're using defer or async, then user will see the the page before the script loads.
In such case, some graphical components are probably not initialized yet.
Don't forget to put “loading” indication and disable buttons that aren't functional yet.
Let the user clearly see what he can do on the page, and what's still getting ready.
Browser: Document, Events, InterfacesDocument and resource loading
Resource loading: onload and onerror
The browser allows us to track the loading of external resources – scripts, iframes, pictures and so on.
There are two events for it:
onload – successful load,
onerror – an error occurred.
- Loading a script
Let's say we need to load a third-party script and call a function that resides there.
We can load it dynamically, like this:
let script = document.createElement('script');
script.src = "my.js";
document.head.append(script);
…But how to run the function that is declared inside that script? We need to wait until the script loads, and only then we can call it.
Please note:
For our own scripts we could use JavaScript modules here, but they are not widely adopted by third-party libraries.
script.onload
The main helper is the load event.
It triggers after the script was loaded and executed.
For instance:
let script = document.createElement('script');
// can load any script, from any domain
script.src = "https://cdnjs.cloudflare.com/ajax/libs/lodash.js/4.3.0/lodash.js"
document.head.append(script);
script.onload = function() {
// the script creates a variable "_"
alert( _.VERSION ); // shows library version
};
So in onload we can use script variables, run functions etc.
…And what if the loading failed? For instance, there's no such script (error 404) or the server is down (unavailable).
script.onerror
Errors that occur during the loading of the script can be tracked in an error event.
For instance, let's request a script that doesn't exist:
let script = document.createElement('script');
script.src = "https://example.com/404.js"; // no such script
document.head.append(script);
script.onerror = function() {
alert("Error loading " + this.src); // Error loading https://example.com/404.js
};
Please note that we can't get HTTP error details here.
We don't know if it was an error 404 or 500 or something else.
Just that the loading failed.
Important:
Events onload/onerror track only the loading itself.
Errors that may occur during script processing and execution are out of scope for these events.
That is: if a script loaded successfully, then onload triggers, even if it has programming errors in it.
To track script errors, one can use window.onerror global handler.
- Other resources
The load and error events also work for other resources, basically for any resource that has an external src.
For example:
let img = document.createElement('img');
img.src = "https://js.cx/clipart/train.gif"; // (*)
img.onload = function() {
alert(`Image loaded, size ${img.width}x${img.height}`);
};
img.onerror = function() {
alert("Error occurred while loading image");
};
There are some notes though:
Most resources start loading when they are added to the document.
But <img> is an exception.
It starts loading when it gets a src (*).
For <iframe>, the iframe.onload event triggers when the iframe loading finished, both for successful load and in case of an error.
That's for historical reasons.
- Crossorigin policy
There's a rule: scripts from one site can't access contents of the other site.
So, e.g.
a script at https://facebook.com can't read the user's mailbox at https://gmail.com.
Or, to be more precise, one origin (domain/port/protocol triplet) can't access the content from another one.
So even if we have a subdomain, or just another port, these are different origins with no access to each other.
This rule also affects resources from other domains.
If we're using a script from another domain, and there's an error in it, we can't get error details.
For example, let's take a script error.js that consists of a single (bad) function call:
// error.js
noSuchFunction();
Now load it from the same site where it's located:
<script>
window.onerror = function(message, url, line, col, errorObj) {
alert(`${message}\n${url}, ${line}:${col}`);
};
</script>
<script src="/article/onload-onerror/crossorigin/error.js"></script>
We can see a good error report, like this:
Uncaught ReferenceError: noSuchFunction is not defined
https://javascript.info/article/onload-onerror/crossorigin/error.js, 1:1
Now let's load the same script from another domain:
<script>
window.onerror = function(message, url, line, col, errorObj) {
alert(`${message}\n${url}, ${line}:${col}`);
};
</script>
<script src="https://cors.javascript.info/article/onload-onerror/crossorigin/error.js"></script>
The report is different, like this:
Script error.
, 0:0
Details may vary depending on the browser, but the idea is the same: any information about the internals of a script, including error stack traces, is hidden.
Exactly because it's from another domain.
Why do we need error details?
There are many services (and we can build our own) that listen for global errors using window.onerror, save errors and provide an interface to access and analyze them.
That's great, as we can see real errors, triggered by our users.
But if a script comes from another origin, then there's not much information about errors in it, as we've just seen.
Similar cross-origin policy (CORS) is enforced for other types of resources as well.
To allow cross-origin access, the <script> tag needs to have the crossorigin attribute, plus the remote server must provide special headers.
There are three levels of cross-origin access:
No crossorigin attribute – access prohibited.
crossorigin="anonymous" – access allowed if the server responds with the header Access-Control-Allow-Origin with * or our origin.
Browser does not send authorization information and cookies to remote server.
crossorigin="use-credentials" – access allowed if the server sends back the header Access-Control-Allow-Origin with our origin and Access-Control-Allow-Credentials: true.
Browser sends authorization information and cookies to remote server.
Please note:
You can read more about cross-origin access in the chapter Fetch: Cross-Origin Requests.
It describes the fetch method for network requests, but the policy is exactly the same.
Such thing as “cookies” is out of our current scope, but you can read about them in the chapter Cookies, document.cookie.
In our case, we didn't have any crossorigin attribute.
So the cross-origin access was prohibited.
Let's add it.
We can choose between "anonymous" (no cookies sent, one server-side header needed) and "use-credentials" (sends cookies too, two server-side headers needed).
If we don't care about cookies, then "anonymous" is the way to go:
<script>
window.onerror = function(message, url, line, col, errorObj) {
alert(`${message}\n${url}, ${line}:${col}`);
};
</script>
<script crossorigin="anonymous" src="https://cors.javascript.info/article/onload-onerror/crossorigin/error.js"></script>
Now, assuming that the server provides an Access-Control-Allow-Origin header, everything's fine.
We have the full error report.
- Summary
Images <img>, external styles, scripts and other resources provide load and error events to track their loading:
load triggers on a successful load,
error triggers on a failed load.
The only exception is <iframe>: for historical reasons it always triggers load, for any load completion, even if the page is not found.
The readystatechange event also works for resources, but is rarely used, because load/error events are simpler.
importance: 4
Normally, images are loaded when they are created.
So when we add <img> to the page, the user does not see the picture immediately.
The browser needs to load it first.
To show an image immediately, we can create it “in advance”, like this:
let img = document.createElement('img');
img.src = 'my.jpg';
The browser starts loading the image and remembers it in the cache.
Later, when the same image appears in the document (no matter how), it shows up immediately.
Create a function preloadImages(sources, callback) that loads all images from the array sources and, when ready, runs callback.
For instance, this will show an alert after the images are loaded:
function loaded() {
alert("Images loaded")
}
preloadImages(["1.jpg", "2.jpg", "3.jpg"], loaded);
In case of an error, the function should still assume the picture “loaded”.
In other words, the callback is executed when all images are either loaded or errored out.
The function is useful, for instance, when we plan to show a gallery with many scrollable images, and want to be sure that all images are loaded.
In the source document you can find links to test images, and also the code to check whether they are loaded or not.
It should output 300.
Open a sandbox for the task.
The algorithm:
Make img for every source.
Add onload/onerror for every image.
Increase the counter when either onload or onerror triggers.
When the counter value equals to the sources count – we're done: callback().
Open the solution in a sandbox.TutorialBrowser: Document, Events, Interfaces
MutationObserver is a built-in object that observes a DOM element and fires a callback when it detects a change.
We'll first take a look at the syntax, and then explore a real-world use case, to see where such thing may be useful.
- Syntax
MutationObserver is easy to use.
First, we create an observer with a callback-function:
let observer = new MutationObserver(callback);
And then attach it to a DOM node:
observer.observe(node, config);config is an object with boolean options “what kind of changes to react on”:
childList – changes in the direct children of node,
subtree – in all descendants of node,
attributes – attributes of node,
attributeFilter – an array of attribute names, to observe only selected ones.
characterData – whether to observe node.data (text content),
Few other options:
attributeOldValue – if true, pass both the old and the new value of attribute to callback (see below), otherwise only the new one (needs attributes option),
characterDataOldValue – if true, pass both the old and the new value of node.data to callback (see below), otherwise only the new one (needs characterData option).
Then after any changes, the callback is executed: changes are passed in the first argument as a list of MutationRecord objects, and the observer itself as the second argument.
MutationRecord objects have properties:
type – mutation type, one of
"attributes": attribute modified
"characterData": data modified, used for text nodes,
"childList": child elements added/removed,
target – where the change occurred: an element for "attributes", or text node for "characterData", or an element for a "childList" mutation,
addedNodes/removedNodes – nodes that were added/removed,
previousSibling/nextSibling – the previous and next sibling to added/removed nodes,
attributeName/attributeNamespace – the name/namespace (for XML) of the changed attribute,
oldValue – the previous value, only for attribute or text changes, if the corresponding option is set attributeOldValue/characterDataOldValue.
For example, here's a <div> with a contentEditable attribute.
That attribute allows us to focus on it and edit.
<div contentEditable id="elem">Click and <b>edit</b>, please</div>
<script>
let observer = new MutationObserver(mutationRecords => {
console.log(mutationRecords); // console.log(the changes)
});
// observe everything except attributes
observer.observe(elem, {
childList: true, // observe direct children
subtree: true, // and lower descendants too
characterDataOldValue: true // pass old data to callback
});
</script>
If we run this code in the browser, then focus on the given <div> and change the text inside <b>edit</b>, console.log will show one mutation:
mutationRecords = [{
type: "characterData",
oldValue: "edit",
target: <text node>,
// other properties empty
}];
If we make more complex editing operations, e.g.
remove the <b>edit</b>, the mutation event may contain multiple mutation records:
mutationRecords = [{
type: "childList",
target: <div#elem>,
removedNodes: [<b>],
nextSibling: <text node>,
previousSibling: <text node>
// other properties empty
}, {
type: "characterData"
target: <text node>
// ...mutation details depend on how the browser handles such removal
// it may coalesce two adjacent text nodes "edit " and ", please" into one node
// or it may leave them separate text nodes
}];
So, MutationObserver allows to react on any changes within DOM subtree.
- Usage for integration
When such thing may be useful?
Imagine the situation when you need to add a third-party script that contains useful functionality, but also does something unwanted, e.g.
shows ads <div class="ads">Unwanted ads</div>.
Naturally, the third-party script provides no mechanisms to remove it.
Using MutationObserver, we can detect when the unwanted element appears in our DOM and remove it.
There are other situations when a third-party script adds something into our document, and we'd like to detect, when it happens, to adapt our page, dynamically resize something etc.
MutationObserver allows to implement this.
- Usage for architecture
There are also situations when MutationObserver is good from architectural standpoint.
Let's say we're making a website about programming.
Naturally, articles and other materials may contain source code snippets.
Such snippet in an HTML markup looks like this:
...
<pre class="language-javascript"><code>
// here's the code
let hello = "world";
</code></pre>
...
For better readability and at the same time, to beautify it, we'll be using a JavaScript syntax highlighting library on our site, like Prism.js.
To get syntax highlighting for above snippet in Prism, Prism.highlightElem(pre) is called, which examines the contents of such pre elements and adds special tags and styles for colored syntax highlighting into those elements, similar to what you see in examples here, on this page.
When exactly should we run that highlighting method? Well, we can do it on DOMContentLoaded event, or put the script at the bottom of the page.
The moment our DOM is ready, we can search for elements pre[class*="language"] and call Prism.highlightElem on them:
// highlight all code snippets on the page
document.querySelectorAll('pre[class*="language"]').forEach(Prism.highlightElem);
Everything's simple so far, right? We find code snippets in HTML and highlight them.
Now let's go on.
Let's say we're going to dynamically fetch materials from a server.
We'll study methods for that later in the tutorial.
For now it only matters that we fetch an HTML article from a webserver and display it on demand:
let article = /* fetch new content from server */
articleElem.innerHTML = article;
The new article HTML may contain code snippets.
We need to call Prism.highlightElem on them, otherwise they won't get highlighted.
Where and when to call Prism.highlightElem for a dynamically loaded article?
We could append that call to the code that loads an article, like this:
let article = /* fetch new content from server */
articleElem.innerHTML = article;
let snippets = articleElem.querySelectorAll('pre[class*="language-"]');
snippets.forEach(Prism.highlightElem);
…But, imagine if we have many places in the code where we load our content – articles, quizzes, forum posts, etc.
Do we need to put the highlighting call everywhere, to highlight the code in content after loading? That's not very convenient.
And what if the content is loaded by a third-party module? For example, we have a forum written by someone else, that loads content dynamically, and we'd like to add syntax highlighting to it.
No one likes patching third-party scripts.
Luckily, there's another option.
We can use MutationObserver to automatically detect when code snippets are inserted into the page and highlight them.
So we'll handle the highlighting functionality in one place, relieving us from the need to integrate it.
Dynamic highlight demo
Here's the working example.
If you run this code, it starts observing the element below and highlighting any code snippets that appear there:
let observer = new MutationObserver(mutations => {
for(let mutation of mutations) {
// examine new nodes, is there anything to highlight?
for(let node of mutation.addedNodes) {
// we track only elements, skip other nodes (e.g.
text nodes)
if (!(node instanceof HTMLElement)) continue;
// check the inserted element for being a code snippet
if (node.matches('pre[class*="language-"]')) {
Prism.highlightElement(node);
}
// or maybe there's a code snippet somewhere in its subtree?
for(let elem of node.querySelectorAll('pre[class*="language-"]')) {
Prism.highlightElement(elem);
}
}
}
});
let demoElem = document.getElementById('highlight-demo');
observer.observe(demoElem, {childList: true, subtree: true});
Here, below, there's an HTML-element and JavaScript that dynamically fills it using innerHTML.
Please run the previous code (above, observes that element), and then the code below.
You'll see how MutationObserver detects and highlights the snippet.
A demo-element with id="highlight-demo", run the code above to observe it.
The following code populates its innerHTML, that causes the MutationObserver to react and highlight its contents:
let demoElem = document.getElementById('highlight-demo');
// dynamically insert content with code snippets
demoElem.innerHTML = `A code snippet is below:
<pre class="language-javascript"><code> let hello = "world!"; </code></pre>
<div>Another one:</div>
<div>
<pre class="language-css"><code>.class { margin: 5px; } </code></pre>
</div>
`;
Now we have MutationObserver that can track all highlighting in observed elements or the whole document.
We can add/remove code snippets in HTML without thinking about it.
- Additional methods
There's a method to stop observing the node:
observer.disconnect() – stops the observation.
When we stop the observing, it might be possible that some changes were not yet processed by the observer.
In such cases, we use
observer.takeRecords() – gets a list of unprocessed mutation records – those that happened, but the callback has not handled them.
These methods can be used together, like this:
// get a list of unprocessed mutations
// should be called before disconnecting,
// if you care about possibly unhandled recent mutations
let mutationRecords = observer.takeRecords();
// stop tracking changes
observer.disconnect();
...
Records returned by observer.takeRecords() are removed from the processing queue
The callback won't be called for records, returned by observer.takeRecords().
Garbage collection interaction
Observers use weak references to nodes internally.
That is, if a node is removed from the DOM, and becomes unreachable, then it can be garbage collected.
The mere fact that a DOM node is observed doesn't prevent the garbage collection.
- Summary
MutationObserver can react to changes in DOM – attributes, text content and adding/removing elements.
We can use it to track changes introduced by other parts of our code, as well as to integrate with third-party scripts.
MutationObserver can track any changes.
The config “what to observe” options are used for optimizations, not to spend resources on unneeded callback invocations.
Browser: Document, Events, InterfacesMiscellaneous
Selection and Range
In this chapter we'll cover selection in the document, as well as selection in form fields, such as <input>.
JavaScript can access an existing selection, select/deselect DOM nodes as a whole or partially, remove the selected content from the document, wrap it into a tag, and so on.
You can find some recipes for common tasks at the end of the chapter, in “Summary” section.
Maybe that covers your current needs, but you'll get much more if you read the whole text.
The underlying Range and Selection objects are easy to grasp, and then you'll need no recipes to make them do what you want.
- Range
The basic concept of selection is Range, that is essentially a pair of “boundary points”: range start and range end.
A Range object is created without parameters:
let range = new Range();
Then we can set the selection boundaries using range.setStart(node, offset) and range.setEnd(node, offset).
The first argument node can be either a text node or an element node.
The meaning of the second argument depends on that:
If node is a text node, then offset must be the position in the text.
If node is an element node, then offset must be the child number.
For example, let's create a range in this fragment:
<p id="p">Example: <i>italic</i> and <b>bold</b></p>
Here's its DOM structure:
Let's make a range for "Example: <i>italic</i>".
As we can see, this phrase consists of exactly the first and the second children of <p>:
The starting point has <p> as the parent node, and 0 as the offset.
The ending point also has <p> as the parent node, but 2 as the offset (it specifies the range up to, but not including offset).
Here's the demo, if you run it, you can see that the text gets selected:
<p id="p">Example: <i>italic</i> and <b>bold</b></p>
<script>
let range = new Range();
range.setStart(p, 0);
range.setEnd(p, 2);
// toString of a range returns its content as text, without tags
console.log(range); // Example: italic
// let's apply this range for document selection (explained later)
document.getSelection().addRange(range);
</script>
Here's a more flexible test stand where you try more variants:
<p id="p">Example: <i>italic</i> and <b>bold</b></p>
From <input id="start" type="number" value=1> – To <input id="end" type="number" value=4>
<button id="button">Click to select</button>
<script>
button.onclick = () => {
let range = new Range();
range.setStart(p, start.value);
range.setEnd(p, end.value);
// apply the selection, explained later
document.getSelection().removeAllRanges();
document.getSelection().addRange(range);
};
</script>
E.g.
selecting in the same <p> from offset 1 to 4 gives range <i>italic</i> and <b>bold</b>:
We don't have to use the same node in setStart and setEnd.
A range may span across many unrelated nodes.
It's only important that the end is after the start.
Selecting parts of text nodes
Let's select the text partially, like this:
That's also possible, we just need to set the start and the end as a relative offset in text nodes.
We need to create a range, that:
starts from position 2 in <p> first child (taking all but two first letters of "Example: ")
ends at the position 3 in <b> first child (taking first three letters of “bold”, but no more):
<p id="p">Example: <i>italic</i> and <b>bold</b></p>
<script>
let range = new Range();
range.setStart(p.firstChild, 2);
range.setEnd(p.querySelector('b').firstChild, 3);
console.log(range); // ample: italic and bol
// use this range for selection (explained later)
window.getSelection().addRange(range);
</script>
The range object has following properties:
startContainer, startOffset – node and offset of the start,
in the example above: first text node inside <p> and 2.
endContainer, endOffset – node and offset of the end,
in the example above: first text node inside <b> and 3.
collapsed – boolean, true if the range starts and ends on the same point (so there's no content inside the range),
in the example above: falsecommonAncestorContainer – the nearest common ancestor of all nodes within the range,
in the example above: <p>
- Range methods
There are many convenience methods to manipulate ranges.
Set range start:
setStart(node, offset) set start at: position offset in nodesetStartBefore(node) set start at: right before nodesetStartAfter(node) set start at: right after node
Set range end (similar methods):
setEnd(node, offset) set end at: position offset in nodesetEndBefore(node) set end at: right before nodesetEndAfter(node) set end at: right after nodeAs it was demonstrated, node can be both a text or element node: for text nodes offset skips that many of characters, while for element nodes that many child nodes.
Others:
selectNode(node) set range to select the whole nodeselectNodeContents(node) set range to select the whole node contents
collapse(toStart) if toStart=true set end=start, otherwise set start=end, thus collapsing the range
cloneRange() creates a new range with the same start/end
To manipulate the content within the range:
deleteContents() – remove range content from the document
extractContents() – remove range content from the document and return as DocumentFragmentcloneContents() – clone range content and return as DocumentFragmentinsertNode(node) – insert node into the document at the beginning of the range
surroundContents(node) – wrap node around range content.
For this to work, the range must contain both opening and closing tags for all elements inside it: no partial ranges like <i>abc.
With these methods we can do basically anything with selected nodes.
Here's the test stand to see them in action:
Click buttons to run methods on the selection, "resetExample" to reset it.
<p id="p">Example: <i>italic</i> and <b>bold</b></p>
<p id="result"></p>
<script>
let range = new Range();
// Each demonstrated method is represented here:
let methods = {
deleteContents() {
range.deleteContents()
},
extractContents() {
let content = range.extractContents();
result.innerHTML = "";
result.append("extracted: ", content);
},
cloneContents() {
let content = range.cloneContents();
result.innerHTML = "";
result.append("cloned: ", content);
},
insertNode() {
let newNode = document.createElement('u');
newNode.innerHTML = "NEW NODE";
range.insertNode(newNode);
},
surroundContents() {
let newNode = document.createElement('u');
try {
range.surroundContents(newNode);
} catch(e) { console.log(e) }
},
resetExample() {
p.innerHTML = `Example: <i>italic</i> and <b>bold</b>`;
result.innerHTML = "";
range.setStart(p.firstChild, 2);
range.setEnd(p.querySelector('b').firstChild, 3);
window.getSelection().removeAllRanges();
window.getSelection().addRange(range);
}
};
for(let method in methods) {
document.write(`<div><button onclick="methods.${method}()">${method}</button></div>`);
}
methods.resetExample();
</script>
There also exist methods to compare ranges, but these are rarely used.
When you need them, please refer to the spec or MDN manual.
- Selection
Range is a generic object for managing selection ranges.
We may create Range objects, pass them around – they do not visually select anything on their own.
The document selection is represented by Selection object, that can be obtained as window.getSelection() or document.getSelection().
A selection may include zero or more ranges.
At least, the Selection API specification says so.
In practice though, only Firefox allows to select multiple ranges in the document by using Ctrl+click (Cmd+click for Mac).
Here's a screenshot of a selection with 3 ranges, made in Firefox:
Other browsers support at maximum 1 range.
As we'll see, some of Selection methods imply that there may be many ranges, but again, in all browsers except Firefox, there's at maximum 1.
- Selection properties
Similar to a range, a selection has a start, called “anchor”, and the end, called “focus”.
The main selection properties are:
anchorNode – the node where the selection starts,
anchorOffset – the offset in anchorNode where the selection starts,
focusNode – the node where the selection ends,
focusOffset – the offset in focusNode where the selection ends,
isCollapsed – true if selection selects nothing (empty range), or doesn't exist.
rangeCount – count of ranges in the selection, maximum 1 in all browsers except Firefox.
Usually, the selection end focusNode is after its start anchorNode, but it's not always the case
There are many ways to select the content, depending on the user agent: mouse, hotkeys, taps on a mobile etc.
Some of them, such as a mouse, allow the same selection can be created in two directions: “left-to-right” and “right-to-left”.
If the start (anchor) of the selection goes in the document before the end (focus), this selection is said to have “forward” direction.
E.g.
if the user starts selecting with mouse and goes from “Example” to “italic”:
Otherwise, if they go from the end of “italic” to “Example”, the selection is directed “backward”, its focus will be before the anchor:
That's different from Range objects that are always directed forward: the range start can't be after its end.
- Selection events
There are events on to keep track of selection:
elem.onselectstart – when a selection starts on elem, e.g.
the user starts moving mouse with pressed button.
Preventing the default action makes the selection not start.
document.onselectionchange – whenever a selection changes.
Please note: this handler can be set only on document.
Selection tracking demo
Here's a small demo that shows selection boundaries dynamically as it changes:
<p id="p">Select me: <i>italic</i> and <b>bold</b></p>
From <input id="from" disabled> – To <input id="to" disabled>
<script>
document.onselectionchange = function() {
let {anchorNode, anchorOffset, focusNode, focusOffset} = document.getSelection();
from.value = `${anchorNode && anchorNode.data}:${anchorOffset}`;
to.value = `${focusNode && focusNode.data}:${focusOffset}`;
};
</script>
Selection getting demo
To get the whole selection:
As text: just call document.getSelection().toString().
As DOM nodes: get the underlying ranges and call their cloneContents() method (only first range if we don't support Firefox multiselection).
And here's the demo of getting the selection both as text and as DOM nodes:
<p id="p">Select me: <i>italic</i> and <b>bold</b></p>
Cloned: <span id="cloned"></span>
<br>
As text: <span id="astext"></span>
<script>
document.onselectionchange = function() {
let selection = document.getSelection();
cloned.innerHTML = astext.innerHTML = "";
// Clone DOM nodes from ranges (we support multiselect here)
for (let i = 0; i < selection.rangeCount; i++) {
cloned.append(selection.getRangeAt(i).cloneContents());
}
// Get as text
astext.innerHTML += selection;
};
</script>
- Selection methods
Selection methods to add/remove ranges:
getRangeAt(i) – get i-th range, starting from 0.
In all browsers except firefox, only 0 is used.
addRange(range) – add range to selection.
All browsers except Firefox ignore the call, if the selection already has an associated range.
removeRange(range) – remove range from the selection.
removeAllRanges() – remove all ranges.
empty() – alias to removeAllRanges.
Also, there are convenience methods to manipulate the selection range directly, without Range:
collapse(node, offset) – replace selected range with a new one that starts and ends at the given node, at position offset.
setPosition(node, offset) – alias to collapse.
collapseToStart() – collapse (replace with an empty range) to selection start,
collapseToEnd() – collapse to selection end,
extend(node, offset) – move focus of the selection to the given node, position offset,
setBaseAndExtent(anchorNode, anchorOffset, focusNode, focusOffset) – replace selection range with the given start anchorNode/anchorOffset and end focusNode/focusOffset.
All content in-between them is selected.
selectAllChildren(node) – select all children of the node.
deleteFromDocument() – remove selected content from the document.
containsNode(node, allowPartialContainment = false) – checks whether the selection contains node (partially if the second argument is true)
So, for many tasks we can call Selection methods, no need to access the underlying Range object.
For example, selecting the whole contents of the paragraph <p>:
<p id="p">Select me: <i>italic</i> and <b>bold</b></p>
<script>
// select from 0th child of <p> to the last child
document.getSelection().setBaseAndExtent(p, 0, p, p.childNodes.length);
</script>
The same thing using ranges:
<p id="p">Select me: <i>italic</i> and <b>bold</b></p>
<script>
let range = new Range();
range.selectNodeContents(p); // or selectNode(p) to select the <p> tag too
document.getSelection().removeAllRanges(); // clear existing selection if any
document.getSelection().addRange(range);
</script>
To select, remove the existing selection first
If the selection already exists, empty it first with removeAllRanges().
And then add ranges.
Otherwise, all browsers except Firefox ignore new ranges.
The exception is some selection methods, that replace the existing selection, like setBaseAndExtent.
- Selection in form controls
Form elements, such as input and textarea provide special API for selection, without Selection or Range objects.
As an input value is a pure text, not HTML, there's no need for such objects, everything's much simpler.
Properties:
input.selectionStart – position of selection start (writeable),
input.selectionEnd – position of selection end (writeable),
input.selectionDirection – selection direction, one of: “forward”, “backward” or “none” (if e.g.
selected with a double mouse click),
Events:
input.onselect – triggers when something is selected.
Methods:
input.select() – selects everything in the text control (can be textarea instead of input),
input.setSelectionRange(start, end, [direction]) – change the selection to span from position start till end, in the given direction (optional).
input.setRangeText(replacement, [start], [end], [selectionMode]) – replace a range of text with the new text.
Optional arguments start and end, if provided, set the range start and end, otherwise user selection is used.
The last argument, selectionMode, determines how the selection will be set after the text has been replaced.
The possible values are:
"select" – the newly inserted text will be selected.
"start" – the selection range collapses just before the inserted text (the cursor will be immediately before it).
"end" – the selection range collapses just after the inserted text (the cursor will be right after it).
"preserve" – attempts to preserve the selection.
This is the default.
Now let's see these methods in action.
Example: tracking selection
For example, this code uses onselect event to track selection:
<textarea id="area" style="width:80%;height:60px">
Selecting in this text updates values below.
</textarea>
<br>
From <input id="from" disabled> – To <input id="to" disabled>
<script>
area.onselect = function() {
from.value = area.selectionStart;
to.value = area.selectionEnd;
};
</script>
Please note:
onselect triggers when something is selected, but not when the selection is removed.
document.onselectionchange event should not trigger for selections inside a form control, according to the spec, as it's not related to document selection and ranges.
Some browsers generate it, but we shouldn't rely on it.
Example: moving cursor
We can change selectionStart and selectionEnd, that sets the selection.
An important edge case is when selectionStart and selectionEnd equal each other.
Then it's exactly the cursor position.
Or, to rephrase, when nothing is selected, the selection is collapsed at the cursor position.
So, by setting selectionStart and selectionEnd to the same value, we move the cursor.
For example:
<textarea id="area" style="width:80%;height:60px">
Focus on me, the cursor will be at position 10.
</textarea>
<script>
area.onfocus = () => {
// zero delay setTimeout to run after browser "focus" action finishes
setTimeout(() => {
// we can set any selection
// if start=end, the cursor is exactly at that place
area.selectionStart = area.selectionEnd = 10;
});
};
</script>
Example: modifying selection
To modify the content of the selection, we can use input.setRangeText() method.
Of course, we can read selectionStart/End and, with the knowledge of the selection, change the corresponding substring of value, but setRangeText is more powerful and often more convenient.
That's a somewhat complex method.
In its simplest one-argument form it replaces the user selected range and removes the selection.
For example, here the user selection will be wrapped by *...*:
<input id="input" style="width:200px" value="Select here and click the button">
<button id="button">Wrap selection in stars *...*</button>
<script>
button.onclick = () => {
if (input.selectionStart == input.selectionEnd) {
return; // nothing is selected
}
let selected = input.value.slice(input.selectionStart, input.selectionEnd);
input.setRangeText(`*${selected}*`);
};
</script>
With more arguments, we can set range start and end.
In this example we find "THIS" in the input text, replace it and keep the replacement selected:
<input id="input" style="width:200px" value="Replace THIS in text">
<button id="button">Replace THIS</button>
<script>
button.onclick = () => {
let pos = input.value.indexOf("THIS");
if (pos >= 0) {
input.setRangeText("*THIS*", pos, pos + 4, "select");
input.focus(); // focus to make selection visible
}
};
</script>
Example: insert at cursor
If nothing is selected, or we use equal start and end in setRangeText, then the new text is just inserted, nothing is removed.
We can also insert something “at the cursor” using setRangeText.
Here's a button that inserts "HELLO" at the cursor position and puts the cursor immediately after it.
If the selection is not empty, then it gets replaced (we can detect it by comparing selectionStart!=selectionEnd and do something else instead):
<input id="input" style="width:200px" value="Text Text Text Text Text">
<button id="button">Insert "HELLO" at cursor</button>
<script>
button.onclick = () => {
input.setRangeText("HELLO", input.selectionStart, input.selectionEnd, "end");
input.focus();
};
</script>
- Making unselectable
To make something unselectable, there are three ways:
Use CSS property user-select: none.
<style>
#elem {
user-select: none;
}
</style>
<div>Selectable <div id="elem">Unselectable</div> Selectable</div>
This doesn't allow the selection to start at elem.
But the user may start the selection elsewhere and include elem into it.
Then elem will become a part of document.getSelection(), so the selection actually happens, but its content is usually ignored in copy-paste.
Prevent default action in onselectstart or mousedown events.
<div>Selectable <div id="elem">Unselectable</div> Selectable</div>
<script>
elem.onselectstart = () => false;
</script>
This prevents starting the selection on elem, but the visitor may start it at another element, then extend to elem.
That's convenient when there's another event handler on the same action that triggers the select (e.g.
mousedown).
So we disable the selection to avoid conflict, still allowing elem contents to be copied.
We can also clear the selection post-factum after it happens with document.getSelection().empty().
That's rarely used, as this causes unwanted blinking as the selection appears-disappears.
We covered two different APIs for selections:
For document: Selection and Range objects.
For input, textarea: additional methods and properties.
The second API is very simple, as it works with text.
The most used recipes are probably:
Getting the selection:
let selection = document.getSelection();
let cloned = /* element to clone the selected nodes to */;
// then apply Range methods to selection.getRangeAt(0)
// or, like here, to all ranges to support multi-select
for (let i = 0; i < selection.rangeCount; i++) {
cloned.append(selection.getRangeAt(i).cloneContents());
}
Setting the selection:
let selection = document.getSelection();
// directly:
selection.setBaseAndExtent(...from...to...);
// or we can create a range and:
selection.removeAllRanges();
selection.addRange(range);
And finally, about the cursor.
The cursor position in editable elements, like <textarea> is always at the start or the end of the selection.
We can use it to get cursor position or to move the cursor by setting elem.selectionStart and elem.selectionEnd.
Browser: Document, Events, InterfacesMiscellaneous
Event loop: microtasks and macrotasks
Browser JavaScript execution flow, as well as in Node.js, is based on an event loop.
Understanding how event loop works is important for optimizations, and sometimes for the right architecture.
In this chapter we first cover theoretical details about how things work, and then see practical applications of that knowledge.
- Event Loop
The event loop concept is very simple.
There's an endless loop, where the JavaScript engine waits for tasks, executes them and then sleeps, waiting for more tasks.
The general algorithm of the engine:
While there are tasks:
execute them, starting with the oldest task.
Sleep until a task appears, then go to 1.
That's a formalization for what we see when browsing a page.
The JavaScript engine does nothing most of the time, it only runs if a script/handler/event activates.
Examples of tasks:
When an external script <script src="..."> loads, the task is to execute it.
When a user moves their mouse, the task is to dispatch mousemove event and execute handlers.
When the time is due for a scheduled setTimeout, the task is to run its callback.
…and so on.
Tasks are set – the engine handles them – then waits for more tasks (while sleeping and consuming close to zero CPU).
It may happen that a task comes while the engine is busy, then it's enqueued.
The tasks form a queue, so-called “macrotask queue” (v8 term):
For instance, while the engine is busy executing a script, a user may move their mouse causing mousemove, and setTimeout may be due and so on, these tasks form a queue, as illustrated on the picture above.
Tasks from the queue are processed on “first come – first served” basis.
When the engine browser is done with the script, it handles mousemove event, then setTimeout handler, and so on.
So far, quite simple, right?
Two more details:
Rendering never happens while the engine executes a task.
It doesn't matter if the task takes a long time.
Changes to the DOM are painted only after the task is complete.
If a task takes too long, the browser can't do other tasks, such as processing user events.
So after a time, it raises an alert like “Page Unresponsive”, suggesting killing the task with the whole page.
That happens when there are a lot of complex calculations or a programming error leading to an infinite loop.
That was the theory.
Now let's see how we can apply that knowledge.
- Use-case 1: splitting CPU-hungry tasks
Let's say we have a CPU-hungry task.
For example, syntax-highlighting (used to colorize code examples on this page) is quite CPU-heavy.
To highlight the code, it performs the analysis, creates many colored elements, adds them to the document – for a large amount of text that takes a lot of time.
While the engine is busy with syntax highlighting, it can't do other DOM-related stuff, process user events, etc.
It may even cause the browser to “hiccup” or even “hang” for a bit, which is unacceptable.
We can avoid problems by splitting the big task into pieces.
Highlight first 100 lines, then schedule setTimeout (with zero-delay) for the next 100 lines, and so on.
To demonstrate this approach, for the sake of simplicity, instead of text-highlighting, let's take a function that counts from 1 to 1000000000.
If you run the code below, the engine will “hang” for some time.
For server-side JS that's clearly noticeable, and if you are running it in-browser, then try to click other buttons on the page – you'll see that no other events get handled until the counting finishes.
let i = 0;
let start = Date.now();
function count() {
// do a heavy job
for (let j = 0; j < 1e9; j++) {
i++;
}
alert("Done in " + (Date.now() - start) + 'ms');
}
count();
The browser may even show a “the script takes too long” warning.
Let's split the job using nested setTimeout calls:
let i = 0;
let start = Date.now();
function count() {
// do a piece of the heavy job (*)
do {
i++;
} while (i % 1e6 != 0);
if (i == 1e9) {
alert("Done in " + (Date.now() - start) + 'ms');
} else {
setTimeout(count); // schedule the new call (**)
}
}
count();
Now the browser interface is fully functional during the “counting” process.
A single run of count does a part of the job (*), and then re-schedules itself (**) if needed:
First run counts: i=1...1000000.
Second run counts: i=1000001..2000000.
…and so on.
Now, if a new side task (e.g.
onclick event) appears while the engine is busy executing part 1, it gets queued and then executes when part 1 finished, before the next part.
Periodic returns to the event loop between count executions provide just enough “air” for the JavaScript engine to do something else, to react to other user actions.
The notable thing is that both variants – with and without splitting the job by setTimeout – are comparable in speed.
There's not much difference in the overall counting time.
To make them closer, let's make an improvement.
We'll move the scheduling to the beginning of the count():
let i = 0;
let start = Date.now();
function count() {
// move the scheduling to the beginning
if (i < 1e9 - 1e6) {
setTimeout(count); // schedule the new call
}
do {
i++;
} while (i % 1e6 != 0);
if (i == 1e9) {
alert("Done in " + (Date.now() - start) + 'ms');
}
}
count();
Now when we start to count() and see that we'll need to count() more, we schedule that immediately, before doing the job.
If you run it, it's easy to notice that it takes significantly less time.
Why?
That's simple: as you remember, there's the in-browser minimal delay of 4ms for many nested setTimeout calls.
Even if we set 0, it's 4ms (or a bit more).
So the earlier we schedule it – the faster it runs.
Finally, we've split a CPU-hungry task into parts – now it doesn't block the user interface.
And its overall execution time isn't much longer.
- Use case 2: progress indication
Another benefit of splitting heavy tasks for browser scripts is that we can show progress indication.
As mentioned earlier, changes to DOM are painted only after the currently running task is completed, irrespective of how long it takes.
On one hand, that's great, because our function may create many elements, add them one-by-one to the document and change their styles – the visitor won't see any “intermediate”, unfinished state.
An important thing, right?
Here's the demo, the changes to i won't show up until the function finishes, so we'll see only the last value:
<div id="progress"></div>
<script>
function count() {
for (let i = 0; i < 1e6; i++) {
i++;
progress.innerHTML = i;
}
}
count();
</script>
…But we also may want to show something during the task, e.g.
a progress bar.
If we split the heavy task into pieces using setTimeout, then changes are painted out in-between them.
This looks prettier:
<div id="progress"></div>
<script>
let i = 0;
function count() {
// do a piece of the heavy job (*)
do {
i++;
progress.innerHTML = i;
} while (i % 1e3 != 0);
if (i < 1e7) {
setTimeout(count);
}
}
count();
</script>
Now the <div> shows increasing values of i, a kind of a progress bar.
- Use case 3: doing something after the event
In an event handler we may decide to postpone some actions until the event bubbled up and was handled on all levels.
We can do that by wrapping the code in zero delay setTimeout.
In the chapter Dispatching custom events we saw an example: custom event menu-open is dispatched in setTimeout, so that it happens after the “click” event is fully handled.
menu.onclick = function() {
// ...
// create a custom event with the clicked menu item data
let customEvent = new CustomEvent("menu-open", {
bubbles: true
});
// dispatch the custom event asynchronously
setTimeout(() => menu.dispatchEvent(customEvent));
};
- Macrotasks and Microtasks
Along with macrotasks, described in this chapter, there are microtasks, mentioned in the chapter Microtasks.
Microtasks come solely from our code.
They are usually created by promises: an execution of .then/catch/finally handler becomes a microtask.
Microtasks are used “under the cover” of await as well, as it's another form of promise handling.
There's also a special function queueMicrotask(func) that queues func for execution in the microtask queue.
Immediately after every macrotask, the engine executes all tasks from microtask queue, prior to running any other macrotasks or rendering or anything else.
For instance, take a look:
setTimeout(() => alert("timeout"));
Promise.resolve()
.then(() => alert("promise"));
alert("code");
What's going to be the order here?
code shows first, because it's a regular synchronous call.
promise shows second, because .then passes through the microtask queue, and runs after the current code.
timeout shows last, because it's a macrotask.
The richer event loop picture looks like this (order is from top to bottom, that is: the script first, then microtasks, rendering and so on):
All microtasks are completed before any other event handling or rendering or any other macrotask takes place.
That's important, as it guarantees that the application environment is basically the same (no mouse coordinate changes, no new network data, etc) between microtasks.
If we'd like to execute a function asynchronously (after the current code), but before changes are rendered or new events handled, we can schedule it with queueMicrotask.
Here's an example with “counting progress bar”, similar to the one shown previously, but queueMicrotask is used instead of setTimeout.
You can see that it renders at the very end.
Just like the synchronous code:
<div id="progress"></div>
<script>
let i = 0;
function count() {
// do a piece of the heavy job (*)
do {
i++;
progress.innerHTML = i;
} while (i % 1e3 != 0);
if (i < 1e6) {
queueMicrotask(count);
}
}
count();
</script>
- Summary
A more detailed event loop algorithm (though still simplified compared to the specification):
Dequeue and run the oldest task from the macrotask queue (e.g.
“script”).
Execute all microtasks:
While the microtask queue is not empty:
Dequeue and run the oldest microtask.
Render changes if any.
If the macrotask queue is empty, wait till a macrotask appears.
Go to step 1.
To schedule a new macrotask:
Use zero delayed setTimeout(f).
That may be used to split a big calculation-heavy task into pieces, for the browser to be able to react to user events and show progress between them.
Also, used in event handlers to schedule an action after the event is fully handled (bubbling done).
To schedule a new microtask
Use queueMicrotask(f).
Also promise handlers go through the microtask queue.
There's no UI or network event handling between microtasks: they run immediately one after another.
So one may want to queueMicrotask to execute a function asynchronously, but within the environment state.
Web Workers
For long heavy calculations that shouldn't block the event loop, we can use Web Workers.
That's a way to run code in another, parallel thread.
Web Workers can exchange messages with the main process, but they have their own variables, and their own event loop.
Web Workers do not have access to DOM, so they are useful, mainly, for calculations, to use multiple CPU cores simultaneously.
A popup window is one of the oldest methods to show additional document to user.
Basically, you just run:
window.open('https://javascript.info/')
…And it will open a new window with given URL.
Most modern browsers are configured to open url in new tabs instead of separate windows.
Popups exist from really ancient times.
The initial idea was to show another content without closing the main window.
As of now, there are other ways to do that: we can load content dynamically with fetch and show it in a dynamically generated <div>.
So, popups is not something we use everyday.
Also, popups are tricky on mobile devices, that don't show multiple windows simultaneously.
Still, there are tasks where popups are still used, e.g.
for OAuth authorization (login with Google/Facebook/…), because:
A popup is a separate window which has its own independent JavaScript environment.
So opening a popup from a third-party, non-trusted site is safe.
It's very easy to open a popup.
A popup can navigate (change URL) and send messages to the opener window.
- Popup blocking
In the past, evil sites abused popups a lot.
A bad page could open tons of popup windows with ads.
So now most browsers try to block popups and protect the user.
Most browsers block popups if they are called outside of user-triggered event handlers like onclick.
For example:
// popup blocked
window.open('https://javascript.info');
// popup allowed
button.onclick = () => {
window.open('https://javascript.info');
};
This way users are somewhat protected from unwanted popups, but the functionality is not disabled totally.
What if the popup opens from onclick, but after setTimeout? That's a bit tricky.
Try this code:
// open after 3 seconds
setTimeout(() => window.open('http://google.com'), 3000);
The popup opens in Chrome, but gets blocked in Firefox.
…If we decrease the delay, the popup works in Firefox too:
// open after 1 seconds
setTimeout(() => window.open('http://google.com'), 1000);
The difference is that Firefox treats a timeout of 2000ms or less are acceptable, but after it – removes the “trust”, assuming that now it's “outside of the user action”.
So the first one is blocked, and the second one is not.
- window.open
The syntax to open a popup is: window.open(url, name, params):
url
An URL to load into the new window.
name
A name of the new window.
Each window has a window.name, and here we can specify which window to use for the popup.
If there's already a window with such name – the given URL opens in it, otherwise a new window is opened.
params
The configuration string for the new window.
It contains settings, delimited by a comma.
There must be no spaces in params, for instance: width=200,height=100.
Settings for params:
Position:
left/top (numeric) – coordinates of the window top-left corner on the screen.
There is a limitation: a new window cannot be positioned offscreen.
width/height (numeric) – width and height of a new window.
There is a limit on minimal width/height, so it's impossible to create an invisible window.
Window features:
menubar (yes/no) – shows or hides the browser menu on the new window.
toolbar (yes/no) – shows or hides the browser navigation bar (back, forward, reload etc) on the new window.
location (yes/no) – shows or hides the URL field in the new window.
FF and IE don't allow to hide it by default.
status (yes/no) – shows or hides the status bar.
Again, most browsers force it to show.
resizable (yes/no) – allows to disable the resize for the new window.
Not recommended.
scrollbars (yes/no) – allows to disable the scrollbars for the new window.
Not recommended.
There is also a number of less supported browser-specific features, which are usually not used.
Check window.open in MDN for examples.
- Example: a minimalistic window
Let's open a window with minimal set of features, just to see which of them browser allows to disable:
let params = `scrollbars=no,resizable=no,status=no,location=no,toolbar=no,menubar=no,
width=0,height=0,left=-1000,top=-1000`;
open('/', 'test', params);
Here most “window features” are disabled and window is positioned offscreen.
Run it and see what really happens.
Most browsers “fix” odd things like zero width/height and offscreen left/top.
For instance, Chrome open such a window with full width/height, so that it occupies the full screen.
Let's add normal positioning options and reasonable width, height, left, top coordinates:
let params = `scrollbars=no,resizable=no,status=no,location=no,toolbar=no,menubar=no,
width=600,height=300,left=100,top=100`;
open('/', 'test', params);
Most browsers show the example above as required.
Rules for omitted settings:
If there is no 3rd argument in the open call, or it is empty, then the default window parameters are used.
If there is a string of params, but some yes/no features are omitted, then the omitted features assumed to have no value.
So if you specify params, make sure you explicitly set all required features to yes.
If there is no left/top in params, then the browser tries to open a new window near the last opened window.
If there is no width/height, then the new window will be the same size as the last opened.
- Accessing popup from window
The open call returns a reference to the new window.
It can be used to manipulate it's properties, change location and even more.
In this example, we generate popup content from JavaScript:
let newWin = window.open("about:blank", "hello", "width=200,height=200");
newWin.document.write("Hello, world!");
And here we modify the contents after loading:
let newWindow = open('/', 'example', 'width=300,height=300')
newWindow.focus();
alert(newWindow.location.href); // (*) about:blank, loading hasn't started yet
newWindow.onload = function() {
let html = `<div style="font-size:30px">Welcome!</div>`;
newWindow.document.body.insertAdjacentHTML('afterbegin', html);
};
Please note: immediately after window.open, the new window isn't loaded yet.
That's demonstrated by alert in line (*).
So we wait for onload to modify it.
We could also use DOMContentLoaded handler for newWin.document.
Same origin policy
Windows may freely access content of each other only if they come from the same origin (the same protocol://domain:port).
Otherwise, e.g.
if the main window is from site.com, and the popup from gmail.com, that's impossible for user safety reasons.
For the details, see chapter Cross-window communication.
- Accessing window from popup
A popup may access the “opener” window as well using window.opener reference.
It is null for all windows except popups.
If you run the code below, it replaces the opener (current) window content with “Test”:
let newWin = window.open("about:blank", "hello", "width=200,height=200");
newWin.document.write(
"<script>window.opener.document.body.innerHTML = 'Test'<\/script>"
);
So the connection between the windows is bidirectional: the main window and the popup have a reference to each other.
- Closing a popup
To close a window: win.close().
To check if a window is closed: win.closed.
Technically, the close() method is available for any window, but window.close() is ignored by most browsers if window is not created with window.open().
So it'll only work on a popup.
The closed property is true if the window is closed.
That's useful to check if the popup (or the main window) is still open or not.
A user can close it anytime, and our code should take that possibility into account.
This code loads and then closes the window:
let newWindow = open('/', 'example', 'width=300,height=300');
newWindow.onload = function() {
newWindow.close();
alert(newWindow.closed); // true
};
- Moving and resizing
There are methods to move/resize a window:
win.moveBy(x,y)
Move the window relative to current position x pixels to the right and y pixels down.
Negative values are allowed (to move left/up).
win.moveTo(x,y)
Move the window to coordinates (x,y) on the screen.
win.resizeBy(width,height)
Resize the window by given width/height relative to the current size.
Negative values are allowed.
win.resizeTo(width,height)
Resize the window to the given size.
There's also window.onresize event.
Only popups
To prevent abuse, the browser usually blocks these methods.
They only work reliably on popups that we opened, that have no additional tabs.
No minification/maximization
JavaScript has no way to minify or maximize a window.
These OS-level functions are hidden from Frontend-developers.
Move/resize methods do not work for maximized/minimized windows.
Scroll the window x pixels right and y down relative the current scroll.
Negative values are allowed.
win.scrollTo(x,y)
Scroll the window to the given coordinates (x,y).
elem.scrollIntoView(top = true)
Scroll the window to make elem show up at the top (the default) or at the bottom for elem.scrollIntoView(false).
There's also window.onscroll event.
- Focus/blur on a window
Theoretically, there are window.focus() and window.blur() methods to focus/unfocus on a window.
And there are also focus/blur events that allow to catch the moment when the visitor focuses on a window and switches elsewhere.
Although, in practice they are severely limited, because in the past evil pages abused them.
For instance, look at this code:
window.onblur = () => window.focus();
When a user attempts to switch out of the window (window.onblur), it brings the window back into focus.
The intention is to “lock” the user within the window.
So browsers had to introduce many limitations to forbid the code like that and protect the user from ads and evils pages.
They depend on the browser.
For instance, a mobile browser usually ignores window.focus() completely.
Also focusing doesn't work when a popup opens in a separate tab rather than a new window.
Still, there are some use cases when such calls do work and can be useful.
For instance:
When we open a popup, it's might be a good idea to run a newWindow.focus() on it.
Just in case, for some OS/browser combinations it ensures that the user is in the new window now.
If we want to track when a visitor actually uses our web-app, we can track window.onfocus/onblur.
That allows us to suspend/resume in-page activities, animations etc.
But please note that the blur event means that the visitor switched out from the window, but they still may observe it.
The window is in the background, but still may be visible.
- Summary
Popup windows are used rarely, as there are alternatives: loading and displaying information in-page, or in iframe.
If we're going to open a popup, a good practice is to inform the user about it.
An “opening window” icon near a link or button would allow the visitor to survive the focus shift and keep both windows in mind.
A popup can be opened by the open(url, name, params) call.
It returns the reference to the newly opened window.
Browsers block open calls from the code outside of user actions.
Usually a notification appears, so that a user may allow them.
Browsers open a new tab by default, but if sizes are provided, then it'll be a popup window.
The popup may access the opener window using the window.opener property.
The main window and the popup can freely read and modify each other if they have the same origin.
Otherwise, they can change location of each other and exchange messages.
To close the popup: use close() call.
Also the user may close them (just like any other windows).
The window.closed is true after that.
Methods focus() and blur() allow to focus/unfocus a window.
But they don't work all the time.
Events focus and blur allow to track switching in and out of the window.
But please note that a window may still be visible even in the background state, after blur.
Frames and windows
Cross-window communication
The “Same Origin” (same site) policy limits access of windows and frames to each other.
The idea is that if a user has two pages open: one from john-smith.com, and another one is gmail.com, then they wouldn't want a script from john-smith.com to read our mail from gmail.com.
So, the purpose of the “Same Origin” policy is to protect users from information theft.
- Same Origin
Two URLs are said to have the “same origin” if they have the same protocol, domain and port.
These URLs all share the same origin:
http://site.comhttp://site.com/http://site.com/my/page.html
These ones do not:
http://www.site.com (another domain: www. matters)
http://site.org (another domain: .org matters)
https://site.com (another protocol: https)
http://site.com:8080 (another port: 8080)
The “Same Origin” policy states that:
if we have a reference to another window, e.g.
a popup created by window.open or a window inside <iframe>, and that window comes from the same origin, then we have full access to that window.
otherwise, if it comes from another origin, then we can't access the content of that window: variables, document, anything.
The only exception is location: we can change it (thus redirecting the user).
But we cannot read location (so we can't see where the user is now, no information leak).
In action: iframe
An <iframe> tag hosts a separate embedded window, with its own separate document and window objects.
We can access them using properties:
iframe.contentWindow to get the window inside the <iframe>.
iframe.contentDocument to get the document inside the <iframe>, shorthand for iframe.contentWindow.document.
When we access something inside the embedded window, the browser checks if the iframe has the same origin.
If that's not so then the access is denied (writing to location is an exception, it's still permitted).
For instance, let's try reading and writing to <iframe> from another origin:
<iframe src="https://example.com" id="iframe"></iframe>
<script>
iframe.onload = function() {
// we can get the reference to the inner window
let iframeWindow = iframe.contentWindow; // OK
try {
// ...but not to the document inside it
let doc = iframe.contentDocument; // ERROR
} catch(e) {
alert(e); // Security Error (another origin)
}
// also we can't READ the URL of the page in iframe
try {
// Can't read URL from the Location object
let href = iframe.contentWindow.location.href; // ERROR
} catch(e) {
alert(e); // Security Error
}
// ...we can WRITE into location (and thus load something else into the iframe)!
iframe.contentWindow.location = '/'; // OK
iframe.onload = null; // clear the handler, not to run it after the location change
};
</script>
The code above shows errors for any operations except:
Getting the reference to the inner window iframe.contentWindow – that's allowed.
Writing to location.
Contrary to that, if the <iframe> has the same origin, we can do anything with it:
<!-- iframe from the same site -->
<iframe src="/" id="iframe"></iframe>
<script>
iframe.onload = function() {
// just do anything
iframe.contentDocument.body.prepend("Hello, world!");
};
</script>iframe.onload vs iframe.contentWindow.onload
The iframe.onload event (on the <iframe> tag) is essentially the same as iframe.contentWindow.onload (on the embedded window object).
It triggers when the embedded window fully loads with all resources.
…But we can't access iframe.contentWindow.onload for an iframe from another origin, so using iframe.onload.
- Windows on subdomains: document.domain
By definition, two URLs with different domains have different origins.
But if windows share the same second-level domain, for instance john.site.com, peter.site.com and site.com (so that their common second-level domain is site.com), we can make the browser ignore that difference, so that they can be treated as coming from the “same origin” for the purposes of cross-window communication.
To make it work, each such window should run the code:
document.domain = 'site.com';
That's all.
Now they can interact without limitations.
Again, that's only possible for pages with the same second-level domain.
- Iframe: wrong document pitfall
When an iframe comes from the same origin, and we may access its document, there's a pitfall.
It's not related to cross-origin things, but important to know.
Upon its creation an iframe immediately has a document.
But that document is different from the one that loads into it!
So if we do something with the document immediately, that will probably be lost.
Here, look:
<iframe src="/" id="iframe"></iframe>
<script>
let oldDoc = iframe.contentDocument;
iframe.onload = function() {
let newDoc = iframe.contentDocument;
// the loaded document is not the same as initial!
alert(oldDoc == newDoc); // false
};
</script>
We shouldn't work with the document of a not-yet-loaded iframe, because that's the wrong document.
If we set any event handlers on it, they will be ignored.
How to detect the moment when the document is there?
The right document is definitely at place when iframe.onload triggers.
But it only triggers when the whole iframe with all resources is loaded.
We can try to catch the moment earlier using checks in setInterval:
<iframe src="/" id="iframe"></iframe>
<script>
let oldDoc = iframe.contentDocument;
// every 100 ms check if the document is the new one
let timer = setInterval(() => {
let newDoc = iframe.contentDocument;
if (newDoc == oldDoc) return;
alert("New document is here!");
clearInterval(timer); // cancel setInterval, don't need it any more
}, 100);
</script>
- Collection: window.frames
An alternative way to get a window object for <iframe> – is to get it from the named collection window.frames:
By number: window.frames[0] – the window object for the first frame in the document.
By name: window.frames.iframeName – the window object for the frame with name="iframeName".
For instance:
<iframe src="/" style="height:80px" name="win" id="iframe"></iframe>
<script>
alert(iframe.contentWindow == frames[0]); // true
alert(iframe.contentWindow == frames.win); // true
</script>
An iframe may have other iframes inside.
The corresponding window objects form a hierarchy.
Navigation links are:
window.frames – the collection of “children” windows (for nested frames).
window.parent – the reference to the “parent” (outer) window.
window.top – the reference to the topmost parent window.
For instance:
window.frames[0].parent === window; // true
We can use the top property to check if the current document is open inside a frame or not:
if (window == top) { // current window == window.top?
alert('The script is in the topmost window, not in a frame');
} else {
alert('The script runs in a frame!');
}
- The “sandbox” iframe attribute
The sandbox attribute allows for the exclusion of certain actions inside an <iframe> in order to prevent it executing untrusted code.
It “sandboxes” the iframe by treating it as coming from another origin and/or applying other limitations.
There's a “default set” of restrictions applied for <iframe sandbox src="...">.
But it can be relaxed if we provide a space-separated list of restrictions that should not be applied as a value of the attribute, like this: <iframe sandbox="allow-forms allow-popups">.
In other words, an empty "sandbox" attribute puts the strictest limitations possible, but we can put a space-delimited list of those that we want to lift.
Here's a list of limitations:
allow-same-origin
By default "sandbox" forces the “different origin” policy for the iframe.
In other words, it makes the browser to treat the iframe as coming from another origin, even if its src points to the same site.
With all implied restrictions for scripts.
This option removes that feature.
allow-top-navigation
Allows the iframe to change parent.location.
allow-forms
Allows to submit forms from iframe.
allow-scripts
Allows to run scripts from the iframe.
allow-popups
Allows to window.open popups from the iframe
See the manual for more.
The example below demonstrates a sandboxed iframe with the default set of restrictions: <iframe sandbox src="...">.
It has some JavaScript and a form.
Please note that nothing works.
So the default set is really harsh:
Result
index.html
sandboxed.html
<!doctype html>
<html>
<head>
<meta charset="UTF-8">
</head>
<body>
<div>The iframe below has the <code>sandbox</code> attribute.</div>
<iframe sandbox src="sandboxed.html" style="height:60px;width:90%"></iframe>
</body>
</html><!doctype html>
<html>
<head>
<meta charset="UTF-8">
</head>
<body>
<button onclick="alert(123)">Click to run a script (doesn't work)</button>
<form action="http://google.com">
<input type="text">
<input type="submit" value="Submit (doesn't work)">
</form>
</body>
</html>
Please note:
The purpose of the "sandbox" attribute is only to add more restrictions.
It cannot remove them.
In particular, it can't relax same-origin restrictions if the iframe comes from another origin.
- Cross-window messaging
The postMessage interface allows windows to talk to each other no matter which origin they are from.
So, it's a way around the “Same Origin” policy.
It allows a window from john-smith.com to talk to gmail.com and exchange information, but only if they both agree and call corresponding JavaScript functions.
That makes it safe for users.
The interface has two parts.
postMessage
The window that wants to send a message calls postMessage method of the receiving window.
In other words, if we want to send the message to win, we should call win.postMessage(data, targetOrigin).
Arguments:
data
The data to send.
Can be any object, the data is cloned using the “structured serialization algorithm”.
IE supports only strings, so we should JSON.stringify complex objects to support that browser.
targetOrigin
Specifies the origin for the target window, so that only a window from the given origin will get the message.
The targetOrigin is a safety measure.
Remember, if the target window comes from another origin, we can't read it's location in the sender window.
So we can't be sure which site is open in the intended window right now: the user could navigate away, and the sender window has no idea about it.
Specifying targetOrigin ensures that the window only receives the data if it's still at the right site.
Important when the data is sensitive.
For instance, here win will only receive the message if it has a document from the origin http://example.com:
<iframe src="http://example.com" name="example">
<script>
let win = window.frames.example;
win.postMessage("message", "http://example.com");
</script>
If we don't want that check, we can set targetOrigin to *.
<iframe src="http://example.com" name="example">
<script>
let win = window.frames.example;
win.postMessage("message", "*");
</script>
onmessage
To receive a message, the target window should have a handler on the message event.
It triggers when postMessage is called (and targetOrigin check is successful).
The event object has special properties:
data
The data from postMessage.
origin
The origin of the sender, for instance http://javascript.info.
source
The reference to the sender window.
We can immediately source.postMessage(...) back if we want.
To assign that handler, we should use addEventListener, a short syntax window.onmessage does not work.
Here's an example:
window.addEventListener("message", function(event) {
if (event.origin != 'http://javascript.info') {
// something from an unknown domain, let's ignore it
return;
}
alert( "received: " + event.data );
// can message back using event.source.postMessage(...)
});
The full example:
Result
iframe.html
index.html
<!doctype html>
<html>
<head>
<meta charset="UTF-8">
</head>
<body>
Receiving iframe.
<script>
window.addEventListener('message', function(event) {
alert(`Received ${event.data} from ${event.origin}`);
});
</script>
</body>
</html><!doctype html>
<html>
<head>
<meta charset="UTF-8">
</head>
<body>
<form id="form">
<input type="text" placeholder="Enter message" name="message">
<input type="submit" value="Click to send">
</form>
<iframe src="iframe.html" id="iframe" style="display:block;height:60px"></iframe>
<script>
form.onsubmit = function() {
iframe.contentWindow.postMessage(this.message.value, '*');
return false;
};
</script>
</body>
</html>
- Summary
To call methods and access the content of another window, we should first have a reference to it.
For popups we have these references:
From the opener window: window.open – opens a new window and returns a reference to it,
From the popup: window.opener – is a reference to the opener window from a popup.
For iframes, we can access parent/children windows using:
window.frames – a collection of nested window objects,
window.parent, window.top are the references to parent and top windows,
iframe.contentWindow is the window inside an <iframe> tag.
If windows share the same origin (host, port, protocol), then windows can do whatever they want with each other.
Otherwise, only possible actions are:
Change the location of another window (write-only access).
Post a message to it.
Exceptions are:
Windows that share the same second-level domain: a.site.com and b.site.com.
Then setting document.domain='site.com' in both of them puts them into the “same origin” state.
If an iframe has a sandbox attribute, it is forcefully put into the “different origin” state, unless the allow-same-origin is specified in the attribute value.
That can be used to run untrusted code in iframes from the same site.
The postMessage interface allows two windows with any origins to talk:
The sender calls targetWin.postMessage(data, targetOrigin).
If targetOrigin is not '*', then the browser checks if window targetWin has the origin targetOrigin.
If it is so, then targetWin triggers the message event with special properties:
origin – the origin of the sender window (like http://my.site.com)
source – the reference to the sender window.
data – the data, any object in everywhere except IE that supports only strings.
We should use addEventListener to set the handler for this event inside the target window.
Frames and windows
The clickjacking attack
The “clickjacking” attack allows an evil page to click on a “victim site” on behalf of the visitor.
Many sites were hacked this way, including Twitter, Facebook, Paypal and other sites.
They have all been fixed, of course.
- The idea
The idea is very simple.
Here's how clickjacking was done with Facebook:
A visitor is lured to the evil page.
It doesn't matter how.
The page has a harmless-looking link on it (like “get rich now” or “click here, very funny”).
Over that link the evil page positions a transparent <iframe> with src from facebook.com, in such a way that the “Like” button is right above that link.
Usually that's done with z-index.
In attempting to click the link, the visitor in fact clicks the button.
- The demo
Here's how the evil page looks.
To make things clear, the <iframe> is half-transparent (in real evil pages it's fully transparent):
<style>
iframe { /* iframe from the victim site */
width: 400px;
height: 100px;
position: absolute;
top:0; left:-20px;
opacity: 0.5; /* in real opacity:0 */
z-index: 1;
}
</style>
<div>Click to get rich now:</div>
<!-- The url from the victim site -->
<iframe src="/clickjacking/facebook.html"></iframe>
<button>Click here!</button>
<div>...And you're cool (I'm a cool hacker actually)!</div>
The full demo of the attack:
Result
facebook.html
index.html
<!DOCTYPE HTML>
<html>
<body style="margin:10px;padding:10px">
<input type="button" onclick="alert('Like pressed on facebook.html!')" value="I LIKE IT !">
</body>
</html><!doctype html>
<html>
<head>
<meta charset="UTF-8">
</head>
<body>
<style>
iframe {
width: 400px;
height: 100px;
position: absolute;
top: 5px;
left: -14px;
opacity: 0.5;
z-index: 1;
}
</style>
<div>Click to get rich now:</div>
<!-- The url from the victim site -->
<iframe src="facebook.html"></iframe>
<button>Click here!</button>
<div>...And you're cool (I'm a cool hacker actually)!</div>
</body>
</html>
Here we have a half-transparent <iframe src="facebook.html">, and in the example we can see it hovering over the button.
A click on the button actually clicks on the iframe, but that's not visible to the user, because the iframe is transparent.
As a result, if the visitor is authorized on Facebook (“remember me” is usually turned on), then it adds a “Like”.
On Twitter that would be a “Follow” button.
Here's the same example, but closer to reality, with opacity:0 for <iframe>:
Result
facebook.html
index.html
<!DOCTYPE HTML>
<html>
<body style="margin:10px;padding:10px">
<input type="button" onclick="alert('Like pressed on facebook.html!')" value="I LIKE IT !">
</body>
</html><!doctype html>
<html>
<head>
<meta charset="UTF-8">
</head>
<body>
<style>
iframe {
width: 400px;
height: 100px;
position: absolute;
top: 5px;
left: -14px;
opacity: 0;
z-index: 1;
}
</style>
<div>Click to get rich now:</div>
<!-- The url from the victim site -->
<iframe src="facebook.html"></iframe>
<button>Click here!</button>
<div>...And you're cool (I'm a cool hacker actually)!</div>
</body>
</html>
All we need to attack – is to position the <iframe> on the evil page in such a way that the button is right over the link.
So that when a user clicks the link, they actually click the button.
That's usually doable with CSS.
Clickjacking is for clicks, not for keyboard
The attack only affects mouse actions (or similar, like taps on mobile).
Keyboard input is much difficult to redirect.
Technically, if we have a text field to hack, then we can position an iframe in such a way that text fields overlap each other.
So when a visitor tries to focus on the input they see on the page, they actually focus on the input inside the iframe.
But then there's a problem.
Everything that the visitor types will be hidden, because the iframe is not visible.
People will usually stop typing when they can't see their new characters printing on the screen.
- Old-school defences (weak)
The oldest defence is a bit of JavaScript which forbids opening the page in a frame (so-called “framebusting”).
That looks like this:
if (top != window) {
top.location = window.location;
}
That is: if the window finds out that it's not on top, then it automatically makes itself the top.
This not a reliable defence, because there are many ways to hack around it.
Let's cover a few.
Blocking top-navigation
We can block the transition caused by changing top.location in beforeunload event handler.
The top page (enclosing one, belonging to the hacker) sets a preventing handler to it, like this:
window.onbeforeunload = function() {
return false;
};
When the iframe tries to change top.location, the visitor gets a message asking them whether they want to leave.
In most cases the visitor would answer negatively because they don't know about the iframe – all they can see is the top page, there's no reason to leave.
So top.location won't change!
In action:
Result
iframe.html
index.html
<!doctype html>
<html>
<head>
<meta charset="UTF-8">
</head>
<body>
<div>Changes top.location to javascript.info</div>
<script>
top.location = 'https://javascript.info';
</script>
</body>
</html><!doctype html>
<html>
<head>
<meta charset="UTF-8">
<style>
iframe {
width: 400px;
height: 100px;
position: absolute;
top: 0;
left: -20px;
opacity: 0;
z-index: 1;
}
</style>
<script>
function attack() {
window.onbeforeunload = function() {
window.onbeforeunload = null;
return "Want to leave without learning all the secrets (he-he)?";
};
document.body.insertAdjacentHTML('beforeend', '<iframe src="iframe.html">');
}
</script>
</head>
<body>
<p>After a click on the button the visitor gets a "strange" question about whether they want to leave.</p>
<p>Probably they would respond "No", and the iframe protection is hacked.</p>
<button onclick="attack()">Add a "protected" iframe</button>
</body>
</html>
Sandbox attribute
One of the things restricted by the sandbox attribute is navigation.
A sandboxed iframe may not change top.location.
So we can add the iframe with sandbox="allow-scripts allow-forms".
That would relax the restrictions, permitting scripts and forms.
But we omit allow-top-navigation so that changing top.location is forbidden.
Here's the code:
<iframe sandbox="allow-scripts allow-forms" src="facebook.html"></iframe>
There are other ways to work around that simple protection too.
- X-Frame-Options
The server-side header X-Frame-Options can permit or forbid displaying the page inside a frame.
It must be sent exactly as HTTP-header: the browser will ignore it if found in HTML <meta> tag.
So, <meta http-equiv="X-Frame-Options"...> won't do anything.
The header may have 3 values:
DENY
Never ever show the page inside a frame.
SAMEORIGIN
Allow inside a frame if the parent document comes from the same origin.
ALLOW-FROM domain
Allow inside a frame if the parent document is from the given domain.
For instance, Twitter uses X-Frame-Options: SAMEORIGIN.
Here's the result:
<iframe src="https://twitter.com"></iframe>
Depending on your browser, the iframe above is either empty or alerting you that the browser won't permit that page to be navigating in this way.
- Showing with disabled functionality
The X-Frame-Options header has a side-effect.
Other sites won't be able to show our page in a frame, even if they have good reasons to do so.
So there are other solutions… For instance, we can “cover” the page with a <div> with styles height: 100%; width: 100%;, so that it will intercept all clicks.
That <div> is to be removed if window == top or if we figure out that we don't need the protection.
Something like this:
<style>
#protector {
height: 100%;
width: 100%;
position: absolute;
left: 0;
top: 0;
z-index: 99999999;
}
</style>
<div id="protector">
<a href="/" target="_blank">Go to the site</a>
</div>
<script>
// there will be an error if top window is from the different origin
// but that's ok here
if (top.document.domain == document.domain) {
protector.remove();
}
</script>
The demo:
Result
iframe.html
index.html
<!doctype html>
<html>
<head>
<meta charset="UTF-8">
<style>
#protector {
height: 100%;
width: 100%;
position: absolute;
left: 0;
top: 0;
z-index: 99999999;
}
</style>
</head>
<body>
<div id="protector">
<a href="/" target="_blank">Go to the site</a>
</div>
<script>
if (top.document.domain == document.domain) {
protector.remove();
}
</script>
This text is always visible.
But if the page was open inside a document from another domain, the div over it would prevent any actions.
<button onclick="alert(1)">Click wouldn't work in that case</button>
</body>
</html><!doctype html>
<html>
<head>
<meta charset="UTF-8">
</head>
<body>
<iframe src="iframe.html"></iframe>
</body>
</html>
- Samesite cookie attribute
The samesite cookie attribute can also prevent clickjacking attacks.
A cookie with such attribute is only sent to a website if it's opened directly, not via a frame, or otherwise.
More information in the chapter Cookies, document.cookie.
If the site, such as Facebook, had samesite attribute on its authentication cookie, like this:
Set-Cookie: authorization=secret; samesite
…Then such cookie wouldn't be sent when Facebook is open in iframe from another site.
So the attack would fail.
The samesite cookie attribute will not have an effect when cookies are not used.
This may allow other websites to easily show our public, unauthenticated pages in iframes.
However, this may also allow clickjacking attacks to work in a few limited cases.
An anonymous polling website that prevents duplicate voting by checking IP addresses, for example, would still be vulnerable to clickjacking because it does not authenticate users using cookies.
- Summary
Clickjacking is a way to “trick” users into clicking on a victim site without even knowing what's happening.
That's dangerous if there are important click-activated actions.
A hacker can post a link to their evil page in a message, or lure visitors to their page by some other means.
There are many variations.
From one perspective – the attack is “not deep”: all a hacker is doing is intercepting a single click.
But from another perspective, if the hacker knows that after the click another control will appear, then they may use cunning messages to coerce the user into clicking on them as well.
The attack is quite dangerous, because when we engineer the UI we usually don't anticipate that a hacker may click on behalf of the visitor.
So vulnerabilities can be found in totally unexpected places.
It is recommended to use X-Frame-Options: SAMEORIGIN on pages (or whole websites) which are not intended to be viewed inside frames.
Use a covering <div> if we want to allow our pages to be shown in iframes, but still stay safe.
In web-development we meet binary data mostly while dealing with files (create, upload, download).
Another typical use case is image processing.
That's all possible in JavaScript, and binary operations are high-performant.
Although, there's a bit of confusion, because there are many classes.
To name a few:
ArrayBuffer, Uint8Array, DataView, Blob, File, etc.
Binary data in JavaScript is implemented in a non-standard way, compared to other languages.
But when we sort things out, everything becomes fairly simple.
The basic binary object is ArrayBuffer – a reference to a fixed-length contiguous memory area.
We create it like this:
let buffer = new ArrayBuffer(16); // create a buffer of length 16
alert(buffer.byteLength); // 16
This allocates a contiguous memory area of 16 bytes and pre-fills it with zeroes.
ArrayBuffer is not an array of something
Let's eliminate a possible source of confusion.
ArrayBuffer has nothing in common with Array:
It has a fixed length, we can't increase or decrease it.
It takes exactly that much space in the memory.
To access individual bytes, another “view” object is needed, not buffer[index].
ArrayBuffer is a memory area.
What's stored in it? It has no clue.
Just a raw sequence of bytes.
To manipulate an ArrayBuffer, we need to use a “view” object.
A view object does not store anything on it's own.
It's the “eyeglasses” that give an interpretation of the bytes stored in the ArrayBuffer.
For instance:
Uint8Array – treats each byte in ArrayBuffer as a separate number, with possible values from 0 to 255 (a byte is 8-bit, so it can hold only that much).
Such value is called a “8-bit unsigned integer”.
Uint16Array – treats every 2 bytes as an integer, with possible values from 0 to 65535.
That's called a “16-bit unsigned integer”.
Uint32Array – treats every 4 bytes as an integer, with possible values from 0 to 4294967295.
That's called a “32-bit unsigned integer”.
Float64Array – treats every 8 bytes as a floating point number with possible values from 5.0x10-324 to 1.8x10308.
So, the binary data in an ArrayBuffer of 16 bytes can be interpreted as 16 “tiny numbers”, or 8 bigger numbers (2 bytes each), or 4 even bigger (4 bytes each), or 2 floating-point values with high precision (8 bytes each).
ArrayBuffer is the core object, the root of everything, the raw binary data.
But if we're going to write into it, or iterate over it, basically for almost any operation – we must use a view, e.g:
let buffer = new ArrayBuffer(16); // create a buffer of length 16
let view = new Uint32Array(buffer); // treat buffer as a sequence of 32-bit integers
alert(Uint32Array.BYTES_PER_ELEMENT); // 4 bytes per integer
alert(view.length); // 4, it stores that many integers
alert(view.byteLength); // 16, the size in bytes
// let's write a value
view[0] = 123456;
// iterate over values
for(let num of view) {
alert(num); // 123456, then 0, 0, 0 (4 values total)
}
- TypedArray
The common term for all these views (Uint8Array, Uint32Array, etc) is TypedArray.
They share the same set of methods and properities.
Please note, there's no constructor called TypedArray, it's just a common “umbrella” term to represent one of views over ArrayBuffer: Int8Array, Uint8Array and so on, the full list will soon follow.
When you see something like new TypedArray, it means any of new Int8Array, new Uint8Array, etc.
Typed arrays behave like regular arrays: have indexes and are iterable.
A typed array constructor (be it Int8Array or Float64Array, doesn't matter) behaves differently depending on argument types.
There are 5 variants of arguments:
new TypedArray(buffer, [byteOffset], [length]);
new TypedArray(object);
new TypedArray(typedArray);
new TypedArray(length);
new TypedArray();
If an ArrayBuffer argument is supplied, the view is created over it.
We used that syntax already.
Optionally we can provide byteOffset to start from (0 by default) and the length (till the end of the buffer by default), then the view will cover only a part of the buffer.
If an Array, or any array-like object is given, it creates a typed array of the same length and copies the content.
We can use it to pre-fill the array with the data:
let arr = new Uint8Array([0, 1, 2, 3]);
alert( arr.length ); // 4, created binary array of the same length
alert( arr[1] ); // 1, filled with 4 bytes (unsigned 8-bit integers) with given values
If another TypedArray is supplied, it does the same: creates a typed array of the same length and copies values.
Values are converted to the new type in the process, if needed.
let arr16 = new Uint16Array([1, 1000]);
let arr8 = new Uint8Array(arr16);
alert( arr8[0] ); // 1
alert( arr8[1] ); // 232, tried to copy 1000, but can't fit 1000 into 8 bits (explanations below)
For a numeric argument length – creates the typed array to contain that many elements.
Its byte length will be length multiplied by the number of bytes in a single item TypedArray.BYTES_PER_ELEMENT:
let arr = new Uint16Array(4); // create typed array for 4 integers
alert( Uint16Array.BYTES_PER_ELEMENT ); // 2 bytes per integer
alert( arr.byteLength ); // 8 (size in bytes)
Without arguments, creates an zero-length typed array.
We can create a TypedArray directly, without mentioning ArrayBuffer.
But a view cannot exist without an underlying ArrayBuffer, so gets created automatically in all these cases except the first one (when provided).
To access the ArrayBuffer, there are properties:
arr.buffer – references the ArrayBuffer.
arr.byteLength – the length of the ArrayBuffer.
So, we can always move from one view to another:
let arr8 = new Uint8Array([0, 1, 2, 3]);
// another view on the same data
let arr16 = new Uint16Array(arr8.buffer);
Here's the list of typed arrays:
Uint8Array, Uint16Array, Uint32Array – for integer numbers of 8, 16 and 32 bits.
Uint8ClampedArray – for 8-bit integers, “clamps” them on assignment (see below).
Int8Array, Int16Array, Int32Array – for signed integer numbers (can be negative).
Float32Array, Float64Array – for signed floating-point numbers of 32 and 64 bits.
No int8 or similar single-valued types
Please note, despite of the names like Int8Array, there's no single-value type like int, or int8 in JavaScript.
That's logical, as Int8Array is not an array of these individual values, but rather a view on ArrayBuffer.
Out-of-bounds behavior
What if we attempt to write an out-of-bounds value into a typed array? There will be no error.
But extra bits are cut-off.
For instance, let's try to put 256 into Uint8Array.
In binary form, 256 is 100000000 (9 bits), but Uint8Array only provides 8 bits per value, that makes the available range from 0 to 255.
For bigger numbers, only the rightmost (less significant) 8 bits are stored, and the rest is cut off:
So we'll get zero.
For 257, the binary form is 100000001 (9 bits), the rightmost 8 get stored, so we'll have 1 in the array:
In other words, the number modulo 28 is saved.
Here's the demo:
let uint8array = new Uint8Array(16);
let num = 256;
alert(num.toString(2)); // 100000000 (binary representation)
uint8array[0] = 256;
uint8array[1] = 257;
alert(uint8array[0]); // 0
alert(uint8array[1]); // 1Uint8ClampedArray is special in this aspect, its behavior is different.
It saves 255 for any number that is greater than 255, and 0 for any negative number.
That behavior is useful for image processing.
- TypedArray methods
TypedArray has regular Array methods, with notable exceptions.
We can iterate, map, slice, find, reduce etc.
There are few things we can't do though:
No splice – we can't “delete” a value, because typed arrays are views on a buffer, and these are fixed, contiguous areas of memory.
All we can do is to assign a zero.
No concat method.
There are two additional methods:
arr.set(fromArr, [offset]) copies all elements from fromArr to the arr, starting at position offset (0 by default).
arr.subarray([begin, end]) creates a new view of the same type from begin to end (exclusive).
That's similar to slice method (that's also supported), but doesn't copy anything – just creates a new view, to operate on the given piece of data.
These methods allow us to copy typed arrays, mix them, create new arrays from existing ones, and so on.
- DataView
DataView is a special super-flexible “untyped” view over ArrayBuffer.
It allows to access the data on any offset in any format.
For typed arrays, the constructor dictates what the format is.
The whole array is supposed to be uniform.
The i-th number is arr[i].
With DataView we access the data with methods like .getUint8(i) or .getUint16(i).
We choose the format at method call time instead of the construction time.
The syntax:
new DataView(buffer, [byteOffset], [byteLength])buffer – the underlying ArrayBuffer.
Unlike typed arrays, DataView doesn't create a buffer on its own.
We need to have it ready.
byteOffset – the starting byte position of the view (by default 0).
byteLength – the byte length of the view (by default till the end of buffer).
For instance, here we extract numbers in different formats from the same buffer:
// binary array of 4 bytes, all have the maximal value 255
let buffer = new Uint8Array([255, 255, 255, 255]).buffer;
let dataView = new DataView(buffer);
// get 8-bit number at offset 0
alert( dataView.getUint8(0) ); // 255
// now get 16-bit number at offset 0, it consists of 2 bytes, together interpreted as 65535
alert( dataView.getUint16(0) ); // 65535 (biggest 16-bit unsigned int)
// get 32-bit number at offset 0
alert( dataView.getUint32(0) ); // 4294967295 (biggest 32-bit unsigned int)
dataView.setUint32(0, 0); // set 4-byte number to zero, thus setting all bytes to 0DataView is great when we store mixed-format data in the same buffer.
For example, when we store a sequence of pairs (16-bit integer, 32-bit float), DataView allows to access them easily.
- Summary
ArrayBuffer is the core object, a reference to the fixed-length contiguous memory area.
To do almost any operation on ArrayBuffer, we need a view.
It can be a TypedArray:
Uint8Array, Uint16Array, Uint32Array – for unsigned integers of 8, 16, and 32 bits.
Uint8ClampedArray – for 8-bit integers, “clamps” them on assignment.
Int8Array, Int16Array, Int32Array – for signed integer numbers (can be negative).
Float32Array, Float64Array – for signed floating-point numbers of 32 and 64 bits.
Or a DataView – the view that uses methods to specify a format, e.g.
getUint8(offset).
In most cases we create and operate directly on typed arrays, leaving ArrayBuffer under cover, as a “common denominator”.
We can access it as .buffer and make another view if needed.
There are also two additional terms, that are used in descriptions of methods that operate on binary data:
ArrayBufferView is an umbrella term for all these kinds of views.
BufferSource is an umbrella term for ArrayBuffer or ArrayBufferView.
We'll see these terms in the next chapters.
BufferSource is one of the most common terms, as it means “any kind of binary data” – an ArrayBuffer or a view over it.
Here's a cheatsheet:
Given an array of Uint8Array, write a function concat(arrays) that returns a concatenation of them into a single array.
Open a sandbox with tests.function concat(arrays) {
// sum of individual array lengths
let totalLength = arrays.reduce((acc, value) => acc + value.length, 0);
if (!arrays.length) return null;
let result = new Uint8Array(totalLength);
// for each array - copy it over result
// next array is copied right after the previous one
let length = 0;
for(let array of arrays) {
result.set(array, length);
length += array.length;
}
return result;
}Open the solution with tests in a sandbox.Binary data, files
TextDecoder and TextEncoder
What if the binary data is actually a string? For instance, we received a file with textual data.
The build-in TextDecoder object allows to read the value into an actual JavaScript string, given the buffer and the encoding.
We first need to create it:
let decoder = new TextDecoder([label], [options]);label – the encoding, utf-8 by default, but big5, windows-1251 and many other are also supported.
options – optional object:
fatal – boolean, if true then throw an exception for invalid (non-decodable) characters, otherwise (default) replace them with character \uFFFD.
ignoreBOM – boolean, if true then ignore BOM (an optional byte-order Unicode mark), rarely needed.
…And then decode:
let str = decoder.decode([input], [options]);input – BufferSource to decode.
options – optional object:
stream – true for decoding streams, when decoder is called repeatedly with incoming chunks of data.
In that case a multi-byte character may occasionally split between chunks.
This options tells TextDecoder to memorize “unfinished” characters and decode them when the next chunk comes.
For instance:
let uint8Array = new Uint8Array([72, 101, 108, 108, 111]);
alert( new TextDecoder().decode(uint8Array) ); // Hellolet uint8Array = new Uint8Array([228, 189, 160, 229, 165, 189]);
alert( new TextDecoder().decode(uint8Array) ); // 你好
We can decode a part of the buffer by creating a subarray view for it:
let uint8Array = new Uint8Array([0, 72, 101, 108, 108, 111, 0]);
// the string is in the middle
// create a new view over it, without copying anything
let binaryString = uint8Array.subarray(1, -1);
alert( new TextDecoder().decode(binaryString) ); // Hello
- TextEncoder
TextEncoder does the reverse thing – converts a string into bytes.
The syntax is:
let encoder = new TextEncoder();
The only encoding it supports is “utf-8”.
It has two methods:
encode(str) – returns Uint8Array from a string.
encodeInto(str, destination) – encodes str into destination that must be Uint8Array.
let encoder = new TextEncoder();
let uint8Array = encoder.encode("Hello");
alert(uint8Array); // 72,101,108,108,111Binary data, files
Blob
ArrayBuffer and views are a part of ECMA standard, a part of JavaScript.
In the browser, there are additional higher-level objects, described in File API, in particular Blob.
Blob consists of an optional string type (a MIME-type usually), plus blobParts – a sequence of other Blob objects, strings and BufferSource.
The constructor syntax is:
new Blob(blobParts, options);blobParts is an array of Blob/BufferSource/String values.
options optional object:
type – Blob type, usually MIME-type, e.g.
image/png,
endings – whether to transform end-of-line to make the Blob correspond to current OS newlines (\r\n or \n).
By default "transparent" (do nothing), but also can be "native" (transform).
For example:
// create Blob from a string
let blob = new Blob(["<html>…</html>"], {type: 'text/html'});
// please note: the first argument must be an array [...]// create Blob from a typed array and strings
let hello = new Uint8Array([72, 101, 108, 108, 111]); // "Hello" in binary form
let blob = new Blob([hello, ' ', 'world'], {type: 'text/plain'});
We can extract Blob slices with:
blob.slice([byteStart], [byteEnd], [contentType]);byteStart – the starting byte, by default 0.
byteEnd – the last byte (exclusive, by default till the end).
contentType – the type of the new blob, by default the same as the source.
The arguments are similar to array.slice, negative numbers are allowed too.
Blob objects are immutable
We can't change data directly in a Blob, but we can slice parts of a Blob, create new Blob objects from them, mix them into a new Blob and so on.
This behavior is similar to JavaScript strings: we can't change a character in a string, but we can make a new corrected string.
- Blob as URL
A Blob can be easily used as a URL for <a>, <img> or other tags, to show its contents.
Thanks to type, we can also download/upload Blob objects, and the type naturally becomes Content-Type in network requests.
Let's start with a simple example.
By clicking on a link you download a dynamically-generated Blob with hello world contents as a file:
<!-- download attribute forces the browser to download instead of navigating -->
<a download="hello.txt" href='#' id="link">Download</a>
<script>
let blob = new Blob(["Hello, world!"], {type: 'text/plain'});
link.href = URL.createObjectURL(blob);
</script>
We can also create a link dynamically in JavaScript and simulate a click by link.click(), then download starts automatically.
Here's the similar code that causes user to download the dynamicallly created Blob, without any HTML:
let link = document.createElement('a');
link.download = 'hello.txt';
let blob = new Blob(['Hello, world!'], {type: 'text/plain'});
link.href = URL.createObjectURL(blob);
link.click();
URL.revokeObjectURL(link.href);URL.createObjectURL takes a Blob and creates a unique URL for it, in the form blob:<origin>/<uuid>.
That's what the value of link.href looks like:
blob:https://javascript.info/1e67e00e-860d-40a5-89ae-6ab0cbee6273
For each URL generated by URL.createObjectURL the browser stores a URL → Blob mapping internally.
So such URLs are short, but allow to access the Blob.
A generated URL (and hence the link with it) is only valid within the current document, while it's open.
And it allows to reference the Blob in <img>, <a>, basically any other object that expects a URL.
There's a side-effect though.
While there's a mapping for a Blob, the Blob itself resides in the memory.
The browser can't free it.
The mapping is automatically cleared on document unload, so Blob objects are freed then.
But if an app is long-living, then that doesn't happen soon.
So if we create a URL, that Blob will hang in memory, even if not needed any more.URL.revokeObjectURL(url) removes the reference from the internal mapping, thus allowing the Blob to be deleted (if there are no other references), and the memory to be freed.
In the last example, we intend the Blob to be used only once, for instant downloading, so we call URL.revokeObjectURL(link.href) immediately.
In the previous example with the clickable HTML-link, we don't call URL.revokeObjectURL(link.href), because that would make the Blob url invalid.
After the revocation, as the mapping is removed, the URL doesn't work any more.
- Blob to base64
An alternative to URL.createObjectURL is to convert a Blob into a base64-encoded string.
That encoding represents binary data as a string of ultra-safe “readable” characters with ASCII-codes from 0 to 64.
And what's more important – we can use this encoding in “data-urls”.
A data url has the form data:[<mediatype>][;base64],<data>.
We can use such urls everywhere, on par with “regular” urls.
For instance, here's a smiley:
<img src="data:image/png;base64,R0lGODlhDAAMAKIFAF5LAP/zxAAAANyuAP/gaP///wAAAAAAACH5BAEAAAUALAAAAAAMAAwAAAMlWLPcGjDKFYi9lxKBOaGcF35DhWHamZUW0K4mAbiwWtuf0uxFAgA7">
The browser will decode the string and show the image:
To transform a Blob into base64, we'll use the built-in FileReader object.
It can read data from Blobs in multiple formats.
In the next chapter we'll cover it more in-depth.
Here's the demo of downloading a blob, now via base-64:
let link = document.createElement('a');
link.download = 'hello.txt';
let blob = new Blob(['Hello, world!'], {type: 'text/plain'});
let reader = new FileReader();
reader.readAsDataURL(blob); // converts the blob to base64 and calls onload
reader.onload = function() {
link.href = reader.result; // data url
link.click();
};
Both ways of making a URL of a Blob are usable.
But usually URL.createObjectURL(blob) is simpler and faster.
URL.createObjectURL(blob)
We need to revoke them if care about memory.
Direct access to blob, no “encoding/decoding”
Blob to data url
No need to revoke anything.
Performance and memory losses on big Blob objects for encoding.
- Image to blob
We can create a Blob of an image, an image part, or even make a page screenshot.
That's handy to upload it somewhere.
Image operations are done via <canvas> element:
Draw an image (or its part) on canvas using canvas.drawImage.
Call canvas method .toBlob(callback, format, quality) that creates a Blob and runs callback with it when done.
In the example below, an image is just copied, but we could cut from it, or transform it on canvas prior to making a blob:
// take any image
let img = document.querySelector('img');
// make <canvas> of the same size
let canvas = document.createElement('canvas');
canvas.width = img.clientWidth;
canvas.height = img.clientHeight;
let context = canvas.getContext('2d');
// copy image to it (this method allows to cut image)
context.drawImage(img, 0, 0);
// we can context.rotate(), and do many other things on canvas
// toBlob is async opereation, callback is called when done
canvas.toBlob(function(blob) {
// blob ready, download it
let link = document.createElement('a');
link.download = 'example.png';
link.href = URL.createObjectURL(blob);
link.click();
// delete the internal blob reference, to let the browser clear memory from it
URL.revokeObjectURL(link.href);
}, 'image/png');
If we prefer async/await instead of callbacks:
let blob = await new Promise(resolve => canvasElem.toBlob(resolve, 'image/png'));
For screenshotting a page, we can use a library such as https://github.com/niklasvh/html2canvas.
What it does is just walks the page and draws it on <canvas>.
Then we can get a Blob of it the same way as above.
- From Blob to ArrayBuffer
The Blob constructor allows to create a blob from almost anything, including any BufferSource.
But if we need to perform low-level processing, we can get the lowest-level ArrayBuffer from it using FileReader:
// get arrayBuffer from blob
let fileReader = new FileReader();
fileReader.readAsArrayBuffer(blob);
fileReader.onload = function(event) {
let arrayBuffer = fileReader.result;
};
- Summary
While ArrayBuffer, Uint8Array and other BufferSource are “binary data”, a Blob represents “binary data with type”.
That makes Blobs convenient for upload/download operations, that are so common in the browser.
Methods that perform web-requests, such as XMLHttpRequest, fetch and so on, can work with Blob natively, as well as with other binary types.
We can easily convert betweeen Blob and low-level binary data types:
We can make a Blob from a typed array using new Blob(...) constructor.
We can get back ArrayBuffer from a Blob using FileReader, and then create a view over it for low-level binary processing.
Binary data, files
File and FileReader
A File object inherits from Blob and is extended with filesystem-related capabilities.
There are two ways to obtain it.
First, there's a constructor, similar to Blob:
new File(fileParts, fileName, [options])fileParts – is an array of Blob/BufferSource/String values.
fileName – file name string.
options – optional object:
lastModified – the timestamp (integer date) of last modification.
Second, more often we get a file from <input type="file"> or drag'n'drop or other browser interfaces.
In that case, the file gets this information from OS.
As File inherits from Blob, File objects have the same properties, plus:
name – the file name,
lastModified – the timestamp of last modification.
That's how we can get a File object from <input type="file">:
<input type="file" onchange="showFile(this)">
<script>
function showFile(input) {
let file = input.files[0];
alert(`File name: ${file.name}`); // e.g my.png
alert(`Last modified: ${file.lastModified}`); // e.g 1552830408824
}
</script>
Please note:
The input may select multiple files, so input.files is an array-like object with them.
Here we have only one file, so we just take input.files[0].
- FileReader
FileReader is an object with the sole purpose of reading data from Blob (and hence File too) objects.
It delivers the data using events, as reading from disk may take time.
The constructor:
let reader = new FileReader(); // no arguments
The main methods:
readAsArrayBuffer(blob) – read the data in binary format ArrayBuffer.
readAsText(blob, [encoding]) – read the data as a text string with the given encoding (utf-8 by default).
readAsDataURL(blob) – read the binary data and encode it as base64 data url.
abort() – cancel the operation.
The choice of read* method depends on which format we prefer, how we're going to use the data.
readAsArrayBuffer – for binary files, to do low-level binary operations.
For high-level operations, like slicing, File inherits from Blob, so we can call them directly, without reading.
readAsText – for text files, when we'd like to get a string.
readAsDataURL – when we'd like to use this data in src for img or another tag.
There's an alternative to reading a file for that, as discussed in chapter Blob: URL.createObjectURL(file).
As the reading proceeds, there are events:
loadstart – loading started.
progress – occurs during reading.
load – no errors, reading complete.
abort – abort() called.
error – error has occurred.
loadend – reading finished with either success or failure.
When the reading is finished, we can access the result as:
reader.result is the result (if successful)
reader.error is the error (if failed).
The most widely used events are for sure load and error.
Here's an example of reading a file:
<input type="file" onchange="readFile(this)">
<script>
function readFile(input) {
let file = input.files[0];
let reader = new FileReader();
reader.readAsText(file);
reader.onload = function() {
console.log(reader.result);
};
reader.onerror = function() {
console.log(reader.error);
};
}
</script>FileReader for blobs
As mentioned in the chapter Blob, FileReader can read not just files, but any blobs.
We can use it to convert a blob to another format:
readAsArrayBuffer(blob) – to ArrayBuffer,
readAsText(blob, [encoding]) – to string (an alternative to TextDecoder),
readAsDataURL(blob) – to base64 data url.
FileReaderSync is available inside Web Workers
For Web Workers, there also exists a synchronous variant of FileReader, called FileReaderSync.
Its reading methods read* do not generate events, but rather return a result, as regular functions do.
That's only inside a Web Worker though, because delays in synchronous calls, that are possible while reading from files, in Web Workers are less important.
They do not affect the page.
- Summary
File objects inherit from Blob.
In addition to Blob methods and properties, File objects also have name and lastModified properties, plus the internal ability to read from filesystem.
We usually get File objects from user input, like <input> or Drag'n'Drop events (ondragend).
FileReader objects can read from a file or a blob, in one of three formats:
String (readAsText).
ArrayBuffer (readAsArrayBuffer).
Data url, base-64 encoded (readAsDataURL).
In many cases though, we don't have to read the file contents.
Just as we did with blobs, we can create a short url with URL.createObjectURL(file) and assign it to <a> or <img>.
This way the file can be downloaded or shown up as an image, as a part of canvas etc.
And if we're going to send a File over a network, that's also easy: network API like XMLHttpRequest or fetch natively accepts File objects.
JavaScript can send network requests to the server and load new information whenever it's needed.
For example, we can use a network request to:
Submit an order,
Load user information,
Receive latest updates from the server,
…etc.
…And all of that without reloading the page!
There's an umbrella term “AJAX” (abbreviated Asynchronous JavaScript And XML) for network requests from JavaScript.
We don't have to use XML though: the term comes from old times, that's why that word is there.
You may have heard that term already.
There are multiple ways to send a network request and get information from the server.
The fetch() method is modern and versatile, so we'll start with it.
It's not supported by old browsers (can be polyfilled), but very well supported among the modern ones.
The basic syntax is:
let promise = fetch(url, [options])url – the URL to access.
options – optional parameters: method, headers etc.
Without options, this is a simple GET request, downloading the contents of the url.
The browser starts the request right away and returns a promise that the calling code should use to get the result.
Getting a response is usually a two-stage process.
First, the promise, returned by fetch, resolves with an object of the built-in Response class as soon as the server responds with headers.
At this stage we can check HTTP status, to see whether it is successful or not, check headers, but don't have the body yet.
The promise rejects if the fetch was unable to make HTTP-request, e.g.
network problems, or there's no such site.
Abnormal HTTP-statuses, such as 404 or 500 do not cause an error.
We can see HTTP-status in response properties:
status – HTTP status code, e.g.
200.
ok – boolean, true if the HTTP status code is 200-299.
For example:
let response = await fetch(url);
if (response.ok) { // if HTTP-status is 200-299
// get the response body (the method explained below)
let json = await response.json();
} else {
alert("HTTP-Error: " + response.status);
}Second, to get the response body, we need to use an additional method call.Response provides multiple promise-based methods to access the body in various formats:
response.text() – read the response and return as text,
response.json() – parse the response as JSON,
response.formData() – return the response as FormData object (explained in the next chapter),
response.blob() – return the response as Blob (binary data with type),
response.arrayBuffer() – return the response as ArrayBuffer (low-level representation of binary data),
additionally, response.body is a ReadableStream object, it allows you to read the body chunk-by-chunk, we'll see an example later.
For instance, let's get a JSON-object with latest commits from GitHub:
let url = 'https://api.github.com/repos/javascript-tutorial/en.javascript.info/commits';
let response = await fetch(url);
let commits = await response.json(); // read response body and parse as JSON
alert(commits[0].author.login);
Or, the same without await, using pure promises syntax:
fetch('https://api.github.com/repos/javascript-tutorial/en.javascript.info/commits')
.then(response => response.json())
.then(commits => alert(commits[0].author.login));
To get the response text, await response.text() instead of .json():
let response = await fetch('https://api.github.com/repos/javascript-tutorial/en.javascript.info/commits');
let text = await response.text(); // read response body as text
alert(text.slice(0, 80) + '...');
As a show-case for reading in binary format, let's fetch and show a logo image of “fetch” specification (see chapter Blob for details about operations on Blob):
let response = await fetch('/article/fetch/logo-fetch.svg');
let blob = await response.blob(); // download as Blob object
// create <img> for it
let img = document.createElement('img');
img.style = 'position:fixed;top:10px;left:10px;width:100px';
document.body.append(img);
// show it
img.src = URL.createObjectURL(blob);
setTimeout(() => { // hide after three seconds
img.remove();
URL.revokeObjectURL(img.src);
}, 3000);
Important:
We can choose only one body-reading method.
If we've already got the response with response.text(), then response.json() won't work, as the body content has already been processed.
let text = await response.text(); // response body consumed
let parsed = await response.json(); // fails (already consumed)
- Response headers
The response headers are available in a Map-like headers object in response.headers.
It's not exactly a Map, but it has similar methods to get individual headers by name or iterate over them:
let response = await fetch('https://api.github.com/repos/javascript-tutorial/en.javascript.info/commits');
// get one header
alert(response.headers.get('Content-Type')); // application/json; charset=utf-8
// iterate over all headers
for (let [key, value] of response.headers) {
alert(`${key} = ${value}`);
}
- Request headers
To set a request header in fetch, we can use the headers option.
It has an object with outgoing headers, like this:
let response = fetch(protectedUrl, {
headers: {
Authentication: 'secret'
}
});
…But there's a list of forbidden HTTP headers that we can't set:
Accept-Charset, Accept-EncodingAccess-Control-Request-HeadersAccess-Control-Request-MethodConnectionContent-LengthCookie, Cookie2DateDNTExpectHostKeep-AliveOriginRefererTETrailerTransfer-EncodingUpgradeViaProxy-*Sec-*
These headers ensure proper and safe HTTP, so they are controlled exclusively by the browser.
- POST requests
To make a POST request, or a request with another method, we need to use fetch options:
method – HTTP-method, e.g.
POST,
body – the request body, one of:
a string (e.g.
JSON-encoded),
FormData object, to submit the data as form/multipart,
Blob/BufferSource to send binary data,
URLSearchParams, to submit the data in x-www-form-urlencoded encoding, rarely used.
The JSON format is used most of the time.
For example, this code submits user object as JSON:
let user = {
name: 'John',
surname: 'Smith'
};
let response = await fetch('/article/fetch/post/user', {
method: 'POST',
headers: {
'Content-Type': 'application/json;charset=utf-8'
},
body: JSON.stringify(user)
});
let result = await response.json();
alert(result.message);
Please note, if the request body is a string, then Content-Type header is set to text/plain;charset=UTF-8 by default.
But, as we're going to send JSON, we use headers option to send application/json instead, the correct Content-Type for JSON-encoded data.
- Sending an image
We can also submit binary data with fetch using Blob or BufferSource objects.
In this example, there's a <canvas> where we can draw by moving a mouse over it.
A click on the “submit” button sends the image to the server:
<body style="margin:0">
<canvas id="canvasElem" width="100" height="80" style="border:1px solid"></canvas>
<input type="button" value="Submit" onclick="submit()">
<script>
canvasElem.onmousemove = function(e) {
let ctx = canvasElem.getContext('2d');
ctx.lineTo(e.clientX, e.clientY);
ctx.stroke();
};
async function submit() {
let blob = await new Promise(resolve => canvasElem.toBlob(resolve, 'image/png'));
let response = await fetch('/article/fetch/post/image', {
method: 'POST',
body: blob
});
// the server responds with confirmation and the image size
let result = await response.json();
alert(result.message);
}
</script>
</body>
Please note, here we don't set Content-Type header manually, because a Blob object has a built-in type (here image/png, as generated by toBlob).
For Blob objects that type becomes the value of Content-Type.
The submit() function can be rewritten without async/await like this:
function submit() {
canvasElem.toBlob(function(blob) {
fetch('/article/fetch/post/image', {
method: 'POST',
body: blob
})
.then(response => response.json())
.then(result => alert(JSON.stringify(result, null, 2)))
}, 'image/png');
}
- Summary
A typical fetch request consists of two await calls:
let response = await fetch(url, options); // resolves with response headers
let result = await response.json(); // read body as json
Or, without await:
fetch(url, options)
.then(response => response.json())
.then(result => /* process result */)
Response properties:
response.status – HTTP code of the response,
response.ok – true is the status is 200-299.
response.headers – Map-like object with HTTP headers.
Methods to get response body:
response.text() – return the response as text,
response.json() – parse the response as JSON object,
response.formData() – return the response as FormData object (form/multipart encoding, see the next chapter),
response.blob() – return the response as Blob (binary data with type),
response.arrayBuffer() – return the response as ArrayBuffer (low-level binary data),
Fetch options so far:
method – HTTP-method,
headers – an object with request headers (not any header is allowed),
body – the data to send (request body) as string, FormData, BufferSource, Blob or UrlSearchParams object.
In the next chapters we'll see more options and use cases of fetch.
Create an async function getUsers(names), that gets an array of GitHub logins, fetches the users from GitHub and returns an array of GitHub users.
The GitHub url with user information for the given USERNAME is: https://api.github.com/users/USERNAME.
There's a test example in the sandbox.
Important details:
There should be one fetch request per user.
Requests shouldn't wait for each other.
So that the data arrives as soon as possible.
If any request fails, or if there's no such user, the function should return null in the resulting array.
Open a sandbox with tests.
To fetch a user we need: fetch('https://api.github.com/users/USERNAME').
If the response has status 200, call .json() to read the JS object.
Otherwise, if a fetch fails, or the response has non-200 status, we just return null in the resulting array.
So here's the code:
async function getUsers(names) {
let jobs = [];
for(let name of names) {
let job = fetch(`https://api.github.com/users/${name}`).then(
successResponse => {
if (successResponse.status != 200) {
return null;
} else {
return successResponse.json();
}
},
failResponse => {
return null;
}
);
jobs.push(job);
}
let results = await Promise.all(jobs);
return results;
}
Please note: .then call is attached directly to fetch, so that when we have the response, it doesn't wait for other fetches, but starts to read .json() immediately.
If we used await Promise.all(names.map(name => fetch(...))), and call .json() on the results, then it would wait for all fetches to respond.
By adding .json() directly to each fetch, we ensure that individual fetches start reading data as JSON without waiting for each other.
That's an example of how low-level Promise API can still be useful even if we mainly use async/await.
Open the solution with tests in a sandbox.Network requests
FormData
This chapter is about sending HTML forms: with or without files, with additional fields and so on.
FormData objects can help with that.
As you might have guessed, it's the object to represent HTML form data.
The constructor is:
let formData = new FormData([form]);
If HTML form element is provided, it automatically captures its fields.
The special thing about FormData is that network methods, such as fetch, can accept a FormData object as a body.
It's encoded and sent out with Content-Type: multipart/form-data.
From the server point of view, that looks like a usual form submission.
- Sending a simple form
Let's send a simple form first.
As you can see, that's almost one-liner:
<form id="formElem">
<input type="text" name="name" value="John">
<input type="text" name="surname" value="Smith">
<input type="submit">
</form>
<script>
formElem.onsubmit = async (e) => {
e.preventDefault();
let response = await fetch('/article/formdata/post/user', {
method: 'POST',
body: new FormData(formElem)
});
let result = await response.json();
alert(result.message);
};
</script>
In this example, the server code is not presented, as it's beyond our scope.
The server accepts the POST request and replies “User saved”.
- FormData Methods
We can modify fields in FormData with methods:
formData.append(name, value) – add a form field with the given name and value,
formData.append(name, blob, fileName) – add a field as if it were <input type="file">, the third argument fileName sets file name (not form field name), as it were a name of the file in user's filesystem,
formData.delete(name) – remove the field with the given name,
formData.get(name) – get the value of the field with the given name,
formData.has(name) – if there exists a field with the given name, returns true, otherwise false
A form is technically allowed to have many fields with the same name, so multiple calls to append add more same-named fields.
There's also method set, with the same syntax as append.
The difference is that .set removes all fields with the given name, and then appends a new field.
So it makes sure there's only one field with such name, the rest is just like append:
formData.set(name, value),
formData.set(name, blob, fileName).
Also we can iterate over formData fields using for..of loop:
let formData = new FormData();
formData.append('key1', 'value1');
formData.append('key2', 'value2');
// List key/value pairs
for(let [name, value] of formData) {
alert(`${name} = ${value}`); // key1 = value1, then key2 = value2
}
- Sending a form with a file
The form is always sent as Content-Type: multipart/form-data, this encoding allows to send files.
So, <input type="file"> fields are sent also, similar to a usual form submission.
Here's an example with such form:
<form id="formElem">
<input type="text" name="firstName" value="John">
Picture: <input type="file" name="picture" accept="image/*">
<input type="submit">
</form>
<script>
formElem.onsubmit = async (e) => {
e.preventDefault();
let response = await fetch('/article/formdata/post/user-avatar', {
method: 'POST',
body: new FormData(formElem)
});
let result = await response.json();
alert(result.message);
};
</script>
- Sending a form with Blob data
As we've seen in the chapter Fetch, it's easy to send dynamically generated binary data e.g.
an image, as Blob.
We can supply it directly as fetch parameter body.
In practice though, it's often convenient to send an image not separately, but as a part of the form, with additional fields, such as “name” and other metadata.
Also, servers are usually more suited to accept multipart-encoded forms, rather than raw binary data.
This example submits an image from <canvas>, along with some other fields, as a form, using FormData:
<body style="margin:0">
<canvas id="canvasElem" width="100" height="80" style="border:1px solid"></canvas>
<input type="button" value="Submit" onclick="submit()">
<script>
canvasElem.onmousemove = function(e) {
let ctx = canvasElem.getContext('2d');
ctx.lineTo(e.clientX, e.clientY);
ctx.stroke();
};
async function submit() {
let imageBlob = await new Promise(resolve => canvasElem.toBlob(resolve, 'image/png'));
let formData = new FormData();
formData.append("firstName", "John");
formData.append("image", imageBlob, "image.png");
let response = await fetch('/article/formdata/post/image-form', {
method: 'POST',
body: formData
});
let result = await response.json();
alert(result.message);
}
</script>
</body>
Please note how the image Blob is added:
formData.append("image", imageBlob, "image.png");
That's same as if there were <input type="file" name="image"> in the form, and the visitor submitted a file named "image.png" (3rd argument) with the data imageBlob (2nd argument) from their filesystem.
The server reads form data and the file, as if it were a regular form submission.
- Summary
FormData objects are used to capture HTML form and submit it using fetch or another network method.
We can either create new FormData(form) from an HTML form, or create a object without a form at all, and then append fields with methods:
formData.append(name, value)formData.append(name, blob, fileName)formData.set(name, value)formData.set(name, blob, fileName)
Let's note two peculiarities here:
The set method removes fields with the same name, append doesn't.
That's the only difference between them.
To send a file, 3-argument syntax is needed, the last argument is a file name, that normally is taken from user filesystem for <input type="file">.
Other methods are:
formData.delete(name)formData.get(name)formData.has(name)
That's it!
Network requests
Fetch: Download progress
The fetch method allows to track download progress.
Please note: there's currently no way for fetch to track upload progress.
For that purpose, please use XMLHttpRequest, we'll cover it later.
To track download progress, we can use response.body property.
It's ReadableStream – a special object that provides body chunk-by-chunk, as it comes.
Readable streams are described in the Streams API specification.
Unlike response.text(), response.json() and other methods, response.body gives full control over the reading process, and we can count how much is consumed at any moment.
Here's the sketch of code that reads the reponse from response.body:
// instead of response.json() and other methods
const reader = response.body.getReader();
// infinite loop while the body is downloading
while(true) {
// done is true for the last chunk
// value is Uint8Array of the chunk bytes
const {done, value} = await reader.read();
if (done) {
break;
}
console.log(`Received ${value.length} bytes`)
}
The result of await reader.read() call is an object with two properties:
done – true when the reading is complete, otherwise false.
value – a typed array of bytes: Uint8Array.
Please note:
Streams API also describes asynchronous iteration over ReadableStream with for await..of loop, but it's not yet widely supported (see browser issues), so we use while loop.
We receive response chunks in the loop, until the loading finishes, that is: until done becomes true.
To log the progress, we just need for every received fragment value to add its length to the counter.
Here's the full working example that gets the response and logs the progress in console, more explanations to follow:
// Step 1: start the fetch and obtain a reader
let response = await fetch('https://api.github.com/repos/javascript-tutorial/en.javascript.info/commits?per_page=100');
const reader = response.body.getReader();
// Step 2: get total length
const contentLength = +response.headers.get('Content-Length');
// Step 3: read the data
let receivedLength = 0; // received that many bytes at the moment
let chunks = []; // array of received binary chunks (comprises the body)
while(true) {
const {done, value} = await reader.read();
if (done) {
break;
}
chunks.push(value);
receivedLength += value.length;
console.log(`Received ${receivedLength} of ${contentLength}`)
}
// Step 4: concatenate chunks into single Uint8Array
let chunksAll = new Uint8Array(receivedLength); // (4.1)
let position = 0;
for(let chunk of chunks) {
chunksAll.set(chunk, position); // (4.2)
position += chunk.length;
}
// Step 5: decode into a string
let result = new TextDecoder("utf-8").decode(chunksAll);
// We're done!
let commits = JSON.parse(result);
alert(commits[0].author.login);
Let's explain that step-by-step:
We perform fetch as usual, but instead of calling response.json(), we obtain a stream reader response.body.getReader().
Please note, we can't use both these methods to read the same response: either use a reader or a response method to get the result.
Prior to reading, we can figure out the full response length from the Content-Length header.
It may be absent for cross-origin requests (see chapter Fetch: Cross-Origin Requests) and, well, technically a server doesn't have to set it.
But usually it's at place.
Call await reader.read() until it's done.
We gather response chunks in the array chunks.
That's important, because after the response is consumed, we won't be able to “re-read” it using response.json() or another way (you can try, there'll be an error).
At the end, we have chunks – an array of Uint8Array byte chunks.
We need to join them into a single result.
Unfortunately, there's no single method that concatenates those, so there's some code to do that:
We create chunksAll = new Uint8Array(receivedLength) – a same-typed array with the combined length.
Then use .set(chunk, position) method to copy each chunk one after another in it.
We have the result in chunksAll.
It's a byte array though, not a string.
To create a string, we need to interpret these bytes.
The built-in TextDecoder does exactly that.
Then we can JSON.parse it, if necessary.
What if we need binary content instead of a string? That's even simpler.
Replace steps 4 and 5 with a single line that creates a Blob from all chunks:
let blob = new Blob(chunks);
At the end we have the result (as a string or a blob, whatever is convenient), and progress-tracking in the process.
Once again, please note, that's not for upload progress (no way now with fetch), only for download progress.
Also, if the size is unknown, we should check receivedLength in the loop and break it once it reaches a certain limit.
So that the chunks won't overflow the memory.
Network requests
Fetch: Abort
As we know, fetch returns a promise.
And JavaScript generally has no concept of “aborting” a promise.
So how can we cancel an ongoing fetch? E.g.
if the user actions on our site indicate that the fetch isn't needed any more.
There's a special built-in object for such purposes: AbortController.
It can be used to abort not only fetch, but other asynchronous tasks as well.
The usage is very straightforward:
- The AbortController object
Create a controller:
let controller = new AbortController();
A controller is an extremely simple object.
It has a single method abort(),
And a single property signal that allows to set event liseners on it.
When abort() is called:
controller.signal emits the "abort" event.
controller.signal.aborted property becomes true.
Generally, we have two parties in the process:
The one that performs a cancelable operation, it sets a listener on controller.signal.
The one that cancels: it calls controller.abort() when needed.
Here's the full example (without fetch yet):
let controller = new AbortController();
let signal = controller.signal;
// The party that performs a cancelable operation
// gets the "signal" object
// and sets the listener to trigger when controller.abort() is called
signal.addEventListener('abort', () => alert("abort!"));
// The other party, that cancels (at any point later):
controller.abort(); // abort!
// The event triggers and signal.aborted becomes true
alert(signal.aborted); // true
As we can see, AbortController is just a mean to pass abort events when abort() is called on it.
We could implement the same kind of event listening in our code on our own, without the AbortController object.
But what's valuable is that fetch knows how to work with the AbortController object.
It's integrated in it.
- Using with fetch
To be able to cancel fetch, pass the signal property of an AbortController as a fetch option:
let controller = new AbortController();
fetch(url, {
signal: controller.signal
});
The fetch method knows how to work with AbortController.
It will listen to abort events on signal.
Now, to abort, call controller.abort():
controller.abort();
We're done: fetch gets the event from signal and aborts the request.
When a fetch is aborted, its promise rejects with an error AbortError, so we should handle it, e.g.
in try..catch.
Here's the full example with fetch aborted after 1 second:
// abort in 1 second
let controller = new AbortController();
setTimeout(() => controller.abort(), 1000);
try {
let response = await fetch('/article/fetch-abort/demo/hang', {
signal: controller.signal
});
} catch(err) {
if (err.name == 'AbortError') { // handle abort()
alert("Aborted!");
} else {
throw err;
}
}
- AbortController is scalable
AbortController is scalable.
It allows to cancel multiple fetches at once.
Here's a sketch of code that fetches many urls in parallel, and uses a single controller to abort them all:
let urls = [...]; // a list of urls to fetch in parallel
let controller = new AbortController();
// an array of fetch promises
let fetchJobs = urls.map(url => fetch(url, {
signal: controller.signal
}));
let results = await Promise.all(fetchJobs);
// if controller.abort() is called from anywhere,
// it aborts all fetches
If we have our own asynchronous tasks, different from fetch, we can use a single AbortController to stop those, together with fetches.
We just need to listen to its abort event in our tasks:
let urls = [...];
let controller = new AbortController();
let ourJob = new Promise((resolve, reject) => { // our task
...
controller.signal.addEventListener('abort', reject);
});
let fetchJobs = urls.map(url => fetch(url, { // fetches
signal: controller.signal
}));
// Wait for fetches and our task in parallel
let results = await Promise.all([...fetchJobs, ourJob]);
// if controller.abort() is called from anywhere,
// it aborts all fetches and ourJob
- Summary
AbortController is a simple object that generates an abort event on it's signal property when the abort() method is called (and also sets signal.aborted to true).
fetch integrates with it: we pass the signal property as the option, and then fetch listens to it, so it's possible to abort the fetch.
We can use AbortController in our code.
The "call abort()" → “listen to abort event” interaction is simple and universal.
We can use it even without fetch.
Network requests
Fetch: Cross-Origin Requests
If we send a fetch request to another web-site, it will probably fail.
For instance, let's try fetching http://example.com:
try {
await fetch('http://example.com');
} catch(err) {
alert(err); // Failed to fetch
}
Fetch fails, as expected.
The core concept here is origin – a domain/port/protocol triplet.
Cross-origin requests – those sent to another domain (even a subdomain) or protocol or port – require special headers from the remote side.
That policy is called “CORS”: Cross-Origin Resource Sharing.
- Why is CORS needed? A brief history
CORS exists to protect the internet from evil hackers.
Seriously.
Let's make a very brief historical digression.
For many years a script from one site could not access the content of another site.
That simple, yet powerful rule was a foundation of the internet security.
E.g.
an evil script from website hacker.com could not access the user's mailbox at website gmail.com.
People felt safe.
JavaScript also did not have any special methods to perform network requests at that time.
It was a toy language to decorate a web page.
But web developers demanded more power.
A variety of tricks were invented to work around the limitation and make requests to other websites.
Using forms
One way to communicate with another server was to submit a <form> there.
People submitted it into <iframe>, just to stay on the current page, like this:
<!-- form target -->
<iframe name="iframe"></iframe>
<!-- a form could be dynamically generated and submited by JavaScript -->
<form target="iframe" method="POST" action="http://another.com/…">
...
</form>
So, it was possible to make a GET/POST request to another site, even without networking methods, as forms can send data anywhere.
But as it's forbidden to access the content of an <iframe> from another site, it wasn't possible to read the response.
To be precise, there were actually tricks for that, they required special scripts at both the iframe and the page.
So the communication with the iframe was technically possible.
Right now there's no point to go into details, let these dinosaurs rest in peace.
Using scripts
Another trick was to use a script tag.
A script could have any src, with any domain, like <script src="http://another.com/…">.
It's possible to execute a script from any website.
If a website, e.g.
another.com intended to expose data for this kind of access, then a so-called “JSONP (JSON with padding)” protocol was used.
Here's how it worked.
Let's say we, at our site, need to get the data from http://another.com, such as the weather:
First, in advance, we declare a global function to accept the data, e.g.
gotWeather.
// 1.
Declare the function to process the weather data
function gotWeather({ temperature, humidity }) {
alert(`temperature: ${temperature}, humidity: ${humidity}`);
}
Then we make a <script> tag with src="http://another.com/weather.json?callback=gotWeather", using the name of our function as the callback URL-parameter.
let script = document.createElement('script');
script.src = `http://another.com/weather.json?callback=gotWeather`;
document.body.append(script);
The remote server another.com dynamically generates a script that calls gotWeather(...) with the data it wants us to receive.
// The expected answer from the server looks like this:
gotWeather({
temperature: 25,
humidity: 78
});
When the remote script loads and executes, gotWeather runs, and, as it's our function, we have the data.
That works, and doesn't violate security, because both sides agreed to pass the data this way.
And, when both sides agree, it's definitely not a hack.
There are still services that provide such access, as it works even for very old browsers.
After a while, networking methods appeared in browser JavaScript.
At first, cross-origin requests were forbidden.
But as a result of long discussions, cross-origin requests were allowed, but with any new capabilities requiring an explicit allowance by the server, expressed in special headers.
- Safe requests
There are two types of cross-origin requests:
Safe requests.
All the others.
Safe Requests are simpler to make, so let's start with them.
A request is safe if it satisfies two conditions:
Safe method: GET, POST or HEAD
Safe headers – the only allowed custom headers are:
Accept,
Accept-Language,
Content-Language,
Content-Type with the value application/x-www-form-urlencoded, multipart/form-data or text/plain.
Any other request is considered “unsafe”.
For instance, a request with PUT method or with an API-Key HTTP-header does not fit the limitations.
The essential difference is that a safe request can be made with a <form> or a <script>, without any special methods.
So, even a very old server should be ready to accept a safe request.
Contrary to that, requests with non-standard headers or e.g.
method DELETE can't be created this way.
For a long time JavaScript was unable to do such requests.
So an old server may assume that such requests come from a privileged source, “because a webpage is unable to send them”.
When we try to make a unsafe request, the browser sends a special “preflight” request that asks the server – does it agree to accept such cross-origin requests, or not?
And, unless the server explicitly confirms that with headers, an unsafe request is not sent.
Now we'll go into details.
- CORS for safe requests
If a request is cross-origin, the browser always adds the Origin header to it.
For instance, if we request https://anywhere.com/request from https://javascript.info/page, the headers will look like:
GET /request
Host: anywhere.com
Origin: https://javascript.info
...
As you can see, the Origin header contains exactly the origin (domain/protocol/port), without a path.
The server can inspect the Origin and, if it agrees to accept such a request, add a special header Access-Control-Allow-Origin to the response.
That header should contain the allowed origin (in our case https://javascript.info), or a star *.
Then the response is successful, otherwise it's an error.
The browser plays the role of a trusted mediator here:
It ensures that the correct Origin is sent with a cross-origin request.
It checks for permitting Access-Control-Allow-Origin in the response, if it exists, then JavaScript is allowed to access the response, otherwise it fails with an error.
Here's an example of a permissive server response:
200 OK
Content-Type:text/html; charset=UTF-8
Access-Control-Allow-Origin: https://javascript.info
- Response headers
For cross-origin request, by default JavaScript may only access so-called “safe” response headers:
Cache-ControlContent-LanguageContent-TypeExpiresLast-ModifiedPragma
Accessing any other response header causes an error.
Please note:
There's no Content-Length header in the list!
This header contains the full response length.
So, if we're downloading something and would like to track the percentage of progress, then an additional permission is required to access that header (see below).
To grant JavaScript access to any other response header, the server must send the Access-Control-Expose-Headers header.
It contains a comma-separated list of unsafe header names that should be made accessible.
For example:
200 OK
Content-Type:text/html; charset=UTF-8
Content-Length: 12345
API-Key: 2c9de507f2c54aa1
Access-Control-Allow-Origin: https://javascript.info
Access-Control-Expose-Headers: Content-Length,API-Key
With such an Access-Control-Expose-Headers header, the script is allowed to read the Content-Length and API-Key headers of the response.
- “Unsafe” requests
We can use any HTTP-method: not just GET/POST, but also PATCH, DELETE and others.
Some time ago no one could even imagine that a webpage could make such requests.
So there may still exist webservices that treat a non-standard method as a signal: “That's not a browser”.
They can take it into account when checking access rights.
So, to avoid misunderstandings, any “unsafe” request – that couldn't be done in the old times, the browser does not make such requests right away.
First, it sends a preliminary, so-called “preflight” request, to ask for permission.
A preflight request uses the method OPTIONS, no body and two headers:
Access-Control-Request-Method header has the method of the unsafe request.
Access-Control-Request-Headers header provides a comma-separated list of its unsafe HTTP-headers.
If the server agrees to serve the requests, then it should respond with empty body, status 200 and headers:
Access-Control-Allow-Origin must be either * or the requesting origin, such as https://javascript.info, to allow it.
Access-Control-Allow-Methods must have the allowed method.
Access-Control-Allow-Headers must have a list of allowed headers.
Additionally, the header Access-Control-Max-Age may specify a number of seconds to cache the permissions.
So the browser won't have to send a preflight for subsequent requests that satisfy given permissions.
Let's see how it works step-by-step on the example of a cross-origin PATCH request (this method is often used to update data):
let response = await fetch('https://site.com/service.json', {
method: 'PATCH',
headers: {
'Content-Type': 'application/json',
'API-Key': 'secret'
}
});
There are three reasons why the request is unsafe (one is enough):
Method PATCHContent-Type is not one of: application/x-www-form-urlencoded, multipart/form-data, text/plain.
“Unsafe” API-Key header.
Step 1 (preflight request)
Prior to sending such a request, the browser, on its own, sends a preflight request that looks like this:
OPTIONS /service.json
Host: site.com
Origin: https://javascript.info
Access-Control-Request-Method: PATCH
Access-Control-Request-Headers: Content-Type,API-Key
Method: OPTIONS.
The path – exactly the same as the main request: /service.json.
Cross-origin special headers:
Origin – the source origin.
Access-Control-Request-Method – requested method.
Access-Control-Request-Headers – a comma-separated list of “unsafe” headers.
Step 2 (preflight response)
The server should respond with status 200 and the headers:
Access-Control-Allow-Origin: https://javascript.infoAccess-Control-Allow-Methods: PATCHAccess-Control-Allow-Headers: Content-Type,API-Key.
That allows future communication, otherwise an error is triggered.
If the server expects other methods and headers in the future, it makes sense to allow them in advance by adding them to the list.
For example, this response also allows PUT, DELETE and additional headers:
200 OK
Access-Control-Allow-Origin: https://javascript.info
Access-Control-Allow-Methods: PUT,PATCH,DELETE
Access-Control-Allow-Headers: API-Key,Content-Type,If-Modified-Since,Cache-Control
Access-Control-Max-Age: 86400
Now the browser can see that PATCH is in Access-Control-Allow-Methods and Content-Type,API-Key are in the list Access-Control-Allow-Headers, so it sends out the main request.
If there's the header Access-Control-Max-Age with a number of seconds, then the preflight permissions are cached for the given time.
The response above will be cached for 86400 seconds (one day).
Within this timeframe, subsequent requests will not cause a preflight.
Assuming that they fit the cached allowances, they will be sent directly.
Step 3 (actual request)
When the preflight is successful, the browser now makes the main request.
The process here is the same as for safe requests.
The main request has the Origin header (because it's cross-origin):
PATCH /service.json
Host: site.com
Content-Type: application/json
API-Key: secret
Origin: https://javascript.info
Step 4 (actual response)
The server should not forget to add Access-Control-Allow-Origin to the main response.
A successful preflight does not relieve from that:
Access-Control-Allow-Origin: https://javascript.info
Then JavaScript is able to read the main server response.
Please note:
Preflight request occurs “behind the scenes”, it's invisible to JavaScript.
JavaScript only gets the response to the main request or an error if there's no server permission.
- Credentials
A cross-origin request initiated by JavaScript code by default does not bring any credentials (cookies or HTTP authentication).
That's uncommon for HTTP-requests.
Usually, a request to http://site.com is accompanied by all cookies from that domain.
Cross-origin requests made by JavaScript methods on the other hand are an exception.
For example, fetch('http://another.com') does not send any cookies, even those (!) that belong to another.com domain.
Why?
That's because a request with credentials is much more powerful than without them.
If allowed, it grants JavaScript the full power to act on behalf of the user and access sensitive information using their credentials.
Does the server really trust the script that much? Then it must explicitly allow requests with credentials with an additional header.
To send credentials in fetch, we need to add the option credentials: "include", like this:
fetch('http://another.com', {
credentials: "include"
});
Now fetch sends cookies originating from another.com with request to that site.
If the server agrees to accept the request with credentials, it should add a header Access-Control-Allow-Credentials: true to the response, in addition to Access-Control-Allow-Origin.
For example:
200 OK
Access-Control-Allow-Origin: https://javascript.info
Access-Control-Allow-Credentials: true
Please note: Access-Control-Allow-Origin is prohibited from using a star * for requests with credentials.
Like shown above, it must provide the exact origin there.
That's an additional safety measure, to ensure that the server really knows who it trusts to make such requests.
- Summary
From the browser point of view, there are two kinds of cross-origin requests: “safe” and all the others.
“Safe” requests must satisfy the following conditions:
Method: GET, POST or HEAD.
Headers – we can set only:
AcceptAccept-LanguageContent-LanguageContent-Type to the value application/x-www-form-urlencoded, multipart/form-data or text/plain.
The essential difference is that safe requests were doable since ancient times using <form> or <script> tags, while unsafe were impossible for browsers for a long time.
So, the practical difference is that safe requests are sent right away, with the Origin header, while for the other ones the browser makes a preliminary “preflight” request, asking for permission.
For safe requests:
→ The browser sends the Origin header with the origin.
← For requests without credentials (not sent by default), the server should set:
Access-Control-Allow-Origin to * or same value as Origin
← For requests with credentials, the server should set:
Access-Control-Allow-Origin to same value as OriginAccess-Control-Allow-Credentials to true
Additionally, to grant JavaScript access to any response headers except Cache-Control, Content-Language, Content-Type, Expires, Last-Modified or Pragma, the server should list the allowed ones in Access-Control-Expose-Headers header.
For unsafe requests, a preliminary “preflight” request is issued before the requested one:
→ The browser sends an OPTIONS request to the same URL, with the headers:
Access-Control-Request-Method has requested method.
Access-Control-Request-Headers lists unsafe requested headers.
← The server should respond with status 200 and the headers:
Access-Control-Allow-Methods with a list of allowed methods,
Access-Control-Allow-Headers with a list of allowed headers,
Access-Control-Max-Age with a number of seconds to cache the permissions.
Then the actual request is sent, and the previous “safe” scheme is applied.
importance: 5
As you probably know, there's HTTP-header Referer, that usually contains an url of the page which initiated a network request.
For instance, when fetching http://google.com from http://javascript.info/some/url, the headers look like this:
Accept: */*
Accept-Charset: utf-8
Accept-Encoding: gzip,deflate,sdch
Connection: keep-alive
Host: google.com
Origin: http://javascript.info
Referer: http://javascript.info/some/url
As you can see, both Referer and Origin are present.
The questions:
Why Origin is needed, if Referer has even more information?
Is it possible that there's no Referer or Origin, or is it incorrect?
We need Origin, because sometimes Referer is absent.
For instance, when we fetch HTTP-page from HTTPS (access less secure from more secure), then there's no Referer.
The Content Security Policy may forbid sending a Referer.
As we'll see, fetch has options that prevent sending the Referer and even allow to change it (within the same site).
By specification, Referer is an optional HTTP-header.
Exactly because Referer is unreliable, Origin was invented.
The browser guarantees correct Origin for cross-origin requests.
Network requests
Fetch API
So far, we know quite a bit about fetch.
Let's see the rest of API, to cover all its abilities.
Please note:
Please note: most of these options are used rarely.
You may skip this chapter and still use fetch well.
Still, it's good to know what fetch can do, so if the need arises, you can return and read the details.
Here's the full list of all possible fetch options with their default values (alternatives in comments):
let promise = fetch(url, {
method: "GET", // POST, PUT, DELETE, etc.
headers: {
// the content type header value is usually auto-set
// depending on the request body
"Content-Type": "text/plain;charset=UTF-8"
},
body: undefined // string, FormData, Blob, BufferSource, or URLSearchParams
referrer: "about:client", // or "" to send no Referer header,
// or an url from the current origin
referrerPolicy: "no-referrer-when-downgrade", // no-referrer, origin, same-origin...
mode: "cors", // same-origin, no-cors
credentials: "same-origin", // omit, include
cache: "default", // no-store, reload, no-cache, force-cache, or only-if-cached
redirect: "follow", // manual, error
integrity: "", // a hash, like "sha256-abcdef1234567890"
keepalive: false, // true
signal: undefined, // AbortController to abort request
window: window // null
});
An impressive list, right?
We fully covered method, headers and body in the chapter Fetch.
The signal option is covered in Fetch: Abort.
Now let's explore the remaining capabilities.
- referrer, referrerPolicy
These options govern how fetch sets the HTTP Referer header.
Usually that header is set automatically and contains the url of the page that made the request.
In most scenarios, it's not important at all, sometimes, for security purposes, it makes sense to remove or shorten it.
The referrer option allows to set any Referer (within the current origin) or remove it.
To send no referer, set an empty string:
fetch('/page', {
referrer: "" // no Referer header
});
To set another url within the current origin:
fetch('/page', {
// assuming we're on https://javascript.info
// we can set any Referer header, but only within the current origin
referrer: "https://javascript.info/anotherpage"
});The referrerPolicy option sets general rules for Referer.
Requests are split into 3 types:
Request to the same origin.
Request to another origin.
Request from HTTPS to HTTP (from safe to unsafe protocol).
Unlike the referrer option that allows to set the exact Referer value, referrerPolicy tells the browser general rules for each request type.
Possible values are described in the Referrer Policy specification:
"no-referrer-when-downgrade" – the default value: full Referer is always sent, unless we send a request from HTTPS to HTTP (to the less secure protocol).
"no-referrer" – never send Referer.
"origin" – only send the origin in Referer, not the full page URL, e.g.
only http://site.com instead of http://site.com/path.
"origin-when-cross-origin" – send the full Referer to the same origin, but only the origin part for cross-origin requests (as above).
"same-origin" – send the full Referer to the same origin, but no Referer for cross-origin requests.
"strict-origin" – send only the origin, not the Referer for HTTPS→HTTP requests.
"strict-origin-when-cross-origin" – for same-origin send the full Referer, for cross-origin send only the origin, unless it's HTTPS→HTTP request, then send nothing.
"unsafe-url" – always send the full url in Referer, even for HTTPS→HTTP requests.
Here's a table with all combinations:
Value
To same origin
To another origin
HTTPS→HTTP
"no-referrer"
-
-
-
"no-referrer-when-downgrade" or "" (default)
full
full
-
"origin"
origin
origin
origin
"origin-when-cross-origin"
full
origin
origin
"same-origin"
full
-
-
"strict-origin"
origin
origin
-
"strict-origin-when-cross-origin"
full
origin
-
"unsafe-url"
full
full
full
Let's say we have an admin zone with a URL structure that shouldn't be known from outside of the site.
If we send a fetch, then by default it always sends the Referer header with the full url of our page (except when we request from HTTPS to HTTP, then no Referer).
E.g.
Referer: https://javascript.info/admin/secret/paths.
If we'd like other websites know only the origin part, not the URL-path, we can set the option:
fetch('https://another.com/page', {
// ...
referrerPolicy: "origin-when-cross-origin" // Referer: https://javascript.info
});
We can put it to all fetch calls, maybe integrate into JavaScript library of our project that does all requests and uses fetch inside.
Its only difference compared to the default behavior is that for requests to another origin fetch sends only the origin part of the URL (e.g.
https://javascript.info, without path).
For requests to our origin we still get the full Referer (maybe useful for debugging purposes).
Referrer policy is not only for fetch
Referrer policy, described in the specification, is not just for fetch, but more global.
In particular, it's possible to set the default policy for the whole page using the Referrer-Policy HTTP header, or per-link, with <a rel="noreferrer">.
- mode
The mode option is a safe-guard that prevents occasional cross-origin requests:
"cors" – the default, cross-origin requests are allowed, as described in Fetch: Cross-Origin Requests,
"same-origin" – cross-origin requests are forbidden,
"no-cors" – only safe cross-origin requests are allowed.
This option may be useful when the URL for fetch comes from a 3rd-party, and we want a “power off switch” to limit cross-origin capabilities.
- credentials
The credentials option specifies whether fetch should send cookies and HTTP-Authorization headers with the request.
"same-origin" – the default, don't send for cross-origin requests,
"include" – always send, requires Accept-Control-Allow-Credentials from cross-origin server in order for JavaScript to access the response, that was covered in the chapter Fetch: Cross-Origin Requests,
"omit" – never send, even for same-origin requests.
- cache
By default, fetch requests make use of standard HTTP-caching.
That is, it respects the Expires and Cache-Control headers, sends If-Modified-Since and so on.
Just like regular HTTP-requests do.
The cache options allows to ignore HTTP-cache or fine-tune its usage:
"default" – fetch uses standard HTTP-cache rules and headers,
"no-store" – totally ignore HTTP-cache, this mode becomes the default if we set a header If-Modified-Since, If-None-Match, If-Unmodified-Since, If-Match, or If-Range,
"reload" – don't take the result from HTTP-cache (if any), but populate the cache with the response (if the response headers permit this action),
"no-cache" – create a conditional request if there is a cached response, and a normal request otherwise.
Populate HTTP-cache with the response,
"force-cache" – use a response from HTTP-cache, even if it's stale.
If there's no response in HTTP-cache, make a regular HTTP-request, behave normally,
"only-if-cached" – use a response from HTTP-cache, even if it's stale.
If there's no response in HTTP-cache, then error.
Only works when mode is "same-origin".
- redirect
Normally, fetch transparently follows HTTP-redirects, like 301, 302 etc.
The redirect option allows to change that:
"follow" – the default, follow HTTP-redirects,
"error" – error in case of HTTP-redirect,
"manual" – don't follow HTTP-redirect, but response.url will be the new URL, and response.redirected will be true, so that we can perform the redirect manually to the new URL (if needed).
- integrity
The integrity option allows to check if the response matches the known-ahead checksum.
As described in the specification, supported hash-functions are SHA-256, SHA-384, and SHA-512, there might be others depending on the browser.
For example, we're downloading a file, and we know that it's SHA-256 checksum is “abcdef” (a real checksum is longer, of course).
We can put it in the integrity option, like this:
fetch('http://site.com/file', {
integrity: 'sha256-abcdef'
});
Then fetch will calculate SHA-256 on its own and compare it with our string.
In case of a mismatch, an error is triggered.
- keepalive
The keepalive option indicates that the request may “outlive” the webpage that initiated it.
For example, we gather statistics on how the current visitor uses our page (mouse clicks, page fragments he views), to analyze and improve the user experience.
When the visitor leaves our page – we'd like to save the data to our server.
We can use the window.onunload event for that:
window.onunload = function() {
fetch('/analytics', {
method: 'POST',
body: "statistics",
keepalive: true
});
};
Normally, when a document is unloaded, all associated network requests are aborted.
But the keepalive option tells the browser to perform the request in the background, even after it leaves the page.
So this option is essential for our request to succeed.
It has a few limitations:
We can't send megabytes: the body limit for keepalive requests is 64KB.
If we need to gather a lot of statistics about the visit, we should send it out regularly in packets, so that there won't be a lot left for the last onunload request.
This limit applies to all keepalive requests together.
In other words, we can perform multiple keepalive requests in parallel, but the sum of their body lengths should not exceed 64KB.
We can't handle the server response if the document is unloaded.
So in our example fetch will succeed due to keepalive, but subsequent functions won't work.
In most cases, such as sending out statistics, it's not a problem, as the server just accepts the data and usually sends an empty response to such requests.
Network requests
URL objects
The built-in URL class provides a convenient interface for creating and parsing URLs.
There are no networking methods that require exactly a URL object, strings are good enough.
So technically we don't have to use URL.
But sometimes it can be really helpful.
- Creating a URL
The syntax to create a new URL object:
new URL(url, [base])url – the full URL or only path (if base is set, see below),
base – an optional base URL: if set and url argument has only path, then the URL is generated relative to base.
For example:
let url = new URL('https://javascript.info/profile/admin');
These two URLs are same:
let url1 = new URL('https://javascript.info/profile/admin');
let url2 = new URL('/profile/admin', 'https://javascript.info');
alert(url1); // https://javascript.info/profile/admin
alert(url2); // https://javascript.info/profile/admin
We can easily create a new URL based on the path relative to an existing URL:
let url = new URL('https://javascript.info/profile/admin');
let newUrl = new URL('tester', url);
alert(newUrl); // https://javascript.info/profile/tester
The URL object immediately allows us to access its components, so it's a nice way to parse the url, e.g.:
let url = new URL('https://javascript.info/url');
alert(url.protocol); // https:
alert(url.host); // javascript.info
alert(url.pathname); // /url
Here's the cheatsheet for URL components:
href is the full url, same as url.toString()protocol ends with the colon character :search – a string of parameters, starts with the question mark ?hash starts with the hash character #
there may be also user and password properties if HTTP authentication is present: http://login:password@site.com (not painted above, rarely used).
We can pass URL objects to networking (and most other) methods instead of a string
We can use a URL object in fetch or XMLHttpRequest, almost everywhere where a URL-string is expected.
Generally, the URL object can be passed to any method instead of a string, as most methods will perform the string conversion, that turns a URL object into a string with full URL.
- SearchParams “?…”
Let's say we want to create a url with given search params, for instance, https://google.com/search?query=JavaScript.
We can provide them in the URL string:
new URL('https://google.com/search?query=JavaScript')
…But parameters need to be encoded if they contain spaces, non-latin letters, etc (more about that below).
So there's a URL property for that: url.searchParams, an object of type URLSearchParams.
It provides convenient methods for search parameters:
append(name, value) – add the parameter by name,
delete(name) – remove the parameter by name,
get(name) – get the parameter by name,
getAll(name) – get all parameters with the same name (that's possible, e.g.
?user=John&user=Pete),
has(name) – check for the existence of the parameter by name,
set(name, value) – set/replace the parameter,
sort() – sort parameters by name, rarely needed,
…and it's also iterable, similar to Map.
An example with parameters that contain spaces and punctuation marks:
let url = new URL('https://google.com/search');
url.searchParams.set('q', 'test me!'); // added parameter with a space and !
alert(url); // https://google.com/search?q=test+me%21
url.searchParams.set('tbs', 'qdr:y'); // added parameter with a colon :
// parameters are automatically encoded
alert(url); // https://google.com/search?q=test+me%21&tbs=qdr%3Ay
// iterate over search parameters (decoded)
for(let [name, value] of url.searchParams) {
alert(`${name}=${value}`); // q=test me!, then tbs=qdr:y
}
- Encoding
There's a standard RFC3986 that defines which characters are allowed in URLs and which are not.
Those that are not allowed, must be encoded, for instance non-latin letters and spaces – replaced with their UTF-8 codes, prefixed by %, such as %20 (a space can be encoded by +, for historical reasons, but that's an exception).
The good news is that URL objects handle all that automatically.
We just supply all parameters unencoded, and then convert the URL to string:
// using some cyrillic characters for this example
let url = new URL('https://ru.wikipedia.org/wiki/Тест');
url.searchParams.set('key', 'ъ');
alert(url); //https://ru.wikipedia.org/wiki/%D0%A2%D0%B5%D1%81%D1%82?key=%D1%8A
As you can see, both Тест in the url path and ъ in the parameter are encoded.
The URL became longer, because each cyrillic letter is represented with two bytes in UTF-8, so there are two %.. entities.
Encoding strings
In old times, before URL objects appeared, people used strings for URLs.
As of now, URL objects are often more convenient, but strings can still be used as well.
In many cases using a string makes the code shorter.
If we use a string though, we need to encode/decode special characters manually.
There are built-in functions for that:
encodeURI – encodes URL as a whole.
decodeURI – decodes it back.
encodeURIComponent – encodes a URL component, such as a search parameter, or a hash, or a pathname.
decodeURIComponent – decodes it back.
A natural question is: “What's the difference between encodeURIComponent and encodeURI? When we should use either?”
That's easy to understand if we look at the URL, that's split into components in the picture above:
https://site.com:8080/path/page?p1=v1&p2=v2#hash
As we can see, characters such as :, ?, =, &, # are allowed in URL.
…On the other hand, if we look at a single URL component, such as a search parameter, these characters must be encoded, not to break the formatting.
encodeURI encodes only characters that are totally forbidden in URL.
encodeURIComponent encodes same characters, and, in addition to them, characters #, $, &, +, ,, /, :, ;, =, ? and @.
So, for a whole URL we can use encodeURI:
// using cyrillic characters in url path
let url = encodeURI('http://site.com/привет');
alert(url); // http://site.com/%D0%BF%D1%80%D0%B8%D0%B2%D0%B5%D1%82
…While for URL parameters we should use encodeURIComponent instead:
let music = encodeURIComponent('Rock&Roll');
let url = `https://google.com/search?q=${music}`;
alert(url); // https://google.com/search?q=Rock%26Roll
Compare it with encodeURI:
let music = encodeURI('Rock&Roll');
let url = `https://google.com/search?q=${music}`;
alert(url); // https://google.com/search?q=Rock&Roll
As we can see, encodeURI does not encode &, as this is a legit character in URL as a whole.
But we should encode & inside a search parameter, otherwise, we get q=Rock&Roll – that is actually q=Rock plus some obscure parameter Roll.
Not as intended.
So we should use only encodeURIComponent for each search parameter, to correctly insert it in the URL string.
The safest is to encode both name and value, unless we're absolutely sure that it has only allowed characters.
Encoding difference compared to URL
Classes URL and URLSearchParams are based on the latest URI specification: RFC3986, while encode* functions are based on the obsolete version RFC2396.
There are a few differences, e.g.
IPv6 addresses are encoded differently:
// valid url with IPv6 address
let url = 'http://[2607:f8b0:4005:802::1007]/';
alert(encodeURI(url)); // http://%5B2607:f8b0:4005:802::1007%5D/
alert(new URL(url)); // http://[2607:f8b0:4005:802::1007]/
As we can see, encodeURI replaced square brackets [...], that's not correct, the reason is: IPv6 urls did not exist at the time of RFC2396 (August 1998).
Such cases are rare, encode* functions work well most of the time.
Network requests
XMLHttpRequest
XMLHttpRequest is a built-in browser object that allows to make HTTP requests in JavaScript.
Despite of having the word “XML” in its name, it can operate on any data, not only in XML format.
We can upload/download files, track progress and much more.
Right now, there's another, more modern method fetch, that somewhat deprecates XMLHttpRequest.
In modern web-development XMLHttpRequest is used for three reasons:
Historical reasons: we need to support existing scripts with XMLHttpRequest.
We need to support old browsers, and don't want polyfills (e.g.
to keep scripts tiny).
We need something that fetch can't do yet, e.g.
to track upload progress.
Does that sound familiar? If yes, then all right, go on with XMLHttpRequest.
Otherwise, please head on to Fetch.
- The basics
XMLHttpRequest has two modes of operation: synchronous and asynchronous.
Let's see the asynchronous first, as it's used in the majority of cases.
To do the request, we need 3 steps:
Create XMLHttpRequest:
let xhr = new XMLHttpRequest();
The constructor has no arguments.
Initialize it, usually right after new XMLHttpRequest:
xhr.open(method, URL, [async, user, password])
This method specifies the main parameters of the request:
method – HTTP-method.
Usually "GET" or "POST".
URL – the URL to request, a string, can be URL object.
async – if explicitly set to false, then the request is synchronous, we'll cover that a bit later.
user, password – login and password for basic HTTP auth (if required).
Please note that open call, contrary to its name, does not open the connection.
It only configures the request, but the network activity only starts with the call of send.
Send it out.
xhr.send([body])
This method opens the connection and sends the request to server.
The optional body parameter contains the request body.
Some request methods like GET do not have a body.
And some of them like POST use body to send the data to the server.
We'll see examples of that later.
Listen to xhr events for response.
These three events are the most widely used:
load – when the request is complete (even if HTTP status is like 400 or 500), and the response is fully downloaded.
error – when the request couldn't be made, e.g.
network down or invalid URL.
progress – triggers periodically while the response is being downloaded, reports how much has been downloaded.
xhr.onload = function() {
alert(`Loaded: ${xhr.status} ${xhr.response}`);
};
xhr.onerror = function() { // only triggers if the request couldn't be made at all
alert(`Network Error`);
};
xhr.onprogress = function(event) { // triggers periodically
// event.loaded - how many bytes downloaded
// event.lengthComputable = true if the server sent Content-Length header
// event.total - total number of bytes (if lengthComputable)
alert(`Received ${event.loaded} of ${event.total}`);
};
Here's a full example.
The code below loads the URL at /article/xmlhttprequest/example/load from the server and prints the progress:
// 1.
Create a new XMLHttpRequest object
let xhr = new XMLHttpRequest();
// 2.
Configure it: GET-request for the URL /article/.../load
xhr.open('GET', '/article/xmlhttprequest/example/load');
// 3.
Send the request over the network
xhr.send();
// 4.
This will be called after the response is received
xhr.onload = function() {
if (xhr.status != 200) { // analyze HTTP status of the response
alert(`Error ${xhr.status}: ${xhr.statusText}`); // e.g.
404: Not Found
} else { // show the result
alert(`Done, got ${xhr.response.length} bytes`); // response is the server response
}
};
xhr.onprogress = function(event) {
if (event.lengthComputable) {
alert(`Received ${event.loaded} of ${event.total} bytes`);
} else {
alert(`Received ${event.loaded} bytes`); // no Content-Length
}
};
xhr.onerror = function() {
alert("Request failed");
};
Once the server has responded, we can receive the result in the following xhr properties:
status
HTTP status code (a number): 200, 404, 403 and so on, can be 0 in case of a non-HTTP failure.
statusText
HTTP status message (a string): usually OK for 200, Not Found for 404, Forbidden for 403 and so on.
response (old scripts may use responseText)
The server response body.
We can also specify a timeout using the corresponding property:
xhr.timeout = 10000; // timeout in ms, 10 seconds
If the request does not succeed within the given time, it gets canceled and timeout event triggers.
URL search parameters
To add parameters to URL, like ?name=value, and ensure the proper encoding, we can use URL object:
let url = new URL('https://google.com/search');
url.searchParams.set('q', 'test me!');
// the parameter 'q' is encoded
xhr.open('GET', url); // https://google.com/search?q=test+me%21
- Response Type
We can use xhr.responseType property to set the response format:
"" (default) – get as string,
"text" – get as string,
"arraybuffer" – get as ArrayBuffer (for binary data, see chapter ArrayBuffer, binary arrays),
"blob" – get as Blob (for binary data, see chapter Blob),
"document" – get as XML document (can use XPath and other XML methods) or HTML document (based on the MIME type of the received data),
"json" – get as JSON (parsed automatically).
For example, let's get the response as JSON:
let xhr = new XMLHttpRequest();
xhr.open('GET', '/article/xmlhttprequest/example/json');
xhr.responseType = 'json';
xhr.send();
// the response is {"message": "Hello, world!"}
xhr.onload = function() {
let responseObj = xhr.response;
alert(responseObj.message); // Hello, world!
};
Please note:
In the old scripts you may also find xhr.responseText and even xhr.responseXML properties.
They exist for historical reasons, to get either a string or XML document.
Nowadays, we should set the format in xhr.responseType and get xhr.response as demonstrated above.
- Ready states
XMLHttpRequest changes between states as it progresses.
The current state is accessible as xhr.readyState.
All states, as in the specification:
UNSENT = 0; // initial state
OPENED = 1; // open called
HEADERS_RECEIVED = 2; // response headers received
LOADING = 3; // response is loading (a data packet is received)
DONE = 4; // request complete
An XMLHttpRequest object travels them in the order 0 → 1 → 2 → 3 → … → 3 → 4.
State 3 repeats every time a data packet is received over the network.
We can track them using readystatechange event:
xhr.onreadystatechange = function() {
if (xhr.readyState == 3) {
// loading
}
if (xhr.readyState == 4) {
// request finished
}
};
You can find readystatechange listeners in really old code, it's there for historical reasons, as there was a time when there were no load and other events.
Nowadays, load/error/progress handlers deprecate it.
- Aborting request
We can terminate the request at any time.
The call to xhr.abort() does that:
xhr.abort(); // terminate the request
That triggers abort event, and xhr.status becomes 0.
- Synchronous requests
If in the open method the third parameter async is set to false, the request is made synchronously.
In other words, JavaScript execution pauses at send() and resumes when the response is received.
Somewhat like alert or prompt commands.
Here's the rewritten example, the 3rd parameter of open is false:
let xhr = new XMLHttpRequest();
xhr.open('GET', '/article/xmlhttprequest/hello.txt', false);
try {
xhr.send();
if (xhr.status != 200) {
alert(`Error ${xhr.status}: ${xhr.statusText}`);
} else {
alert(xhr.response);
}
} catch(err) { // instead of onerror
alert("Request failed");
}
It might look good, but synchronous calls are used rarely, because they block in-page JavaScript till the loading is complete.
In some browsers it becomes impossible to scroll.
If a synchronous call takes too much time, the browser may suggest to close the “hanging” webpage.
Many advanced capabilities of XMLHttpRequest, like requesting from another domain or specifying a timeout, are unavailable for synchronous requests.
Also, as you can see, no progress indication.
Because of all that, synchronous requests are used very sparingly, almost never.
We won't talk about them any more.
- HTTP-headers
XMLHttpRequest allows both to send custom headers and read headers from the response.
There are 3 methods for HTTP-headers:
setRequestHeader(name, value)
Sets the request header with the given name and value.
For instance:
xhr.setRequestHeader('Content-Type', 'application/json');
Headers limitations
Several headers are managed exclusively by the browser, e.g.
Referer and Host.
The full list is in the specification.
XMLHttpRequest is not allowed to change them, for the sake of user safety and correctness of the request.
Can't remove a header
Another peculiarity of XMLHttpRequest is that one can't undo setRequestHeader.
Once the header is set, it's set.
Additional calls add information to the header, don't overwrite it.
For instance:
xhr.setRequestHeader('X-Auth', '123');
xhr.setRequestHeader('X-Auth', '456');
// the header will be:
// X-Auth: 123, 456
getResponseHeader(name)
Gets the response header with the given name (except Set-Cookie and Set-Cookie2).
For instance:
xhr.getResponseHeader('Content-Type')
getAllResponseHeaders()
Returns all response headers, except Set-Cookie and Set-Cookie2.
Headers are returned as a single line, e.g.:
Cache-Control: max-age=31536000
Content-Length: 4260
Content-Type: image/png
Date: Sat, 08 Sep 2012 16:53:16 GMT
The line break between headers is always "\r\n" (doesn't depend on OS), so we can easily split it into individual headers.
The separator between the name and the value is always a colon followed by a space ": ".
That's fixed in the specification.
So, if we want to get an object with name/value pairs, we need to throw in a bit JS.
Like this (assuming that if two headers have the same name, then the latter one overwrites the former one):
let headers = xhr
.getAllResponseHeaders()
.split('\r\n')
.reduce((result, current) => {
let [name, value] = current.split(': ');
result[name] = value;
return result;
}, {});
// headers['Content-Type'] = 'image/png'
- POST, FormData
To make a POST request, we can use the built-in FormData object.
The syntax:
let formData = new FormData([form]); // creates an object, optionally fill from <form>
formData.append(name, value); // appends a field
We create it, optionally fill from a form, append more fields if needed, and then:
xhr.open('POST', ...) – use POST method.
xhr.send(formData) to submit the form to the server.
For instance:
<form name="person">
<input name="name" value="John">
<input name="surname" value="Smith">
</form>
<script>
// pre-fill FormData from the form
let formData = new FormData(document.forms.person);
// add one more field
formData.append("middle", "Lee");
// send it out
let xhr = new XMLHttpRequest();
xhr.open("POST", "/article/xmlhttprequest/post/user");
xhr.send(formData);
xhr.onload = () => alert(xhr.response);
</script>
The form is sent with multipart/form-data encoding.
Or, if we like JSON more, then JSON.stringify and send as a string.
Just don't forget to set the header Content-Type: application/json, many server-side frameworks automatically decode JSON with it:
let xhr = new XMLHttpRequest();
let json = JSON.stringify({
name: "John",
surname: "Smith"
});
xhr.open("POST", '/submit')
xhr.setRequestHeader('Content-type', 'application/json; charset=utf-8');
xhr.send(json);
The .send(body) method is pretty omnivore.
It can send almost any body, including Blob and BufferSource objects.
- Upload progress
The progress event triggers only on the downloading stage.
That is: if we POST something, XMLHttpRequest first uploads our data (the request body), then downloads the response.
If we're uploading something big, then we're surely more interested in tracking the upload progress.
But xhr.onprogress doesn't help here.
There's another object, without methods, exclusively to track upload events: xhr.upload.
It generates events, similar to xhr, but xhr.upload triggers them solely on uploading:
loadstart – upload started.
progress – triggers periodically during the upload.
abort – upload aborted.
error – non-HTTP error.
load – upload finished successfully.
timeout – upload timed out (if timeout property is set).
loadend – upload finished with either success or error.
Example of handlers:
xhr.upload.onprogress = function(event) {
alert(`Uploaded ${event.loaded} of ${event.total} bytes`);
};
xhr.upload.onload = function() {
alert(`Upload finished successfully.`);
};
xhr.upload.onerror = function() {
alert(`Error during the upload: ${xhr.status}`);
};
Here's a real-life example: file upload with progress indication:
<input type="file" onchange="upload(this.files[0])">
<script>
function upload(file) {
let xhr = new XMLHttpRequest();
// track upload progress
xhr.upload.onprogress = function(event) {
console.log(`Uploaded ${event.loaded} of ${event.total}`);
};
// track completion: both successful or not
xhr.onloadend = function() {
if (xhr.status == 200) {
console.log("success");
} else {
console.log("error " + this.status);
}
};
xhr.open("POST", "/article/xmlhttprequest/post/upload");
xhr.send(file);
}
</script>
- Cross-origin requests
XMLHttpRequest can make cross-origin requests, using the same CORS policy as fetch.
Just like fetch, it doesn't send cookies and HTTP-authorization to another origin by default.
To enable them, set xhr.withCredentials to true:
let xhr = new XMLHttpRequest();
xhr.withCredentials = true;
xhr.open('POST', 'http://anywhere.com/request');
...
See the chapter Fetch: Cross-Origin Requests for details about cross-origin headers.
- Summary
Typical code of the GET-request with XMLHttpRequest:
let xhr = new XMLHttpRequest();
xhr.open('GET', '/my/url');
xhr.send();
xhr.onload = function() {
if (xhr.status != 200) { // HTTP error?
// handle error
alert( 'Error: ' + xhr.status);
return;
}
// get the response from xhr.response
};
xhr.onprogress = function(event) {
// report progress
alert(`Loaded ${event.loaded} of ${event.total}`);
};
xhr.onerror = function() {
// handle non-HTTP error (e.g.
network down)
};
There are actually more events, the modern specification lists them (in the lifecycle order):
loadstart – the request has started.
progress – a data packet of the response has arrived, the whole response body at the moment is in response.
abort – the request was canceled by the call xhr.abort().
error – connection error has occurred, e.g.
wrong domain name.
Doesn't happen for HTTP-errors like 404.
load – the request has finished successfully.
timeout – the request was canceled due to timeout (only happens if it was set).
loadend – triggers after load, error, timeout or abort.
The error, abort, timeout, and load events are mutually exclusive.
Only one of them may happen.
The most used events are load completion (load), load failure (error), or we can use a single loadend handler and check the properties of the request object xhr to see what happened.
We've already seen another event: readystatechange.
Historically, it appeared long ago, before the specification settled.
Nowadays, there's no need to use it, we can replace it with newer events, but it can often be found in older scripts.
If we need to track uploading specifically, then we should listen to same events on xhr.upload object.
Network requests
Resumable file upload
With fetch method it's fairly easy to upload a file.
How to resume the upload after lost connection? There's no built-in option for that, but we have the pieces to implement it.
Resumable uploads should come with upload progress indication, as we expect big files (if we may need to resume).
So, as fetch doesn't allow to track upload progress, we'll use XMLHttpRequest.
- Not-so-useful progress event
To resume upload, we need to know how much was uploaded till the connection was lost.
There's xhr.upload.onprogress to track upload progress.
Unfortunately, it won't help us to resume the upload here, as it triggers when the data is sent, but was it received by the server? The browser doesn't know.
Maybe it was buffered by a local network proxy, or maybe the remote server process just died and couldn't process them, or it was just lost in the middle and didn't reach the receiver.
That's why this event is only useful to show a nice progress bar.
To resume upload, we need to know exactly the number of bytes received by the server.
And only the server can tell that, so we'll make an additional request.
- Algorithm
First, create a file id, to uniquely identify the file we're going to upload:
let fileId = file.name + '-' + file.size + '-' + file.lastModified;
That's needed for resume upload, to tell the server what we're resuming.
If the name or the size or the last modification date changes, then there'll be another fileId.
Send a request to the server, asking how many bytes it already has, like this:
let response = await fetch('status', {
headers: {
'X-File-Id': fileId
}
});
// The server has that many bytes
let startByte = +await response.text();
This assumes that the server tracks file uploads by X-File-Id header.
Should be implemented at server-side.
If the file doesn't yet exist at the server, then the server response should be 0
Then, we can use Blob method slice to send the file from startByte:
xhr.open("POST", "upload", true);
// File id, so that the server knows which file we upload
xhr.setRequestHeader('X-File-Id', fileId);
// The byte we're resuming from, so the server knows we're resuming
xhr.setRequestHeader('X-Start-Byte', startByte);
xhr.upload.onprogress = (e) => {
console.log(`Uploaded ${startByte + e.loaded} of ${startByte + e.total}`);
};
// file can be from input.files[0] or another source
xhr.send(file.slice(startByte));
Here we send the server both file id as X-File-Id, so it knows which file we're uploading, and the starting byte as X-Start-Byte, so it knows we're not uploading it initially, but resuming.
The server should check its records, and if there was an upload of that file, and the current uploaded size is exactly X-Start-Byte, then append the data to it.
Here's the demo with both client and server code, written on Node.js.
It works only partially on this site, as Node.js is behind another server named Nginx, that buffers uploads, passing them to Node.js when fully complete.
But you can download it and run locally for the full demonstration:
Result
server.js
uploader.js
index.html
let http = require('http');
let static = require('node-static');
let fileServer = new static.Server('.');
let path = require('path');
let fs = require('fs');
let debug = require('debug')('example:resume-upload');
let uploads = Object.create(null);
function onUpload(req, res) {
let fileId = req.headers['x-file-id'];
let startByte = +req.headers['x-start-byte'];
if (!fileId) {
res.writeHead(400, "No file id");
res.end();
}
// we'll files "nowhere"
let filePath = '/dev/null';
// could use a real path instead, e.g.
// let filePath = path.join('/tmp', fileId);
debug("onUpload fileId: ", fileId);
// initialize a new upload
if (!uploads[fileId]) uploads[fileId] = {};
let upload = uploads[fileId];
debug("bytesReceived:" + upload.bytesReceived + " startByte:" + startByte)
let fileStream;
// if startByte is 0 or not set, create a new file, otherwise check the size and append to existing one
if (!startByte) {
upload.bytesReceived = 0;
fileStream = fs.createWriteStream(filePath, {
flags: 'w'
});
debug("New file created: " + filePath);
} else {
// we can check on-disk file size as well to be sure
if (upload.bytesReceived != startByte) {
res.writeHead(400, "Wrong start byte");
res.end(upload.bytesReceived);
return;
}
// append to existing file
fileStream = fs.createWriteStream(filePath, {
flags: 'a'
});
debug("File reopened: " + filePath);
}
req.on('data', function(data) {
debug("bytes received", upload.bytesReceived);
upload.bytesReceived += data.length;
});
// send request body to file
req.pipe(fileStream);
// when the request is finished, and all its data is written
fileStream.on('close', function() {
if (upload.bytesReceived == req.headers['x-file-size']) {
debug("Upload finished");
delete uploads[fileId];
// can do something else with the uploaded file here
res.end("Success " + upload.bytesReceived);
} else {
// connection lost, we leave the unfinished file around
debug("File unfinished, stopped at " + upload.bytesReceived);
res.end();
}
});
// in case of I/O error - finish the request
fileStream.on('error', function(err) {
debug("fileStream error");
res.writeHead(500, "File error");
res.end();
});
}
function onStatus(req, res) {
let fileId = req.headers['x-file-id'];
let upload = uploads[fileId];
debug("onStatus fileId:", fileId, " upload:", upload);
if (!upload) {
res.end("0")
} else {
res.end(String(upload.bytesReceived));
}
}
function accept(req, res) {
if (req.url == '/status') {
onStatus(req, res);
} else if (req.url == '/upload' && req.method == 'POST') {
onUpload(req, res);
} else {
fileServer.serve(req, res);
}
}
// -----------------------------------
if (!module.parent) {
http.createServer(accept).listen(8080);
console.log('Server listening at port 8080');
} else {
exports.accept = accept;
}class Uploader {
constructor({file, onProgress}) {
this.file = file;
this.onProgress = onProgress;
// create fileId that uniquely identifies the file
// we could also add user session identifier (if had one), to make it even more unique
this.fileId = file.name + '-' + file.size + '-' + file.lastModified;
}
async getUploadedBytes() {
let response = await fetch('status', {
headers: {
'X-File-Id': this.fileId
}
});
if (response.status != 200) {
throw new Error("Can't get uploaded bytes: " + response.statusText);
}
let text = await response.text();
return +text;
}
async upload() {
this.startByte = await this.getUploadedBytes();
let xhr = this.xhr = new XMLHttpRequest();
xhr.open("POST", "upload", true);
// send file id, so that the server knows which file to resume
xhr.setRequestHeader('X-File-Id', this.fileId);
// send the byte we're resuming from, so the server knows we're resuming
xhr.setRequestHeader('X-Start-Byte', this.startByte);
xhr.upload.onprogress = (e) => {
this.onProgress(this.startByte + e.loaded, this.startByte + e.total);
};
console.log("send the file, starting from", this.startByte);
xhr.send(this.file.slice(this.startByte));
// return
// true if upload was successful,
// false if aborted
// throw in case of an error
return await new Promise((resolve, reject) => {
xhr.onload = xhr.onerror = () => {
console.log("upload end status:" + xhr.status + " text:" + xhr.statusText);
if (xhr.status == 200) {
resolve(true);
} else {
reject(new Error("Upload failed: " + xhr.statusText));
}
};
// onabort triggers only when xhr.abort() is called
xhr.onabort = () => resolve(false);
});
}
stop() {
if (this.xhr) {
this.xhr.abort();
}
}
}<!DOCTYPE HTML>
<script src="uploader.js"></script>
<form name="upload" method="POST" enctype="multipart/form-data" action="/upload">
<input type="file" name="myfile">
<input type="submit" name="submit" value="Upload (Resumes automatically)">
</form>
<button onclick="uploader.stop()">Stop upload</button>
<div id="log">Progress indication</div>
<script>
function log(html) {
document.getElementById('log').innerHTML = html;
console.log(html);
}
function onProgress(loaded, total) {
log("progress " + loaded + ' / ' + total);
}
let uploader;
document.forms.upload.onsubmit = async function(e) {
e.preventDefault();
let file = this.elements.myfile.files[0];
if (!file) return;
uploader = new Uploader({file, onProgress});
try {
let uploaded = await uploader.upload();
if (uploaded) {
log('success');
} else {
log('stopped');
}
} catch(err) {
console.error(err);
log('error');
}
};
</script>
As we can see, modern networking methods are close to file managers in their capabilities – control over headers, progress indicator, sending file parts, etc.
We can implement resumable upload and much more.
Network requests
Long polling
Long polling is the simplest way of having persistent connection with server, that doesn't use any specific protocol like WebSocket or Server Side Events.
Being very easy to implement, it's also good enough in a lot of cases.
- Regular Polling
The simplest way to get new information from the server is periodic polling.
That is, regular requests to the server: “Hello, I'm here, do you have any information for me?”.
For example, once every 10 seconds.
In response, the server first takes a notice to itself that the client is online, and second – sends a packet of messages it got till that moment.
That works, but there are downsides:
Messages are passed with a delay up to 10 seconds (between requests).
Even if there are no messages, the server is bombed with requests every 10 seconds, even if the user switched somewhere else or is asleep.
That's quite a load to handle, speaking performance-wise.
So, if we're talking about a very small service, the approach may be viable, but generally, it needs an improvement.
- Long polling
So-called “long polling” is a much better way to poll the server.
It's also very easy to implement, and delivers messages without delays.
The flow:
A request is sent to the server.
The server doesn't close the connection until it has a message to send.
When a message appears – the server responds to the request with it.
The browser makes a new request immediately.
The situation when the browser sent a request and has a pending connection with the server, is standard for this method.
Only when a message is delivered, the connection is reestablished.
If the connection is lost, because of, say, a network error, the browser immediately sends a new request.
A sketch of client-side subscribe function that makes long requests:
async function subscribe() {
let response = await fetch("/subscribe");
if (response.status == 502) {
// Status 502 is a connection timeout error,
// may happen when the connection was pending for too long,
// and the remote server or a proxy closed it
// let's reconnect
await subscribe();
} else if (response.status != 200) {
// An error - let's show it
showMessage(response.statusText);
// Reconnect in one second
await new Promise(resolve => setTimeout(resolve, 1000));
await subscribe();
} else {
// Get and show the message
let message = await response.text();
showMessage(message);
// Call subscribe() again to get the next message
await subscribe();
}
}
subscribe();
As you can see, subscribe function makes a fetch, then waits for the response, handles it and calls itself again.
Server should be ok with many pending connections
The server architecture must be able to work with many pending connections.
Certain server architectures run one process per connection, resulting in there being as many processes as there are connections, while each process consumes quite a bit of memory.
So, too many connections will just consume it all.
That's often the case for backends written in languages like PHP and Ruby.
Servers written using Node.js usually don't have such problems.
That said, it isn't a programming language issue.
Most modern languages, including PHP and Ruby allow to implement a proper backend.
Just please make sure that your server architecture works fine with many simultaneous connections.
- Demo: a chat
Here's a demo chat, you can also download it and run locally (if you're familiar with Node.js and can install modules):
Result
browser.js
server.js
index.html
// Sending messages, a simple POST
function PublishForm(form, url) {
function sendMessage(message) {
fetch(url, {
method: 'POST',
body: message
});
}
form.onsubmit = function() {
let message = form.message.value;
if (message) {
form.message.value = '';
sendMessage(message);
}
return false;
};
}
// Receiving messages with long polling
function SubscribePane(elem, url) {
function showMessage(message) {
let messageElem = document.createElement('div');
messageElem.append(message);
elem.append(messageElem);
}
async function subscribe() {
let response = await fetch(url);
if (response.status == 502) {
// Connection timeout
// happens when the connection was pending for too long
// let's reconnect
await subscribe();
} else if (response.status != 200) {
// Show Error
showMessage(response.statusText);
// Reconnect in one second
await new Promise(resolve => setTimeout(resolve, 1000));
await subscribe();
} else {
// Got message
let message = await response.text();
showMessage(message);
await subscribe();
}
}
subscribe();
}let http = require('http');
let url = require('url');
let querystring = require('querystring');
let static = require('node-static');
let fileServer = new static.Server('.');
let subscribers = Object.create(null);
function onSubscribe(req, res) {
let id = Math.random();
res.setHeader('Content-Type', 'text/plain;charset=utf-8');
res.setHeader("Cache-Control", "no-cache, must-revalidate");
subscribers[id] = res;
req.on('close', function() {
delete subscribers[id];
});
}
function publish(message) {
for (let id in subscribers) {
let res = subscribers[id];
res.end(message);
}
subscribers = Object.create(null);
}
function accept(req, res) {
let urlParsed = url.parse(req.url, true);
// new client wants messages
if (urlParsed.pathname == '/subscribe') {
onSubscribe(req, res);
return;
}
// sending a message
if (urlParsed.pathname == '/publish' && req.method == 'POST') {
// accept POST
req.setEncoding('utf8');
let message = '';
req.on('data', function(chunk) {
message += chunk;
}).on('end', function() {
publish(message); // publish it to everyone
res.end("ok");
});
return;
}
// the rest is static
fileServer.serve(req, res);
}
function close() {
for (let id in subscribers) {
let res = subscribers[id];
res.end();
}
}
// -----------------------------------
if (!module.parent) {
http.createServer(accept).listen(8080);
console.log('Server running on port 8080');
} else {
exports.accept = accept;
if (process.send) {
process.on('message', (msg) => {
if (msg === 'shutdown') {
close();
}
});
}
process.on('SIGINT', close);
}<!DOCTYPE html>
<script src="browser.js"></script>
All visitors of this page will see messages of each other.
<form name="publish">
<input type="text" name="message" />
<input type="submit" value="Send" />
</form>
<div id="subscribe">
</div>
<script>
new PublishForm(document.forms.publish, 'publish');
// random url parameter to avoid any caching issues
new SubscribePane(document.getElementById('subscribe'), 'subscribe?random=' + Math.random());
</script>
Browser code is in browser.js.
- Area of usage
Long polling works great in situations when messages are rare.
If messages come very often, then the chart of requesting-receiving messages, painted above, becomes saw-like.
Every message is a separate request, supplied with headers, authentication overhead, and so on.
So, in this case, another method is preferred, such as Websocket or Server Sent Events.
Network requests
WebSocket
The WebSocket protocol, described in the specification RFC 6455 provides a way to exchange data between browser and server via a persistent connection.
The data can be passed in both directions as “packets”, without breaking the connection and additional HTTP-requests.
WebSocket is especially great for services that require continuous data exchange, e.g.
online games, real-time trading systems and so on.
- A simple example
To open a websocket connection, we need to create new WebSocket using the special protocol ws in the url:
let socket = new WebSocket("ws://javascript.info");
There's also encrypted wss:// protocol.
It's like HTTPS for websockets.
Always prefer wss://
The wss:// protocol is not only encrypted, but also more reliable.
That's because ws:// data is not encrypted, visible for any intermediary.
Old proxy servers do not know about WebSocket, they may see “strange” headers and abort the connection.
On the other hand, wss:// is WebSocket over TLS, (same as HTTPS is HTTP over TLS), the transport security layer encrypts the data at sender and decrypts at the receiver.
So data packets are passed encrypted through proxies.
They can't see what's inside and let them through.
Once the socket is created, we should listen to events on it.
There are totally 4 events:
open – connection established,
message – data received,
error – websocket error,
close – connection closed.
…And if we'd like to send something, then socket.send(data) will do that.
Here's an example:
let socket = new WebSocket("wss://javascript.info/article/websocket/demo/hello");
socket.onopen = function(e) {
alert("[open] Connection established");
alert("Sending to server");
socket.send("My name is John");
};
socket.onmessage = function(event) {
alert(`[message] Data received from server: ${event.data}`);
};
socket.onclose = function(event) {
if (event.wasClean) {
alert(`[close] Connection closed cleanly, code=${event.code} reason=${event.reason}`);
} else {
// e.g.
server process killed or network down
// event.code is usually 1006 in this case
alert('[close] Connection died');
}
};
socket.onerror = function(error) {
alert(`[error] ${error.message}`);
};
For demo purposes, there's a small server server.js written in Node.js, for the example above, running.
It responds with “Hello from server, John”, then waits 5 seconds and closes the connection.
So you'll see events open → message → close.
That's actually it, we can talk WebSocket already.
Quite simple, isn't it?
Now let's talk more in-depth.
- Opening a websocket
When new WebSocket(url) is created, it starts connecting immediately.
During the connection the browser (using headers) asks the server: “Do you support Websocket?” And if the server replies “yes”, then the talk continues in WebSocket protocol, which is not HTTP at all.
Here's an example of browser headers for request made by new WebSocket("wss://javascript.info/chat").
GET /chat
Host: javascript.info
Origin: https://javascript.info
Connection: Upgrade
Upgrade: websocket
Sec-WebSocket-Key: Iv8io/9s+lYFgZWcXczP8Q==
Sec-WebSocket-Version: 13Origin – the origin of the client page, e.g.
https://javascript.info.
WebSocket objects are cross-origin by nature.
There are no special headers or other limitations.
Old servers are unable to handle WebSocket anyway, so there are no compabitility issues.
But Origin header is important, as it allows the server to decide whether or not to talk WebSocket with this website.
Connection: Upgrade – signals that the client would like to change the protocol.
Upgrade: websocket – the requested protocol is “websocket”.
Sec-WebSocket-Key – a random browser-generated key for security.
Sec-WebSocket-Version – WebSocket protocol version, 13 is the current one.
WebSocket handshake can't be emulated
We can't use XMLHttpRequest or fetch to make this kind of HTTP-request, because JavaScript is not allowed to set these headers.
If the server agrees to switch to WebSocket, it should send code 101 response:
101 Switching Protocols
Upgrade: websocket
Connection: Upgrade
Sec-WebSocket-Accept: hsBlbuDTkk24srzEOTBUlZAlC2g=
Here Sec-WebSocket-Accept is Sec-WebSocket-Key, recoded using a special algorithm.
The browser uses it to make sure that the response corresponds to the request.
Afterwards, the data is transfered using WebSocket protocol, we'll see its structure (“frames”) soon.
And that's not HTTP at all.
Extensions and subprotocols
There may be additional headers Sec-WebSocket-Extensions and Sec-WebSocket-Protocol that describe extensions and subprotocols.
For instance:
Sec-WebSocket-Extensions: deflate-frame means that the browser supports data compression.
An extension is something related to transferring the data, functionality that extends WebSocket protocol.
The header Sec-WebSocket-Extensions is sent automatically by the browser, with the list of all extensions it supports.
Sec-WebSocket-Protocol: soap, wamp means that we'd like to transfer not just any data, but the data in SOAP or WAMP (“The WebSocket Application Messaging Protocol”) protocols.
WebSocket subprotocols are registered in the IANA catalogue.
So, this header describes data formats that we're going to use.
This optional header is set using the second parameter of new WebSocket.
That's the array of subprotocols, e.g.
if we'd like to use SOAP or WAMP:
let socket = new WebSocket("wss://javascript.info/chat", ["soap", "wamp"]);
The server should respond with a list of protocols and extensions that it agrees to use.
For example, the request:
GET /chat
Host: javascript.info
Upgrade: websocket
Connection: Upgrade
Origin: https://javascript.info
Sec-WebSocket-Key: Iv8io/9s+lYFgZWcXczP8Q==
Sec-WebSocket-Version: 13
Sec-WebSocket-Extensions: deflate-frame
Sec-WebSocket-Protocol: soap, wamp
Response:
101 Switching Protocols
Upgrade: websocket
Connection: Upgrade
Sec-WebSocket-Accept: hsBlbuDTkk24srzEOTBUlZAlC2g=
Sec-WebSocket-Extensions: deflate-frame
Sec-WebSocket-Protocol: soap
Here the server responds that it supports the extension “deflate-frame”, and only SOAP of the requested subprotocols.
- Data transfer
WebSocket communication consists of “frames” – data fragments, that can be sent from either side, and can be of several kinds:
“text frames” – contain text data that parties send to each other.
“binary data frames” – contain binary data that parties send to each other.
“ping/pong frames” are used to check the connection, sent from the server, the browser responds to these automatically.
there's also “connection close frame” and a few other service frames.
In the browser, we directly work only with text or binary frames.
WebSocket .send() method can send either text or binary data.
A call socket.send(body) allows body in string or a binary format, including Blob, ArrayBuffer, etc.
No settings required: just send it out in any format.
When we receive the data, text always comes as string.
And for binary data, we can choose between Blob and ArrayBuffer formats.
That's set by socket.binaryType property, it's "blob" by default, so binary data comes as Blob objects.
Blob is a high-level binary object, it directly integrates with <a>, <img> and other tags, so that's a sane default.
But for binary processing, to access individual data bytes, we can change it to "arraybuffer":
socket.binaryType = "arraybuffer";
socket.onmessage = (event) => {
// event.data is either a string (if text) or arraybuffer (if binary)
};
- Rate limiting
Imagine, our app is generating a lot of data to send.
But the user has a slow network connection, maybe on a mobile internet, outside of a city.
We can call socket.send(data) again and again.
But the data will be buffered (stored) in memory and sent out only as fast as network speed allows.
The socket.bufferedAmount property stores how many bytes remain buffered at this moment, waiting to be sent over the network.
We can examine it to see whether the socket is actually available for transmission.
// every 100ms examine the socket and send more data
// only if all the existing data was sent out
setInterval(() => {
if (socket.bufferedAmount == 0) {
socket.send(moreData());
}
}, 100);
- Connection close
Normally, when a party wants to close the connection (both browser and server have equal rights), they send a “connection close frame” with a numeric code and a textual reason.
The method for that is:
socket.close([code], [reason]);code is a special WebSocket closing code (optional)
reason is a string that describes the reason of closing (optional)
Then the other party in close event handler gets the code and the reason, e.g.:
// closing party:
socket.close(1000, "Work complete");
// the other party
socket.onclose = event => {
// event.code === 1000
// event.reason === "Work complete"
// event.wasClean === true (clean close)
};
Most common code values:
1000 – the default, normal closure (used if no code supplied),
1006 – no way to set such code manually, indicates that the connection was lost (no close frame).
There are other codes like:
1001 – the party is going away, e.g.
server is shutting down, or a browser leaves the page,
1009 – the message is too big to process,
1011 – unexpected error on server,
…and so on.
The full list can be found in RFC6455, §7.4.1.
WebSocket codes are somewhat like HTTP codes, but different.
In particular, any codes less than 1000 are reserved, there'll be an error if we try to set such a code.
// in case connection is broken
socket.onclose = event => {
// event.code === 1006
// event.reason === ""
// event.wasClean === false (no closing frame)
};
- Connection state
To get connection state, additionally there's socket.readyState property with values:
0 – “CONNECTING”: the connection has not yet been established,
1 – “OPEN”: communicating,
2 – “CLOSING”: the connection is closing,
3 – “CLOSED”: the connection is closed.
- Chat example
Let's review a chat example using browser WebSocket API and Node.js WebSocket module https://github.com/websockets/ws.
We'll pay the main attention to the client side, but the server is also simple.
HTML: we need a <form> to send messages and a <div> for incoming messages:
<!-- message form -->
<form name="publish">
<input type="text" name="message">
<input type="submit" value="Send">
</form>
<!-- div with messages -->
<div id="messages"></div>
From JavaScript we want three things:
Open the connection.
On form submission – socket.send(message) for the message.
On incoming message – append it to div#messages.
Here's the code:
let socket = new WebSocket("wss://javascript.info/article/websocket/chat/ws");
// send message from the form
document.forms.publish.onsubmit = function() {
let outgoingMessage = this.message.value;
socket.send(outgoingMessage);
return false;
};
// message received - show the message in div#messages
socket.onmessage = function(event) {
let message = event.data;
let messageElem = document.createElement('div');
messageElem.textContent = message;
document.getElementById('messages').prepend(messageElem);
}
Server-side code is a little bit beyond our scope.
Here we'll use Node.js, but you don't have to.
Other platforms also have their means to work with WebSocket.
The server-side algorithm will be:
Create clients = new Set() – a set of sockets.
For each accepted websocket, add it to the set clients.add(socket) and setup message event listener to get its messages.
When a message received: iterate over clients and send it to everyone.
When a connection is closed: clients.delete(socket).
const ws = new require('ws');
const wss = new ws.Server({noServer: true});
const clients = new Set();
http.createServer((req, res) => {
// here we only handle websocket connections
// in real project we'd have some other code here to handle non-websocket requests
wss.handleUpgrade(req, req.socket, Buffer.alloc(0), onSocketConnect);
});
function onSocketConnect(ws) {
clients.add(ws);
ws.on('message', function(message) {
message = message.slice(0, 50); // max message length will be 50
for(let client of clients) {
client.send(message);
}
});
ws.on('close', function() {
clients.delete(ws);
});
}
Here's the working example:
You can also download it (upper-right button in the iframe) and run locally.
Just don't forget to install Node.js and npm install ws before running.
- Summary
WebSocket is a modern way to have persistent browser-server connections.
WebSockets don't have cross-origin limitations.
They are well-supported in browsers.
Can send/receive strings and binary data.
The API is simple.
Methods:
socket.send(data),
socket.close([code], [reason]).
Events:
open,
message,
error,
close.
WebSocket by itself does not include reconnection, authentication and many other high-level mechanisms.
So there are client/server libraries for that, and it's also possible to implement these capabilities manually.
Sometimes, to integrate WebSocket into existing project, people run WebSocket server in parallel with the main HTTP-server, and they share a single database.
Requests to WebSocket use wss://ws.site.com, a subdomain that leads to WebSocket server, while https://site.com goes to the main HTTP-server.
Surely, other ways of integration are also possible.
Network requests
Server Sent Events
The Server-Sent Events specification describes a built-in class EventSource, that keeps connection with the server and allows to receive events from it.
Similar to WebSocket, the connection is persistent.
But there are several important differences:
WebSocket
EventSource
Bi-directional: both client and server can exchange messages
One-directional: only server sends data
Binary and text data
Only text
WebSocket protocol
Regular HTTP
EventSource is a less-powerful way of communicating with the server than WebSocket.
Why should one ever use it?
The main reason: it's simpler.
In many applications, the power of WebSocket is a little bit too much.
We need to receive a stream of data from server: maybe chat messages or market prices, or whatever.
That's what EventSource is good at.
Also it supports auto-reconnect, something we need to implement manually with WebSocket.
Besides, it's a plain old HTTP, not a new protocol.
- Getting messages
To start receiving messages, we just need to create new EventSource(url).
The browser will connect to url and keep the connection open, waiting for events.
The server should respond with status 200 and the header Content-Type: text/event-stream, then keep the connection and write messages into it in the special format, like this:
data: Message 1
data: Message 2
data: Message 3
data: of two lines
A message text goes after data:, the space after the colon is optional.
Messages are delimited with double line breaks \n\n.
To send a line break \n, we can immediately send one more data: (3rd message above).
In practice, complex messages are usually sent JSON-encoded.
Line-breaks are encoded as \n within them, so multiline data: messages are not necessary.
For instance:
data: {"user":"John","message":"First line\n Second line"}
…So we can assume that one data: holds exactly one message.
For each such message, the message event is generated:
let eventSource = new EventSource("/events/subscribe");
eventSource.onmessage = function(event) {
console.log("New message", event.data);
// will log 3 times for the data stream above
};
// or eventSource.addEventListener('message', ...)
Cross-origin requests
EventSource supports cross-origin requests, like fetch and any other networking methods.
We can use any URL:
let source = new EventSource("https://another-site.com/events");
The remote server will get the Origin header and must respond with Access-Control-Allow-Origin to proceed.
To pass credentials, we should set the additional option withCredentials, like this:
let source = new EventSource("https://another-site.com/events", {
withCredentials: true
});
Please see the chapter Fetch: Cross-Origin Requests for more details about cross-origin headers.
- Reconnection
Upon creation, new EventSource connects to the server, and if the connection is broken – reconnects.
That's very convenient, as we don't have to care about it.
There's a small delay between reconnections, a few seconds by default.
The server can set the recommended delay using retry: in response (in milliseconds):
retry: 15000
data: Hello, I set the reconnection delay to 15 seconds
The retry: may come both together with some data, or as a standalone message.
The browser should wait that many milliseconds before reconnecting.
Or longer, e.g.
if the browser knows (from OS) that there's no network connection at the moment, it may wait until the connection appears, and then retry.
If the server wants the browser to stop reconnecting, it should respond with HTTP status 204.
If the browser wants to close the connection, it should call eventSource.close():
let eventSource = new EventSource(...);
eventSource.close();
Also, there will be no reconnection if the response has an incorrect Content-Type or its HTTP status differs from 301, 307, 200 and 204.
In such cases the "error" event will be emitted, and the browser won't reconnect.
Please note:
When a connection is finally closed, there's no way to “reopen” it.
If we'd like to connect again, just create a new EventSource.
- Message id
When a connection breaks due to network problems, either side can't be sure which messages were received, and which weren't.
To correctly resume the connection, each message should have an id field, like this:
data: Message 1
id: 1
data: Message 2
id: 2
data: Message 3
data: of two lines
id: 3
When a message with id: is received, the browser:
Sets the property eventSource.lastEventId to its value.
Upon reconnection sends the header Last-Event-ID with that id, so that the server may re-send following messages.
Put id: after data:
Please note: the id is appended below message data by the server, to ensure that lastEventId is updated after the message is received.
- Connection status: readyState
The EventSource object has readyState property, that has one of three values:
EventSource.CONNECTING = 0; // connecting or reconnecting
EventSource.OPEN = 1; // connected
EventSource.CLOSED = 2; // connection closed
When an object is created, or the connection is down, it's always EventSource.CONNECTING (equals 0).
We can query this property to know the state of EventSource.
- Event types
By default EventSource object generates three events:
message – a message received, available as event.data.
open – the connection is open.
error – the connection could not be established, e.g.
the server returned HTTP 500 status.
The server may specify another type of event with event: ... at the event start.
For example:
event: join
data: Bob
data: Hello
event: leave
data: Bob
To handle custom events, we must use addEventListener, not onmessage:
eventSource.addEventListener('join', event => {
alert(`Joined ${event.data}`);
});
eventSource.addEventListener('message', event => {
alert(`Said: ${event.data}`);
});
eventSource.addEventListener('leave', event => {
alert(`Left ${event.data}`);
});
- Full example
Here's the server that sends messages with 1, 2, 3, then bye and breaks the connection.
Then the browser automatically reconnects.
Result
server.js
index.html
let http = require('http');
let url = require('url');
let querystring = require('querystring');
let static = require('node-static');
let fileServer = new static.Server('.');
function onDigits(req, res) {
res.writeHead(200, {
'Content-Type': 'text/event-stream; charset=utf-8',
'Cache-Control': 'no-cache'
});
let i = 0;
let timer = setInterval(write, 1000);
write();
function write() {
i++;
if (i == 4) {
res.write('event: bye\ndata: bye-bye\n\n');
clearInterval(timer);
res.end();
return;
}
res.write('data: ' + i + '\n\n');
}
}
function accept(req, res) {
if (req.url == '/digits') {
onDigits(req, res);
return;
}
fileServer.serve(req, res);
}
if (!module.parent) {
http.createServer(accept).listen(8080);
} else {
exports.accept = accept;
}<!DOCTYPE html>
<script>
let eventSource;
function start() { // when "Start" button pressed
if (!window.EventSource) {
// IE or an old browser
alert("The browser doesn't support EventSource.");
return;
}
eventSource = new EventSource('digits');
eventSource.onopen = function(e) {
log("Event: open");
};
eventSource.onerror = function(e) {
log("Event: error");
if (this.readyState == EventSource.CONNECTING) {
log(`Reconnecting (readyState=${this.readyState})...`);
} else {
log("Error has occured.");
}
};
eventSource.addEventListener('bye', function(e) {
log("Event: bye, data: " + e.data);
});
eventSource.onmessage = function(e) {
log("Event: message, data: " + e.data);
};
}
function stop() { // when "Stop" button pressed
eventSource.close();
log("eventSource.close()");
}
function log(msg) {
logElem.innerHTML += msg + "<br>";
document.documentElement.scrollTop = 99999999;
}
</script>
<button onclick="start()">Start</button> Press the "Start" to begin.
<div id="logElem" style="margin: 6px 0"></div>
<button onclick="stop()">Stop</button> "Stop" to finish.
- Summary
EventSource object automatically establishes a persistent connection and allows the server to send messages over it.
It offers:
Automatic reconnect, with tunable retry timeout.
Message ids to resume events, the last received identifier is sent in Last-Event-ID header upon reconnection.
The current state is in the readyState property.
That makes EventSource a viable alternative to WebSocket, as the latter is more low-level and lacks such built-in features (though they can be implemented).
In many real-life applications, the power of EventSource is just enough.
Supported in all modern browsers (not IE).
The syntax is:
let source = new EventSource(url, [credentials]);
The second argument has only one possible option: { withCredentials: true }, it allows sending cross-origin credentials.
Overall cross-origin security is same as for fetch and other network methods.
Properties of an EventSource object
readyState
The current connection state: either EventSource.CONNECTING (=0), EventSource.OPEN (=1) or EventSource.CLOSED (=2).
lastEventId
The last received id.
Upon reconnection the browser sends it in the header Last-Event-ID.
Methods
close()
Closes the connection.
Events
message
Message received, the data is in event.data.
open
The connection is established.
error
In case of an error, including both lost connection (will auto-reconnect) and fatal errors.
We can check readyState to see if the reconnection is being attempted.
The server may set a custom event name in event:.
Such events should be handled using addEventListener, not on<event>.
Server response format
The server sends messages, delimited by \n\n.
A message may have following fields:
data: – message body, a sequence of multiple data is interpreted as a single message, with \n between the parts.
id: – renews lastEventId, sent in Last-Event-ID on reconnect.
retry: – recommends a retry delay for reconnections in ms.
There's no way to set it from JavaScript.
event: – event name, must precede data:.
A message may include one or more fields in any order, but id: usually goes the last.
Cookies are small strings of data that are stored directly in the browser.
They are a part of the HTTP protocol, defined by the RFC 6265 specification.
Cookies are usually set by a web-server using the response Set-Cookie HTTP-header.
Then, the browser automatically adds them to (almost) every request to the same domain using the Cookie HTTP-header.
One of the most widespread use cases is authentication:
Upon sign in, the server uses the Set-Cookie HTTP-header in the response to set a cookie with a unique “session identifier”.
Next time when the request is sent to the same domain, the browser sends the cookie over the net using the Cookie HTTP-header.
So the server knows who made the request.
We can also access cookies from the browser, using document.cookie property.
There are many tricky things about cookies and their options.
In this chapter we'll cover them in detail.
- Reading from document.cookie
Does your browser store any cookies from this site? Let's see:
// At javascript.info, we use Google Analytics for statistics,
// so there should be some cookies
alert( document.cookie ); // cookie1=value1; cookie2=value2;...
The value of document.cookie consists of name=value pairs, delimited by ;.
Each one is a separate cookie.
To find a particular cookie, we can split document.cookie by ;, and then find the right name.
We can use either a regular expression or array functions to do that.
We leave it as an exercise for the reader.
Also, at the end of the chapter you'll find helper functions to manipulate cookies.
- Writing to document.cookie
We can write to document.cookie.
But it's not a data property, it's an accessor (getter/setter).
An assignment to it is treated specially.
A write operation to document.cookie updates only cookies mentioned in it, but doesn't touch other cookies.
For instance, this call sets a cookie with the name user and value John:
document.cookie = "user=John"; // update only cookie named 'user'
alert(document.cookie); // show all cookies
If you run it, then probably you'll see multiple cookies.
That's because the document.cookie= operation does not overwrite all cookies.
It only sets the mentioned cookie user.
Technically, name and value can have any characters.
To keep the valid formatting, they should be escaped using a built-in encodeURIComponent function:
// special characters (spaces), need encoding
let name = "my name";
let value = "John Smith"
// encodes the cookie as my%20name=John%20Smith
document.cookie = encodeURIComponent(name) + '=' + encodeURIComponent(value);
alert(document.cookie); // ...; my%20name=John%20Smith
Limitations
There are few limitations:
The name=value pair, after encodeURIComponent, should not exceed 4KB.
So we can't store anything huge in a cookie.
The total number of cookies per domain is limited to around 20+, the exact limit depends on the browser.
Cookies have several options, many of them are important and should be set.
The options are listed after key=value, delimited by ;, like this:
document.cookie = "user=John; path=/; expires=Tue, 19 Jan 2038 03:14:07 GMT"
- path
path=/mypath
The url path prefix must be absolute.
It makes the cookie accessible for pages under that path.
By default, it's the current path.
If a cookie is set with path=/admin, it's visible at pages /admin and /admin/something, but not at /home or /adminpage.
Usually, we should set path to the root: path=/ to make the cookie accessible from all website pages.
- domain
domain=site.com
A domain defines where the cookie is accessible.
In practice though, there are limitations.
We can't set any domain.
By default, a cookie is accessible only at the domain that set it.
So, if the cookie was set by site.com, we won't get it at other.com.
…But what's more tricky, we also won't get the cookie at a subdomain forum.site.com!
// at site.com
document.cookie = "user=John"
// at forum.site.com
alert(document.cookie); // no userThere's no way to let a cookie be accessible from another 2nd-level domain, so other.com will never receive a cookie set at site.com.
It's a safety restriction, to allow us to store sensitive data in cookies, that should be available only on one site.
…But if we'd like to allow subdomains like forum.site.com to get a cookie, that's possible.
When setting a cookie at site.com, we should explicitly set the domain option to the root domain: domain=site.com:
// at site.com
// make the cookie accessible on any subdomain *.site.com:
document.cookie = "user=John; domain=site.com"
// later
// at forum.site.com
alert(document.cookie); // has cookie user=John
For historical reasons, domain=.site.com (a dot before site.com) also works the same way, allowing access to the cookie from subdomains.
That's an old notation and should be used if we need to support very old browsers.
So, the domain option allows to make a cookie accessible at subdomains.
- expires, max-age
By default, if a cookie doesn't have one of these options, it disappears when the browser is closed.
Such cookies are called “session cookies”
To let cookies survive a browser close, we can set either the expires or max-age option.
expires=Tue, 19 Jan 2038 03:14:07 GMT
The cookie expiration date defines the time, when the browser will automatically delete it.
The date must be exactly in this format, in the GMT timezone.
We can use date.toUTCString to get it.
For instance, we can set the cookie to expire in 1 day:
// +1 day from now
let date = new Date(Date.now() + 86400e3);
date = date.toUTCString();
document.cookie = "user=John; expires=" + date;
If we set expires to a date in the past, the cookie is deleted.
max-age=3600
Is an alternative to expires and specifies the cookie's expiration in seconds from the current moment.
If set to zero or a negative value, the cookie is deleted:
// cookie will die in +1 hour from now
document.cookie = "user=John; max-age=3600";
// delete cookie (let it expire right now)
document.cookie = "user=John; max-age=0";
- secure
secure
The cookie should be transferred only over HTTPS.
By default, if we set a cookie at http://site.com, then it also appears at https://site.com and vice versa.
That is, cookies are domain-based, they do not distinguish between the protocols.
With this option, if a cookie is set by https://site.com, then it doesn't appear when the same site is accessed by HTTP, as http://site.com.
So if a cookie has sensitive content that should never be sent over unencrypted HTTP, the secure flag is the right thing.
// assuming we're on https:// now
// set the cookie to be secure (only accessible over HTTPS)
document.cookie = "user=John; secure";
- samesite
That's another security attribute samesite.
It's designed to protect from so-called XSRF (cross-site request forgery) attacks.
To understand how it works and when it's useful, let's take a look at XSRF attacks.
XSRF attack
Imagine, you are logged into the site bank.com.
That is: you have an authentication cookie from that site.
Your browser sends it to bank.com with every request, so that it recognizes you and performs all sensitive financial operations.
Now, while browsing the web in another window, you accidentally come to another site evil.com.
That site has JavaScript code that submits a form <form action="https://bank.com/pay"> to bank.com with fields that initiate a transaction to the hacker's account.
The browser sends cookies every time you visit the site bank.com, even if the form was submitted from evil.com.
So the bank recognizes you and actually performs the payment.
That's a so-called “Cross-Site Request Forgery” (in short, XSRF) attack.
Real banks are protected from it of course.
All forms generated by bank.com have a special field, a so-called “XSRF protection token”, that an evil page can't generate or extract from a remote page.
It can submit a form there, but can't get the data back.
The site bank.com checks for such token in every form it receives.
Such a protection takes time to implement though.
We need to ensure that every form has the required token field, and we must also check all requests.
Enter cookie samesite option
The cookie samesite option provides another way to protect from such attacks, that (in theory) should not require “xsrf protection tokens”.
It has two possible values:
samesite=strict (same as samesite without value)
A cookie with samesite=strict is never sent if the user comes from outside the same site.
In other words, whether a user follows a link from their mail or submits a form from evil.com, or does any operation that originates from another domain, the cookie is not sent.
If authentication cookies have the samesite option, then a XSRF attack has no chances to succeed, because a submission from evil.com comes without cookies.
So bank.com will not recognize the user and will not proceed with the payment.
The protection is quite reliable.
Only operations that come from bank.com will send the samesite cookie, e.g.
a form submission from another page at bank.com.
Although, there's a small inconvenience.
When a user follows a legitimate link to bank.com, like from their own notes, they'll be surprised that bank.com does not recognize them.
Indeed, samesite=strict cookies are not sent in that case.
We could work around that by using two cookies: one for “general recognition”, only for the purposes of saying: “Hello, John”, and the other one for data-changing operations with samesite=strict.
Then, a person coming from outside of the site will see a welcome, but payments must be initiated from the bank's website, for the second cookie to be sent.
samesite=lax
A more relaxed approach that also protects from XSRF and doesn't break the user experience.
Lax mode, just like strict, forbids the browser to send cookies when coming from outside the site, but adds an exception.
A samesite=lax cookie is sent if both of these conditions are true:
The HTTP method is “safe” (e.g.
GET, but not POST).
The full list of safe HTTP methods is in the RFC7231 specification.
Basically, these are the methods that should be used for reading, but not writing the data.
They must not perform any data-changing operations.
Following a link is always GET, the safe method.
The operation performs a top-level navigation (changes URL in the browser address bar).
That's usually true, but if the navigation is performed in an <iframe>, then it's not top-level.
Also, JavaScript methods for network requests do not perform any navigation, hence they don't fit.
So, what samesite=lax does, is to basically allow the most common “go to URL” operation to have cookies.
E.g.
opening a website link from notes that satisfy these conditions.
But anything more complicated, like a network request from another site or a form submission, loses cookies.
If that's fine for you, then adding samesite=lax will probably not break the user experience and add protection.
Overall, samesite is a great option, but it has an important drawback:
samesite is ignored (not supported) by old browsers, year 2017 or so.
So if we solely rely on samesite to provide protection, then old browsers will be vulnerable.
But we surely can use samesite together with other protection measures, like xsrf tokens, to add an additional layer of defence and then, in the future, when old browsers die out, we'll probably be able to drop xsrf tokens.
- httpOnly
This option has nothing to do with JavaScript, but we have to mention it for completeness.
The web-server uses the Set-Cookie header to set a cookie.
Also, it may set the httpOnly option.
This option forbids any JavaScript access to the cookie.
We can't see such a cookie or manipulate it using document.cookie.
That's used as a precaution measure, to protect from certain attacks when a hacker injects his own JavaScript code into a page and waits for a user to visit that page.
That shouldn't be possible at all, hackers should not be able to inject their code into our site, but there may be bugs that let them do it.
Normally, if such a thing happens, and a user visits a web-page with hacker's JavaScript code, then that code executes and gains access to document.cookie with user cookies containing authentication information.
That's bad.
But if a cookie is httpOnly, then document.cookie doesn't see it, so it is protected.
- Appendix: Cookie functions
Here's a small set of functions to work with cookies, more convenient than a manual modification of document.cookie.
There exist many cookie libraries for that, so these are for demo purposes.
Fully working though.
getCookie(name)
The shortest way to access a cookie is to use a regular expression.
The function getCookie(name) returns the cookie with the given name:
// returns the cookie with the given name,
// or undefined if not found
function getCookie(name) {
let matches = document.cookie.match(new RegExp(
"(?:^|; )" + name.replace(/([\.$?*|{}\(\)\[\]\\\/\+^])/g, '\\$1') + "=([^;]*)"
));
return matches ? decodeURIComponent(matches[1]) : undefined;
}
Here new RegExp is generated dynamically, to match ; name=<value>.
Please note that a cookie value is encoded, so getCookie uses a built-in decodeURIComponent function to decode it.
setCookie(name, value, options)
Sets the cookie's name to the given value with path=/ by default (can be modified to add other defaults):
function setCookie(name, value, options = {}) {
options = {
path: '/',
// add other defaults here if necessary
...options
};
if (options.expires instanceof Date) {
options.expires = options.expires.toUTCString();
}
let updatedCookie = encodeURIComponent(name) + "=" + encodeURIComponent(value);
for (let optionKey in options) {
updatedCookie += "; " + optionKey;
let optionValue = options[optionKey];
if (optionValue !== true) {
updatedCookie += "=" + optionValue;
}
}
document.cookie = updatedCookie;
}
// Example of use:
setCookie('user', 'John', {secure: true, 'max-age': 3600});
deleteCookie(name)
To delete a cookie, we can call it with a negative expiration date:
function deleteCookie(name) {
setCookie(name, "", {
'max-age': -1
})
}
Updating or deleting must use same path and domain
Please note: when we update or delete a cookie, we should use exactly the same path and domain options as when we set it.
Together: cookie.js.
- Appendix: Third-party cookies
A cookie is called “third-party” if it's placed by a domain other than the page the user is visiting.
For instance:
A page at site.com loads a banner from another site: <img src="https://ads.com/banner.png">.
Along with the banner, the remote server at ads.com may set the Set-Cookie header with a cookie like id=1234.
Such a cookie originates from the ads.com domain, and will only be visible at ads.com:
Next time when ads.com is accessed, the remote server gets the id cookie and recognizes the user:
What's even more important is, when the user moves from site.com to another site other.com, which also has a banner, then ads.com gets the cookie, as it belongs to ads.com, thus recognizing the visitor and tracking him as he moves between sites:
Third-party cookies are traditionally used for tracking and ads services, due to their nature.
They are bound to the originating domain, so ads.com can track the same user between different sites, if they all access it.
Naturally, some people don't like being tracked, so browsers allow to disable such cookies.
Also, some modern browsers employ special policies for such cookies:
Safari does not allow third-party cookies at all.
Firefox comes with a “black list” of third-party domains where it blocks third-party cookies.
Please note:
If we load a script from a third-party domain, like <script src="https://google-analytics.com/analytics.js">, and that script uses document.cookie to set a cookie, then such cookie is not third-party.
If a script sets a cookie, then no matter where the script came from – the cookie belongs to the domain of the current webpage.
- Appendix: GDPR
This topic is not related to JavaScript at all, just something to keep in mind when setting cookies.
There's a legislation in Europe called GDPR, that enforces a set of rules for websites to respect the users' privacy.
One of these rules is to require an explicit permission for tracking cookies from the user.
Please note, that's only about tracking/identifying/authorizing cookies.
So, if we set a cookie that just saves some information, but neither tracks nor identifies the user, then we are free to do it.
But if we are going to set a cookie with an authentication session or a tracking id, then a user must allow that.
Websites generally have two variants of following GDPR.
You must have seen them both already in the web:
If a website wants to set tracking cookies only for authenticated users.
To do so, the registration form should have a checkbox like “accept the privacy policy” (that describes how cookies are used), the user must check it, and then the website is free to set auth cookies.
If a website wants to set tracking cookies for everyone.
To do so legally, a website shows a modal “splash screen” for newcomers, and requires them to agree to the cookies.
Then the website can set them and let people see the content.
That can be disturbing for new visitors though.
No one likes to see such “must-click” modal splash screens instead of the content.
But GDPR requires an explicit agreement.
GDPR is not only about cookies, it's about other privacy-related issues too, but that's too much beyond our scope.
- Summary
document.cookie provides access to cookies
write operations modify only cookies mentioned in it.
name/value must be encoded.
one cookie must not exceed 4KB, 20+ cookies per site (depends on the browser).
Cookie options:
path=/, by default current path, makes the cookie visible only under that path.
domain=site.com, by default a cookie is visible on the current domain only.
If the domain is set explicitly, the cookie becomes visible on subdomains.
expires or max-age sets the cookie expiration time.
Without them the cookie dies when the browser is closed.
secure makes the cookie HTTPS-only.
samesite forbids the browser to send the cookie with requests coming from outside the site.
This helps to prevent XSRF attacks.
Additionally:
Third-party cookies may be forbidden by the browser, e.g.
Safari does that by default.
When setting a tracking cookie for EU citizens, GDPR requires to ask for permission.
Storing data in the browser
LocalStorage, sessionStorage
Web storage objects localStorage and sessionStorage allow to save key/value pairs in the browser.
What's interesting about them is that the data survives a page refresh (for sessionStorage) and even a full browser restart (for localStorage).
We'll see that very soon.
We already have cookies.
Why additional objects?
Unlike cookies, web storage objects are not sent to server with each request.
Because of that, we can store much more.
Most browsers allow at least 2 megabytes of data (or more) and have settings to configure that.
Also unlike cookies, the server can't manipulate storage objects via HTTP headers.
Everything's done in JavaScript.
The storage is bound to the origin (domain/protocol/port triplet).
That is, different protocols or subdomains infer different storage objects, they can't access data from each other.
Both storage objects provide same methods and properties:
setItem(key, value) – store key/value pair.
getItem(key) – get the value by key.
removeItem(key) – remove the key with its value.
clear() – delete everything.
key(index) – get the key on a given position.
length – the number of stored items.
As you can see, it's like a Map collection (setItem/getItem/removeItem), but also allows access by index with key(index).
Let's see how it works.
- localStorage demo
The main features of localStorage are:
Shared between all tabs and windows from the same origin.
The data does not expire.
It remains after the browser restart and even OS reboot.
For instance, if you run this code…
localStorage.setItem('test', 1);
…And close/open the browser or just open the same page in a different window, then you can get it like this:
alert( localStorage.getItem('test') ); // 1
We only have to be on the same origin (domain/port/protocol), the url path can be different.
The localStorage is shared between all windows with the same origin, so if we set the data in one window, the change becomes visible in another one.
- Object-like access
We can also use a plain object way of getting/setting keys, like this:
// set key
localStorage.test = 2;
// get key
alert( localStorage.test ); // 2
// remove key
delete localStorage.test;
That's allowed for historical reasons, and mostly works, but generally not recommended, because:
If the key is user-generated, it can be anything, like length or toString, or another built-in method of localStorage.
In that case getItem/setItem work fine, while object-like access fails:
let key = 'length';
localStorage[key] = 5; // Error, can't assign length
There's a storage event, it triggers when we modify the data.
That event does not happen for object-like access.
We'll see that later in this chapter.
- Looping over keys
As we've seen, the methods provide “get/set/remove by key” functionality.
But how to get all saved values or keys?
Unfortunately, storage objects are not iterable.
One way is to loop over them as over an array:
for(let i=0; i<localStorage.length; i++) {
let key = localStorage.key(i);
alert(`${key}: ${localStorage.getItem(key)}`);
}
Another way is to use for key in localStorage loop, just as we do with regular objects.
It iterates over keys, but also outputs few built-in fields that we don't need:
// bad try
for(let key in localStorage) {
alert(key); // shows getItem, setItem and other built-in stuff
}
…So we need either to filter fields from the prototype with hasOwnProperty check:
for(let key in localStorage) {
if (!localStorage.hasOwnProperty(key)) {
continue; // skip keys like "setItem", "getItem" etc
}
alert(`${key}: ${localStorage.getItem(key)}`);
}
…Or just get the “own” keys with Object.keys and then loop over them if needed:
let keys = Object.keys(localStorage);
for(let key of keys) {
alert(`${key}: ${localStorage.getItem(key)}`);
}
The latter works, because Object.keys only returns the keys that belong to the object, ignoring the prototype.
- Strings only
Please note that both key and value must be strings.
If were any other type, like a number, or an object, it gets converted to string automatically:
sessionStorage.user = {name: "John"};
alert(sessionStorage.user); // [object Object]
We can use JSON to store objects though:
sessionStorage.user = JSON.stringify({name: "John"});
// sometime later
let user = JSON.parse( sessionStorage.user );
alert( user.name ); // John
Also it is possible to stringify the whole storage object, e.g.
for debugging purposes:
// added formatting options to JSON.stringify to make the object look nicer
alert( JSON.stringify(localStorage, null, 2) );
- sessionStorage
The sessionStorage object is used much less often than localStorage.
Properties and methods are the same, but it's much more limited:
The sessionStorage exists only within the current browser tab.
Another tab with the same page will have a different storage.
But it is shared between iframes in the same tab (assuming they come from the same origin).
The data survives page refresh, but not closing/opening the tab.
Let's see that in action.
Run this code…
sessionStorage.setItem('test', 1);
…Then refresh the page.
Now you can still get the data:
alert( sessionStorage.getItem('test') ); // after refresh: 1
…But if you open the same page in another tab, and try again there, the code above returns null, meaning “nothing found”.
That's exactly because sessionStorage is bound not only to the origin, but also to the browser tab.
For that reason, sessionStorage is used sparingly.
- Storage event
When the data gets updated in localStorage or sessionStorage, storage event triggers, with properties:
key – the key that was changed (null if .clear() is called).
oldValue – the old value (null if the key is newly added).
newValue – the new value (null if the key is removed).
url – the url of the document where the update happened.
storageArea – either localStorage or sessionStorage object where the update happened.
The important thing is: the event triggers on all window objects where the storage is accessible, except the one that caused it.
Let's elaborate.
Imagine, you have two windows with the same site in each.
So localStorage is shared between them.
You might want to open this page in two browser windows to test the code below.
If both windows are listening for window.onstorage, then each one will react on updates that happened in the other one.
// triggers on updates made to the same storage from other documents
window.onstorage = event => { // same as window.addEventListener('storage', event => {
if (event.key != 'now') return;
alert(event.key + ':' + event.newValue + " at " + event.url);
};
localStorage.setItem('now', Date.now());
Please note that the event also contains: event.url – the url of the document where the data was updated.
Also, event.storageArea contains the storage object – the event is the same for both sessionStorage and localStorage, so event.storageArea references the one that was modified.
We may even want to set something back in it, to “respond” to a change.
That allows different windows from the same origin to exchange messages.
Modern browsers also support Broadcast channel API, the special API for same-origin inter-window communication, it's more full featured, but less supported.
There are libraries that polyfill that API, based on localStorage, that make it available everywhere.
- Summary
Web storage objects localStorage and sessionStorage allow to store key/value in the browser.
Both key and value must be strings.
The limit is 5mb+, depends on the browser.
They do not expire.
The data is bound to the origin (domain/port/protocol).
localStorage
sessionStorage
Shared between all tabs and windows with the same origin
Visible within a browser tab, including iframes from the same origin
Survives browser restart
Survives page refresh (but not tab close)
API:
setItem(key, value) – store key/value pair.
getItem(key) – get the value by key.
removeItem(key) – remove the key with its value.
clear() – delete everything.
key(index) – get the key number index.
length – the number of stored items.
Use Object.keys to get all keys.
We access keys as object properties, in that case storage event isn't triggered.
Storage event:
Triggers on setItem, removeItem, clear calls.
Contains all the data about the operation (key/oldValue/newValue), the document url and the storage object storageArea.
Triggers on all window objects that have access to the storage except the one that generated it (within a tab for sessionStorage, globally for localStorage).
IndexedDB is a database that is built into browser, much more powerful than localStorage.
Stores almost any kind of values by keys, multiple key types.
Supports transactions for reliability.
Supports key range queries, indexes.
Can store much bigger volumes of data than localStorage.
That power is usually excessive for traditional client-server apps.
IndexedDB is intended for offline apps, to be combined with ServiceWorkers and other technologies.
The native interface to IndexedDB, described in the specification https://www.w3.org/TR/IndexedDB, is event-based.
We can also use async/await with the help of a promise-based wrapper, like https://github.com/jakearchibald/idb.
That's pretty convenient, but the wrapper is not perfect, it can't replace events for all cases.
So we'll start with events, and then, after we gain an understanding of IndexedDb, we'll use the wrapper.
- Open database
To start working with IndexedDB, we first need to open (connect to) a database.
The syntax:
let openRequest = indexedDB.open(name, version);name – a string, the database name.
version – a positive integer version, by default 1 (explained below).
We can have many databases with different names, but all of them exist within the current origin (domain/protocol/port).
Different websites can't access each other's databases.
The call returns openRequest object, we should listen to events on it:
success: database is ready, there's the “database object” in openRequest.result, we should use it for further calls.
error: opening failed.
upgradeneeded: database is ready, but its version is outdated (see below).
IndexedDB has a built-in mechanism of “schema versioning”, absent in server-side databases.
Unlike server-side databases, IndexedDB is client-side, the data is stored in the browser, so we, developers, don't have full-time access to it.
So, when we have published a new version of our app, and the user visits our webpage, we may need to update the database.
If the local database version is less than specified in open, then a special event upgradeneeded is triggered, and we can compare versions and upgrade data structures as needed.
The upgradeneeded event also triggers when the database doesn't yet exist (technically, it's version is 0), so we can perform the initialization.
Let's say we published the first version of our app.
Then we can open the database with version 1 and perform the initialization in an upgradeneeded handler like this:
let openRequest = indexedDB.open("store", 1);
openRequest.onupgradeneeded = function() {
// triggers if the client had no database
// ...perform initialization...
};
openRequest.onerror = function() {
console.error("Error", openRequest.error);
};
openRequest.onsuccess = function() {
let db = openRequest.result;
// continue working with database using db object
};
Then, later, we publish the 2nd version.
We can open it with version 2 and perform the upgrade like this:
let openRequest = indexedDB.open("store", 2);
openRequest.onupgradeneeded = function(event) {
// the existing database version is less than 2 (or it doesn't exist)
let db = openRequest.result;
switch(event.oldVersion) { // existing db version
case 0:
// version 0 means that the client had no database
// perform initialization
case 1:
// client had version 1
// update
}
};
Please note: as our current version is 2, onupgradeneeded handler has a code branch for version 0, suitable for users that are accessing for the first time and have no database, and also for version 1, for upgrades.
And then, only if onupgradeneeded handler finishes without errors, openRequest.onsuccess triggers, and the database is considered successfully opened.
To delete a database:
let deleteRequest = indexedDB.deleteDatabase(name)
// deleteRequest.onsuccess/onerror tracks the result
We can't open an older version of the database
If the current user database has a higher version than in the open call, e.g.
the existing DB version is 3, and we try to open(...2), then that's an error, openRequest.onerror triggers.
That's rare, but such a thing may happen when a visitor loads outdated JavaScript code, e.g.
from a proxy cache.
So the code is old, but his database is new.
To protect from errors, we should check db.version and suggest a page reload.
Use proper HTTP caching headers to avoid loading the old code, so that you'll never have such problems.
Parallel update problem
As we're talking about versioning, let's tackle a small related problem.
Let's say:
A visitor opened our site in a browser tab, with database version 1.
Then we rolled out an update, so our code is newer.
And then the same visitor opens our site in another tab.
So there's a tab with an open connection to DB version 1, while the second one attempts to update it to version 2 in its upgradeneeded handler.
The problem is that a database is shared between two tabs, as it's the same site, same origin.
And it can't be both version 1 and 2.
To perform the update to version 2, all connections to version 1 must be closed, including the one in the first tab.
In order to organize that, the versionchange event triggers on the “outdated” database object.
We should listen for it and close the old database connection (and probably suggest a page reload, to load the updated code).
If we don't listen for the versionchange event and don't close the old connection, then the second, new connection won't be made.
The openRequest object will emit the blocked event instead of success.
So the second tab won't work.
Here's the code to correctly handle the parallel upgrade.
It installs an onversionchange handler after the database is opened, that closes the old connection:
let openRequest = indexedDB.open("store", 2);
openRequest.onupgradeneeded = ...;
openRequest.onerror = ...;
openRequest.onsuccess = function() {
let db = openRequest.result;
db.onversionchange = function() {
db.close();
alert("Database is outdated, please reload the page.")
};
// ...the db is ready, use it...
};
openRequest.onblocked = function() {
// this event shouldn't trigger if we handle onversionchange correctly
// it means that there's another open connection to same database
// and it wasn't closed after db.onversionchange triggered for it
};
Here we do two things:
Add db.onversionchange listener after a successful opening, to be informed about a parallel update attempt.
Add openRequest.onblocked listener to handle the case when an old connection wasn't closed.
This doesn't happen if we close it in db.onversionchange.
There are other variants.
For example, we can take the time to close things gracefully in db.onversionchange, and prompt the visitor to save the data before the connection is closed.
The new updating connection will be blocked immediately after db.onversionchange has finished without closing, and we can ask the visitor in the new tab to close other tabs for the update.
These update collisions happen rarely, but we should at least have some handling for them, e.g.
onblocked handler, so that our script doesn't surprise the user by dying silently.
- Object store
To store something in IndexedDB, we need an object store.
An object store is a core concept of IndexedDB.
Counterparts in other databases are called “tables” or “collections”.
It's where the data is stored.
A database may have multiple stores: one for users, another one for goods, etc.
Despite being named an “object store”, primitives can be stored too.
We can store almost any value, including complex objects.
IndexedDB uses the standard serialization algorithm to clone-and-store an object.
It's like JSON.stringify, but more powerful, capable of storing much more datatypes.
An example of an object that can't be stored: an object with circular references.
Such objects are not serializable.
JSON.stringify also fails for such objects.
There must be a unique key for every value in the store.
A key must be one of the these types – number, date, string, binary, or array.
It's a unique identifier, so we can search/remove/update values by the key.
As we'll see very soon, we can provide a key when we add a value to the store, similar to localStorage.
But when we store objects, IndexedDB allows setting up an object property as the key, which is much more convenient.
Or we can auto-generate keys.
But we need to create an object store first.
The syntax to create an object store:
db.createObjectStore(name[, keyOptions]);
Please note, the operation is synchronous, no await needed.
name is the store name, e.g.
"books" for books,
keyOptions is an optional object with one of two properties:
keyPath – a path to an object property that IndexedDB will use as the key, e.g.
id.
autoIncrement – if true, then the key for a newly stored object is generated automatically, as an ever-incrementing number.
If we don't supply keyOptions, then we'll need to provide a key explicitly later, when storing an object.
For instance, this object store uses id property as the key:
db.createObjectStore('books', {keyPath: 'id'});An object store can only be created/modified while updating the DB version, in upgradeneeded handler.
That's a technical limitation.
Outside of the handler we'll be able to add/remove/update the data, but object stores can only be created/removed/altered during a version update.
To perform a database version upgrade, there are two main approaches:
We can implement per-version upgrade functions: from 1 to 2, from 2 to 3, from 3 to 4 etc.
Then, in upgradeneeded we can compare versions (e.g.
old 2, now 4) and run per-version upgrades step by step, for every intermediate version (2 to 3, then 3 to 4).
Or we can just examine the database: get a list of existing object stores as db.objectStoreNames.
That object is a DOMStringList that provides contains(name) method to check for existance.
And then we can do updates depending on what exists and what doesn't.
For small databases the second variant may be simpler.
Here's the demo of the second approach:
let openRequest = indexedDB.open("db", 2);
// create/upgrade the database without version checks
openRequest.onupgradeneeded = function() {
let db = openRequest.result;
if (!db.objectStoreNames.contains('books')) { // if there's no "books" store
db.createObjectStore('books', {keyPath: 'id'}); // create it
}
};
To delete an object store:
db.deleteObjectStore('books')
- Transactions
The term “transaction” is generic, used in many kinds of databases.
A transaction is a group operations, that should either all succeed or all fail.
For instance, when a person buys something, we need to:
Subtract the money from their account.
Add the item to their inventory.
It would be pretty bad if we complete the 1st operation, and then something goes wrong, e.g.
lights out, and we fail to do the 2nd.
Both should either succeed (purchase complete, good!) or both fail (at least the person kept their money, so they can retry).
Transactions can guarantee that.
All data operations must be made within a transaction in IndexedDB.
To start a transaction:
db.transaction(store[, type]);store is a store name that the transaction is going to access, e.g.
"books".
Can be an array of store names if we're going to access multiple stores.
type – a transaction type, one of:
readonly – can only read, the default.
readwrite – can only read and write the data, but not create/remove/alter object stores.
There's also versionchange transaction type: such transactions can do everything, but we can't create them manually.
IndexedDB automatically creates a versionchange transaction when opening the database, for updateneeded handler.
That's why it's a single place where we can update the database structure, create/remove object stores.
Why are there different types of transactions?
Performance is the reason why transactions need to be labeled either readonly and readwrite.
Many readonly transactions are able to access the same store concurrently, but readwrite transactions can't.
A readwrite transaction “locks” the store for writing.
The next transaction must wait before the previous one finishes before accessing the same store.
After the transaction is created, we can add an item to the store, like this:
let transaction = db.transaction("books", "readwrite"); // (1)
// get an object store to operate on it
let books = transaction.objectStore("books"); // (2)
let book = {
id: 'js',
price: 10,
created: new Date()
};
let request = books.add(book); // (3)
request.onsuccess = function() { // (4)
console.log("Book added to the store", request.result);
};
request.onerror = function() {
console.log("Error", request.error);
};
There were basically four steps:
Create a transaction, mentioning all the stores it's going to access, at (1).
Get the store object using transaction.objectStore(name), at (2).
Perform the request to the object store books.add(book), at (3).
…Handle request success/error (4), then we can make other requests if needed, etc.
Object stores support two methods to store a value:
put(value, [key])
Add the value to the store.
The key is supplied only if the object store did not have keyPath or autoIncrement option.
If there's already a value with the same key, it will be replaced.
add(value, [key])
Same as put, but if there's already a value with the same key, then the request fails, and an error with the name "ConstraintError" is generated.
Similar to opening a database, we can send a request: books.add(book), and then wait for success/error events.
The request.result for add is the key of the new object.
The error is in request.error (if any).
- Transactions' autocommit
In the example above we started the transaction and made add request.
But as we stated previously, a transaction may have multiple associated requests, that must either all succeed or all fail.
How do we mark the transaction as finished, with no more requests to come?
The short answer is: we don't.
In the next version 3.0 of the specification, there will probably be a manual way to finish the transaction, but right now in 2.0 there isn't.
When all transaction requests are finished, and the microtasks queue is empty, it is committed automatically.
Usually, we can assume that a transaction commits when all its requests are complete, and the current code finishes.
So, in the example above no special call is needed to finish the transaction.
Transactions auto-commit principle has an important side effect.
We can't insert an async operation like fetch, setTimeout in the middle of transaction.
IndexedDB will not keep the transaction waiting till these are done.
In the code below, request2 in line (*) fails, because the transaction is already committed, and can't make any request in it:
let request1 = books.add(book);
request1.onsuccess = function() {
fetch('/').then(response => {
let request2 = books.add(anotherBook); // (*)
request2.onerror = function() {
console.log(request2.error.name); // TransactionInactiveError
};
});
};
That's because fetch is an asynchronous operation, a macrotask.
Transactions are closed before the browser starts doing macrotasks.
Authors of IndexedDB spec believe that transactions should be short-lived.
Mostly for performance reasons.
Notably, readwrite transactions “lock” the stores for writing.
So if one part of application initiated readwrite on books object store, then another part that wants to do the same has to wait: the new transaction “hangs” till the first one is done.
That can lead to strange delays if transactions take a long time.
So, what to do?
In the example above we could make a new db.transaction right before the new request (*).
But it will be even better, if we'd like to keep the operations together, in one transaction, to split apart IndexedDB transactions and “other” async stuff.
First, make fetch, prepare the data if needed, afterwards create a transaction and perform all the database requests, it'll work then.
To detect the moment of successful completion, we can listen to transaction.oncomplete event:
let transaction = db.transaction("books", "readwrite");
// ...perform operations...
transaction.oncomplete = function() {
console.log("Transaction is complete");
};
Only complete guarantees that the transaction is saved as a whole.
Individual requests may succeed, but the final write operation may go wrong (e.g.
I/O error or something).
To manually abort the transaction, call:
transaction.abort();
That cancels all modification made by the requests in it and triggers transaction.onabort event.
- Error handling
Write requests may fail.
That's to be expected, not only because of possible errors at our side, but also for reasons not related to the transaction itself.
For instance, the storage quota may be exceeded.
So we must be ready to handle such case.
A failed request automatically aborts the transaction, canceling all its changes.
In some situations, we may want to handle the failure (e.g.
try another request), without canceling existing changes, and continue the transaction.
That's possible.
The request.onerror handler is able to prevent the transaction abort by calling event.preventDefault().
In the example below a new book is added with the same key (id) as the existing one.
The store.add method generates a "ConstraintError" in that case.
We handle it without canceling the transaction:
let transaction = db.transaction("books", "readwrite");
let book = { id: 'js', price: 10 };
let request = transaction.objectStore("books").add(book);
request.onerror = function(event) {
// ConstraintError occurs when an object with the same id already exists
if (request.error.name == "ConstraintError") {
console.log("Book with such id already exists"); // handle the error
event.preventDefault(); // don't abort the transaction
// use another key for the book?
} else {
// unexpected error, can't handle it
// the transaction will abort
}
};
transaction.onabort = function() {
console.log("Error", transaction.error);
};
Event delegation
Do we need onerror/onsuccess for every request? Not every time.
We can use event delegation instead.
IndexedDB events bubble: request → transaction → database.
All events are DOM events, with capturing and bubbling, but usually only bubbling stage is used.
So we can catch all errors using db.onerror handler, for reporting or other purposes:
db.onerror = function(event) {
let request = event.target; // the request that caused the error
console.log("Error", request.error);
};
…But what if an error is fully handled? We don't want to report it in that case.
We can stop the bubbling and hence db.onerror by using event.stopPropagation() in request.onerror.
request.onerror = function(event) {
if (request.error.name == "ConstraintError") {
console.log("Book with such id already exists"); // handle the error
event.preventDefault(); // don't abort the transaction
event.stopPropagation(); // don't bubble error up, "chew" it
} else {
// do nothing
// transaction will be aborted
// we can take care of error in transaction.onabort
}
};
- Searching by keys
There are two main types of search in an object store:
By a key or a key range.
That is: by book.id in our “books” storage.
By another object field, e.g.
book.price.
First let's deal with the keys and key ranges (1).
Methods that involve searching support either exact keys or so-called “range queries” – IDBKeyRange objects that specify a “key range”.
Ranges are created using following calls:
IDBKeyRange.lowerBound(lower, [open]) means: ≥lower (or >lower if open is true)
IDBKeyRange.upperBound(upper, [open]) means: ≤upper (or <upper if open is true)
IDBKeyRange.bound(lower, upper, [lowerOpen], [upperOpen]) means: between lower and upper.
If the open flags is true, the corresponding key is not included in the range.
IDBKeyRange.only(key) – a range that consists of only one key, rarely used.
All searching methods accept a query argument that can be either an exact key or a key range:
store.get(query) – search for the first value by a key or a range.
store.getAll([query], [count]) – search for all values, limit by count if given.
store.getKey(query) – search for the first key that satisfies the query, usually a range.
store.getAllKeys([query], [count]) – search for all keys that satisfy the query, usually a range, up to count if given.
store.count([query]) – get the total count of keys that satisfy the query, usually a range.
For instance, we have a lot of books in our store.
Remember, the id field is the key, so all these methods can search by id.
Request examples:
// get one book
books.get('js')
// get books with 'css' <= id <= 'html'
books.getAll(IDBKeyRange.bound('css', 'html'))
// get books with id < 'html'
books.getAll(IDBKeyRange.upperBound('html', true))
// get all books
books.getAll()
// get all keys: id > 'js'
books.getAllKeys(IDBKeyRange.lowerBound('js', true))
Object store is always sorted
Object store sorts values by key internally.
So requests that return many values always return them in sorted by key order.
- Searching by any field with an index
To search by other object fields, we need to create an additional data structure named “index”.
An index is an “add-on” to the store that tracks a given object field.
For each value of that field, it stores a list of keys for objects that have that value.
There will be a more detailed picture below.
The syntax:
objectStore.createIndex(name, keyPath, [options]);name – index name,
keyPath – path to the object field that the index should track (we're going to search by that field),
option – an optional object with properties:
unique – if true, then there may be only one object in the store with the given value at the keyPath.
The index will enforce that by generating an error if we try to add a duplicate.
multiEntry – only used if the value on keyPath is an array.
In that case, by default, the index will treat the whole array as the key.
But if multiEntry is true, then the index will keep a list of store objects for each value in that array.
So array members become index keys.
In our example, we store books keyed by id.
Let's say we want to search by price.
First, we need to create an index.
It must be done in upgradeneeded, just like an object store:
openRequest.onupgradeneeded = function() {
// we must create the index here, in versionchange transaction
let books = db.createObjectStore('books', {keyPath: 'id'});
let index = books.createIndex('price_idx', 'price');
};
The index will track price field.
The price is not unique, there may be multiple books with the same price, so we don't set unique option.
The price is not an array, so multiEntry flag is not applicable.
Imagine that our inventory has 4 books.
Here's the picture that shows exactly what the index is:
As said, the index for each value of price (second argument) keeps the list of keys that have that price.
The index keeps itself up to date automatically, we don't have to care about it.
Now, when we want to search for a given price, we simply apply the same search methods to the index:
let transaction = db.transaction("books"); // readonly
let books = transaction.objectStore("books");
let priceIndex = books.index("price_idx");
let request = priceIndex.getAll(10);
request.onsuccess = function() {
if (request.result !== undefined) {
console.log("Books", request.result); // array of books with price=10
} else {
console.log("No such books");
}
};
We can also use IDBKeyRange to create ranges and looks for cheap/expensive books:
// find books where price <= 5
let request = priceIndex.getAll(IDBKeyRange.upperBound(5));
Indexes are internally sorted by the tracked object field, price in our case.
So when we do the search, the results are also sorted by price.
- Deleting from store
The delete method looks up values to delete by a query, the call format is similar to getAll:
delete(query) – delete matching values by query.
For instance:
// delete the book with id='js'
books.delete('js');
If we'd like to delete books based on a price or another object field, then we should first find the key in the index, and then call delete:
// find the key where price = 5
let request = priceIndex.getKey(5);
request.onsuccess = function() {
let id = request.result;
let deleteRequest = books.delete(id);
};
To delete everything:
books.clear(); // clear the storage.
- Cursors
Methods like getAll/getAllKeys return an array of keys/values.
But an object storage can be huge, bigger than the available memory.
Then getAll will fail to get all records as an array.
What to do?
Cursors provide the means to work around that.
A cursor is a special object that traverses the object storage, given a query, and returns one key/value at a time, thus saving memory.
As an object store is sorted internally by key, a cursor walks the store in key order (ascending by default).
The syntax:
// like getAll, but with a cursor:
let request = store.openCursor(query, [direction]);
// to get keys, not values (like getAllKeys): store.openKeyCursorquery is a key or a key range, same as for getAll.
direction is an optional argument, which order to use:
"next" – the default, the cursor walks up from the record with the lowest key.
"prev" – the reverse order: down from the record with the biggest key.
"nextunique", "prevunique" – same as above, but skip records with the same key (only for cursors over indexes, e.g.
for multiple books with price=5 only the first one will be returned).
The main difference of the cursor is that request.onsuccess triggers multiple times: once for each result.
Here's an example of how to use a cursor:
let transaction = db.transaction("books");
let books = transaction.objectStore("books");
let request = books.openCursor();
// called for each book found by the cursor
request.onsuccess = function() {
let cursor = request.result;
if (cursor) {
let key = cursor.key; // book key (id field)
let value = cursor.value; // book object
console.log(key, value);
cursor.continue();
} else {
console.log("No more books");
}
};
The main cursor methods are:
advance(count) – advance the cursor count times, skipping values.
continue([key]) – advance the cursor to the next value in range matching (or immediately after key if given).
Whether there are more values matching the cursor or not – onsuccess gets called, and then in result we can get the cursor pointing to the next record, or undefined.
In the example above the cursor was made for the object store.
But we also can make a cursor over an index.
As we remember, indexes allow to search by an object field.
Cursors over indexes do precisely the same as over object stores – they save memory by returning one value at a time.
For cursors over indexes, cursor.key is the index key (e.g.
price), and we should use cursor.primaryKey property for the object key:
let request = priceIdx.openCursor(IDBKeyRange.upperBound(5));
// called for each record
request.onsuccess = function() {
let cursor = request.result;
if (cursor) {
let primaryKey = cursor.primaryKey; // next object store key (id field)
let value = cursor.value; // next object store object (book object)
let key = cursor.key; // next index key (price)
console.log(key, value);
cursor.continue();
} else {
console.log("No more books");
}
};
- Promise wrapper
Adding onsuccess/onerror to every request is quite a cumbersome task.
Sometimes we can make our life easier by using event delegation, e.g.
set handlers on the whole transactions, but async/await is much more convenient.
Let's use a thin promise wrapper https://github.com/jakearchibald/idb further in this chapter.
It creates a global idb object with promisified IndexedDB methods.
Then, instead of onsuccess/onerror we can write like this:
let db = await idb.openDB('store', 1, db => {
if (db.oldVersion == 0) {
// perform the initialization
db.createObjectStore('books', {keyPath: 'id'});
}
});
let transaction = db.transaction('books', 'readwrite');
let books = transaction.objectStore('books');
try {
await books.add(...);
await books.add(...);
await transaction.complete;
console.log('jsbook saved');
} catch(err) {
console.log('error', err.message);
}
So we have all the sweet “plain async code” and “try…catch” stuff.
Error handling
If we don't catch an error, then it falls through, till the closest outer try..catch.
An uncaught error becomes an “unhandled promise rejection” event on window object.
We can handle such errors like this:
window.addEventListener('unhandledrejection', event => {
let request = event.target; // IndexedDB native request object
let error = event.reason; // Unhandled error object, same as request.error
...report about the error...
});
“Inactive transaction” pitfall
As we already know, a transaction auto-commits as soon as the browser is done with the current code and microtasks.
So if we put a macrotask like fetch in the middle of a transaction, then the transaction won't wait for it to finish.
It just auto-commits.
So the next request in it would fail.
For a promise wrapper and async/await the situation is the same.
Here's an example of fetch in the middle of the transaction:
let transaction = db.transaction("inventory", "readwrite");
let inventory = transaction.objectStore("inventory");
await inventory.add({ id: 'js', price: 10, created: new Date() });
await fetch(...); // (*)
await inventory.add({ id: 'js', price: 10, created: new Date() }); // Error
The next inventory.add after fetch(*) fails with an “inactive transaction” error, because the transaction is already committed and closed at that time.
The workaround is same as when working with native IndexedDB: either make a new transaction or just split things apart.
Prepare the data and fetch all that's needed first.
Then save in the database.
Getting native objects
Internally, the wrapper performs a native IndexedDB request, adding onerror/onsuccess to it, and returns a promise that rejects/resolves with the result.
That works fine most of the time.
The examples are at the lib page https://github.com/jakearchibald/idb.
In few rare cases, when we need the original request object, we can access it as promise.request property of the promise:
let promise = books.add(book); // get a promise (don't await for its result)
let request = promise.request; // native request object
let transaction = request.transaction; // native transaction object
// ...do some native IndexedDB voodoo...
let result = await promise; // if still needed
- Summary
IndexedDB can be thought of as a “localStorage on steroids”.
It's a simple key-value database, powerful enough for offline apps, yet simple to use.
The best manual is the specification, the current one is 2.0, but few methods from 3.0 (it's not much different) are partially supported.
The basic usage can be described with a few phrases:
Get a promise wrapper like idb.
Open a database: idb.openDb(name, version, onupgradeneeded)
Create object storages and indexes in onupgradeneeded handler or perform version update if needed.
For requests:
Create transaction db.transaction('books') (readwrite if needed).
Get the object store transaction.objectStore('books').
Then, to search by a key, call methods on the object store directly.
To search by an object field, create an index.
If the data does not fit in memory, use a cursor.
Here's a small demo app:
Result
index.html
<!doctype html>
<script src="https://cdn.jsdelivr.net/npm/idb@3.0.2/build/idb.min.js"></script>
<button onclick="addBook()">Add a book</button>
<button onclick="clearBooks()">Clear books</button>
<p>Books list:</p>
<ul id="listElem"></ul>
<script>
let db;
init();
async function init() {
db = await idb.openDb('booksDb', 1, db => {
db.createObjectStore('books', {keyPath: 'name'});
});
list();
}
async function list() {
let tx = db.transaction('books');
let bookStore = tx.objectStore('books');
let books = await bookStore.getAll();
if (books.length) {
listElem.innerHTML = books.map(book => `<li>
name: ${book.name}, price: ${book.price}
</li>`).join('');
} else {
listElem.innerHTML = '<li>No books yet.
Please add books.</li>'
}
}
async function clearBooks() {
let tx = db.transaction('books', 'readwrite');
await tx.objectStore('books').clear();
await list();
}
async function addBook() {
let name = prompt("Book name?");
let price = +prompt("Book price?");
let tx = db.transaction('books', 'readwrite');
try {
await tx.objectStore('books').add({name, price});
await list();
} catch(err) {
if (err.name == 'ConstraintError') {
alert("Such book exists already");
await addBook();
} else {
throw err;
}
}
}
window.addEventListener('unhandledrejection', event => {
alert("Error: " + event.reason.message);
});
</script>
Bezier curves are used in computer graphics to draw shapes, for CSS animation and in many other places.
They are a very simple thing, worth to study once and then feel comfortable in the world of vector graphics and advanced animations.
- Control points
A bezier curve is defined by control points.
There may be 2, 3, 4 or more.
For instance, two points curve:
Three points curve:
Four points curve:
If you look closely at these curves, you can immediately notice:
Points are not always on curve. That's perfectly normal, later we'll see how the curve is built.
The curve order equals the number of points minus one.
For two points we have a linear curve (that's a straight line), for three points – quadratic curve (parabolic), for four points – cubic curve.
A curve is always inside the convex hull of control points:
Because of that last property, in computer graphics it's possible to optimize intersection tests.
If convex hulls do not intersect, then curves do not either.
So checking for the convex hulls intersection first can give a very fast “no intersection” result.
Checking the intersection of convex hulls is much easier, because they are rectangles, triangles and so on (see the picture above), much simpler figures than the curve.
The main value of Bezier curves for drawing – by moving the points the curve is changing in intuitively obvious way.
Try to move control points using a mouse in the example below:
As you can notice, the curve stretches along the tangential lines 1 → 2 and 3 → 4.
After some practice it becomes obvious how to place points to get the needed curve.
And by connecting several curves we can get practically anything.
Here are some examples:
- De Casteljau's algorithm
There's a mathematical formula for Bezier curves, but let's cover it a bit later, because
De Casteljau's algorithm is identical to the mathematical definition and visually shows how it is constructed.
First let's see the 3-points example.
Here's the demo, and the explanation follow.
Control points (1,2 and 3) can be moved by the mouse.
Press the “play” button to run it.
De Casteljau's algorithm of building the 3-point bezier curve:
Draw control points.
In the demo above they are labeled: 1, 2, 3.
Build segments between control points 1 → 2 → 3.
In the demo above they are brown.
The parameter t moves from 0 to 1.
In the example above the step 0.05 is used: the loop goes over 0, 0.05, 0.1, 0.15, ...
0.95, 1.
For each of these values of t:
On each brown segment we take a point located on the distance proportional to t from its beginning.
As there are two segments, we have two points.
For instance, for t=0 – both points will be at the beginning of segments, and for t=0.25 – on the 25% of segment length from the beginning, for t=0.5 – 50%(the middle), for t=1 – in the end of segments.
Connect the points.
On the picture below the connecting segment is painted blue.
For t=0.25
For t=0.5
Now in the blue segment take a point on the distance proportional to the same value of t.
That is, for t=0.25 (the left picture) we have a point at the end of the left quarter of the segment, and for t=0.5 (the right picture) – in the middle of the segment.
On pictures above that point is red.
As t runs from 0 to 1, every value of t adds a point to the curve.
The set of such points forms the Bezier curve.
It's red and parabolic on the pictures above.
That was a process for 3 points.
But the same is for 4 points.
The demo for 4 points (points can be moved by a mouse):
The algorithm for 4 points:
Connect control points by segments: 1 → 2, 2 → 3, 3 → 4.
There will be 3 brown segments.
For each t in the interval from 0 to 1:
We take points on these segments on the distance proportional to t from the beginning.
These points are connected, so that we have two green segments.
On these segments we take points proportional to t.
We get one blue segment.
On the blue segment we take a point proportional to t.
On the example above it's red.
These points together form the curve.
The algorithm is recursive and can be generalized for any number of control points.
Given N of control points:
We connect them to get initially N-1 segments.
Then for each t from 0 to 1, we take a point on each segment on the distance proportional to t and connect them.
There will be N-2 segments.
Repeat step 2 until there is only one point.
These points make the curve.
Run and pause examples to clearly see the segments and how the curve is built.
A curve that looks like y=1/t:
Zig-zag control points also work fine:
Making a loop is possible:
A non-smooth Bezier curve (yeah, that's possible too):
If there's something unclear in the algorithm description, please look at the live examples above to see how
the curve is built.
As the algorithm is recursive, we can build Bezier curves of any order, that is: using 5, 6 or more control points.
But in practice many points are less useful.
Usually we take 2-3 points, and for complex lines glue several curves together.
That's simpler to develop and calculate.
How to draw a curve through given points?
To specify a Bezier curve, control points are used.
As we can see, they are not on the curve, except the first and the last ones.
Sometimes we have another task: to draw a curve through several points, so that all of them are on a single smooth curve.
That task is called interpolation, and here we don't cover it.
There are mathematical formulas for such curves, for instance Lagrange polynomial.
In computer graphics spline interpolation is often used to build smooth curves that connect many points.
- Maths
A Bezier curve can be described using a mathematical formula.
As we saw – there's actually no need to know it, most people just draw the curve by moving points with a mouse.
But if you're into maths – here it is.
Given the coordinates of control points Pi: the first control point has coordinates P1 = (x1, y1), the second: P2 = (x2, y2), and so on, the curve coordinates are described by the equation that depends on the parameter t from the segment [0,1].
The formula for a 2-points curve:
P = (1-t)P1 + tP2
For 3 control points:
P = (1 t)2P1 + 2(1 t)tP2 + t2P3
For 4 control points:
P = (1 t)3P1 + 3(1 t)2tP2 +3(1 t)t2P3 + t3P4
These are vector equations.
In other words, we can put x and y instead of P to get corresponding coordinates.
For instance, the 3-point curve is formed by points (x,y) calculated as:
x = (1 t)2x1 + 2(1 t)tx2 + t2x3y = (1 t)2y1 + 2(1 t)ty2 + t2y3
Instead of x1, y1, x2, y2, x3, y3 we should put coordinates of 3 control points, and then as t moves from 0 to 1, for each value of t we'll have (x,y) of the curve.
For instance, if control points are (0,0), (0.5, 1) and (1, 0), the equations become:
x = (1 t)2 * 0 + 2(1 t)t * 0.5 + t2 * 1 = (1-t)t + t2 = ty = (1 t)2 * 0 + 2(1 t)t * 1 + t2 * 0 = 2(1-t)t = –2t2 + 2t
Now as t runs from 0 to 1, the set of values (x,y) for each t forms the curve for such control points.
- Summary
Bezier curves are defined by their control points.
We saw two definitions of Bezier curves:
Using a drawing process: De Casteljau's algorithm.
Using a mathematical formulas.
Good properties of Bezier curves:
We can draw smooth lines with a mouse by moving control points.
Complex shapes can be made of several Bezier curves.
Usage:
In computer graphics, modeling, vector graphic editors.
Fonts are described by Bezier curves.
In web development – for graphics on Canvas and in the SVG format.
By the way, “live” examples above are written in SVG.
They are actually a single SVG document that is given different points as parameters.
You can open it in a separate window and see the source: demo.svg.
In CSS animation to describe the path and speed of animation.
Animation
CSS-animations
CSS animations make it possible to do simple animations without JavaScript at all.
JavaScript can be used to control CSS animations and make them even better, with little code.
- CSS transitions
The idea of CSS transitions is simple.
We describe a property and how its changes should be animated.
When the property changes, the browser paints the animation.
That is, all we need is to change the property, and the fluid transition will be done by the browser.
For instance, the CSS below animates changes of background-color for 3 seconds:
.animated {
transition-property: background-color;
transition-duration: 3s;
}
Now if an element has .animated class, any change of background-color is animated during 3 seconds.
Click the button below to animate the background:
<button id="color">Click me</button>
<style>
#color {
transition-property: background-color;
transition-duration: 3s;
}
</style>
<script>
color.onclick = function() {
this.style.backgroundColor = 'red';
};
</script>
There are 4 properties to describe CSS transitions:
transition-propertytransition-durationtransition-timing-functiontransition-delay
We'll cover them in a moment, for now let's note that the common transition property allows declaring them together in the order: property duration timing-function delay, as well as animating multiple properties at once.
For instance, this button animates both color and font-size:
<button id="growing">Click me</button>
<style>
#growing {
transition: font-size 3s, color 2s;
}
</style>
<script>
growing.onclick = function() {
this.style.fontSize = '36px';
this.style.color = 'red';
};
</script>
Now, let's cover animation properties one by one.
- transition-property
In transition-property, we write a list of properties to animate, for instance: left, margin-left, height, color.
Or we could write all, which means “animate all properties”.
Do note that, there are properties which can not be animated.
However, most of the generally used properties are animatable.
- transition-duration
In transition-duration we can specify how long the animation should take.
The time should be in CSS time format: in seconds s or milliseconds ms.
- transition-delay
In transition-delay we can specify the delay before the animation.
For instance, if transition-delay is 1s and transition-duration is 2s, then the animation starts 1 second after the property change and the total duration will be 2 seconds.
Negative values are also possible.
Then the animation is shown immediately, but the starting point of the animation will be after given value (time).
For example, if transition-delay is -1s and transition-duration is 2s, then animation starts from the halfway point and total duration will be 1 second.
Here the animation shifts numbers from 0 to 9 using CSS translate property:
Result
script.js
style.css
index.html
stripe.onclick = function() {
stripe.classList.add('animate');
};#digit {
width: .5em;
overflow: hidden;
font: 32px monospace;
cursor: pointer;
}
#stripe {
display: inline-block
}
#stripe.animate {
transform: translate(-90%);
transition-property: transform;
transition-duration: 9s;
transition-timing-function: linear;
}<!doctype html>
<html>
<head>
<meta charset="UTF-8">
<link rel="stylesheet" href="style.css">
</head>
<body>
Click below to animate:
<div id="digit"><div id="stripe">0123456789</div></div>
<script src="script.js"></script>
</body>
</html>
The transform property is animated like this:
#stripe.animate {
transform: translate(-90%);
transition-property: transform;
transition-duration: 9s;
}
In the example above JavaScript adds the class .animate to the element – and the animation starts:
stripe.classList.add('animate');
We could also start it from somewhere in the middle of the transition, from an exact number, e.g.
corresponding to the current second, using a negative transition-delay.
Here if you click the digit – it starts the animation from the current second:
Result
script.js
style.css
index.html
stripe.onclick = function() {
let sec = new Date().getSeconds() % 10;
stripe.style.transitionDelay = '-' + sec + 's';
stripe.classList.add('animate');
};#digit {
width: .5em;
overflow: hidden;
font: 32px monospace;
cursor: pointer;
}
#stripe {
display: inline-block
}
#stripe.animate {
transform: translate(-90%);
transition-property: transform;
transition-duration: 9s;
transition-timing-function: linear;
}<!doctype html>
<html>
<head>
<meta charset="UTF-8">
<link rel="stylesheet" href="style.css">
</head>
<body>
Click below to animate:
<div id="digit"><div id="stripe">0123456789</div></div>
<script src="script.js"></script>
</body>
</html>
JavaScript does it with an extra line:
stripe.onclick = function() {
let sec = new Date().getSeconds() % 10;
// for instance, -3s here starts the animation from the 3rd second
stripe.style.transitionDelay = '-' + sec + 's';
stripe.classList.add('animate');
};
- transition-timing-function
The timing function describes how the animation process is distributed along its timeline.
Will it start slowly and then go fast, or vice versa.
It appears to be the most complicated property at first.
But it becomes very simple if we devote a bit time to it.
That property accepts two kinds of values: a Bezier curve or steps.
Let's start with the curve, as it's used more often.
Bezier curve
The timing function can be set as a Bezier curve with 4 control points that satisfy the conditions:
First control point: (0,0).
Last control point: (1,1).
For intermediate points, the values of x must be in the interval 0..1, y can be anything.
The syntax for a Bezier curve in CSS: cubic-bezier(x2, y2, x3, y3).
Here we need to specify only 2nd and 3rd control points, because the 1st one is fixed to (0,0) and the 4th one is (1,1).
The timing function describes how fast the animation process goes.
The x axis is the time: 0 – the start, 1 – the end of transition-duration.
The y axis specifies the completion of the process: 0 – the starting value of the property, 1 – the final value.
The simplest variant is when the animation goes uniformly, with the same linear speed.
That can be specified by the curve cubic-bezier(0, 0, 1, 1).
Here's how that curve looks:
…As we can see, it's just a straight line.
As the time (x) passes, the completion (y) of the animation steadily goes from 0 to 1.
The train in the example below goes from left to right with the permanent speed (click it):
Result
style.css
index.html
.train {
position: relative;
cursor: pointer;
width: 177px;
height: 160px;
left: 0;
transition: left 5s cubic-bezier(0, 0, 1, 1);
}<!doctype html>
<html>
<head>
<meta charset="UTF-8">
<link rel="stylesheet" href="style.css">
</head>
<body>
<img class="train" src="https://js.cx/clipart/train.gif" onclick="this.style.left='450px'">
</body>
</html>
The CSS transition is based on that curve:
.train {
left: 0;
transition: left 5s cubic-bezier(0, 0, 1, 1);
/* JavaScript sets left to 450px */
}
…And how can we show a train slowing down?
We can use another Bezier curve: cubic-bezier(0.0, 0.5, 0.5 ,1.0).
The graph:
As we can see, the process starts fast: the curve soars up high, and then slower and slower.
Here's the timing function in action (click the train):
Result
style.css
index.html
.train {
position: relative;
cursor: pointer;
width: 177px;
height: 160px;
left: 0px;
transition: left 5s cubic-bezier(0.0, 0.5, 0.5, 1.0);
}<!doctype html>
<html>
<head>
<meta charset="UTF-8">
<link rel="stylesheet" href="style.css">
</head>
<body>
<img class="train" src="https://js.cx/clipart/train.gif" onclick="this.style.left='450px'">
</body>
</html>
CSS:
.train {
left: 0;
transition: left 5s cubic-bezier(0, .5, .5, 1);
/* JavaScript sets left to 450px */
}
There are several built-in curves: linear, ease, ease-in, ease-out and ease-in-out.
The linear is a shorthand for cubic-bezier(0, 0, 1, 1) – a straight line, which we described above.
Other names are shorthands for the following cubic-bezier:
ease*
ease-in
ease-out
ease-in-out
(0.25, 0.1, 0.25, 1.0)
(0.42, 0, 1.0, 1.0)
(0, 0, 0.58, 1.0)
(0.42, 0, 0.58, 1.0)
* – by default, if there's no timing function, ease is used.
So we could use ease-out for our slowing down train:
.train {
left: 0;
transition: left 5s ease-out;
/* transition: left 5s cubic-bezier(0, .5, .5, 1); */
}
But it looks a bit differently.
A Bezier curve can make the animation exceed its range.
The control points on the curve can have any y coordinates: even negative or huge ones.
Then the Bezier curve would also extend very low or high, making the animation go beyond its normal range.
In the example below the animation code is:
.train {
left: 100px;
transition: left 5s cubic-bezier(.5, -1, .5, 2);
/* JavaScript sets left to 400px */
}
The property left should animate from 100px to 400px.
But if you click the train, you'll see that:
First, the train goes back: left becomes less than 100px.
Then it goes forward, a little bit farther than 400px.
And then back again – to 400px.
Result
style.css
index.html
.train {
position: relative;
cursor: pointer;
width: 177px;
height: 160px;
left: 100px;
transition: left 5s cubic-bezier(.5, -1, .5, 2);
}<!doctype html>
<html>
<head>
<meta charset="UTF-8">
<link rel="stylesheet" href="style.css">
</head>
<body>
<img class="train" src="https://js.cx/clipart/train.gif" onclick="this.style.left='400px'">
</body>
</html>
Why it happens is pretty obvious if we look at the graph of the given Bezier curve:
We moved the y coordinate of the 2nd point below zero, and for the 3rd point we made it over 1, so the curve goes out of the “regular” quadrant.
The y is out of the “standard” range 0..1.
As we know, y measures “the completion of the animation process”.
The value y = 0 corresponds to the starting property value and y = 1 – the ending value.
So values y<0 move the property beyond the starting left and y>1 – past the final left.
That's a “soft” variant for sure.
If we put y values like -99 and 99 then the train would jump out of the range much more.
But how do we make a Bezier curve for a specific task? There are many tools.
For instance, we can do it on the site http://cubic-bezier.com/.
Steps
The timing function steps(number of steps[, start/end]) allows splitting an animation into steps.
Let's see that in an example with digits.
Here's a list of digits, without any animations, just as a source:
Result
style.css
index.html
#digit {
border: 1px solid red;
width: 1.2em;
}
#stripe {
display: inline-block;
font: 32px monospace;
}<!DOCTYPE html>
<html>
<head>
<meta charset="utf-8">
<link rel="stylesheet" href="style.css">
</head>
<body>
<div id="digit"><div id="stripe">0123456789</div></div>
</body>
</html>
We'll make the digits appear in a discrete way by making the part of the list outside of the red “window” invisible and shifting the list to the left with each step.
There will be 9 steps, a step-move for each digit:
#stripe.animate {
transform: translate(-90%);
transition: transform 9s steps(9, start);
}
In action:
Result
style.css
index.html
#digit {
width: .5em;
overflow: hidden;
font: 32px monospace;
cursor: pointer;
}
#stripe {
display: inline-block
}
#stripe.animate {
transform: translate(-90%);
transition-property: transform;
transition-duration: 9s;
transition-timing-function: steps(9, start);
}<!DOCTYPE html>
<html>
<head>
<meta charset="utf-8">
<link rel="stylesheet" href="style.css">
</head>
<body>
Click below to animate:
<div id="digit"><div id="stripe">0123456789</div></div>
<script>
digit.onclick = function() {
stripe.classList.add('animate');
}
</script>
</body>
</html>
The first argument of steps(9, start) is the number of steps.
The transform will be split into 9 parts (10% each).
The time interval is automatically divided into 9 parts as well, so transition: 9s gives us 9 seconds for the whole animation – 1 second per digit.
The second argument is one of two words: start or end.
The start means that in the beginning of animation we need to make the first step immediately.
We can observe that during the animation: when we click on the digit it changes to 1 (the first step) immediately, and then changes in the beginning of the next second.
The process is progressing like this:
0s – -10% (first change in the beginning of the 1st second, immediately)
1s – -20%
…
8s – -80%
(the last second shows the final value).
The alternative value end would mean that the change should be applied not in the beginning, but at the end of each second.
So the process would go like this:
0s – 01s – -10% (first change at the end of the 1st second)
2s – -20%
…
9s – -90%
Here's steps(9, end) in action (note the pause between the first digit change):
Result
style.css
index.html
#digit {
width: .5em;
overflow: hidden;
font: 32px monospace;
cursor: pointer;
}
#stripe {
display: inline-block
}
#stripe.animate {
transform: translate(-90%);
transition-property: transform;
transition-duration: 9s;
transition-timing-function: steps(9, end);
}<!DOCTYPE html>
<html>
<head>
<meta charset="utf-8">
<link rel="stylesheet" href="style.css">
</head>
<body>
Click below to animate:
<div id="digit"><div id="stripe">0123456789</div></div>
<script>
digit.onclick = function() {
stripe.classList.add('animate');
}
</script>
</body>
</html>
There are also shorthand values:
step-start – is the same as steps(1, start).
That is, the animation starts immediately and takes 1 step.
So it starts and finishes immediately, as if there were no animation.
step-end – the same as steps(1, end): make the animation in a single step at the end of transition-duration.
These values are rarely used, because that's not really animation, but rather a single-step change.
- Event transitionend
When the CSS animation finishes the transitionend event triggers.
It is widely used to do an action after the animation is done.
Also we can join animations.
For instance, the ship in the example below starts to sail there and back when clicked, each time farther and farther to the right:
The animation is initiated by the function go that re-runs each time the transition finishes, and flips the direction:
boat.onclick = function() {
//...
let times = 1;
function go() {
if (times % 2) {
// sail to the right
boat.classList.remove('back');
boat.style.marginLeft = 100 * times + 200 + 'px';
} else {
// sail to the left
boat.classList.add('back');
boat.style.marginLeft = 100 * times - 200 + 'px';
}
}
go();
boat.addEventListener('transitionend', function() {
times++;
go();
});
};
The event object for transitionend has a few specific properties:
event.propertyName
The property that has finished animating.
Can be good if we animate multiple properties simultaneously.
event.elapsedTime
The time (in seconds) that the animation took, without transition-delay.
- Keyframes
We can join multiple simple animations together using the @keyframes CSS rule.
It specifies the “name” of the animation and rules – what, when and where to animate.
Then using the animation property, we can attach the animation to the element and specify additional parameters for it.
Here's an example with explanations:
<div class="progress"></div>
<style>
@keyframes go-left-right { /* give it a name: "go-left-right" */
from { left: 0px; } /* animate from left: 0px */
to { left: calc(100% - 50px); } /* animate to left: 100%-50px */
}
.progress {
animation: go-left-right 3s infinite alternate;
/* apply the animation "go-left-right" to the element
duration 3 seconds
number of times: infinite
alternate direction every time
*/
position: relative;
border: 2px solid green;
width: 50px;
height: 20px;
background: lime;
}
</style>
There are many articles about @keyframes and a detailed specification.
You probably won't need @keyframes often, unless everything is in constant motion on your sites.
- Summary
CSS animations allow smoothly (or not) animated changes of one or multiple CSS properties.
They are good for most animation tasks.
We're also able to use JavaScript for animations, the next chapter is devoted to that.
Limitations of CSS animations compared to JavaScript animations:
Merits
Simple things done simply.
Fast and lightweight for CPU.
Demerits
JavaScript animations are flexible.
They can implement any animation logic, like an “explosion” of an element.
Not just property changes.
We can create new elements in JavaScript as part of the animation.
The majority of animations can be implemented using CSS as described in this chapter.
And the transitionend event allows JavaScript to be run after the animation, so it integrates fine with the code.
But in the next chapter we'll do some JavaScript animations to cover more complex cases.
importance: 5
Show the animation like on the picture below (click the plane):
The picture grows on click from 40x24px to 400x240px (10 times larger).
The animation takes 3 seconds.
At the end output: “Done!”.
During the animation process, there may be more clicks on the plane.
They shouldn't “break” anything.
Open a sandbox for the task.
CSS to animate both width and height:
/* original class */
#flyjet {
transition: all 3s;
}
/* JS adds .growing */
#flyjet.growing {
width: 400px;
height: 240px;
}
Please note that transitionend triggers two times – once for every property.
So if we don't perform an additional check then the message would show up 2 times.
Open the solution in a sandbox.
Animate the flying plane (CSS)
importance: 5
Modify the solution of the previous task Animate a plane (CSS) to make the plane grow more than its original size 400x240px (jump out), and then return to that size.
Here's how it should look (click on the plane):
Take the solution of the previous task as the source.
We need to choose the right Bezier curve for that animation.
It should have y>1 somewhere for the plane to “jump out”.
For instance, we can take both control points with y>1, like: cubic-bezier(0.25, 1.5, 0.75, 1.5).
The graph:
Open the solution in a sandbox.
Animated circle
importance: 5
Create a function showCircle(cx, cy, radius) that shows an animated growing circle.
cx,cy are window-relative coordinates of the center of the circle,
radius is the radius of the circle.
Click the button below to see how it should look like:
The source document has an example of a circle with right styles, so the task is precisely to do the animation right.
Open a sandbox for the task.Open the solution in a sandbox.
Animated circle with callback
In the task Animated circle an animated growing circle is shown.
Now let's say we need not just a circle, but to show a message inside it.
The message should appear after the animation is complete (the circle is fully grown), otherwise it would look ugly.
In the solution of the task, the function showCircle(cx, cy, radius) draws the circle, but gives no way to track when it's ready.
Add a callback argument: showCircle(cx, cy, radius, callback) to be called when the animation is complete.
The callback should receive the circle <div> as an argument.
Here's the example:
showCircle(150, 150, 100, div => {
div.classList.add('message-ball');
div.append("Hello, world!");
});
Demo:
Take the solution of the task Animated circle as the base.
Open the solution in a sandbox.Animation
JavaScript animations
JavaScript animations can handle things that CSS can't.
For instance, moving along a complex path, with a timing function different from Bezier curves, or an animation on a canvas.
- Using setInterval
An animation can be implemented as a sequence of frames – usually small changes to HTML/CSS properties.
For instance, changing style.left from 0px to 100px moves the element.
And if we increase it in setInterval, changing by 2px with a tiny delay, like 50 times per second, then it looks smooth.
That's the same principle as in the cinema: 24 frames per second is enough to make it look smooth.
The pseudo-code can look like this:
let timer = setInterval(function() {
if (animation complete) clearInterval(timer);
else increase style.left by 2px
}, 20); // change by 2px every 20ms, about 50 frames per second
More complete example of the animation:
let start = Date.now(); // remember start time
let timer = setInterval(function() {
// how much time passed from the start?
let timePassed = Date.now() - start;
if (timePassed >= 2000) {
clearInterval(timer); // finish the animation after 2 seconds
return;
}
// draw the animation at the moment timePassed
draw(timePassed);
}, 20);
// as timePassed goes from 0 to 2000
// left gets values from 0px to 400px
function draw(timePassed) {
train.style.left = timePassed / 5 + 'px';
}
Click for the demo:
Result
index.html
<!DOCTYPE HTML>
<html>
<head>
<style>
#train {
position: relative;
cursor: pointer;
}
</style>
</head>
<body>
<img id="train" src="https://js.cx/clipart/train.gif">
<script>
train.onclick = function() {
let start = Date.now();
let timer = setInterval(function() {
let timePassed = Date.now() - start;
train.style.left = timePassed / 5 + 'px';
if (timePassed > 2000) clearInterval(timer);
}, 20);
}
</script>
</body>
</html>
- Using requestAnimationFrame
Let's imagine we have several animations running simultaneously.
If we run them separately, then even though each one has setInterval(..., 20), then the browser would have to repaint much more often than every 20ms.
That's because they have different starting time, so “every 20ms” differs between different animations.
The intervals are not aligned.
So we'll have several independent runs within 20ms.
In other words, this:
setInterval(function() {
animate1();
animate2();
animate3();
}, 20)
…Is lighter than three independent calls:
setInterval(animate1, 20); // independent animations
setInterval(animate2, 20); // in different places of the script
setInterval(animate3, 20);
These several independent redraws should be grouped together, to make the redraw easier for the browser and hence load less CPU load and look smoother.
There's one more thing to keep in mind.
Sometimes CPU is overloaded, or there are other reasons to redraw less often (like when the browser tab is hidden), so we really shouldn't run it every 20ms.
But how do we know about that in JavaScript? There's a specification Animation timing that provides the function requestAnimationFrame.
It addresses all these issues and even more.
The syntax:
let requestId = requestAnimationFrame(callback)
That schedules the callback function to run in the closest time when the browser wants to do animation.
If we do changes in elements in callback then they will be grouped together with other requestAnimationFrame callbacks and with CSS animations.
So there will be one geometry recalculation and repaint instead of many.
The returned value requestId can be used to cancel the call:
// cancel the scheduled execution of callback
cancelAnimationFrame(requestId);
The callback gets one argument – the time passed from the beginning of the page load in microseconds.
This time can also be obtained by calling performance.now().
Usually callback runs very soon, unless the CPU is overloaded or the laptop battery is almost discharged, or there's another reason.
The code below shows the time between first 10 runs for requestAnimationFrame.
Usually it's 10-20ms:
<script>
let prev = performance.now();
let times = 0;
requestAnimationFrame(function measure(time) {
document.body.insertAdjacentHTML("beforeEnd", Math.floor(time - prev) + " ");
prev = time;
if (times++ < 10) requestAnimationFrame(measure);
})
</script>
- Structured animation
Now we can make a more universal animation function based on requestAnimationFrame:
function animate({timing, draw, duration}) {
let start = performance.now();
requestAnimationFrame(function animate(time) {
// timeFraction goes from 0 to 1
let timeFraction = (time - start) / duration;
if (timeFraction > 1) timeFraction = 1;
// calculate the current animation state
let progress = timing(timeFraction)
draw(progress); // draw it
if (timeFraction < 1) {
requestAnimationFrame(animate);
}
});
}
Function animate accepts 3 parameters that essentially describes the animation:
duration
Total time of animation.
Like, 1000.
timing(timeFraction)
Timing function, like CSS-property transition-timing-function that gets the fraction of time that passed (0 at start, 1 at the end) and returns the animation completion (like y on the Bezier curve).
For instance, a linear function means that the animation goes on uniformly with the same speed:
function linear(timeFraction) {
return timeFraction;
}
It's graph:
That's just like transition-timing-function: linear.
There are more interesting variants shown below.
draw(progress)
The function that takes the animation completion state and draws it.
The value progress=0 denotes the beginning animation state, and progress=1 – the end state.
This is that function that actually draws out the animation.
It can move the element:
function draw(progress) {
train.style.left = progress + 'px';
}
…Or do anything else, we can animate anything, in any way.
Let's animate the element width from 0 to 100% using our function.
Click on the element for the demo:
Result
animate.js
index.html
function animate({duration, draw, timing}) {
let start = performance.now();
requestAnimationFrame(function animate(time) {
let timeFraction = (time - start) / duration;
if (timeFraction > 1) timeFraction = 1;
let progress = timing(timeFraction)
draw(progress);
if (timeFraction < 1) {
requestAnimationFrame(animate);
}
});
}<!DOCTYPE HTML>
<html>
<head>
<meta charset="utf-8">
<style>
progress {
width: 5%;
}
</style>
<script src="animate.js"></script>
</head>
<body>
<progress id="elem"></progress>
<script>
elem.onclick = function() {
animate({
duration: 1000,
timing: function(timeFraction) {
return timeFraction;
},
draw: function(progress) {
elem.style.width = progress * 100 + '%';
}
});
};
</script>
</body>
</html>
The code for it:
animate({
duration: 1000,
timing(timeFraction) {
return timeFraction;
},
draw(progress) {
elem.style.width = progress * 100 + '%';
}
});
Unlike CSS animation, we can make any timing function and any drawing function here.
The timing function is not limited by Bezier curves.
And draw can go beyond properties, create new elements for like fireworks animation or something.
- Timing functions
We saw the simplest, linear timing function above.
Let's see more of them.
We'll try movement animations with different timing functions to see how they work.
Power of n
If we want to speed up the animation, we can use progress in the power n.
For instance, a parabolic curve:
function quad(timeFraction) {
return Math.pow(timeFraction, 2)
}
The graph:
See in action (click to activate):
…Or the cubic curve or even greater n.
Increasing the power makes it speed up faster.
Here's the graph for progress in the power 5:
In action:
The arc
Function:
function circ(timeFraction) {
return 1 - Math.sin(Math.acos(timeFraction));
}
The graph:
Back: bow shooting
This function does the “bow shooting”.
First we “pull the bowstring”, and then “shoot”.
Unlike previous functions, it depends on an additional parameter x, the “elasticity coefficient”.
The distance of “bowstring pulling” is defined by it.
The code:
function back(x, timeFraction) {
return Math.pow(timeFraction, 2) * ((x + 1) * timeFraction - x)
}The graph for x = 1.5:For animation we use it with a specific value of x.
Example for x = 1.5:
Bounce
Imagine we are dropping a ball.
It falls down, then bounces back a few times and stops.
The bounce function does the same, but in the reverse order: “bouncing” starts immediately.
It uses few special coefficients for that:
function bounce(timeFraction) {
for (let a = 0, b = 1, result; 1; a += b, b /= 2) {
if (timeFraction >= (7 - 4 * a) / 11) {
return -Math.pow((11 - 6 * a - 11 * timeFraction) / 4, 2) + Math.pow(b, 2)
}
}
}
In action:
Elastic animation
One more “elastic” function that accepts an additional parameter x for the “initial range”.
function elastic(x, timeFraction) {
return Math.pow(2, 10 * (timeFraction - 1)) * Math.cos(20 * Math.PI * x / 3 * timeFraction)
}The graph for x=1.5:
In action for x=1.5:
- Reversal: ease*
So we have a collection of timing functions.
Their direct application is called “easeIn”.
Sometimes we need to show the animation in the reverse order.
That's done with the “easeOut” transform.
easeOut
In the “easeOut” mode the timing function is put into a wrapper timingEaseOut:
timingEaseOut(timeFraction) = 1 - timing(1 - timeFraction)
In other words, we have a “transform” function makeEaseOut that takes a “regular” timing function and returns the wrapper around it:
// accepts a timing function, returns the transformed variant
function makeEaseOut(timing) {
return function(timeFraction) {
return 1 - timing(1 - timeFraction);
}
}
For instance, we can take the bounce function described above and apply it:
let bounceEaseOut = makeEaseOut(bounce);
Then the bounce will be not in the beginning, but at the end of the animation.
Looks even better:
Result
style.css
index.html
#brick {
width: 40px;
height: 20px;
background: #EE6B47;
position: relative;
cursor: pointer;
}
#path {
outline: 1px solid #E8C48E;
width: 540px;
height: 20px;
}<!DOCTYPE HTML>
<html>
<head>
<meta charset="utf-8">
<link rel="stylesheet" href="style.css">
<script src="https://js.cx/libs/animate.js"></script>
</head>
<body>
<div id="path">
<div id="brick"></div>
</div>
<script>
function makeEaseOut(timing) {
return function(timeFraction) {
return 1 - timing(1 - timeFraction);
}
}
function bounce(timeFraction) {
for (let a = 0, b = 1, result; 1; a += b, b /= 2) {
if (timeFraction >= (7 - 4 * a) / 11) {
return -Math.pow((11 - 6 * a - 11 * timeFraction) / 4, 2) + Math.pow(b, 2)
}
}
}
let bounceEaseOut = makeEaseOut(bounce);
brick.onclick = function() {
animate({
duration: 3000,
timing: bounceEaseOut,
draw: function(progress) {
brick.style.left = progress * 500 + 'px';
}
});
};
</script>
</body>
</html>
Here we can see how the transform changes the behavior of the function:
If there's an animation effect in the beginning, like bouncing – it will be shown at the end.
In the graph above the regular bounce has the red color, and the easeOut bounce is blue.
Regular bounce – the object bounces at the bottom, then at the end sharply jumps to the top.
After easeOut – it first jumps to the top, then bounces there.
easeInOut
We also can show the effect both in the beginning and the end of the animation.
The transform is called “easeInOut”.
Given the timing function, we calculate the animation state like this:
if (timeFraction <= 0.5) { // first half of the animation
return timing(2 * timeFraction) / 2;
} else { // second half of the animation
return (2 - timing(2 * (1 - timeFraction))) / 2;
}
The wrapper code:
function makeEaseInOut(timing) {
return function(timeFraction) {
if (timeFraction < .5)
return timing(2 * timeFraction) / 2;
else
return (2 - timing(2 * (1 - timeFraction))) / 2;
}
}
bounceEaseInOut = makeEaseInOut(bounce);
In action, bounceEaseInOut:
Result
style.css
index.html
#brick {
width: 40px;
height: 20px;
background: #EE6B47;
position: relative;
cursor: pointer;
}
#path {
outline: 1px solid #E8C48E;
width: 540px;
height: 20px;
}<!DOCTYPE HTML>
<html>
<head>
<meta charset="utf-8">
<link rel="stylesheet" href="style.css">
<script src="https://js.cx/libs/animate.js"></script>
</head>
<body>
<div id="path">
<div id="brick"></div>
</div>
<script>
function makeEaseInOut(timing) {
return function(timeFraction) {
if (timeFraction < .5)
return timing(2 * timeFraction) / 2;
else
return (2 - timing(2 * (1 - timeFraction))) / 2;
}
}
function bounce(timeFraction) {
for (let a = 0, b = 1, result; 1; a += b, b /= 2) {
if (timeFraction >= (7 - 4 * a) / 11) {
return -Math.pow((11 - 6 * a - 11 * timeFraction) / 4, 2) + Math.pow(b, 2)
}
}
}
let bounceEaseInOut = makeEaseInOut(bounce);
brick.onclick = function() {
animate({
duration: 3000,
timing: bounceEaseInOut,
draw: function(progress) {
brick.style.left = progress * 500 + 'px';
}
});
};
</script>
</body>
</html>
The “easeInOut” transform joins two graphs into one: easeIn (regular) for the first half of the animation and easeOut (reversed) – for the second part.
The effect is clearly seen if we compare the graphs of easeIn, easeOut and easeInOut of the circ timing function:
Red is the regular variant of circ (easeIn).
Green – easeOut.
Blue – easeInOut.
As we can see, the graph of the first half of the animation is the scaled down easeIn, and the second half is the scaled down easeOut.
As a result, the animation starts and finishes with the same effect.
- More interesting “draw”
Instead of moving the element we can do something else.
All we need is to write the proper draw.
Here's the animated “bouncing” text typing:
Result
style.css
index.html
textarea {
display: block;
border: 1px solid #BBB;
color: #444;
font-size: 110%;
}
button {
margin-top: 10px;
}<!DOCTYPE HTML>
<html>
<head>
<meta charset="utf-8">
<link rel="stylesheet" href="style.css">
<script src="https://js.cx/libs/animate.js"></script>
</head>
<body>
<textarea id="textExample" rows="5" cols="60">He took his vorpal sword in hand:
Long time the manxome foe he sought—
So rested he by the Tumtum tree,
And stood awhile in thought.
</textarea>
<button onclick="animateText(textExample)">Run the animated typing!</button>
<script>
function animateText(textArea) {
let text = textArea.value;
let to = text.length,
from = 0;
animate({
duration: 5000,
timing: bounce,
draw: function(progress) {
let result = (to - from) * progress + from;
textArea.value = text.substr(0, Math.ceil(result))
}
});
}
function bounce(timeFraction) {
for (let a = 0, b = 1, result; 1; a += b, b /= 2) {
if (timeFraction >= (7 - 4 * a) / 11) {
return -Math.pow((11 - 6 * a - 11 * timeFraction) / 4, 2) + Math.pow(b, 2)
}
}
}
</script>
</body>
</html>
- Summary
For animations that CSS can't handle well, or those that need tight control, JavaScript can help.
JavaScript animations should be implemented via requestAnimationFrame.
That built-in method allows to setup a callback function to run when the browser will be preparing a repaint.
Usually that's very soon, but the exact time depends on the browser.
When a page is in the background, there are no repaints at all, so the callback won't run: the animation will be suspended and won't consume resources.
That's great.
Here's the helper animate function to setup most animations:
function animate({timing, draw, duration}) {
let start = performance.now();
requestAnimationFrame(function animate(time) {
// timeFraction goes from 0 to 1
let timeFraction = (time - start) / duration;
if (timeFraction > 1) timeFraction = 1;
// calculate the current animation state
let progress = timing(timeFraction);
draw(progress); // draw it
if (timeFraction < 1) {
requestAnimationFrame(animate);
}
});
}
Options:
duration – the total animation time in ms.
timing – the function to calculate animation progress.
Gets a time fraction from 0 to 1, returns the animation progress, usually from 0 to 1.
draw – the function to draw the animation.
Surely we could improve it, add more bells and whistles, but JavaScript animations are not applied on a daily basis.
They are used to do something interesting and non-standard.
So you'd want to add the features that you need when you need them.
JavaScript animations can use any timing function.
We covered a lot of examples and transformations to make them even more versatile.
Unlike CSS, we are not limited to Bezier curves here.
The same is about draw: we can animate anything, not just CSS properties.
importance: 5
Make a bouncing ball.
Click to see how it should look:
Open a sandbox for the task.
To bounce we can use CSS property top and position:absolute for the ball inside the field with position:relative.
The bottom coordinate of the field is field.clientHeight.
The CSS top property refers to the upper edge of the ball.
So it should go from 0 till field.clientHeight - ball.clientHeight, that's the final lowest position of the upper edge of the ball.
To get the “bouncing” effect we can use the timing function bounce in easeOut mode.
Here's the final code for the animation:
let to = field.clientHeight - ball.clientHeight;
animate({
duration: 2000,
timing: makeEaseOut(bounce),
draw(progress) {
ball.style.top = to * progress + 'px'
}
});Open the solution in a sandbox.
Animate the ball bouncing to the right
importance: 5
Make the ball bounce to the right.
Like this:
Write the animation code.
The distance to the left is 100px.
Take the solution of the previous task Animate the bouncing ball as the source.
In the task Animate the bouncing ball we had only one property to animate.
Now we need one more: elem.style.left.
The horizontal coordinate changes by another law: it does not “bounce”, but gradually increases shifting the ball to the right.
We can write one more animate for it.
As the time function we could use linear, but something like makeEaseOut(quad) looks much better.
The code:
let height = field.clientHeight - ball.clientHeight;
let width = 100;
// animate top (bouncing)
animate({
duration: 2000,
timing: makeEaseOut(bounce),
draw: function(progress) {
ball.style.top = height * progress + 'px'
}
});
// animate left (moving to the right)
animate({
duration: 2000,
timing: makeEaseOut(quad),
draw: function(progress) {
ball.style.left = width * progress + "px"
}
});Open the solution in a sandbox.
This section describes a set of modern standards for “web components”.
As of now, these standards are under development.
Some features are well-supported and integrated into the modern HTML/DOM standard, while others are yet in draft stage.
You can try examples in any browser, Google Chrome is probably the most up to date with these features.
Guess, that's because Google fellows are behind many of the related specifications.
- What's common between…
The whole component idea is nothing new.
It's used in many frameworks and elsewhere.
Before we move to implementation details, take a look at this great achievement of humanity:
That's the International Space Station (ISS).
And this is how it's made inside (approximately):
The International Space Station:
Consists of many components.
Each component, in its turn, has many smaller details inside.
The components are very complex, much more complicated than most websites.
Components are developed internationally, by teams from different countries, speaking different languages.
…And this thing flies, keeps humans alive in space!
How such complex devices are created?
Which principles we could borrow to make our development same-level reliable and scalable? Or, at least, close to it.
- Component architecture
The well known rule for developing complex software is: don't make complex software.
If something becomes complex – split it into simpler parts and connect in the most obvious way.
A good architect is the one who can make the complex simple.
We can split user interface into visual components: each of them has own place on the page, can “do” a well-described task, and is separate from the others.
Let's take a look at a website, for example Twitter.
It naturally splits into components:
Top navigation.
User info.
Follow suggestions.
Submit form.
(and also 6, 7) – messages.
Components may have subcomponents, e.g.
messages may be parts of a higher-level “message list” component.
A clickable user picture itself may be a component, and so on.
How do we decide, what is a component? That comes from intuition, experience and common sense.
Usually it's a separate visual entity that we can describe in terms of what it does and how it interacts with the page.
In the case above, the page has blocks, each of them plays its own role, it's logical to make these components.
A component has:
Its own JavaScript class.
DOM structure, managed solely by its class, outside code doesn't access it (“encapsulation” principle).
CSS styles, applied to the component.
API: events, class methods etc, to interact with other components.
Once again, the whole “component” thing is nothing special.
There exist many frameworks and development methodologies to build them, each with its own bells and whistles.
Usually, special CSS classes and conventions are used to provide “component feel” – CSS scoping and DOM encapsulation.
“Web components” provide built-in browser capabilities for that, so we don't have to emulate them any more.
Custom elements – to define custom HTML elements.
Shadow DOM – to create an internal DOM for the component, hidden from the others.
CSS Scoping – to declare styles that only apply inside the Shadow DOM of the component.
Event retargeting and other minor stuff to make custom components better fit the development.
In the next chapter we'll go into details of “Custom Elements” – the fundamental and well-supported feature of web components, good on its own.
Web components
Custom elements
We can create custom HTML elements, described by our class, with its own methods and properties, events and so on.
Once a custom element is defined, we can use it on par with built-in HTML elements.
That's great, as HTML dictionary is rich, but not infinite.
There are no <easy-tabs>, <sliding-carousel>, <beautiful-upload>… Just think of any other tag we might need.
We can define them with a special class, and then use as if they were always a part of HTML.
There are two kinds of custom elements:
Autonomous custom elements – “all-new” elements, extending the abstract HTMLElement class.
Customized built-in elements – extending built-in elements, like a customized button, based on HTMLButtonElement etc.
First we'll cover autonomous elements, and then move to customized built-in ones.
To create a custom element, we need to tell the browser several details about it: how to show it, what to do when the element is added or removed to page, etc.
That's done by making a class with special methods.
That's easy, as there are only few methods, and all of them are optional.
Here's a sketch with the full list:
class MyElement extends HTMLElement {
constructor() {
super();
// element created
}
connectedCallback() {
// browser calls this method when the element is added to the document
// (can be called many times if an element is repeatedly added/removed)
}
disconnectedCallback() {
// browser calls this method when the element is removed from the document
// (can be called many times if an element is repeatedly added/removed)
}
static get observedAttributes() {
return [/* array of attribute names to monitor for changes */];
}
attributeChangedCallback(name, oldValue, newValue) {
// called when one of attributes listed above is modified
}
adoptedCallback() {
// called when the element is moved to a new document
// (happens in document.adoptNode, very rarely used)
}
// there can be other element methods and properties
}
After that, we need to register the element:
// let the browser know that <my-element> is served by our new class
customElements.define("my-element", MyElement);
Now for any HTML elements with tag <my-element>, an instance of MyElement is created, and the aforementioned methods are called.
We also can document.createElement('my-element') in JavaScript.
Custom element name must contain a hyphen -
Custom element name must have a hyphen -, e.g.
my-element and super-button are valid names, but myelement is not.
That's to ensure that there are no name conflicts between built-in and custom HTML elements.
- Example: “time-formatted”
For example, there already exists <time> element in HTML, for date/time.
But it doesn't do any formatting by itself.
Let's create <time-formatted> element that displays the time in a nice, language-aware format:
<script>
class TimeFormatted extends HTMLElement { // (1)
connectedCallback() {
let date = new Date(this.getAttribute('datetime') || Date.now());
this.innerHTML = new Intl.DateTimeFormat("default", {
year: this.getAttribute('year') || undefined,
month: this.getAttribute('month') || undefined,
day: this.getAttribute('day') || undefined,
hour: this.getAttribute('hour') || undefined,
minute: this.getAttribute('minute') || undefined,
second: this.getAttribute('second') || undefined,
timeZoneName: this.getAttribute('time-zone-name') || undefined,
}).format(date);
}
}
customElements.define("time-formatted", TimeFormatted); // (2)
</script>
<!-- (3) -->
<time-formatted datetime="2019-12-01"
year="numeric" month="long" day="numeric"
hour="numeric" minute="numeric" second="numeric"
time-zone-name="short"
></time-formatted>
The class has only one method connectedCallback() – the browser calls it when <time-formatted> element is added to page (or when HTML parser detects it), and it uses the built-in Intl.DateTimeFormat data formatter, well-supported across the browsers, to show a nicely formatted time.
We need to register our new element by customElements.define(tag, class).
And then we can use it everywhere.
Custom elements upgrade
If the browser encounters any <time-formatted> elements before customElements.define, that's not an error.
But the element is yet unknown, just like any non-standard tag.
Such “undefined” elements can be styled with CSS selector :not(:defined).
When customElement.define is called, they are “upgraded”: a new instance of TimeFormatted
is created for each, and connectedCallback is called.
They become :defined.
To get the information about custom elements, there are methods:
customElements.get(name) – returns the class for a custom element with the given name,
customElements.whenDefined(name) – returns a promise that resolves (without value) when a custom element with the given name becomes defined.
Rendering in connectedCallback, not in constructor
In the example above, element content is rendered (created) in connectedCallback.
Why not in the constructor?
The reason is simple: when constructor is called, it's yet too early.
The element is created, but the browser did not yet process/assign attributes at this stage: calls to getAttribute would return null.
So we can't really render there.
Besides, if you think about it, that's better performance-wise – to delay the work until it's really needed.
The connectedCallback triggers when the element is added to the document.
Not just appended to another element as a child, but actually becomes a part of the page.
So we can build detached DOM, create elements and prepare them for later use.
They will only be actually rendered when they make it into the page.
- Observing attributes
In the current implementation of <time-formatted>, after the element is rendered, further attribute changes don't have any effect.
That's strange for an HTML element.
Usually, when we change an attribute, like a.href, we expect the change to be immediately visible.
So let's fix this.
We can observe attributes by providing their list in observedAttributes() static getter.
For such attributes, attributeChangedCallback is called when they are modified.
It doesn't trigger for other, unlisted attributes (that's for performance reasons).
Here's a new <time-formatted>, that auto-updates when attributes change:
<script>
class TimeFormatted extends HTMLElement {
render() { // (1)
let date = new Date(this.getAttribute('datetime') || Date.now());
this.innerHTML = new Intl.DateTimeFormat("default", {
year: this.getAttribute('year') || undefined,
month: this.getAttribute('month') || undefined,
day: this.getAttribute('day') || undefined,
hour: this.getAttribute('hour') || undefined,
minute: this.getAttribute('minute') || undefined,
second: this.getAttribute('second') || undefined,
timeZoneName: this.getAttribute('time-zone-name') || undefined,
}).format(date);
}
connectedCallback() { // (2)
if (!this.rendered) {
this.render();
this.rendered = true;
}
}
static get observedAttributes() { // (3)
return ['datetime', 'year', 'month', 'day', 'hour', 'minute', 'second', 'time-zone-name'];
}
attributeChangedCallback(name, oldValue, newValue) { // (4)
this.render();
}
}
customElements.define("time-formatted", TimeFormatted);
</script>
<time-formatted id="elem" hour="numeric" minute="numeric" second="numeric"></time-formatted>
<script>
setInterval(() => elem.setAttribute('datetime', new Date()), 1000); // (5)
</script>
The rendering logic is moved to render() helper method.
We call it once when the element is inserted into page.
For a change of an attribute, listed in observedAttributes(), attributeChangedCallback triggers.
…and re-renders the element.
At the end, we can easily make a live timer.
- Rendering order
When HTML parser builds the DOM, elements are processed one after another, parents before children.
E.g.
if we have <outer><inner></inner></outer>, then <outer> element is created and connected to DOM first, and then <inner>.
That leads to important consequences for custom elements.
For example, if a custom element tries to access innerHTML in connectedCallback, it gets nothing:
<script>
customElements.define('user-info', class extends HTMLElement {
connectedCallback() {
alert(this.innerHTML); // empty (*)
}
});
</script>
<user-info>John</user-info>
If you run it, the alert is empty.
That's exactly because there are no children on that stage, the DOM is unfinished.
HTML parser connected the custom element <user-info>, and is going to proceed to its children, but just didn't yet.
If we'd like to pass information to custom element, we can use attributes.
They are available immediately.
Or, if we really need the children, we can defer access to them with zero-delay setTimeout.
This works:
<script>
customElements.define('user-info', class extends HTMLElement {
connectedCallback() {
setTimeout(() => alert(this.innerHTML)); // John (*)
}
});
</script>
<user-info>John</user-info>
Now the alert in line (*) shows “John”, as we run it asynchronously, after the HTML parsing is complete.
We can process children if needed and finish the initialization.
On the other hand, this solution is also not perfect.
If nested custom elements also use setTimeout to initialize themselves, then they queue up: the outer setTimeout triggers first, and then the inner one.
So the outer element finishes the initialization before the inner one.
Let's demonstrate that on example:
<script>
customElements.define('user-info', class extends HTMLElement {
connectedCallback() {
alert(`${this.id} connected.`);
setTimeout(() => alert(`${this.id} initialized.`));
}
});
</script>
<user-info id="outer">
<user-info id="inner"></user-info>
</user-info>
Output order:
outer connected.
inner connected.
outer initialized.
inner initialized.
We can clearly see that the outer element finishes initialization (3) before the inner one (4).
There's no built-in callback that triggers after nested elements are ready.
If needed, we can implement such thing on our own.
For instance, inner elements can dispatch events like initialized, and outer ones can listen and react on them.
- Customized built-in elements
New elements that we create, such as <time-formatted>, don't have any associated semantics.
They are unknown to search engines, and accessibility devices can't handle them.
But such things can be important.
E.g, a search engine would be interested to know that we actually show a time.
And if we're making a special kind of button, why not reuse the existing <button> functionality?
We can extend and customize built-in HTML elements by inheriting from their classes.
For example, buttons are instances of HTMLButtonElement, let's build upon it.
Extend HTMLButtonElement with our class:
class HelloButton extends HTMLButtonElement { /* custom element methods */ }
Provide the third argument to customElements.define, that specifies the tag:
customElements.define('hello-button', HelloButton, {extends: 'button'});
There may be different tags that share the same DOM-class, that's why specifying extends is needed.
At the end, to use our custom element, insert a regular <button> tag, but add is="hello-button" to it:
<button is="hello-button">...</button>
Here's a full example:
<script>
// The button that says "hello" on click
class HelloButton extends HTMLButtonElement {
constructor() {
super();
this.addEventListener('click', () => alert("Hello!"));
}
}
customElements.define('hello-button', HelloButton, {extends: 'button'});
</script>
<button is="hello-button">Click me</button>
<button is="hello-button" disabled>Disabled</button>
Our new button extends the built-in one.
So it keeps the same styles and standard features like disabled attribute.
We already have <time-formatted> element to show a nicely formatted time.
Create <live-timer> element to show the current time:
It should use <time-formatted> internally, not duplicate its functionality.
Ticks (updates) every second.
For every tick, a custom event named tick should be generated, with the current date in event.detail (see chapter Dispatching custom events).
Usage:
<live-timer id="elem"></live-timer>
<script>
elem.addEventListener('tick', event => console.log(event.detail));
</script>
Demo:
Open a sandbox for the task.
Please note:
We clear setInterval timer when the element is removed from the document.
That's important, otherwise it continues ticking even if not needed any more.
And the browser can't clear the memory from this element and referenced by it.
We can access current date as elem.date property.
All class methods and properties are naturally element methods and properties.
Open the solution in a sandbox.Web components
Shadow DOM
Shadow DOM serves for encapsulation.
It allows a component to have its very own “shadow” DOM tree, that can't be accidentally accessed from the main document, may have local style rules, and more.
- Built-in shadow DOM
Did you ever think how complex browser controls are created and styled?
Such as <input type="range">:
The browser uses DOM/CSS internally to draw them.
That DOM structure is normally hidden from us, but we can see it in developer tools.
E.g.
in Chrome, we need to enable in Dev Tools “Show user agent shadow DOM” option.
Then <input type="range"> looks like this:
What you see under #shadow-root is called “shadow DOM”.
We can't get built-in shadow DOM elements by regular JavaScript calls or selectors.
These are not regular children, but a powerful encapsulation technique.
In the example above, we can see a useful attribute pseudo.
It's non-standard, exists for historical reasons.
We can use it style subelements with CSS, like this:
<style>
/* make the slider track red */
input::-webkit-slider-runnable-track {
background: red;
}
</style>
<input type="range">
Once again, pseudo is a non-standard attribute.
Chronologically, browsers first started to experiment with internal DOM structures to implement controls, and then, after time, shadow DOM was standardized to allow us, developers, to do the similar thing.
Further on, we'll use the modern shadow DOM standard, covered by DOM spec and other related specifications.
- Shadow tree
A DOM element can have two types of DOM subtrees:
Light tree – a regular DOM subtree, made of HTML children.
All subtrees that we've seen in previous chapters were “light”.
Shadow tree – a hidden DOM subtree, not reflected in HTML, hidden from prying eyes.
If an element has both, then the browser renders only the shadow tree.
But we can setup a kind of composition between shadow and light trees as well.
We'll see the details later in the chapter Shadow DOM slots, composition.
Shadow tree can be used in Custom Elements to hide component internals and apply component-local styles.
For example, this <show-hello> element hides its internal DOM in shadow tree:
<script>
customElements.define('show-hello', class extends HTMLElement {
connectedCallback() {
const shadow = this.attachShadow({mode: 'open'});
shadow.innerHTML = `<p>
Hello, ${this.getAttribute('name')}
</p>`;
}
});
</script>
<show-hello name="John"></show-hello>
That's how the resulting DOM looks in Chrome dev tools, all the content is under “#shadow-root”:
First, the call to elem.attachShadow({mode: …}) creates a shadow tree.
There are two limitations:
We can create only one shadow root per element.
The elem must be either a custom element, or one of: “article”, “aside”, “blockquote”, “body”, “div”, “footer”, “h1…h6”, “header”, “main” “nav”, “p”, “section”, or “span”.
Other elements, like <img>, can't host shadow tree.
The mode option sets the encapsulation level.
It must have any of two values:
"open" – the shadow root is available as elem.shadowRoot.
Any code is able to access the shadow tree of elem.
"closed" – elem.shadowRoot is always null.
We can only access the shadow DOM by the reference returned by attachShadow (and probably hidden inside a class).
Browser-native shadow trees, such as <input type="range">, are closed.
There's no way to access them.
The shadow root, returned by attachShadow, is like an element: we can use innerHTML or DOM methods, such as append, to populate it.
The element with a shadow root is called a “shadow tree host”, and is available as the shadow root host property:
// assuming {mode: "open"}, otherwise elem.shadowRoot is null
alert(elem.shadowRoot.host === elem); // true
- Encapsulation
Shadow DOM is strongly delimited from the main document:
Shadow DOM elements are not visible to querySelector from the light DOM.
In particular, Shadow DOM elements may have ids that conflict with those in the light DOM.
They must be unique only within the shadow tree.
Shadow DOM has own stylesheets.
Style rules from the outer DOM don't get applied.
For example:
<style>
/* document style won't apply to the shadow tree inside #elem (1) */
p { color: red; }
</style>
<div id="elem"></div>
<script>
elem.attachShadow({mode: 'open'});
// shadow tree has its own style (2)
elem.shadowRoot.innerHTML = `
<style> p { font-weight: bold; } </style>
<p>Hello, John!</p>
`;
// <p> is only visible from queries inside the shadow tree (3)
alert(document.querySelectorAll('p').length); // 0
alert(elem.shadowRoot.querySelectorAll('p').length); // 1
</script>
The style from the document does not affect the shadow tree.
…But the style from the inside works.
To get elements in shadow tree, we must query from inside the tree.
Shadow DOM is a way to create a component-local DOM.
shadowRoot = elem.attachShadow({mode: open|closed}) – creates shadow DOM for elem.
If mode="open", then it's accessible as elem.shadowRoot property.
We can populate shadowRoot using innerHTML or other DOM methods.
Shadow DOM elements:
Have their own ids space,
Invisible to JavaScript selectors from the main document, such as querySelector,
Use styles only from the shadow tree, not from the main document.
Shadow DOM, if exists, is rendered by the browser instead of so-called “light DOM” (regular children).
In the chapter Shadow DOM slots, composition we'll see how to compose them.
Web components
Template element
A built-in <template> element serves as a storage for HTML markup templates.
The browser ignores it contents, only checks for syntax validity, but we can access and use it in JavaScript, to create other elements.
In theory, we could create any invisible element somewhere in HTML for HTML markup storage purposes.
What's special about <template>?
First, its content can be any valid HTML, even if it normally requires a proper enclosing tag.
For example, we can put there a table row <tr>:
<template>
<tr>
<td>Contents</td>
</tr>
</template>
Usually, if we try to put <tr> inside, say, a <div>, the browser detects the invalid DOM structure and “fixes” it, adds <table> around.
That's not what we want.
On the other hand, <template> keeps exactly what we place there.
We can put styles and scripts into <template> as well:
<template>
<style>
p { font-weight: bold; }
</style>
<script>
alert("Hello");
</script>
</template>
The browser considers <template> content “out of the document”: styles are not applied, scripts are not executed, <video autoplay> is not run, etc.
The content becomes live (styles apply, scripts run etc) when we insert it into the document.
- Inserting template
The template content is available in its content property as a DocumentFragment – a special type of DOM node.
We can treat it as any other DOM node, except one special property: when we insert it somewhere, its children are inserted instead.
For example:
<template id="tmpl">
<script>
alert("Hello");
</script>
<div class="message">Hello, world!</div>
</template>
<script>
let elem = document.createElement('div');
// Clone the template content to reuse it multiple times
elem.append(tmpl.content.cloneNode(true));
document.body.append(elem);
// Now the script from <template> runs
</script>
Let's rewrite a Shadow DOM example from the previous chapter using <template>:
<template id="tmpl">
<style> p { font-weight: bold; } </style>
<p id="message"></p>
</template>
<div id="elem">Click me</div>
<script>
elem.onclick = function() {
elem.attachShadow({mode: 'open'});
elem.shadowRoot.append(tmpl.content.cloneNode(true)); // (*)
elem.shadowRoot.getElementById('message').innerHTML = "Hello from the shadows!";
};
</script>
In the line (*) when we clone and insert tmpl.content, as its DocumentFragment, its children (<style>, <p>) are inserted instead.
They form the shadow DOM:
<div id="elem">
#shadow-root
<style> p { font-weight: bold; } </style>
<p id="message"></p>
</div>
- Summary
To summarize:
<template> content can be any syntactically correct HTML.
<template> content is considered “out of the document”, so it doesn't affect anything.
We can access template.content from JavaScript, clone it to reuse in a new component.
The <template> tag is quite unique, because:
The browser checks HTML syntax inside it (as opposed to using a template string inside a script).
…But still allows use of any top-level HTML tags, even those that don't make sense without proper wrappers (e.g.
<tr>).
The content becomes interactive: scripts run, <video autoplay> plays etc, when inserted into the document.
The <template> element does not feature any iteration mechanisms, data binding or variable substitutions, but we can implement those on top of it.
Web components
Shadow DOM slots, composition
Many types of components, such as tabs, menus, image galleries, and so on, need the content to render.
Just like built-in browser <select> expects <option> items, our <custom-tabs> may expect the actual tab content to be passed.
And a <custom-menu> may expect menu items.
The code that makes use of <custom-menu> can look like this:
<custom-menu>
<title>Candy menu</title>
<item>Lollipop</item>
<item>Fruit Toast</item>
<item>Cup Cake</item>
</custom-menu>
…Then our component should render it properly, as a nice menu with given title and items, handle menu events, etc.
How to implement it?
We could try to analyze the element content and dynamically copy-rearrange DOM nodes.
That's possible, but if we're moving elements to shadow DOM, then CSS styles from the document do not apply in there, so the visual styling may be lost.
Also that requires some coding.
Luckily, we don't have to.
Shadow DOM supports <slot> elements, that are automatically filled by the content from light DOM.
- Named slots
Let's see how slots work on a simple example.
Here, <user-card> shadow DOM provides two slots, filled from light DOM:
<script>
customElements.define('user-card', class extends HTMLElement {
connectedCallback() {
this.attachShadow({mode: 'open'});
this.shadowRoot.innerHTML = `
<div>Name:
<slot name="username"></slot>
</div>
<div>Birthday:
<slot name="birthday"></slot>
</div>
`;
}
});
</script>
<user-card>
<span slot="username">John Smith</span>
<span slot="birthday">01.01.2001</span>
</user-card>
In the shadow DOM, <slot name="X"> defines an “insertion point”, a place where elements with slot="X" are rendered.
Then the browser performs “composition”: it takes elements from the light DOM and renders them in corresponding slots of the shadow DOM.
At the end, we have exactly what we want – a component that can be filled with data.
Here's the DOM structure after the script, not taking composition into account:
<user-card>
#shadow-root
<div>Name:
<slot name="username"></slot>
</div>
<div>Birthday:
<slot name="birthday"></slot>
</div>
<span slot="username">John Smith</span>
<span slot="birthday">01.01.2001</span>
</user-card>
We created the shadow DOM, so here it is, under #shadow-root.
Now the element has both light and shadow DOM.
For rendering purposes, for each <slot name="..."> in shadow DOM, the browser looks for slot="..." with the same name in the light DOM.
These elements are rendered inside the slots:
The result is called “flattened” DOM:
<user-card>
#shadow-root
<div>Name:
<slot name="username">
<!-- slotted element is inserted into the slot -->
<span slot="username">John Smith</span>
</slot>
</div>
<div>Birthday:
<slot name="birthday">
<span slot="birthday">01.01.2001</span>
</slot>
</div>
</user-card>
…But the flattened DOM exists only for rendering and event-handling purposes.
It's kind of “virtual”.
That's how things are shown.
But the nodes in the document are actually not moved around!
That can be easily checked if we run querySelectorAll: nodes are still at their places.
// light DOM <span> nodes are still at the same place, under `<user-card>`
alert( document.querySelectorAll('user-card span').length ); // 2
So, the flattened DOM is derived from shadow DOM by inserting slots.
The browser renders it and uses for style inheritance, event propagation (more about that later).
But JavaScript still sees the document “as is”, before flattening.
Only top-level children may have slot="…" attribute
The slot="..." attribute is only valid for direct children of the shadow host (in our example, <user-card> element).
For nested elements it's ignored.
For example, the second <span> here is ignored (as it's not a top-level child of <user-card>):
<user-card>
<span slot="username">John Smith</span>
<div>
<!-- invalid slot, must be direct child of user-card -->
<span slot="birthday">01.01.2001</span>
</div>
</user-card>
If there are multiple elements in light DOM with the same slot name, they are appended into the slot, one after another.
For example, this:
<user-card>
<span slot="username">John</span>
<span slot="username">Smith</span>
</user-card>
Gives this flattened DOM with two elements in <slot name="username">:
<user-card>
#shadow-root
<div>Name:
<slot name="username">
<span slot="username">John</span>
<span slot="username">Smith</span>
</slot>
</div>
<div>Birthday:
<slot name="birthday"></slot>
</div>
</user-card>
- Slot fallback content
If we put something inside a <slot>, it becomes the fallback, “default” content.
The browser shows it if there's no corresponding filler in light DOM.
For example, in this piece of shadow DOM, Anonymous renders if there's no slot="username" in light DOM.
<div>Name:
<slot name="username">Anonymous</slot>
</div>
- Default slot: first unnamed
The first <slot> in shadow DOM that doesn't have a name is a “default” slot.
It gets all nodes from the light DOM that aren't slotted elsewhere.
For example, let's add the default slot to our <user-card> that shows all unslotted information about the user:
<script>
customElements.define('user-card', class extends HTMLElement {
connectedCallback() {
this.attachShadow({mode: 'open'});
this.shadowRoot.innerHTML = `
<div>Name:
<slot name="username"></slot>
</div>
<div>Birthday:
<slot name="birthday"></slot>
</div>
<fieldset>
<legend>Other information</legend>
<slot></slot>
</fieldset>
`;
}
});
</script>
<user-card>
<div>I like to swim.</div>
<span slot="username">John Smith</span>
<span slot="birthday">01.01.2001</span>
<div>...And play volleyball too!</div>
</user-card>
All the unslotted light DOM content gets into the “Other information” fieldset.
Elements are appended to a slot one after another, so both unslotted pieces of information are in the default slot together.
The flattened DOM looks like this:
<user-card>
#shadow-root
<div>Name:
<slot name="username">
<span slot="username">John Smith</span>
</slot>
</div>
<div>Birthday:
<slot name="birthday">
<span slot="birthday">01.01.2001</span>
</slot>
</div>
<fieldset>
<legend>Other information</legend>
<slot>
<div>I like to swim.</div>
<div>...And play volleyball too!</div>
</slot>
</fieldset>
</user-card>
- Menu example
Now let's back to <custom-menu>, mentioned at the beginning of the chapter.
We can use slots to distribute elements.
Here's the markup for <custom-menu>:
<custom-menu>
<span slot="title">Candy menu</span>
<li slot="item">Lollipop</li>
<li slot="item">Fruit Toast</li>
<li slot="item">Cup Cake</li>
</custom-menu>
The shadow DOM template with proper slots:
<template id="tmpl">
<style> /* menu styles */ </style>
<div class="menu">
<slot name="title"></slot>
<ul><slot name="item"></slot></ul>
</div>
</template><span slot="title"> goes into <slot name="title">.
There are many <li slot="item"> in the template, but only one <slot name="item"> in the template.
So all such <li slot="item"> are appended to <slot name="item"> one after another, thus forming the list.
The flattened DOM becomes:
<custom-menu>
#shadow-root
<style> /* menu styles */ </style>
<div class="menu">
<slot name="title">
<span slot="title">Candy menu</span>
</slot>
<ul>
<slot name="item">
<li slot="item">Lollipop</li>
<li slot="item">Fruit Toast</li>
<li slot="item">Cup Cake</li>
</slot>
</ul>
</div>
</custom-menu>
One might notice that, in a valid DOM, <li> must be a direct child of <ul>.
But that's flattened DOM, it describes how the component is rendered, such thing happens naturally here.
We just need to add a click handler to open/close the list, and the <custom-menu> is ready:
customElements.define('custom-menu', class extends HTMLElement {
connectedCallback() {
this.attachShadow({mode: 'open'});
// tmpl is the shadow DOM template (above)
this.shadowRoot.append( tmpl.content.cloneNode(true) );
// we can't select light DOM nodes, so let's handle clicks on the slot
this.shadowRoot.querySelector('slot[name="title"]').onclick = () => {
// open/close the menu
this.shadowRoot.querySelector('.menu').classList.toggle('closed');
};
}
});
Here's the full demo:
Of course, we can add more functionality to it: events, methods and so on.
- Updating slots
What if the outer code wants to add/remove menu items dynamically?
The browser monitors slots and updates the rendering if slotted elements are added/removed.
Also, as light DOM nodes are not copied, but just rendered in slots, the changes inside them immediately become visible.
So we don't have to do anything to update rendering.
But if the component code wants to know about slot changes, then slotchange event is available.
For example, here the menu item is inserted dynamically after 1 second, and the title changes after 2 seconds:
<custom-menu id="menu">
<span slot="title">Candy menu</span>
</custom-menu>
<script>
customElements.define('custom-menu', class extends HTMLElement {
connectedCallback() {
this.attachShadow({mode: 'open'});
this.shadowRoot.innerHTML = `<div class="menu">
<slot name="title"></slot>
<ul><slot name="item"></slot></ul>
</div>`;
// shadowRoot can't have event handlers, so using the first child
this.shadowRoot.firstElementChild.addEventListener('slotchange',
e => alert("slotchange: " + e.target.name)
);
}
});
setTimeout(() => {
menu.insertAdjacentHTML('beforeEnd', '<li slot="item">Lollipop</li>')
}, 1000);
setTimeout(() => {
menu.querySelector('[slot="title"]').innerHTML = "New menu";
}, 2000);
</script>
The menu rendering updates each time without our intervention.
There are two slotchange events here:
At initialization:
slotchange: title triggers immediately, as the slot="title" from the light DOM gets into the corresponding slot.
After 1 second:
slotchange: item triggers, when a new <li slot="item"> is added.
Please note: there's no slotchange event after 2 seconds, when the content of slot="title" is modified.
That's because there's no slot change.
We modify the content inside the slotted element, that's another thing.
If we'd like to track internal modifications of light DOM from JavaScript, that's also possible using a more generic mechanism: MutationObserver.
- Slot API
Finally, let's mention the slot-related JavaScript methods.
As we've seen before, JavaScript looks at the “real” DOM, without flattening.
But, if the shadow tree has {mode: 'open'}, then we can figure out which elements assigned to a slot and, vise-versa, the slot by the element inside it:
node.assignedSlot – returns the <slot> element that the node is assigned to.
slot.assignedNodes({flatten: true/false}) – DOM nodes, assigned to the slot.
The flatten option is false by default.
If explicitly set to true, then it looks more deeply into the flattened DOM, returning nested slots in case of nested components and the fallback content if no node assigned.
slot.assignedElements({flatten: true/false}) – DOM elements, assigned to the slot (same as above, but only element nodes).
These methods are useful when we need not just show the slotted content, but also track it in JavaScript.
For example, if <custom-menu> component wants to know, what it shows, then it could track slotchange and get the items from slot.assignedElements:
<custom-menu id="menu">
<span slot="title">Candy menu</span>
<li slot="item">Lollipop</li>
<li slot="item">Fruit Toast</li>
</custom-menu>
<script>
customElements.define('custom-menu', class extends HTMLElement {
items = []
connectedCallback() {
this.attachShadow({mode: 'open'});
this.shadowRoot.innerHTML = `<div class="menu">
<slot name="title"></slot>
<ul><slot name="item"></slot></ul>
</div>`;
// triggers when slot content changes
this.shadowRoot.firstElementChild.addEventListener('slotchange', e => {
let slot = e.target;
if (slot.name == 'item') {
this.items = slot.assignedElements().map(elem => elem.textContent);
alert("Items: " + this.items);
}
});
}
});
// items update after 1 second
setTimeout(() => {
menu.insertAdjacentHTML('beforeEnd', '<li slot="item">Cup Cake</li>')
}, 1000);
</script>
- Summary
Usually, if an element has shadow DOM, then its light DOM is not displayed.
Slots allow to show elements from light DOM in specified places of shadow DOM.
There are two kinds of slots:
Named slots: <slot name="X">...</slot> – gets light children with slot="X".
Default slot: the first <slot> without a name (subsequent unnamed slots are ignored) – gets unslotted light children.
If there are many elements for the same slot – they are appended one after another.
The content of <slot> element is used as a fallback.
It's shown if there are no light children for the slot.
The process of rendering slotted elements inside their slots is called “composition”.
The result is called a “flattened DOM”.
Composition does not really move nodes, from JavaScript point of view the DOM is still same.
JavaScript can access slots using methods:
slot.assignedNodes/Elements() – returns nodes/elements inside the slot.
node.assignedSlot – the reverse property, returns slot by a node.
If we'd like to know what we're showing, we can track slot contents using:
slotchange event – triggers the first time a slot is filled, and on any add/remove/replace operation of the slotted element, but not its children.
The slot is event.target.
MutationObserver to go deeper into slot content, watch changes inside it.
Now, as we know how to show elements from light DOM in shadow DOM, let's see how to style them properly.
The basic rule is that shadow elements are styled inside, and light elements – outside, but there are notable exceptions.
We'll see the details in the next chapter.
Web components
Shadow DOM styling
Shadow DOM may include both <style> and <link rel="stylesheet" href="…"> tags.
In the latter case, stylesheets are HTTP-cached, so they are not redownloaded for multiple components that use same template.
As a general rule, local styles work only inside the shadow tree, and document styles work outside of it.
But there are few exceptions.
- :host
The :host selector allows to select the shadow host (the element containing the shadow tree).
For instance, we're making <custom-dialog> element that should be centered.
For that we need to style the <custom-dialog> element itself.
That's exactly what :host does:
<template id="tmpl">
<style>
/* the style will be applied from inside to the custom-dialog element */
:host {
position: fixed;
left: 50%;
top: 50%;
transform: translate(-50%, -50%);
display: inline-block;
border: 1px solid red;
padding: 10px;
}
</style>
<slot></slot>
</template>
<script>
customElements.define('custom-dialog', class extends HTMLElement {
connectedCallback() {
this.attachShadow({mode: 'open'}).append(tmpl.content.cloneNode(true));
}
});
</script>
<custom-dialog>
Hello!
</custom-dialog>
- Cascading
The shadow host (<custom-dialog> itself) resides in the light DOM, so it's affected by document CSS rules.
If there's a property styled both in :host locally, and in the document, then the document style takes precedence.
For instance, if in the document we had:
<style>
custom-dialog {
padding: 0;
}
</style>
…Then the <custom-dialog> would be without padding.
It's very convenient, as we can setup “default” component styles in its :host rule, and then easily override them in the document.
The exception is when a local property is labelled !important, for such properties, local styles take precedence.
- :host(selector)
Same as :host, but applied only if the shadow host matches the selector.
For example, we'd like to center the <custom-dialog> only if it has centered attribute:
<template id="tmpl">
<style>
:host([centered]) {
position: fixed;
left: 50%;
top: 50%;
transform: translate(-50%, -50%);
border-color: blue;
}
:host {
display: inline-block;
border: 1px solid red;
padding: 10px;
}
</style>
<slot></slot>
</template>
<script>
customElements.define('custom-dialog', class extends HTMLElement {
connectedCallback() {
this.attachShadow({mode: 'open'}).append(tmpl.content.cloneNode(true));
}
});
</script>
<custom-dialog centered>
Centered!
</custom-dialog>
<custom-dialog>
Not centered.
</custom-dialog>
Now the additional centering styles are only applied to the first dialog: <custom-dialog centered>.
- :host-context(selector)
Same as :host, but applied only if the shadow host or any of its ancestors in the outer document matches the selector.
E.g.
:host-context(.dark-theme) matches only if there's dark-theme class on <custom-dialog> on anywhere above it:
<body class="dark-theme">
<!--
:host-context(.dark-theme) applies to custom-dialogs inside .dark-theme
-->
<custom-dialog>...</custom-dialog>
</body>
To summarize, we can use :host-family of selectors to style the main element of the component, depending on the context.
These styles (unless !important) can be overridden by the document.
- Styling slotted content
Now let's consider the situation with slots.
Slotted elements come from light DOM, so they use document styles.
Local styles do not affect slotted content.
In the example below, slotted <span> is bold, as per document style, but does not take background from the local style:
<style>
span { font-weight: bold }
</style>
<user-card>
<div slot="username"><span>John Smith</span></div>
</user-card>
<script>
customElements.define('user-card', class extends HTMLElement {
connectedCallback() {
this.attachShadow({mode: 'open'});
this.shadowRoot.innerHTML = `
<style>
span { background: red; }
</style>
Name: <slot name="username"></slot>
`;
}
});
</script>
The result is bold, but not red.
If we'd like to style slotted elements in our component, there are two choices.
First, we can style the <slot> itself and rely on CSS inheritance:
<user-card>
<div slot="username"><span>John Smith</span></div>
</user-card>
<script>
customElements.define('user-card', class extends HTMLElement {
connectedCallback() {
this.attachShadow({mode: 'open'});
this.shadowRoot.innerHTML = `
<style>
slot[name="username"] { font-weight: bold; }
</style>
Name: <slot name="username"></slot>
`;
}
});
</script>
Here <p>John Smith</p> becomes bold, because CSS inheritance is in effect between the <slot> and its contents.
But in CSS itself not all properties are inherited.
Another option is to use ::slotted(selector) pseudo-class.
It matches elements based on two conditions:
That's a slotted element, that comes from the light DOM.
Slot name doesn't matter.
Just any slotted element, but only the element itself, not its children.
The element matches the selector.
In our example, ::slotted(div) selects exactly <div slot="username">, but not its children:
<user-card>
<div slot="username">
<div>John Smith</div>
</div>
</user-card>
<script>
customElements.define('user-card', class extends HTMLElement {
connectedCallback() {
this.attachShadow({mode: 'open'});
this.shadowRoot.innerHTML = `
<style>
::slotted(div) { border: 1px solid red; }
</style>
Name: <slot name="username"></slot>
`;
}
});
</script>
Please note, ::slotted selector can't descend any further into the slot.
These selectors are invalid:
::slotted(div span) {
/* our slotted <div> does not match this */
}
::slotted(div) p {
/* can't go inside light DOM */
}
Also, ::slotted can only be used in CSS.
We can't use it in querySelector.
- CSS hooks with custom properties
How do we style internal elements of a component from the main document?
Selectors like :host apply rules to <custom-dialog> element or <user-card>, but how to style shadow DOM elements inside them?
There's no selector that can directly affect shadow DOM styles from the document.
But just as we expose methods to interact with our component, we can expose CSS variables (custom CSS properties) to style it.
Custom CSS properties exist on all levels, both in light and shadow.
For example, in shadow DOM we can use --user-card-field-color CSS variable to style fields, and the outer document can set its value:
<style>
.field {
color: var(--user-card-field-color, black);
/* if --user-card-field-color is not defined, use black color */
}
</style>
<div class="field">Name: <slot name="username"></slot></div>
<div class="field">Birthday: <slot name="birthday"></slot></div>
Then, we can declare this property in the outer document for <user-card>:
user-card {
--user-card-field-color: green;
}
Custom CSS properties pierce through shadow DOM, they are visible everywhere, so the inner .field rule will make use of it.
Here's the full example:
<style>
user-card {
--user-card-field-color: green;
}
</style>
<template id="tmpl">
<style>
.field {
color: var(--user-card-field-color, black);
}
</style>
<div class="field">Name: <slot name="username"></slot></div>
<div class="field">Birthday: <slot name="birthday"></slot></div>
</template>
<script>
customElements.define('user-card', class extends HTMLElement {
connectedCallback() {
this.attachShadow({mode: 'open'});
this.shadowRoot.append(document.getElementById('tmpl').content.cloneNode(true));
}
});
</script>
<user-card>
<span slot="username">John Smith</span>
<span slot="birthday">01.01.2001</span>
</user-card>
- Summary
Shadow DOM can include styles, such as <style> or <link rel="stylesheet">.
Local styles can affect:
shadow tree,
shadow host with :host-family pseudoclasses,
slotted elements (coming from light DOM), ::slotted(selector) allows to select slotted elements themselves, but not their children.
Document styles can affect:
shadow host (as it lives in the outer document)
slotted elements and their contents (as that's also in the outer document)
When CSS properties conflict, normally document styles have precedence, unless the property is labelled as !important.
Then local styles have precedence.
CSS custom properties pierce through shadow DOM.
They are used as “hooks” to style the component:
The component uses a custom CSS property to style key elements, such as var(--component-name-title, <default value>).
Component author publishes these properties for developers, they are same important as other public component methods.
When a developer wants to style a title, they assign --component-name-title CSS property for the shadow host or above.
Profit!
Web components
Shadow DOM and events
The idea behind shadow tree is to encapsulate internal implementation details of a component.
Let's say, a click event happens inside a shadow DOM of <user-card> component.
But scripts in the main document have no idea about the shadow DOM internals, especially if the component comes from a 3rd-party library.
So, to keep the details encapsulated, the browser retargets the event.
Events that happen in shadow DOM have the host element as the target, when caught outside of the component.
Here's a simple example:
<user-card></user-card>
<script>
customElements.define('user-card', class extends HTMLElement {
connectedCallback() {
this.attachShadow({mode: 'open'});
this.shadowRoot.innerHTML = `<p>
<button>Click me</button>
</p>`;
this.shadowRoot.firstElementChild.onclick =
e => alert("Inner target: " + e.target.tagName);
}
});
document.onclick =
e => alert("Outer target: " + e.target.tagName);
</script>
If you click on the button, the messages are:
Inner target: BUTTON – internal event handler gets the correct target, the element inside shadow DOM.
Outer target: USER-CARD – document event handler gets shadow host as the target.
Event retargeting is a great thing to have, because the outer document doesn't have to know about component internals.
From its point of view, the event happened on <user-card>.
Retargeting does not occur if the event occurs on a slotted element, that physically lives in the light DOM.
For example, if a user clicks on <span slot="username"> in the example below, the event target is exactly this span element, for both shadow and light handlers:
<user-card id="userCard">
<span slot="username">John Smith</span>
</user-card>
<script>
customElements.define('user-card', class extends HTMLElement {
connectedCallback() {
this.attachShadow({mode: 'open'});
this.shadowRoot.innerHTML = `<div>
<b>Name:</b> <slot name="username"></slot>
</div>`;
this.shadowRoot.firstElementChild.onclick =
e => alert("Inner target: " + e.target.tagName);
}
});
userCard.onclick = e => alert(`Outer target: ${e.target.tagName}`);
</script>
If a click happens on "John Smith", for both inner and outer handlers the target is <span slot="username">.
That's an element from the light DOM, so no retargeting.
On the other hand, if the click occurs on an element originating from shadow DOM, e.g.
on <b>Name</b>, then, as it bubbles out of the shadow DOM, its event.target is reset to <user-card>.
- Bubbling, event.composedPath()
For purposes of event bubbling, flattened DOM is used.
So, if we have a slotted element, and an event occurs somewhere inside it, then it bubbles up to the <slot> and upwards.
The full path to the original event target, with all the shadow elements, can be obtained using event.composedPath().
As we can see from the name of the method, that path is taken after the composition.
In the example above, the flattened DOM is:
<user-card id="userCard">
#shadow-root
<div>
<b>Name:</b>
<slot name="username">
<span slot="username">John Smith</span>
</slot>
</div>
</user-card>
So, for a click on <span slot="username">, a call to event.composedPath() returns an array: [span, slot, div, shadow-root, user-card, body, html, document, window].
That's exactly the parent chain from the target element in the flattened DOM, after the composition.
Shadow tree details are only provided for {mode:'open'} trees
If the shadow tree was created with {mode: 'closed'}, then the composed path starts from the host: user-card and upwards.
That's the similar principle as for other methods that work with shadow DOM.
Internals of closed trees are completely hidden.
- event.composed
Most events successfully bubble through a shadow DOM boundary.
There are few events that do not.
This is governed by the composed event object property.
If it's true, then the event does cross the boundary.
Otherwise, it only can be caught from inside the shadow DOM.
If you take a look at UI Events specification, most events have composed: true:
blur, focus, focusin, focusout,
click, dblclick,
mousedown, mouseupmousemove, mouseout, mouseover,
wheel,
beforeinput, input, keydown, keyup.
All touch events and pointer events also have composed: true.
There are some events that have composed: false though:
mouseenter, mouseleave (they do not bubble at all),
load, unload, abort, error,
select,
slotchange.
These events can be caught only on elements within the same DOM, where the event target resides.
- Custom events
When we dispatch custom events, we need to set both bubbles and composed properties to true for it to bubble up and out of the component.
For example, here we create div#inner in the shadow DOM of div#outer and trigger two events on it.
Only the one with composed: true makes it outside to the document:
<div id="outer"></div>
<script>
outer.attachShadow({mode: 'open'});
let inner = document.createElement('div');
outer.shadowRoot.append(inner);
/*
div(id=outer)
#shadow-dom
div(id=inner)
*/
document.addEventListener('test', event => alert(event.detail));
inner.dispatchEvent(new CustomEvent('test', {
bubbles: true,
composed: true,
detail: "composed"
}));
inner.dispatchEvent(new CustomEvent('test', {
bubbles: true,
composed: false,
detail: "not composed"
}));
</script>
- Summary
Events only cross shadow DOM boundaries if their composed flag is set to true.
Built-in events mostly have composed: true, as described in the relevant specifications:
UI Events https://www.w3.org/TR/uievents.
Touch Events https://w3c.github.io/touch-events.
Pointer Events https://www.w3.org/TR/pointerevents.
…And so on.
Some built-in events that have composed: false:
mouseenter, mouseleave (also do not bubble),
load, unload, abort, error,
select,
slotchange.
These events can be caught only on elements within the same DOM.
If we dispatch a CustomEvent, then we should explicitly set composed: true.
Please note that in case of nested components, one shadow DOM may be nested into another.
In that case composed events bubble through all shadow DOM boundaries.
So, if an event is intended only for the immediate enclosing component, we can also dispatch it on the shadow host and set composed: false.
Then it's out of the component shadow DOM, but won't bubble up to higher-level DOM.
Regular expressions are patterns that provide a powerful way to search and replace in text.
In JavaScript, they are available via the RegExp object, as well as being integrated in methods of strings.
- Regular Expressions
A regular expression (also “regexp”, or just “reg”) consists of a pattern and optional flags.
There are two syntaxes that can be used to create a regular expression object.
The “long” syntax:
regexp = new RegExp("pattern", "flags");
And the “short” one, using slashes "/":
regexp = /pattern/; // no flags
regexp = /pattern/gmi; // with flags g,m and i (to be covered soon)
Slashes /.../ tell JavaScript that we are creating a regular expression.
They play the same role as quotes for strings.
In both cases regexp becomes an instance of the built-in RegExp class.
The main difference between these two syntaxes is that pattern using slashes /.../ does not allow for expressions to be inserted (like string template literals with ${...}).
They are fully static.
Slashes are used when we know the regular expression at the code writing time – and that's the most common situation.
While new RegExp is more often used when we need to create a regexp “on the fly” from a dynamically generated string.
For instance:
let tag = prompt("What tag do you want to find?", "h2");
let regexp = new RegExp(`<${tag}>`); // same as /<h2>/ if answered "h2" in the prompt above
- Flags
Regular expressions may have flags that affect the search.
There are only 6 of them in JavaScript:
i
With this flag the search is case-insensitive: no difference between A and a (see the example below).
g
With this flag the search looks for all matches, without it – only the first match is returned.
Enables “dotall” mode, that allows a dot . to match newline character \n (covered in the chapter Character classes).
u
Enables full Unicode support.
The flag enables correct processing of surrogate pairs.
More about that in the chapter Unicode: flag "u" and class \p{...}.
Colors
From here on the color scheme is:
regexp – red
string (where we search) – blue
result – green
- Searching: str.match
As mentioned previously, regular expressions are integrated with string methods.
The method str.match(regexp) finds all matches of regexp in the string str.
It has 3 working modes:
If the regular expression has flag g, it returns an array of all matches:
let str = "We will, we will rock you";
alert( str.match(/we/gi) ); // We,we (an array of 2 substrings that match)
Please note that both We and we are found, because flag i makes the regular expression case-insensitive.
If there's no such flag it returns only the first match in the form of an array, with the full match at index 0 and some additional details in properties:
let str = "We will, we will rock you";
let result = str.match(/we/i); // without flag g
alert( result[0] ); // We (1st match)
alert( result.length ); // 1
// Details:
alert( result.index ); // 0 (position of the match)
alert( result.input ); // We will, we will rock you (source string)
The array may have other indexes, besides 0 if a part of the regular expression is enclosed in parentheses.
We'll cover that in the chapter Capturing groups.
And, finally, if there are no matches, null is returned (doesn't matter if there's flag g or not).
This a very important nuance.
If there are no matches, we don't receive an empty array, but instead receive null.
Forgetting about that may lead to errors, e.g.:
let matches = "JavaScript".match(/HTML/); // = null
if (!matches.length) { // Error: Cannot read property 'length' of null
alert("Error in the line above");
}
If we'd like the result to always be an array, we can write it this way:
let matches = "JavaScript".match(/HTML/) || [];
if (!matches.length) {
alert("No matches"); // now it works
}
- Replacing: str.replace
The method str.replace(regexp, replacement) replaces matches found using regexp in string str with replacement (all matches if there's flag g, otherwise, only the first one).
For instance:
// no flag g
alert( "We will, we will".replace(/we/i, "I") ); // I will, we will
// with flag g
alert( "We will, we will".replace(/we/ig, "I") ); // I will, I will
The second argument is the replacement string.
We can use special character combinations in it to insert fragments of the match:
Symbols
Action in the replacement string
$&
inserts the whole match
$`
inserts a part of the string before the match
$'
inserts a part of the string after the match
$n
if n is a 1-2 digit number, then it inserts the contents of n-th parentheses, more about it in the chapter Capturing groups
$<name>
inserts the contents of the parentheses with the given name, more about it in the chapter Capturing groups
$$
inserts character $
An example with $&:
alert( "I love HTML".replace(/HTML/, "$& and JavaScript") ); // I love HTML and JavaScript
- Testing: regexp.test
The method regexp.test(str) looks for at least one match, if found, returns true, otherwise false.
let str = "I love JavaScript";
let regexp = /LOVE/i;
alert( regexp.test(str) ); // true
Later in this chapter we'll study more regular expressions, walk through more examples, and also meet other methods.
Full information about the methods is given in the article Methods of RegExp and String.
- Summary
A regular expression consists of a pattern and optional flags: g, i, m, u, s, y.
Without flags and special symbols (that we'll study later), the search by a regexp is the same as a substring search.
The method str.match(regexp) looks for matches: all of them if there's g flag, otherwise, only the first one.
The method str.replace(regexp, replacement) replaces matches found using regexp with replacement: all of them if there's g flag, otherwise only the first one.
The method regexp.test(str) returns true if there's at least one match, otherwise, it returns false.
Regular expressions
Character classes
Consider a practical task – we have a phone number like "+7(903)-123-45-67", and we need to turn it into pure numbers: 79031234567.
To do so, we can find and remove anything that's not a number.
Character classes can help with that.
A character class is a special notation that matches any symbol from a certain set.
For the start, let's explore the “digit” class.
It's written as \d and corresponds to “any single digit”.
For instance, let's find the first digit in the phone number:
let str = "+7(903)-123-45-67";
let regexp = /\d/;
alert( str.match(regexp) ); // 7
Without the flag g, the regular expression only looks for the first match, that is the first digit \d.
Let's add the g flag to find all digits:
let str = "+7(903)-123-45-67";
let regexp = /\d/g;
alert( str.match(regexp) ); // array of matches: 7,9,0,3,1,2,3,4,5,6,7
// let's make the digits-only phone number of them:
alert( str.match(regexp).join('') ); // 79031234567
That was a character class for digits.
There are other character classes as well.
Most used are:
\d (“d” is from “digit”)
A digit: a character from 0 to 9.
\s (“s” is from “space”)
A space symbol: includes spaces, tabs \t, newlines \n and few other rare characters, such as \v, \f and \r.
\w (“w” is from “word”)
A “wordly” character: either a letter of Latin alphabet or a digit or an underscore _.
Non-Latin letters (like cyrillic or hindi) do not belong to \w.
For instance, \d\s\w means a “digit” followed by a “space character” followed by a “wordly character”, such as 1 a.
A regexp may contain both regular symbols and character classes.
For instance, CSS\d matches a string CSS with a digit after it:
let str = "Is there CSS4?";
let regexp = /CSS\d/
alert( str.match(regexp) ); // CSS4
Also we can use many character classes:
alert( "I love HTML5!".match(/\s\w\w\w\w\d/) ); // ' HTML5'
The match (each regexp character class has the corresponding result character):
- Inverse classes
For every character class there exists an “inverse class”, denoted with the same letter, but uppercased.
The “inverse” means that it matches all other characters, for instance:
\D
Non-digit: any character except \d, for instance a letter.
\S
Non-space: any character except \s, for instance a letter.
\W
Non-wordly character: anything but \w, e.g a non-latin letter or a space.
In the beginning of the chapter we saw how to make a number-only phone number from a string like +7(903)-123-45-67: find all digits and join them.
let str = "+7(903)-123-45-67";
alert( str.match(/\d/g).join('') ); // 79031234567
An alternative, shorter way is to find non-digits \D and remove them from the string:
let str = "+7(903)-123-45-67";
alert( str.replace(/\D/g, "") ); // 79031234567
- A dot is “any character”
A dot . is a special character class that matches “any character except a newline”.
For instance:
alert( "Z".match(/./) ); // Z
Or in the middle of a regexp:
let regexp = /CS.4/;
alert( "CSS4".match(regexp) ); // CSS4
alert( "CS-4".match(regexp) ); // CS-4
alert( "CS 4".match(regexp) ); // CS 4 (space is also a character)
Please note that a dot means “any character”, but not the “absence of a character”.
There must be a character to match it:
alert( "CS4".match(/CS.4/) ); // null, no match because there's no character for the dot
Dot as literally any character with “s” flag
By default, a dot doesn't match the newline character \n.
For instance, the regexp A.B matches A, and then B with any character between them, except a newline \n:
alert( "A\nB".match(/A.B/) ); // null (no match)
There are many situations when we'd like a dot to mean literally “any character”, newline included.
That's what flag s does.
If a regexp has it, then a dot . matches literally any character:
alert( "A\nB".match(/A.B/s) ); // A\nB (match!)
Not supported in IE
The s flag is not supported in IE.
Luckily, there's an alternative, that works everywhere.
We can use a regexp like [\s\S] to match “any character” (this pattern will be covered in the article Sets and ranges [...]).
alert( "A\nB".match(/A[\s\S]B/) ); // A\nB (match!)
The pattern [\s\S] literally says: “a space character OR not a space character”.
In other words, “anything”.
We could use another pair of complementary classes, such as [\d\D], that doesn't matter.
Or even the [^] – as it means match any character except nothing.
Also we can use this trick if we want both kind of “dots” in the same pattern: the actual dot . behaving the regular way (“not including a newline”), and also a way to match “any character” with [\s\S] or alike.
Pay attention to spaces
Usually we pay little attention to spaces.
For us strings 1-5 and 1 - 5 are nearly identical.
But if a regexp doesn't take spaces into account, it may fail to work.
Let's try to find digits separated by a hyphen:
alert( "1 - 5".match(/\d-\d/) ); // null, no match!
Let's fix it adding spaces into the regexp \d - \d:
alert( "1 - 5".match(/\d - \d/) ); // 1 - 5, now it works
// or we can use \s class:
alert( "1 - 5".match(/\d\s-\s\d/) ); // 1 - 5, also worksA space is a character.
Equal in importance with any other character.
We can't add or remove spaces from a regular expression and expect it to work the same.
In other words, in a regular expression all characters matter, spaces too.
- Summary
There exist following character classes:
\d – digits.
\D – non-digits.
\s – space symbols, tabs, newlines.
\S – all but \s.
\w – Latin letters, digits, underscore '_'.
\W – all but \w.
. – any character if with the regexp 's' flag, otherwise any except a newline \n.
…But that's not all!
Unicode encoding, used by JavaScript for strings, provides many properties for characters, like: which language the letter belongs to (if it's a letter), is it a punctuation sign, etc.
We can search by these properties as well.
That requires flag u, covered in the next article.
Regular expressions
Unicode: flag "u" and class \p{...}
JavaScript uses Unicode encoding for strings.
Most characters are encoded with 2 bytes, but that allows to represent at most 65536 characters.
That range is not big enough to encode all possible characters, that's why some rare characters are encoded with 4 bytes, for instance like (mathematical X) or (a smile), some hieroglyphs and so on.
Here are the Unicode values of some characters:
Character
Unicode
Bytes count in Unicode
a
0x0061
2
≈
0x2248
2
0x1d4b3
4
0x1d4b4
4
0x1f604
4
So characters like a and ≈ occupy 2 bytes, while codes for , and are longer, they have 4 bytes.
Long time ago, when JavaScript language was created, Unicode encoding was simpler: there were no 4-byte characters.
So, some language features still handle them incorrectly.
For instance, length thinks that here are two characters:
alert(' '.length); // 2
alert(' '.length); // 2
…But we can see that there's only one, right? The point is that length treats 4 bytes as two 2-byte characters.
That's incorrect, because they must be considered only together (so-called “surrogate pair”, you can read about them in the article Strings).
By default, regular expressions also treat 4-byte “long characters” as a pair of 2-byte ones.
And, as it happens with strings, that may lead to odd results.
We'll see that a bit later, in the article Sets and ranges [...].
Unlike strings, regular expressions have flag u that fixes such problems.
With such flag, a regexp handles 4-byte characters correctly.
And also Unicode property search becomes available, we'll get to it next.
- Unicode properties \p{…}
Every character in Unicode has a lot of properties.
They describe what “category” the character belongs to, contain miscellaneous information about it.
For instance, if a character has Letter property, it means that the character belongs to an alphabet (of any language).
And Number property means that it's a digit: maybe Arabic or Chinese, and so on.
We can search for characters with a property, written as \p{…}.
To use \p{…}, a regular expression must have flag u.
For instance, \p{Letter} denotes a letter in any language.
We can also use \p{L}, as L is an alias of Letter.
There are shorter aliases for almost every property.
In the example below three kinds of letters will be found: English, Georgian and Korean.
let str = "A ";
alert( str.match(/\p{L}/gu) ); // A, ,
alert( str.match(/\p{L}/g) ); // null (no matches, \p doesn't work without the flag "u")
Here's the main character categories and their subcategories:
Letter L:
lowercase Ll
modifier Lm,
titlecase Lt,
uppercase Lu,
other Lo.
Number N:
decimal digit Nd,
letter number Nl,
other No.
Punctuation P:
connector Pc,
dash Pd,
initial quote Pi,
final quote Pf,
open Ps,
close Pe,
other Po.
Mark M (accents etc):
spacing combining Mc,
enclosing Me,
non-spacing Mn.
Symbol S:
currency Sc,
modifier Sk,
math Sm,
other So.
Separator Z:
line Zl,
paragraph Zp,
space Zs.
Other C:
control Cc,
format Cf,
not assigned Cn,
private use Co,
surrogate Cs.
So, e.g.
if we need letters in lower case, we can write \p{Ll}, punctuation signs: \p{P} and so on.
There are also other derived categories, like:
Alphabetic (Alpha), includes Letters L, plus letter numbers Nl (e.g.
Ⅻ – a character for the roman number 12), plus some other symbols Other_Alphabetic (OAlpha).
Hex_Digit includes hexadecimal digits: 0-9, a-f.
…And so on.
Unicode supports many different properties, their full list would require a lot of space, so here are the references:
List all properties by a character: https://unicode.org/cldr/utility/character.jsp.
List all characters by a property: https://unicode.org/cldr/utility/list-unicodeset.jsp.
Short aliases for properties: https://www.unicode.org/Public/UCD/latest/ucd/PropertyValueAliases.txt.
A full base of Unicode characters in text format, with all properties, is here: https://www.unicode.org/Public/UCD/latest/ucd/.
Example: hexadecimal numbers
For instance, let's look for hexadecimal numbers, written as xFF, where F is a hex digit (0…1 or A…F).
A hex digit can be denoted as \p{Hex_Digit}:
let regexp = /x\p{Hex_Digit}\p{Hex_Digit}/u;
alert("number: xAF".match(regexp)); // xAF
Example: Chinese hieroglyphs
Let's look for Chinese hieroglyphs.
There's a Unicode property Script (a writing system), that may have a value: Cyrillic, Greek, Arabic, Han (Chinese) and so on, here's the full list.
To look for characters in a given writing system we should use Script=<value>, e.g.
for Cyrillic letters: \p{sc=Cyrillic}, for Chinese hieroglyphs: \p{sc=Han}, and so on:
let regexp = /\p{sc=Han}/gu; // returns Chinese hieroglyphs
let str = `Hello Привет 你好 123_456`;
alert( str.match(regexp) ); // 你,好
Example: currency
Characters that denote a currency, such as $, €, ¥, have Unicode property \p{Currency_Symbol}, the short alias: \p{Sc}.
Let's use it to look for prices in the format “currency, followed by a digit”:
let regexp = /\p{Sc}\d/gu;
let str = `Prices: $2, €1, ¥9`;
alert( str.match(regexp) ); // $2,€1,¥9
Later, in the article Quantifiers +, *, ? and {n} we'll see how to look for numbers that contain many digits.
- Summary
Flag u enables the support of Unicode in regular expressions.
That means two things:
Characters of 4 bytes are handled correctly: as a single character, not two 2-byte characters.
Unicode properties can be used in the search: \p{…}.
With Unicode properties we can look for words in given languages, special characters (quotes, currencies) and so on.
Regular expressions
Anchors: string start ^ and end $
The caret ^ and dollar $ characters have special meaning in a regexp.
They are called “anchors”.
The caret ^ matches at the beginning of the text, and the dollar $ – at the end.
For instance, let's test if the text starts with Mary:
let str1 = "Mary had a little lamb";
alert( /^Mary/.test(str1) ); // true
The pattern ^Mary means: “string start and then Mary”.
Similar to this, we can test if the string ends with snow using snow$:
let str1 = "it's fleece was white as snow";
alert( /snow$/.test(str1) ); // true
In these particular cases we could use string methods startsWith/endsWith instead.
Regular expressions should be used for more complex tests.
- Testing for a full match
Both anchors together ^...$ are often used to test whether or not a string fully matches the pattern.
For instance, to check if the user input is in the right format.
Let's check whether or not a string is a time in 12:34 format.
That is: two digits, then a colon, and then another two digits.
In regular expressions language that's \d\d:\d\d:
let goodInput = "12:34";
let badInput = "12:345";
let regexp = /^\d\d:\d\d$/;
alert( regexp.test(goodInput) ); // true
alert( regexp.test(badInput) ); // false
Here the match for \d\d:\d\d must start exactly after the beginning of the text ^, and the end $ must immediately follow.
The whole string must be exactly in this format.
If there's any deviation or an extra character, the result is false.
Anchors behave differently if flag m is present.
We'll see that in the next article.
Anchors have “zero width”
Anchors ^ and $ are tests.
They have zero width.
In other words, they do not match a character, but rather force the regexp engine to check the condition (text start/end).
Which string matches the pattern ^$?
An empty string is the only match: it starts and immediately finishes.
The task once again demonstrates that anchors are not characters, but tests.
The string is empty "".
The engine first matches the ^ (input start), yes it's there, and then immediately the end $, it's here too.
So there's a match.
Regular expressions
Multiline mode of anchors ^ $, flag "m"
The multiline mode is enabled by the flag m.
It only affects the behavior of ^ and $.
In the multiline mode they match not only at the beginning and the end of the string, but also at start/end of line.
- Searching at line start ^
In the example below the text has multiple lines.
The pattern /^\d/gm takes a digit from the beginning of each line:
let str = `1st place: Winnie
2nd place: Piglet
3rd place: Eeyore`;
alert( str.match(/^\d/gm) ); // 1, 2, 3
Without the flag m only the first digit is matched:
let str = `1st place: Winnie
2nd place: Piglet
3rd place: Eeyore`;
alert( str.match(/^\d/g) ); // 1
That's because by default a caret ^ only matches at the beginning of the text, and in the multiline mode – at the start of any line.
Please note:
“Start of a line” formally means “immediately after a line break”: the test ^ in multiline mode matches at all positions preceeded by a newline character \n.
And at the text start.
- Searching at line end $
The dollar sign $ behaves similarly.
The regular expression \d$ finds the last digit in every line
let str = `Winnie: 1
Piglet: 2
Eeyore: 3`;
alert( str.match(/\d$/gm) ); // 1,2,3
Without the flag m, the dollar $ would only match the end of the whole text, so only the very last digit would be found.
Please note:
“End of a line” formally means “immediately before a line break”: the test $ in multiline mode matches at all positions succeeded by a newline character \n.
And at the text end.
- Searching for \n instead of ^ $
To find a newline, we can use not only anchors ^ and $, but also the newline character \n.
What's the difference? Let's see an example.
Here we search for \d\n instead of \d$:
let str = `Winnie: 1
Piglet: 2
Eeyore: 3`;
alert( str.match(/\d\n/gm) ); // 1\n,2\n
As we can see, there are 2 matches instead of 3.
That's because there's no newline after 3 (there's text end though, so it matches $).
Another difference: now every match includes a newline character \n.
Unlike the anchors ^$, that only test the condition (start/end of a line), \n is a character, so it becomes a part of the result.
So, a \n in the pattern is used when we need newline characters in the result, while anchors are used to find something at the beginning/end of a line.
Regular expressions
Word boundary: \b
A word boundary \b is a test, just like ^ and $.
When the regexp engine (program module that implements searching for regexps) comes across \b, it checks that the position in the string is a word boundary.
There are three different positions that qualify as word boundaries:
At string start, if the first string character is a word character \w.
Between two characters in the string, where one is a word character \w and the other is not.
At string end, if the last string character is a word character \w.
For instance, regexp \bJava\b will be found in Hello, Java!, where Java is a standalone word, but not in Hello, JavaScript!.
alert( "Hello, Java!".match(/\bJava\b/) ); // Java
alert( "Hello, JavaScript!".match(/\bJava\b/) ); // null
In the string Hello, Java! following positions correspond to \b:
So, it matches the pattern \bHello\b, because:
At the beginning of the string matches the first test \b.
Then matches the word Hello.
Then the test \b matches again, as we're between o and a comma.
So the pattern \bHello\b would match, but not \bHell\b (because there's no word boundary after l) and not Java!\b (because the exclamation sign is not a wordly character \w, so there's no word boundary after it).
alert( "Hello, Java!".match(/\bHello\b/) ); // Hello
alert( "Hello, Java!".match(/\bJava\b/) ); // Java
alert( "Hello, Java!".match(/\bHell\b/) ); // null (no match)
alert( "Hello, Java!".match(/\bJava!\b/) ); // null (no match)
We can use \b not only with words, but with digits as well.
For example, the pattern \b\d\d\b looks for standalone 2-digit numbers.
In other words, it looks for 2-digit numbers that are surrounded by characters different from \w, such as spaces or punctuation (or text start/end).
alert( "1 23 456 78".match(/\b\d\d\b/g) ); // 23,78
alert( "12,34,56".match(/\b\d\d\b/g) ); // 12,34,56
Word boundary \b doesn't work for non-latin alphabets
The word boundary test \b checks that there should be \w on the one side from the position and "not \w" – on the other side.
But \w means a latin letter a-z (or a digit or an underscore), so the test doesn't work for other characters, e.g.
cyrillic letters or hieroglyphs.
The time has a format: hours:minutes.
Both hours and minutes has two digits, like 09:00.
Make a regexp to find time in the string: Breakfast at 09:00 in the room 123:456.
P.S.
In this task there's no need to check time correctness yet, so 25:99 can also be a valid result.
P.P.S.
The regexp shouldn't match 123:456.
The answer: \b\d\d:\d\d\b.
alert( "Breakfast at 09:00 in the room 123:456.".match( /\b\d\d:\d\d\b/ ) ); // 09:00Regular expressions
Escaping, special characters
As we've seen, a backslash \ is used to denote character classes, e.g.
\d.
So it's a special character in regexps (just like in regular strings).
There are other special characters as well, that have special meaning in a regexp.
They are used to do more powerful searches.
Here's a full list of them: [ \ ^ $ .
| ? * + ( ).
Don't try to remember the list – soon we'll deal with each of them separately and you'll know them by heart automatically.
- Escaping
Let's say we want to find literally a dot.
Not “any character”, but just a dot.
To use a special character as a regular one, prepend it with a backslash: \..
That's also called “escaping a character”.
For example:
alert( "Chapter 5.1".match(/\d\.\d/) ); // 5.1 (match!)
alert( "Chapter 511".match(/\d\.\d/) ); // null (looking for a real dot \.)
Parentheses are also special characters, so if we want them, we should use \(.
The example below looks for a string "g()":
alert( "function g()".match(/g\(\)/) ); // "g()"
If we're looking for a backslash \, it's a special character in both regular strings and regexps, so we should double it.
alert( "1\\2".match(/\\/) ); // '\'
- A slash
A slash symbol '/' is not a special character, but in JavaScript it is used to open and close the regexp: /...pattern.../, so we should escape it too.
Here's what a search for a slash '/' looks like:
alert( "/".match(/\//) ); // '/'
On the other hand, if we're not using /.../, but create a regexp using new RegExp, then we don't need to escape it:
alert( "/".match(new RegExp("/")) ); // finds /
- new RegExp
If we are creating a regular expression with new RegExp, then we don't have to escape /, but need to do some other escaping.
For instance, consider this:
let regexp = new RegExp("\d\.\d");
alert( "Chapter 5.1".match(regexp) ); // null
The similar search in one of previous examples worked with /\d\.\d/, but new RegExp("\d\.\d") doesn't work, why?
The reason is that backslashes are “consumed” by a string.
As we may recall, regular strings have their own special characters, such as \n, and a backslash is used for escaping.
Here's how “\d.\d” is preceived:
alert("\d\.\d"); // d.d
String quotes “consume” backslashes and interpret them on their own, for instance:
\n – becomes a newline character,
\u1234 – becomes the Unicode character with such code,
…And when there's no special meaning: like \d or \z, then the backslash is simply removed.
So new RegExp gets a string without backslashes.
That's why the search doesn't work!
To fix it, we need to double backslashes, because string quotes turn \\ into \:
let regStr = "\\d\\.\\d";
alert(regStr); // \d\.\d (correct now)
let regexp = new RegExp(regStr);
alert( "Chapter 5.1".match(regexp) ); // 5.1
- Summary
To search for special characters [ \ ^ $ .
| ? * + ( ) literally, we need to prepend them with a backslash \ (“escape them”).
We also need to escape / if we're inside /.../ (but not inside new RegExp).
When passing a string to new RegExp, we need to double backslashes \\, cause string quotes consume one of them.
Regular expressions
Sets and ranges [...]
Several characters or character classes inside square brackets […] mean to “search for any character among given”.
- Sets
For instance, [eao] means any of the 3 characters: 'a', 'e', or 'o'.
That's called a set.
Sets can be used in a regexp along with regular characters:
// find [t or m], and then "op"
alert( "Mop top".match(/[tm]op/gi) ); // "Mop", "top"
Please note that although there are multiple characters in the set, they correspond to exactly one character in the match.
So the example below gives no matches:
// find "V", then [o or i], then "la"
alert( "Voila".match(/V[oi]la/) ); // null, no matches
The pattern searches for:
V,
then one of the letters [oi],
then la.
So there would be a match for Vola or Vila.
- Ranges
Square brackets may also contain character ranges.
For instance, [a-z] is a character in range from a to z, and [0-5] is a digit from 0 to 5.
In the example below we're searching for "x" followed by two digits or letters from A to F:
alert( "Exception 0xAF".match(/x[0-9A-F][0-9A-F]/g) ); // xAF
Here [0-9A-F] has two ranges: it searches for a character that is either a digit from 0 to 9 or a letter from A to F.
If we'd like to look for lowercase letters as well, we can add the range a-f: [0-9A-Fa-f].
Or add the flag i.
We can also use character classes inside […].
For instance, if we'd like to look for a wordly character \w or a hyphen -, then the set is [\w-].
Combining multiple classes is also possible, e.g.
[\s\d] means “a space character or a digit”.
Character classes are shorthands for certain character sets
For instance:
\d – is the same as [0-9],
\w – is the same as [a-zA-Z0-9_],
\s – is the same as [\t\n\v\f\r ], plus few other rare Unicode space characters.
Example: multi-language \w
As the character class \w is a shorthand for [a-zA-Z0-9_], it can't find Chinese hieroglyphs, Cyrillic letters, etc.
We can write a more universal pattern, that looks for wordly characters in any language.
That's easy with Unicode properties: [\p{Alpha}\p{M}\p{Nd}\p{Pc}\p{Join_C}].
Let's decipher it.
Similar to \w, we're making a set of our own that includes characters with following Unicode properties:
Alphabetic (Alpha) – for letters,
Mark (M) – for accents,
Decimal_Number (Nd) – for digits,
Connector_Punctuation (Pc) – for the underscore '_' and similar characters,
Join_Control (Join_C) – two special codes 200c and 200d, used in ligatures, e.g.
in Arabic.
An example of use:
let regexp = /[\p{Alpha}\p{M}\p{Nd}\p{Pc}\p{Join_C}]/gu;
let str = `Hi 你好 12`;
// finds all letters and digits:
alert( str.match(regexp) ); // H,i,你,好,1,2
Of course, we can edit this pattern: add Unicode properties or remove them.
Unicode properties are covered in more details in the article Unicode: flag "u" and class \p{...}.
Unicode properties aren't supported in IE
Unicode properties p{…} are not implemented in IE.
If we really need them, we can use library XRegExp.
Or just use ranges of characters in a language that interests us, e.g.
[а-я] for Cyrillic letters.
- Excluding ranges
Besides normal ranges, there are “excluding” ranges that look like [^…].
They are denoted by a caret character ^ at the start and match any character except the given ones.
For instance:
[^aeyo] – any character except 'a', 'e', 'y' or 'o'.
[^0-9] – any character except a digit, the same as \D.
[^\s] – any non-space character, same as \S.
The example below looks for any characters except letters, digits and spaces:
alert( "alice15@gmail.com".match(/[^\d\sA-Z]/gi) ); // @ and .
- Escaping in […]
Usually when we want to find exactly a special character, we need to escape it like \..
And if we need a backslash, then we use \\, and so on.
In square brackets we can use the vast majority of special characters without escaping:
Symbols .
+ ( ) never need escaping.
A hyphen - is not escaped in the beginning or the end (where it does not define a range).
A caret ^ is only escaped in the beginning (where it means exclusion).
The closing square bracket ] is always escaped (if we need to look for that symbol).
In other words, all special characters are allowed without escaping, except when they mean something for square brackets.
A dot . inside square brackets means just a dot.
The pattern [.,] would look for one of characters: either a dot or a comma.
In the example below the regexp [-().^+] looks for one of the characters -().^+:
// No need to escape
let regexp = /[-().^+]/g;
alert( "1 + 2 - 3".match(regexp) ); // Matches +, -
…But if you decide to escape them “just in case”, then there would be no harm:
// Escaped everything
let regexp = /[\-\(\)\.\^\+]/g;
alert( "1 + 2 - 3".match(regexp) ); // also works: +, -
- Ranges and flag “u”
If there are surrogate pairs in the set, flag u is required for them to work correctly.
For instance, let's look for [ ] in the string :
alert( ' '.match(/[ ]/) ); // shows a strange character, like [?]
// (the search was performed incorrectly, half-character returned)
The result is incorrect, because by default regular expressions “don't know” about surrogate pairs.
The regular expression engine thinks that [ ] – are not two, but four characters:
left half of (1),
right half of (2),
left half of (3),
right half of (4).
We can see their codes like this:
for(let i=0; i<' '.length; i++) {
alert(' '.charCodeAt(i)); // 55349, 56499, 55349, 56500
};
So, the example above finds and shows the left half of .
If we add flag u, then the behavior will be correct:
alert( ' '.match(/[ ]/u) ); //
The similar situation occurs when looking for a range, such as [ - ].
If we forget to add flag u, there will be an error:
' '.match(/[ - ]/); // Error: Invalid regular expression
The reason is that without flag u surrogate pairs are perceived as two characters, so [ - ] is interpreted as [<55349><56499>-<55349><56500>] (every surrogate pair is replaced with its codes).
Now it's easy to see that the range 56499-55349 is invalid: its starting code 56499 is greater than the end 55349.
That's the formal reason for the error.
With the flag u the pattern works correctly:
// look for characters from to
alert( ' '.match(/[ - ]/u) ); //
We have a regexp /Java[^script]/.
Does it match anything in the string Java? In the string JavaScript?
Answers: no, yes.
In the script Java it doesn't match anything, because [^script] means “any character except given ones”.
So the regexp looks for "Java" followed by one such symbol, but there's a string end, no symbols after it.
alert( "Java".match(/Java[^script]/) ); // null
Yes, because the [^script] part matches the character "S".
It's not one of script.
As the regexp is case-sensitive (no i flag), it treats "S" as a different character from "s".
alert( "JavaScript".match(/Java[^script]/) ); // "JavaS"
Find the time as hh:mm or hh-mm
The time can be in the format hours:minutes or hours-minutes.
Both hours and minutes have 2 digits: 09:00 or 21-30.
Write a regexp to find time:
let regexp = /your regexp/g;
alert( "Breakfast at 09:00.
Dinner at 21-30".match(regexp) ); // 09:00, 21-30
P.S.
In this task we assume that the time is always correct, there's no need to filter out bad strings like “45:67”.
Later we'll deal with that too.
Answer: \d\d[-:]\d\d.
let regexp = /\d\d[-:]\d\d/g;
alert( "Breakfast at 09:00.
Dinner at 21-30".match(regexp) ); // 09:00, 21-30
Please note that the dash '-' has a special meaning in square brackets, but only between other characters, not when it's in the beginning or at the end, so we don't need to escape it.
Regular expressions
Quantifiers +, *, ? and {n}
Let's say we have a string like +7(903)-123-45-67 and want to find all numbers in it.
But unlike before, we are interested not in single digits, but full numbers: 7, 903, 123, 45, 67.
A number is a sequence of 1 or more digits \d.
To mark how many we need, we can append a quantifier.
- Quantity {n}
The simplest quantifier is a number in curly braces: {n}.
A quantifier is appended to a character (or a character class, or a [...] set etc) and specifies how many we need.
It has a few advanced forms, let's see examples:
The exact count: {5}
\d{5} denotes exactly 5 digits, the same as \d\d\d\d\d.
The example below looks for a 5-digit number:
alert( "I'm 12345 years old".match(/\d{5}/) ); // "12345"
We can add \b to exclude longer numbers: \b\d{5}\b.
The range: {3,5}, match 3-5 times
To find numbers from 3 to 5 digits we can put the limits into curly braces: \d{3,5}alert( "I'm not 12, but 1234 years old".match(/\d{3,5}/) ); // "1234"
We can omit the upper limit.
Then a regexp \d{3,} looks for sequences of digits of length 3 or more:
alert( "I'm not 12, but 345678 years old".match(/\d{3,}/) ); // "345678"
Let's return to the string +7(903)-123-45-67.
A number is a sequence of one or more digits in a row.
So the regexp is \d{1,}:
let str = "+7(903)-123-45-67";
let numbers = str.match(/\d{1,}/g);
alert(numbers); // 7,903,123,45,67
- Shorthands
There are shorthands for most used quantifiers:
+
Means “one or more”, the same as {1,}.
For instance, \d+ looks for numbers:
let str = "+7(903)-123-45-67";
alert( str.match(/\d+/g) ); // 7,903,123,45,67
?
Means “zero or one”, the same as {0,1}.
In other words, it makes the symbol optional.
For instance, the pattern ou?r looks for o followed by zero or one u, and then r.
So, colou?r finds both color and colour:
let str = "Should I write color or colour?";
alert( str.match(/colou?r/g) ); // color, colour
*
Means “zero or more”, the same as {0,}.
That is, the character may repeat any times or be absent.
For example, \d0* looks for a digit followed by any number of zeroes (may be many or none):
alert( "100 10 1".match(/\d0*/g) ); // 100, 10, 1
Compare it with + (one or more):
alert( "100 10 1".match(/\d0+/g) ); // 100, 10
// 1 not matched, as 0+ requires at least one zero
- More examples
Quantifiers are used very often.
They serve as the main “building block” of complex regular expressions, so let's see more examples.
Regexp for decimal fractions (a number with a floating point): \d+\.\d+
In action:
alert( "0 1 12.345 7890".match(/\d+\.\d+/g) ); // 12.345Regexp for an “opening HTML-tag without attributes”, such as <span> or <p>.
The simplest one: /<[a-z]+>/ialert( "<body> ...
</body>".match(/<[a-z]+>/gi) ); // <body>
The regexp looks for character '<' followed by one or more Latin letters, and then '>'.
Improved: /<[a-z][a-z0-9]*>/i
According to the standard, HTML tag name may have a digit at any position except the first one, like <h1>.
alert( "<h1>Hi!</h1>".match(/<[a-z][a-z0-9]*>/gi) ); // <h1>Regexp “opening or closing HTML-tag without attributes”: /<\/?[a-z][a-z0-9]*>/i
We added an optional slash /? near the beginning of the pattern.
Had to escape it with a backslash, otherwise JavaScript would think it is the pattern end.
alert( "<h1>Hi!</h1>".match(/<\/?[a-z][a-z0-9]*>/gi) ); // <h1>, </h1>
To make a regexp more precise, we often need make it more complex
We can see one common rule in these examples: the more precise is the regular expression – the longer and more complex it is.
For instance, for HTML tags we could use a simpler regexp: <\w+>.
But as HTML has stricter restrictions for a tag name, <[a-z][a-z0-9]*> is more reliable.
Can we use <\w+> or we need <[a-z][a-z0-9]*>?
In real life both variants are acceptable.
Depends on how tolerant we can be to “extra” matches and whether it's difficult or not to remove them from the result by other means.
importance: 5
Create a regexp to find ellipsis: 3 (or more?) dots in a row.
Check it:
let regexp = /your regexp/g;
alert( "Hello!...
How goes?.....".match(regexp) ); // ..., .....
Solution:
let regexp = /\.{3,}/g;
alert( "Hello!...
How goes?.....".match(regexp) ); // ..., .....
Please note that the dot is a special character, so we have to escape it and insert as \..
Regexp for HTML colors
Create a regexp to search HTML-colors written as #ABCDEF: first # and then 6 hexadecimal characters.
An example of use:
let regexp = /...your regexp.../
let str = "color:#121212; background-color:#AA00ef bad-colors:f#fddee #fd2 #12345678";
alert( str.match(regexp) ) // #121212,#AA00ef
P.S.
In this task we do not need other color formats like #123 or rgb(1,2,3) etc.
We need to look for # followed by 6 hexadecimal characters.
A hexadecimal character can be described as [0-9a-fA-F].
Or if we use the i flag, then just [0-9a-f].
Then we can look for 6 of them using the quantifier {6}.
As a result, we have the regexp: /#[a-f0-9]{6}/gi.
let regexp = /#[a-f0-9]{6}/gi;
let str = "color:#121212; background-color:#AA00ef bad-colors:f#fddee #fd2"
alert( str.match(regexp) ); // #121212,#AA00ef
The problem is that it finds the color in longer sequences:
alert( "#12345678".match( /#[a-f0-9]{6}/gi ) ) // #123456
To fix that, we can add \b to the end:
// color
alert( "#123456".match( /#[a-f0-9]{6}\b/gi ) ); // #123456
// not a color
alert( "#12345678".match( /#[a-f0-9]{6}\b/gi ) ); // nullRegular expressions
Greedy and lazy quantifiers
Quantifiers are very simple from the first sight, but in fact they can be tricky.
We should understand how the search works very well if we plan to look for something more complex than /\d+/.
Let's take the following task as an example.
We have a text and need to replace all quotes "..." with guillemet marks: ... .
They are preferred for typography in many countries.
For instance: "Hello, world" should become Hello, world .
There exist other quotes, such as Witam, wiat!” (Polish) or 「你好,世界」 (Chinese), but for our task let's choose ... .
The first thing to do is to locate quoted strings, and then we can replace them.
A regular expression like /".+"/g (a quote, then something, then the other quote) may seem like a good fit, but it isn't!
Let's try it:
let regexp = /".+"/g;
let str = 'a "witch" and her "broom" is one';
alert( str.match(regexp) ); // "witch" and her "broom"
…We can see that it works not as intended!
Instead of finding two matches "witch" and "broom", it finds one: "witch" and her "broom".
That can be described as “greediness is the cause of all evil”.
- Greedy search
To find a match, the regular expression engine uses the following algorithm:
For every position in the string
Try to match the pattern at that position.
If there's no match, go to the next position.
These common words do not make it obvious why the regexp fails, so let's elaborate how the search works for the pattern ".+".
The first pattern character is a quote ".
The regular expression engine tries to find it at the zero position of the source string a "witch" and her "broom" is one, but there's a there, so there's immediately no match.
Then it advances: goes to the next positions in the source string and tries to find the first character of the pattern there, fails again, and finally finds the quote at the 3rd position:
The quote is detected, and then the engine tries to find a match for the rest of the pattern.
It tries to see if the rest of the subject string conforms to .+".
In our case the next pattern character is . (a dot).
It denotes “any character except a newline”, so the next string letter 'w' fits:
Then the dot repeats because of the quantifier .+.
The regular expression engine adds to the match one character after another.
…Until when? All characters match the dot, so it only stops when it reaches the end of the string:
Now the engine finished repeating .+ and tries to find the next character of the pattern.
It's the quote ".
But there's a problem: the string has finished, there are no more characters!
The regular expression engine understands that it took too many .+ and starts to backtrack.
In other words, it shortens the match for the quantifier by one character:
Now it assumes that .+ ends one character before the string end and tries to match the rest of the pattern from that position.
If there were a quote there, then the search would end, but the last character is 'e', so there's no match.
…So the engine decreases the number of repetitions of .+ by one more character:
The quote '"' does not match 'n'.
The engine keep backtracking: it decreases the count of repetition for '.' until the rest of the pattern (in our case '"') matches:
The match is complete.
So the first match is "witch" and her "broom".
If the regular expression has flag g, then the search will continue from where the first match ends.
There are no more quotes in the rest of the string is one, so no more results.
That's probably not what we expected, but that's how it works.
In the greedy mode (by default) a quantified character is repeated as many times as possible.
The regexp engine adds to the match as many characters as it can for .+, and then shortens that one by one, if the rest of the pattern doesn't match.
For our task we want another thing.
That's where a lazy mode can help.
- Lazy mode
The lazy mode of quantifiers is an opposite to the greedy mode.
It means: “repeat minimal number of times”.
We can enable it by putting a question mark '?' after the quantifier, so that it becomes *? or +? or even ?? for '?'.
To make things clear: usually a question mark ? is a quantifier by itself (zero or one), but if added after another quantifier (or even itself) it gets another meaning – it switches the matching mode from greedy to lazy.
The regexp /".+?"/g works as intended: it finds "witch" and "broom":
let regexp = /".+?"/g;
let str = 'a "witch" and her "broom" is one';
alert( str.match(regexp) ); // "witch", "broom"
To clearly understand the change, let's trace the search step by step.
The first step is the same: it finds the pattern start '"' at the 3rd position:
The next step is also similar: the engine finds a match for the dot '.':
And now the search goes differently.
Because we have a lazy mode for +?, the engine doesn't try to match a dot one more time, but stops and tries to match the rest of the pattern '"' right now:
If there were a quote there, then the search would end, but there's 'i', so there's no match.
Then the regular expression engine increases the number of repetitions for the dot and tries one more time:
Failure again.
Then the number of repetitions is increased again and again…
…Till the match for the rest of the pattern is found:
The next search starts from the end of the current match and yield one more result:
In this example we saw how the lazy mode works for +?.
Quantifiers *? and ?? work the similar way – the regexp engine increases the number of repetitions only if the rest of the pattern can't match on the given position.
Laziness is only enabled for the quantifier with ?.
Other quantifiers remain greedy.
For instance:
alert( "123 456".match(/\d+ \d+?/) ); // 123 4
The pattern \d+ tries to match as many digits as it can (greedy mode), so it finds 123 and stops, because the next character is a space ' '.
Then there's a space in the pattern, it matches.
Then there's \d+?.
The quantifier is in lazy mode, so it finds one digit 4 and tries to check if the rest of the pattern matches from there.
…But there's nothing in the pattern after \d+?.
The lazy mode doesn't repeat anything without a need.
The pattern finished, so we're done.
We have a match 123 4.
Optimizations
Modern regular expression engines can optimize internal algorithms to work faster.
So they may work a bit differently from the described algorithm.
But to understand how regular expressions work and to build regular expressions, we don't need to know about that.
They are only used internally to optimize things.
Complex regular expressions are hard to optimize, so the search may work exactly as described as well.
- Alternative approach
With regexps, there's often more than one way to do the same thing.
In our case we can find quoted strings without lazy mode using the regexp "[^"]+":
let regexp = /"[^"]+"/g;
let str = 'a "witch" and her "broom" is one';
alert( str.match(regexp) ); // "witch", "broom"
The regexp "[^"]+" gives correct results, because it looks for a quote '"' followed by one or more non-quotes [^"], and then the closing quote.
When the regexp engine looks for [^"]+ it stops the repetitions when it meets the closing quote, and we're done.
Please note, that this logic does not replace lazy quantifiers!
It is just different.
There are times when we need one or another.
Let's see an example where lazy quantifiers fail and this variant works right.
For instance, we want to find links of the form <a href="..." class="doc">, with any href.
Which regular expression to use?
The first idea might be: /<a href=".*" class="doc">/g.
Let's check it:
let str = '...<a href="link" class="doc">...';
let regexp = /<a href=".*" class="doc">/g;
// Works!
alert( str.match(regexp) ); // <a href="link" class="doc">
It worked.
But let's see what happens if there are many links in the text?
let str = '...<a href="link1" class="doc">...
<a href="link2" class="doc">...';
let regexp = /<a href=".*" class="doc">/g;
// Whoops! Two links in one match!
alert( str.match(regexp) ); // <a href="link1" class="doc">...
<a href="link2" class="doc">
Now the result is wrong for the same reason as our “witches” example.
The quantifier .* took too many characters.
The match looks like this:
<a href="....................................." class="doc">
<a href="link1" class="doc">...
<a href="link2" class="doc">
Let's modify the pattern by making the quantifier .*? lazy:
let str = '...<a href="link1" class="doc">...
<a href="link2" class="doc">...';
let regexp = /<a href=".*?" class="doc">/g;
// Works!
alert( str.match(regexp) ); // <a href="link1" class="doc">, <a href="link2" class="doc">
Now it seems to work, there are two matches:
<a href="....." class="doc"> <a href="....." class="doc">
<a href="link1" class="doc">...
<a href="link2" class="doc">
…But let's test it on one more text input:
let str = '...<a href="link1" class="wrong">...
<p style="" class="doc">...';
let regexp = /<a href=".*?" class="doc">/g;
// Wrong match!
alert( str.match(regexp) ); // <a href="link1" class="wrong">...
<p style="" class="doc">
Now it fails.
The match includes not just a link, but also a lot of text after it, including <p...>.
Why?
That's what's going on:
First the regexp finds a link start <a href=".
Then it looks for .*?: takes one character (lazily!), check if there's a match for " class="doc"> (none).
Then takes another character into .*?, and so on… until it finally reaches " class="doc">.
But the problem is: that's already beyond the link <a...>, in another tag <p>.
Not what we want.
Here's the picture of the match aligned with the text:
<a href="..................................." class="doc">
<a href="link1" class="wrong">...
<p style="" class="doc">
So, we need the pattern to look for <a href="...something..." class="doc">, but both greedy and lazy variants have problems.
The correct variant can be: href="[^"]*".
It will take all characters inside the href attribute till the nearest quote, just what we need.
A working example:
let str1 = '...<a href="link1" class="wrong">...
<p style="" class="doc">...';
let str2 = '...<a href="link1" class="doc">...
<a href="link2" class="doc">...';
let regexp = /<a href="[^"]*" class="doc">/g;
// Works!
alert( str1.match(regexp) ); // null, no matches, that's correct
alert( str2.match(regexp) ); // <a href="link1" class="doc">, <a href="link2" class="doc">
- Summary
Quantifiers have two modes of work:
Greedy
By default the regular expression engine tries to repeat the quantified character as many times as possible.
For instance, \d+ consumes all possible digits.
When it becomes impossible to consume more (no more digits or string end), then it continues to match the rest of the pattern.
If there's no match then it decreases the number of repetitions (backtracks) and tries again.
Lazy
Enabled by the question mark ? after the quantifier.
The regexp engine tries to match the rest of the pattern before each repetition of the quantified character.
As we've seen, the lazy mode is not a “panacea” from the greedy search.
An alternative is a “fine-tuned” greedy search, with exclusions, as in the pattern "[^"]+".
What's the match here?
alert( "123 456".match(/\d+? \d+?/g) ); // ?
The result is: 123 4.
First the lazy \d+? tries to take as little digits as it can, but it has to reach the space, so it takes 123.
Then the second \d+? takes only one digit, because that's enough.
Find HTML comments
Find all HTML comments in the text:
let regexp = /your regexp/g;
let str = `...
<!-- My -- comment
test --> ..
<!----> ..
`;
alert( str.match(regexp) ); // '<!-- My -- comment \n test -->', '<!---->'
We need to find the beginning of the comment <!--, then everything till the end of -->.
An acceptable variant is <!--.*?--> – the lazy quantifier makes the dot stop right before -->.
We also need to add flag s for the dot to include newlines.
Otherwise multiline comments won't be found:
let regexp = /<!--.*?-->/gs;
let str = `...
<!-- My -- comment
test --> ..
<!----> ..
`;
alert( str.match(regexp) ); // '<!-- My -- comment \n test -->', '<!---->'
Find HTML tags
Create a regular expression to find all (opening and closing) HTML tags with their attributes.
An example of use:
let regexp = /your regexp/g;
let str = '<> <a href="/"> <input type="radio" checked> <b>';
alert( str.match(regexp) ); // '<a href="/">', '<input type="radio" checked>', '<b>'
Here we assume that tag attributes may not contain < and > (inside quotes too), that simplifies things a bit.
The solution is <[^<>]+>.
let regexp = /<[^<>]+>/g;
let str = '<> <a href="/"> <input type="radio" checked> <b>';
alert( str.match(regexp) ); // '<a href="/">', '<input type="radio" checked>', '<b>'Regular expressions
Capturing groups
A part of a pattern can be enclosed in parentheses (...).
This is called a “capturing group”.
That has two effects:
It allows to get a part of the match as a separate item in the result array.
If we put a quantifier after the parentheses, it applies to the parentheses as a whole.
- Examples
Let's see how parentheses work in examples.
Example: gogogo
Without parentheses, the pattern go+ means g character, followed by o repeated one or more times.
For instance, goooo or gooooooooo.
Parentheses group characters together, so (go)+ means go, gogo, gogogo and so on.
alert( 'Gogogo now!'.match(/(go)+/ig) ); // "Gogogo"
Example: domain
Let's make something more complex – a regular expression to search for a website domain.
For example:
mail.com
users.mail.com
smith.users.mail.com
As we can see, a domain consists of repeated words, a dot after each one except the last one.
In regular expressions that's (\w+\.)+\w+:
let regexp = /(\w+\.)+\w+/g;
alert( "site.com my.site.com".match(regexp) ); // site.com,my.site.com
The search works, but the pattern can't match a domain with a hyphen, e.g.
my-site.com, because the hyphen does not belong to class \w.
We can fix it by replacing \w with [\w-] in every word except the last one: ([\w-]+\.)+\w+.
Example: email
The previous example can be extended.
We can create a regular expression for emails based on it.
The email format is: name@domain.
Any word can be the name, hyphens and dots are allowed.
In regular expressions that's [-.\w]+.
The pattern:
let regexp = /[-.\w]+@([\w-]+\.)+[\w-]+/g;
alert("my@mail.com @ his@site.com.uk".match(regexp)); // my@mail.com, his@site.com.uk
That regexp is not perfect, but mostly works and helps to fix accidental mistypes.
The only truly reliable check for an email can only be done by sending a letter.
- Parentheses contents in the match
Parentheses are numbered from left to right.
The search engine memorizes the content matched by each of them and allows to get it in the result.
The method str.match(regexp), if regexp has no flag g, looks for the first match and returns it as an array:
At index 0: the full match.
At index 1: the contents of the first parentheses.
At index 2: the contents of the second parentheses.
…and so on…
For instance, we'd like to find HTML tags <.*?>, and process them.
It would be convenient to have tag content (what's inside the angles), in a separate variable.
Let's wrap the inner content into parentheses, like this: <(.*?)>.
Now we'll get both the tag as a whole <h1> and its contents h1 in the resulting array:
let str = '<h1>Hello, world!</h1>';
let tag = str.match(/<(.*?)>/);
alert( tag[0] ); // <h1>
alert( tag[1] ); // h1
Nested groups
Parentheses can be nested.
In this case the numbering also goes from left to right.
For instance, when searching a tag in <span class="my"> we may be interested in:
The tag content as a whole: span class="my".
The tag name: span.
The tag attributes: class="my".
Let's add parentheses for them: <(([a-z]+)\s*([^>]*))>.
Here's how they are numbered (left to right, by the opening paren):
In action:
let str = '<span class="my">';
let regexp = /<(([a-z]+)\s*([^>]*))>/;
let result = str.match(regexp);
alert(result[0]); // <span class="my">
alert(result[1]); // span class="my"
alert(result[2]); // span
alert(result[3]); // class="my"
The zero index of result always holds the full match.
Then groups, numbered from left to right by an opening paren.
The first group is returned as result[1].
Here it encloses the whole tag content.
Then in result[2] goes the group from the second opening paren ([a-z]+) – tag name, then in result[3] the tag: ([^>]*).
The contents of every group in the string:
Optional groups
Even if a group is optional and doesn't exist in the match (e.g.
has the quantifier (...)?), the corresponding result array item is present and equals undefined.
For instance, let's consider the regexp a(z)?(c)?.
It looks for "a" optionally followed by "z" optionally followed by "c".
If we run it on the string with a single letter a, then the result is:
let match = 'a'.match(/a(z)?(c)?/);
alert( match.length ); // 3
alert( match[0] ); // a (whole match)
alert( match[1] ); // undefined
alert( match[2] ); // undefined
The array has the length of 3, but all groups are empty.
And here's a more complex match for the string ac:
let match = 'ac'.match(/a(z)?(c)?/)
alert( match.length ); // 3
alert( match[0] ); // ac (whole match)
alert( match[1] ); // undefined, because there's nothing for (z)?
alert( match[2] ); // c
The array length is permanent: 3.
But there's nothing for the group (z)?, so the result is ["ac", undefined, "c"].
- Searching for all matches with groups: matchAll
matchAll is a new method, polyfill may be needed
The method matchAll is not supported in old browsers.
A polyfill may be required, such as https://github.com/ljharb/String.prototype.matchAll.
When we search for all matches (flag g), the match method does not return contents for groups.
For example, let's find all tags in a string:
let str = '<h1> <h2>';
let tags = str.match(/<(.*?)>/g);
alert( tags ); // <h1>,<h2>
The result is an array of matches, but without details about each of them.
But in practice we usually need contents of capturing groups in the result.
To get them, we should search using the method str.matchAll(regexp).
It was added to JavaScript language long after match, as its “new and improved version”.
Just like match, it looks for matches, but there are 3 differences:
It returns not an array, but an iterable object.
When the flag g is present, it returns every match as an array with groups.
If there are no matches, it returns not null, but an empty iterable object.
For instance:
let results = '<h1> <h2>'.matchAll(/<(.*?)>/gi);
// results - is not an array, but an iterable object
alert(results); // [object RegExp String Iterator]
alert(results[0]); // undefined (*)
results = Array.from(results); // let's turn it into array
alert(results[0]); // <h1>,h1 (1st tag)
alert(results[1]); // <h2>,h2 (2nd tag)
As we can see, the first difference is very important, as demonstrated in the line (*).
We can't get the match as results[0], because that object isn't pseudoarray.
We can turn it into a real Array using Array.from.
There are more details about pseudoarrays and iterables in the article Iterables.
There's no need in Array.from if we're looping over results:
let results = '<h1> <h2>'.matchAll(/<(.*?)>/gi);
for(let result of results) {
alert(result);
// first alert: <h1>,h1
// second: <h2>,h2
}
…Or using destructuring:
let [tag1, tag2] = '<h1> <h2>'.matchAll(/<(.*?)>/gi);
Every match, returned by matchAll, has the same format as returned by match without flag g: it's an array with additional properties index (match index in the string) and input (source string):
let results = '<h1> <h2>'.matchAll(/<(.*?)>/gi);
let [tag1, tag2] = results;
alert( tag1[0] ); // <h1>
alert( tag1[1] ); // h1
alert( tag1.index ); // 0
alert( tag1.input ); // <h1> <h2>
Why is a result of matchAll an iterable object, not an array?
Why is the method designed like that? The reason is simple – for the optimization.
The call to matchAll does not perform the search.
Instead, it returns an iterable object, without the results initially.
The search is performed each time we iterate over it, e.g.
in the loop.
So, there will be found as many results as needed, not more.
E.g.
there are potentially 100 matches in the text, but in a for..of loop we found 5 of them, then decided it's enough and made a break.
Then the engine won't spend time finding other 95 matches.
- Named groups
Remembering groups by their numbers is hard.
For simple patterns it's doable, but for more complex ones counting parentheses is inconvenient.
We have a much better option: give names to parentheses.
That's done by putting ?<name> immediately after the opening paren.
For example, let's look for a date in the format “year-month-day”:
let dateRegexp = /(?<year>[0-9]{4})-(?<month>[0-9]{2})-(?<day>[0-9]{2})/;
let str = "2019-04-30";
let groups = str.match(dateRegexp).groups;
alert(groups.year); // 2019
alert(groups.month); // 04
alert(groups.day); // 30
As you can see, the groups reside in the .groups property of the match.
To look for all dates, we can add flag g.
We'll also need matchAll to obtain full matches, together with groups:
let dateRegexp = /(?<year>[0-9]{4})-(?<month>[0-9]{2})-(?<day>[0-9]{2})/g;
let str = "2019-10-30 2020-01-01";
let results = str.matchAll(dateRegexp);
for(let result of results) {
let {year, month, day} = result.groups;
alert(`${day}.${month}.${year}`);
// first alert: 30.10.2019
// second: 01.01.2020
}
- Capturing groups in replacement
Method str.replace(regexp, replacement) that replaces all matches with regexp in str allows to use parentheses contents in the replacement string.
That's done using $n, where n is the group number.
For example,
let str = "John Bull";
let regexp = /(\w+) (\w+)/;
alert( str.replace(regexp, '$2, $1') ); // Bull, John
For named parentheses the reference will be $<name>.
For example, let's reformat dates from “year-month-day” to “day.month.year”:
let regexp = /(?<year>[0-9]{4})-(?<month>[0-9]{2})-(?<day>[0-9]{2})/g;
let str = "2019-10-30, 2020-01-01";
alert( str.replace(regexp, '$<day>.$<month>.$<year>') );
// 30.10.2019, 01.01.2020
- Non-capturing groups with ?:
Sometimes we need parentheses to correctly apply a quantifier, but we don't want their contents in results.
A group may be excluded by adding ?: in the beginning.
For instance, if we want to find (go)+, but don't want the parentheses contents (go) as a separate array item, we can write: (?:go)+.
In the example below we only get the name John as a separate member of the match:
let str = "Gogogo John!";
// ?: exludes 'go' from capturing
let regexp = /(?:go)+ (\w+)/i;
let result = str.match(regexp);
alert( result[0] ); // Gogogo John (full match)
alert( result[1] ); // John
alert( result.length ); // 2 (no more items in the array)
- Summary
Parentheses group together a part of the regular expression, so that the quantifier applies to it as a whole.
Parentheses groups are numbered left-to-right, and can optionally be named with (?<name>...).
The content, matched by a group, can be obtained in the results:
The method str.match returns capturing groups only without flag g.
The method str.matchAll always returns capturing groups.
If the parentheses have no name, then their contents is available in the match array by its number.
Named parentheses are also available in the property groups.
We can also use parentheses contents in the replacement string in str.replace: by the number $n or the name $<name>.
A group may be excluded from numbering by adding ?: in its start.
That's used when we need to apply a quantifier to the whole group, but don't want it as a separate item in the results array.
We also can't reference such parentheses in the replacement string.
MAC-address of a network interface consists of 6 two-digit hex numbers separated by a colon.
For instance: '01:32:54:67:89:AB'.
Write a regexp that checks whether a string is MAC-address.
Usage:
let regexp = /your regexp/;
alert( regexp.test('01:32:54:67:89:AB') ); // true
alert( regexp.test('0132546789AB') ); // false (no colons)
alert( regexp.test('01:32:54:67:89') ); // false (5 numbers, must be 6)
alert( regexp.test('01:32:54:67:89:ZZ') ) // false (ZZ at the end)
A two-digit hex number is [0-9a-f]{2} (assuming the flag i is set).
We need that number NN, and then :NN repeated 5 times (more numbers);
The regexp is: [0-9a-f]{2}(:[0-9a-f]{2}){5}
Now let's show that the match should capture all the text: start at the beginning and end at the end.
That's done by wrapping the pattern in ^...$.
Finally:
let regexp = /^[0-9a-fA-F]{2}(:[0-9a-fA-F]{2}){5}$/i;
alert( regexp.test('01:32:54:67:89:AB') ); // true
alert( regexp.test('0132546789AB') ); // false (no colons)
alert( regexp.test('01:32:54:67:89') ); // false (5 numbers, need 6)
alert( regexp.test('01:32:54:67:89:ZZ') ) // false (ZZ in the end)
Find color in the format #abc or #abcdef
Write a RegExp that matches colors in the format #abc or #abcdef.
That is: # followed by 3 or 6 hexadecimal digits.
Usage example:
let regexp = /your regexp/g;
let str = "color: #3f3; background-color: #AA00ef; and: #abcd";
alert( str.match(regexp) ); // #3f3 #AA00ef
P.S.
This should be exactly 3 or 6 hex digits.
Values with 4 digits, such as #abcd, should not match.
A regexp to search 3-digit color #abc: /#[a-f0-9]{3}/i.
We can add exactly 3 more optional hex digits.
We don't need more or less.
The color has either 3 or 6 digits.
Let's use the quantifier {1,2} for that: we'll have /#([a-f0-9]{3}){1,2}/i.
Here the pattern [a-f0-9]{3} is enclosed in parentheses to apply the quantifier {1,2}.
In action:
let regexp = /#([a-f0-9]{3}){1,2}/gi;
let str = "color: #3f3; background-color: #AA00ef; and: #abcd";
alert( str.match(regexp) ); // #3f3 #AA00ef #abc
There's a minor problem here: the pattern found #abc in #abcd.
To prevent that we can add \b to the end:
let regexp = /#([a-f0-9]{3}){1,2}\b/gi;
let str = "color: #3f3; background-color: #AA00ef; and: #abcd";
alert( str.match(regexp) ); // #3f3 #AA00ef
Find all numbers
Write a regexp that looks for all decimal numbers including integer ones, with the floating point and negative ones.
An example of use:
let regexp = /your regexp/g;
let str = "-1.5 0 2 -123.4.";
alert( str.match(regexp) ); // -1.5, 0, 2, -123.4
A positive number with an optional decimal part is: \d+(\.\d+)?.
Let's add the optional - in the beginning:
let regexp = /-?\d+(\.\d+)?/g;
let str = "-1.5 0 2 -123.4.";
alert( str.match(regexp) ); // -1.5, 0, 2, -123.4
Parse an expression
An arithmetical expression consists of 2 numbers and an operator between them, for instance:
1 + 21.2 * 3.4-3 / -6-2 - 2
The operator is one of: "+", "-", "*" or "/".
There may be extra spaces at the beginning, at the end or between the parts.
Create a function parse(expr) that takes an expression and returns an array of 3 items:
The first number.
The operator.
The second number.
For example:
let [a, op, b] = parse("1.2 * 3.4");
alert(a); // 1.2
alert(op); // *
alert(b); // 3.4
A regexp for a number is: -?\d+(\.\d+)?.
We created it in the previous task.
An operator is [-+*/].
The hyphen - goes first in the square brackets, because in the middle it would mean a character range, while we just want a character -.
The slash / should be escaped inside a JavaScript regexp /.../, we'll do that later.
We need a number, an operator, and then another number.
And optional spaces between them.
The full regular expression: -?\d+(\.\d+)?\s*[-+*/]\s*-?\d+(\.\d+)?.
It has 3 parts, with \s* between them:
-?\d+(\.\d+)? – the first number,
[-+*/] – the operator,
-?\d+(\.\d+)? – the second number.
To make each of these parts a separate element of the result array, let's enclose them in parentheses: (-?\d+(\.\d+)?)\s*([-+*/])\s*(-?\d+(\.\d+)?).
In action:
let regexp = /(-?\d+(\.\d+)?)\s*([-+*\/])\s*(-?\d+(\.\d+)?)/;
alert( "1.2 + 12".match(regexp) );
The result includes:
result[0] == "1.2 + 12" (full match)
result[1] == "1.2" (first group (-?\d+(\.\d+)?) – the first number, including the decimal part)
result[2] == ".2" (second group(\.\d+)? – the first decimal part)
result[3] == "+" (third group ([-+*\/]) – the operator)
result[4] == "12" (forth group (-?\d+(\.\d+)?) – the second number)
result[5] == undefined (fifth group (\.\d+)? – the last decimal part is absent, so it's undefined)
We only want the numbers and the operator, without the full match or the decimal parts, so let's “clean” the result a bit.
The full match (the arrays first item) can be removed by shifting the array result.shift().
Groups that contain decimal parts (number 2 and 4) (.\d+) can be excluded by adding ?: to the beginning: (?:\.\d+)?.
The final solution:
function parse(expr) {
let regexp = /(-?\d+(?:\.\d+)?)\s*([-+*\/])\s*(-?\d+(?:\.\d+)?)/;
let result = expr.match(regexp);
if (!result) return [];
result.shift();
return result;
}
alert( parse("-1.23 * 3.45") ); // -1.23, *, 3.45Regular expressions
Backreferences in pattern: \N and \k<name>
We can use the contents of capturing groups (...) not only in the result or in the replacement string, but also in the pattern itself.
- Backreference by number: \N
A group can be referenced in the pattern using \N, where N is the group number.
To make clear why that's helpful, let's consider a task.
We need to find quoted strings: either single-quoted '...' or a double-quoted "..." – both variants should match.
How to find them?
We can put both kinds of quotes in the square brackets: ['"](.*?)['"], but it would find strings with mixed quotes, like "...' and '...".
That would lead to incorrect matches when one quote appears inside other ones, like in the string "She's the one!":
let str = `He said: "She's the one!".`;
let regexp = /['"](.*?)['"]/g;
// The result is not what we'd like to have
alert( str.match(regexp) ); // "She'
As we can see, the pattern found an opening quote ", then the text is consumed till the other quote ', that closes the match.
To make sure that the pattern looks for the closing quote exactly the same as the opening one, we can wrap it into a capturing group and backreference it: (['"])(.*?)\1.
Here's the correct code:
let str = `He said: "She's the one!".`;
let regexp = /(['"])(.*?)\1/g;
alert( str.match(regexp) ); // "She's the one!"
Now it works! The regular expression engine finds the first quote (['"]) and memorizes its content.
That's the first capturing group.
Further in the pattern \1 means “find the same text as in the first group”, exactly the same quote in our case.
Similar to that, \2 would mean the contents of the second group, \3 – the 3rd group, and so on.
Please note:
If we use ?: in the group, then we can't reference it.
Groups that are excluded from capturing (?:...) are not memorized by the engine.
Don't mess up: in the pattern \1, in the replacement: $1
In the replacement string we use a dollar sign: $1, while in the pattern – a backslash \1.
- Backreference by name: \k<name>
If a regexp has many parentheses, it's convenient to give them names.
To reference a named group we can use \k<name>.
In the example below the group with quotes is named ?<quote>, so the backreference is \k<quote>:
let str = `He said: "She's the one!".`;
let regexp = /(?<quote>['"])(.*?)\k<quote>/g;
alert( str.match(regexp) ); // "She's the one!"Regular expressions
Alternation (OR) |
Alternation is the term in regular expression that is actually a simple “OR”.
In a regular expression it is denoted with a vertical line character |.
For instance, we need to find programming languages: HTML, PHP, Java or JavaScript.
The corresponding regexp: html|php|java(script)?.
A usage example:
let regexp = /html|php|css|java(script)?/gi;
let str = "First HTML appeared, then CSS, then JavaScript";
alert( str.match(regexp) ); // 'HTML', 'CSS', 'JavaScript'
We already saw a similar thing – square brackets.
They allow to choose between multiple characters, for instance gr[ae]y matches gray or grey.
Square brackets allow only characters or character classes.
Alternation allows any expressions.
A regexp A|B|C means one of expressions A, B or C.
For instance:
gr(a|e)y means exactly the same as gr[ae]y.
gra|ey means gra or ey.
To apply alternation to a chosen part of the pattern, we can enclose it in parentheses:
I love HTML|CSS matches I love HTML or CSS.
I love (HTML|CSS) matches I love HTML or I love CSS.
- Example: regexp for time
In previous articles there was a task to build a regexp for searching time in the form hh:mm, for instance 12:00.
But a simple \d\d:\d\d is too vague.
It accepts 25:99 as the time (as 99 minutes match the pattern, but that time is invalid).
How can we make a better pattern?
We can use more careful matching.
First, the hours:
If the first digit is 0 or 1, then the next digit can be any: [01]\d.
Otherwise, if the first digit is 2, then the next must be [0-3].
(no other first digit is allowed)
We can write both variants in a regexp using alternation: [01]\d|2[0-3].
Next, minutes must be from 00 to 59.
In the regular expression language that can be written as [0-5]\d: the first digit 0-5, and then any digit.
If we glue hours and minutes together, we get the pattern: [01]\d|2[0-3]:[0-5]\d.
We're almost done, but there's a problem.
The alternation | now happens to be between [01]\d and 2[0-3]:[0-5]\d.
That is: minutes are added to the second alternation variant, here's a clear picture:
[01]\d | 2[0-3]:[0-5]\d
That pattern looks for [01]\d or 2[0-3]:[0-5]\d.
But that's wrong, the alternation should only be used in the “hours” part of the regular expression, to allow [01]\d OR 2[0-3].
Let's correct that by enclosing “hours” into parentheses: ([01]\d|2[0-3]):[0-5]\d.
The final solution:
let regexp = /([01]\d|2[0-3]):[0-5]\d/g;
alert("00:00 10:10 23:59 25:99 1:2".match(regexp)); // 00:00,10:10,23:59
There are many programming languages, for instance Java, JavaScript, PHP, C, C++.
Create a regexp that finds them in the string Java JavaScript PHP C++ C:
let regexp = /your regexp/g;
alert("Java JavaScript PHP C++ C".match(regexp)); // Java JavaScript PHP C++ C
The first idea can be to list the languages with | in-between.
But that doesn't work right:
let regexp = /Java|JavaScript|PHP|C|C\+\+/g;
let str = "Java, JavaScript, PHP, C, C++";
alert( str.match(regexp) ); // Java,Java,PHP,C,C
The regular expression engine looks for alternations one-by-one.
That is: first it checks if we have Java, otherwise – looks for JavaScript and so on.
As a result, JavaScript can never be found, just because Java is checked first.
The same with C and C++.
There are two solutions for that problem:
Change the order to check the longer match first: JavaScript|Java|C\+\+|C|PHP.
Merge variants with the same start: Java(Script)?|C(\+\+)?|PHP.
In action:
let regexp = /Java(Script)?|C(\+\+)?|PHP/g;
let str = "Java, JavaScript, PHP, C, C++";
alert( str.match(regexp) ); // Java,JavaScript,PHP,C,C++
Find bbtag pairs
A “bb-tag” looks like [tag]...[/tag], where tag is one of: b, url or quote.
For instance:
[b]text[/b]
[url]http://google.com[/url]
BB-tags can be nested.
But a tag can't be nested into itself, for instance:
Normal:
[url] [b]http://google.com[/b] [/url]
[quote] [b]text[/b] [/quote]
Can't happen:
[b][b]text[/b][/b]
Tags can contain line breaks, that's normal:
[quote]
[b]text[/b]
[/quote]
Create a regexp to find all BB-tags with their contents.
For instance:
let regexp = /your regexp/flags;
let str = "..[url]http://google.com[/url]..";
alert( str.match(regexp) ); // [url]http://google.com[/url]
If tags are nested, then we need the outer tag (if we want we can continue the search in its content):
let regexp = /your regexp/flags;
let str = "..[url][b]http://google.com[/b][/url]..";
alert( str.match(regexp) ); // [url][b]http://google.com[/b][/url]
Opening tag is \[(b|url|quote)\].
Then to find everything till the closing tag – let's use the pattern .*? with flag s to match any character including the newline and then add a backreference to the closing tag.
The full pattern: \[(b|url|quote)\].*?\[/\1\].
In action:
let regexp = /\[(b|url|quote)\].*?\[\/\1\]/gs;
let str = `
[b]hello![/b]
[quote]
[url]http://google.com[/url]
[/quote]
`;
alert( str.match(regexp) ); // [b]hello![/b],[quote][url]http://google.com[/url][/quote]
Please note that besides escaping [ and ], we had to escape a slash for the closing tag [\/\1], because normally the slash closes the pattern.
Find quoted strings
Create a regexp to find strings in double quotes "...".
The strings should support escaping, the same way as JavaScript strings do.
For instance, quotes can be inserted as \" a newline as \n, and the slash itself as \\.
let str = "Just like \"here\".";
Please note, in particular, that an escaped quote \" does not end a string.
So we should search from one quote to the other ignoring escaped quotes on the way.
That's the essential part of the task, otherwise it would be trivial.
Examples of strings to match:
..
"test me" ..
..
"Say \"Hello\"!" ...
(escaped quotes inside)
..
"\\" ..
(double slash inside)
..
"\\ \"" ..
(double slash and an escaped quote inside)
In JavaScript we need to double the slashes to pass them right into the string, like this:
let str = ' ..
"test me" ..
"Say \\"Hello\\"!" ..
"\\\\ \\"" ..
';
// the in-memory string
alert(str); // ..
"test me" ..
"Say \"Hello\"!" ..
"\\ \"" ..
The solution: /"(\\.|[^"\\])*"/g.
Step by step:
First we look for an opening quote "
Then if we have a backslash \\ (we technically have to double it in the pattern, because it is a special character, so that's a single backslash in fact), then any character is fine after it (a dot).
Otherwise we take any character except a quote (that would mean the end of the string) and a backslash (to prevent lonely backslashes, the backslash is only used with some other symbol after it): [^"\\]
…And so on till the closing quote.
In action:
let regexp = /"(\\.|[^"\\])*"/g;
let str = ' ..
"test me" ..
"Say \\"Hello\\"!" ..
"\\\\ \\"" ..
';
alert( str.match(regexp) ); // "test me","Say \"Hello\"!","\\ \""
Find the full tag
Write a regexp to find the tag <style...>.
It should match the full tag: it may have no attributes <style> or have several of them <style type="..." id="...">.
…But the regexp should not match <styler>!
For instance:
let regexp = /your regexp/g;
alert( '<style> <styler> <style test="...">'.match(regexp) ); // <style>, <style test="...">
The pattern start is obvious: <style.
…But then we can't simply write <style.*?>, because <styler> would match it.
We need either a space after <style and then optionally something else or the ending >.
In the regexp language: <style(>|\s.*?>).
In action:
let regexp = /<style(>|\s.*?>)/g;
alert( '<style> <styler> <style test="...">'.match(regexp) ); // <style>, <style test="...">Regular expressions
Lookahead and lookbehind
Sometimes we need to find only those matches for a pattern that are followed or preceeded by another pattern.
There's a special syntax for that, called “lookahead” and “lookbehind”, together referred to as “lookaround”.
For the start, let's find the price from the string like 1 turkey costs 30€.
That is: a number, followed by € sign.
- Lookahead
The syntax is: X(?=Y), it means "look for X, but match only if followed by Y".
There may be any pattern instead of X and Y.
For an integer number followed by €, the regexp will be \d+(?=€):
let str = "1 turkey costs 30€";
alert( str.match(/\d+(?=€)/) ); // 30, the number 1 is ignored, as it's not followed by €
Please note: the lookahead is merely a test, the contents of the parentheses (?=...) is not included in the result 30.
When we look for X(?=Y), the regular expression engine finds X and then checks if there's Y immediately after it.
If it's not so, then the potential match is skipped, and the search continues.
More complex tests are possible, e.g.
X(?=Y)(?=Z) means:
Find X.
Check if Y is immediately after X (skip if isn't).
Check if Z is also immediately after X (skip if isn't).
If both tests passed, then the X is a match, otherwise continue searching.
In other words, such pattern means that we're looking for X followed by Y and Z at the same time.
That's only possible if patterns Y and Z aren't mutually exclusive.
For example, \d+(?=\s)(?=.*30) looks for \d+ only if it's followed by a space, and there's 30 somewhere after it:
let str = "1 turkey costs 30€";
alert( str.match(/\d+(?=\s)(?=.*30)/) ); // 1
In our string that exactly matches the number 1.
- Negative lookahead
Let's say that we want a quantity instead, not a price from the same string.
That's a number \d+, NOT followed by €.
For that, a negative lookahead can be applied.
The syntax is: X(?!Y), it means "search X, but only if not followed by Y".
let str = "2 turkeys cost 60€";
alert( str.match(/\d+\b(?!€)/g) ); // 2 (the price is not matched)
- Lookbehind
Lookahead allows to add a condition for “what follows”.
Lookbehind is similar, but it looks behind.
That is, it allows to match a pattern only if there's something before it.
The syntax is:
Positive lookbehind: (?<=Y)X, matches X, but only if there's Y before it.
Negative lookbehind: (?<!Y)X, matches X, but only if there's no Y before it.
For example, let's change the price to US dollars.
The dollar sign is usually before the number, so to look for $30 we'll use (?<=\$)\d+ – an amount preceded by $:
let str = "1 turkey costs $30";
// the dollar sign is escaped \$
alert( str.match(/(?<=\$)\d+/) ); // 30 (skipped the sole number)
And, if we need the quantity – a number, not preceded by $, then we can use a negative lookbehind (?<!\$)\d+:
let str = "2 turkeys cost $60";
alert( str.match(/(?<!\$)\b\d+/g) ); // 2 (the price is not matched)
- Capturing groups
Generally, the contents inside lookaround parentheses does not become a part of the result.
E.g.
in the pattern \d+(?=€), the € sign doesn't get captured as a part of the match.
That's natural: we look for a number \d+, while (?=€) is just a test that it should be followed by €.
But in some situations we might want to capture the lookaround expression as well, or a part of it.
That's possible.
Just wrap that part into additional parentheses.
In the example below the currency sign (€|kr) is captured, along with the amount:
let str = "1 turkey costs 30€";
let regexp = /\d+(?=(€|kr))/; // extra parentheses around €|kr
alert( str.match(regexp) ); // 30, €
And here's the same for lookbehind:
let str = "1 turkey costs $30";
let regexp = /(?<=(\$|£))\d+/;
alert( str.match(regexp) ); // 30, $
- Summary
Lookahead and lookbehind (commonly referred to as “lookaround”) are useful when we'd like to match something depending on the context before/after it.
For simple regexps we can do the similar thing manually.
That is: match everything, in any context, and then filter by context in the loop.
Remember, str.match (without flag g) and str.matchAll (always) return matches as arrays with index property, so we know where exactly in the text it is, and can check the context.
But generally lookaround is more convenient.
Lookaround types:
There's a string of integer numbers.
Create a regexp that looks for only non-negative ones (zero is allowed).
An example of use:
let regexp = /your regexp/g;
let str = "0 12 -5 123 -18";
alert( str.match(regexp) ); // 0, 12, 123
The regexp for an integer number is \d+.
We can exclude negatives by prepending it with the negative lookahead: (?<!-)\d+.
Although, if we try it now, we may notice one more “extra” result:
let regexp = /(?<!-)\d+/g;
let str = "0 12 -5 123 -18";
console.log( str.match(regexp) ); // 0, 12, 123, 8
As you can see, it matches 8, from -18.
To exclude it, we need to ensure that the regexp starts matching a number not from the middle of another (non-matching) number.
We can do it by specifying another negative lookbehind: (?<!-)(?<!\d)\d+.
Now (?<!\d) ensures that a match does not start after another digit, just what we need.
We can also join them into a single lookbehind here:
let regexp = /(?<![-\d])\d+/g;
let str = "0 12 -5 123 -18";
alert( str.match(regexp) ); // 0, 12, 123
Insert After Head
We have a string with an HTML Document.
Write a regular expression that inserts <h1>Hello</h1> immediately after <body> tag.
The tag may have attributes.
For instance:
let regexp = /your regular expression/;
let str = `
<html>
<body style="height: 200px">
...
</body>
</html>
`;
str = str.replace(regexp, `<h1>Hello</h1>`);
After that the value of str should be:
<html>
<body style="height: 200px"><h1>Hello</h1>
...
</body>
</html>
In order to insert after the <body> tag, we must first find it.
We can use the regular expression pattern <body.*?> for that.
In this task we don't need to modify the <body> tag.
We only need to add the text after it.
Here's how we can do it:
let str = '...<body style="...">...';
str = str.replace(/<body.*?>/, '$&<h1>Hello</h1>');
alert(str); // ...<body style="..."><h1>Hello</h1>...
In the replacement string $& means the match itself, that is, the part of the source text that corresponds to <body.*?>.
It gets replaced by itself plus <h1>Hello</h1>.
An alternative is to use lookbehind:
let str = '...<body style="...">...';
str = str.replace(/(?<=<body.*?>)/, `<h1>Hello</h1>`);
alert(str); // ...<body style="..."><h1>Hello</h1>...
As you can see, there's only lookbehind part in this regexp.
It works like this:
At every position in the text.
Check if it's preceeded by <body.*?>.
If it's so then we have the match.
The tag <body.*?> won't be returned.
The result of this regexp is literally an empty string, but it matches only at positions preceeded by <body.*?>.
So we replaces the “empty line”, preceeded by <body.*?>, with <h1>Hello</h1>.
That's the insertion after <body>.
P.S.
Regexp flags, such as s and i can also be useful: /<body.*?>/si.
The s flag makes the dot . match a newline character, and i flag makes <body> also match <BODY> case-insensitively.
Regular expressions
Catastrophic backtracking
Some regular expressions are looking simple, but can execute a veeeeeery long time, and even “hang” the JavaScript engine.
Sooner or later most developers occasionally face such behavior.
The typical symptom – a regular expression works fine sometimes, but for certain strings it “hangs”, consuming 100% of CPU.
In such case a web-browser suggests to kill the script and reload the page.
Not a good thing for sure.
For server-side JavaScript such a regexp may hang the server process, that's even worse.
So we definitely should take a look at it.
- Example
Let's say we have a string, and we'd like to check if it consists of words \w+ with an optional space \s? after each.
An obvious way to construct a regexp would be to take a word followed by an optional space \w+\s? and then repeat it with *.
That leads us to the regexp ^(\w+\s?)*$, it specifies zero or more such words, that start at the beginning ^ and finish at the end $ of the line.
In action:
let regexp = /^(\w+\s?)*$/;
alert( regexp.test("A good string") ); // true
alert( regexp.test("Bad characters: $@#") ); // false
The regexp seems to work.
The result is correct.
Although, on certain strings it takes a lot of time.
So long that JavaScript engine “hangs” with 100% CPU consumption.
If you run the example below, you probably won't see anything, as JavaScript will just “hang”.
A web-browser will stop reacting on events, the UI will stop working (most browsers allow only scrolling).
After some time it will suggest to reload the page.
So be careful with this:
let regexp = /^(\w+\s?)*$/;
let str = "An input string that takes a long time or even makes this regexp hang!";
// will take a very long time
alert( regexp.test(str) );
To be fair, let's note that some regular expression engines can handle such a search effectively, for example V8 engine version starting from 8.8 can do that (so Google Chrome 88 doesn't hang here), while Firefox browser does hang.
- Simplified example
What's the matter? Why does the regular expression hang?
To understand that, let's simplify the example: remove spaces \s?.
Then it becomes ^(\w+)*$.
And, to make things more obvious, let's replace \w with \d.
The resulting regular expression still hangs, for instance:
let regexp = /^(\d+)*$/;
let str = "012345678901234567890123456789z";
// will take a very long time (careful!)
alert( regexp.test(str) );
So what's wrong with the regexp?
First, one may notice that the regexp (\d+)* is a little bit strange.
The quantifier * looks extraneous.
If we want a number, we can use \d+.
Indeed, the regexp is artificial; we got it by simplifying the previous example.
But the reason why it is slow is the same.
So let's understand it, and then the previous example will become obvious.
What happens during the search of ^(\d+)*$ in the line 123456789z (shortened a bit for clarity, please note a non-digit character z at the end, it's important), why does it take so long?
Here's what the regexp engine does:
First, the regexp engine tries to find the content of the parentheses: the number \d+.
The plus + is greedy by default, so it consumes all digits:
\d+.......
(123456789)z
After all digits are consumed, \d+ is considered found (as 123456789).
Then the star quantifier (\d+)* applies.
But there are no more digits in the text, so the star doesn't give anything.
The next character in the pattern is the string end $.
But in the text we have z instead, so there's no match:
X
\d+........$
(123456789)z
As there's no match, the greedy quantifier + decreases the count of repetitions, backtracks one character back.
Now \d+ takes all digits except the last one (12345678):
\d+.......
(12345678)9z
Then the engine tries to continue the search from the next position (right after 12345678).
The star (\d+)* can be applied – it gives one more match of \d+, the number 9:
\d+.......\d+
(12345678)(9)z
The engine tries to match $ again, but fails, because it meets z instead:
X
\d+.......\d+
(12345678)(9)z
There's no match, so the engine will continue backtracking, decreasing the number of repetitions.
Backtracking generally works like this: the last greedy quantifier decreases the number of repetitions until it reaches the minimum.
Then the previous greedy quantifier decreases, and so on.
All possible combinations are attempted.
Here are their examples.
The first number \d+ has 7 digits, and then a number of 2 digits:
X
\d+......\d+
(1234567)(89)z
The first number has 7 digits, and then two numbers of 1 digit each:
X
\d+......\d+\d+
(1234567)(8)(9)z
The first number has 6 digits, and then a number of 3 digits:
X
\d+.......\d+
(123456)(789)z
The first number has 6 digits, and then 2 numbers:
X
\d+.....\d+ \d+
(123456)(78)(9)z
…And so on.
There are many ways to split a sequence of digits 123456789 into numbers.
To be precise, there are 2n-1, where n is the length of the sequence.
For 123456789 we have n=9, that gives 511 combinations.
For a longer sequence with n=20 there are about one million (1048575) combinations.
For n=30 – a thousand times more (1073741823 combinations).
Trying each of them is exactly the reason why the search takes so long.
- Back to words and strings
The similar thing happens in our first example, when we look for words by pattern ^(\w+\s?)*$ in the string An input that hangs!.
The reason is that a word can be represented as one \w+ or many:
(input)
(inpu)(t)
(inp)(u)(t)
(in)(p)(ut)
...
For a human, it's obvious that there may be no match, because the string ends with an exclamation sign !, but the regular expression expects a wordly character \w or a space \s at the end.
But the engine doesn't know that.
It tries all combinations of how the regexp (\w+\s?)* can “consume” the string, including variants with spaces (\w+\s)* and without them (\w+)* (because spaces \s? are optional).
As there are many such combinations (we've seen it with digits), the search takes a lot of time.
What to do?
Should we turn on the lazy mode?
Unfortunately, that won't help: if we replace \w+ with \w+?, the regexp will still hang.
The order of combinations will change, but not their total count.
Some regular expression engines have tricky tests and finite automations that allow to avoid going through all combinations or make it much faster, but most engines don't, and it doesn't always help.
- How to fix?
There are two main approaches to fixing the problem.
The first is to lower the number of possible combinations.
Let's make the space non-optional by rewriting the regular expression as ^(\w+\s)*\w*$ – we'll look for any number of words followed by a space (\w+\s)*, and then (optionally) a final word \w*.
This regexp is equivalent to the previous one (matches the same) and works well:
let regexp = /^(\w+\s)*\w*$/;
let str = "An input string that takes a long time or even makes this regex hang!";
alert( regexp.test(str) ); // false
Why did the problem disappear?
That's because now the space is mandatory.
The previous regexp, if we omit the space, becomes (\w+)*, leading to many combinations of \w+ within a single word
So input could be matched as two repetitions of \w+, like this:
\w+ \w+
(inp)(ut)
The new pattern is different: (\w+\s)* specifies repetitions of words followed by a space! The input string can't be matched as two repetitions of \w+\s, because the space is mandatory.
The time needed to try a lot of (actually most of) combinations is now saved.
- Preventing backtracking
It's not always convenient to rewrite a regexp though.
In the example above it was easy, but it's not always obvious how to do it.
Besides, a rewritten regexp is usually more complex, and that's not good.
Regexps are complex enough without extra efforts.
Luckily, there's an alternative approach.
We can forbid backtracking for the quantifier.
The root of the problem is that the regexp engine tries many combinations that are obviously wrong for a human.
E.g.
in the regexp (\d+)*$ it's obvious for a human, that + shouldn't backtrack.
If we replace one \d+ with two separate \d+\d+, nothing changes:
\d+........
(123456789)!
\d+...\d+....
(1234)(56789)!
And in the original example ^(\w+\s?)*$ we may want to forbid backtracking in \w+.
That is: \w+ should match a whole word, with the maximal possible length.
There's no need to lower the repetitions count in \w+ or to split it into two words \w+\w+ and so on.
Modern regular expression engines support possessive quantifiers for that.
Regular quantifiers become possessive if we add + after them.
That is, we use \d++ instead of \d+ to stop + from backtracking.
Possessive quantifiers are in fact simpler than “regular” ones.
They just match as many as they can, without any backtracking.
The search process without bracktracking is simpler.
There are also so-called “atomic capturing groups” – a way to disable backtracking inside parentheses.
…But the bad news is that, unfortunately, in JavaScript they are not supported.
We can emulate them though using a “lookahead transform”.
Lookahead to the rescue!
So we've come to real advanced topics.
We'd like a quantifier, such as + not to backtrack, because sometimes backtracking makes no sense.
The pattern to take as many repetitions of \w as possible without backtracking is: (?=(\w+))\1.
Of course, we could take another pattern instead of \w.
That may seem odd, but it's actually a very simple transform.
Let's decipher it:
Lookahead ?= looks forward for the longest word \w+ starting at the current position.
The contents of parentheses with ?=... isn't memorized by the engine, so wrap \w+ into parentheses.
Then the engine will memorize their contents
…And allow us to reference it in the pattern as \1.
That is: we look ahead – and if there's a word \w+, then match it as \1.
Why? That's because the lookahead finds a word \w+ as a whole and we capture it into the pattern with \1.
So we essentially implemented a possessive plus + quantifier.
It captures only the whole word \w+, not a part of it.
For instance, in the word JavaScript it may not only match Java, but leave out Script to match the rest of the pattern.
Here's the comparison of two patterns:
alert( "JavaScript".match(/\w+Script/)); // JavaScript
alert( "JavaScript".match(/(?=(\w+))\1Script/)); // null
In the first variant \w+ first captures the whole word JavaScript but then + backtracks character by character, to try to match the rest of the pattern, until it finally succeeds (when \w+ matches Java).
In the second variant (?=(\w+)) looks ahead and finds the word JavaScript, that is included into the pattern as a whole by \1, so there remains no way to find Script after it.
We can put a more complex regular expression into (?=(\w+))\1 instead of \w, when we need to forbid backtracking for + after it.
Please note:
There's more about the relation between possessive quantifiers and lookahead in articles Regex: Emulate Atomic Grouping (and Possessive Quantifiers) with LookAhead and Mimicking Atomic Groups.
Let's rewrite the first example using lookahead to prevent backtracking:
let regexp = /^((?=(\w+))\2\s?)*$/;
alert( regexp.test("A good string") ); // true
let str = "An input string that takes a long time or even makes this regex hang!";
alert( regexp.test(str) ); // false, works and fast!
Here \2 is used instead of \1, because there are additional outer parentheses.
To avoid messing up with the numbers, we can give the parentheses a name, e.g.
(?<word>\w+).
// parentheses are named ?<word>, referenced as \k<word>
let regexp = /^((?=(?<word>\w+))\k<word>\s?)*$/;
let str = "An input string that takes a long time or even makes this regex hang!";
alert( regexp.test(str) ); // false
alert( regexp.test("A correct string") ); // true
The problem described in this article is called “catastrophic backtracking”.
We covered two ways how to solve it:
Rewrite the regexp to lower the possible combinations count.
Prevent backtracking.
Regular expressions
Sticky flag "y", searching at position
The flag y allows to perform the search at the given position in the source string.
To grasp the use case of y flag, and better understand the ways of regexps, let's explore a practical example.
One of common tasks for regexps is “lexical analysis”: we get a text, e.g.
in a programming language, and need to find its structural elements.
For instance, HTML has tags and attributes, JavaScript code has functions, variables, and so on.
Writing lexical analyzers is a special area, with its own tools and algorithms, so we don't go deep in there, but there's a common task: to read something at the given position.
E.g.
we have a code string let varName = "value", and we need to read the variable name from it, that starts at position 4.
We'll look for variable name using regexp \w+.
Actually, JavaScript variable names need a bit more complex regexp for accurate matching, but here it doesn't matter.
A call to str.match(/\w+/) will find only the first word in the line (let).
That's not it.
We can add the flag g.
But then the call str.match(/\w+/g) will look for all words in the text, while we need one word at position 4.
Again, not what we need.
So, how to search for a regexp exactly at the given position?
Let's try using method regexp.exec(str).
For a regexp without flags g and y, this method looks only for the first match, it works exactly like str.match(regexp).
…But if there's flag g, then it performs the search in str, starting from position stored in the regexp.lastIndex property.
And, if it finds a match, then sets regexp.lastIndex to the index immediately after the match.
In other words, regexp.lastIndex serves as a starting point for the search, that each regexp.exec(str) call resets to the new value (“after the last match”).
That's only if there's g flag, of course.
So, successive calls to regexp.exec(str) return matches one after another.
Here's an example of such calls:
let str = 'let varName'; // Let's find all words in this string
let regexp = /\w+/g;
alert(regexp.lastIndex); // 0 (initially lastIndex=0)
let word1 = regexp.exec(str);
alert(word1[0]); // let (1st word)
alert(regexp.lastIndex); // 3 (position after the match)
let word2 = regexp.exec(str);
alert(word2[0]); // varName (2nd word)
alert(regexp.lastIndex); // 11 (position after the match)
let word3 = regexp.exec(str);
alert(word3); // null (no more matches)
alert(regexp.lastIndex); // 0 (resets at search end)
We can get all matches in the loop:
let str = 'let varName';
let regexp = /\w+/g;
let result;
while (result = regexp.exec(str)) {
alert( `Found ${result[0]} at position ${result.index}` );
// Found let at position 0, then
// Found varName at position 4
}
Such use of regexp.exec is an alternative to method str.matchAll, with a bit more control over the process.
Let's go back to our task.
We can manually set lastIndex to 4, to start the search from the given position!
Like this:
let str = 'let varName = "value"';
let regexp = /\w+/g; // without flag "g", property lastIndex is ignored
regexp.lastIndex = 4;
let word = regexp.exec(str);
alert(word); // varName
Hooray! Problem solved!
We performed a search of \w+, starting from position regexp.lastIndex = 4.
The result is correct.
…But wait, not so fast.
Please note: the regexp.exec call starts searching at position lastIndex and then goes further.
If there's no word at position lastIndex, but it's somewhere after it, then it will be found:
let str = 'let varName = "value"';
let regexp = /\w+/g;
// start the search from position 3
regexp.lastIndex = 3;
let word = regexp.exec(str);
// found the match at position 4
alert(word[0]); // varName
alert(word.index); // 4
For some tasks, including the lexical analysis, that's just wrong.
We need to find a match exactly at the given position at the text, not somewhere after it.
And that's what the flag y is for.
The flag y makes regexp.exec to search exactly at position lastIndex, not “starting from” it.
Here's the same search with flag y:
let str = 'let varName = "value"';
let regexp = /\w+/y;
regexp.lastIndex = 3;
alert( regexp.exec(str) ); // null (there's a space at position 3, not a word)
regexp.lastIndex = 4;
alert( regexp.exec(str) ); // varName (word at position 4)
As we can see, regexp /\w+/y doesn't match at position 3 (unlike the flag g), but matches at position 4.
Not only that's what we need, there's an important performance gain when using flag y.
Imagine, we have a long text, and there are no matches in it, at all.
Then a search with flag g will go till the end of the text and find nothing, and this will take significantly more time than the search with flag y, that checks only the exact position.
In tasks like lexical analysis, there are usually many searches at an exact position, to check what we have there.
Using flag y is the key for correct implementations and a good performance.
Regular expressions
Methods of RegExp and String
In this article we'll cover various methods that work with regexps in-depth.
- str.match(regexp)
The method str.match(regexp) finds matches for regexp in the string str.
It has 3 modes:
If the regexp doesn't have flag g, then it returns the first match as an array with capturing groups and properties index (position of the match), input (input string, equals str):
let str = "I love JavaScript";
let result = str.match(/Java(Script)/);
alert( result[0] ); // JavaScript (full match)
alert( result[1] ); // Script (first capturing group)
alert( result.length ); // 2
// Additional information:
alert( result.index ); // 7 (match position)
alert( result.input ); // I love JavaScript (source string)
If the regexp has flag g, then it returns an array of all matches as strings, without capturing groups and other details.
let str = "I love JavaScript";
let result = str.match(/Java(Script)/g);
alert( result[0] ); // JavaScript
alert( result.length ); // 1
If there are no matches, no matter if there's flag g or not, null is returned.
That's an important nuance.
If there are no matches, we don't get an empty array, but null.
It's easy to make a mistake forgetting about it, e.g.:
let str = "I love JavaScript";
let result = str.match(/HTML/);
alert(result); // null
alert(result.length); // Error: Cannot read property 'length' of null
If we want the result to be an array, we can write like this:
let result = str.match(regexp) || [];
- str.matchAll(regexp)
A recent addition
This is a recent addition to the language.
Old browsers may need polyfills.
The method str.matchAll(regexp) is a “newer, improved” variant of str.match.
It's used mainly to search for all matches with all groups.
There are 3 differences from match:
It returns an iterable object with matches instead of an array.
We can make a regular array from it using Array.from.
Every match is returned as an array with capturing groups (the same format as str.match without flag g).
If there are no results, it returns not null, but an empty iterable object.
Usage example:
let str = '<h1>Hello, world!</h1>';
let regexp = /<(.*?)>/g;
let matchAll = str.matchAll(regexp);
alert(matchAll); // [object RegExp String Iterator], not array, but an iterable
matchAll = Array.from(matchAll); // array now
let firstMatch = matchAll[0];
alert( firstMatch[0] ); // <h1>
alert( firstMatch[1] ); // h1
alert( firstMatch.index ); // 0
alert( firstMatch.input ); // <h1>Hello, world!</h1>
If we use for..of to loop over matchAll matches, then we don't need Array.from any more.
- str.split(regexp|substr, limit)
Splits the string using the regexp (or a substring) as a delimiter.
We can use split with strings, like this:
alert('12-34-56'.split('-')) // array of ['12', '34', '56']
But we can split by a regular expression, the same way:
alert('12, 34, 56'.split(/,\s*/)) // array of ['12', '34', '56']
- str.search(regexp)
The method str.search(regexp) returns the position of the first match or -1 if none found:
let str = "A drop of ink may make a million think";
alert( str.search( /ink/i ) ); // 10 (first match position)The important limitation: search only finds the first match.
If we need positions of further matches, we should use other means, such as finding them all with str.matchAll(regexp).
- str.replace(str|regexp, str|func)
This is a generic method for searching and replacing, one of most useful ones.
The swiss army knife for searching and replacing.
We can use it without regexps, to search and replace a substring:
// replace a dash by a colon
alert('12-34-56'.replace("-", ":")) // 12:34-56
There's a pitfall though.
When the first argument of replace is a string, it only replaces the first match.
You can see that in the example above: only the first "-" is replaced by ":".
To find all hyphens, we need to use not the string "-", but a regexp /-/g, with the obligatory g flag:
// replace all dashes by a colon
alert( '12-34-56'.replace( /-/g, ":" ) ) // 12:34:56
The second argument is a replacement string.
We can use special characters in it:
Symbols
Action in the replacement string
$&
inserts the whole match
$`
inserts a part of the string before the match
$'
inserts a part of the string after the match
$n
if n is a 1-2 digit number, inserts the contents of n-th capturing group, for details see Capturing groups
$<name>
inserts the contents of the parentheses with the given name, for details see Capturing groups
$$
inserts character $
For instance:
let str = "John Smith";
// swap first and last name
alert(str.replace(/(john) (smith)/i, '$2, $1')) // Smith, JohnFor situations that require “smart” replacements, the second argument can be a function.
It will be called for each match, and the returned value will be inserted as a replacement.
The function is called with arguments func(match, p1, p2, ..., pn, offset, input, groups):
match – the match,
p1, p2, ..., pn – contents of capturing groups (if there are any),
offset – position of the match,
input – the source string,
groups – an object with named groups.
If there are no parentheses in the regexp, then there are only 3 arguments: func(str, offset, input).
For example, let's uppercase all matches:
let str = "html and css";
let result = str.replace(/html|css/gi, str => str.toUpperCase());
alert(result); // HTML and CSS
Replace each match by its position in the string:
alert("Ho-Ho-ho".replace(/ho/gi, (match, offset) => offset)); // 0-3-6
In the example below there are two parentheses, so the replacement function is called with 5 arguments: the first is the full match, then 2 parentheses, and after it (not used in the example) the match position and the source string:
let str = "John Smith";
let result = str.replace(/(\w+) (\w+)/, (match, name, surname) => `${surname}, ${name}`);
alert(result); // Smith, John
If there are many groups, it's convenient to use rest parameters to access them:
let str = "John Smith";
let result = str.replace(/(\w+) (\w+)/, (...match) => `${match[2]}, ${match[1]}`);
alert(result); // Smith, John
Or, if we're using named groups, then groups object with them is always the last, so we can obtain it like this:
let str = "John Smith";
let result = str.replace(/(?<name>\w+) (?<surname>\w+)/, (...match) => {
let groups = match.pop();
return `${groups.surname}, ${groups.name}`;
});
alert(result); // Smith, John
Using a function gives us the ultimate replacement power, because it gets all the information about the match, has access to outer variables and can do everything.
- str.replaceAll(str|regexp, str|func)
This method is essentially the same as str.replace, with two major differences:
If the first argument is a string, it replaces all occurences of the string, while replace replaces only the first occurence.
If the first argument is a regular expression without the g flag, there'll be an error.
With g flag, it works the same as replace.
The main use case for replaceAll is replacing all occurences of a string.
Like this:
// replace all dashes by a colon
alert('12-34-56'.replaceAll("-", ":")) // 12:34:56
- regexp.exec(str)
The method regexp.exec(str) method returns a match for regexp in the string str.
Unlike previous methods, it's called on a regexp, not on a string.
It behaves differently depending on whether the regexp has flag g.
If there's no g, then regexp.exec(str) returns the first match exactly as str.match(regexp).
This behavior doesn't bring anything new.
But if there's flag g, then:
A call to regexp.exec(str) returns the first match and saves the position immediately after it in the property regexp.lastIndex.
The next such call starts the search from position regexp.lastIndex, returns the next match and saves the position after it in regexp.lastIndex.
…And so on.
If there are no matches, regexp.exec returns null and resets regexp.lastIndex to 0.
So, repeated calls return all matches one after another, using property regexp.lastIndex to keep track of the current search position.
In the past, before the method str.matchAll was added to JavaScript, calls of regexp.exec were used in the loop to get all matches with groups:
let str = 'More about JavaScript at https://javascript.info';
let regexp = /javascript/ig;
let result;
while (result = regexp.exec(str)) {
alert( `Found ${result[0]} at position ${result.index}` );
// Found JavaScript at position 11, then
// Found javascript at position 33
}
This works now as well, although for newer browsers str.matchAll is usually more convenient.
We can use regexp.exec to search from a given position by manually setting lastIndex.
For instance:
let str = 'Hello, world!';
let regexp = /\w+/g; // without flag "g", lastIndex property is ignored
regexp.lastIndex = 5; // search from 5th position (from the comma)
alert( regexp.exec(str) ); // world
If the regexp has flag y, then the search will be performed exactly at the position regexp.lastIndex, not any further.
Let's replace flag g with y in the example above.
There will be no matches, as there's no word at position 5:
let str = 'Hello, world!';
let regexp = /\w+/y;
regexp.lastIndex = 5; // search exactly at position 5
alert( regexp.exec(str) ); // null
That's convenient for situations when we need to “read” something from the string by a regexp at the exact position, not somewhere further.
- regexp.test(str)
The method regexp.test(str) looks for a match and returns true/false whether it exists.
For instance:
let str = "I love JavaScript";
// these two tests do the same
alert( /love/i.test(str) ); // true
alert( str.search(/love/i) != -1 ); // true
An example with the negative answer:
let str = "Bla-bla-bla";
alert( /love/i.test(str) ); // false
alert( str.search(/love/i) != -1 ); // false
If the regexp has flag g, then regexp.test looks from regexp.lastIndex property and updates this property, just like regexp.exec.
So we can use it to search from a given position:
let regexp = /love/gi;
let str = "I love JavaScript";
// start the search from position 10:
regexp.lastIndex = 10;
alert( regexp.test(str) ); // false (no match)
Same global regexp tested repeatedly on different sources may fail
If we apply the same global regexp to different inputs, it may lead to wrong result, because regexp.test call advances regexp.lastIndex property, so the search in another string may start from non-zero position.
For instance, here we call regexp.test twice on the same text, and the second time fails:
let regexp = /javascript/g; // (regexp just created: regexp.lastIndex=0)
alert( regexp.test("javascript") ); // true (regexp.lastIndex=10 now)
alert( regexp.test("javascript") ); // false
That's exactly because regexp.lastIndex is non-zero in the second test.
To work around that, we can set regexp.lastIndex = 0 before each search.
Or instead of calling methods on regexp, use string methods str.match/search/..., they don't use lastIndex.
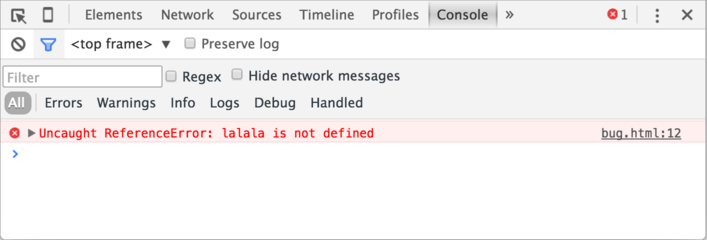

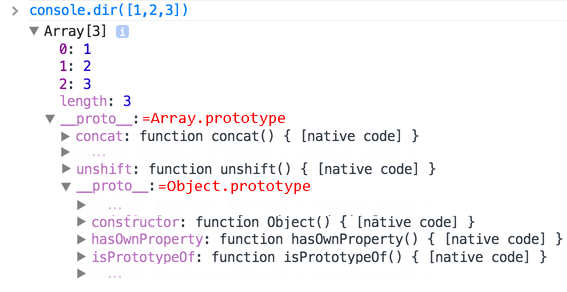


 To transform a
 Because of that last property, in computer graphics it's possible to optimize intersection tests.
If convex hulls do not intersect, then curves do not either.
So checking for the convex hulls intersection first can give a very fast “no intersection” result.
Checking the intersection of convex hulls is much easier, because they are rectangles, triangles and so on (see the picture above), much simpler figures than the curve.
The main value of Bezier curves for drawing – by moving the points the curve is changing in intuitively obvious way.
Try to move control points using a mouse in the example below:
As you can notice, the curve stretches along the tangential lines 1 → 2 and 3 → 4.
After some practice it becomes obvious how to place points to get the needed curve.
And by connecting several curves we can get practically anything.
Here are some examples:
Because of that last property, in computer graphics it's possible to optimize intersection tests.
If convex hulls do not intersect, then curves do not either.
So checking for the convex hulls intersection first can give a very fast “no intersection” result.
Checking the intersection of convex hulls is much easier, because they are rectangles, triangles and so on (see the picture above), much simpler figures than the curve.
The main value of Bezier curves for drawing – by moving the points the curve is changing in intuitively obvious way.
Try to move control points using a mouse in the example below:
As you can notice, the curve stretches along the tangential lines 1 → 2 and 3 → 4.
After some practice it becomes obvious how to place points to get the needed curve.
And by connecting several curves we can get practically anything.
Here are some examples:


 That's just like
  In action for